Borders Added

I added borders. Changes the look of the piece entirely – contains it (as borders do), but the borders also seem to change the colour focus in an interesting way. The narrow inner red frames the panel and the wider outer border allows the greys and greens to stand out somewhat more.

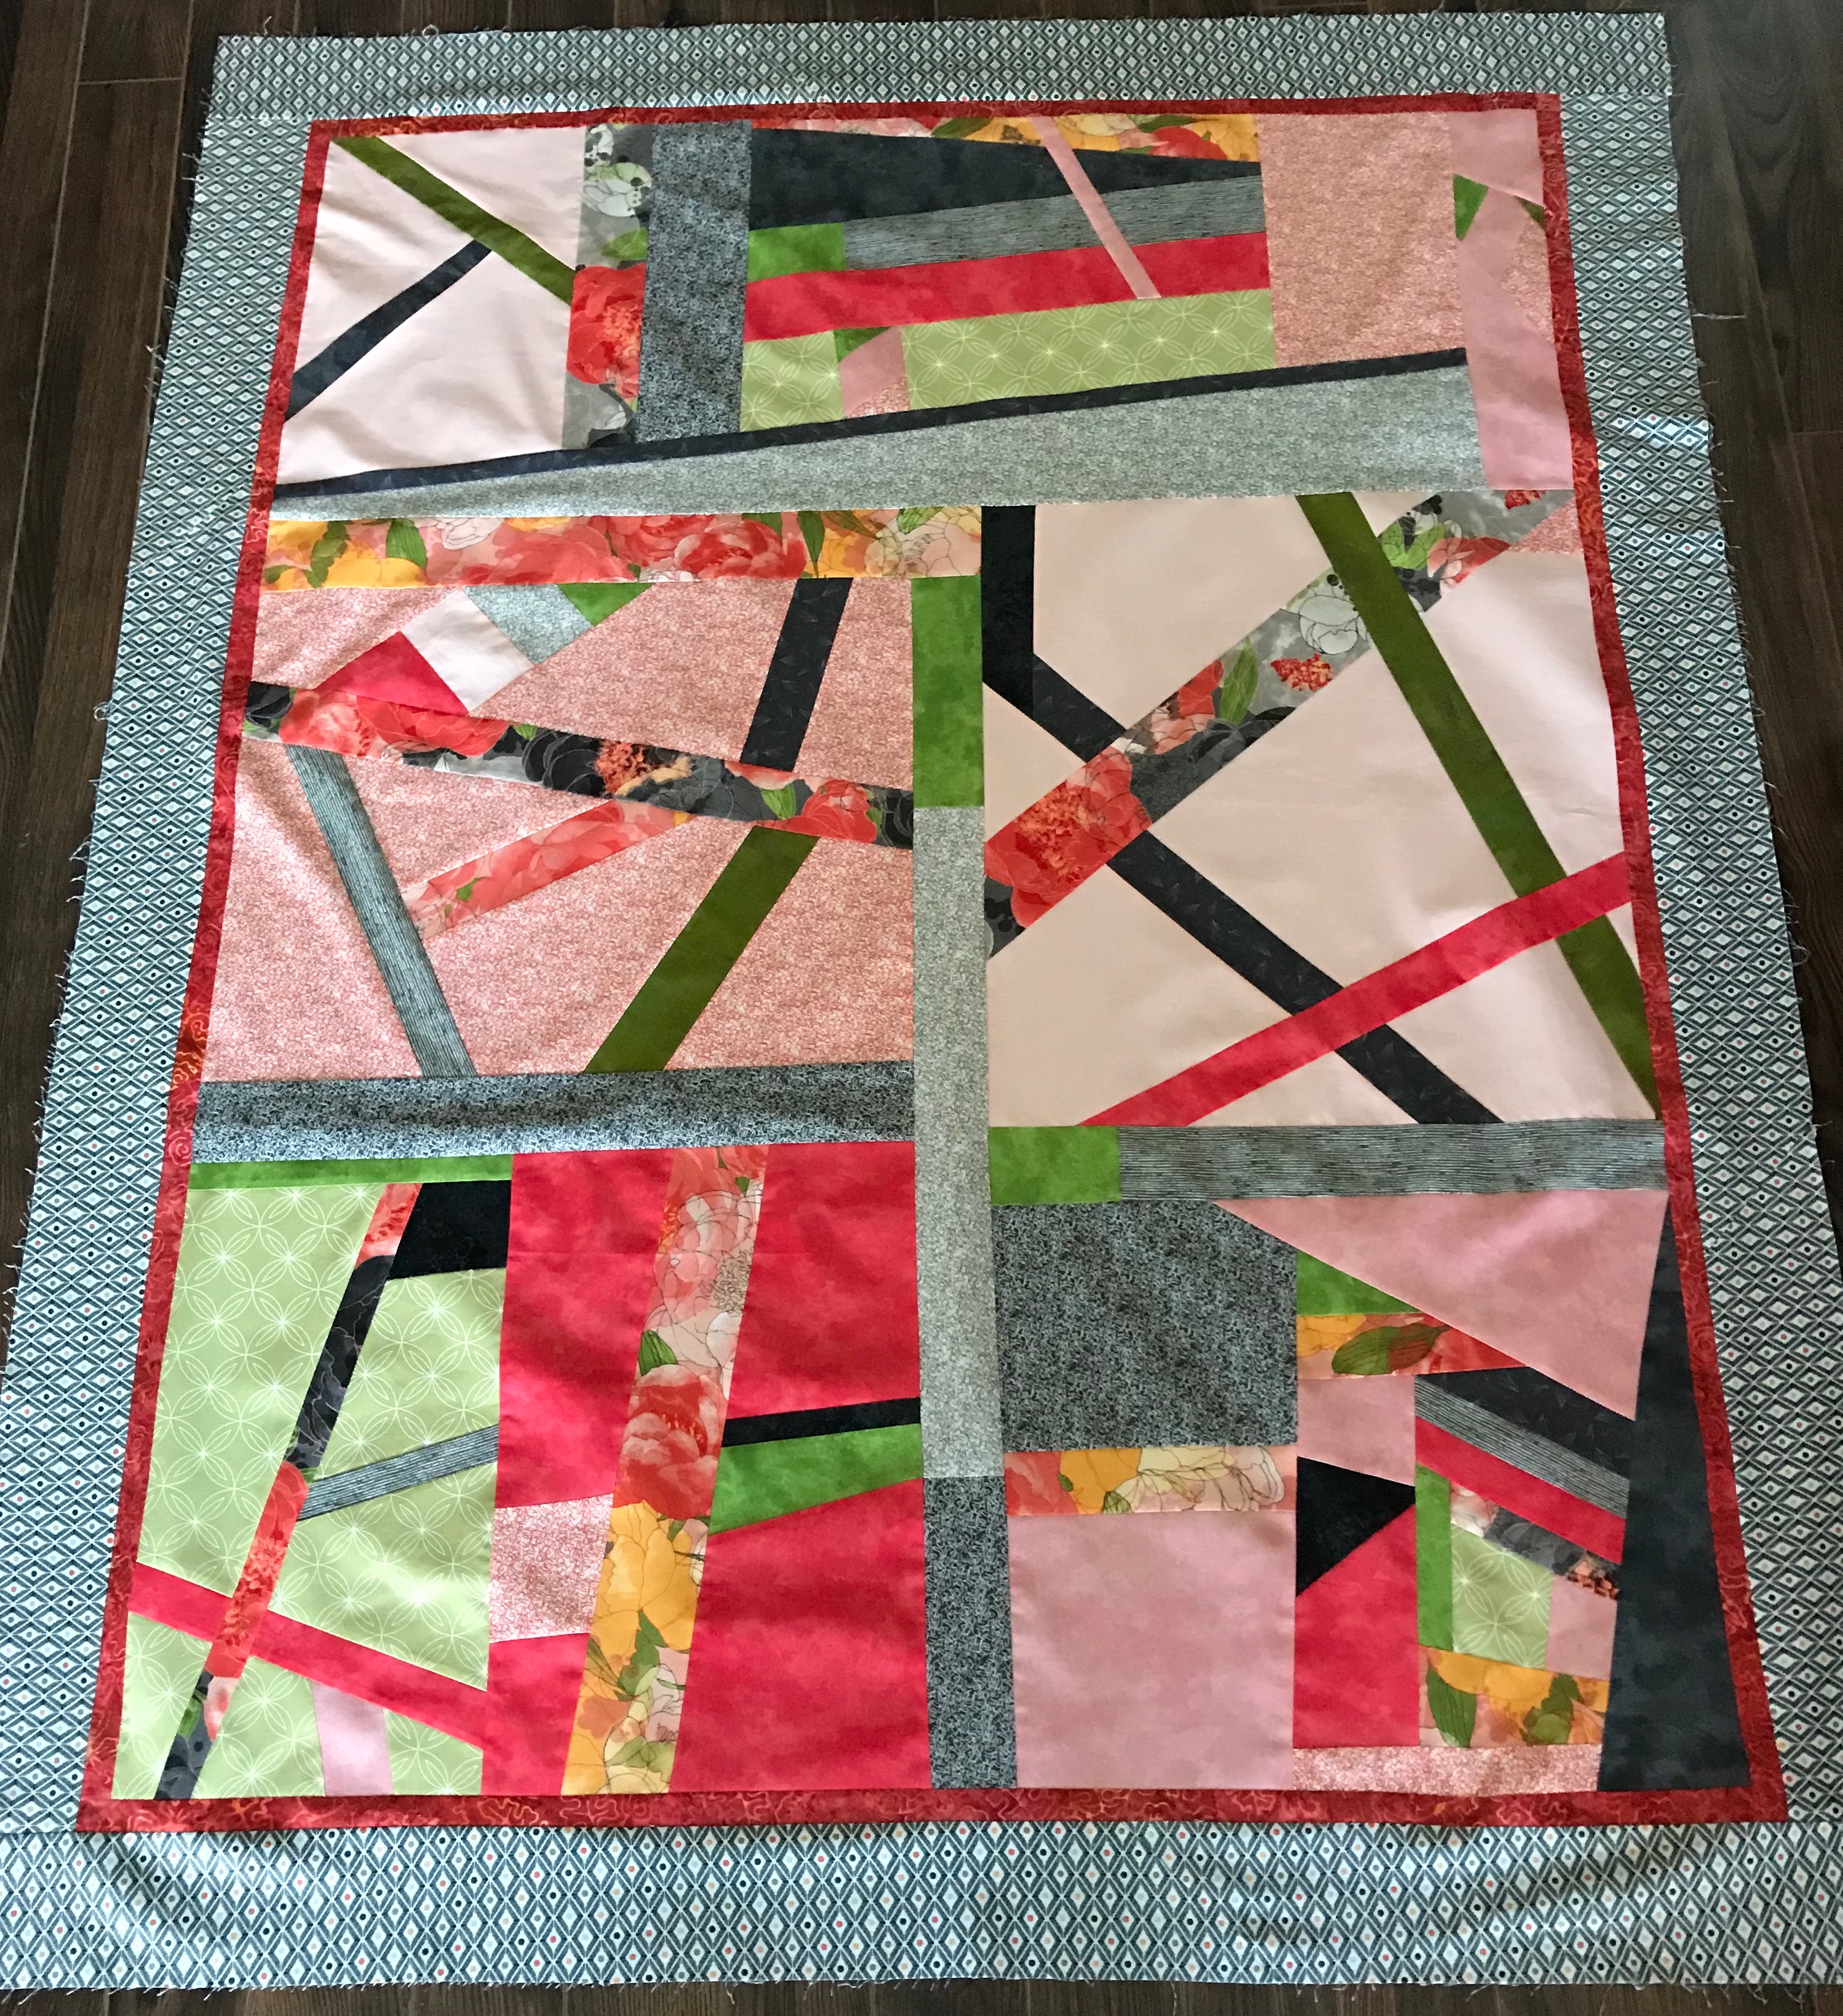
Quilt Top With Borders Added

I showed the panel to a friend last evening – someone who’s been a close friend for 60+ years! – she tells me the truth. She found something jarring in the panel but couldn’t identify precisely what. I think the problem resides with the pale pink solid Kona sections. They’re flat/dead in comparison with the other parts of the top.

Now, I could take those two parts out and replace them with something else, but given this quilt top is an improvisation, an opportunity to explore and learn, I’m going to carry on. I can do quite a bit to change the texture of those pale pink areas with quilting, particularly if I use a contrasting thread and a more dense quilting embroidery than I was originally planning on using. It would fill up those pale empty areas and provide flow to the other parts of the panel.

So stay turned to see how things progress. Next step is to set up a back panel – it will need an insert as usual to make the fabric wide enough. Not sure what to do – I’m thinking about carrying on with large pieces assembled into a strip using these same fabrics.

Quilt Top Assembled

Instead of two shorter rows (one on top and one on bottom), this addition turned into a single longer piece I decided to add to one end. For some reason I can’t articulate, that addition feels like the “top” – almost where a pillow would go had this been a twin size quilt. Instead, it will be a largish lap quilt or throw. It still needs a border, maybe it will want a very narrow inner border – not sure yet.

Quilt Top Panel Assembled

Now I need to walk around this for a bit, at the same time I need to go through my fabric stash to find a fabric that could work as a narrow inner accent border, and something for the wider outer border.

And I guess I should be thinking about a name for the quilt – no idea what it might be.

Finally Back At The Quilt

Just added another two sections to this quilt improvisation. It’s now close to a square – in the ballpark for width and still needing another 12″-15″ in length; I’m thinking I’ll add two narrow strips – one to the top edge and one to the bottom.

The Growing Quilt – now a 42″ x 45″ panel

My goals here are 1) to use up leftover fabric from the previous quilt so I don’t have to try to find room in my fabric storage for it, and 2) to set up a new quilt for a class (Slash ‘n Insert Quilt) I hope to be teaching in a couple of weeks.

What I’m trying to construct is a modern quilt based on large sections of slashed fabric with a few prominent insertions rather than a meticulously pieced panel. Before I started I thought this would go quickly – wrong! The deciding where to cut and whether/how to align elements after cutting is proving more time consuming than I anticipated. That’s why I avoided working on this for nearly 10 days! Anyway, back at it finally and closer to a quilt top than I was yesterday.

Hoping to make time in the next few days to add strips to the top and bottom edges of this panel. Then I intend adding a 4″ (or so) border. By next weekend, I would like to have pieced a back and created the sandwich. I now need to start thinking about what kind of embroidery I need to quilt this – likely an edge-to-edge design of some kind.

Modern Quilt – Improvisation

The start of a new quilt. This is fabric left over from the Blushing Peonies Quilt. I’m working to use it up because my storage drawers and boxes are just about full and there’s really nowhere to put both the large and small fabric pieces.

I decided to use them instead of leaving them lying around gathering dust.

Blushing Peonies – Modern Quilt

What I have so far is this compilation of strips and block sections created by starting with a large piece of fabric, slashing it, then slashing the resulting pieces further, and inserting bits of fabric and recompiling the original block with the insertions included. I’ve done two largish blocks so far, the resulting piece is about 20″ wide x 22″ long – a good start.

I’ll keep adding segments to what I have here intending to end up with a good lap-size quilt 50″ x 65″. What I’m after is large sections with strong insertions – particularly showcasing both blushing peonies fabric – the peach version as well as the darker fabric I used in the original quilt.

Just gotta keep going.

I had originally intended on doing something quite different with the fabrics based on 2 1/2″ strips but the idea I had wanted the central smaller square to be one piece (instead of 4 triangles) using the blushing peonies so the flowers would show.

Garden Trellis – from a jelly roll

Setting up a block like that, however, proved more complicated than I was willing to take on – getting the mitred corners on the surrounding pieces was just too fiddly to bother with. Scrapped that idea for now.

So modern quilt it will be.

Layer Cake Quilt

I’ve been working on this new quilt for the past ten days. I started with sixteen grey batik 10″ squares and eighteen assorted beige/blue/grey 10″ squares – in effect a “layer cake.” I’d had the fabric in my stash for over a year not sure what to make with it. I didn’t have enough of the grey squares to do a whole quilt top so I added some Zen Chic (Fragile, Chalk Stamped) yardage which I also had in my collection. I decided to do an outer “border” with the white, doing the centre of the quilt using the grey batik.

I cut each 10″ square in four and constructed a total of 96 half square triangles, making sure I had enough blocks using the white to build the perimeter of the quilt top. Next I carefully laid out my HST and began sewing them together. Each block has four HSTs separated with a sashing constructed from 4 1/2″ rectangle “snowball” blocks – turns out I had a jelly roll using many of the same fabrics as the mixed batik 10″ squares I began with. I pulled out 12 strips to use for the sashing. To complete the snowballs I needed 384 one and a half inch white squares to add to the four corners of each rectangle.

Assembling The Elements

So far, I’ve assembled half of the inner panel of the quilt top – you can now see the white perimeter taking form and the grey batik interior squares are emerging.

Quilt Top – half pieced

I have two more columns of blocks to construct to add to this half panel. Then I will border the panel with more of the white patterned fabric. I have enough backing fabric that I should be able to add a narrow border of that fabric as well.

In the meantime it’s back to the snowballs – I have 48 more to construct. Once the snowballs are done the remainder of the top construction will go quickly.

Improv Quilt – Completed

Just done in time for my Tuesday Improv Quilt class. I did edge-to-edge quilting in the hoop on the central panel, then quilted the border separately. The inner section I treated as if it were a 6 x 8 pieced panel (using an 8″ x 8″ design which I set up using my embroidery software). That seemed to be the easiest way to do an overall quilting given that my building blocks were various sizes. I did not do any stitching in the ditch although I thought about it before I started the embroidery quilting.

Improv Quilt – Top

The back was pieced using leftovers from the top. I bordered the strip because it turned out the strip was shorter than I needed (that’s because I had added borders to the strip on the top side and this was all the fabric I had left). I like the effect and fortunately I had enough bits of backing to be able to do that.

Improv Quilt – Back

In the end, I had to return to the shop to buy another 15″ of backing fabric to bind the quilt. One last detail – I added a narrow strip of one of the top fabrics to one end to add another small accent. With label attached, this quilt is completed.