 Took this photo in 2008 while on a Caribbean Cruise – the image reminded me of the paintings of Alex Colville – the lone figure, facing away from the photographer (artist), absence of shadow. I made a print and put it in my spare bedroom. I was just tidying up the room and stopped to think about the feelings in the image. Thought it worth sharing.
Month: December 2013
Fossil Fern Quilt – Done
 This is the completed Fossil Fern Quilt. Quilted in the hoop, with stars in the border (used a grand endless hoop which makes the job quite simple), and a pieced binding to bring out the colours of the piecing. The back is solid – no piecing this time, in the end, because the quilt turned out small enough that one WOF (width of fabric) was enough to cover the back – it’s the same blue fabric of the wide border.
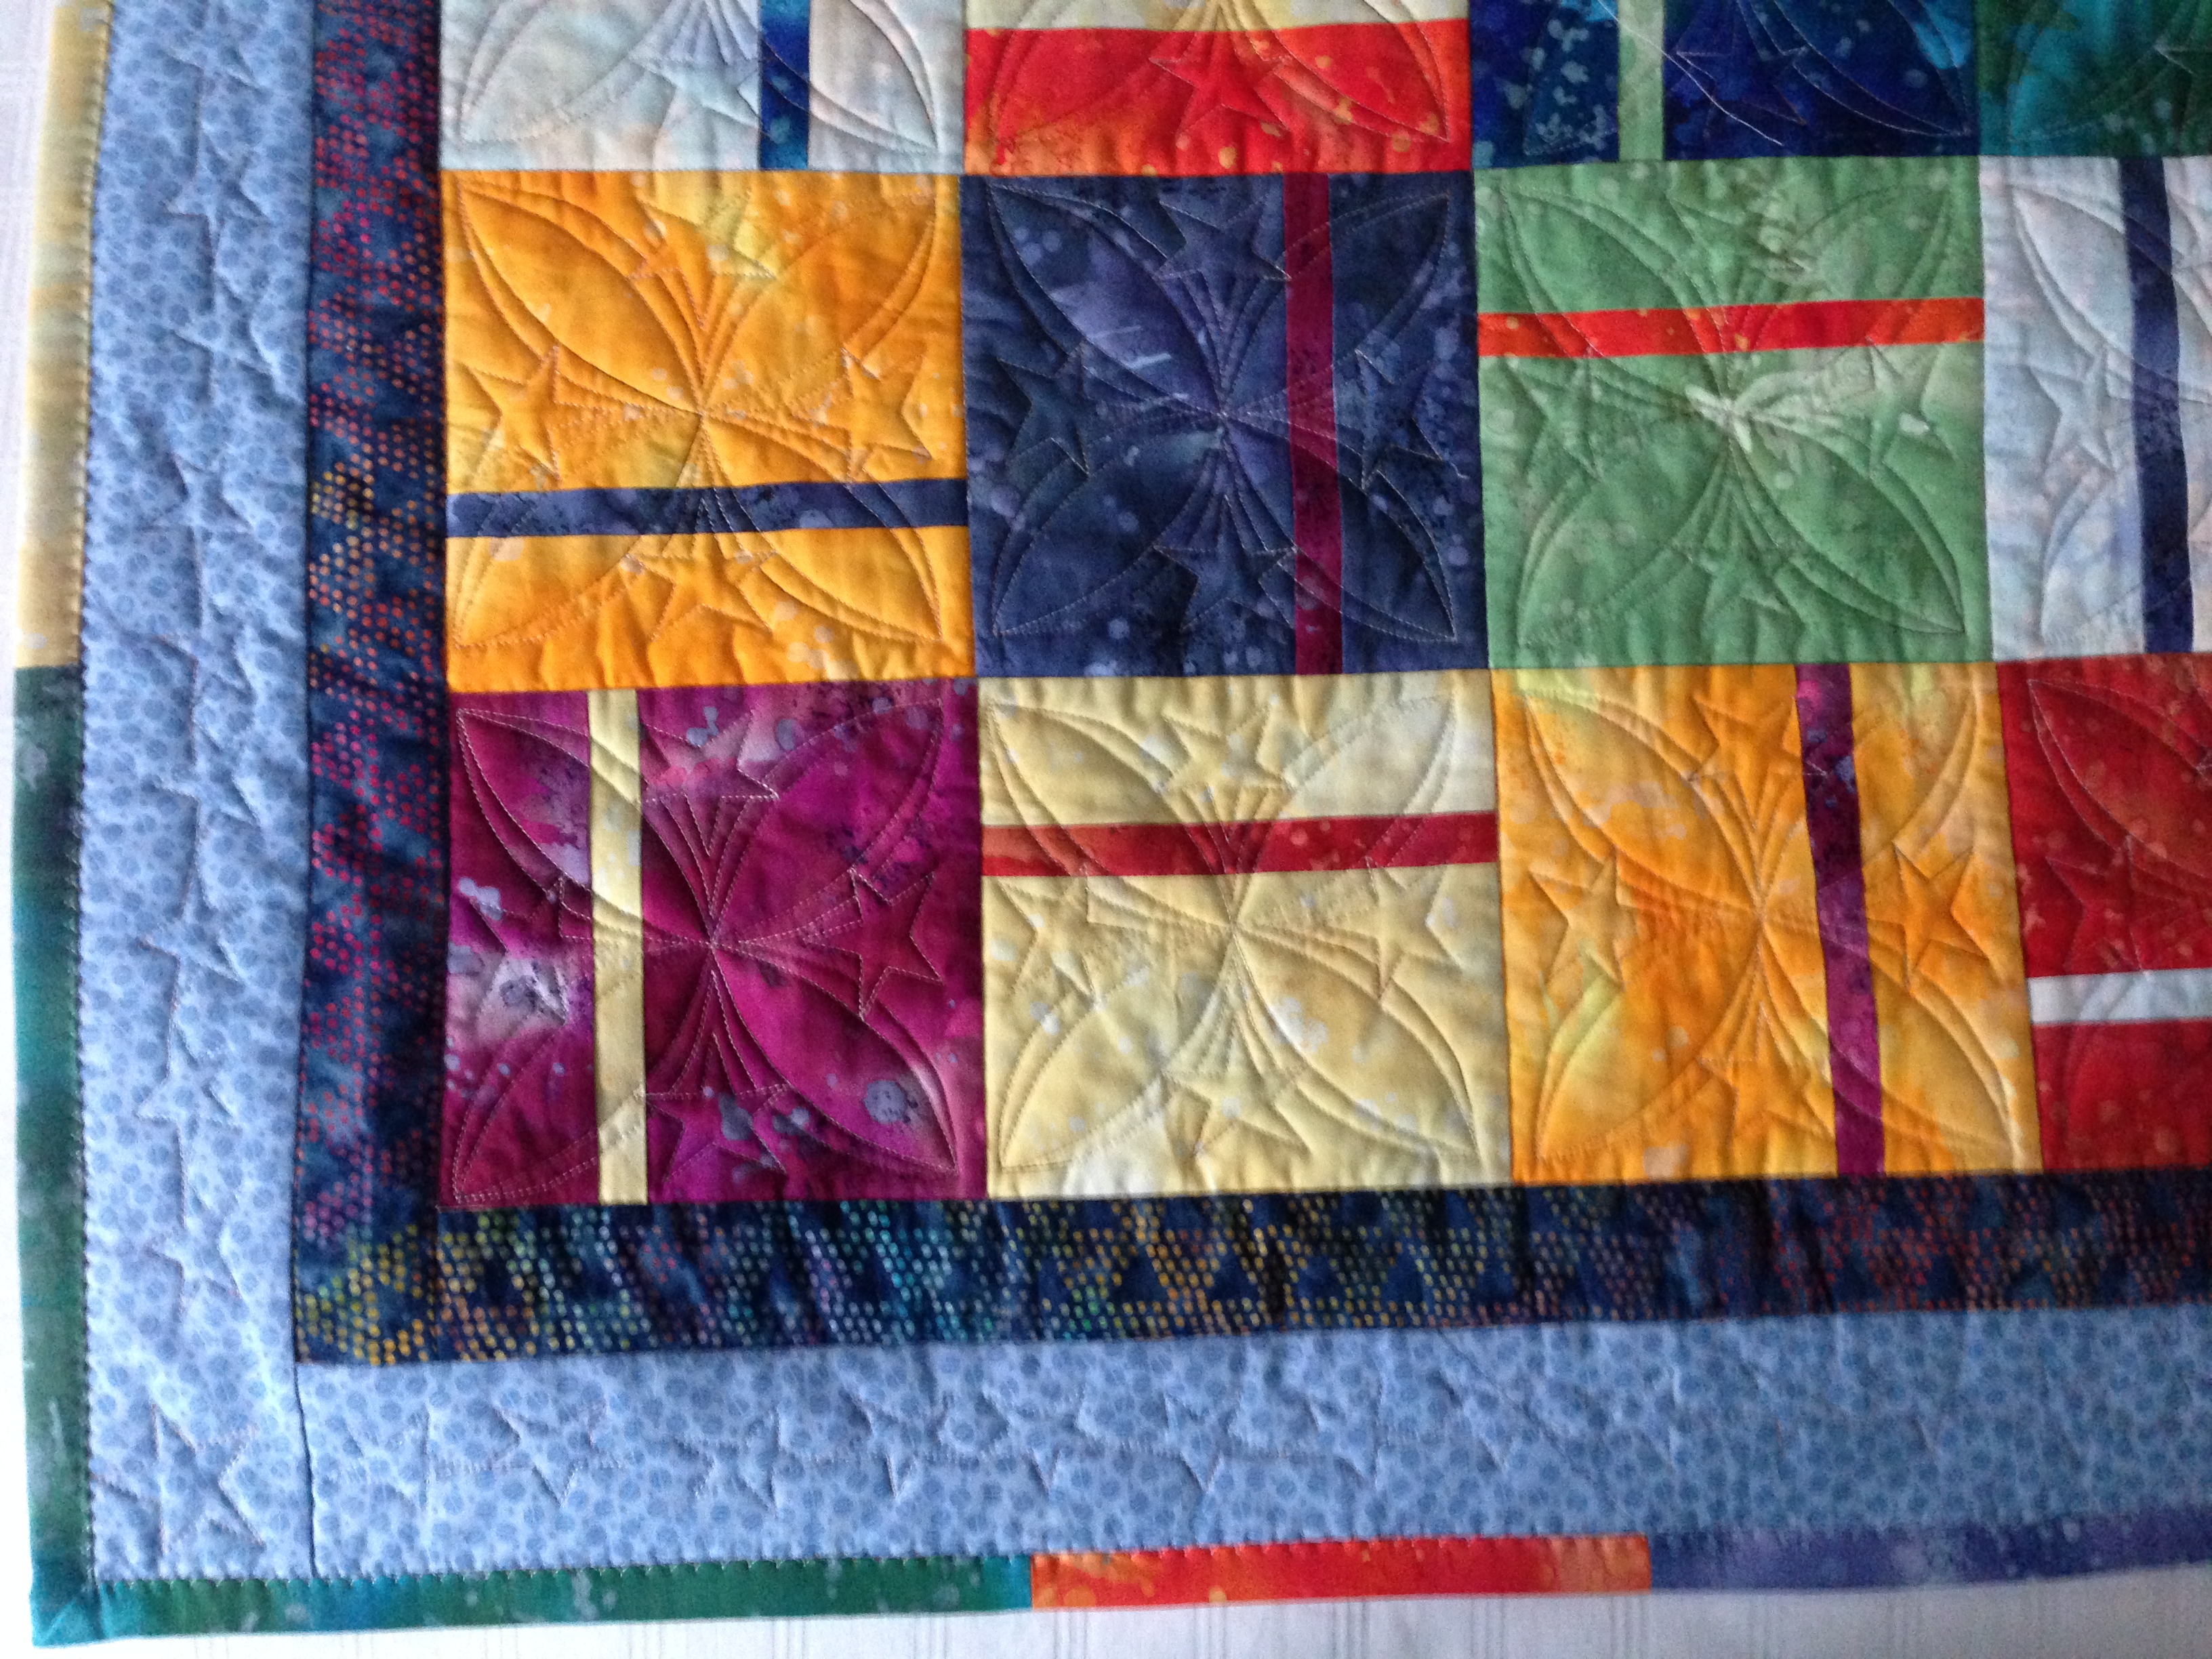 Here is the quilting detail – the star border, the loops with stars the quilting element.
This will likely be a baby quilt for a boy – the blue back kind of determines that, although I wouldn’t be adverse to giving it to a baby girl, but it might not be seen as “appropriate” and therefore not used. So probably a baby boy it will be. For now, it’s hanging in a closet with the rest of the completed quilts waiting for new homes.
Amaryllis
 This isn’t mtg bloom – it’s my neighbour Joan’s plant – a triple amaryllis in full bloom – it’s gorgeous! My house is quite a bit cooler, so mine has grown more slowly – it’ll be at least another ten days before mine will bloom.
Fossil Fern Quilt
 Back at quilt making. Haven’t done one since mid-September – I don’t have a recipient in mind but this will certainly make a good baby quilt for someone – just because the outer border and the back will be in that blue fabric with dots (look like coffee beans, actually), doesn’t mean I can’t give it to a girl child. The other side will also be pieced – haven’t decided exactly how I will do it.
This was twelve fat quarters from the Benartex Fossil Fern collection I bought during the summer. I went through it and picked out contrasting pairs trying to set up a “rainbow” of colours. There’s still a lot left from the fat quarters – the finished blocks are 6″ X 6″ – three of each of twelve colours – that was simply a 6.5″ strip from the longest dimension of the fat quarter, plus another 1″ strip. I’ll use a bit of what’s left to do something on the back of the quilt.
Last Christmas Gift
I had one last Christmas gift to make and it’s done.

The fabric is a piece of pink velvet upholstery from my sister’s old sofa – I had this bit leftover from cushions I made for her – it’s been sitting in a drawer for several years. Thought it would be perfect for an eleven year-old. So I embroidered one piece (the other side is plain), added a zipper, a lining and a strap and it’s done.
Colour Affection Shawl II
It’s finally done! I thought this Colour Affection Shawl would never end – by the end rows had close to 600 stitches – it took at least a half hour to knit one row!
 |
 |
I started it on June 27 2013 (it has been nearly 6 months since I started!) and knit quite a bit until the rows started getting long, and then boredom set in! It was all I could manage to knit a row or two in an evening – many evenings I didn’t even look at it. However, I learned a lot about “lace weight” knitting (which I’ve never done before): the yarn called for a 2.5 mm needle, part way through the first colour I switched to a 3.5 mm circular needle (I started with a 32 cm circular, had to switch to an 80 cm circular) – to get the size and loose affect I was after I should have used at least a 4.5 mm needle – that would have substantially reduced the number of stitches in those long rows at the end. I also would have used three somewhat more contrasting colours – the contrast between the aqua and white is minimal so you don’t really see the three colours. One last thing I discovered is the way I increased stitches made the neck edge of the shawl too tight – I will have to explore a different way of increasing stitches that produces a looser edge, maybe actually doing a YO (yarn over) which would produce an open space would work better – I’ll have to try a swatch to see if that works.
Nevertheless, I love the striping effect of the partial rows when the dark colour is added. I wanted to add more to the bottom edge, I still had a tiny bit of yarn left (maybe enough for 4 more rows) but I just couldn’t face knitting one more row.
The cast off has to be loose – I used a size 3.5mm crochet hook and did a single crochet knitting two stitches together – the tension on the edge turned out perfectly.
Yarn: I used Debbie Bliss Rialto Lace which I bought in my local yarn shop.
Celtic Fair Isle Beret (with Latvian Braid)
 I finished the beret last evening. Here’s the pattern for it. I didn’t use the recommended Patons Classic Wool Worsted, I used Smart Double Knit (a wool yarn of approximately the same weight) using 4.5mm needles as the pattern suggested. However, using the number of stitches recommended (128 after the band) I could see I would end up with a toque rather than a beret, so although I was already into the decreases for the crown, I unravelled the hat back to the band and added a fifth repeat to the hat (170 stitches). I kept track of the repeats by using small plastic rings to indicate each repeat (I used a larger one to mark the beginning of the “row”).
I used the two-hand technique to knit the beret (one colour in my right hand, the other in my left), making sure to cross the yarns every three stitches or so (when the pattern called for 4 or more stitches in one colour). I knit the body of the hat on a short circular needle, did the decreases for the crown using double pointed needles as the round became smaller and smaller in diameter.
Pysanky

These are a few of the pysanky (Ukranian Easter Eggs) I have done. Painstaking work even with an electric stylus. This is a collection of eggs I did a number of years ago to showcase the better executed ones. Most I simply gave away.
Haven’t done any for several years – stopped making them (although I still have all the supplies, including the dyes) for two reasons: first, working with the stylus had become painful – my right wrist would ache when I attempted the small movements required by the designs; and second, the shells of local eggs in my supermarkets seem to have become much more brittle than they used to be. The last time I did pysanky I managed to bring just two eggs through the entire process out of the dozen I began. Hairline cracks destroyed the eggs in the heating process to remove the wax – so I gave up.
Maybe this spring I’ll have another go at making pysanky – it’s always so interesting to see how they turn out.
Le Petit Prince 2
The first pair of Le Petit Prince socks were well received – Jim thought they were lovely. I haven’t heard from him so I’m assuming they fit him fine.

This is the second pair from Le Petit Prince (Opal Yarn) – they’ve turned out to be quite colourful. I’m tempted to put them in my sock drawer but it’s full to overflowing so this pair will go in the give away pile. And on to the next.
I’m also nearing the end of a winter beret to wear with the wine coloured jacket (it has no hood) and yesterday I started to crochet a wool poncho – made one 40 years ago and had it until this spring. I’d loaned it to a friend visiting from Ghana and it came back having been washed in a scented detergent. I tried everything to remove the scent and couldn’t get rid of it and couldn’t wear the poncho because it made me cough. So I sent it off to Value Village (the community clothing recycling shop). On Sunday, a friend handed me a bag of yarn (previously knit but unwound) to pass on but the bulk of that yarn was in a natural colour – perfect for a poncho. Still working on the lace-weight shawl – the rows are now so long I’m bored to death with it. It probably needs 12-14 rows in the third colour – that’s all, but each row is over 500 stitches and it’s all I can do to manage a single row at a time. It will get done, but who knows when.
Gift Bags
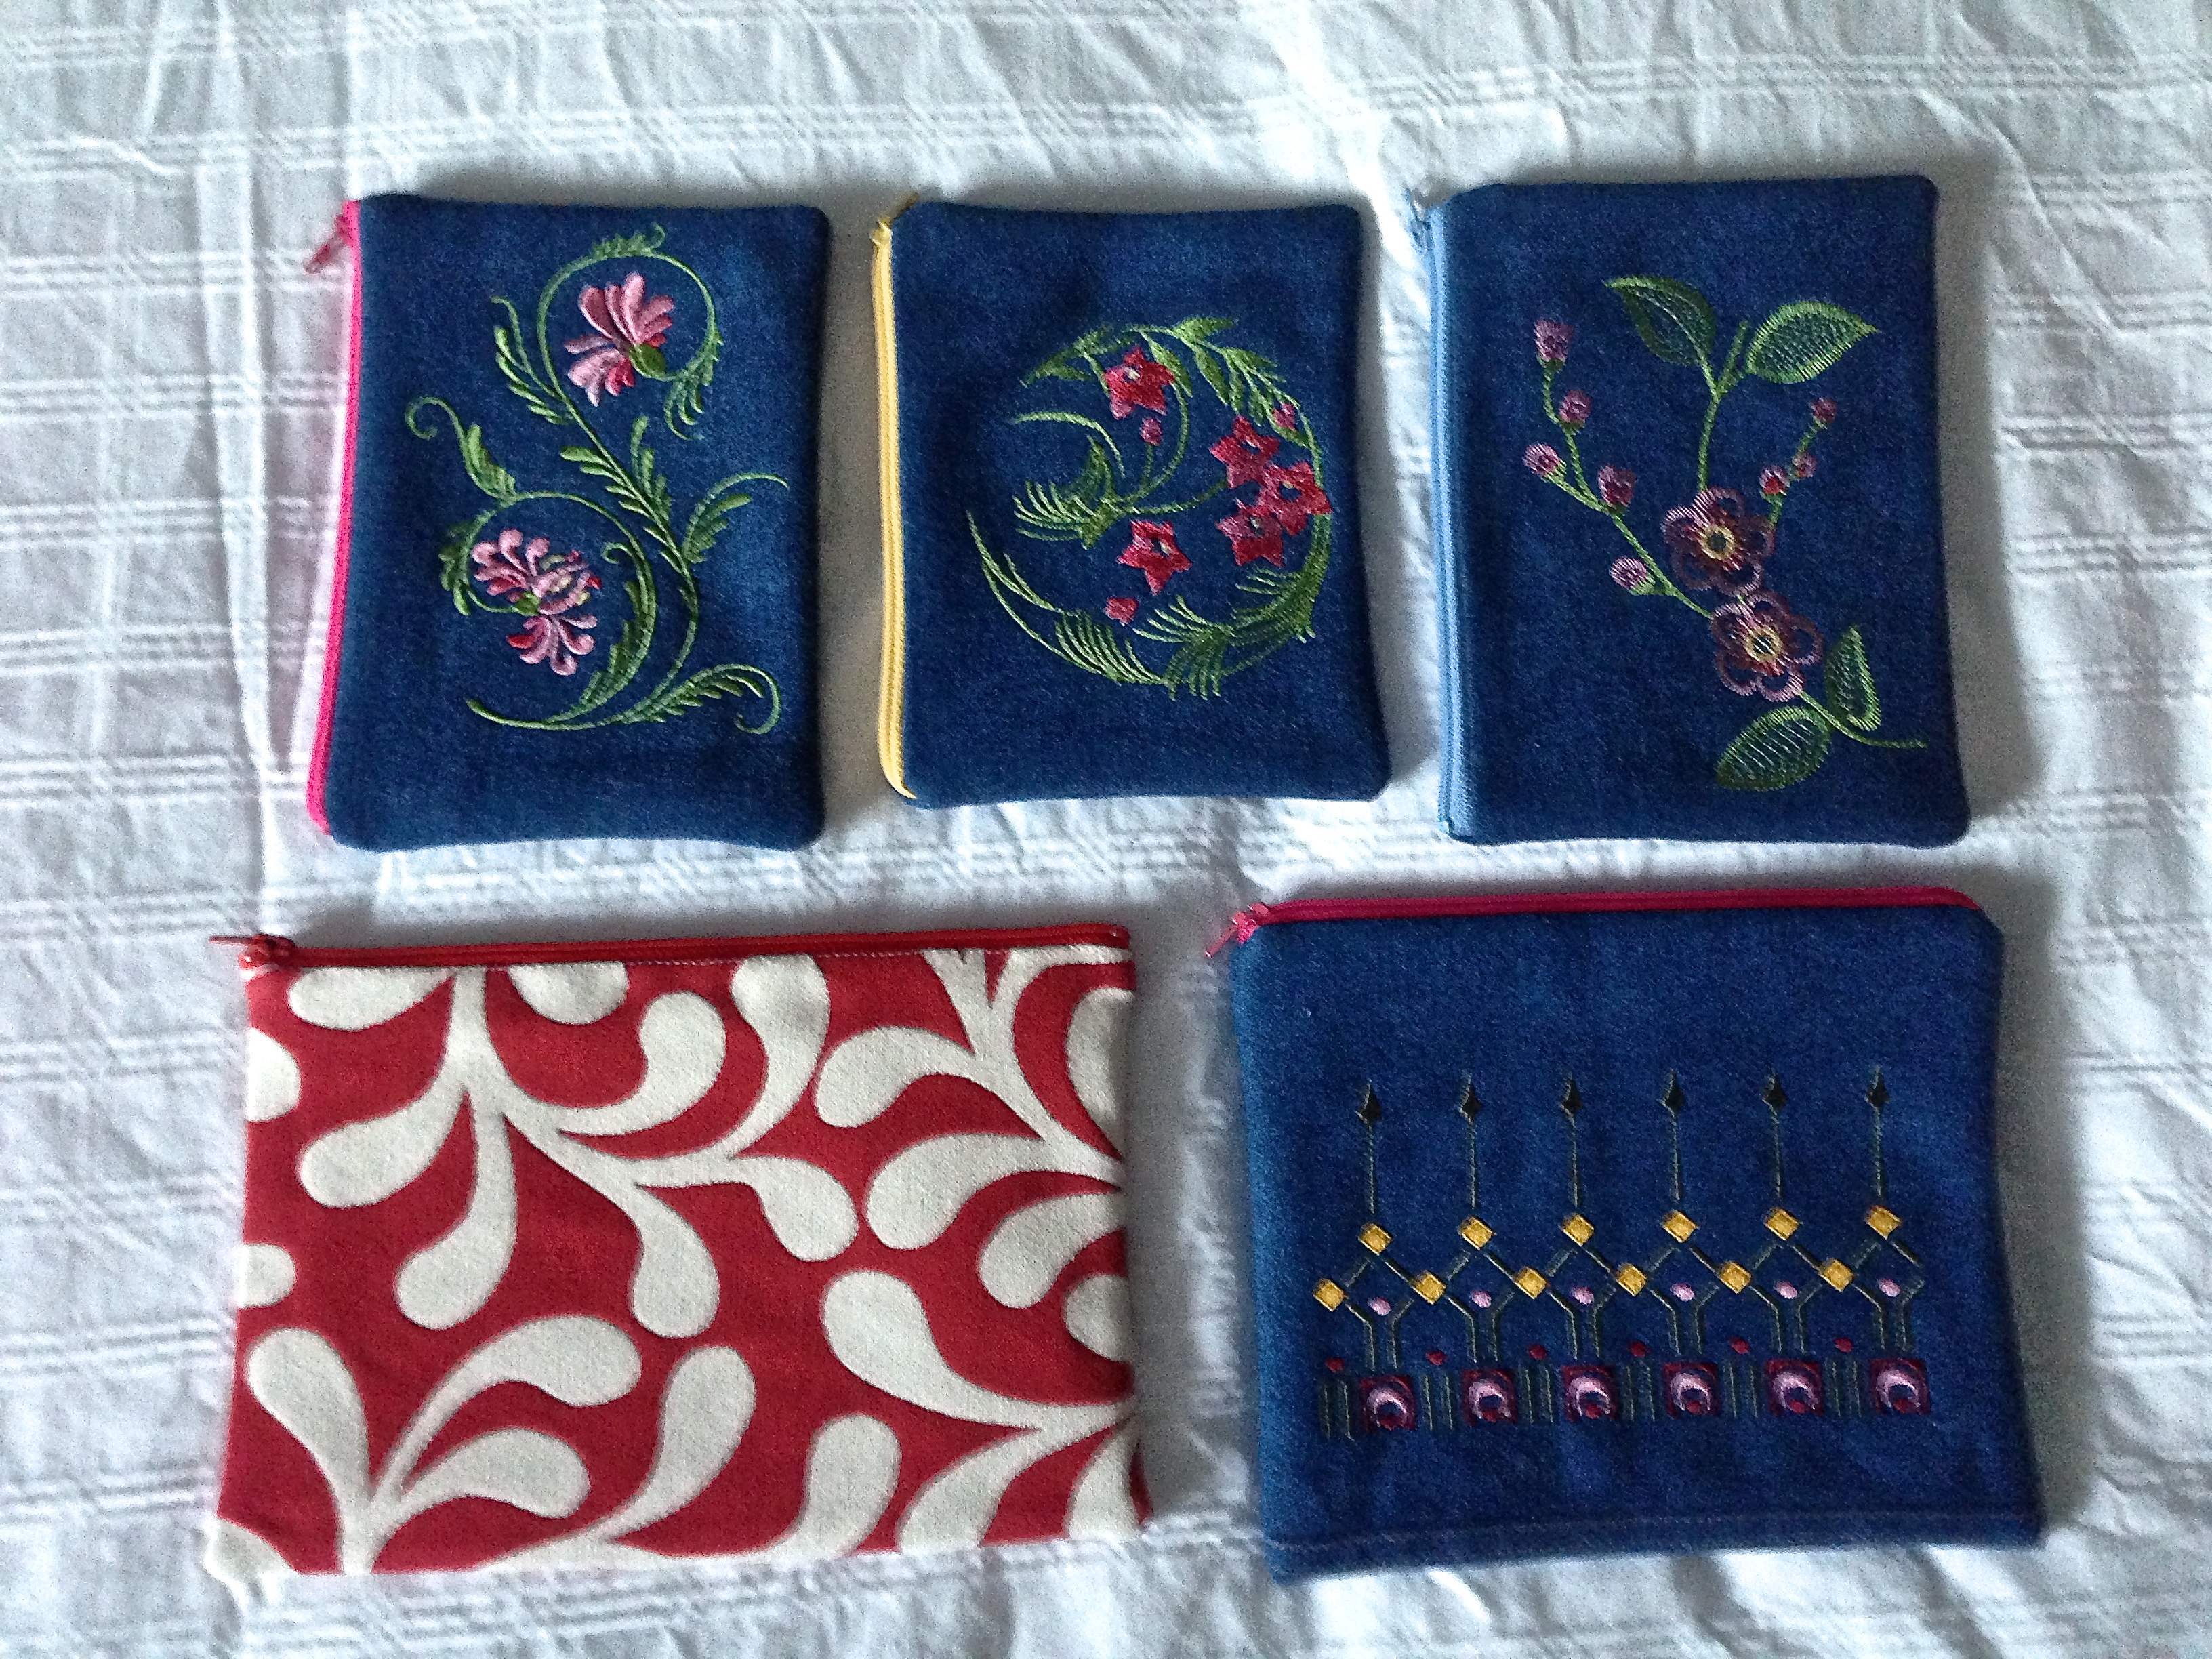
From time to time I make a bunch of small zippered bags to have on hand as gifts. Two days ago, I was tidying up the baskets in my sewing room and came across some denim from a pair of jeans which I’d cut up – making a shopping bag from the top leaving the leg portions. I thought with some embroidery they’d make nice zippered bags. There was also a piece of tapestry left over from a large carry bag I’d made for my bed foam which I take with me when I travel. So I made a small bag from that leftover. As you can see I embroidered each denim bag differently (the tapestry had an interesting enough pattern that I left it alone).
There was also a scrap of pink fabric which I used to make a larger bag:

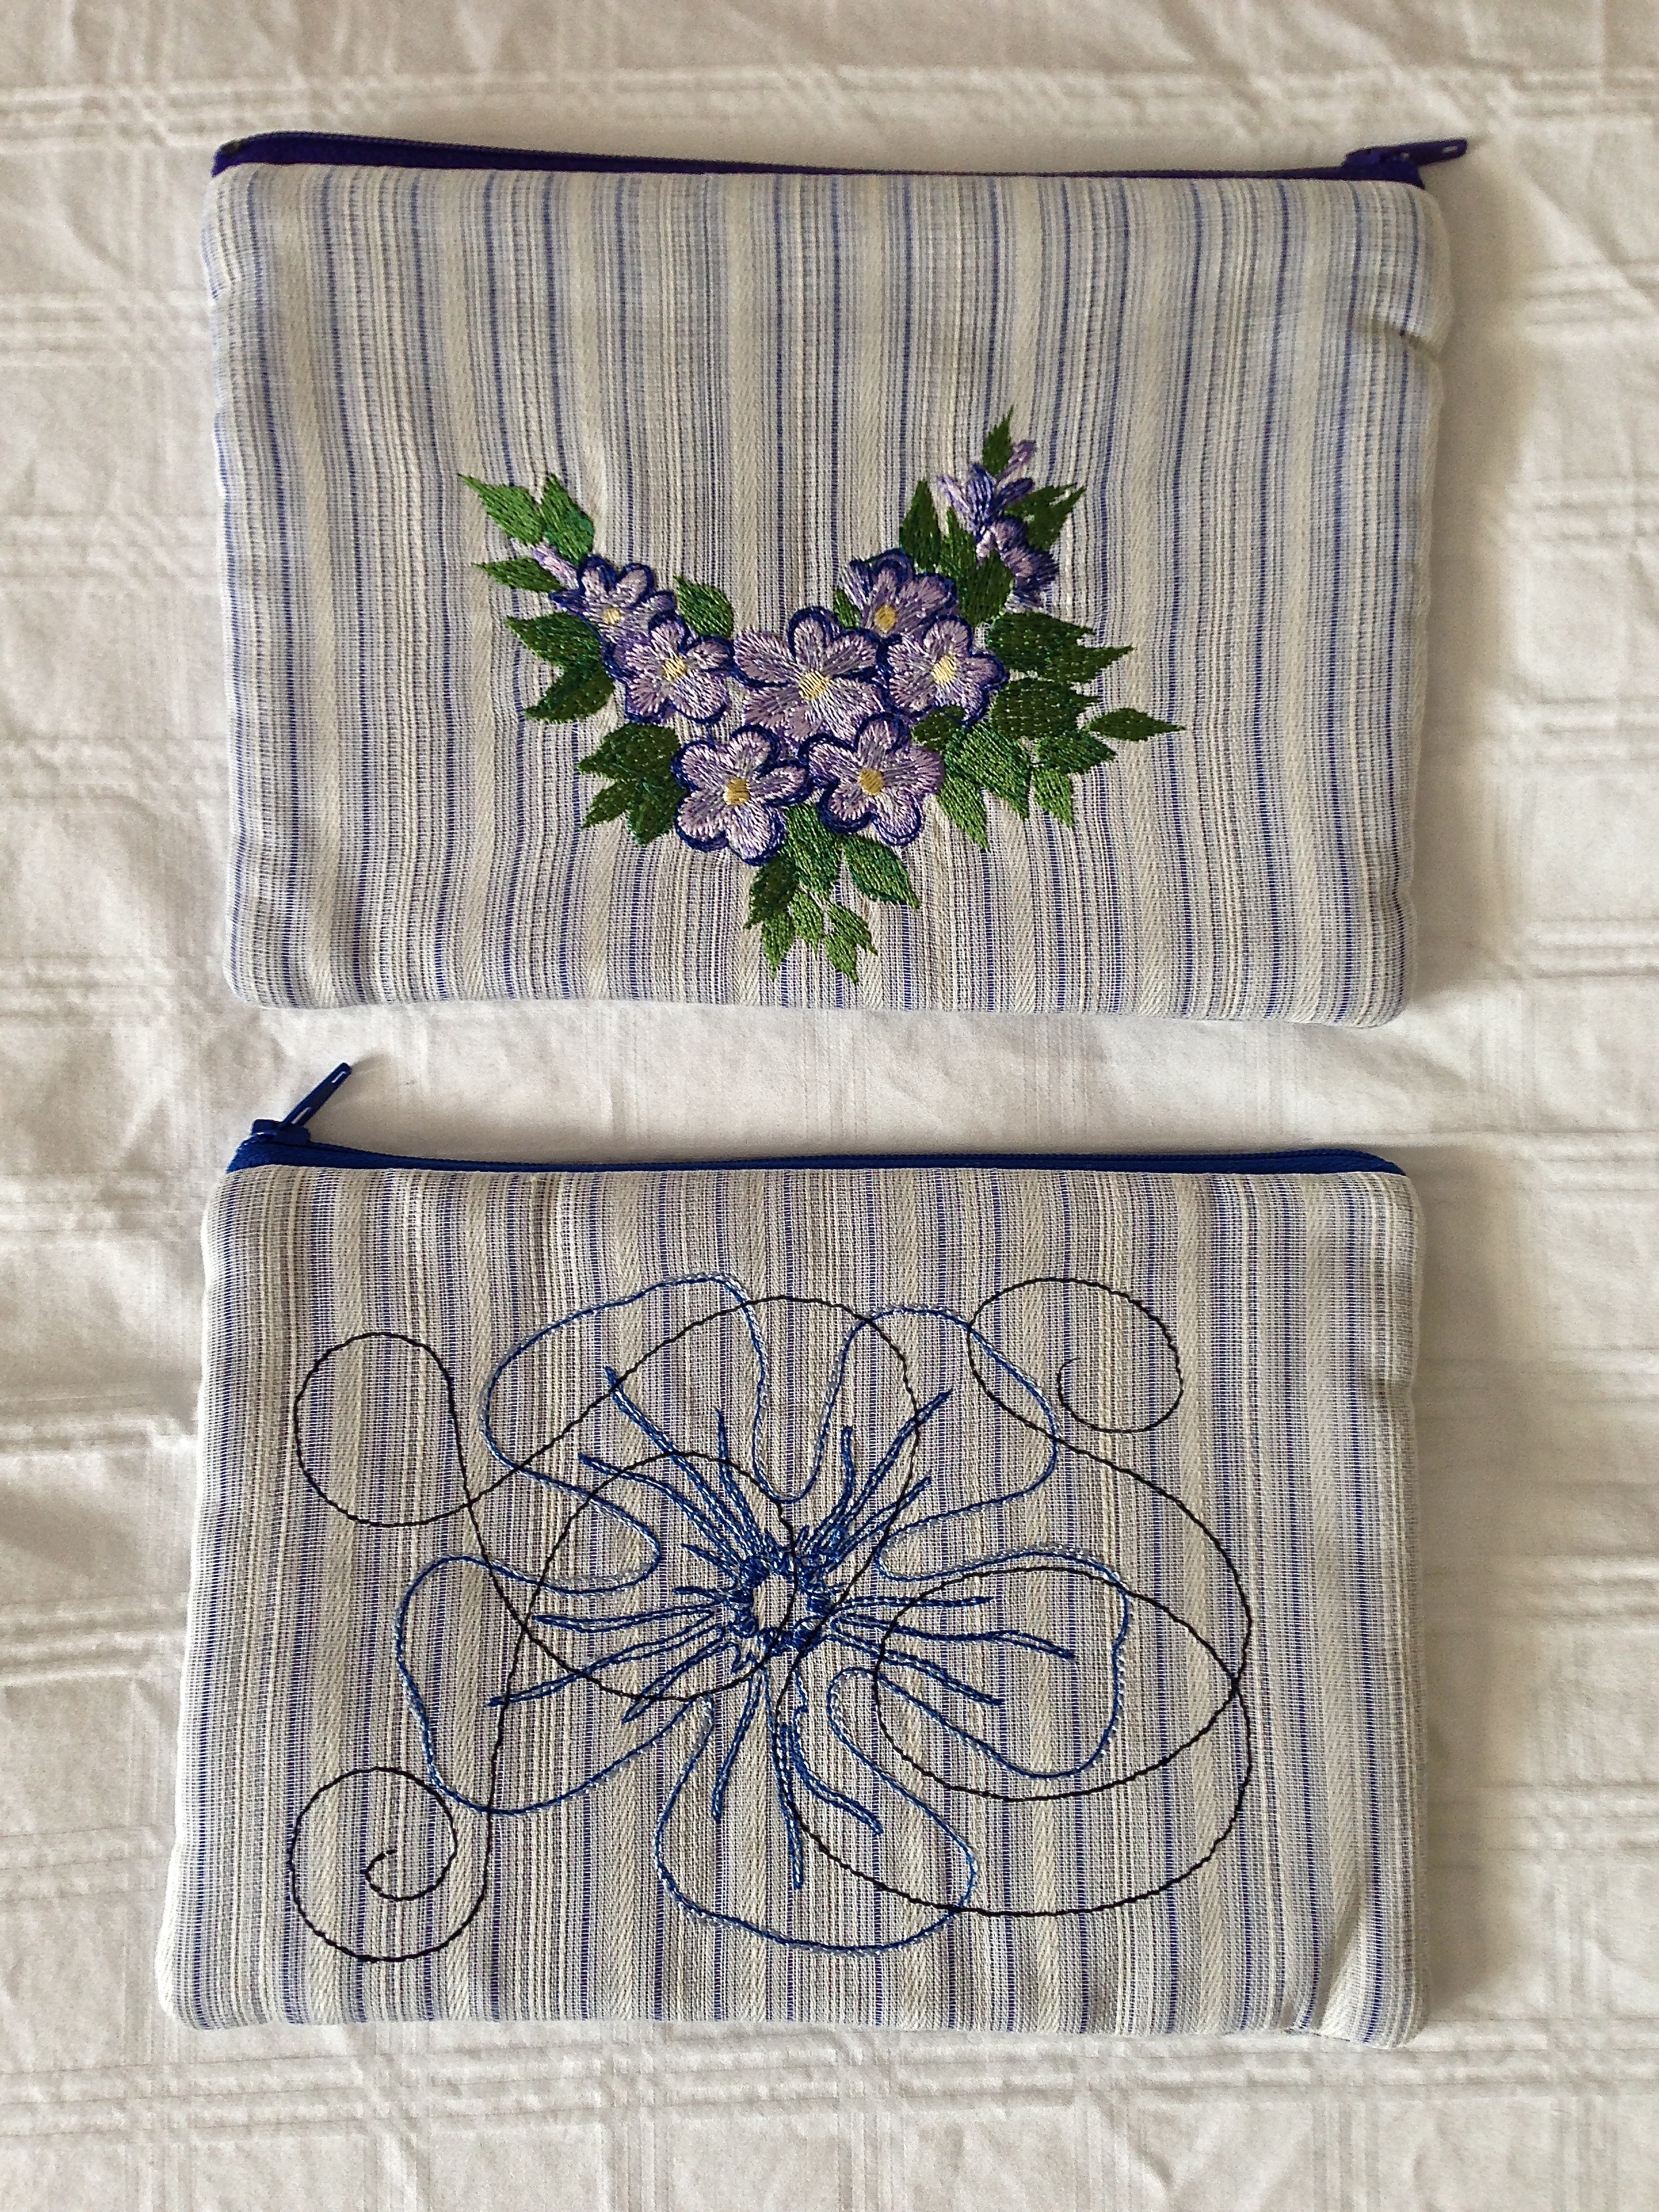
The design in this case was made from built in machine stitches – it was saved as an embroidery and done in one of the larger hoops.
This morning I began using some “lacy” fabric which surfaced in the clean up – I’ve done two bags, I have enough fabric to do two more.
These will all go into the bag stash and be given away as gifts when the occasion calls for something. I use them as gift wrap often, putting something else inside.
If you’re interested, here are instructions for making a simple zippered bag.
