My 5 Essential Quilting Tools

I’ve been trying to track down another seam ripper clipper to have at my embroidery machine and they’re hard as hen’s teeth to locate and get to Halifax. I bought my original online at Nancy’s Notions in Wisconsin – the tool isn’t expensive but the cost of getting one here is prohibitive! It got me thinking about what are my essential quilting tools.

Essential Quilting Tools

Here they are:

  • a seam ripper clipper – it has a small but sturdy/strong point that easily slips under a 2.5mm stitch and fits nicely in my hand. Insert it under a stitch and when you continue pushing, it cuts the stitch on the sharpened interior edge below the point. I needed it yesterday when I had to take out 1000+ quilting stitches to redo the quilting. It’s a must have tool – way better than a conventional seam ripper because there’s less likelihood of cutting the fabric
  • self threading needle – I like to leave tails when I start and end embroideries/quilting which I then embed in the sandwich. A self threading needle with an open back end is easy to thread – place it in the fabric, push the threads into the open eye, pull thread through and trim
  • very sharp small scissors – useful for lots of tasks including trimming threads close to the fabric; definitely essential when I’m doing appliqué work
  • fine pointed 3.5″ tweezers – I can’t manage without these – they’re perfect for grabbing the pulled up bobbin thread when I’m starting a seam – I always have a pair right at hand at each of my machines. Perfect for pulling out loose threads when I’ve taken out a quilted seam.
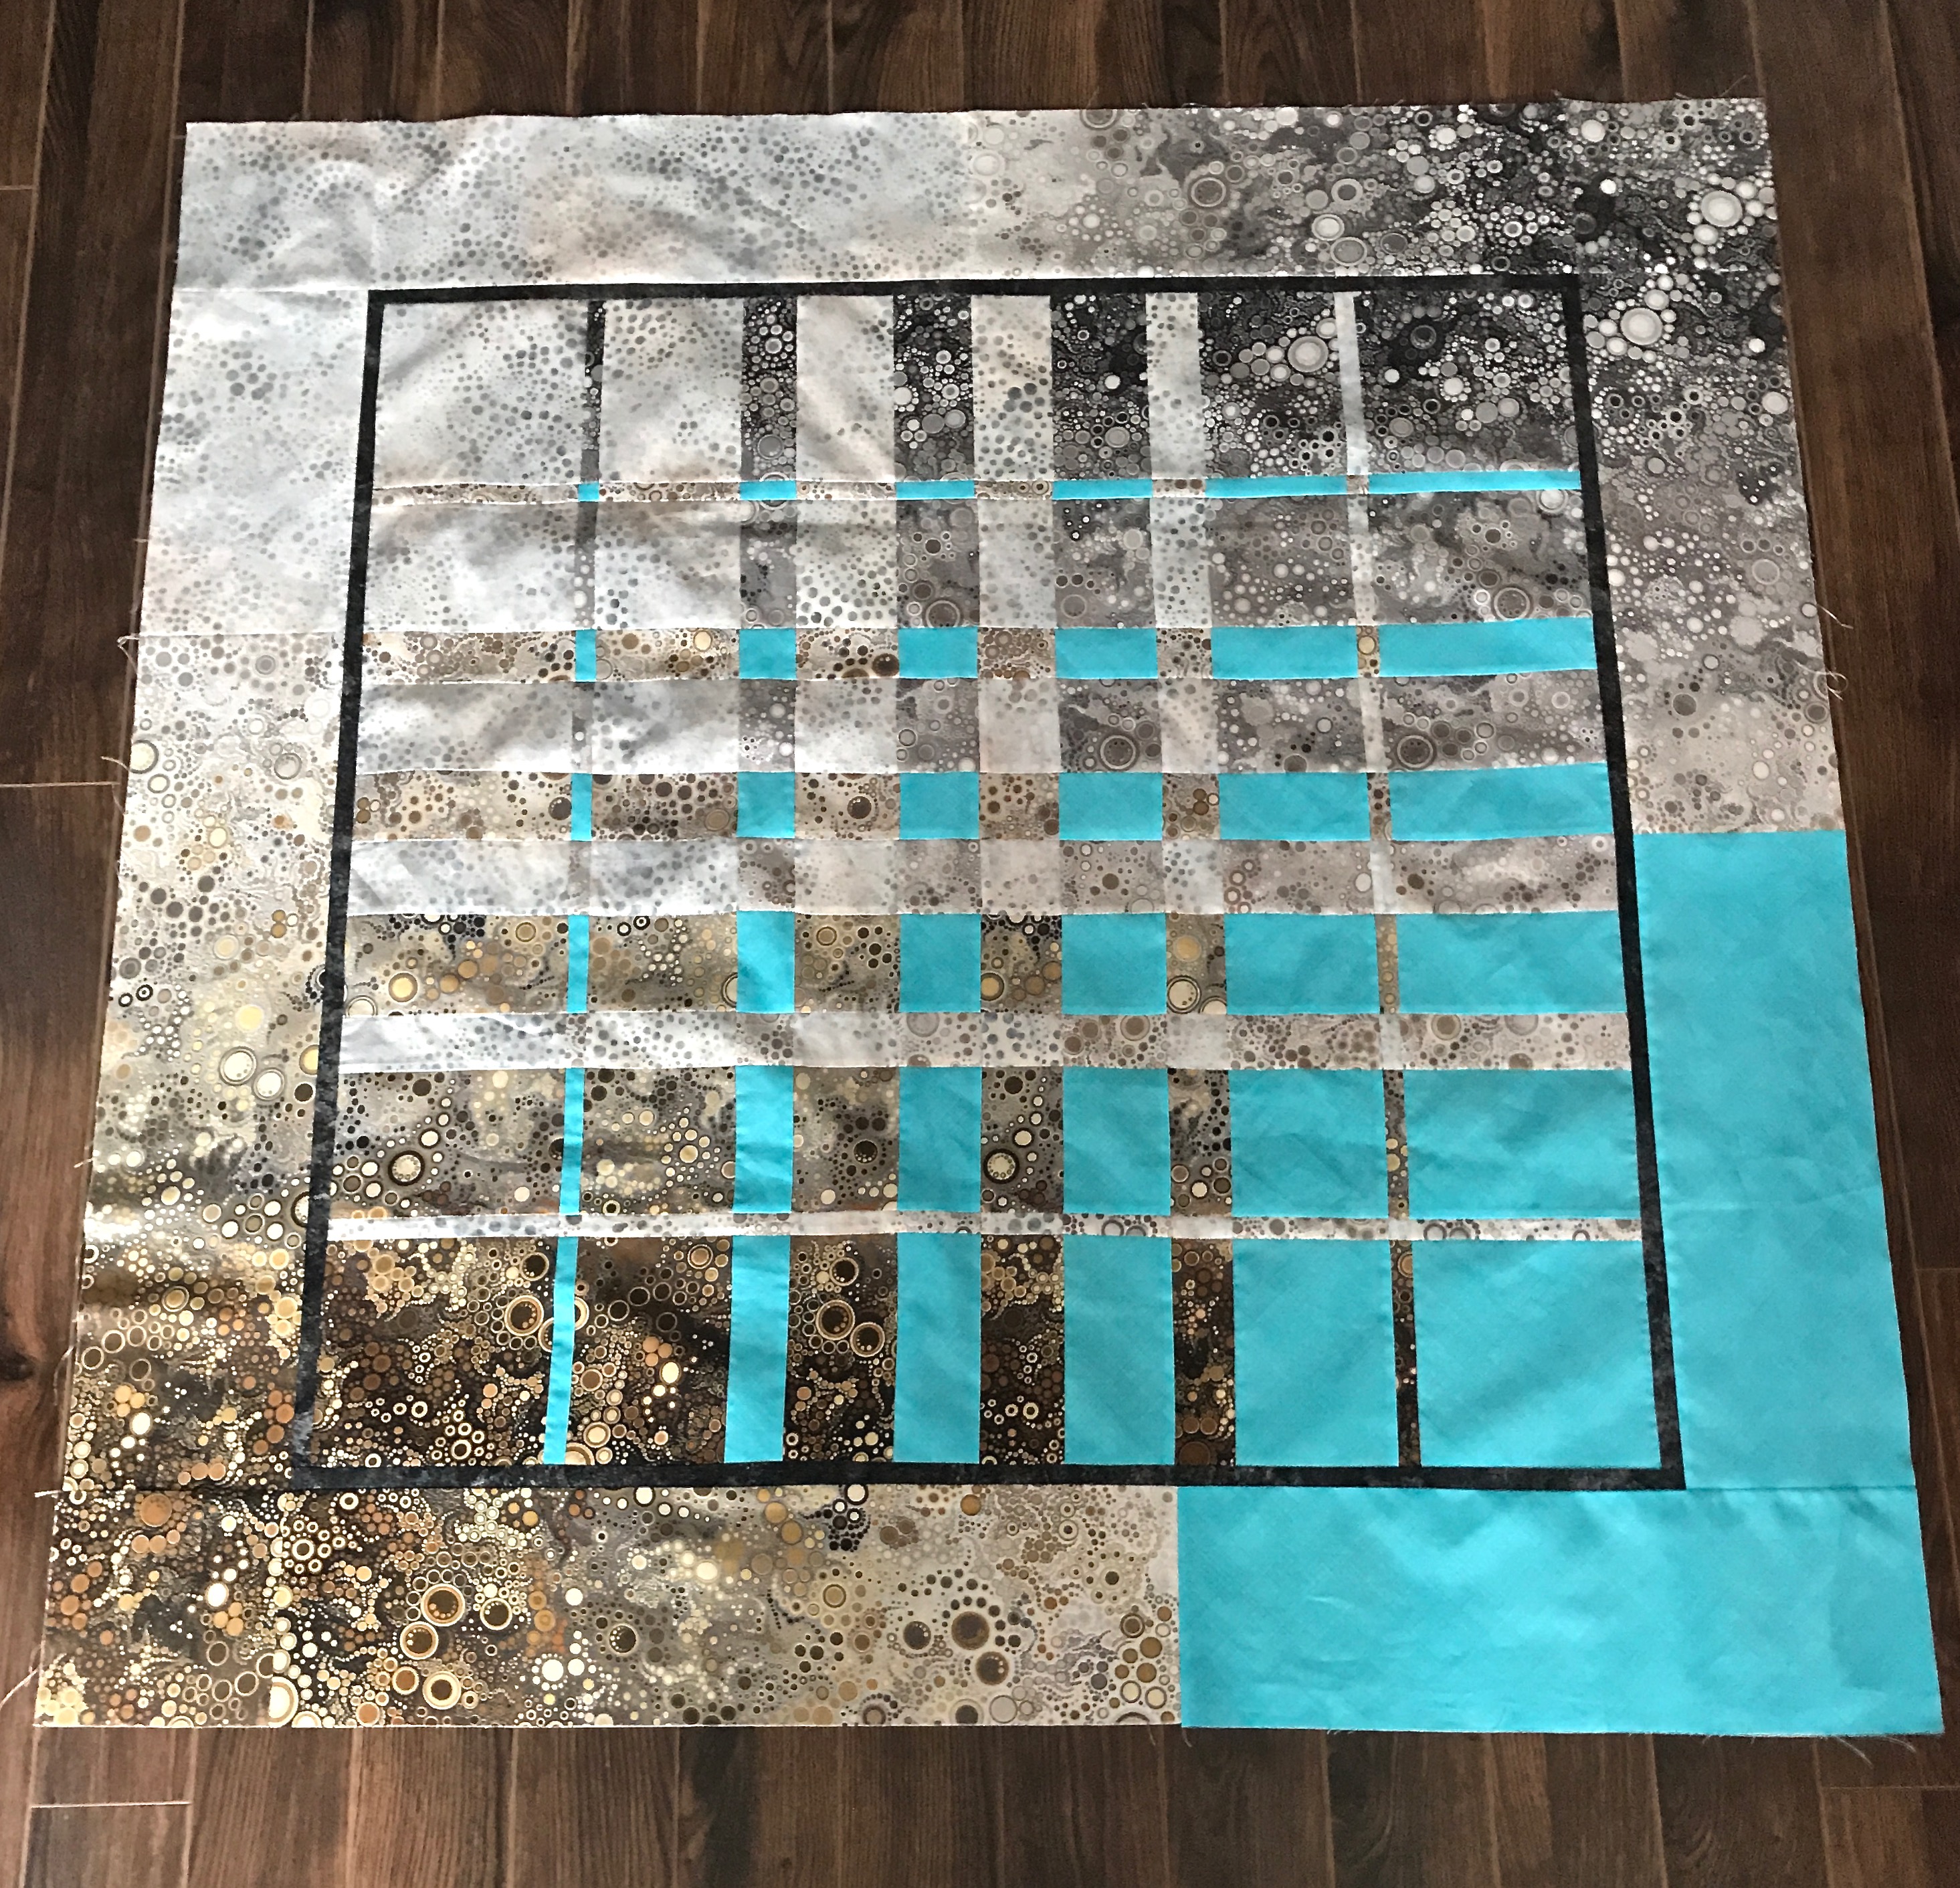
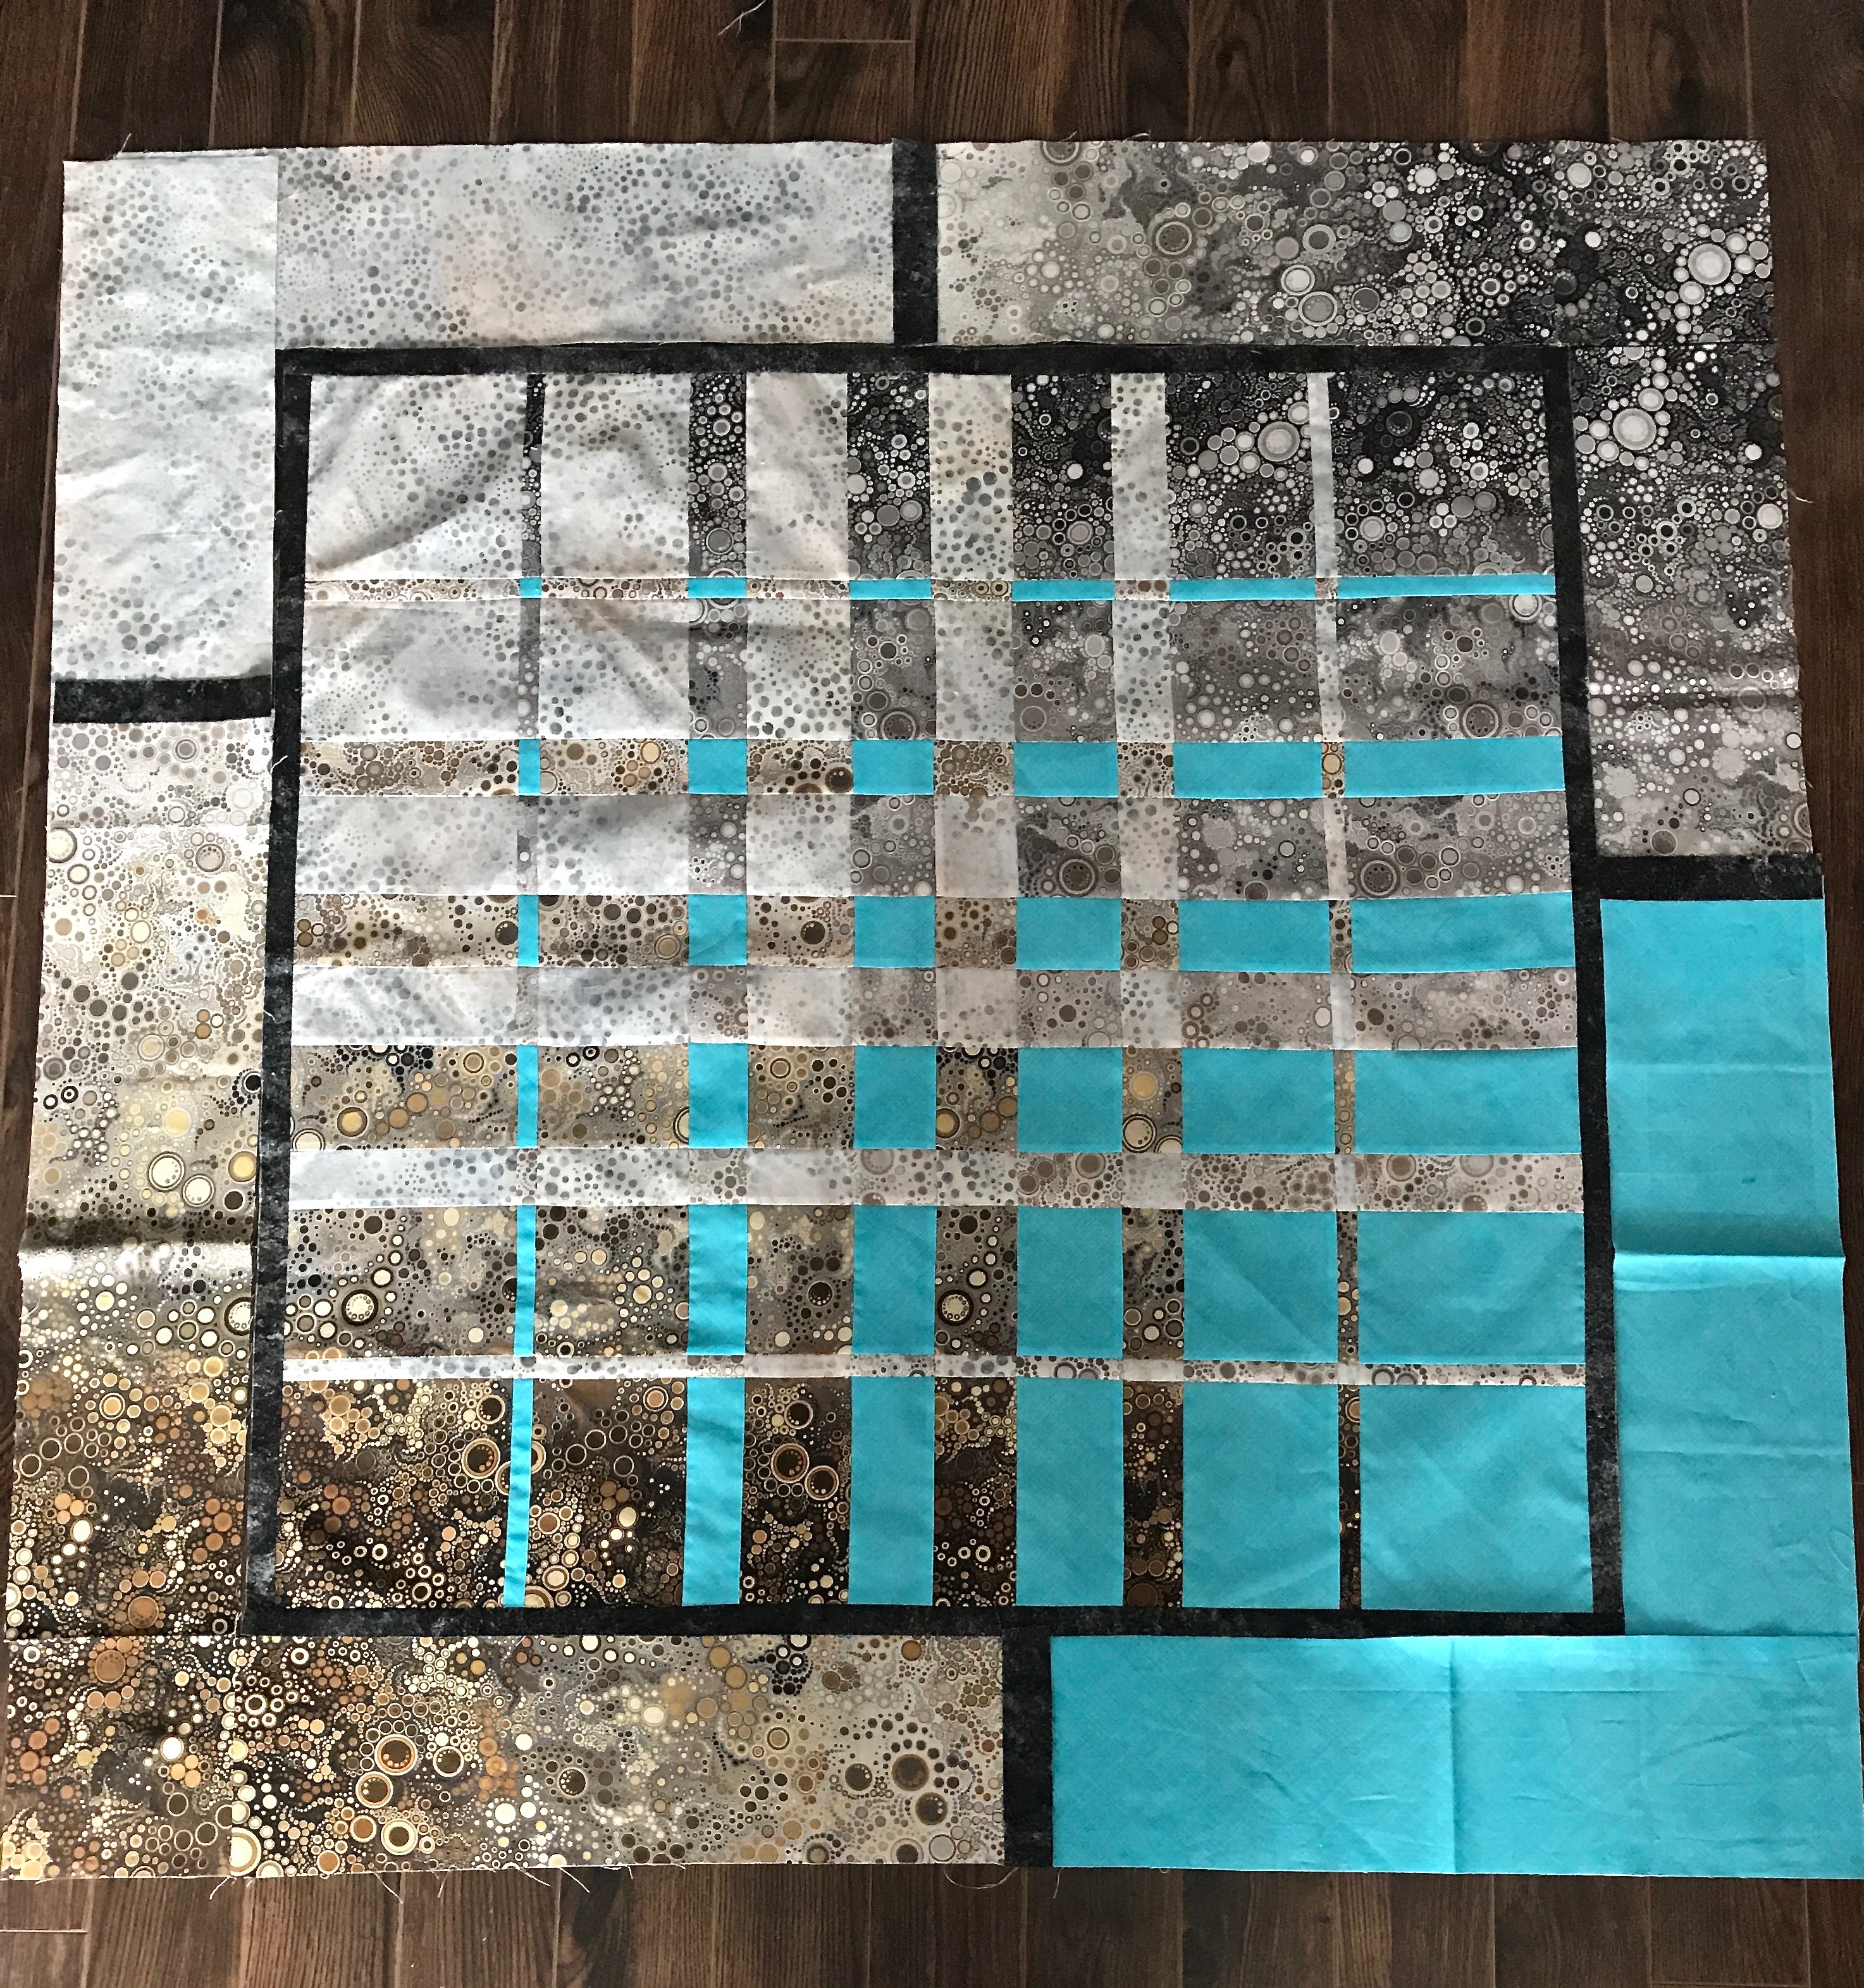
  • Frixion heat erase pens – I just finished the internal panel of the double convergence quilt I’m currently working on. I was doing an edge-to-edge quilting with three different embroideries adjusted to fit the quilt – I had to do a lot of marking to position the starts and ends of the embroideries/quilting elements. Press the panel and the markings disappear (I’m guessing they would reappear were I to take the quilt out into below zero weather or put it in the freezer….)

These are my five essential quilting/sewing tools; can’t function without them. I highly recommend having one of each at each machine in your sewing space.

More Pink Socks

Another pair of pink socks finished last evening. Took a bit longer than usual – the variegated pattern was somewhat boring and I found myself not wanting to pick up the knitting. Anyway, finally done!

I picked out a blue yarn to start this evening – have to keep the needles busy!

Double Convergence Quilt Top

I’ve spent days looking at the double convergence panel not knowing how to finish it. I finally decided to add a narrow dark border, then complete the outer border using the four fabrics I used to construct the convergence.

I thought about a second narrow border bringing in another contrasting colour but I couldn’t find anything in my stash (and my stash is large) that felt right – red? pink? green? yellow? I had a grey batik with small yellow circles, that was as close as I could get to something that possibly worked. In the end I elected to stick with just the four fabrics.

Double Convergence Quilt Top With Borders

To construct the outer border, I was limited by the amount of grey and turquoise fabric I had left. I was able to find some of the ombre online and ordered a yard (at great expense!) so I had options with constructing the ombre corners but I had barely enough grey and turquoise left to make a 6″ border.

I thought about adding a bit of dark fabric where two fabrics met, but when I photographed the layout I didn’t like how that broke up the unity of the border.

Top Layout With Joins Marked

I also thought about using a mitre to make the joins but I didn’t have enough fabric to make that work.

Looking at the finished panel I’ve decided to finish the quilt with a hidden binding – I have no more grey batik or turquoise and I think using the ombre for a traditional quilt binding will just add unnecessary detail.

When completed the quilt will be a rather small throw/lap quilt or a largish wall hanging – it’s ended up an awkward size, but I can’t see any way of extending the “length” that wouldn’t mess up the symmetry, so this is it.

Tropical Flowers III

Yesterday I finished a second leaf. For the moment I’ve left the medium teal unstitched and I think I like how it looks. I’ve covered the grey with the light teal thread and the dark areas are stitched but I like the texture leaving the medium coloured area as is, for now, at least.

Second Leaf

Next I will tackle the red/pink anthuriums – they will actually be a bit easier to work on because the colour moves in a way that will make the stitching flow. Probably not today, though. This morning I went back to the double convergence quilt top.

Tropical Flowers II

One leaf done – a second underway and weeks of work left to do.

One Leaf Done; Weeks Of Work To Do

The question is why bother? Why didn’t I just fussy cut the flowers, fuse and edge-stitch them in place and leave it at that? Good question. The thread painting, in spite of the large amount of work involved, adds interesting texture and dimension to the fabric turning it into a piece of wall art. I probably should have thought more about the size of the piece before I began, choosing fewer elements, but this panel does make an interesting art object. So I committed myself to the work. In addition, the fabric raw edges are inclined to fray because the bark cloth is loosely woven – thread painting lets me densely edge stitch creating a sharper outline for the flowers and leaves.

Tropical Flowers – Bark Cloth

I started with printed bark cloth given me by a friend – 4 one metre pieces with different coloured backgrounds. I chose the blue to work with here but you can see from the black piece just how clearly printed the flowers are. The fabric provides a lovely foundation for doing thread painting.

Tropical Flowers – A Selection

The first step is to choose a few flowers/leaves and cut them out. Next I apply a fusible web to the back of the fabric, pressing the whole thing flat, then fussy cutting before removing the paper backing from the fused web – the paper makes cutting out much sharper. Once the flowers are fused to a background fabric, thread painting can begin.

So that’s where I am in the process. It will take many hours to fill in the colour gradation of the leaves and flowers – I’m working to eliminate the grey using light values of the adjacent colours so “grey” won’t mean grey when I’ve done thread painting – there will be pale green, or pale teal, or pale pink where grey currently is found.

The flowers/leaves on the black backed fabric don’t have grey, instead the fabric has appropriate light shades for each element, making the decision-making process somewhat easier. But now, back to the teal leaf which I began yesterday….

Thread Painting – Tropical Flowers

You’d think because this piece has borders and piping that I’ve done all the thread painting – wrong! I started adding borders on the weekend because I was having the second session for the thread painting workshop and I needed to be able to show the gals how I finish a piece. I’d carefully marked (using a heat removable Frixion pen) a centre vertical line, used that to set up the inner border line. I kept all the markings visible as I partially bordered the piece. (Here are instructions for how I do borders with piping: creating borders). I marked locations and created a signature to show how I position the signature embroidery, as well.

Then I began thread painting – this is going to take several weeks – there’s a lot of fabric to cover – I did enough on the leaf on the bottom left to give an idea of how I shade the colours using two different but similar rayon threads through my needle eye. This provides a bit more texture than using just a single thread and lets me fill in spaces more quickly.

Thread Painting Underway On A Leaf

My plan is to eliminate the grey on leaves and flowers using other shades to in-fill spaces. In this leaf, I’ve used pale greens/yellow greens to stitch in the grey areas. I also did pistils on the anthuriums, flower stems, and leaf central veins while I had a specific thread combination on the machine. This is not my usual way of working but in order to share technique with the gals I did a lot of skipping around.

Now I need to settle in to resume thread painting; this weekend I plan on finishing this leaf and move on to the darker green one above. I also need to baste the edge of the outer border to the batting so I can more easily move the piece around while threading painting.

Possibilities #7

Finally finished this convergence quilt yesterday. Got the binding done and label sewn on. Two sets of mistakes that went together – totally unexpected and unplanned. It definitely worked out quite well.

Finished Quilt Top

I’m happy I took out the narrow vertical turquoise stripe – it disrupted the left-right movement of the convergence flow. Replacing it with the narrow turquoise border was a good decision. I didn’t have enough grey crackle fabric to complete the binding so I incorporated a turquoise piece I trimmed from the backing after I’d finished quilting. I ran out of binding as I was coming to the join and inserted another small piece of turquoise to complete it. I like where that insert landed.

Fiished Quilt Back

To create the quilt back I set up a “jellyroll race” using leftover bits of fabric from the top, with a narrow strip inserted and two unequal sashing strips. Using the turquoise for the backing sets up an interesting flow from top of quilt to the back. There’s enough turquoise in the top that when you flip the quilt over you retain the connection between top and bottom.

The ombre fabric I ordered online arrived Friday so I will now work on completing the double conversion quilt featuring the ombre fabric.

But before I can get to that, I’m have to work on the thread painting wall hanging.

Detail – Thread Painting Floral Wall Art

I started the thread painting last Tuesday as part of a class I’m teaching (I stitched the dark green parts of this and another leaf although you can’t really see what I’ve done in the photo). We meet again coming Tuesday and I have made no progress on the stitching work. Nevertheless I need to move on to framing the piece so I’ve trimmed it, I’m in the process of adding a bit more batting to the edges to allow enough background to balance the floral arrangement and provide support for the borders. Then I have to set up the marking (using Friction heat erasable pens) so I can apply the borders – have to get that process well underway before Tuesday – not completed, but started so I can demonstrate how I add borders. The framing of the piece won’t hinder the massive amount of thread painting I will still have to do.

More Socks

Finished last evening. Into the stash they go. I was pleased with how the blue solid came very close to the blue in the variegated yarn.

Peach/Blue Socks

Can’t leave the needles empty – started a new pair, predominantly red/pink. I have two 100gm balls of variegated yarn left in my collection. Time to go through the yarn leftovers basket to see if I can find some combinations that will work. Each leftover is enough to make a pair of legs so two leftover balls will make a pair of socks, if I can find combinations of variegations that will work nicely together. That leftover yarn could keep me going for quite a while – there’s a lot of it there.