New Face Masks For Christmas

I know, we’re supposed to give up fabric masks in favour of single use surgical or N95 masks but I hate the waste associated with those and besides my masks are made using a high grade quilting cotton with non-woven interfacing stitched into the middle; mine are three-layer masks.

More important those awful disposable blue surgical masks don’t fit me very well (I have to flip the elastic to fit over my ears to suppress my glasses fogging which makes the sides stand open), whereas my homemade masks do! And fit is more important than the materials used in construction, according to the experts I’ve read.

New Face Masks


With Omicron being rapidly transmitted throughout the community I decided everybody could use a new well-fitting face mask as a gift. I started making a batch ten days ago. I made a dozen which I gave away yesterday to the knitting ladies. I have another dozen cut out and ready to assemble – have to work on those today and get them made and washed so I can distribute them, too.

The pattern I’m using this time is the one from SeeKateSew. She provides a template for cutting out the masks. This mask is close fitting but because of the origami folds top and bottom it provides breathing space and I find it comfortable.

I don’t do the folded side in the instructions to enclose the elastic. Instead I insert the elastic into the seam as I construct the facemark which makes the sides a bit longer. I use 6″ – 7″ lengths of elastic depending on the face size of the person I’m making the mask for. When I use a longer elastic I add a silicon slide near the bottom of the mask so people can shorten the elastic if the mask fit is too loose.

Now back to sewing….

Covid-19 “Safe Zone” Revisited

A Batch Of Children’s Masks

People are relaxing their vigilance – washing hands less, moving closer to other people, putting their masks aside. Here in Nova Scotia we’re pretty safe! We’ve had mostly zero new cases each day for the past 10 weeks and the occasional new case has been linked to travel from outside the province. But with university students returning (and maybe self-isolating) and classes set to resume, we could be facing a surge in new cases over the next several weeks.

I thought I’d revisit an article I found very helpful for setting a reasonable tone about how to stay safe which I came across in early April – Saving Your Health One Mask At A Time by Peter Tippett.

He talks about “safe zones” – we’re not exposed to virus everywhere we turn. If we keep our homes and cars clean – they’re safe zones. Being outdoors with others is a relatively safe zone. The article turns down the panic level in a very useful way.

The whole article is worth reading but here are his “Key Takeaways”:

Key Takeaways

Social Distance—Stay six feet from people is a good thing. Ten feet is even better.  

Safe Zone—For most folks, your house is a safe zone.

    • For you, and for family living with you, your yard is likely a safe zone. 
    • When outside, and with no other people nearby, you are in a safe zone
    • For most people, your car should be a safe zone.

Masks—The easiest, most reliable precaution you can take when out of your safe zone

    • If you work with the public, you should absolutely be wearing a mask on the job.  
    • If you are in a safe place, a mask has low value, because the risk is already low. 
    • If you are going to put the same mask on and off, then treat the outside as contaminated and the inside as safe.  
    • If you handle the outside of your mask, then consider your hands as contaminated, and wash them.  
    • Don’t touch the inside of your mask with your hands or anything else dirty.  
    • Put the cloth mask in the laundry at least daily. (or wash with warm water and soap). 
    • Have at least two masks so one can be in the wash and the other clean when needed 
    • Don’t bother boiling masks before you wear them. The detergent in your washing machine is easier, stronger, and more likely to succeed by far.  

And above all—enjoy your safe zone with your family, friends, cat or dog.
Be Well,
Peter

I just thought the idea of “safe zone” worth revisiting as we are likely approaching another surge in cases. The interesting thing is, if we keep up the preventive measures, we’re much less likely to pick up flu this season (I’m still planning on getting my annual flu shot), or even getting a cold. All that hand washing/sanitizing can’t help but reduce transmission of our usual respiratory viruses.

This past week I’ve been making a batch of children’s masks – camouflage fabric for boys, rainbows, animals for girls. They’re quite a bit smaller than the adult size I’ve been making. I also came across little silicone sliding pieces that can be applied to the elastic to shorten or lengthen it so it fits around the ears more comfortably. I’m adding those to these masks.

Children’s Masks In Progress

In Case You Wondered

Just read a piece in the New York Post – “This is the fabric for DIY Face masks, according to science“.

“Much to the delight of many an American grandmother, the quilt fabric performed best as a protective shield against respiratory droplets.”

Anybody surprised? Of course face masks made with a good quality cotton quilting fabric stops cough droplets better than other sorts of home made face coverings.

“Without a mask, droplets from the simulated cough flew more than 8 feet and up to 12. They traveled 3 feet when the bandanna was worn; 15 inches with the folded handkerchief; and 8 inches with the surgical-grade masks.
The stitched, two-ply quilt mask, however, halted droplets after just 2 and ½ inches.
Why quilted? The study suggests that the masks made with quilting fabric fit faces better than loosely tied material. Plus, sturdy two-ply material gives a mask an added layer of protection, other studies have shown.”
So all my efforts haven’t been in vain! I’m now approaching 300 masks – I’ve really lost count. I keep making batches of a dozen. This last week I made another 36.

Latest Face Masks

I keep giving them away. Sent another dozen to my niece in Toronto last week. Have handed them out as I’ve gone to have my haircut, my nails done, had a filling repaired, saw the massage therapist…

This pandemic is going to be going on for a lot longer than people want to believe. Washable face masks are on the way to becoming essential for any socializing if we want to keep infection at some kind of containment level!

I’ve been using bolder, more colourful fabrics with each new batch. My personal collection is closing in on a dozen – I choose a face mask to go with my outfit. Why not, hey? It might as well be a fashion accessory if I have to wear it. And I do wear one whenever I’m in public, everywhere I go (except while actually eating in a restaurant -which I’ve done twice so far).

BTW, this is not all the sewing I’ve done since I last posted. I’ve finally got my latest quilt sandwiched, pinned, and ready to quilt; I made a cotton nightgown for a friend of mine having a birthday on Thursday; I’ve been puttering with Kaleidoscope Table Runners for a class that’s not going to happen. I bought small amounts of fabric yesterday to add to two different sets of octagon “blocks” so I can finish the runners and get on with sewing some summer clothes for myself. Oh yes, and I put elastic inserts into the waists of 7 pairs of pants! And took out excess fabric from the seat of three pairs of jeans I bought at Costco.

I’ve not been idle!

Carrying Case For iPhone

Finally finished the face masks two days ago. Those last 20 were difficult to do – I’d reached my boredom threshold and could barely force myself to work on them. However, I got them all done and washed, and I delivered them yesterday.

The Final 30 Face Masks – Delivered

Now on to some other sewing.

I’ve been wanting to make a small carrying bag for my iPhone. I find the version of the phone (XR) I have now is just a bit too large to carry comfortably in a pants pocket. So I’ve taken to using an embroidered glasses case (that has a side pocket with a zipper in it). I was given my first one by a friend. I added a cord to the open end and turned it into an iPhone case.

Cross Stitched iPhone Case

I have a second one – also a repurposed glasses case to which I’d added both a cord and a zippered side pocket.

Remodeled Glasses Case

But that one, too, is beginning to get a bit worn. Time to make a new one. The challenge was figuring out how to assemble the double pocket case. A small zippered bag is no big deal. An opening ended case is also no big deal. But doing them together in a single carrying case took a bit of trial and error.

I made one yesterday which didn’t work out but in the process I figured out how to construct the iPhone case.

First put the zipper in the side of the case (complete with lining) as if I were making a zippered bag, but leaving one side and end open. Then tack the zippered bag lining to the outer bag and now (with the zipper partly open to facilitate turning the bag right side out out later) attach a second lining to the open end (remember to place cord between bag and lining with ends included in this seam). Top stitch the bag/lining seam. Then sew the side seam of lining/bag. Turn bag/lining right side out, finish by folding in the open “bottom” end of the lining, stitching closed. Push the lining inside the bag between zippered bag lining and bag outer layer.

Trial Carrying Case With Zipper

Once I had figured out I had to partially make the zippered bag, then the open-ended bag, the process went quickly. I used a scrap of quilted batik fabric I had on hand as a test piece. Worked fine. Phone fits.

Now, I’m in the process of embroidering a cross stitch design on a piece of linen so I can make a fancier case.

New Case – In Progress

Here is the iPhone case finished (Click here for instructions):

Finished iPhone Case

[Click here for a more detailed set of instructions.]


Another Batch Ready To go

I wasn’t planning on doing another batch of face masks, really! But when a nearby senior residence called (I’d called and left them a message but hadn’t heard back for a week, by then I’d given away the masks I’d finished) I couldn’t say “No” – so I’ve another batch on the go.

Another Batch Ready To Go

I wasn’t going to do it, but I came up with enough fusible non-woven interfacing by using the 1″ grid interfacing I used for the watercolour wall art pieces. I have cut and fused the interfacing to the back of half of the mask fabric. I’ve cut enough elastic for the ear loops, and enough pipe cleaner for over the nose.

Now to get to the sewing.

Fabric Face Masks

I’ve been collecting various patterns for creating fabric face masks since I began production on March 20. I have not bothered to write a set of instructions or to make a video tutorial – there are many good ones available.

After a bit of experimenting, I settled on the instructions offered by Leah Day (with some modifications of my own).

All Ready To Go

In case you’re interested here are some of the fabric face mask instructions I’ve collected:

There are a gazillion fabric face mask tutorials/instructions now available – all you have to do is google “fabric face mask”.

Pipe Cleaner Clipped In Place

You can follow my fabric face mask journey through the following links:

I’m about to start another batch of 60 face masks for a second nursing home around the corner from me. This is a pared down version of the previous masks – I’m not adding fusible interfacing to one side; I’m not sure whether I’m  going to add a piece of pipe cleaner or not yet; I thought about using ties but I don’t have any cotton tape in my sewing/quilting stash so it’s going to be elastic cord again.

50 Face Masks – Done

I started this latest batch of face masks four days ago – that’s how long it’s taken me to complete this batch of 50. There are a lot of steps which I’ll itemize.

Halfway There

To get this far I had to:

  1. Cut 50 fabric pieces 9″ x 13″; cut 50 interfacing pieces 8 1/2″ x 6″; cut 100 elastic pieces 7″, cut 50 pieces of pipe cleaner to 5″ lengths
  2. Fuse interfacing to one end of the fabric
  3. Fold right sides together
  4. Stitch the end seam in two sections (leaving an opening in the middle)
  5. Press the seam open (rolling the tube to position the seam 1/2″ from the “top” edge)
  6. Pin elastic on one side, pin elastic on second side
  7. Stitch both side seams
  8. Turn face mask right side out
  9. Position and clip pipe cleaner at opposite fold from the seam
  10. Sew 1/4″ seam along edge to encase the pipe cleaner
  11. Trim threads

Pressed And Pleated

Next I had to:

  1. Press each face mask in half, then in quarters, then pleat at each fold
  2. Stitch across the pleats on one side; on the second side
  3. Trim threads
  4. Wash in washing machine
  5. Hang to dry

That’s where I am at the moment: 50 masks to be delivered tomorrow are hanging and drying.

Washed and Drying

I still have to:

  1. Press
  2. Place in bags

I’m just about to press them and bag them and then they’ll be ready to go.

All Ready To Go

In a factory setting these tasks would be going on simultaneously as small batches would be moved along. In this one person sweatshop each step for all 50 masks has to get done before passing the masks on to the next step – it’s been more labour intensive than I imagined before I started.

I actually have managed to scrounge supplies for another 50 masks (elastic and non-woven fusible interfacing are now in short supply both locally and online), but I’m not rushing to commit myself to making them. We’ll see whether the nursing home I’m delivering them to REALLY needs me to do another 50 or whether their call to the local sewing guilds will produce enough masks for them that I can put those supplies aside and get on with other sewing.

Craving Cocolate!

I ate the last of the chocolate I had in the apartment three days ago (except for the chocolate chips which I have been saving to make some cookies – more later).

This afternoon I found myself craving chocolate. I remembered the sugar/dairy free chocolate which I haven’t made for a number of years – I had the ingredients, I hauled them out, and put a batch together.

Sugar/Dairy Free Chocolate

I more or less followed the recipe – I added ground cacao nibs, some finely chopped candied ginger and dried cranberries along with finely ground hazel nuts. This batch should last me a couple of weeks. A little satisfies.

Click here for the recipe and other commentary.

The chocolate was actually the second thing I made. I started with Peanut Butter Oatmeal Chocolate Chip Cookies (Flourless, No Butter). (I made a batch last week which are, of course, gone.)

Peanut Butter Oatmeal Chocolate Chip Cookies

Another recipe I didn’t follow precisely. I used both chunky and smooth peanut butter, but I also had a small amount of tahini I wanted to use up which I threw in. In addition to the oatmeal (called for in the recipe), I added 1/2c finely ground hazelnuts; forgot raisins or dried cranberries.

No flour in the recipe, no butter. What makes this very sticky dough is the nut butter/egg combination. The only way to get it onto the cookie sheet is to pick some up with a tablespoon and push it onto the cookie sheet using a teaspoon. You can’t handle it. The Silpat baking mat makes it easy to remove the cookies when baked and cooled. I store them in the refrigerator.

Says to bake for 9-12 minutes; I baked these for close to 15 before I thought they were firm enough to take out of the oven.

They are “right some good!”

[A recommendation from my friend Susan in Alberta:

I made the peanut butter cookie recipe you posted on your blog. Wow!They are great.David loves them.I broke up a dark chocolate bar. 90% cacao to add since I didn’t have dairy free chocolate chips. It will be a standard recipe now for us. April 11/2020]

The cooking/baking overcame me AFTER I finished up the face masks from yesterday, washed them and hung them to dry.

Today’s Batch Of Masks Hanging To Dry

I have to collect 20 of them, pack them up to courier to Toronto tomorrow. I have another batch of 40 sitting by machine ready to work on when I get up in the morning.

There’s now a huge controversy raging over whether there’s any value to these face masks or not. One of the local seniors’ homes has put out a call to the local sewing guilds to please make face masks for them. So whether public health considers them useful or not, clearly there is a demand in my community.

I’m Bored On An Assembly Line…

I’ve got the mask making process down pretty well, now. I continue to improvise as I figure out more efficient ways of doing each step but I’m now bored out of my mind. I’ve figured out what to do and doing it over and over and over is driving me batty – however, I’m keeping at the face mask making.

There are still a number of bottle necks:

  1. Cut the rope elastic – but each mask needs two pieces and each piece needs a knot in both ends – 50 masks – 100 knots and that takes more time than you realize!
  2. Either pinning (as in the photo below) or clipping the knotted elastic in position in the corners of the sides takes WAAAY more time than I want it to; and I haven’t yet sewn the side seams!

Bottleneck

I got all 25 masks in today’s batch pinned and side seams sewn:

Stack ready to turn right side out

However, each mask needs to be turned right side out – that takes a lot longer than sewing the side seams which went quickly.

Straight Stitch Needle Plate

Along the way, I realized I didn’t need to measure each mask for the first seam with the opening in the middle – I positioned a piece of green masking tape at the start point where I could align one edge, and the marks on the blue masking tape mark the positioning on the second edge. Sewing the seam with the opening went quickly after that.

Another problem arose: sewing in the rope elastic was difficult – the start of the seam kept getting caught in the wide opening in the zigzag needle plate. I finally switched to the straight stitch needle plate with a small hole for the needle – much better.

I’ve also figured out which foot is best for each operation and I make sure I keep changing feet to do the job. That keeps the process running smoothly.

At the moment my tally is 37 + 25 masks. I still have to stitch in the pleats on the 25 – I’ll get that done tomorrow. The bulk of those masks are for family in Toronto. They’ll get shipped as soon as they’re washed and dried.

This afternoon I called a nearby seniors’ residence offering to make masks for them if they can use them. Haven’t heard back as of this writing.

I’m not planning on making this effort a life-long project. I’m now finding the mask making boring; but I’m willing to work away at another 50-100 to help out should they be needed.


Production Underway

I don’t want to bother writing instructions for sewing fabric face masks – Leah Day’s instructions are the most comprehensive I’ve come across, although I made modifications as I went along.

Sewing Side Seams – Elastic in Place

First of all, I had already cut a pile of fabric 6″ x 9″ (Leah cut hers 15″ x 9″ – I found that a bit too long from nose to chin) so instead of putting the cut pieces aside I sewed two together and treated them as a single piece (although shorter than 15″).

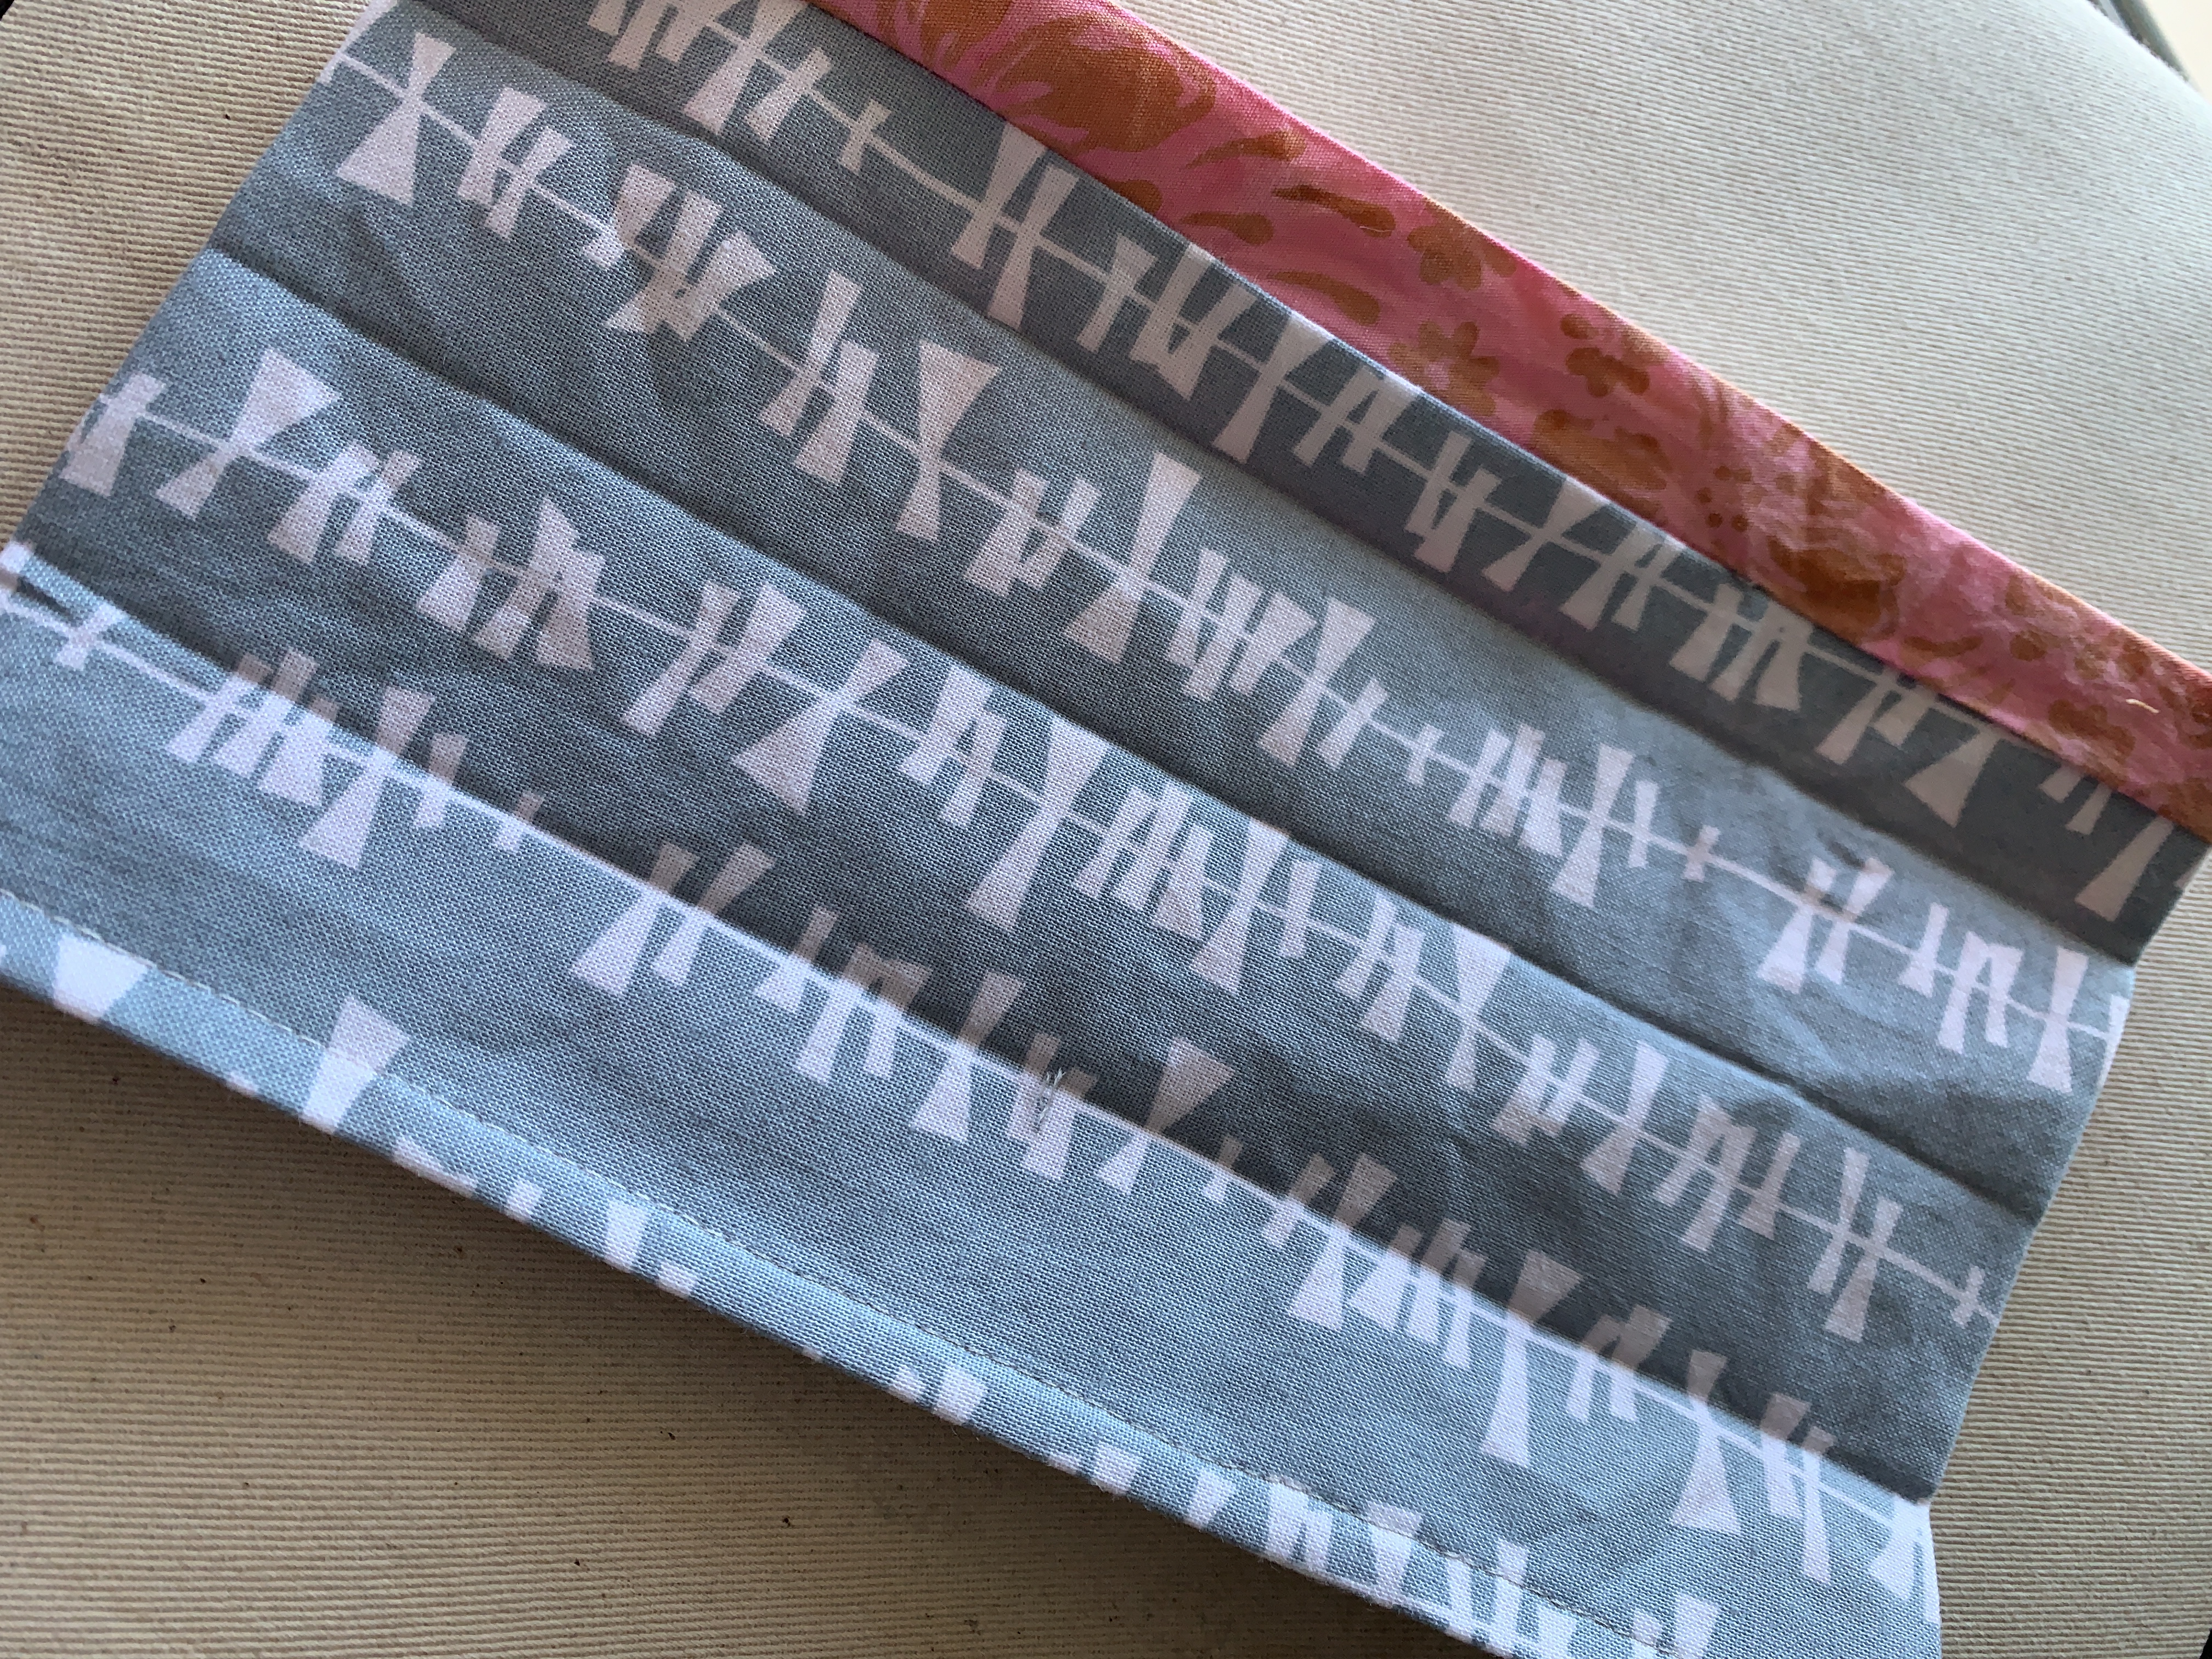
The part that may be hard to follow in Leah’s instructions is her step #5 – it’s a bit easier to see where the 1/2″ seam goes with what I’ve done – the seam is a bit more than 1/2″ above the fold (which is in the second fabric). In the picture above you can see that. You can also see as I sewed the 1/4″ side seams that the elastic is held in the corner with a quilting clip (I don’t use mine very often be they’re perfect for this project! Leah’s suggestion.)

Pipe Cleaner Clipped In Place

With the side seams sewn, turn the mask right side out, press flat. Next, I slipped a piece of pipe cleaner (I’ve also used twist ties) into the fold opposite from the opening (Leah put the pipe cleaner on the near side – I think the opening lays flatter with my adaptation leaving the opening at the bottom rather than the top of the mask). I used a clip to hold the pipe cleaner in place.

Stitching Pipe Cleaner In Place

With a 1/4″ quilting foot with centre guide, I stitched a 1/4″ seam across the entire top edge using the guide to hold the pipe cleaner against the fold – worked nicely.

Pipe Cleaner In Place

You can see the 1/4″ seam holding the pipe cleaner in place in the bottom of the picture.

Now, I had done the next step before inserting the pipe cleaner. Leah carefully measures where to pleat the mask – that’s fine if you’re doing one or two. I’m planning on 100 – too time consuming. I’d seen another video where the gal folded the mask in half, pressed, folded it into quarters, pressed. I’d recommend doing the folding/pressing AFTER inserting the pipe cleaner/twist tie/floral wire – whatever you’re using.

Pleats folded

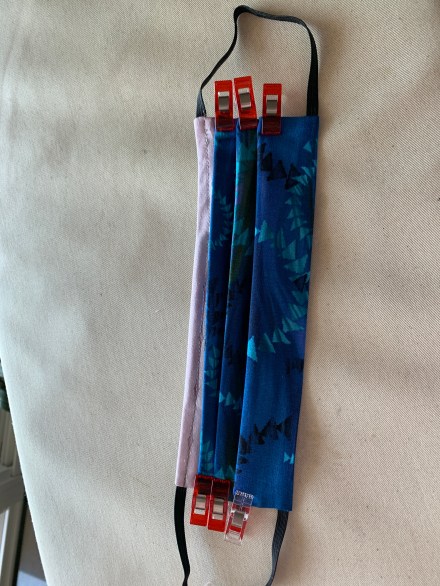
Next it’s time to fold the pleats. I put the mask open side down, opening at the bottom, and began folding from the bottom toward the top, clipping the folds as I went along to hold them.

Sewing Pleats Down

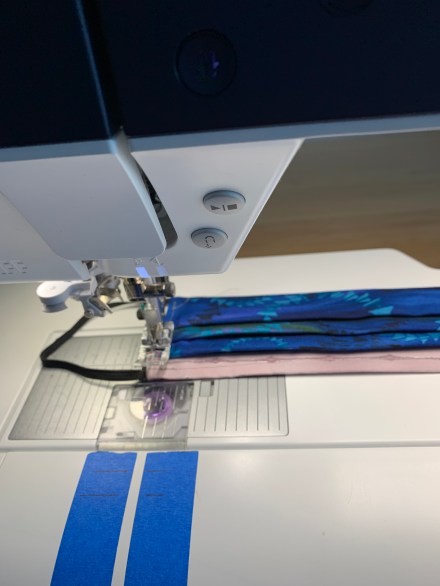
I found it easier to sew the pleats with them facing me, the presser foot (I used the universal foot for this operation) flowed over the fold better, but that meant sewing one side of the mask with the bulk of the mask within the harp (usually the bulk of the sewing is to the left, outside the harp). The other side of the mask gets sewn in the usual way, since the pleats are going in the right direction. Also, I used a 2mm stitch to sew the pleats – just a bit more secure.

I didn’t bother edge stitching the whole face mask. Didn’t think it was required.

16 Completed Face Masks

One other thing – I cut my elastic 6 3/4″ in length which I found was long enough for my face. I recommend doing a test run to check the finished length from nose to chin, and width including elastic before going into any kind of production mode.

Why the opening in the bottom of the mask? Well, first of all, you need it to be able to turn the  mask right side out after you’ve sewn the first seams. Leah left it open so that a surgical mask, (or some other breathable but less permeable material like a piece of vacuum cleaner bag) could be inserted inside, making the cotton face mask a cover rather than the mask itself.

I have 10 more masks set up to work on tomorrow (using my 6″ x 9″ pieces). When those are done, I plan on doing another couple of batches following Leah’s instructions – a single folded piece probably 13 1/2″ in length and follow on from there.