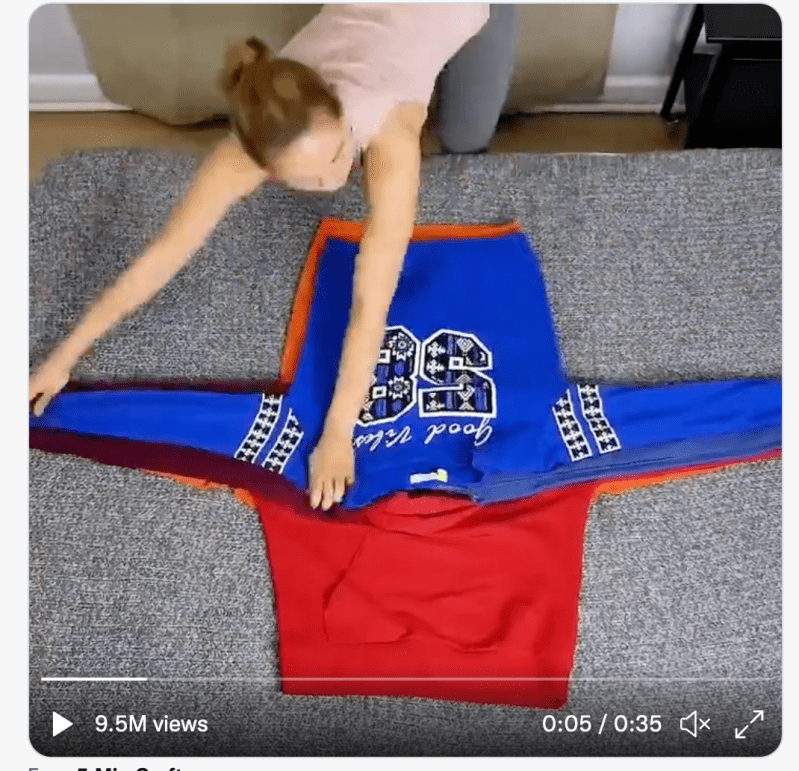
She’s gonna overlap three sweatshirts, two pair of jeans, a couple of shirts, some t-shirts, socks and underwear – by wrapping them up in this overlapped bundle. No wrinkles, and the bundle is small enough to fit into a small carry-on bag with room for cosmetics, tablet and even a pair of shoes, I’m guessing!
This pair of socks turned out nicely, I thought. Great colours in the variegated yarn and the contrast is almost an exact match with the turquoise in the red yarn.
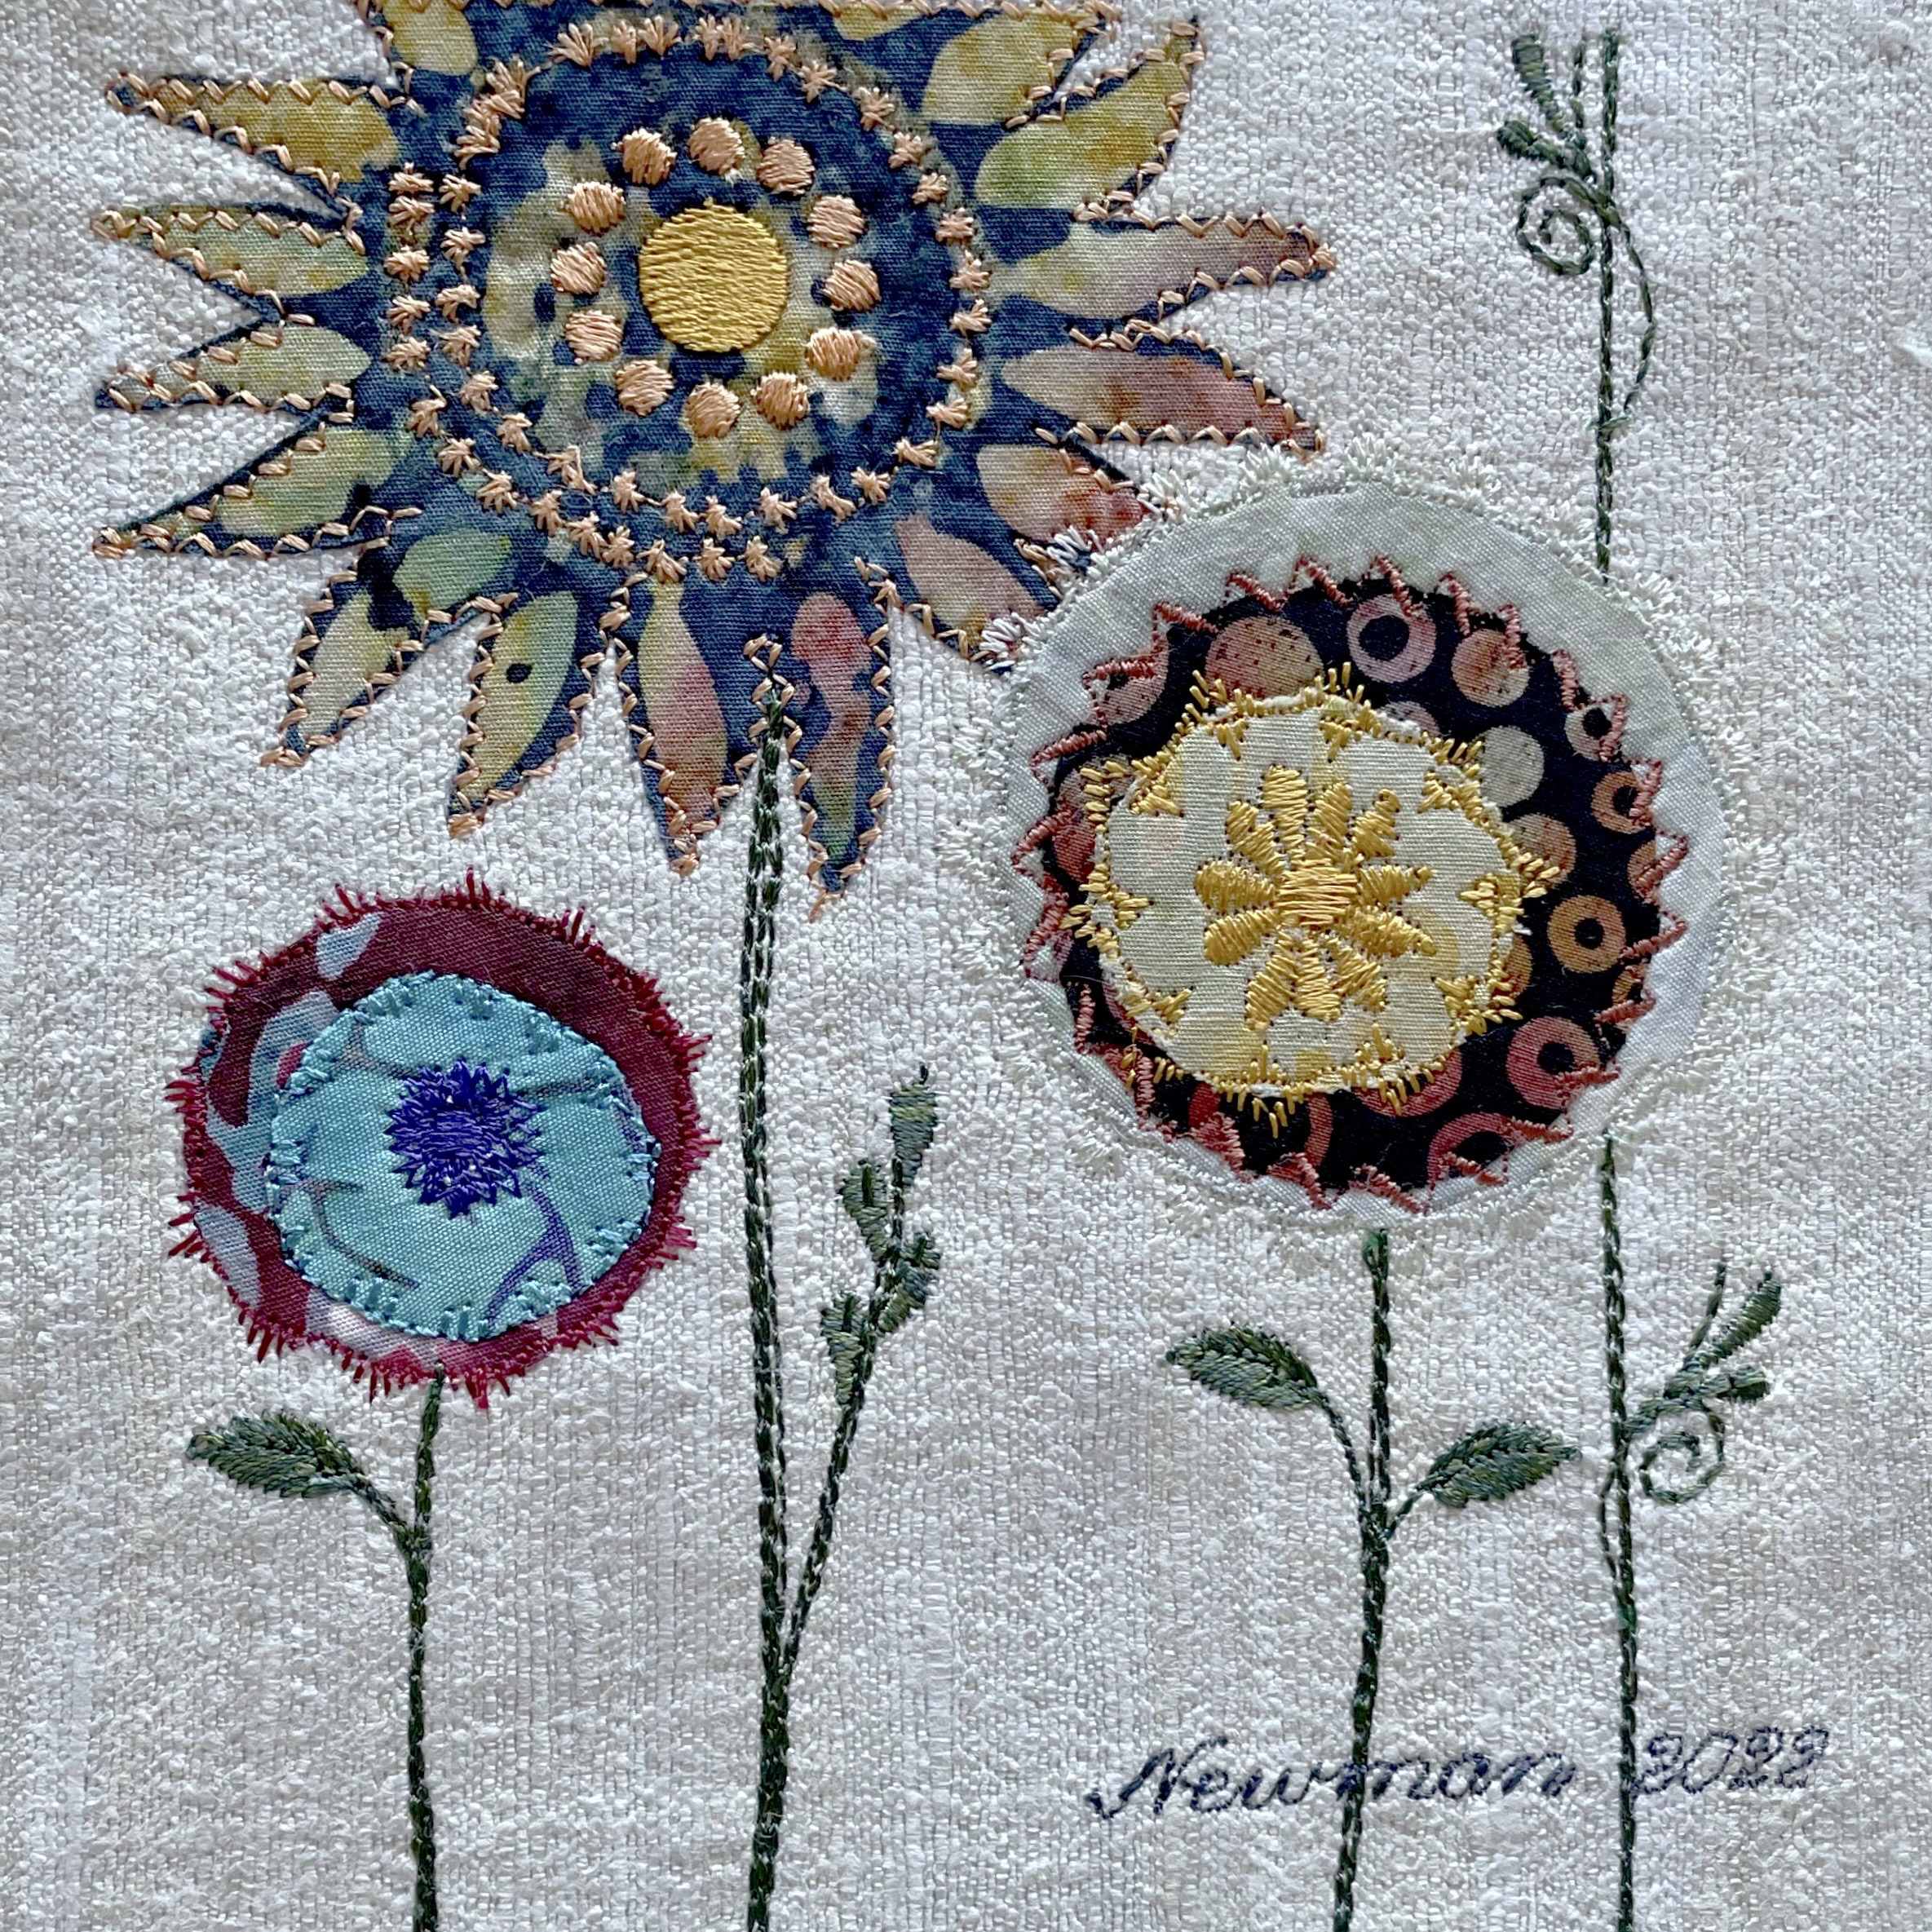
I finished the edge stitching, embroidery and leaves/stems on the last of the ten pieces this morning. I removed the excess stabilizer from the back and pressed each block.
Now each needs to be mounted on a 6×6 stretched canvas panel. I still have to decide whether to place batting beneath each before securing the silk to the back of the wooden frame. I’ll cut out a few pieces of batting and see how it looks. I also have to trim the silk panels to remove excess fabric so they’ll attach smoothly to the framing.
That’s for another day.
I survived Hurricane Fiona – the NE winds howled and pounded rain against my windows for a couple of hours. This storm was as severe as Hurricane Juan in 2003 – even though landfall was about 150kms from Halifax (Fiona came ashore at Canso) – in 2003 the city took a direct hit. Nevertheless winds here were strong enough to do significant damage. We were given ample warning – emergency measures folks were concerned about damage from falling trees because they still have all their leaves. They weren’t wrong.
I didn’t suffer a power outage, although a good portion of the city is still without electricity and for some it will take days before repair crews can get to them. A friend came over this morning to shower and do a bit of laundry! She’s hoping to have her power restored before Wednesday (which is her predicted date!).
I’ve been procrastinating the past week – no idea why – but today I got back to the two 6×6 pieces I had 1/2 finished and completed them.
There are now six. [The outline is done with a Frixion heat-erasable pen. I’ll remove it when I’m ready to mount the individual pieces on the 6×6 stretched canvas frames.]
6×6 Six Finished
I have another couple of hours this afternoon – there are four 6×6 prepared – I’ll get a start on the edge stitching for a couple of them.
I’m scheduled to teach a class at Sew With Vision in a couple of weeks on constructing a smartphone carry case. I’ve written about the simple version I started with that had a single zippered side pocket. This version has two zippered front pockets as well to hold credit cards and other cards like health card, driver’s license, car insurance – the stuff you need to have on hand (not just photos on your phone). With these two additional pockets I no longer need carry a purse.
Leather CaseLinen Case with Bi-colour Zippers
I made this case 3/8″ wider than the previous version to make it easier to slide cards into the zippered pockets. Both of these cases are “right-handed” – that is the zippers are positioned to be easily opened using your right hand. To make these cases “left-handed” reverse the closed position of the front zippers and place the side zipper on the opposite side.
I fully intended documenting the process while making the leather case but the process took over and I didn’t have the photos I needed to describe how to make the case. I made a second from linen (using fusible batting to stabilize the linen). I thought about adding embroidery but because the case is for demonstration purposes I decided it wasn’t worth taking the time. The only “decorative” feature are the bi-colour front zippers (the side zipper is a single colour because I used zipper tape and a pull).
The basic construction is still the same as the earlier version with the added work needed for creating the zippered front pockets. Here’s a link to the instructions for
Give it a try. Let me know how it goes. My measurements are for an iPhone 12 Pro (3″ x 6″). Measure your phone and modify the specifications to work with your phone.
It’s that time of year when nights are cool, but not yet cold, to put your dormant phalaenopsis orchids outdoors so they can experience a noticeable nighttime temperature drop for a couple of weeks. The stuff I’ve read says the cool nighttime temperature (anywhere from 10-15/18 C) persuades the plants the season is changing and it’s time to flower again.
I have 20 dormant orchids – I placed them in two large tubs and put them out on my balcony five days ago. I missed this cool period last year and the temperature on my window ledge wasn’t cold enough so I had but a couple of spikes form. This year I think I’ve timed it right and, fingers crossed, I’m hoping for maybe 15 (could I be lucky and all will spike?) of the plants to create spikes. I plan on leaving them outdoors for at least two weeks (weather permitting and so far it’s looking promising).
The plants are healthy in spite of my benign neglect – however, I’m going to feed them judiciously as well as soon as I bring them in, in the hope that will further encourage them to bloom.
The process is slow – I don’t expect to see spikes until February/March.
Phalaenopsis In Bloom (last winter)
Wouldn’t it be nice if I were to get 5-8 blooms from each spike?
This morning’s project was to complete Block #4. I’m getting more efficient at embellishing the raw edge appliqué, applying stems and leaves, and signature. A bit less than three hours. I’ve built up a library of “edge” stitches, and “leaf” shapes so I’m not spending time browsing and modifying my machine’s stitches to find something to use.
Block #5 tomorrow.
Sweatshirt Makeover
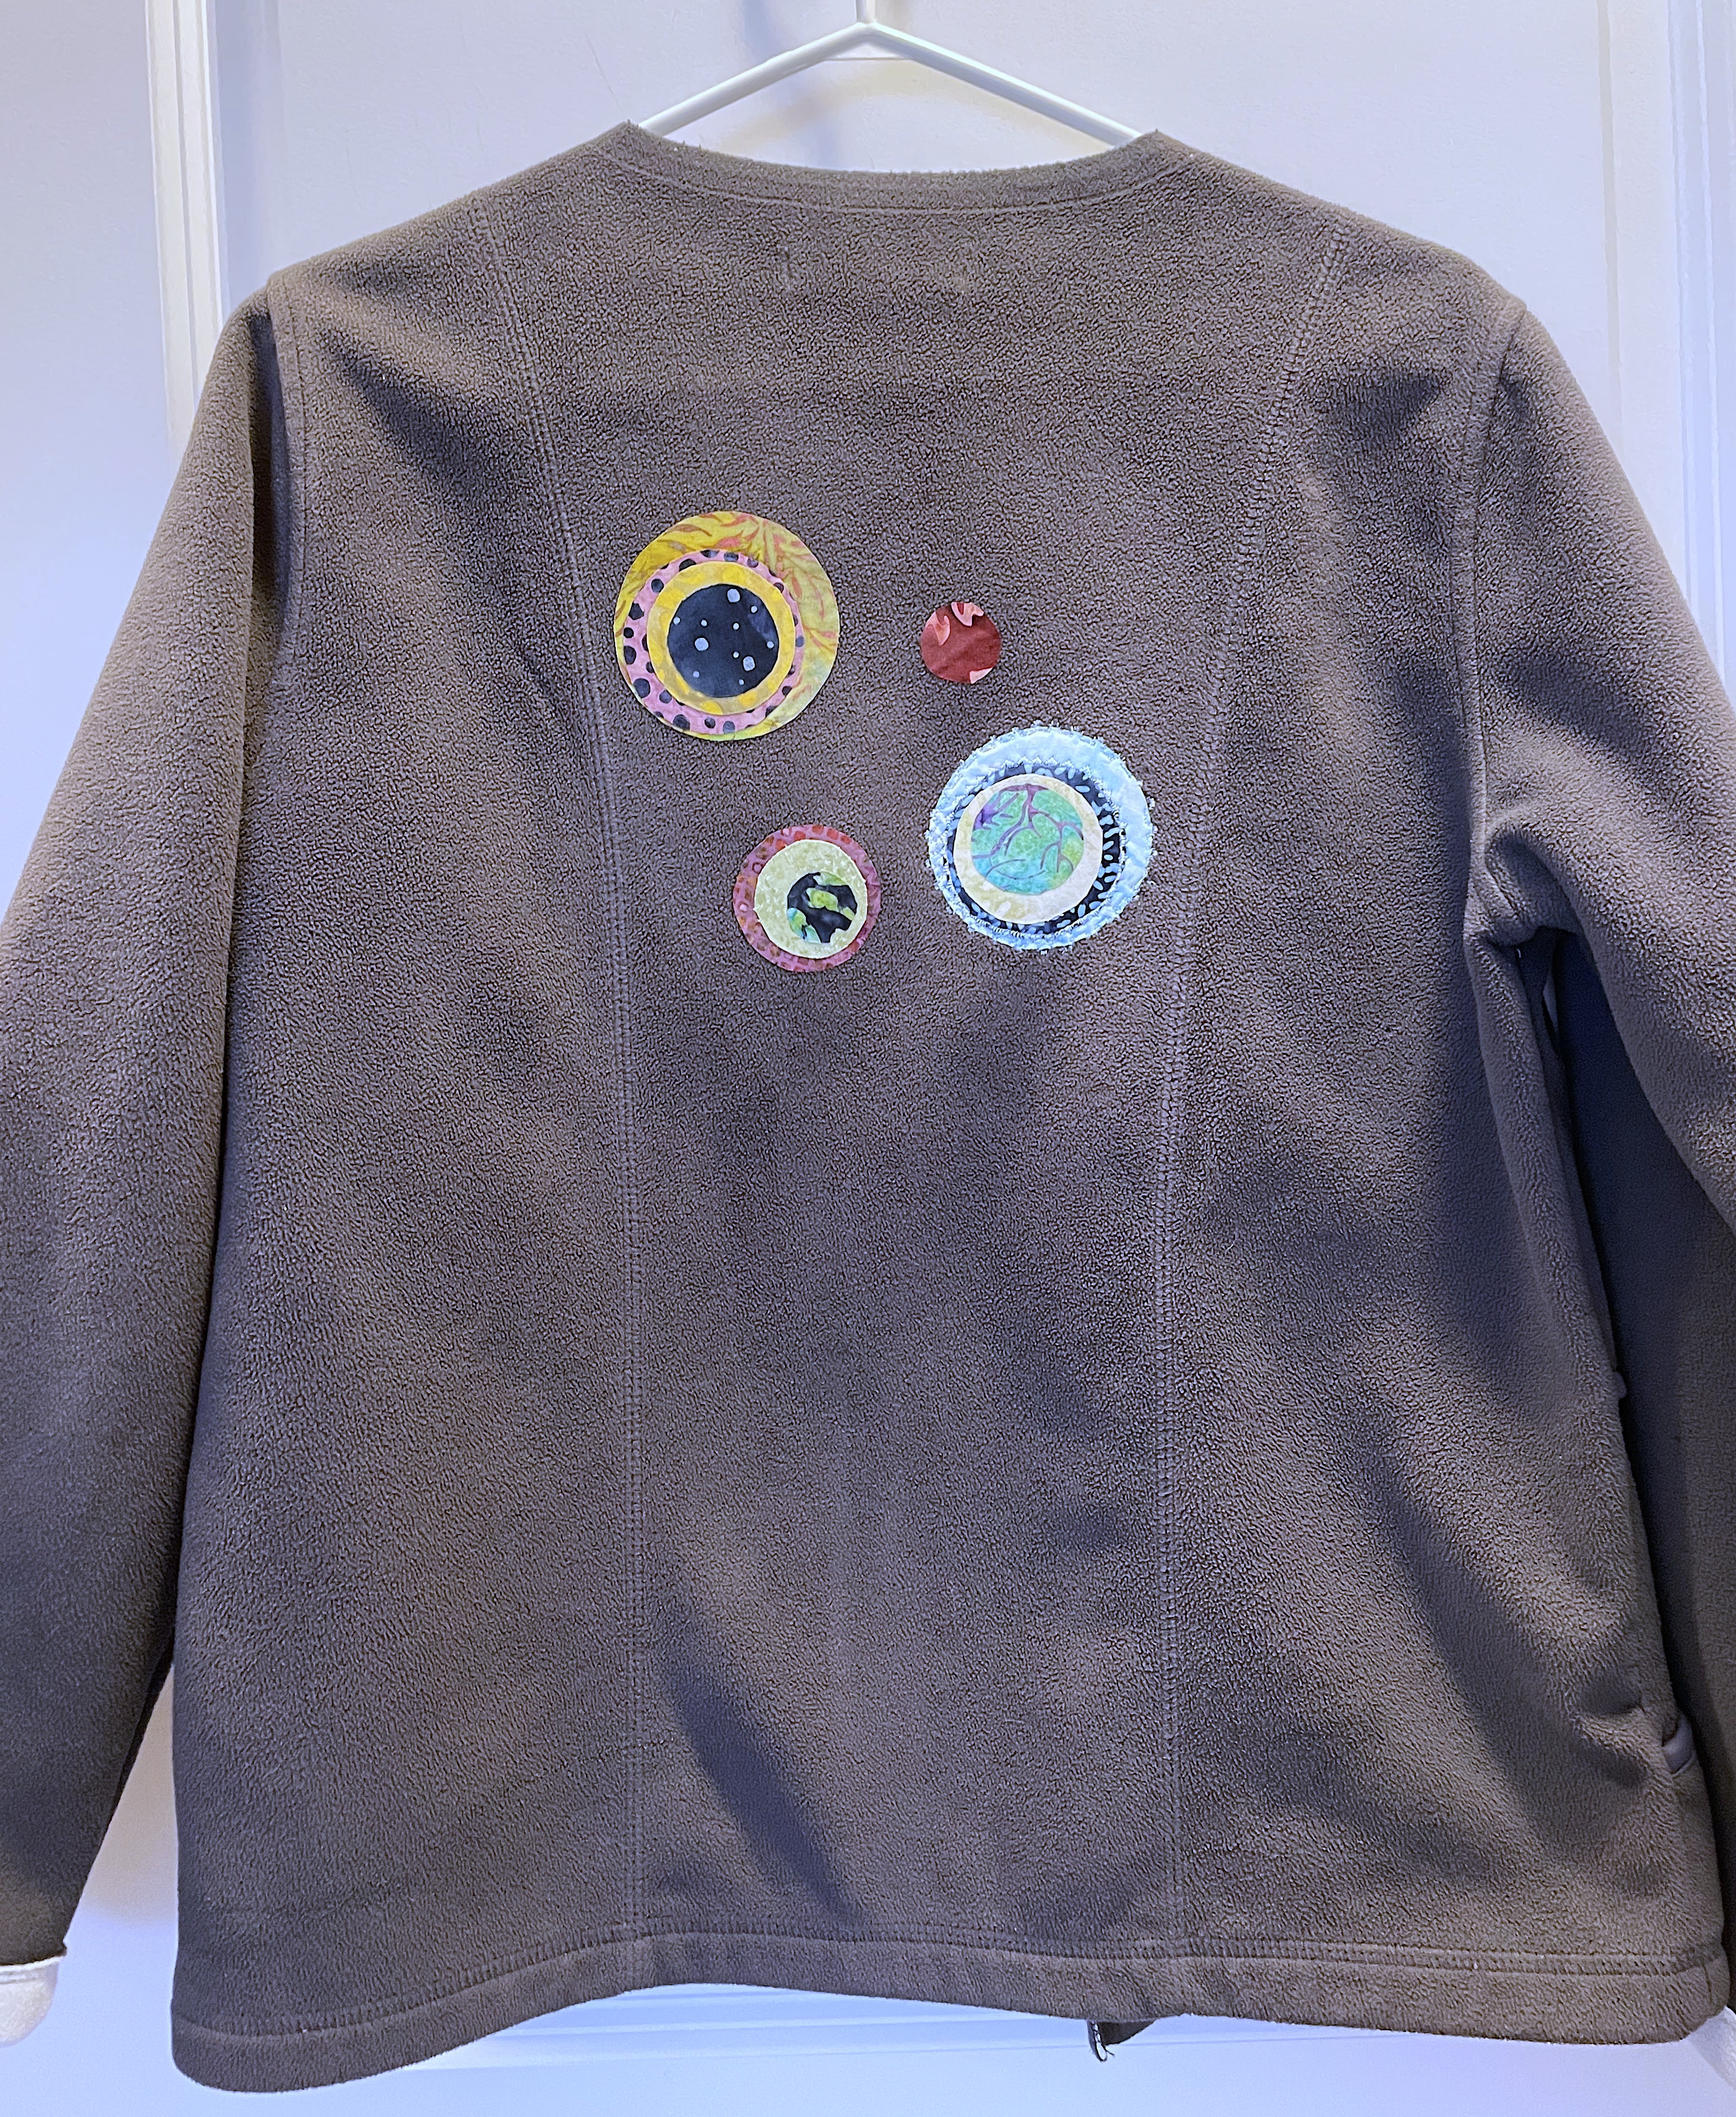
Jacket FrontJacket BackSweatshirt Makeover – In Progress
In just under two weeks I’m teaching a class “Sweatshirt Makeover” – intended to explore remaking and/or embellishing an old sweater, plain jacket, or sweatshirt to give it new life.
I did a couple many years ago:
Iris Appliqué on Sweatshirt BackFramed Mola on Sweatshirt FrontSweatshirt Makeovers
The “Iris Appliqué” was my very first attempt at raw edge appliqué! I added irises to both front and back of the shirt. Several years later my sister brought me two molas from Costa Rica – I fused this bird mola to the front of a black sweatshirt and framed the edges; I still have the fish packed away in a drawer.
There are two aspects to a sweatshirt makeover – you can embellish it (taking particular care to fuse fabric over old stains or holes you want to hide); or you can remodel it – turn a pullover sweatshirt into a jacket with buttons or zipper or snaps. You can remove cuffs from sleeves or hem. Change the neckline. Lots of possibilities.
I didn’t have another old sweatshirt on hand so I went to Mission Mart (a local used clothing depot) to see what I could find. I came across a grey zippered fleece jacket (which was on the small side). So I decided to take out the zipper, remove the collar, shorten the sleeves, reshape the front edges so they’d hang better when I added two centre panels which I intend closing with buttons.
The next decision was how to embellish it. I decided simply to use the “modern flowers” theme I’ve been working on for the 6×6 wall art. I selected a bunch of batik circles, fused them onto the back and fronts of the jacket. Today I started edge stitching the circles and I added stems and leaves to finish the left front.
At the moment, I don’t know what to use to widen the front of the jacket (I need about 5″ in total for the jacket to fall loosely). I have a couple half-yards of wool fabric which might work with the fleece – I have to make a trip to Fabricville to see if I can find a double sided grey fleece (or some other colour) that might work with the jacket.
Or I may never do any more on this project – I’ve done enough to illustrate how you might think about doing a makeover and take this project as is to the shop to put on display to advertise the class.
I liked the colour combination as soon as I had completed the first repeat on the first sock! The light turquoise contrast works beautifully to brighten the whole sock.
It’s taking about three hours to do each block what with the edge stitching on each piece of fabric, free motion stitching in the stems, stitching the leaves (which are decorative stitches) and embroidering the centres (which is taking way more time than I expected – for some reason my top thread is fraying when I’m embroidering so I get stops where I have to clean up the mess, backtrack the embroidery, then continue stitching.
So far, the signature is stitching out without breaking the thread! After I’ve pressed the block, I’ve redrawn the 6″ outline with a Frixion (heat-erasable) pen so I know where my edges are.
Three more left of the original six I prepared. When those are finished (in about a week or so) I’ll layout the remaining four.