I Guess It’s Spring…

Coltsfoot 2021

People have been sending me photos of coltsfoot they’ve come across – it’s really the first native spring flower here in NS. Until today, March 31, I hadn’t seen any myself.

These two flowers were lurking in the wooded patch beside my building. I went looking because that location becomes covered with their happy yellow faces. it’s an interesting plant – the leaves don’t appear until after the flowers have bloomed. 

So I guess it’s now officially spring here. Last year I saw coltsfoot on May 1. The earliest I’ve previously seen any was on April 14 in 2017. March 31 (actually my friend Marlene spotted some last week in her son’s back yard) is VERY early. 

The question now is how soon will we see Forsythia? In the past the first Forsythia has been close to the first of May.  It will certainly be earlier than that this year!

Diamonds Quilt – Completed At Last

I never thought I’d actually finish this quilt. When I started back on Jan 1 (that’s when I brought out the first set of batik strips and considered using them to make diamonds) I had something completely different in mind. A month later on Feb 3 that first effort died. I didn’t pick up the project again until Mar 11 – it’s taken me three weeks to reimagine, rebuild, and complete this quilt. The photo doesn’t do the fabrics justice – the colours blend and just pop. The graduated border continues the flow nicely as well.

Quilt Top Finished

I used a ton of small scraps from the diamonds to construct a 12″ wide crazy quilt strip on the back which I sashed with the same turquoise I used to frame the diamonds on the front.

Finished Quilt Back

I used a hidden binding on the quilt – I hand stitched it down last night (using a small leather patch to protect the hole in my third finger).

Detail of Border Quilting

In the end I decided to quilt the borders fairly densely. I created a swirl motif which I used on the narrow border; I widened it for the wide border.

I quilted most of the borders using the same dark blue variegated thread I used on the back of the quilt. However, when I reached the lighter colours, I switched to another which had pale blue values. You can’t really see where I made the transition – I was lucky that I could blend the lightest colour of the dark thread with the darkest colour of the light thread.

Detail of Narrow Border Quilting

Now, if you can believe it – I’m about to tackle another diamonds quilt – this time using my Kaffe Fassett fabric collection. Wild large prints in way-out colours. The diamonds will be larger and there will be fewer of them. What I’m planning at the moment would need 111 diamonds with bordering half elements. I don’t have 111 fabrics but I bet I have between 50 and 60. So the first thing I need to do is count the fabrics and begin planning from there.

Why diamonds, again? Well, I’m reasonably technically proficient with squares, rectangles,, flying geese, drunkards path blocks, etc. I figure I should also be good at diamonds – the only way to get there is to keep working at it.

Socks From Synthetic Yarn

I have one friend who can’t wear wool so I bought a ball of synthetic yarn at Michael’s to make her a pair of socks.

Socks From Synthetic Yarn

The socks turned out an interesting pattern. However, they took longer than usual to knit because I didn’t like the feel of the yarn in my hands, on the needles!

I discovered that wool has a resistance on the needles that keeps the yarn from slipping – it’s not that the yarn doesn’t slide on the needles, it does, but there’s a drag that I find makes knitting easier. The synthetic yarn was quite slippery – the wooden needles don’t fall out, but my hands tired as I knit with this yarn, having something to do with having to fight the slipperiness of the yarn.

Having knit exclusively with wool these past 18 years, my hands have become accustomed to that subtle drag the yarn has on the wooden needles.

I finally finished this pair of socks. It’s back to wool.

Diamonds Quilt Top – Finished!

This is the finished diamonds quilt top.

It took me three hours today to build that bottom border – I must have spent an hour searching through boxes to look for bits of fabric large enough and in the colour range I needed. Then each piece had to be cut separately because the triangles at the bottom (inside the turquoise border) are all slightly different sizes. I had to measure and cut each piece, attach it to the previous piece, test the running length, then add the next piece.

Diamonds Quilt Top – Finished!

I’d say the border came out all right! It reflects the colour flow on the top and right side pretty well. The turquoise sashing is perfect – separating but not interfering with the inner panel and the outer border.

I’m happy with the diamonds on the left. They could be lowered another two inches but I’m leaving them where they are. They invite the viewer to look for the turquoise, purple and the yellow. They say “look around, see what you can find here.”

From a disaster I’ve ended up with an interesting piece that I’m willing to put on display in the summer Parrsboro showing.

Now to gather up all the scraps and see what I can construct from them. I have a few diamonds among the bits and pieces but I think I’m going to crazy quilt a wide strip to insert into the back. I’m using the dotted dark blue for the backing and I will sash the strip insertion with the turquoise to offset it from the backing.

It’s interesting how the few original diamonds blend with the overall flow. You have to look hard to find them. I used mostly the darker ones although there are two of the original lighter ones – I have to stand right in front of the panel to actually find them, they blend so well.

I can’t imagine trying to make a quilt like this from a kit – how on earth would the directions make any sense? It’s the problem solving in a project like this that keeps me interesting in creating. I never know how the final product will turn out.

For a long while I thought this diamond project had taken me to a dead end, but after letting the problem percolate for a couple of weeks, I was able to break out of the original box and build something colourful and interesting.

Diamonds Quilt – Outer Border

I started the morning by repositioning the three diamonds in the left wide border 3″ lower – I’m happier with the position although I see I could drop them another 2″ with the bottom border still to be added. I’ll probably leave them as they are.

Then I started scrounging for leftover scraps. I was able to find enough pieces for the top border but I spent a ton of time trying to come up with batiks to work along the right side. Turns out, in order to maintain the diagonal lines I needed scraps at least 16″ long and I don’t have many lighter blue/turquoise batiks to choose from. In the end I managed to set up a gradient that works.

Outer Border – Almost Completed

Now for the bottom border. It’s going to be a challenge….

Bottom Border – Auditioning Fabrics

I have very few scraps left in the right shades large enough to insert. I need one brighter magenta (not sure I have anything in the stash) then two more turquoise/light blue pieces (I need to go through the scrap boxes one more time). These pieces on the bottom end are quite a bit smaller so I might be able to find something.

I see from the photograph I need to angle the bottom border pieces in the same direction as the top so the illusion is maintained of the rows carrying through the panel. My inclination would have been to angle them toward the bottom right corner and they need to be toward the bottom left. Good to have caught that.

Tomorrow I’ll get back to finishing the quilt top.

Diamonds Quilt Top – Nearly There

This is as far as I’ve got – I’ve sewn all the diamonds together and the resulting panel isn’t half bad! I sashed it with a 1/2″ turquoise strip and widened the panel with a 5 1/2″ strip which includes three diamonds on point – I’m not sure I have those diamonds positioned right – I have a feeling I should bring them closer to the bottom of the panel by about 3″. If I do that, I will have to extend the other end – which means another seam in that strip.

I aiming for a finished size of ~ 48″ x 64″.

Quilt Top Nearly Finished

To achieve that I need three 3 1/4″ border strips – one each on top and bottom and one on the right side.

The question is whether I want to use the dotted dark blue fabric I’ve used on the dark side of the panel for the remaining three borders, or whether I want to piece it to reflect the changing colour of the panel – that’s the question. If I piece the border, I will make mitre joins to carry on the flow of the diamonds; those joins need to be at the same 45° angle as the diamonds.

I now need to dig through my fabric stash to see what I have that could work as a border.

Gettin’ There

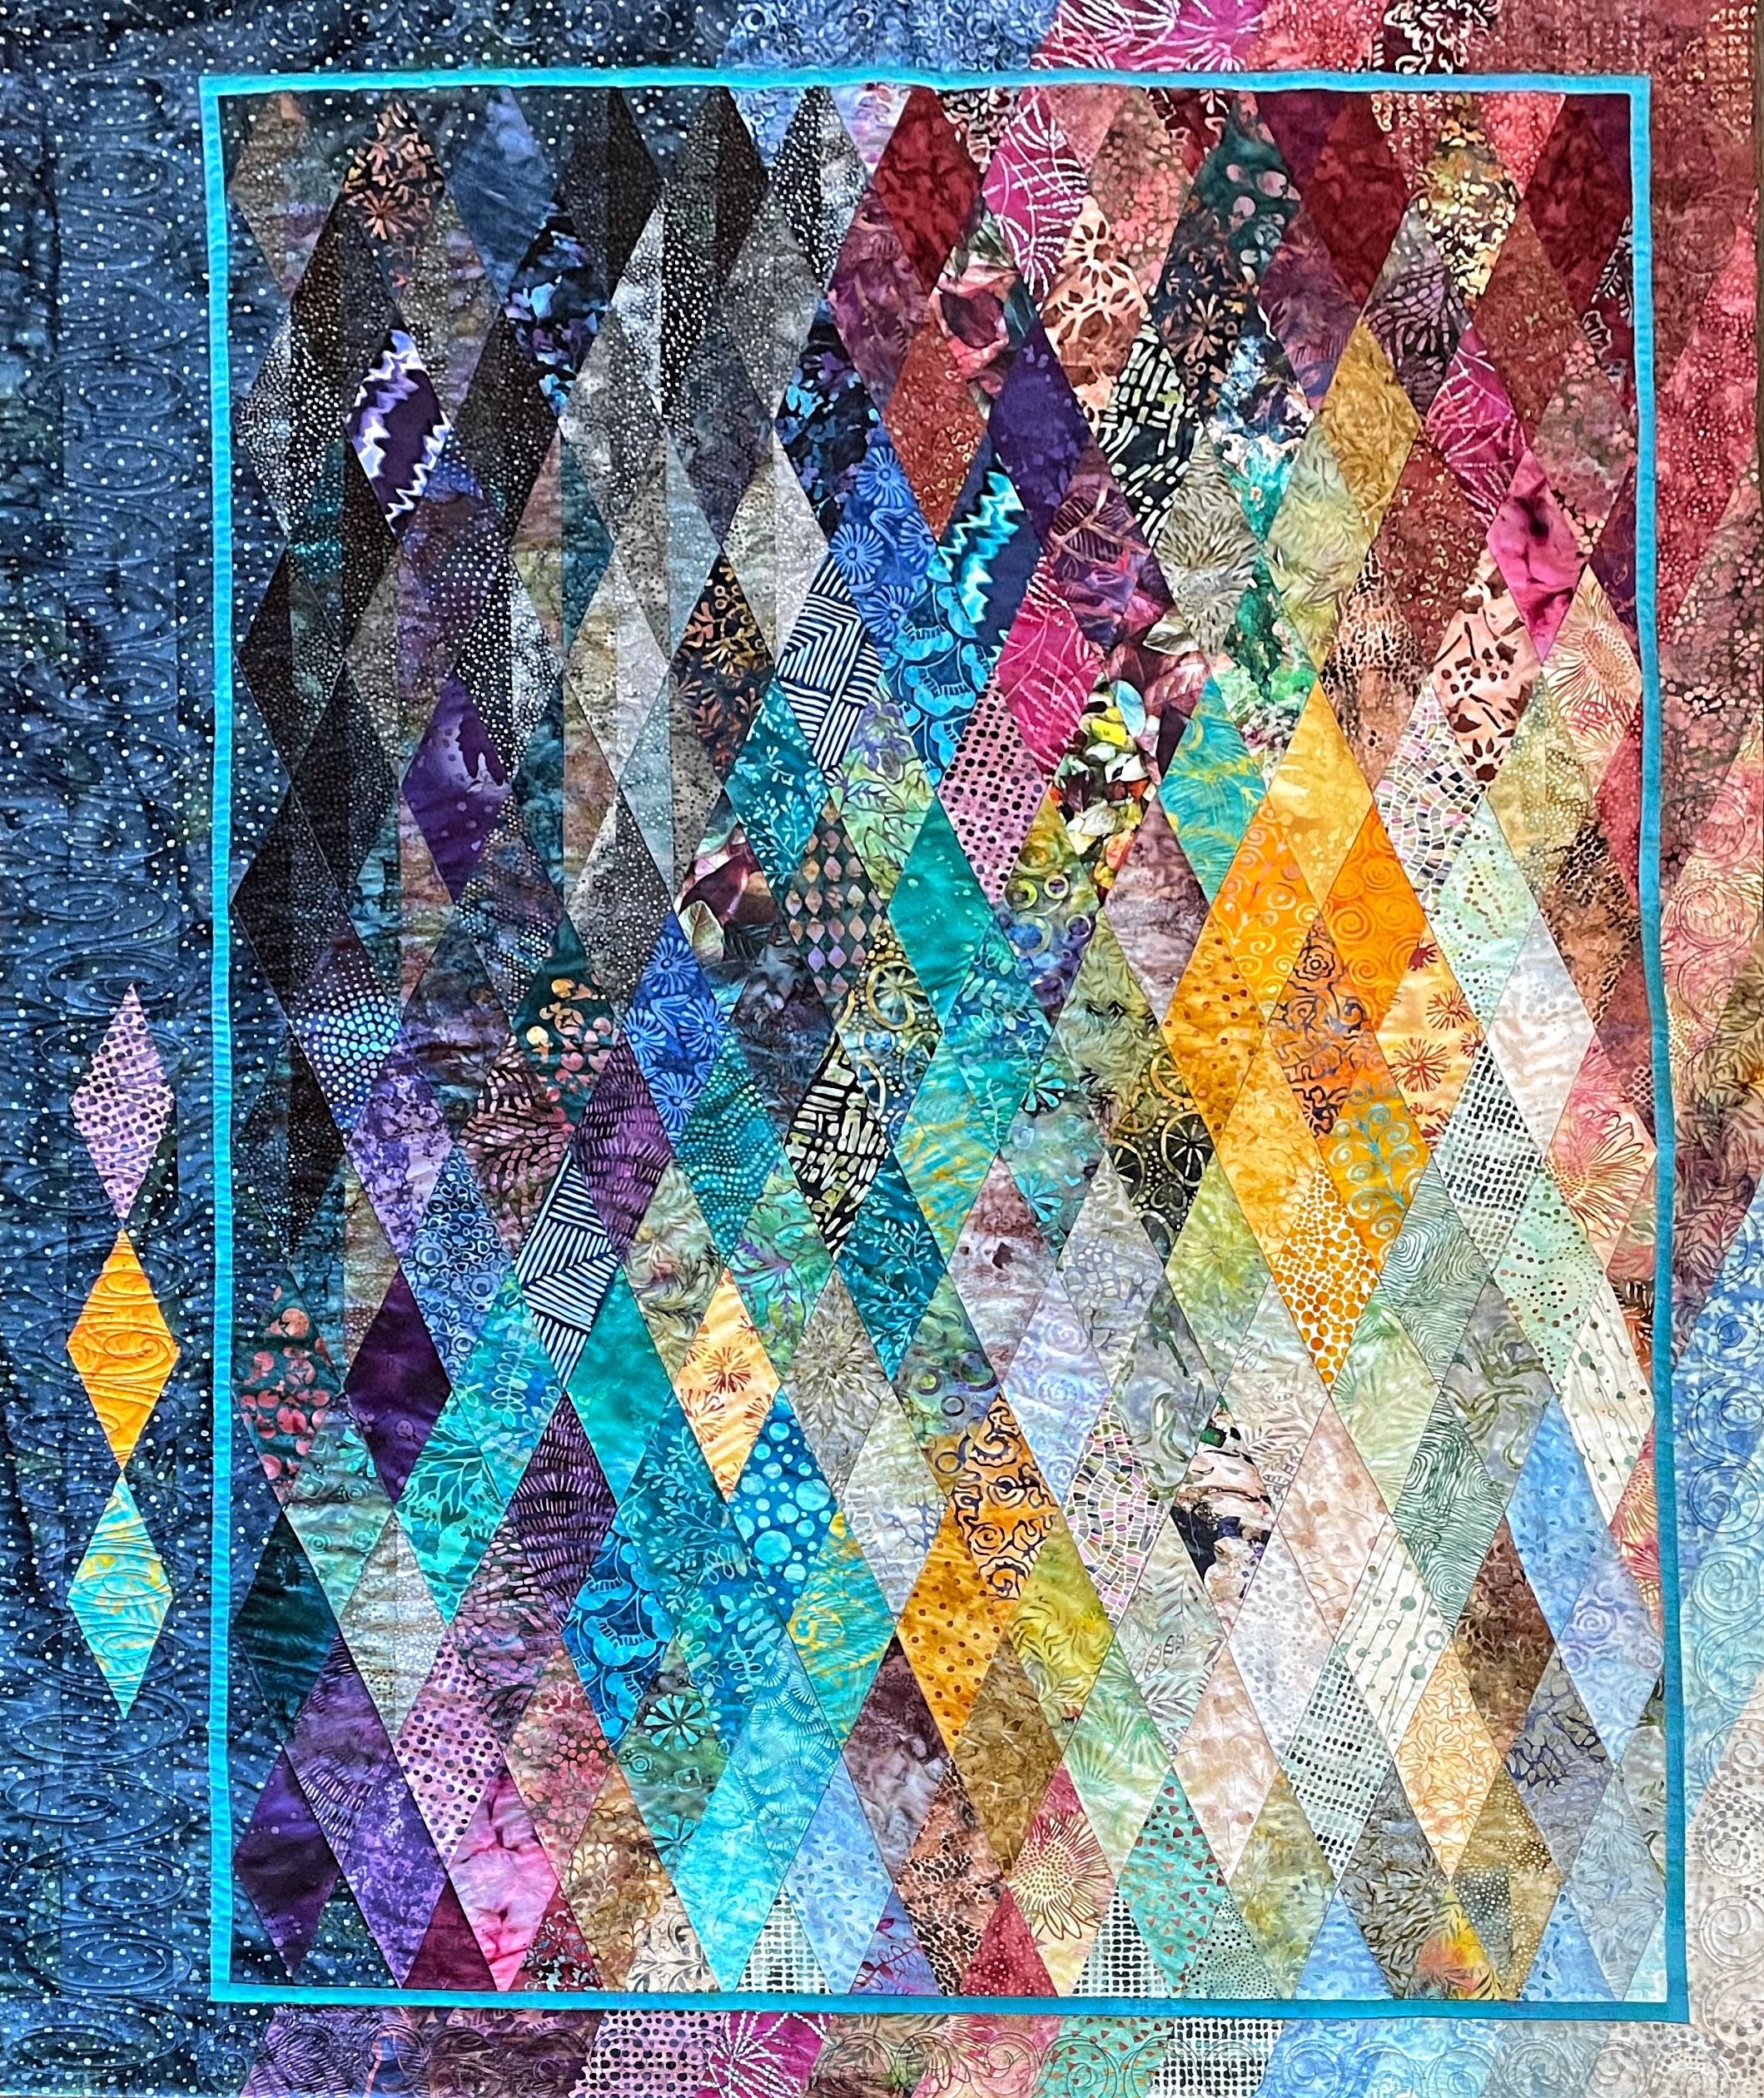
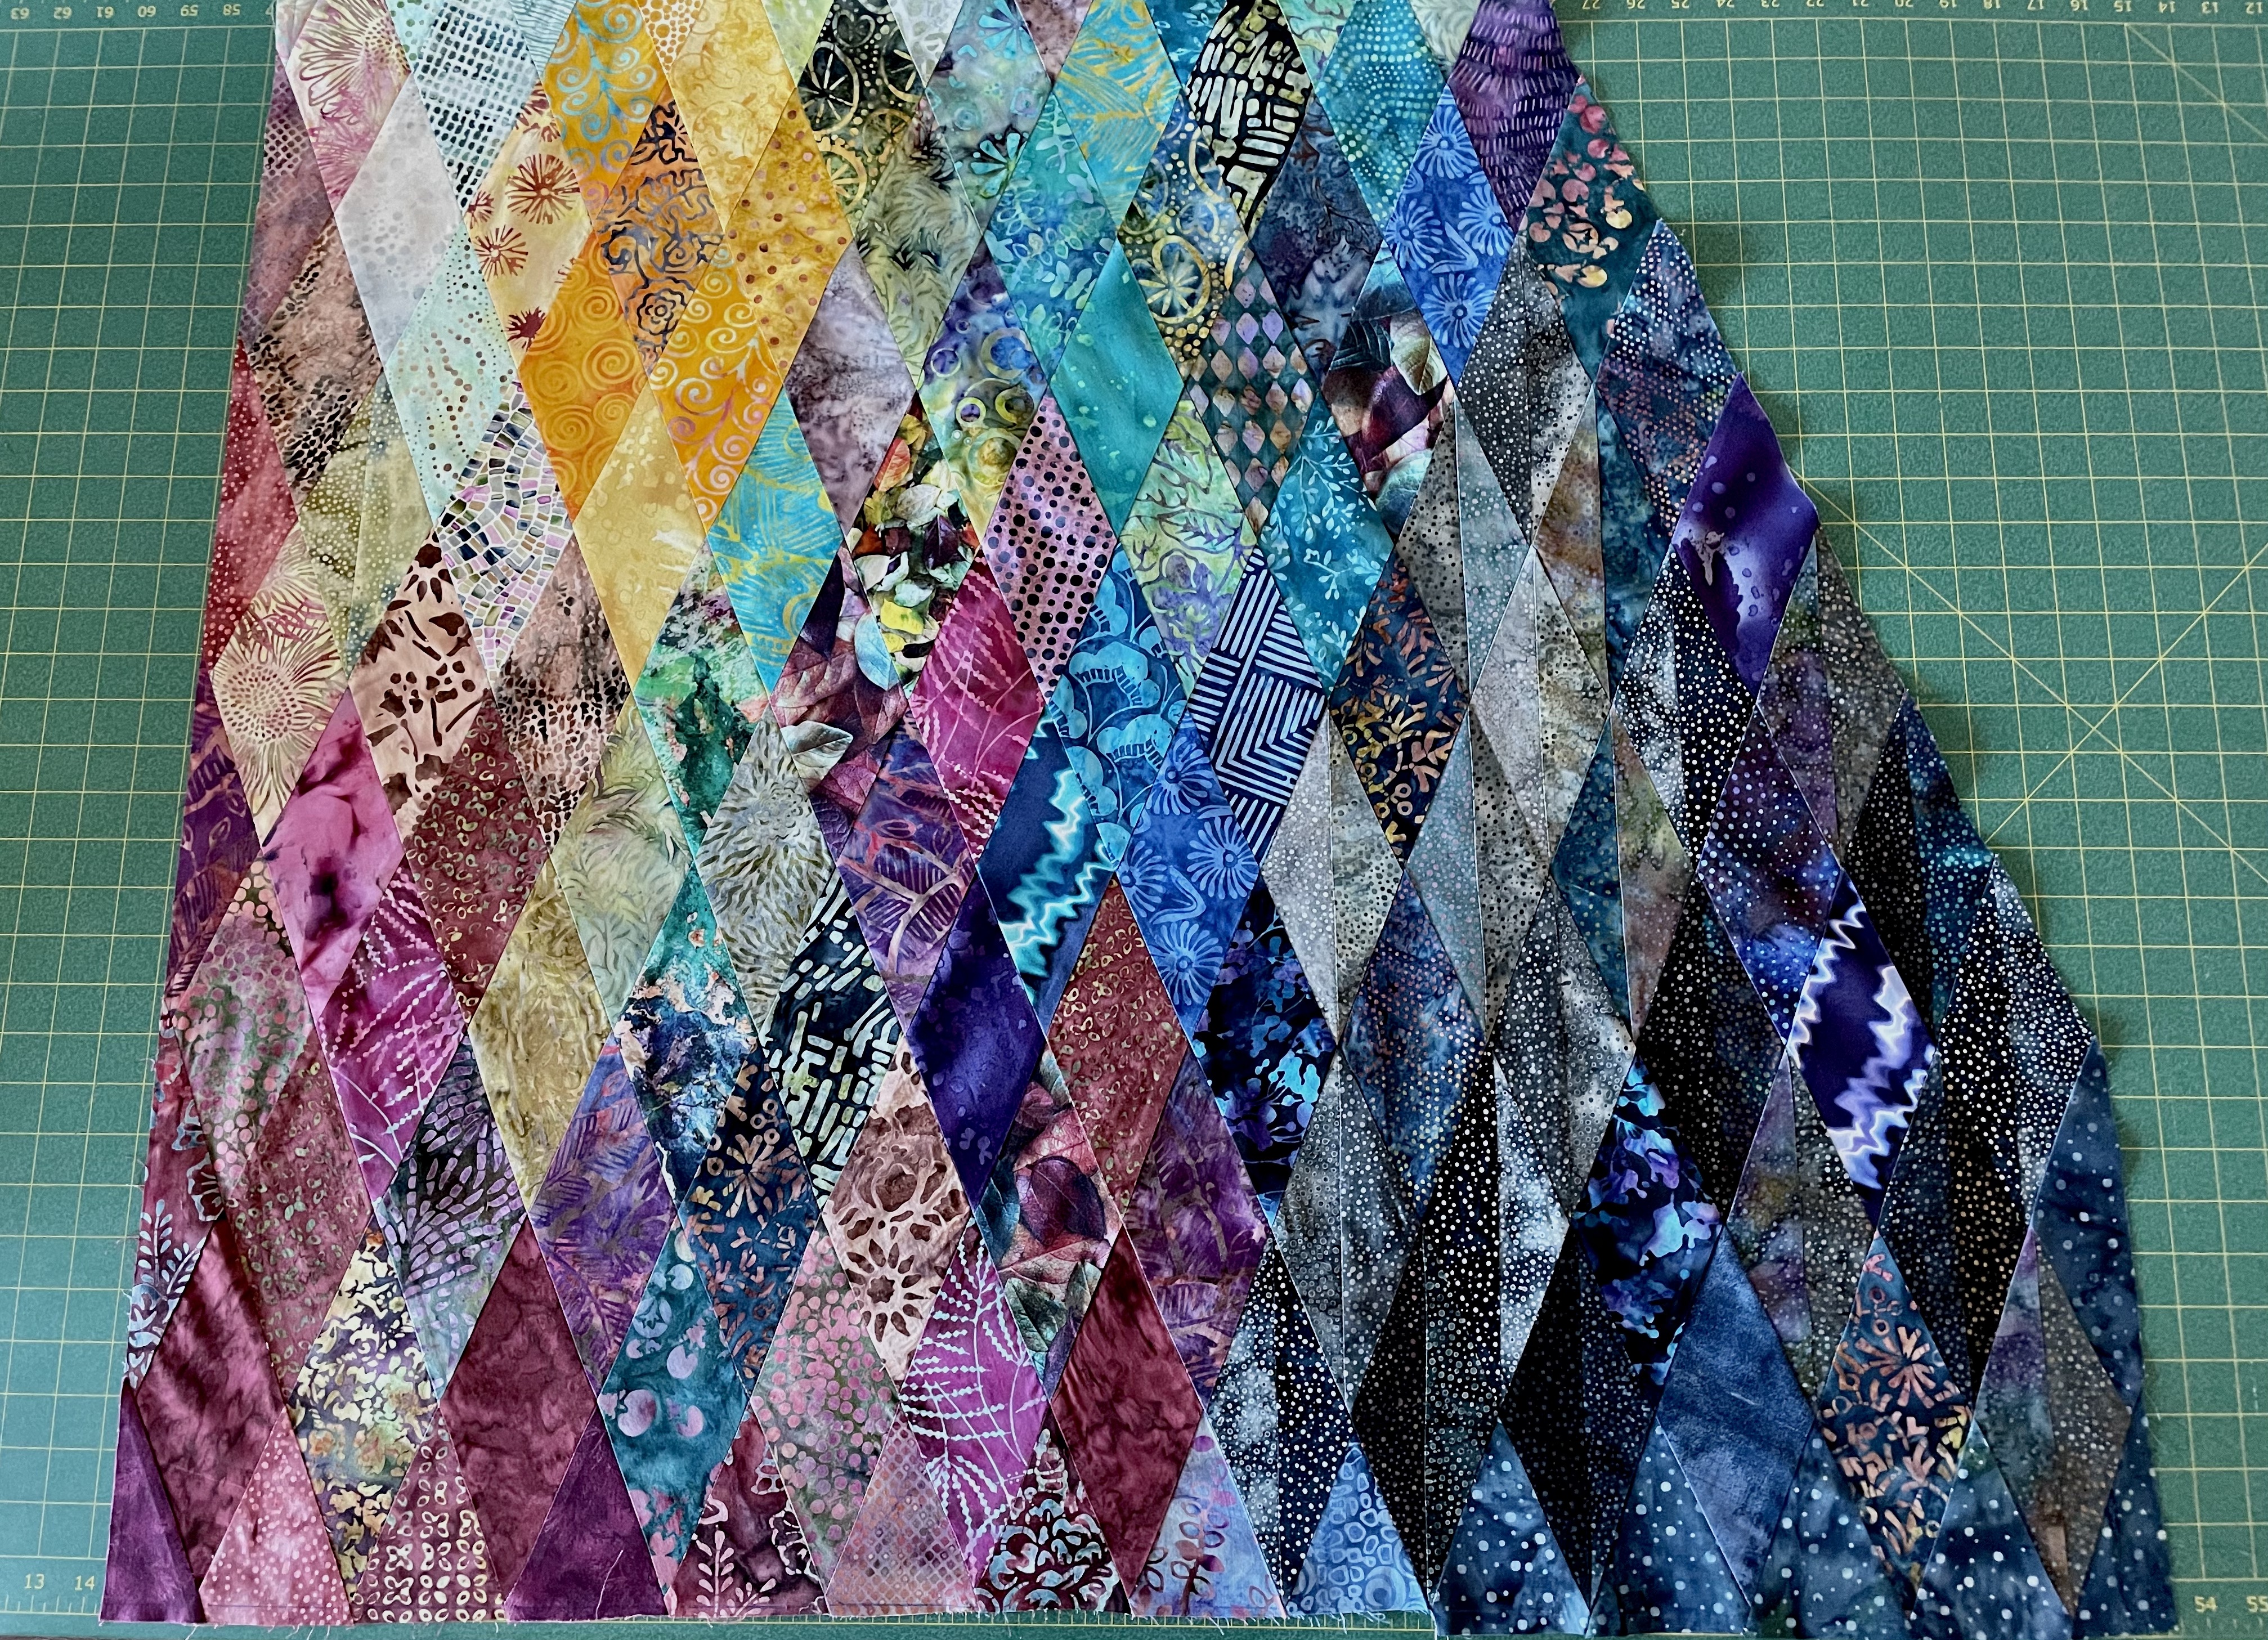
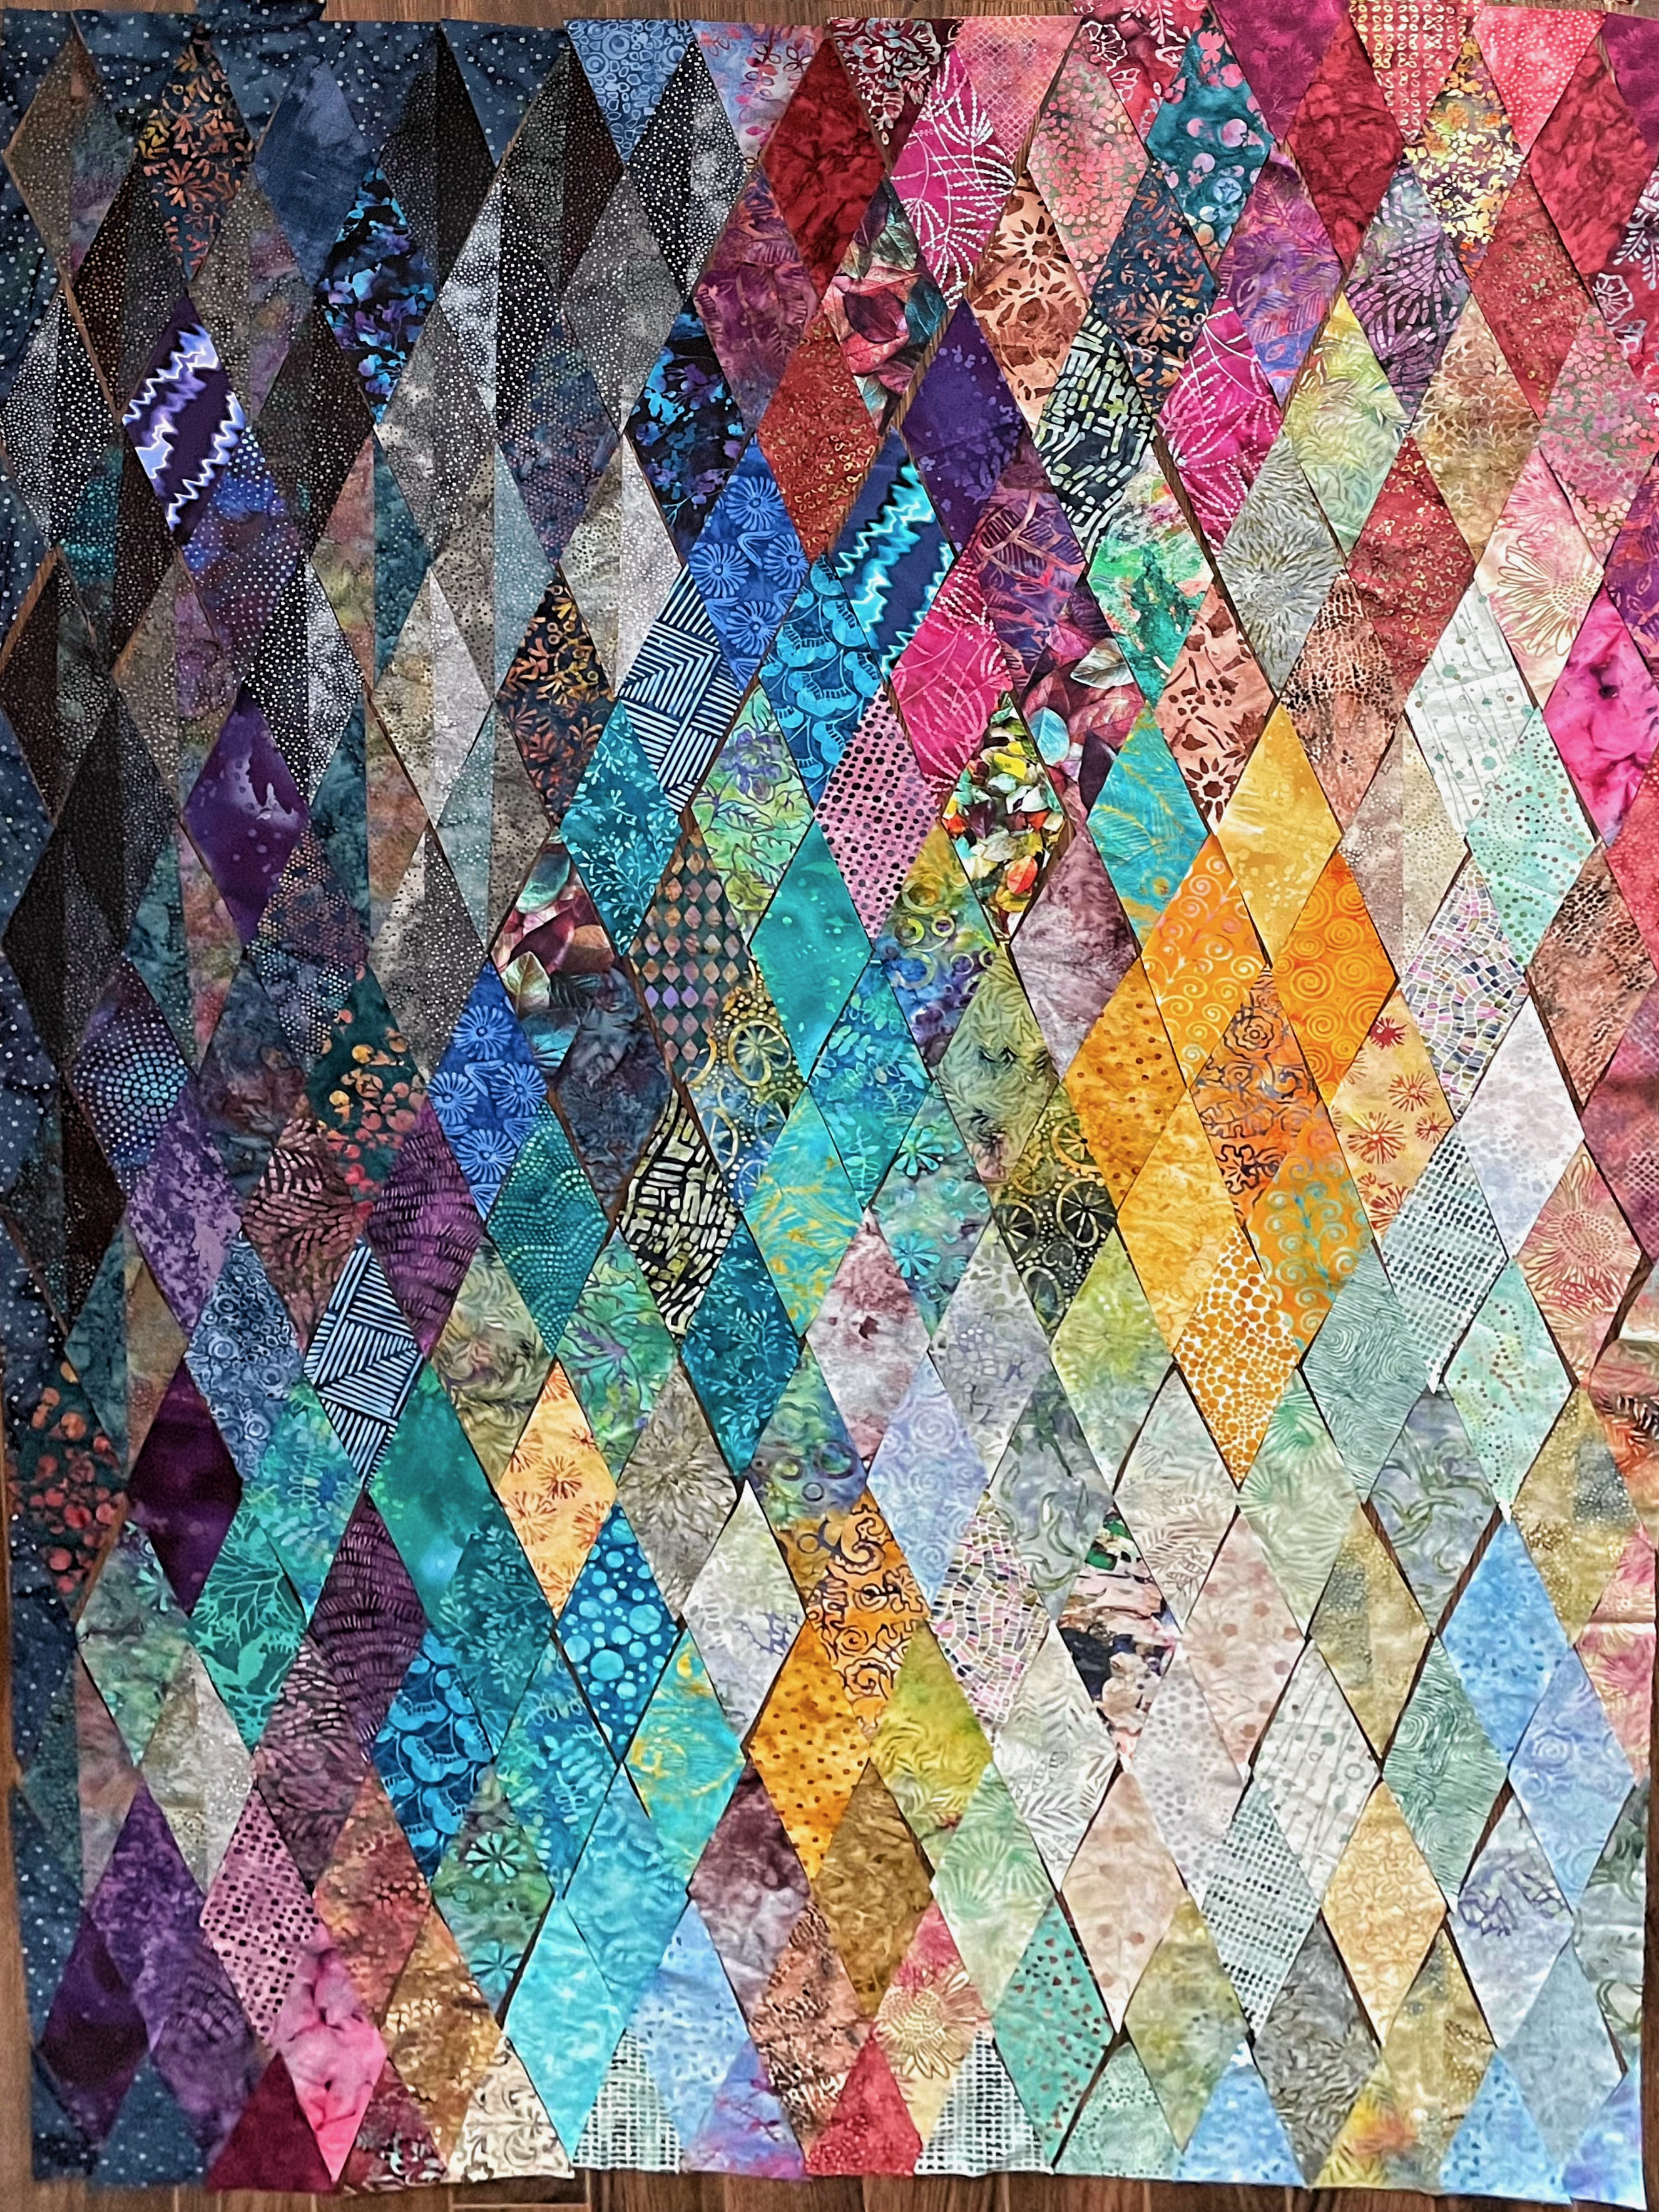
I’m doing better than I feared I would. I now have the panel to a point where the top edge (at the bottom of the photo) is completed (it measures 39″ in width).

Panel Partially Assembled

I can see from the photo I should have discarded ALL the original diamonds constructed from the jellyroll strips. When the panel is completed they’re not going to stick out because they’re mostly clustered in the dark upper corner but I’m aware of them and see the vertical lines they add. When the panel is quilted they will be obscured further (but I will know they are there).

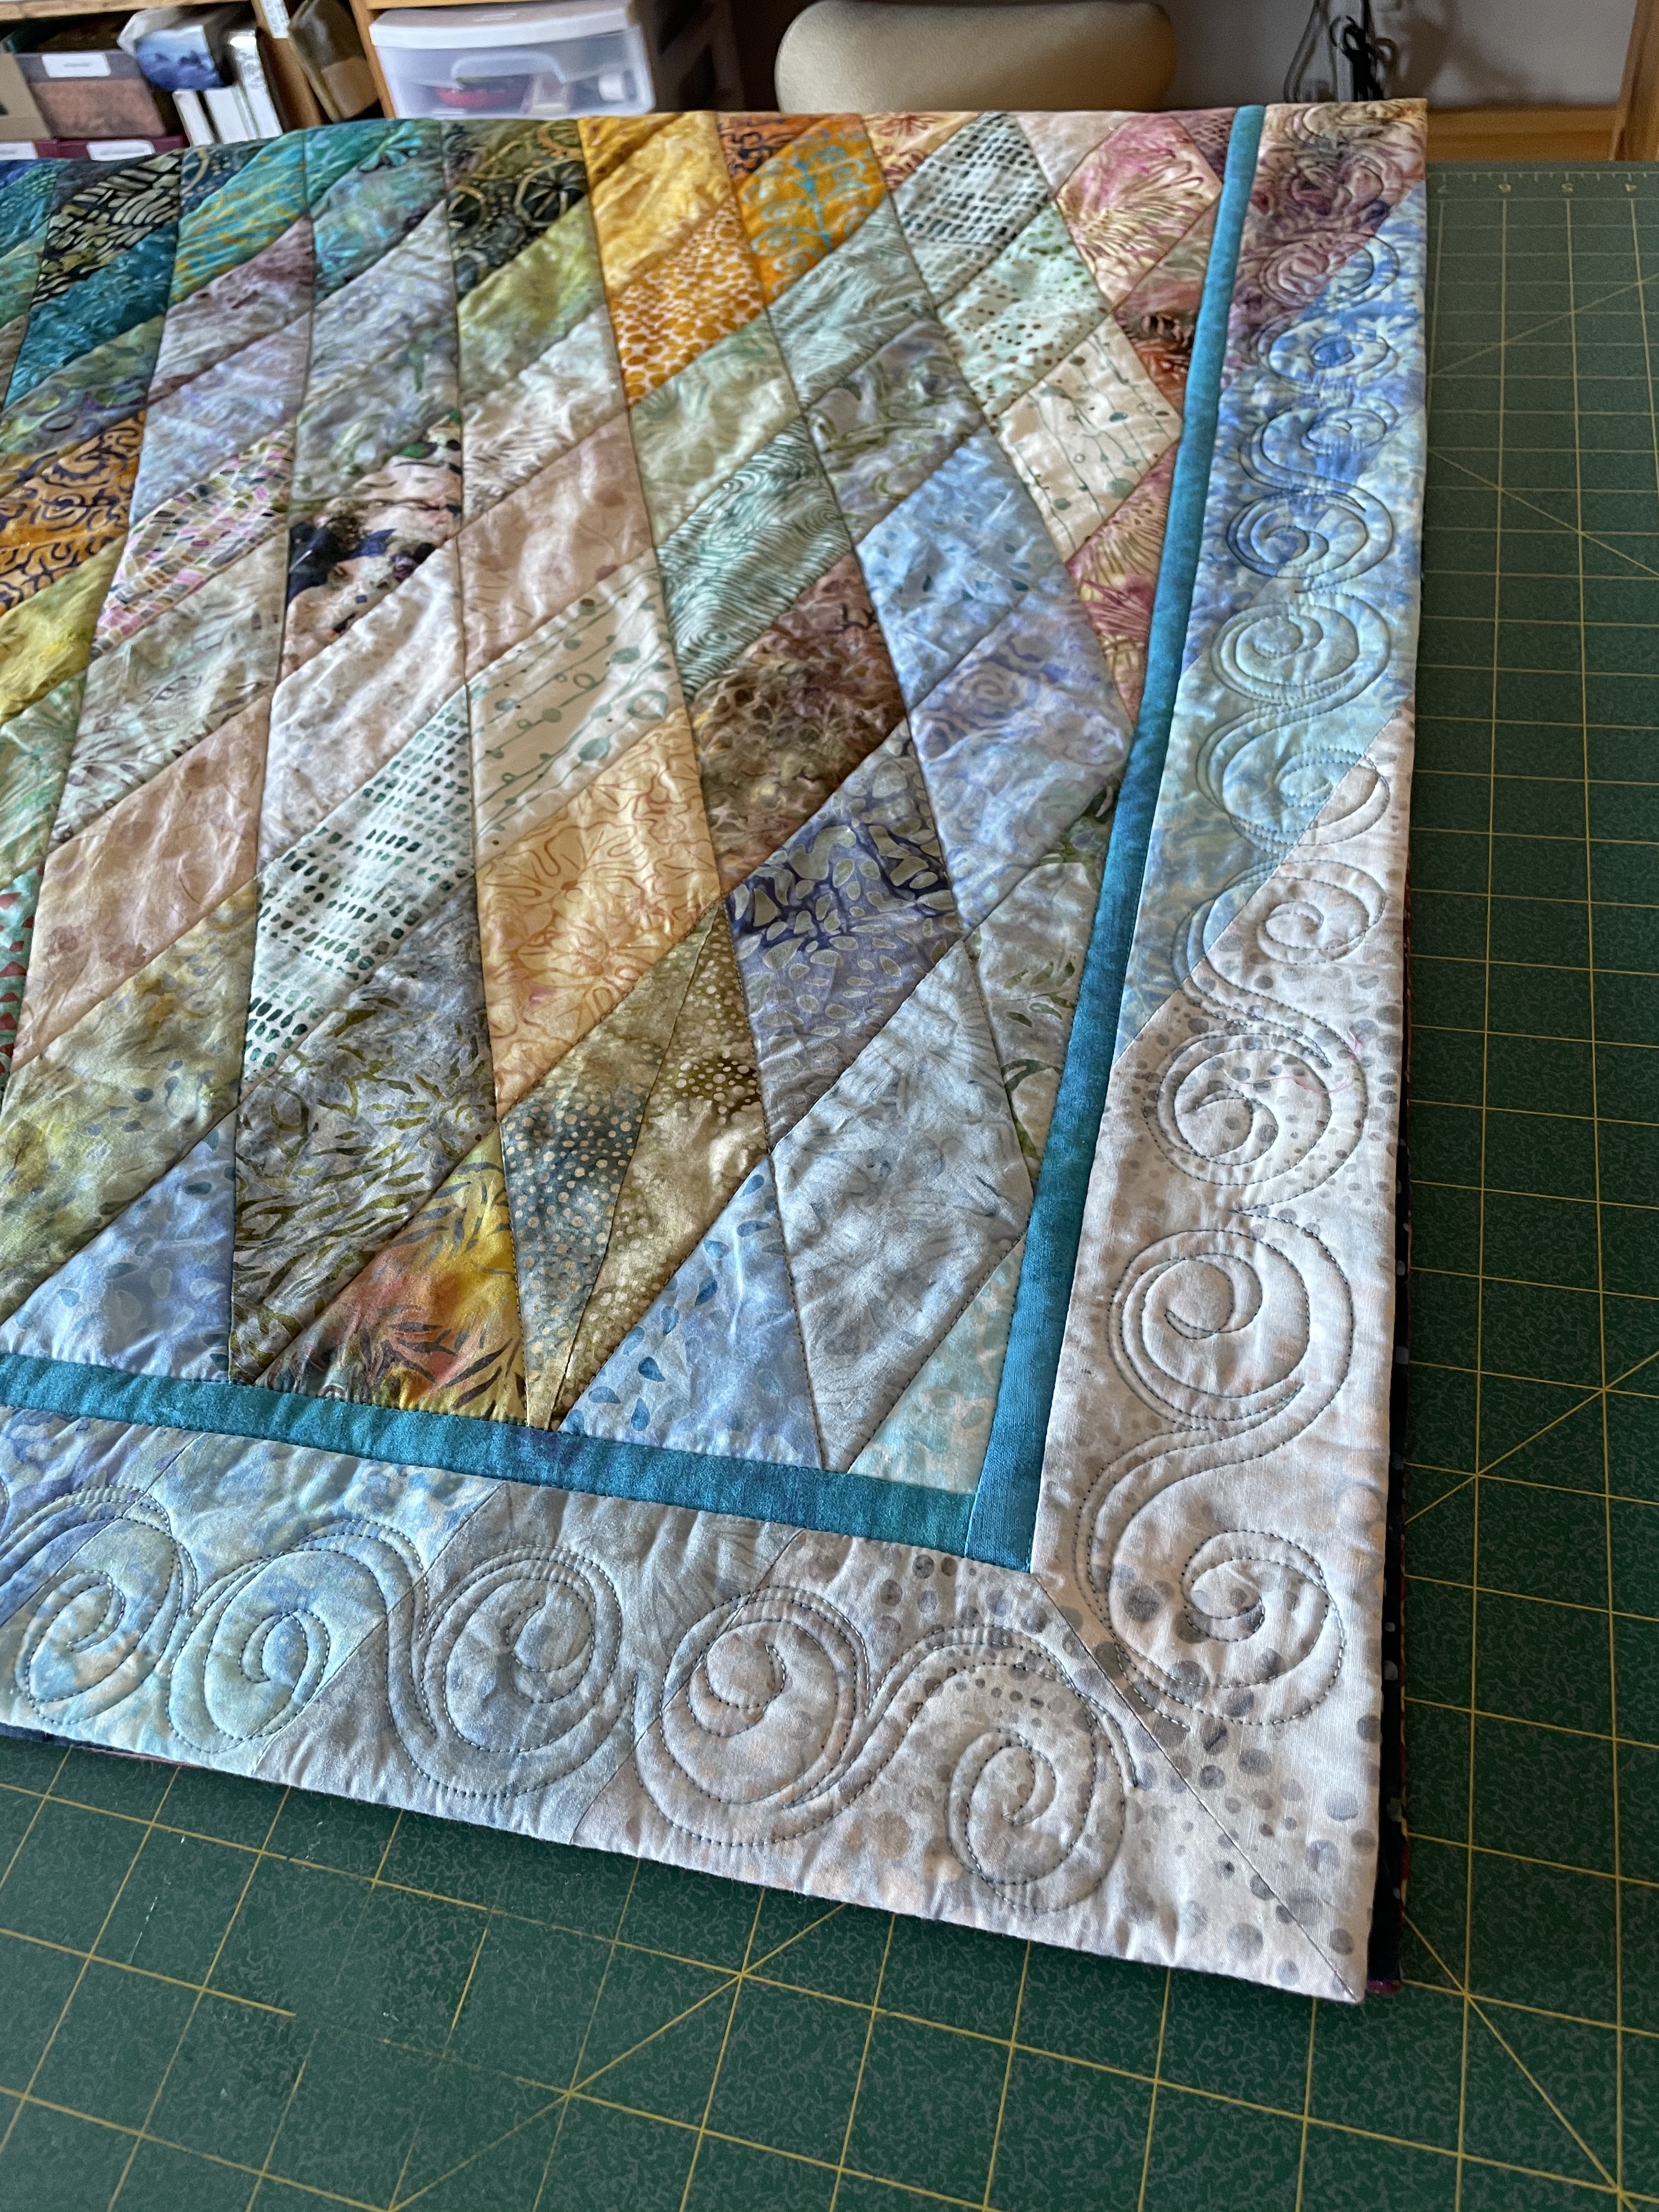
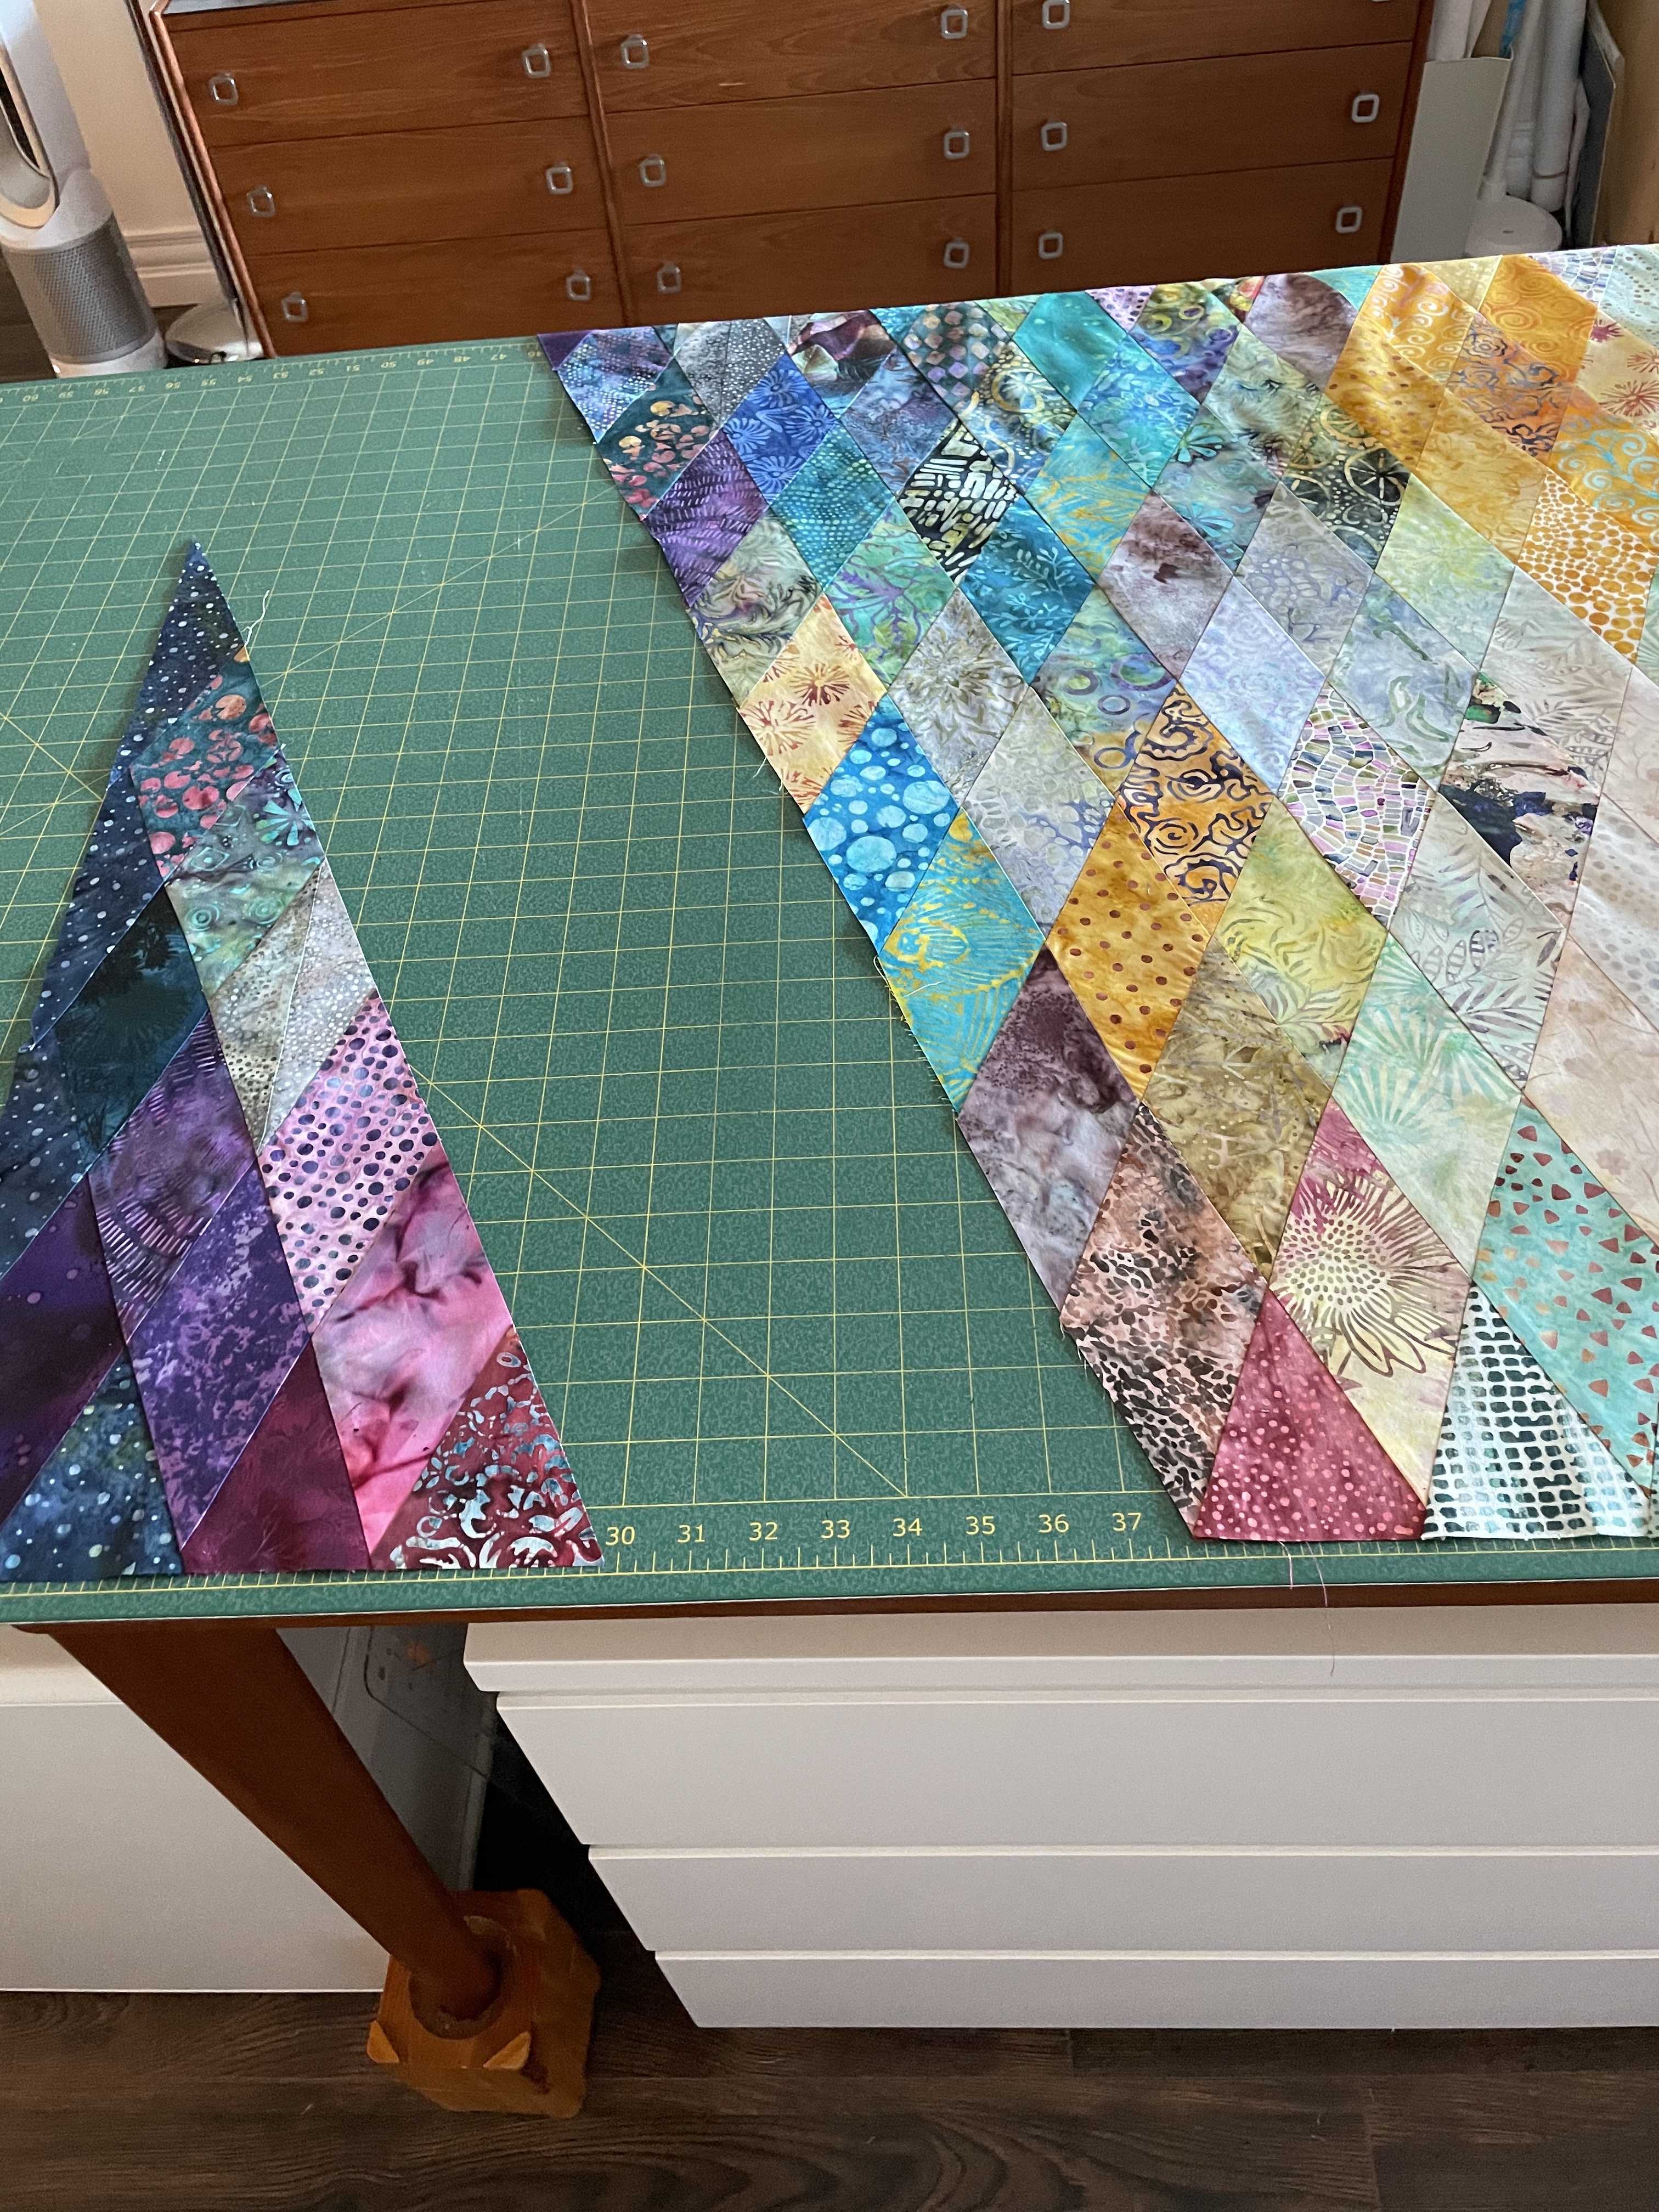
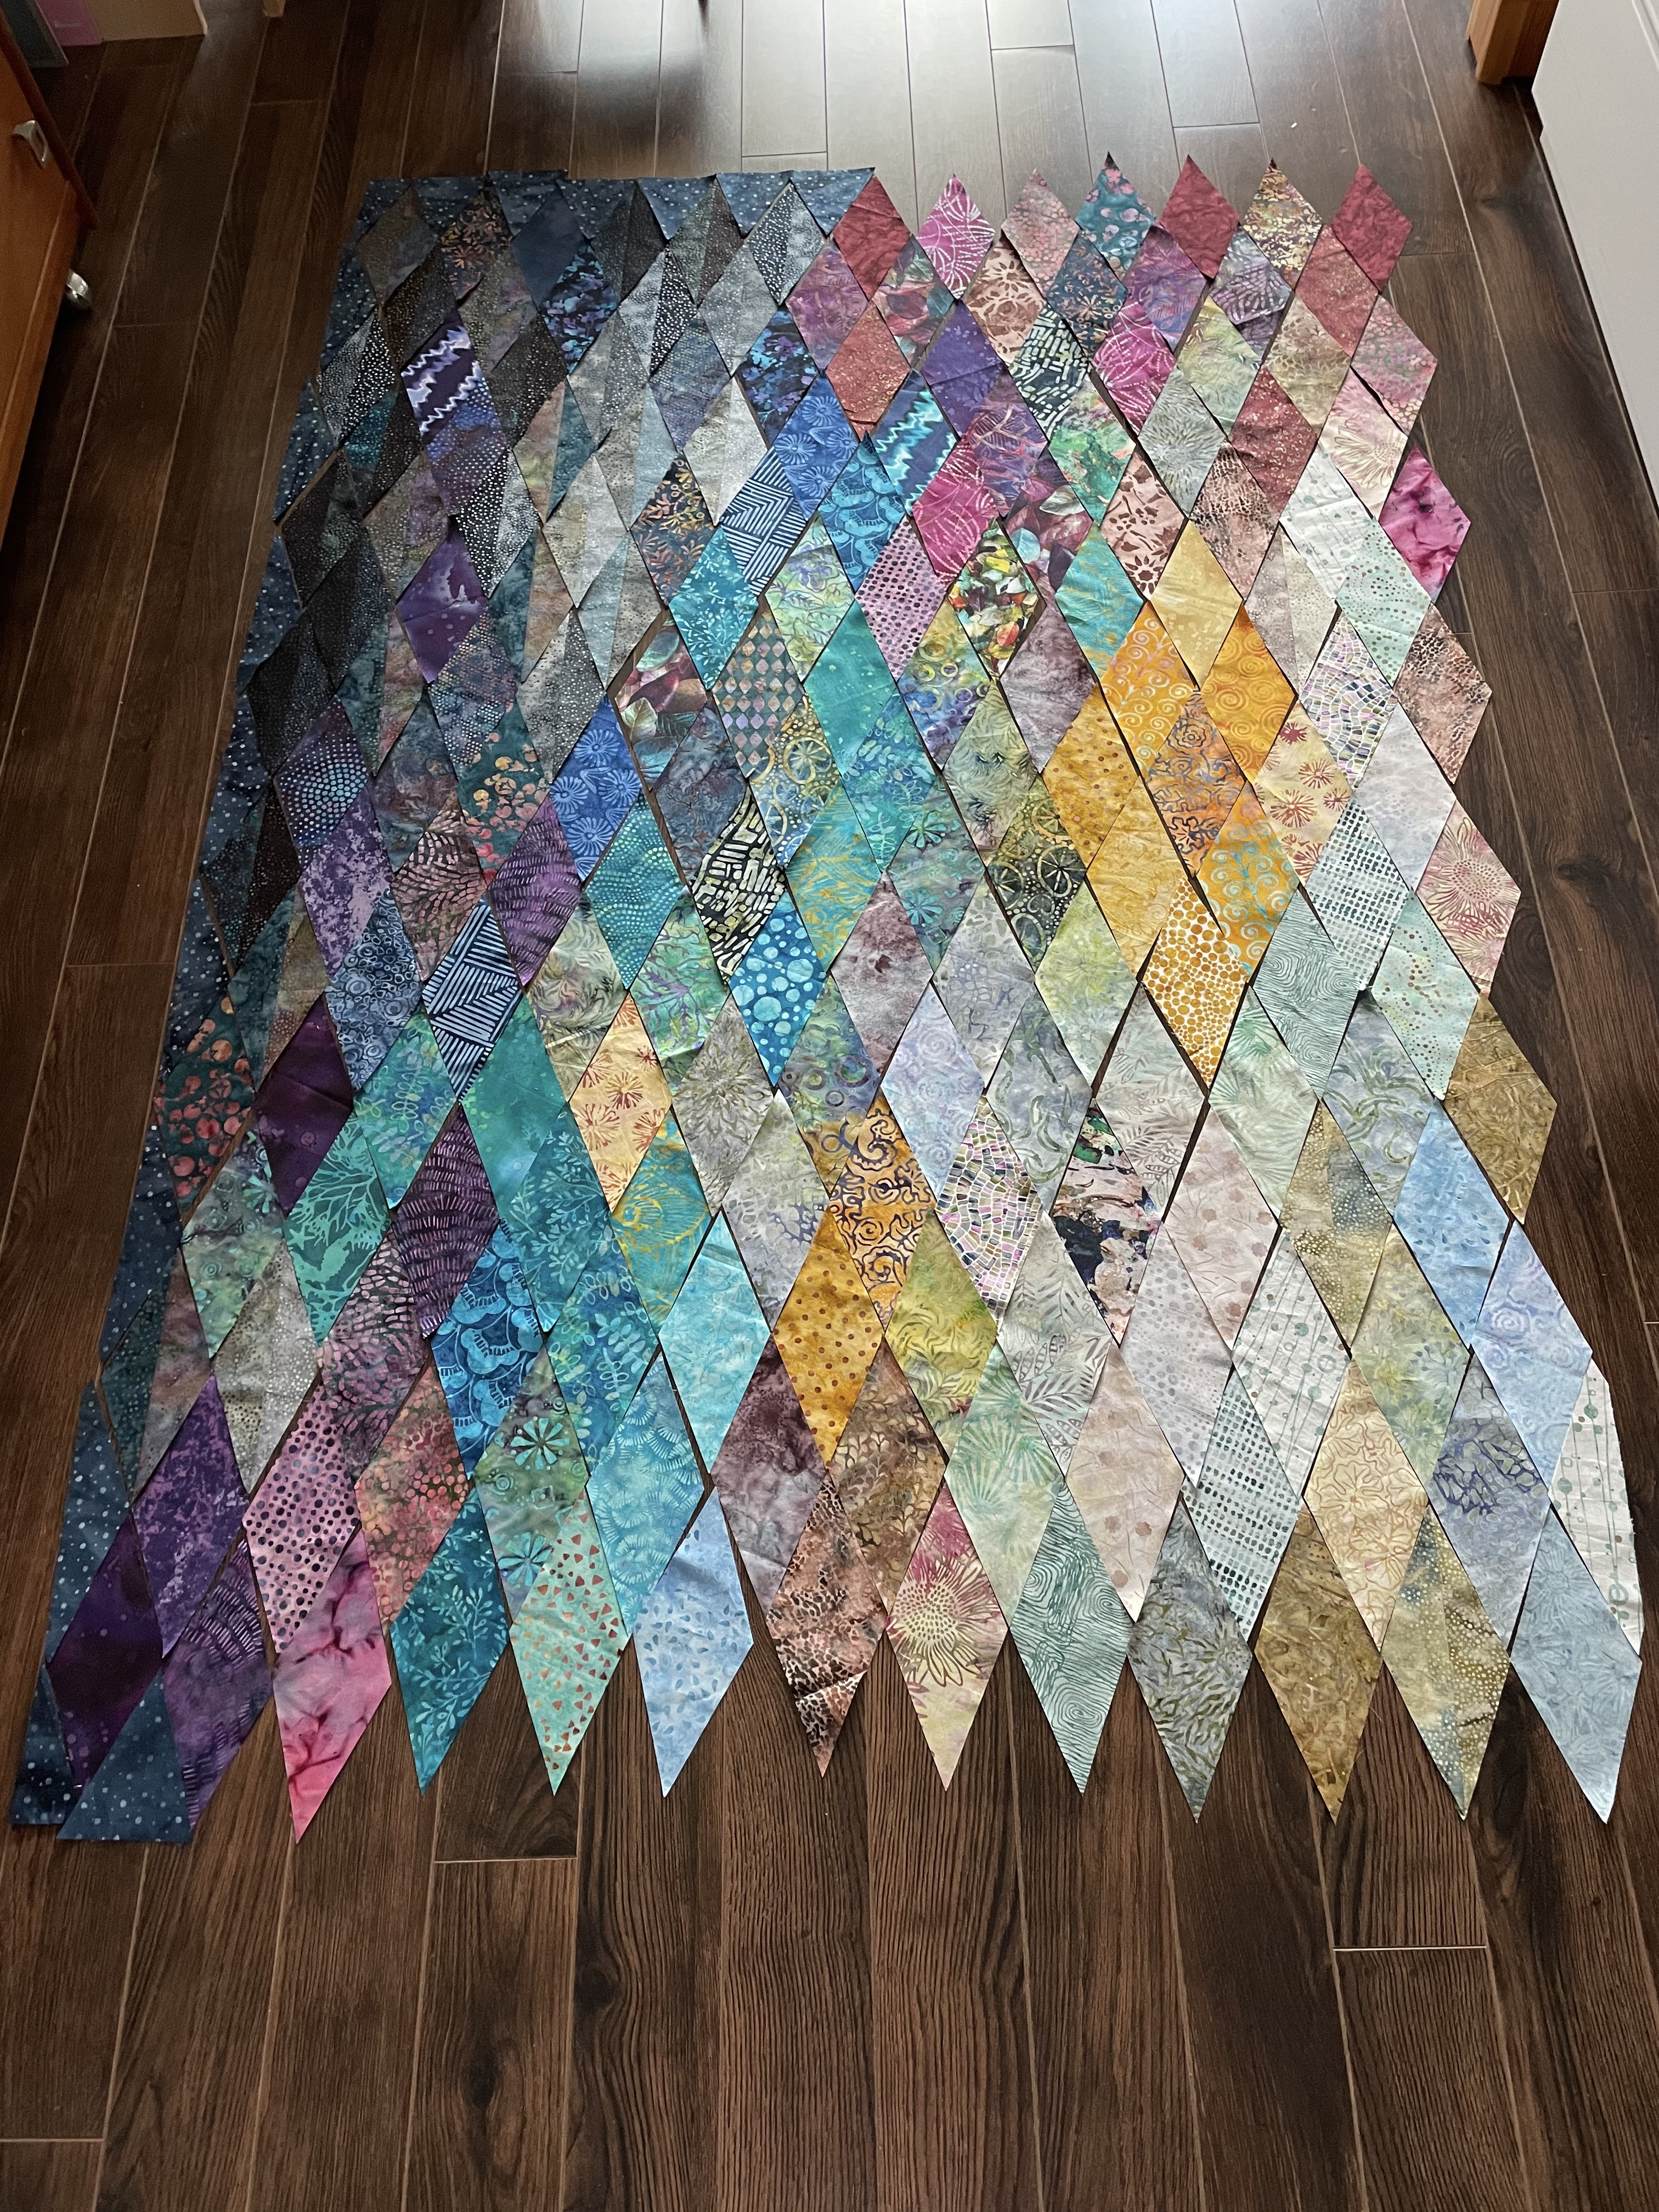
I have the bottom left corner compiled leaving one section remaining to be assembled and inserted.

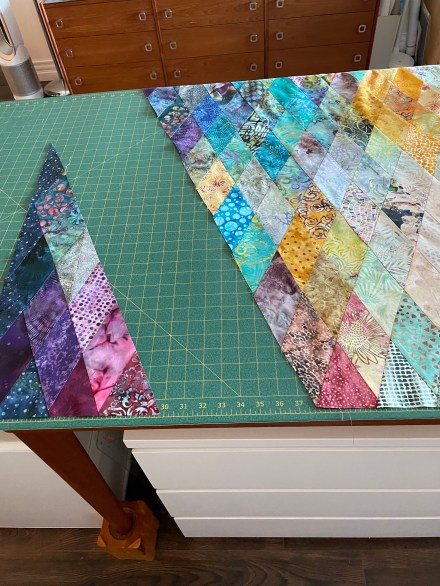
One Strip Still To Do

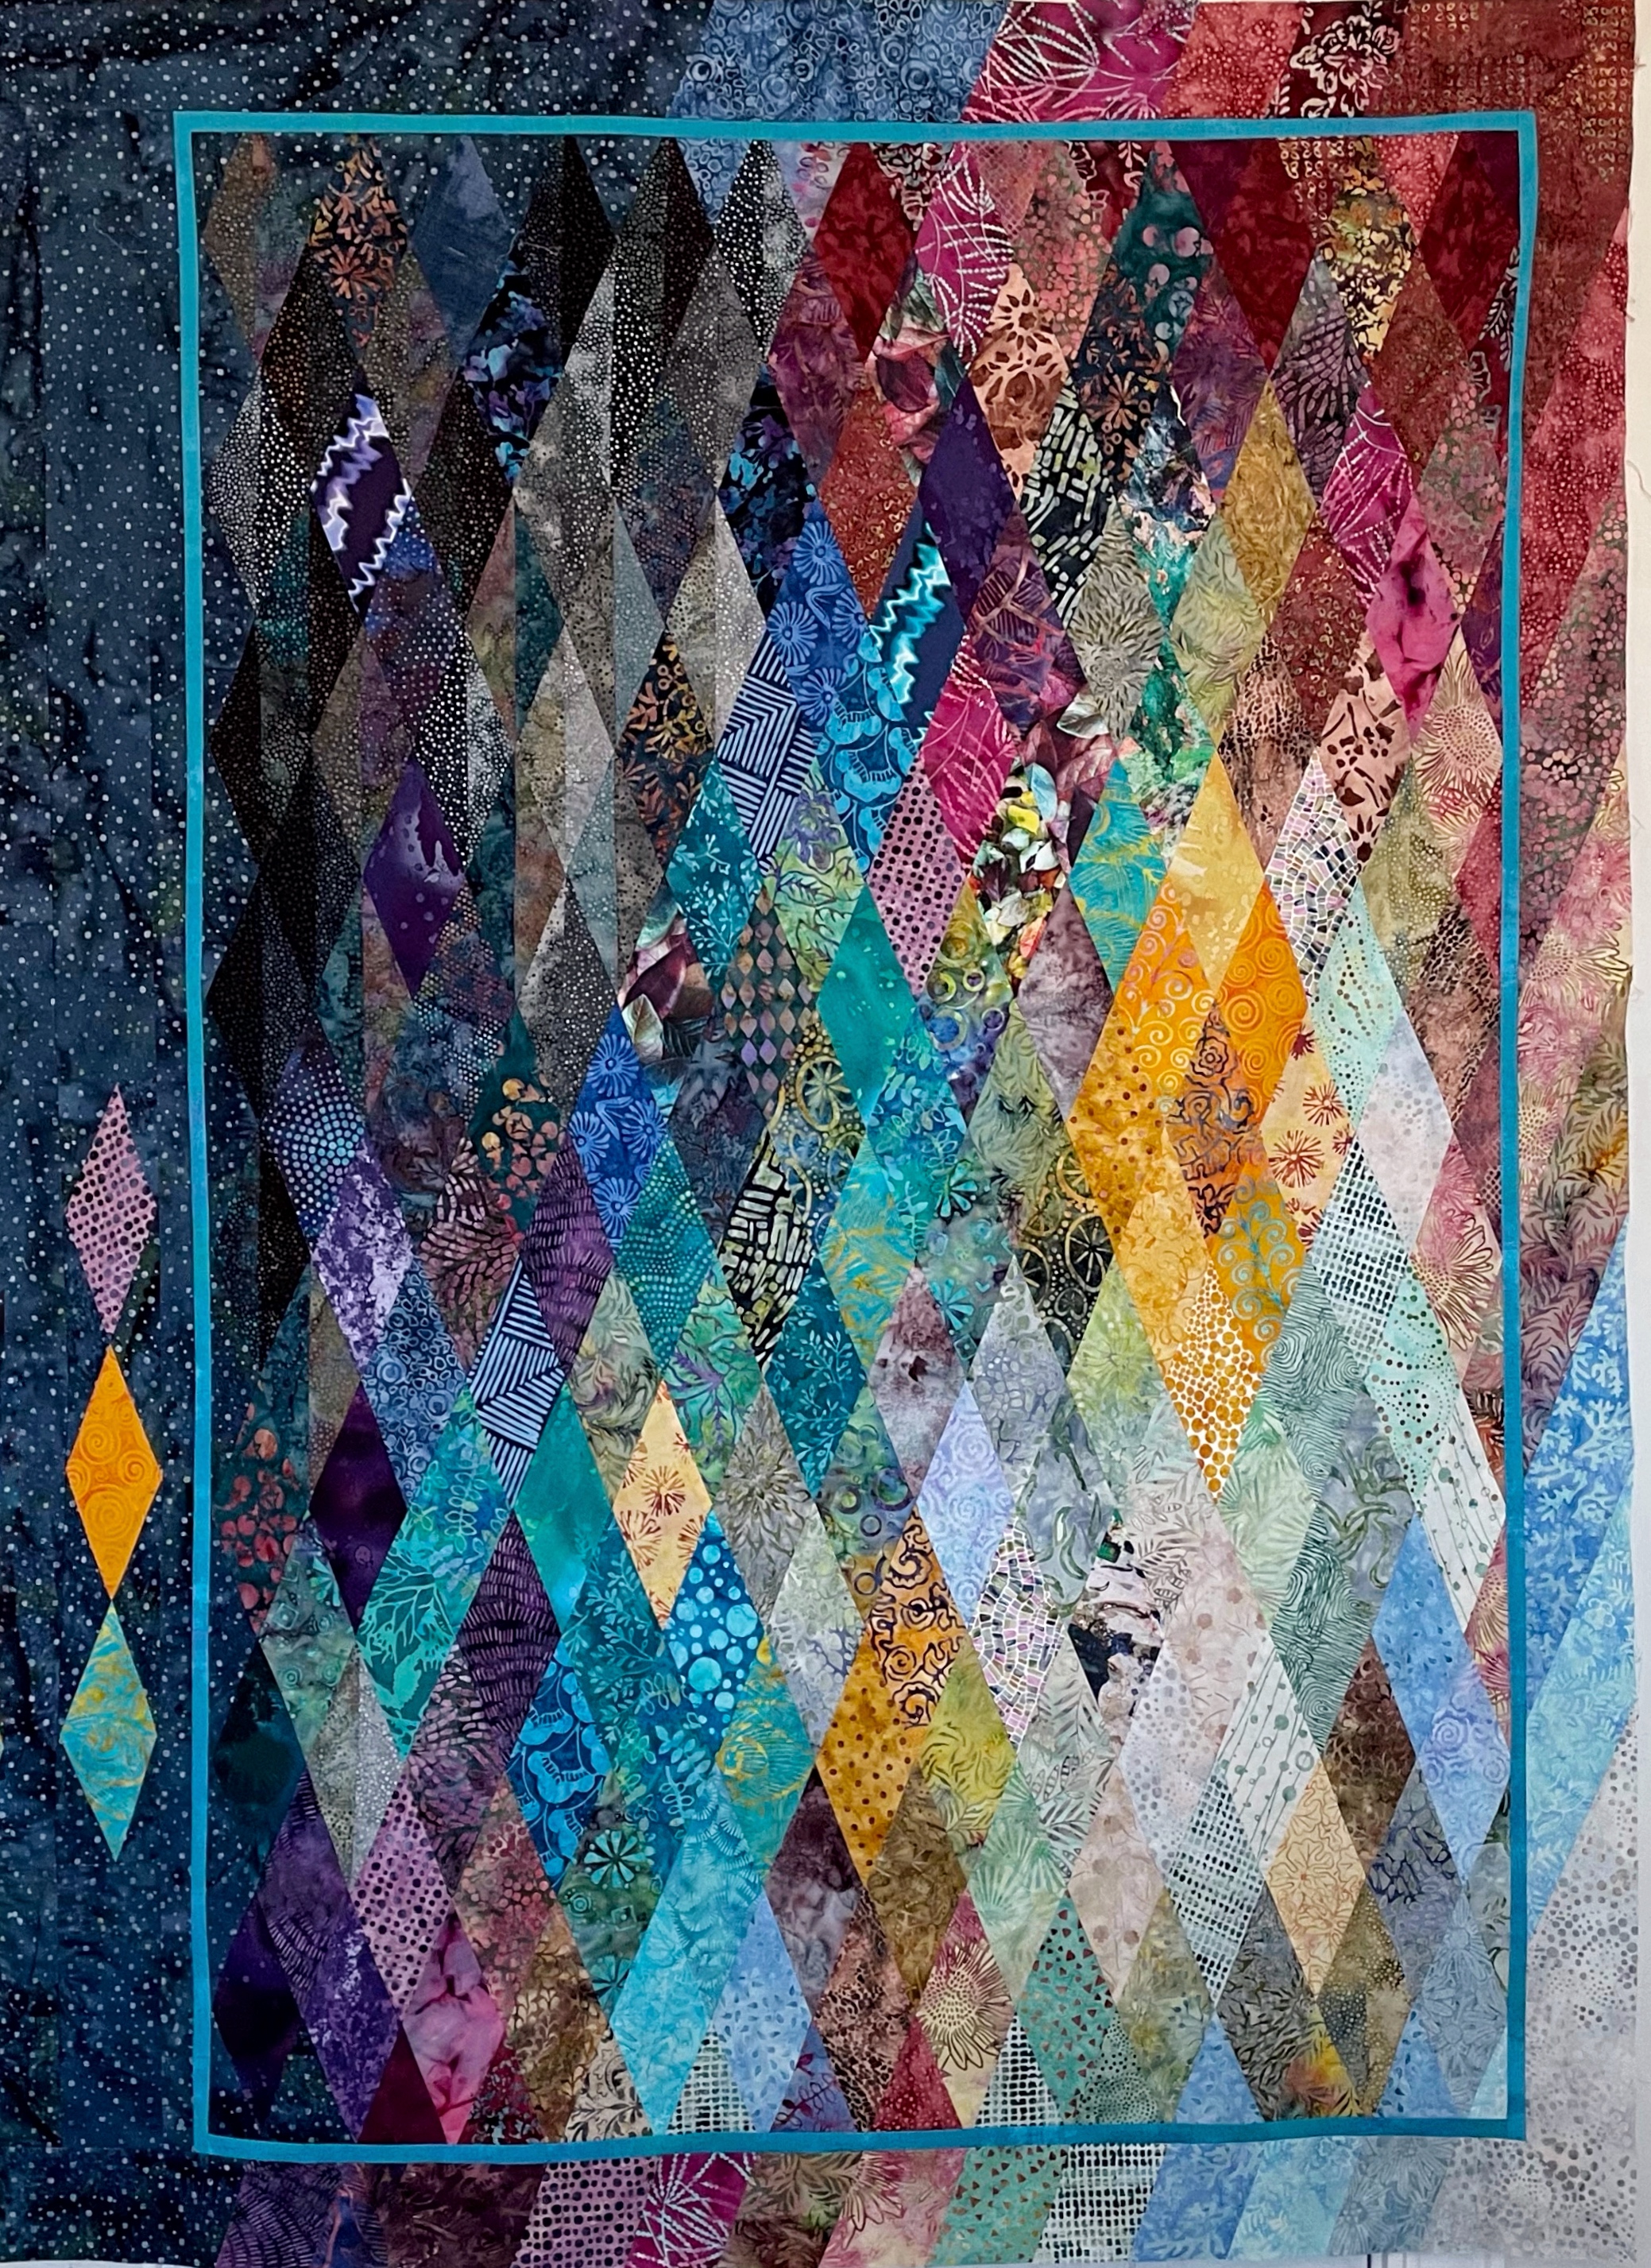
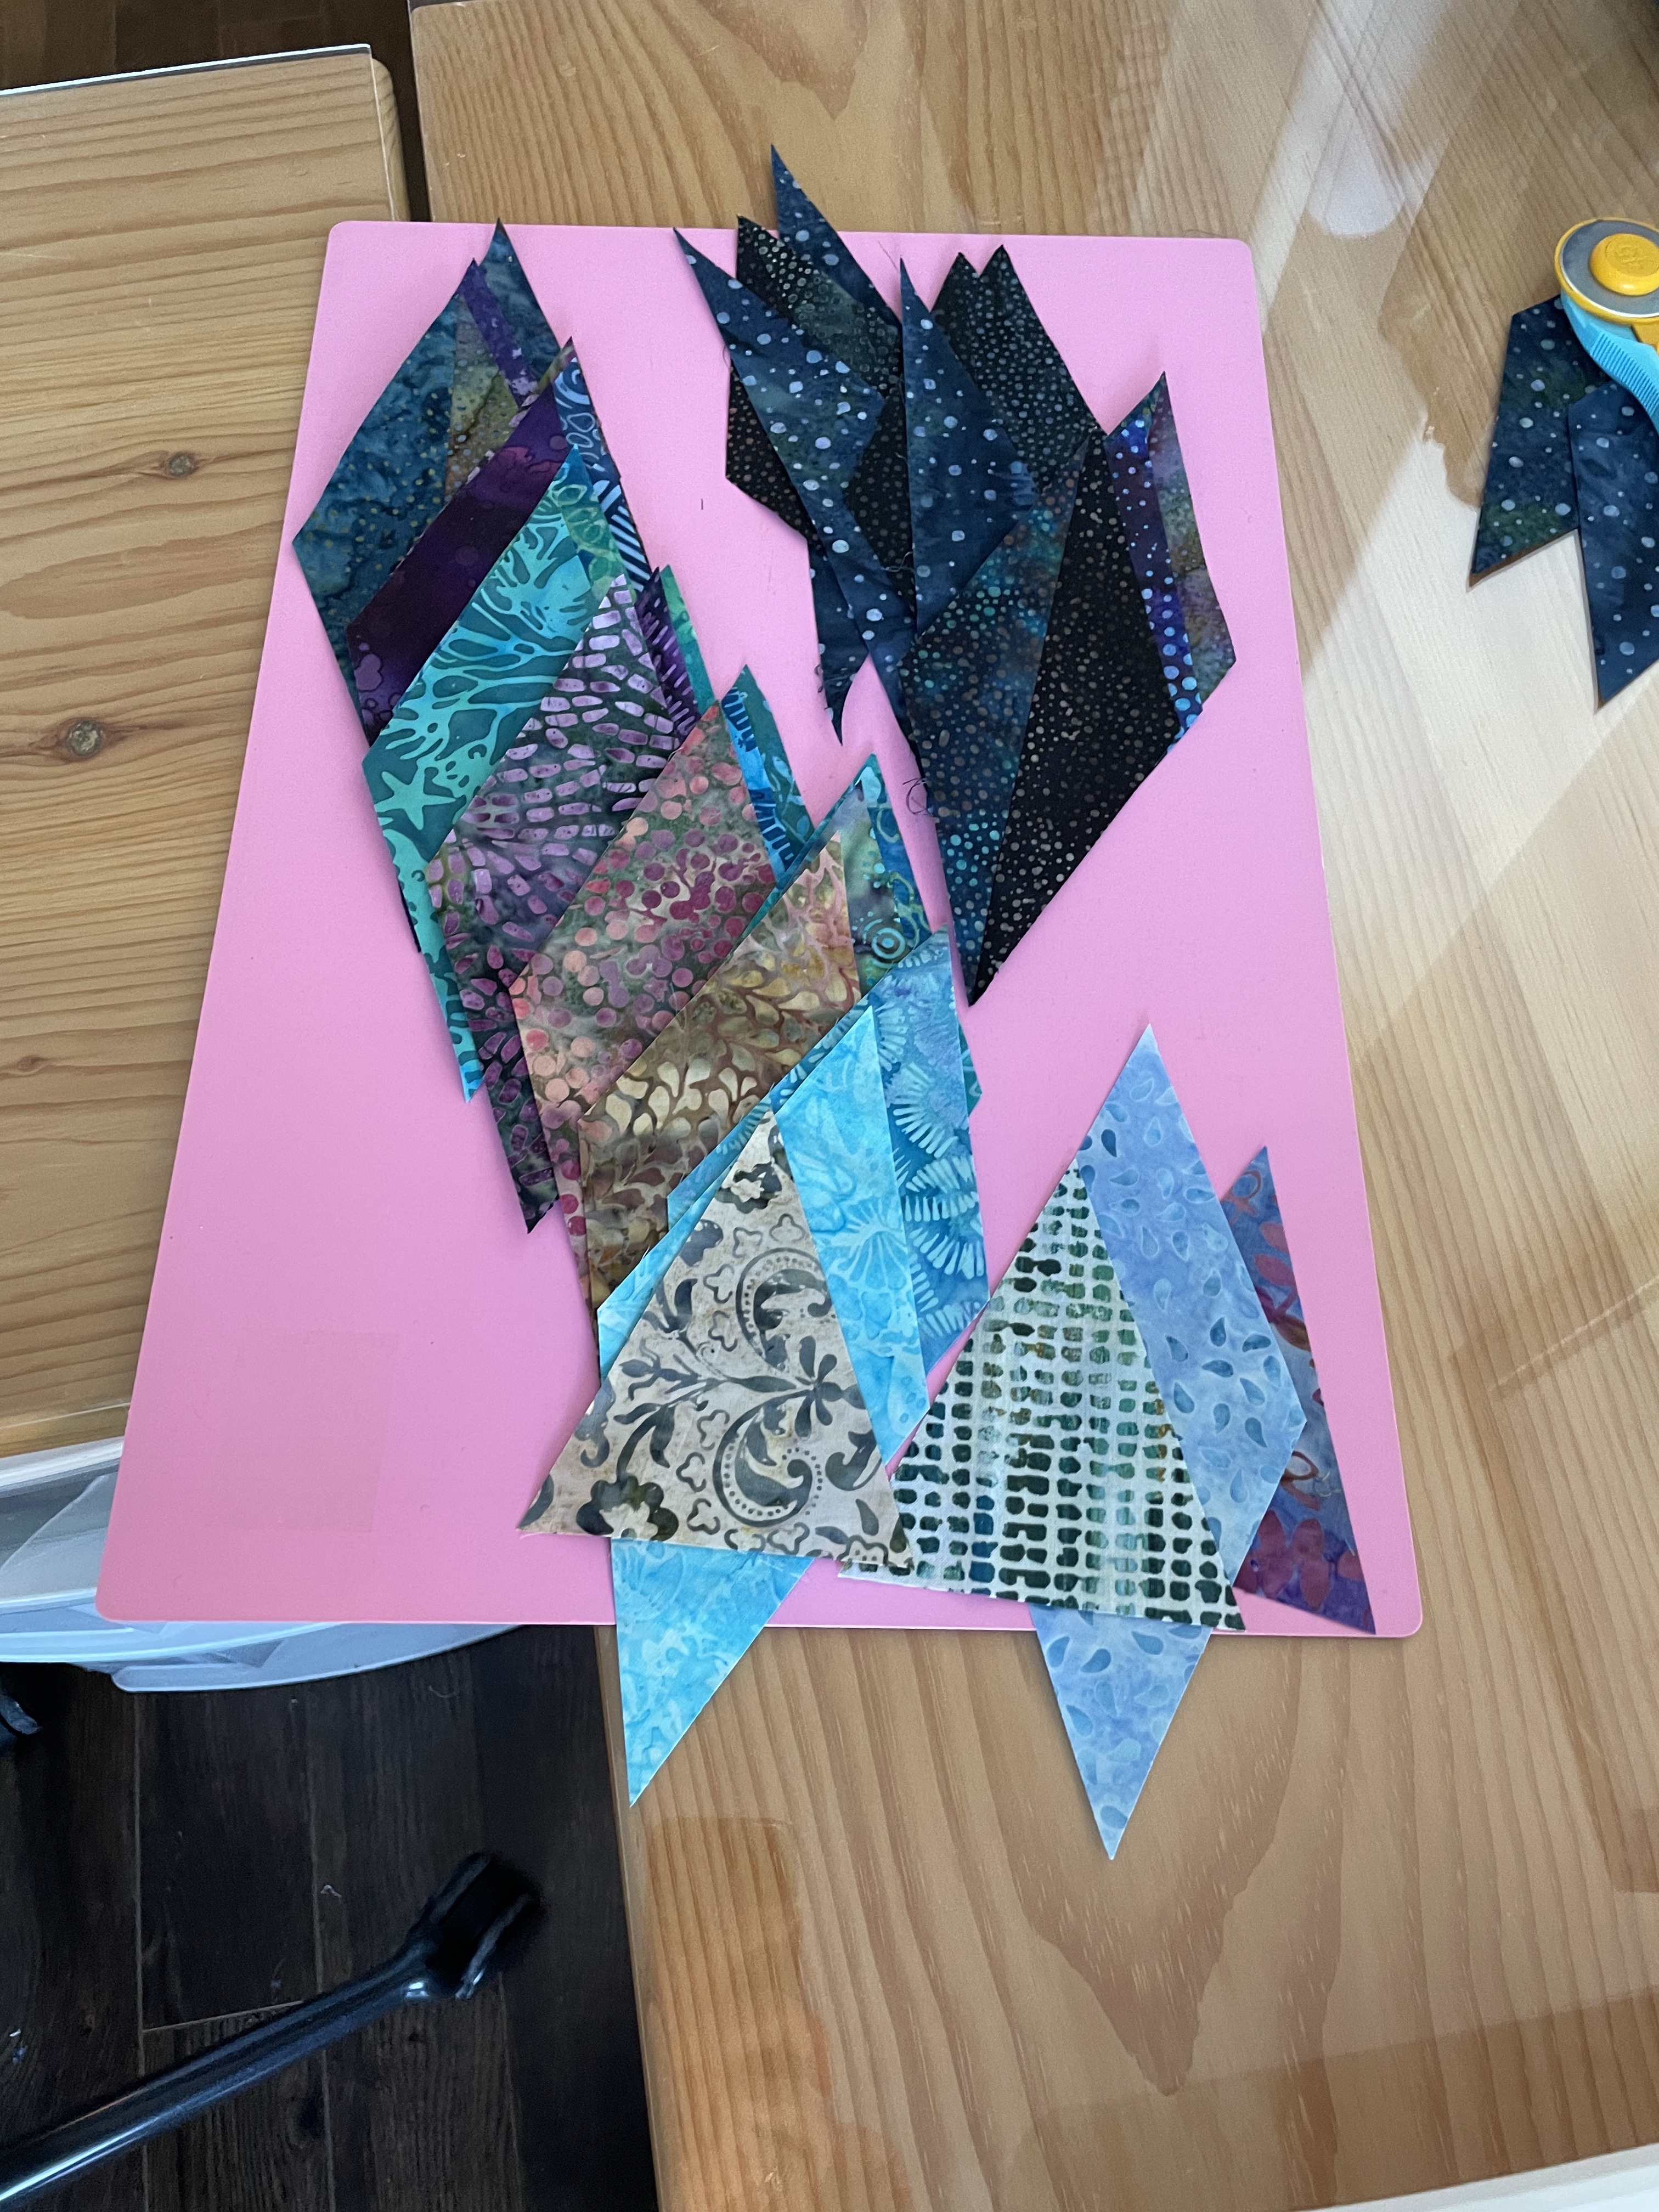
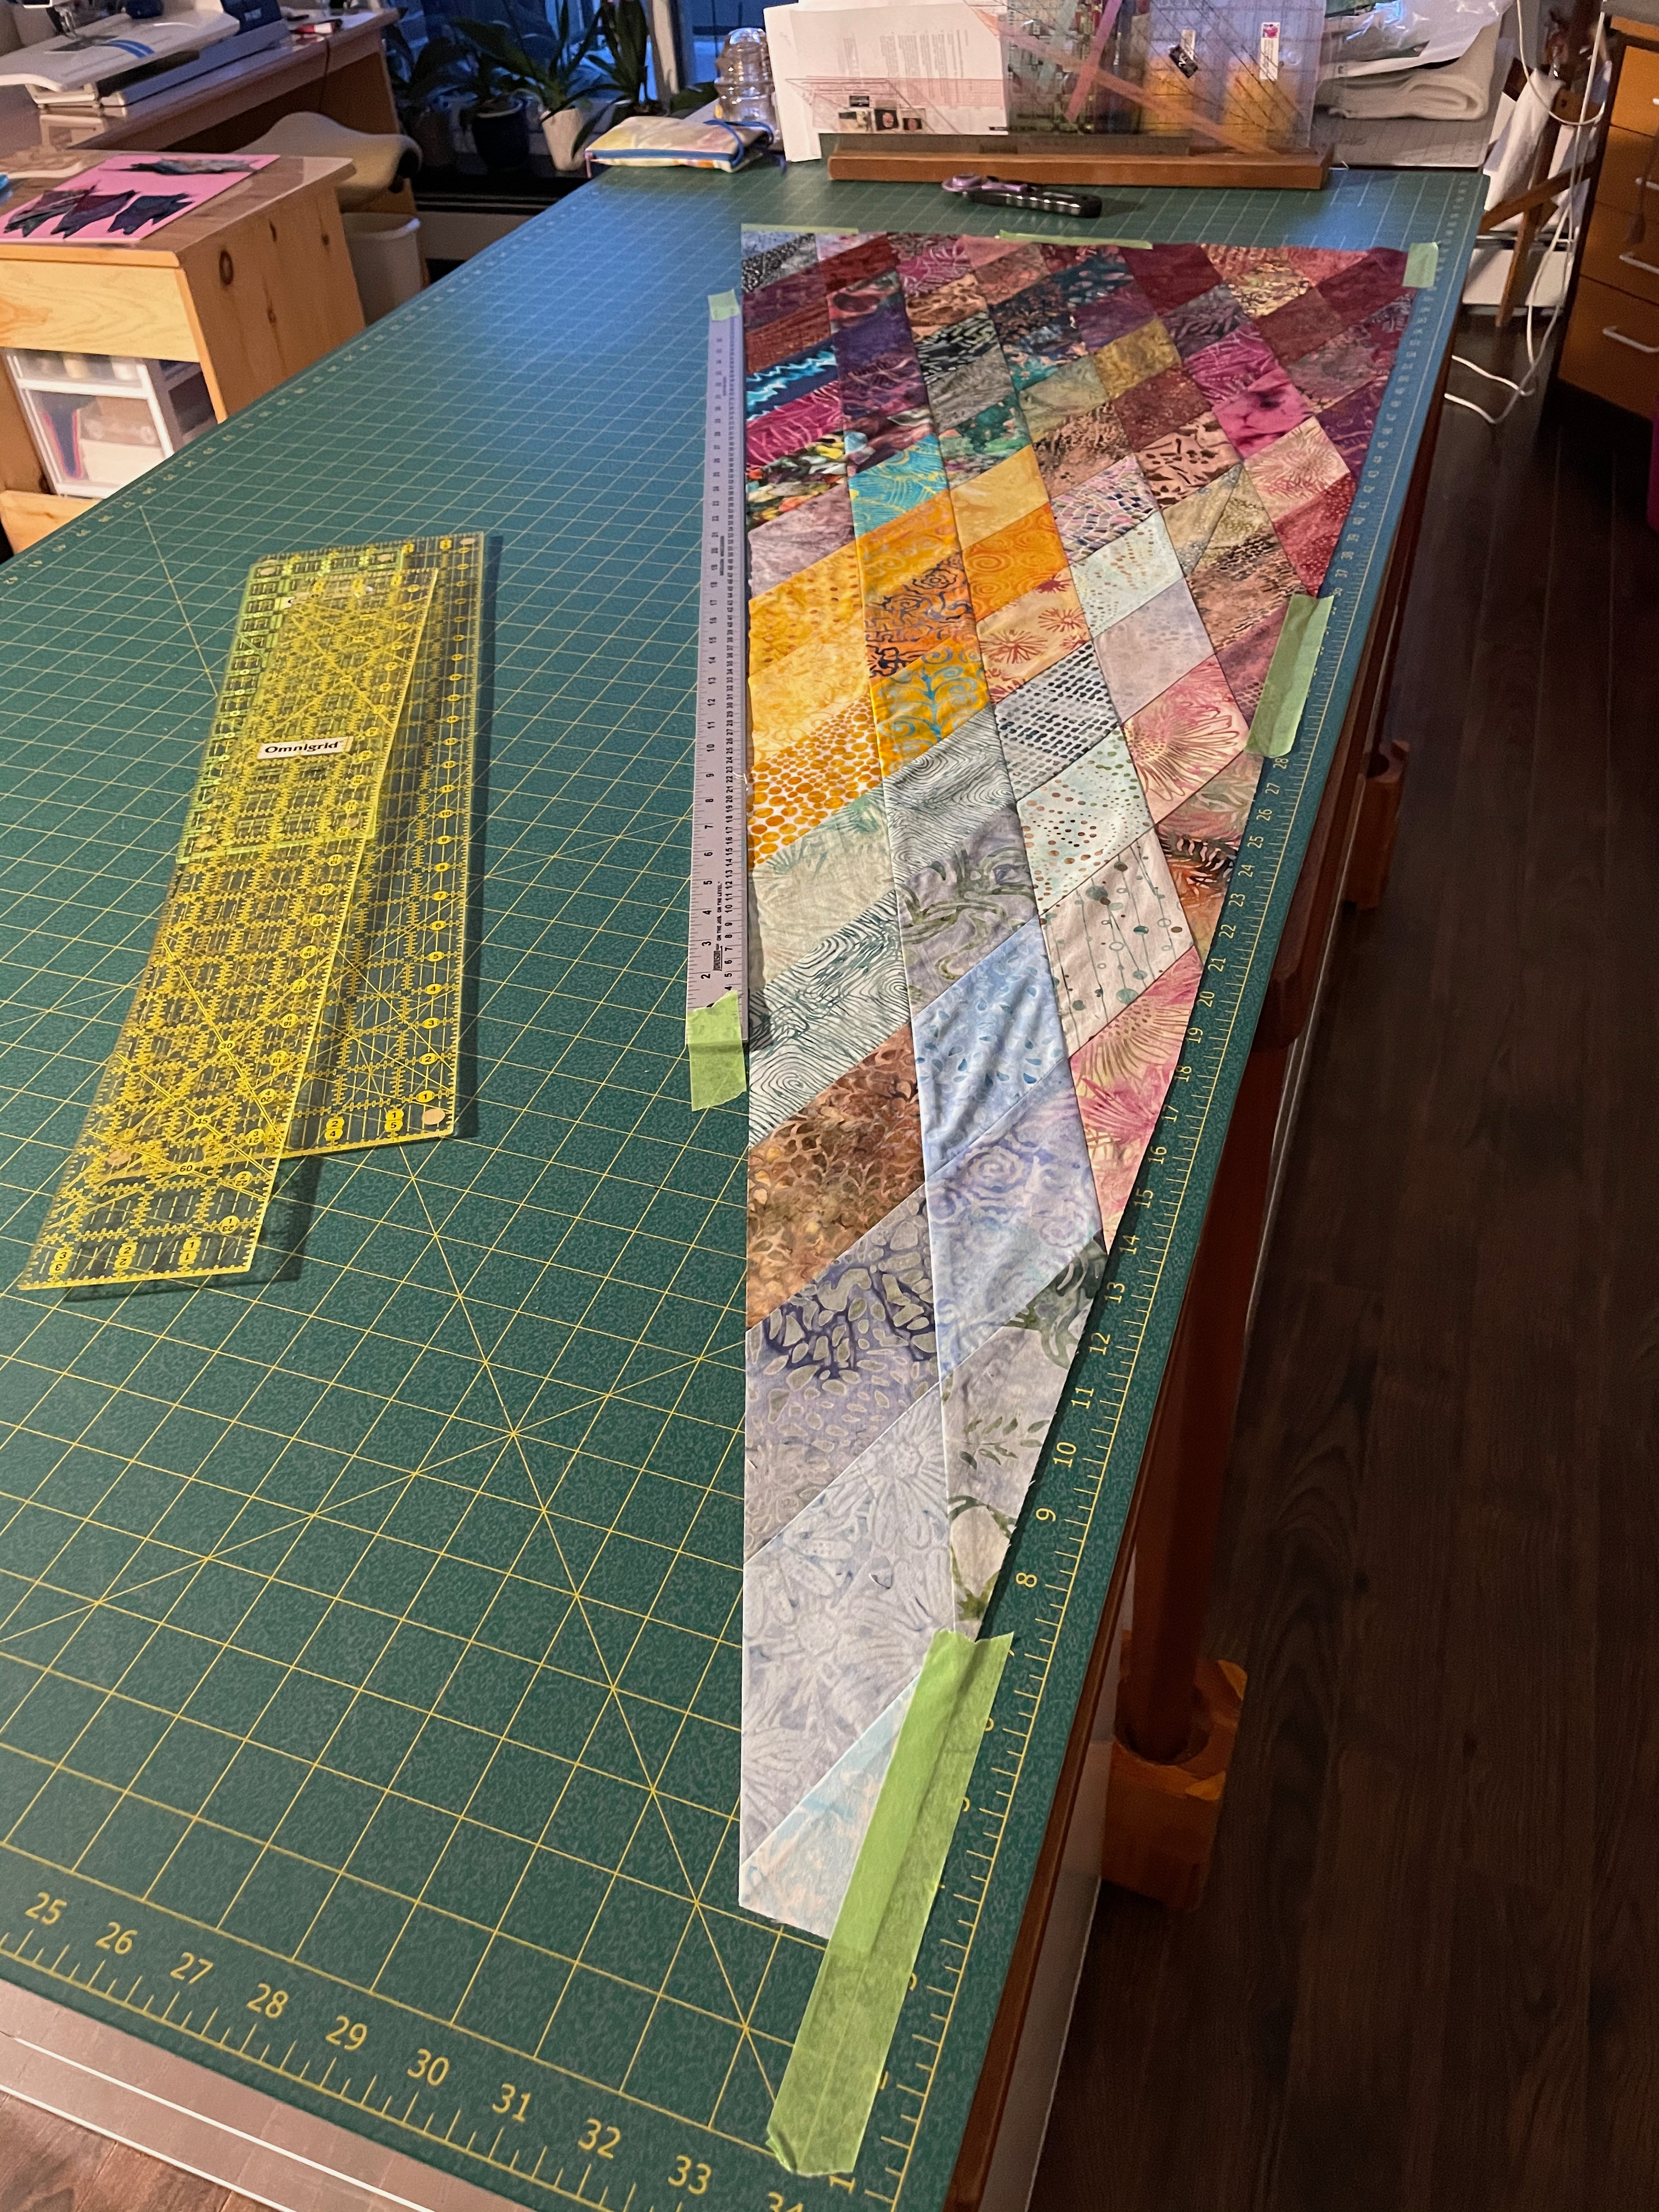
I’ve picked up all the remaining diamonds from the floor in order of stitching. I’ll sew them over the next day or two.

Diamonds Laid Out For Sewing

I’ve changed my construction method: instead of doing a single diagonal row at a time, I’m finding I get a more stable strip if I put together three diamonds at a time which is how I’ve laid them out, then stitch each short row and add it to the growing strip. This approach seems to keep the bias edges from losing shape better.

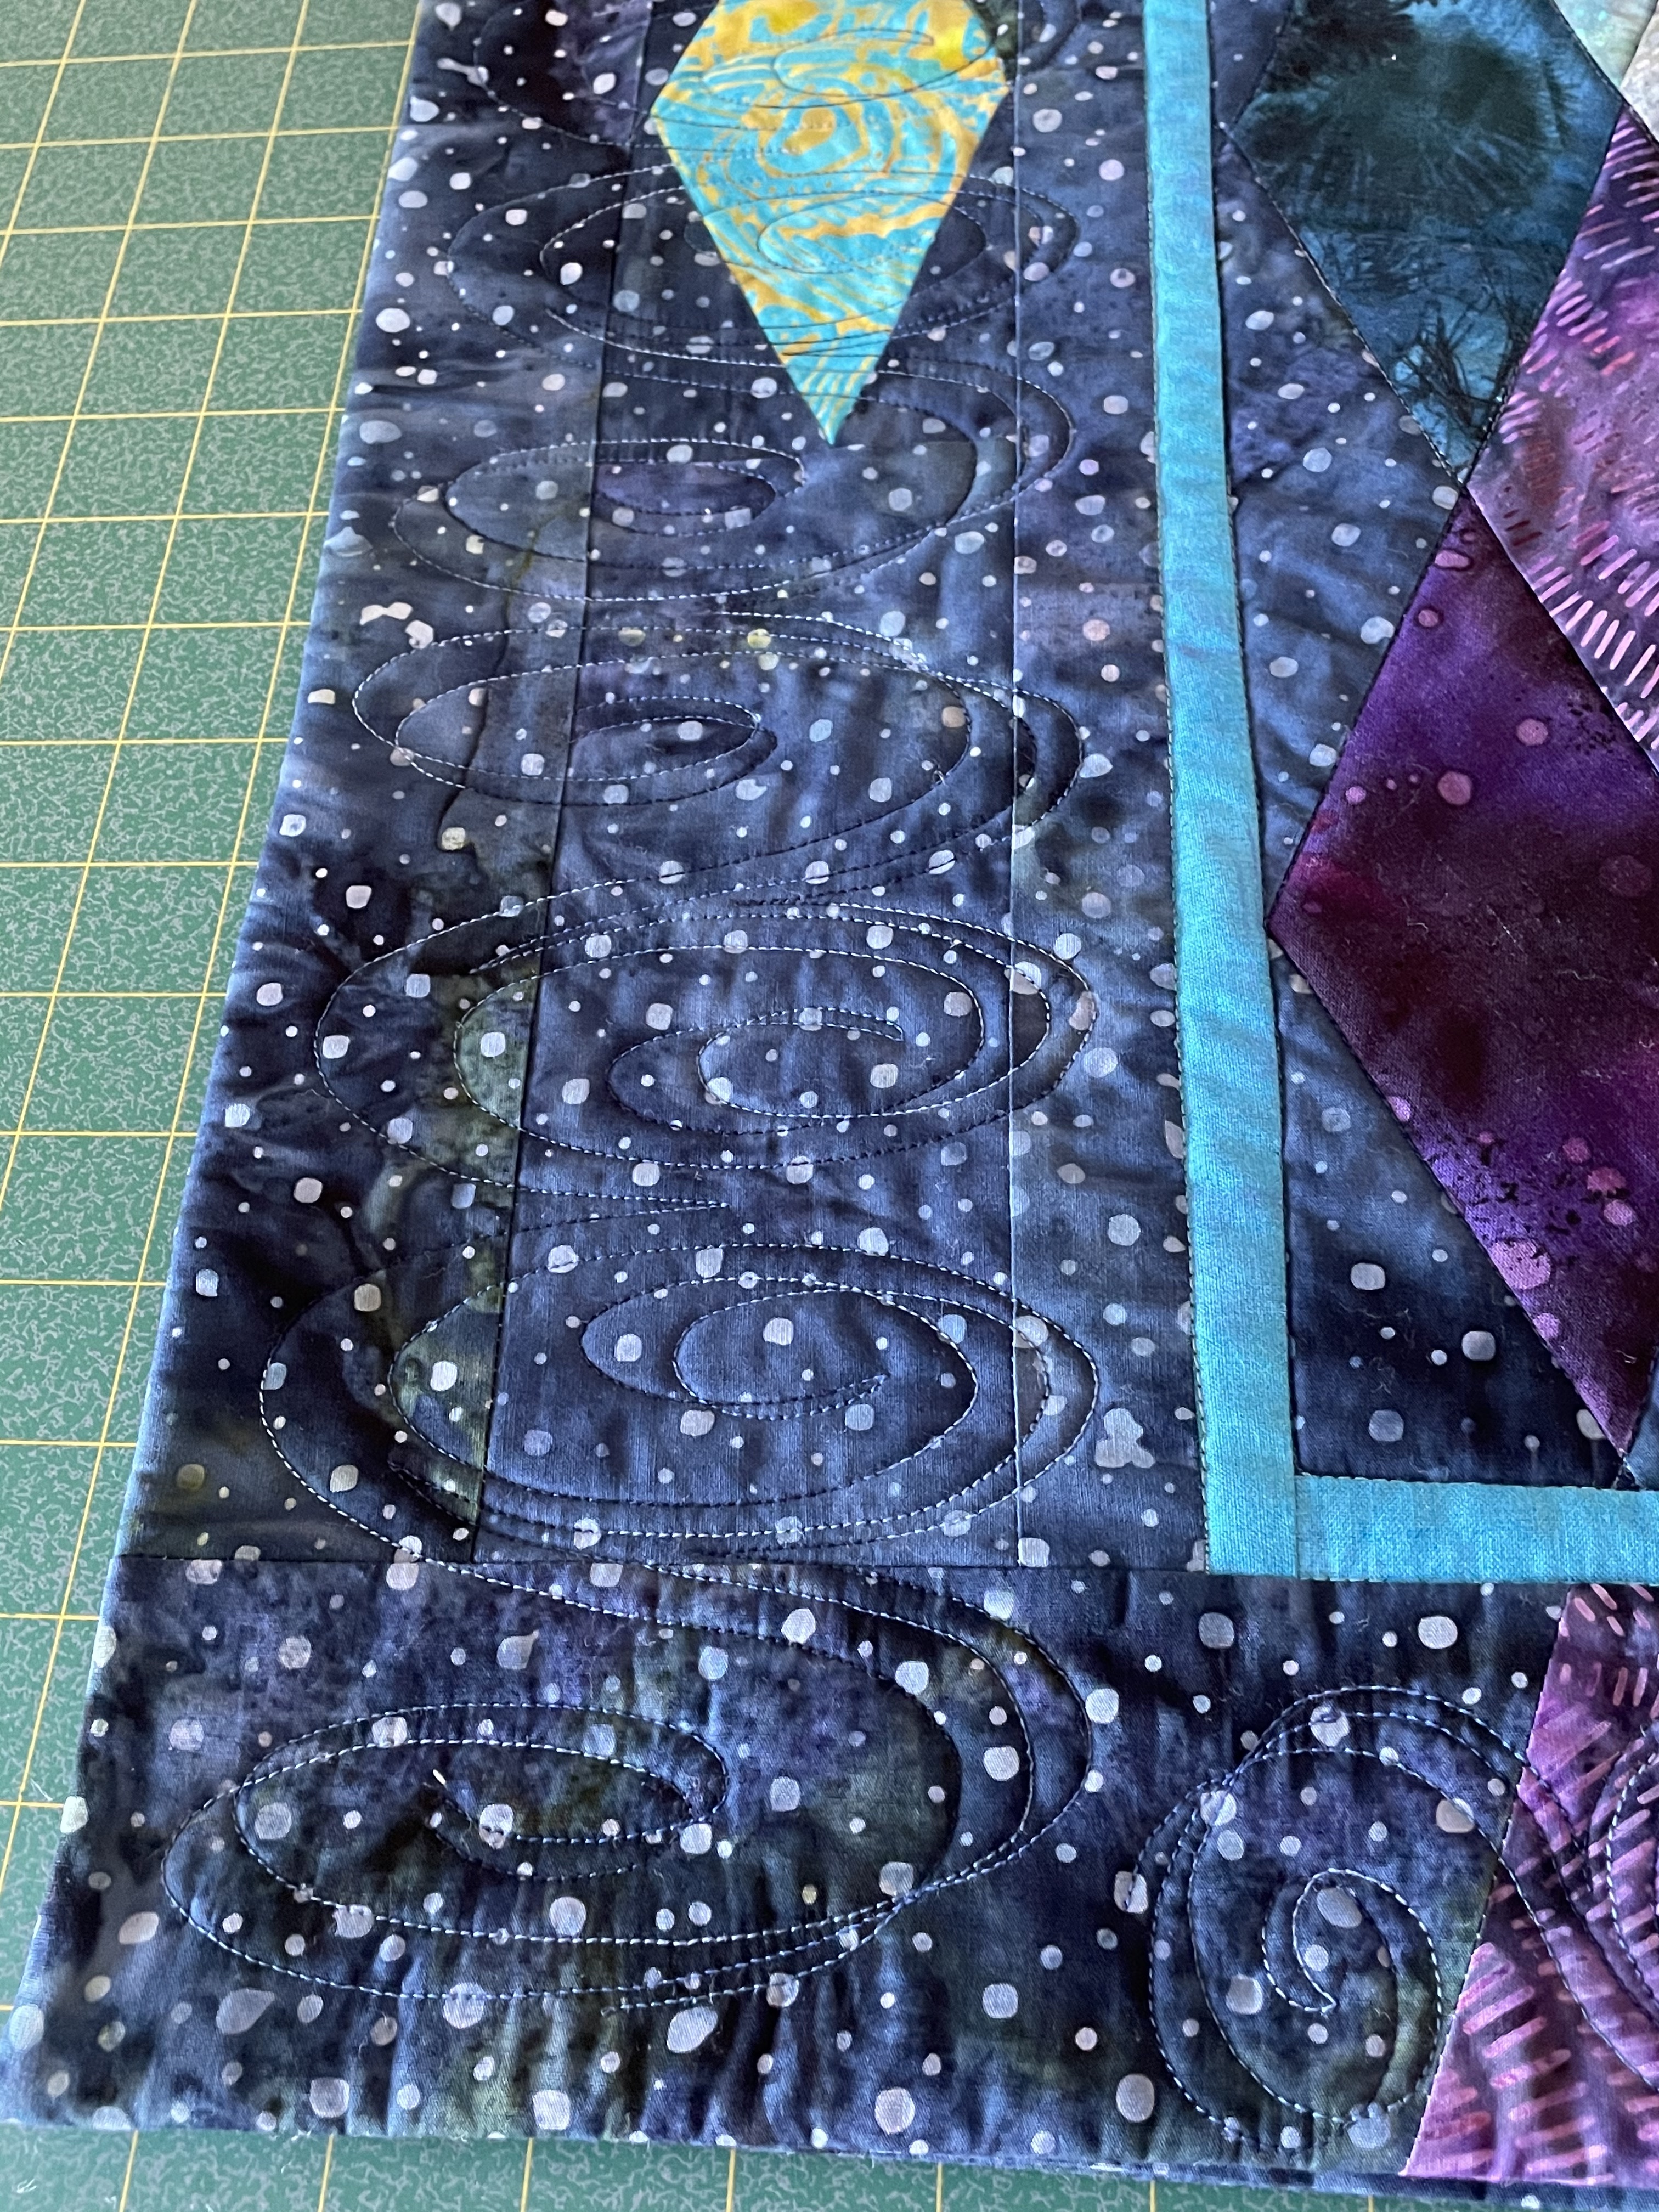
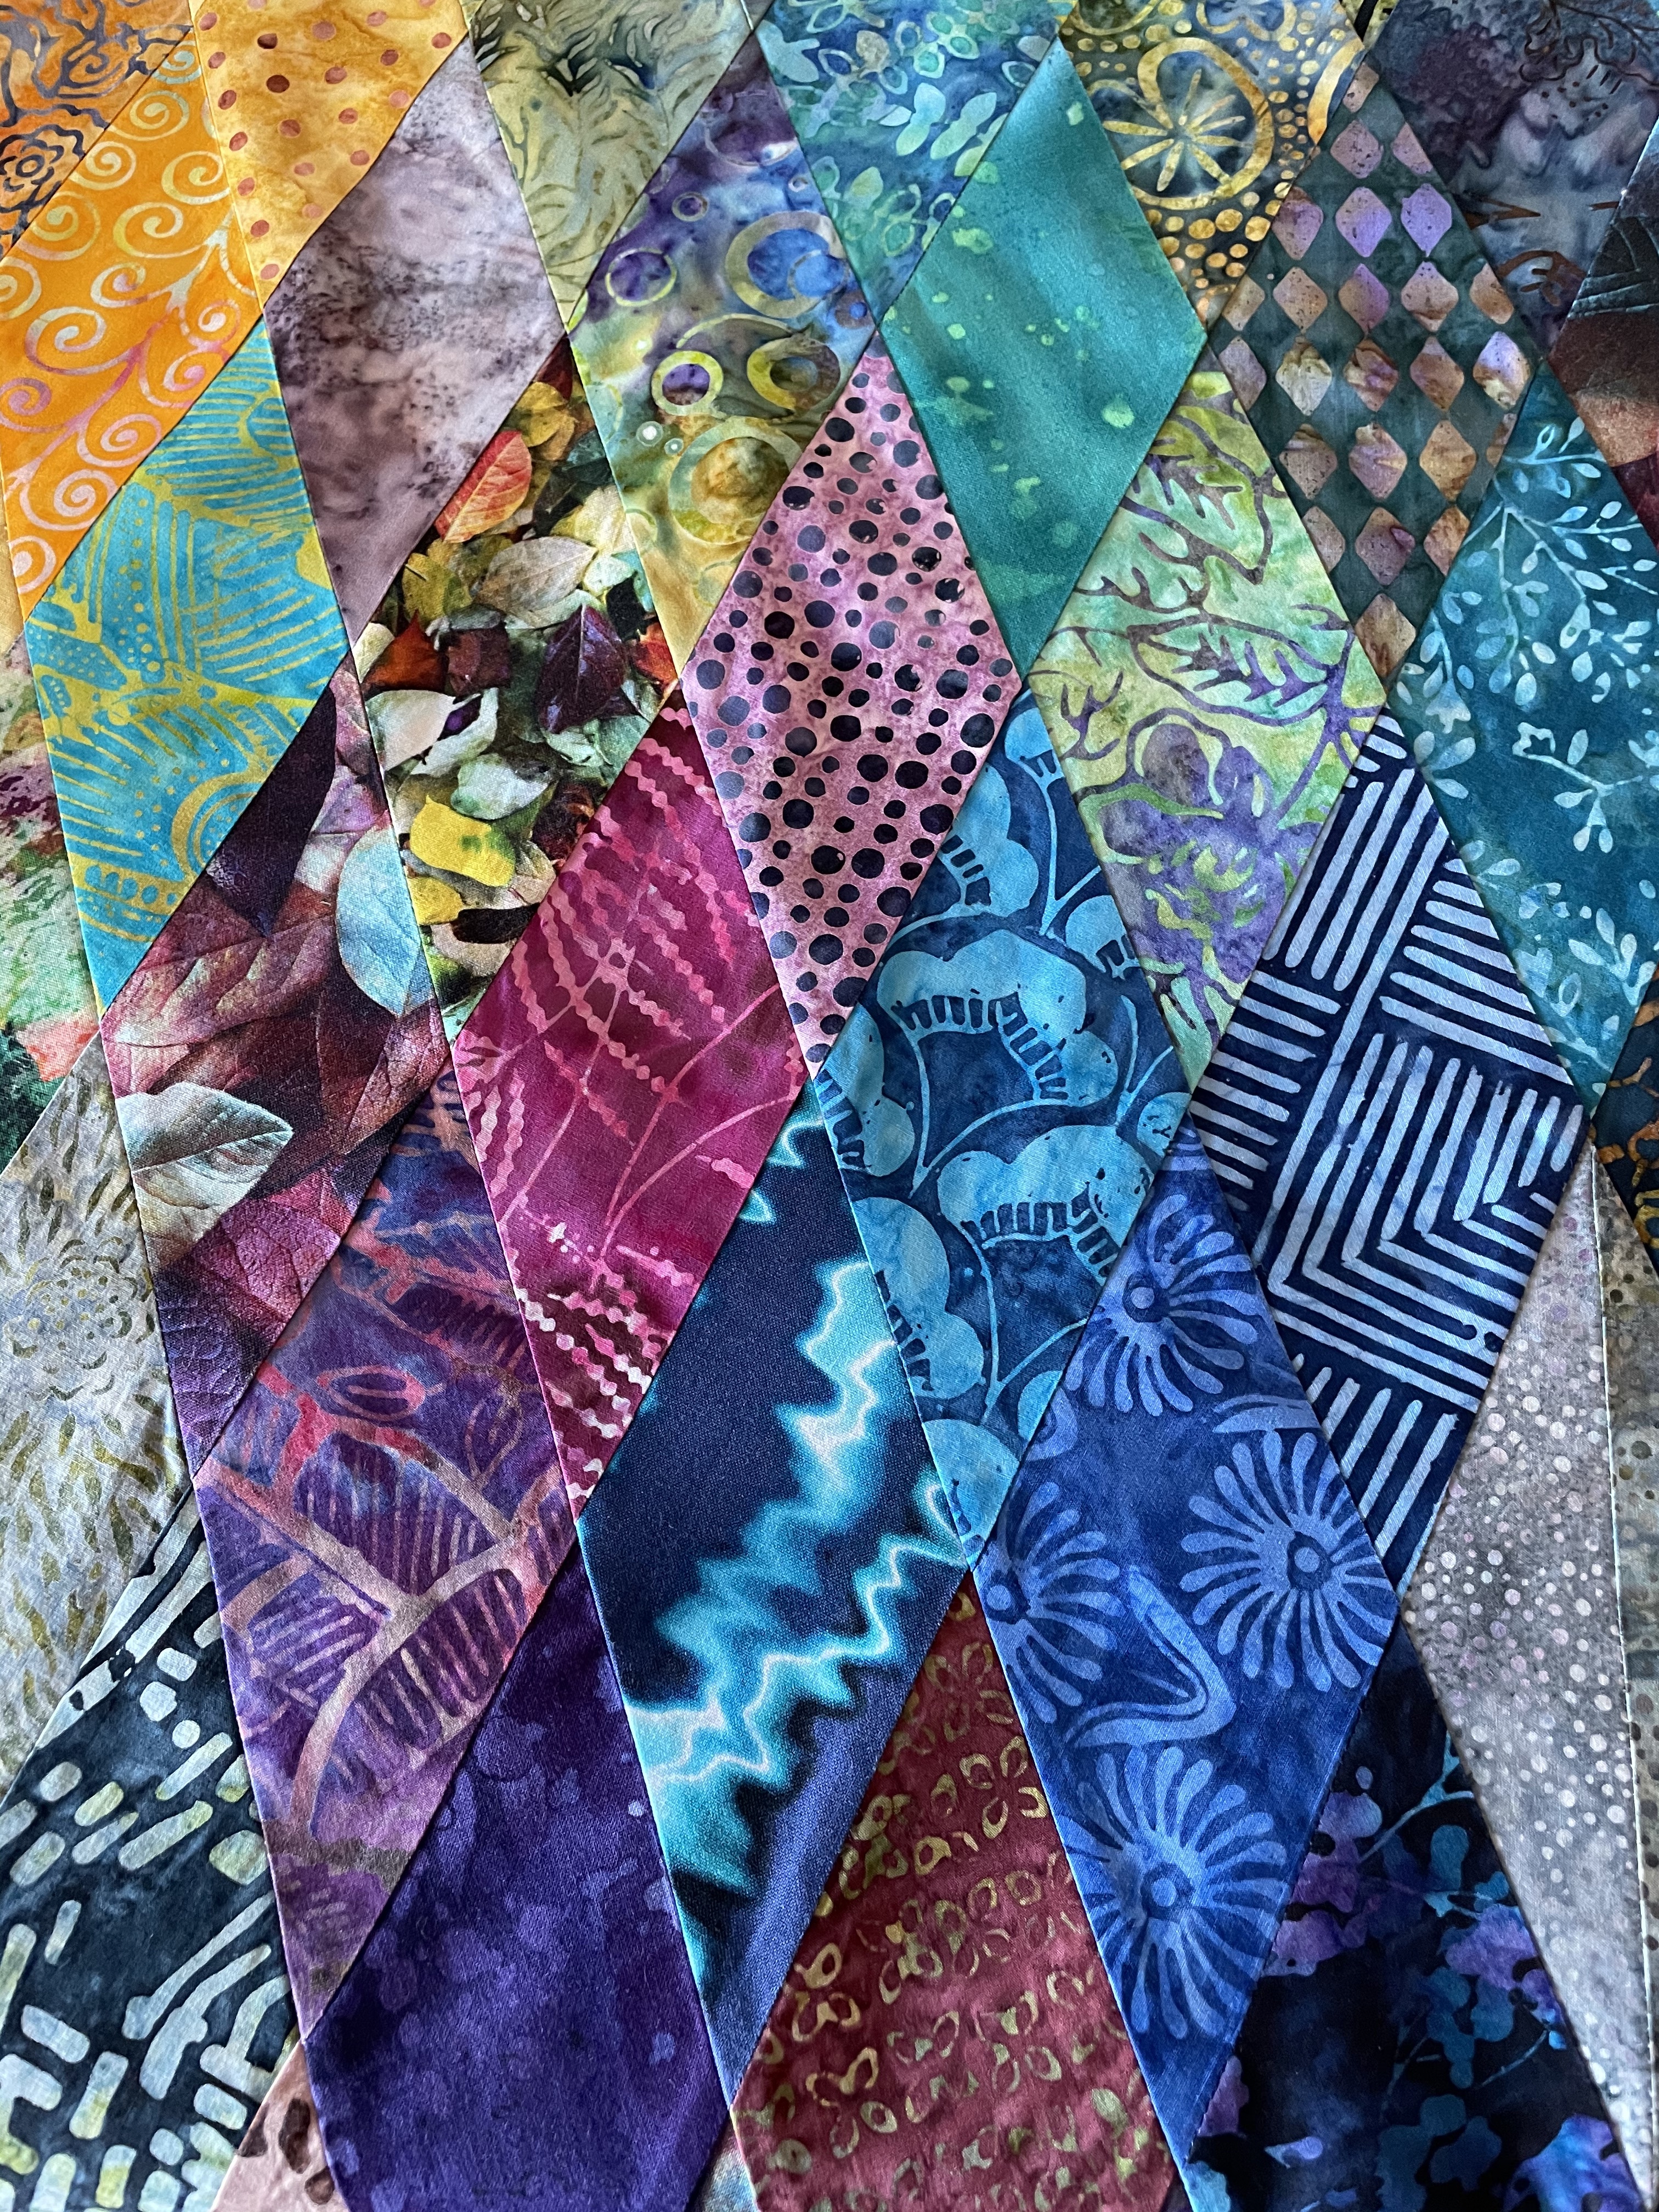
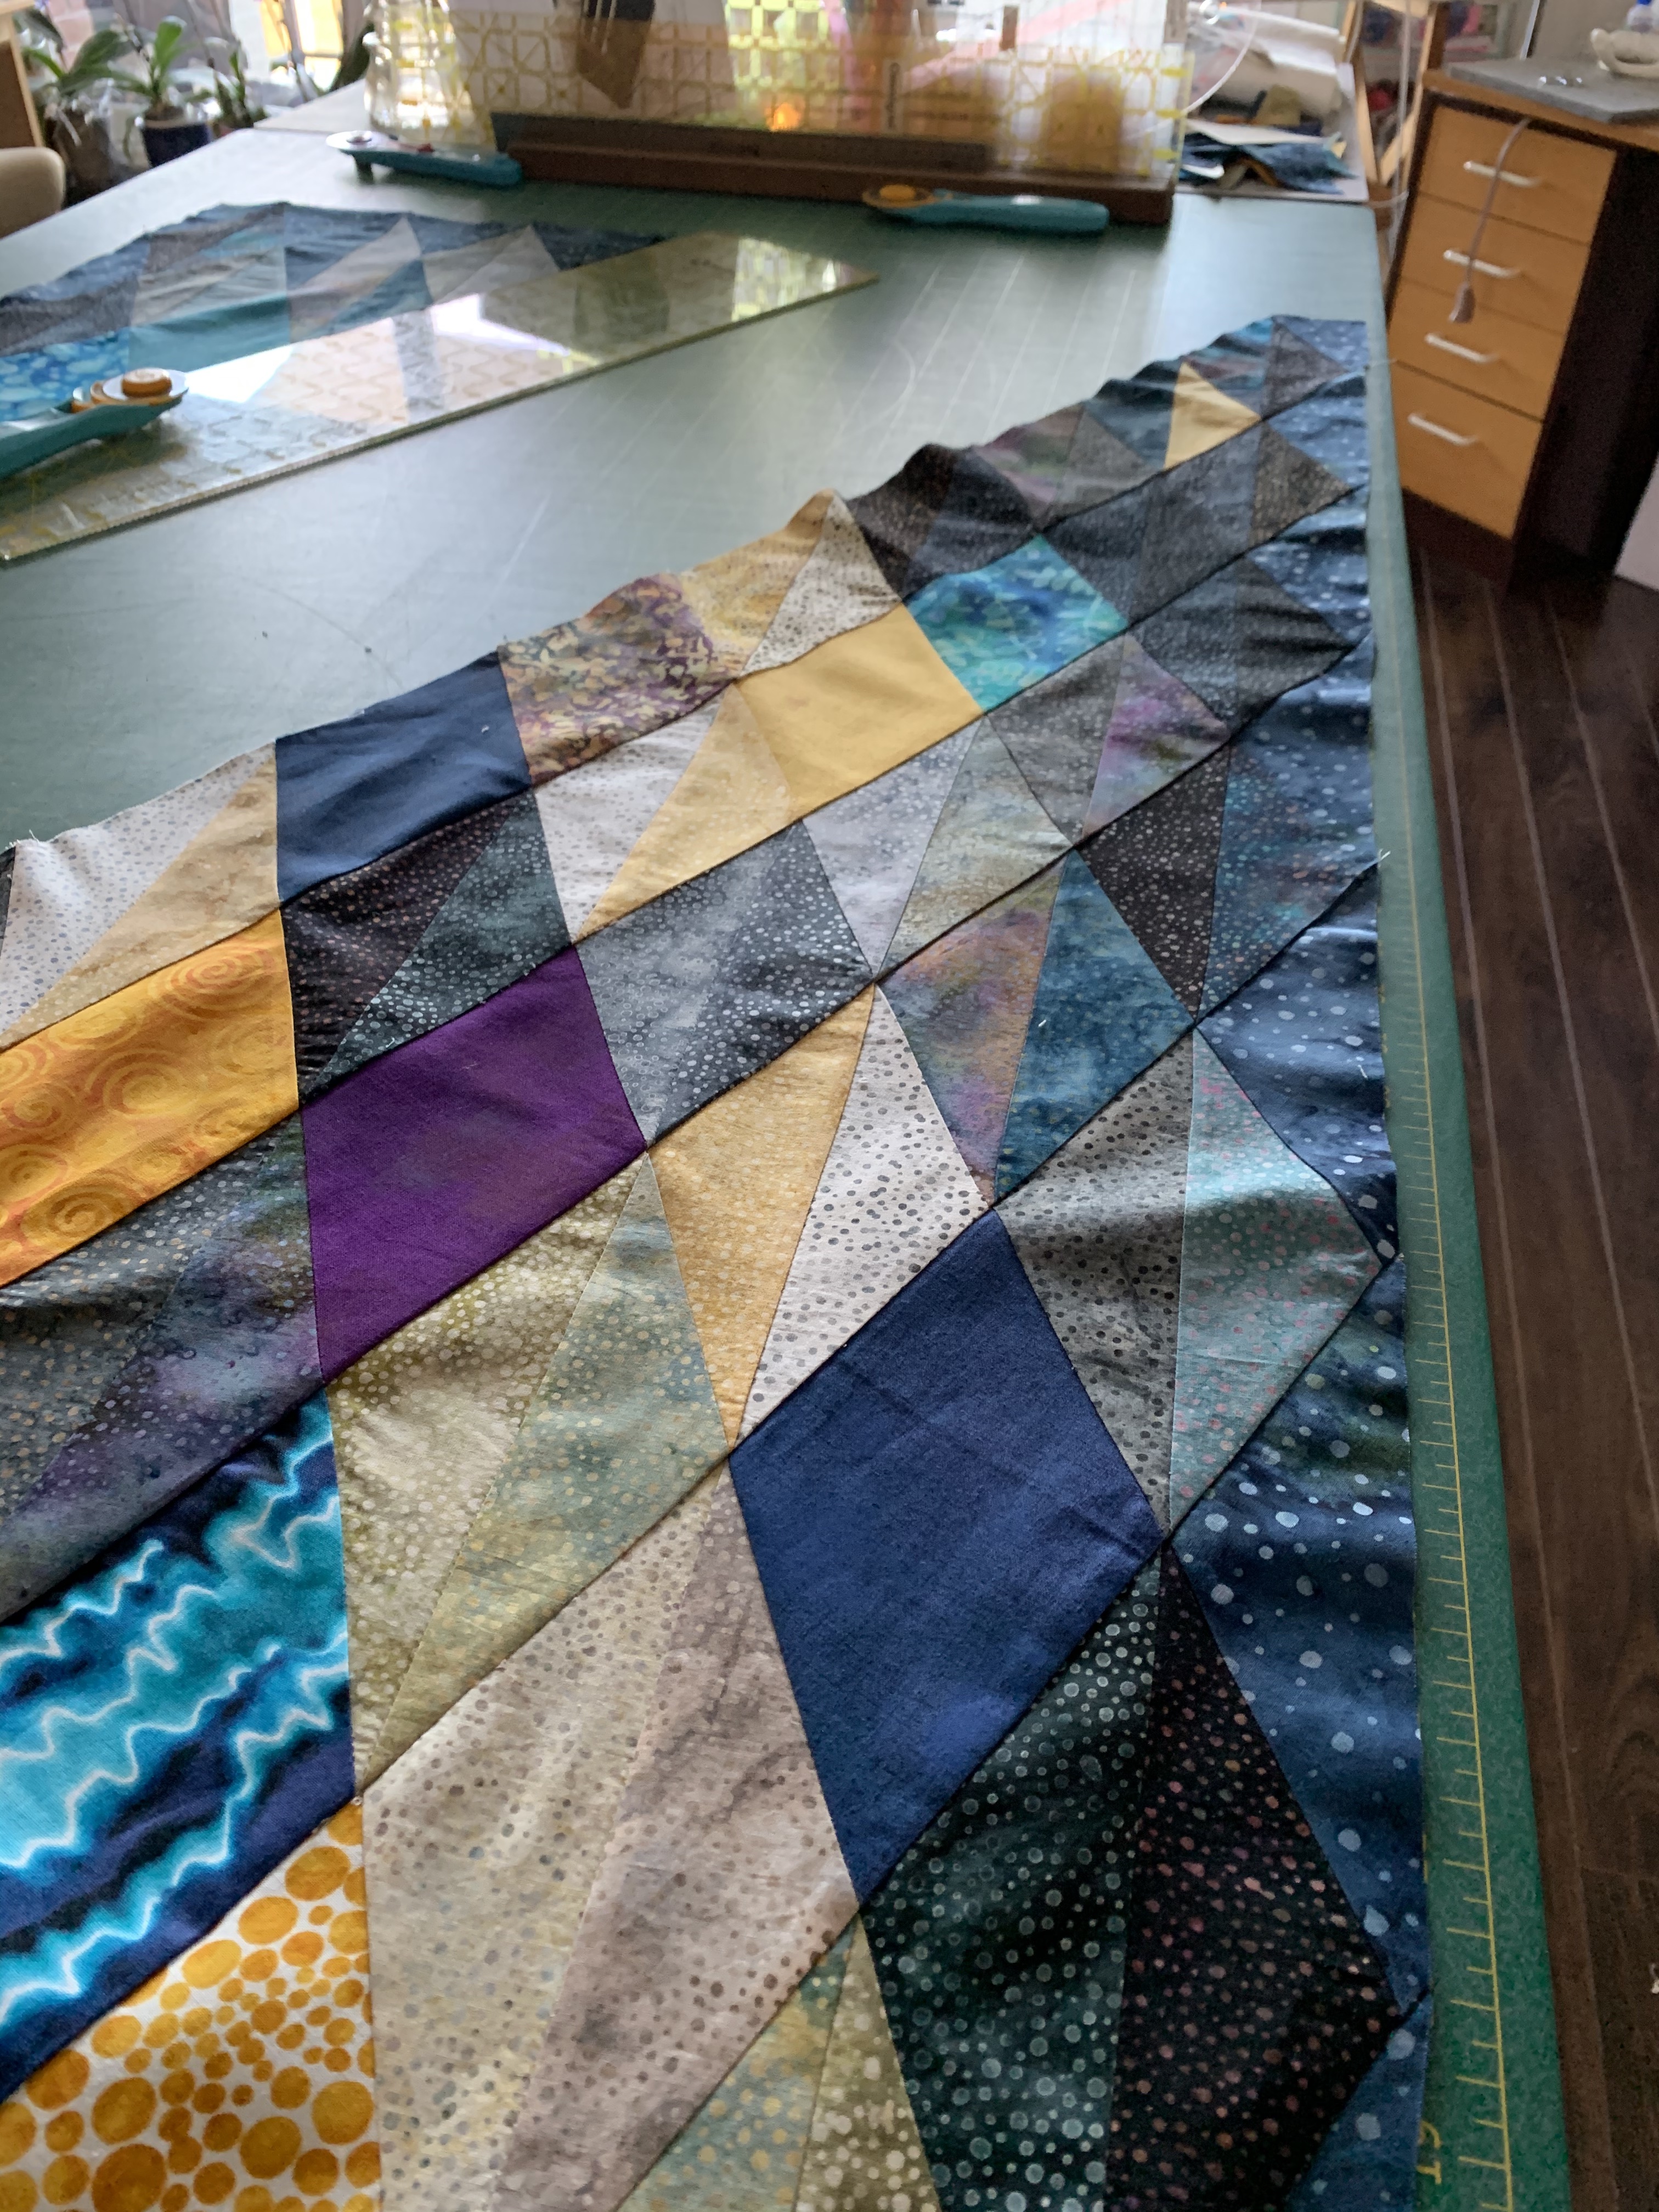
As the closeup below shows, I’m getting the points to align pretty closely and when I draped the panel across the cutting table the diamonds lay quite a bit flatter which means when I place the panel on batting and hoop each section the diamonds will be taut when I quilt them!

Detail Showing Alignment Of The Points

I’m feeling more confident about the outcome as the panel gets closer to being finished. There is no way the edges are going to be square – I am going to have to trim all four sides which means the diamonds at the edges are not going to be complete, but on the other hand the panel will be reasonably flat.

I am considering a narrow (3/8 – 1/2″) turquoise inner sashing/binding to mark the outer limit of the panel, then I’m not sure what will happen with the outer border. The top width at this point is ~39″ – about 3″ narrower than I was hoping for. I could piece a narrowish sashing for each side or I could offset the panel within a backing as I did on the Charm Quilt I made a year ago February – now there’s a thought….

I bought backing fabric the other day, now I have to round up all my scraps to see what I can make from them to extend the width of the backing.

The Fight Is On…

Now I’m fighting the panel. I was so careful when I cut the diamonds – they really are all the same size with 45° and 135° angles at the corners. I’ve been so careful about sewing 1/4″ seams and getting the points to align – and I’m close, but the panel isn’t quite cooperating!

Shaping The Evolving Panel

I’ve taped the side and top edges to my cutting board so those two sides are square. I’ve set up the diagonal straight. However there’s now a slight buckle along the diagonal edge which gets worse with each additional row. So I’ve sprayed the hell out of the diagonal edge, laid rulers on top of the fabric, and now I will let it dry thoroughly. Tomorrow I’ll steam that edge before adding more rows.

I’ve reached the bottom right corner – that’s the length of the panel (at the top left of the photo); there are another five rows to reach the second top corner which will be on the right (that’s the width of the piece). I’m ending up with a length of 58″; I expect the finished width will be close to 42″. the proportions of the panel are not too bad – close to  6 x 9. That means a 3″ border around the panel will give me a final size of approximately 48″ x 64″.

In the meantime, I’m struggling to maintain a square piece that lays flat! It’s probably time to start at the opposite corner and begin building toward this diagonal. That will leave four diagonal rows between the two corners to be fit between. That’s probably a better plan than trying to continue building out from the section I have completed.

This afternoon I was able to keep the two diagonal rows I worked on straight. The problem I ran into was with the slight diagonal fullness in the corner segment I joined them to – adding two more rows just increased the misalignment, which is why I’m trying to “flatten” the diagonal. I know I can incorporate a bit of play when I lay the panel on batting – I can pin out some of the fullness to make it less obvious. Nevertheless, I do want my corners to be square. That’s what I’m fighting to achieve right now.

——–

It’s evening and the panel has dried – the top right corner is square; the diagonal is straight (the whole panel needs a good steam pressing)

From The Bottom Right Corner

Doin’ OK!

So far, I’m doing fine! You can see I’m managing to retain the corner right angle – the diagonal is remaining flat and the points are aligning as they should!

Five Rows…

I’ve had to redo a couple of the rows because the points were slightly out of alignment but the last row worked out correctly on the first go! Maybe I’ve begun to get the hang of how to position and pin the diamond joins so the points position precisely. Unlike the previous attempt when I ended up with a mess.

Wobbly Diagonal

Diamonds Quilt – Further Along

Just about there. I’ve spent the past day and a half moving diamonds around, then moving them some more. When I was more or less happy with the layout, I had to make a decision about how to border the piece.

My original thought was to make a uniform half-diamonds border with the dotted dark teal fabric I had planned on using with the original layout,

Border-1

but I wasn’t happy with how the dark edge cut off the colour flow. I positioned the half-diamonds on the darker side:

Border-2

The dotted dark teal blended much better both along that side and the top. I thought about trying to find a single fabric to border the rest but the colour variation is too great (from darker magenta pale blue/turquoise) – I decided to create border elements to extend the colour flow to the edge:

Just About There!

I am much happier with how this feels. I might be just about ready to start sewing the diagonal rows.

There are 215 pieces in this quilt top; I didn’t count as I was cutting – I must have used 90+ different fabrics, two diamonds for most of them, but I used a few fabrics three times and a few other just once. There’s huge colour variation in each diamond – I’ve positioned those with the highest contrast in strategic positions as I try to move the eye around. The photos don’t do justice to the vibrant colour I now have.

This is a very different piece from the original concept:

Layout With Borders

The challenge still remains: will I be able to sew these diamonds together and still have the panel stay flat!

I’m ready to start sewing….