Watercolour Quilt Workshop

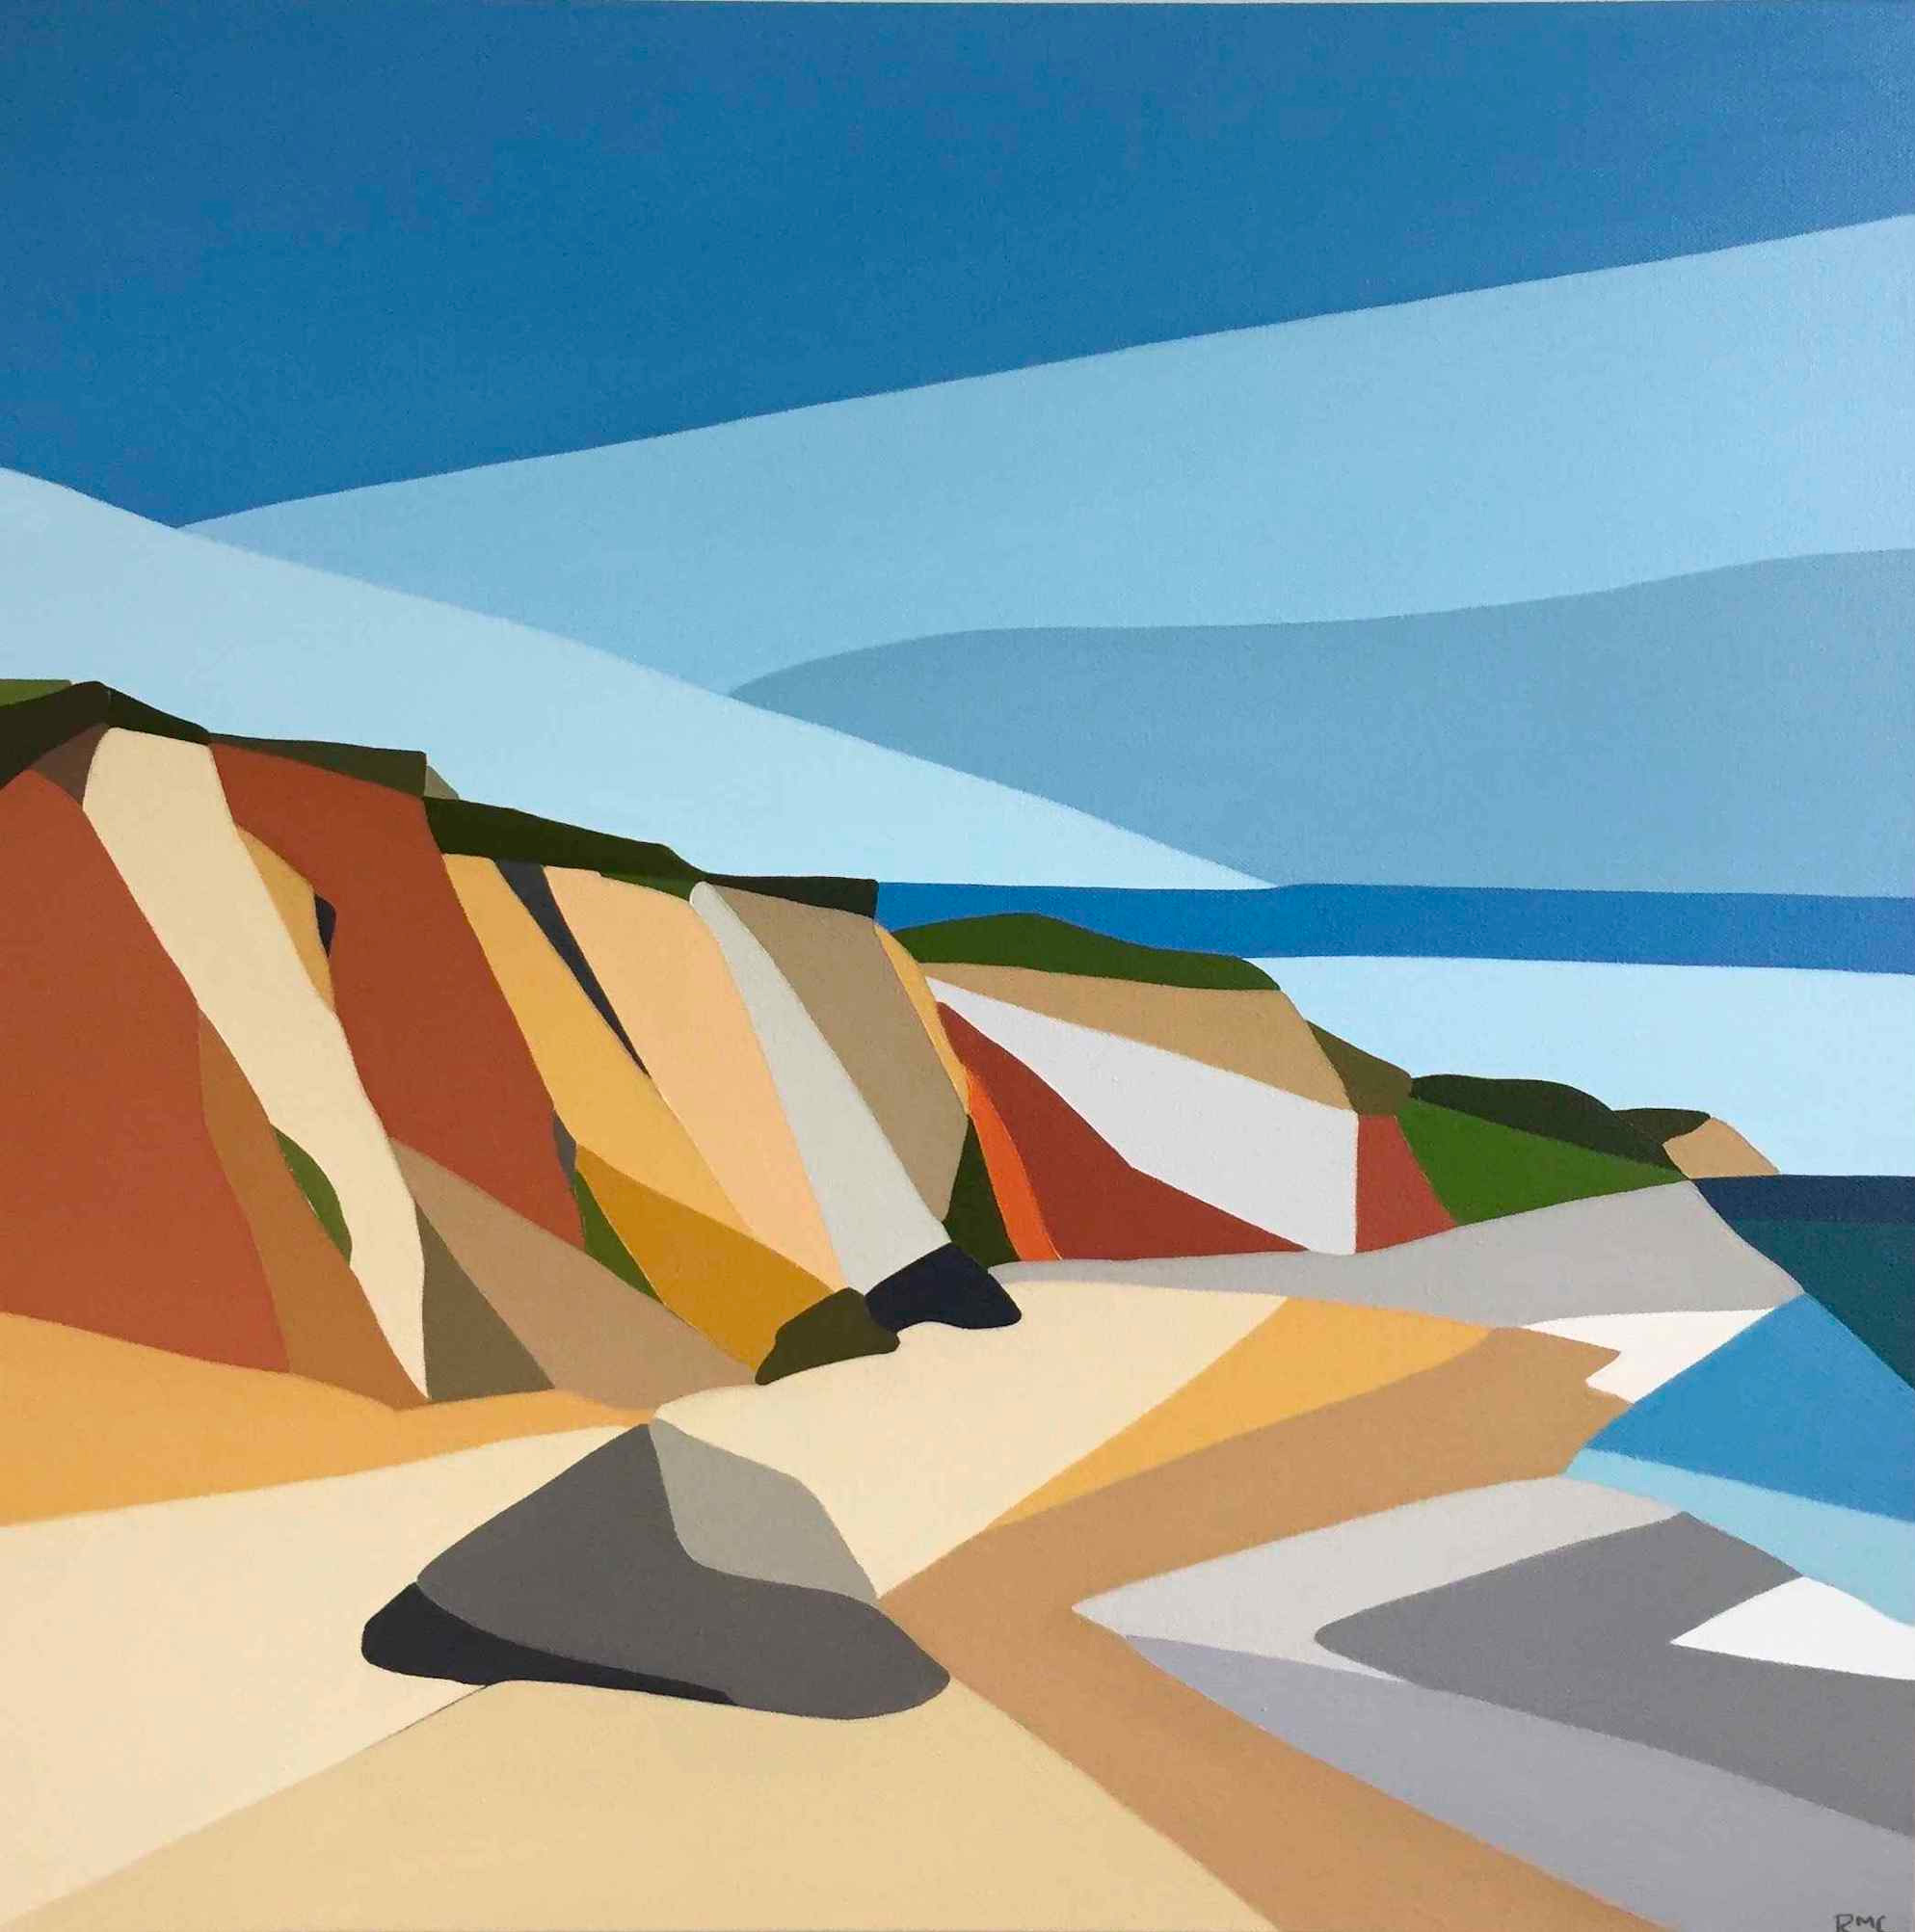
I arrived at the class on Wednesday with my latest watercolour panel completed. I also took along the others I’d done as well as a folder of images I’d compiled from Pinterest to discuss with the gals – pointing out technical decisions evident in each photo.
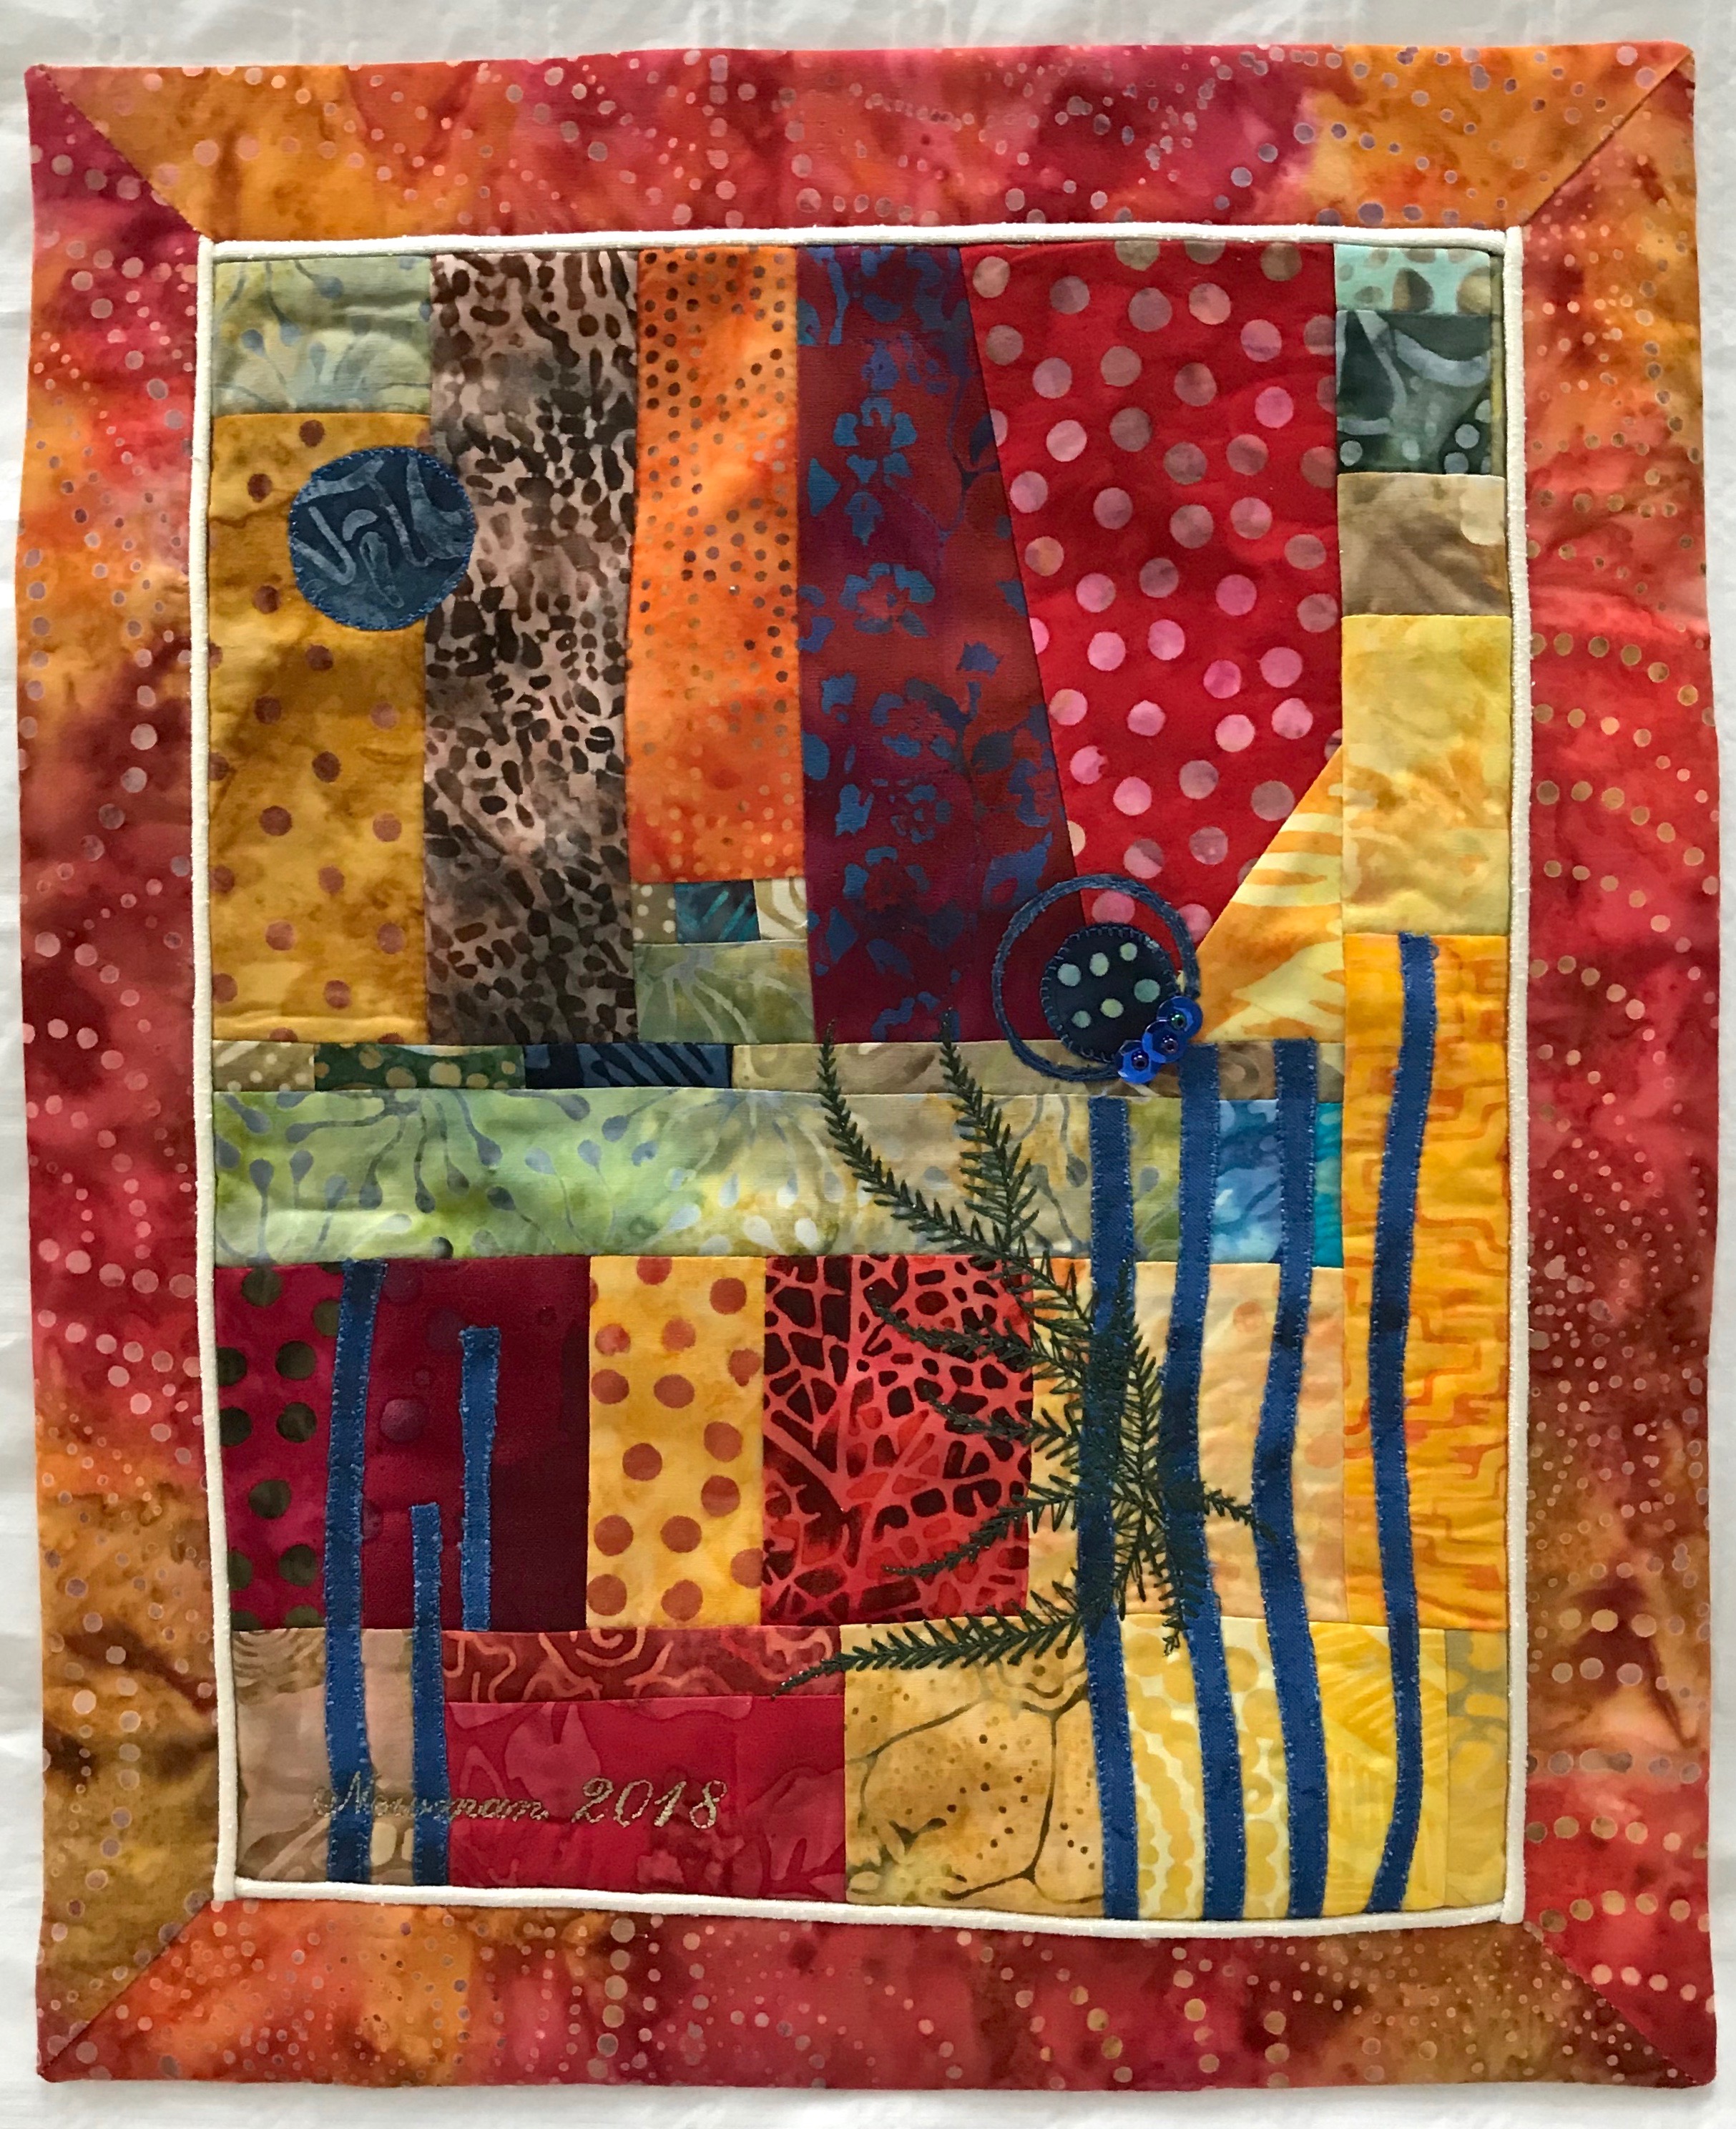
Garden In Pink

We started by preparing the gridded fusible interfacing – cutting it into working size rectangles, then into 8″ rows – to be able to carry them to and fit them on an ironing board.

I’d come to class with over 2000 precut 2″ squares in a wide range of colours (all sorted into small zippered sandwich bags so the gals would have something to use – I was anticipating they might not have a broad colour selection and I wanted to be sure we had enough precut fabric to work with).

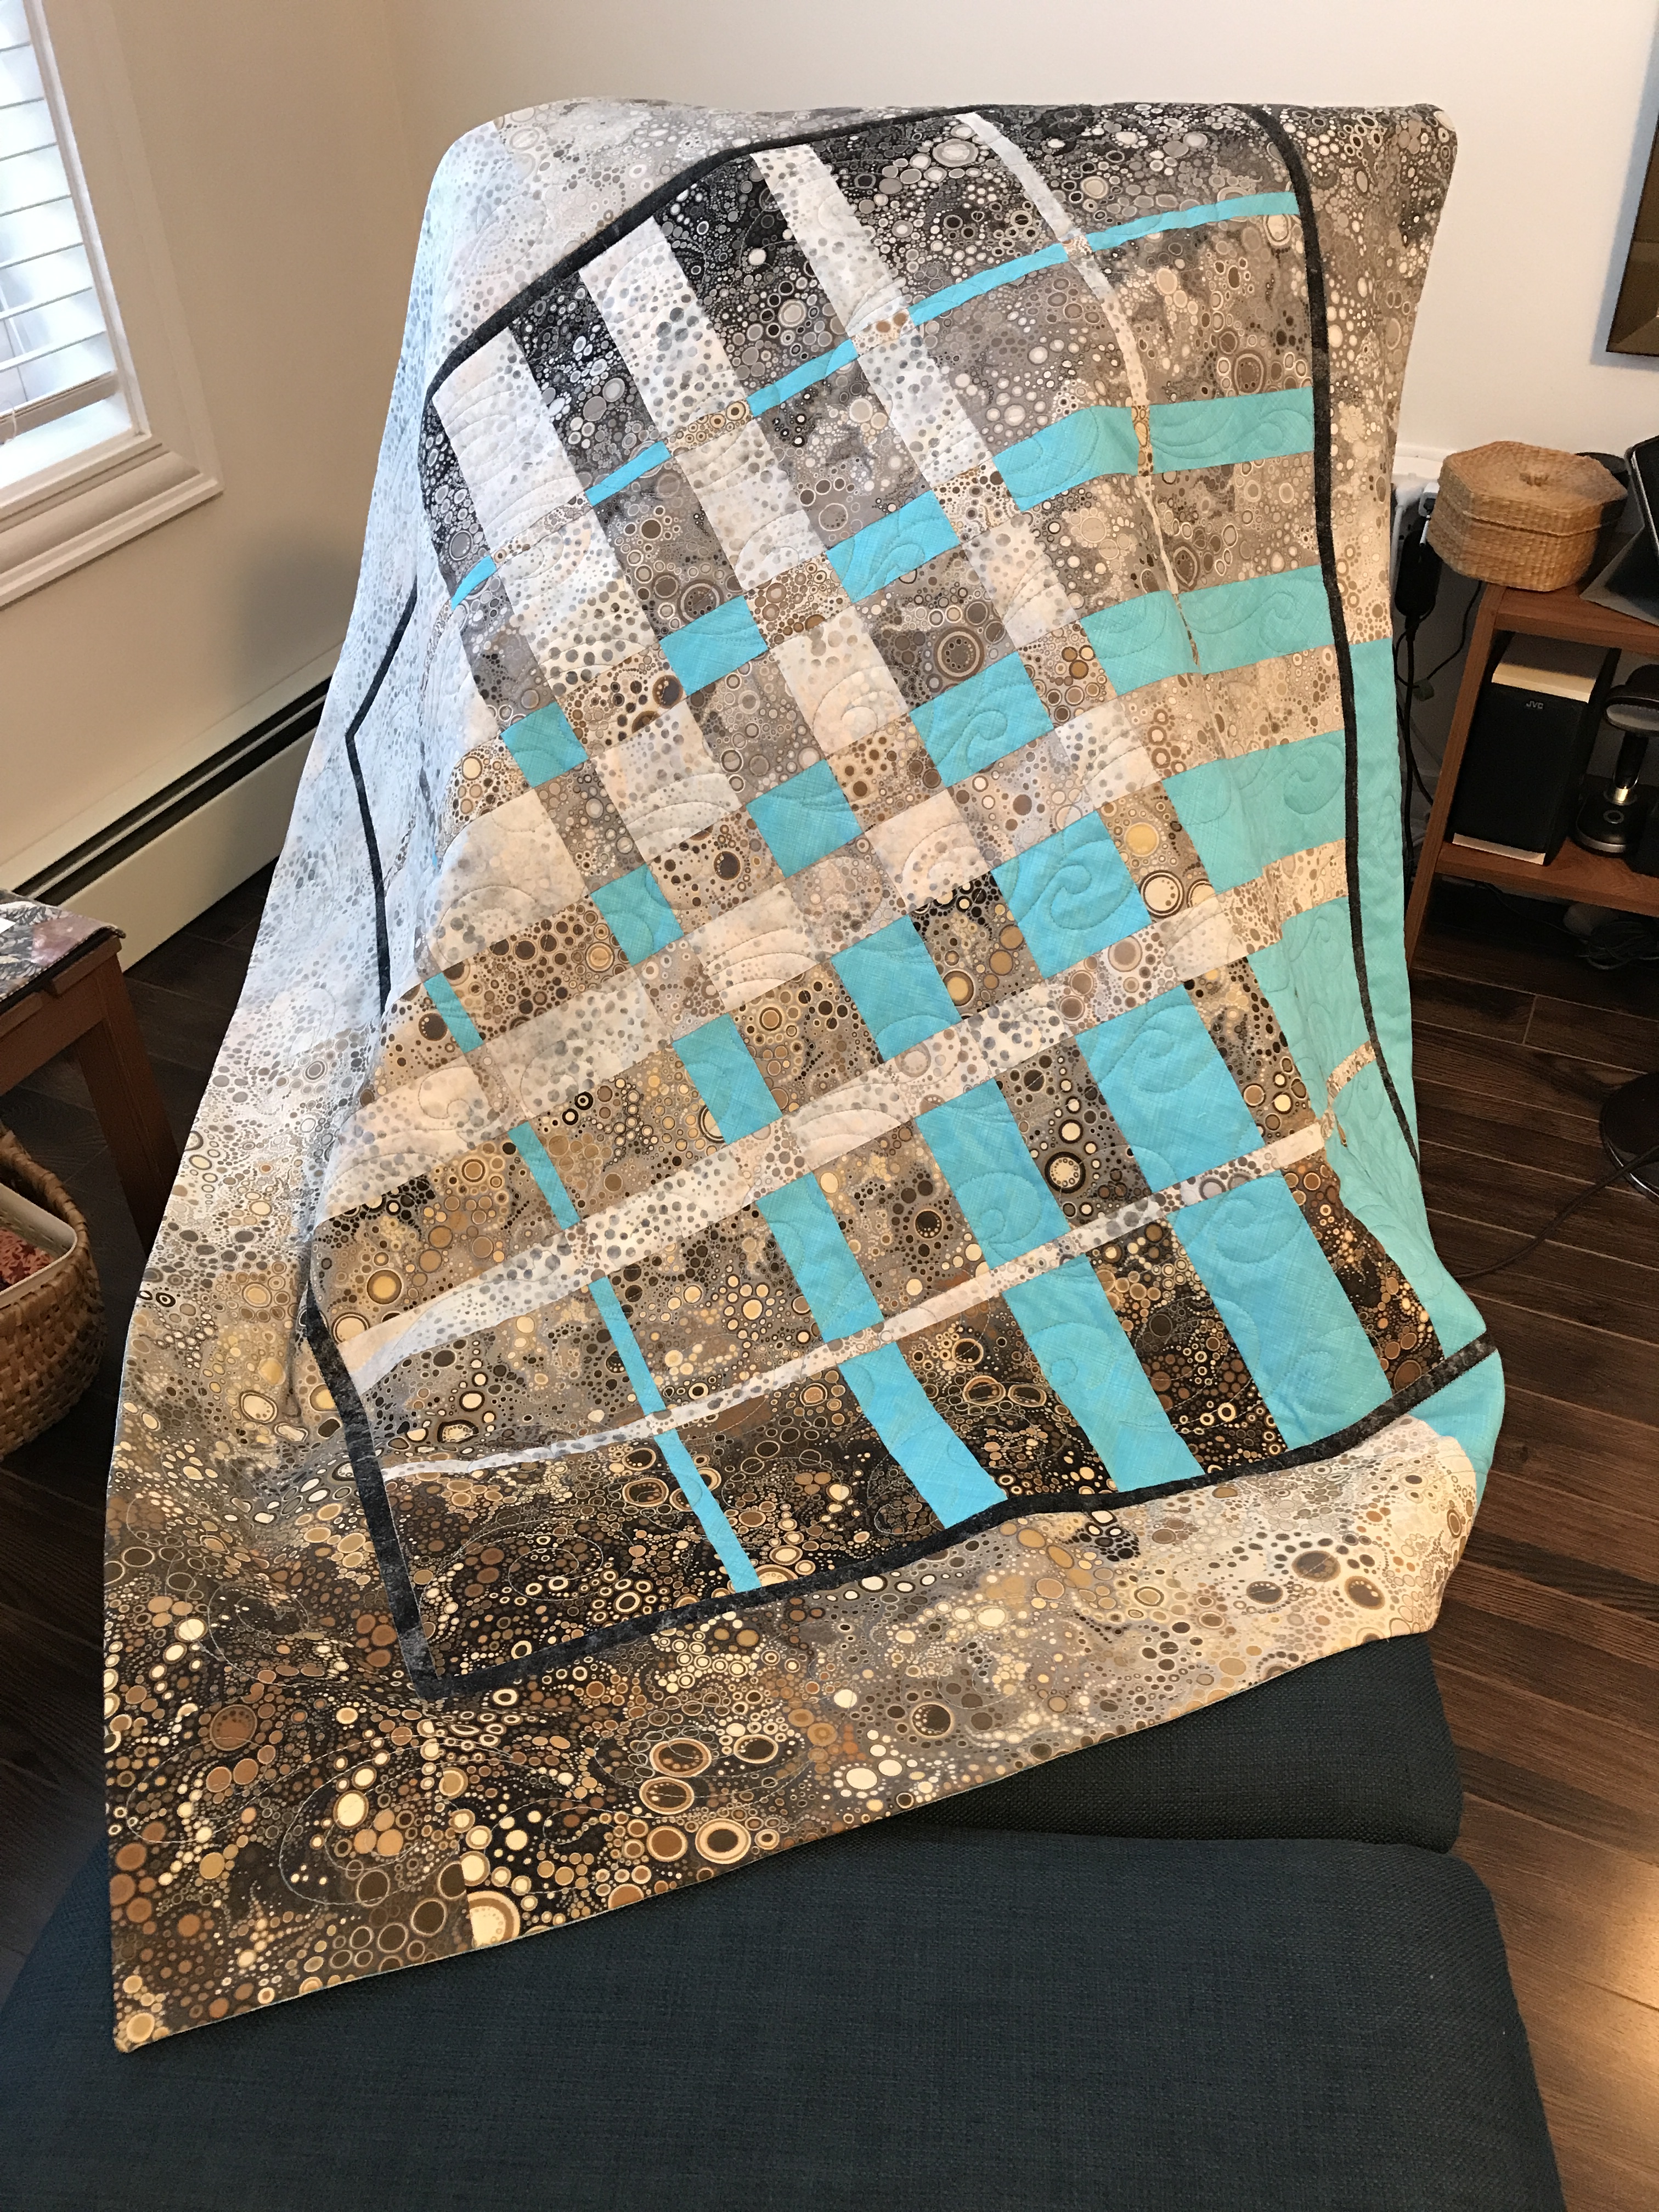
We spent almost all of the day working on developing colour flow. Each panel shaped up into something striking and different from the others – fascinating to watch.

Jean’s

I pitched in as the gals were trying to meld the different parts of their assembly – locating squares from my abundant stash to fill the central gap and draw the panel together.

Faye’s

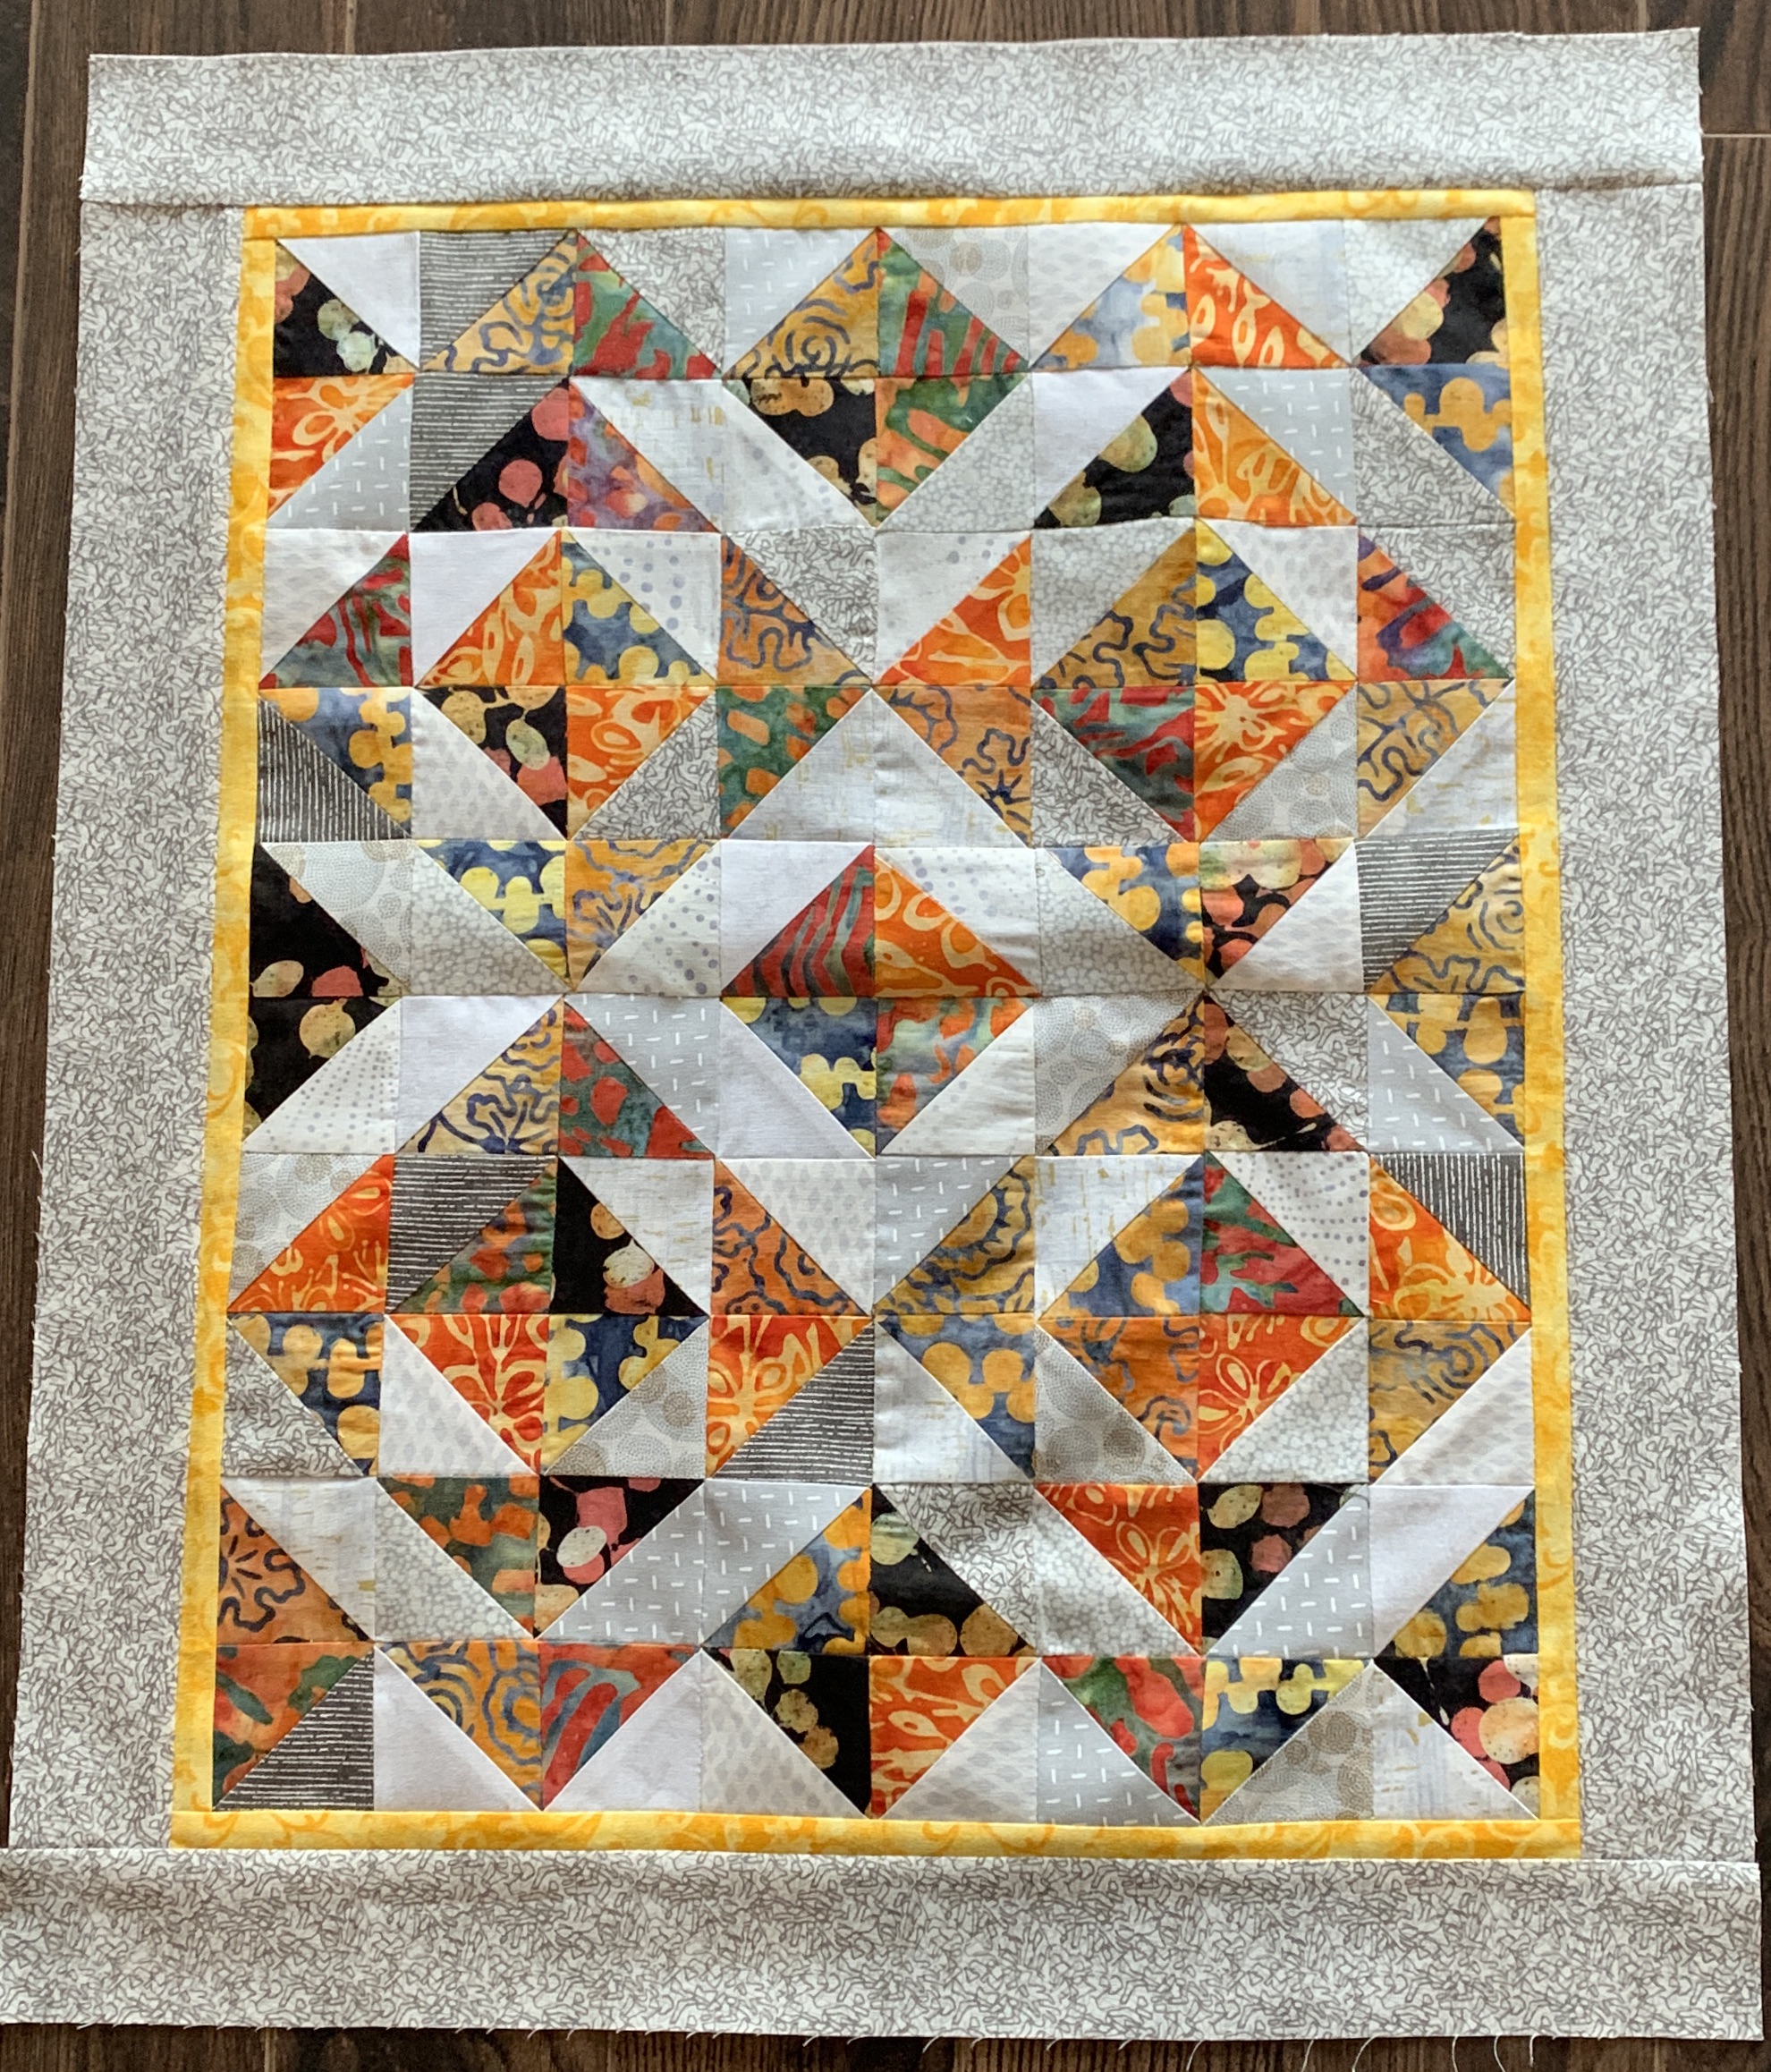
Once laid out, the squares were fused to the fusible interfacing in sections in preparation for sewing the rows and columns together.

Nancy’s

That was as far as we got on Wednesday. Homework: to stitch the panel completely – first,  sew the rows together, then the columns, with the 1/4″ seams pressed open (to allow the panel to press flat).

Heather’s

Coming Wednesday, we’ll turn these panels into finished art works complete with a signature (which I’ve already prepared on my computer and will bring with me on a memory stick so we can use one of the high-end embroidery machines in Sew With Vision to stitch each out).

We’ll frame each panel with a narrow off-white inner frame, a contrasting piping, followed by a wide, contrasting, outer border. Lastly, we’ll add hidden bindings and a backing fabric. All of that takes as much time, I find, as creating the panel itself.

With the pieces taken that far, I’m gambling the gals will blind stitch the hidden binding at home to complete their hanging. I hate contributing to everybody’s UFO piles – I’m determined these pieces will get done.

Medallion Quilt – Carrying On

This project is totally unexpected – I thought I was starting a much larger quilt by building a central block on which I was going to improvise further. The responses I got to the panel were interesting, however – suggesting this was a complete piece as it was.

Medallion Quilt

Worth considering. If it was a piece on its own it still felt unfinished to me – I thought it needed another narrowish border. After auditioning quite a few fabrics from my stash I decided this wild, vibrant batik (which I used in the blocks themselves) was precisely what the emerging piece needed.

I mitred the corners because if this is a wall art piece it needs the finesse of mitres and I’ve overcome the butted piecing of the grey border by stitching in the ditch in both directions creating the illusion of squares in the corners.

I’m not finished stitching in the ditch – I stitched the borders and began on the diagonals. I will continue that tomorrow, emphasizing the squares on-point and the triangles.

It’s so interesting how I start in one direction and find I’m actually going in another – totally unexpected, and yet interesting. It’s about colour, it’s about shape, it’s about visual impact.

I’m not going to do a standard quilt binding – definitely a hidden binding since the outer border stands comfortably alone. The challenge will be establishing a seam allowance that successfully fudges the slight shortfall in a few spots and yet manages to catch the border fabric so it won’t pull out and fray and leave enough width to the border for it to look even.

We’ll see where this goes.

Medallion Quilt II

Funny what calls out to you when you sit down to work. The small triangular cut-offs from the Nine Shades Of Grey quilt said “Play with me” – so I did. I began by sewing them together into half-square triangles, then laying them out in blocks, formed rows, and stitched the rows together. I was trying to mix up the colours so they weren’t adjacent (and I was pretty successful doing that). I ended up with an 8 X 10 array with a bordered square on point in the centre. My piecing isn’t perfect but it’s close enough to live with as it is.

Medallion Quilt – Centre

Once I had the small half-square triangles sewn into a panel, I decided to enclose it with a narrow border rather then a wider one. Had I been doing a wall panel, I’d have used the golden fabric as a piping, but I thought for a quilt it probably needed to be a narrow strip of accent fabric. And then the medium mottled grey seemed to settle the whole panel down – it’s strong enough to stand out and yet sets up the yellow which brings out the golden shades in the batiks.

I have no idea where to go next! Medallion quilts are usually square, but for a comfortable throw/lap quilt it wants to be longer than wider so I went for a rectangular panel. I will see if it’s possible to increase the length with perhaps two insert rows in top and bottom edges as I build the quilt borders out.

Time to look at Medallion quilts and see what inspiration I can find for taking this quilt further. I think I want to keep the “Nine Shades Of Grey” idea going in this project which means whatever I do next should use the grey fabrics extensively with perhaps just hints of the bright batiks – who knows….

Skinny Quilts/Banners II, III, IV – Completed

The remaining skinny quilts/banners are finished. I hand stitched the hidden bindings on the back of each hanging and added a sleeve for hanging it.

I’m happy with the combination of background fabrics and the appliqués – a close look shows I managed the edge stitching precisely. I like the quiet background and strong appliqué colours in this panel.

Skinny Quilt II

I wasn’t sure how I felt about the bright colours in this second banner but now that it’s completed I like the profusion of “dots” in the appliqué fabrics, echoed by the two small circles to fill in the space on the right. In the right location this could be an interesting accent piece.

Skinny Quilt III

I’m less happy with this banner – now that it’s finished I can see my idea to increase the spacing while decreasing the circle size didn’t work so well and I didn’t see, until now, that I have an inbuilt curve to the left! I think I chalk this one up to experiment and construct another to take its place.

Skinny Quilt IV

That’s what’s so interesting about improvising – I’m always amazed by how most of the time my experiments turn out well. It’s not that this one didn’t have potential – it’s just that I didn’t see the “flaws” until it was actually finished and hung on the door. It’s a lesson that I need to be a tad more detached and analytical when looking at these pieces at a distance.

Skinny Quilt I – Finished

Skinny Quilt I – Finished

I finished the hand stitching on this skinny quilt/banner last evening. It’s surprising how long it takes to finish the hand sewing in part because the muslin I’ve used to back the panel has a rather dense thread count and it’s difficult to penetrate even with a new hand sewing needle. Needs a thimble or I end up with a hold in both my third finger and my thumb! It’s awkward sewing, is what I’m saying.

I have a second panel ready to hand stitch and two more will get the hidden bindings sewn on this morning and then be ready to hand stitch. I’ll be glad when that part of the process is completed.

Whiling Away The Time

I just tried sitting in my standard transmission car – it’s 2 1/2 weeks since I broke my right wrist. I can steer using my left hand, but I can’t shift gears with my right! So independence is at least a week away!  I’ll try again next weekend. The new fibreglass cast is providing more support for my wrist but it’s also rubbing protruding bones and can be very uncomfortable and limiting. Thank goodness Wimbledon starts tomorrow – that will help me pass time because sewing is out of the question – I can use the machines, but I can’t cut or press! And the cast is not allowing me to knit much. I’m currently not being creative.

Instead I’m keeping my eyes open for other art endeavours that open possibilities.

Came across one the other day –

The Sandy Cliffs and Blue Skies of Martha’s Vineyard Abstracted into Paintings by Rachael Cassiani

Cliffs Of Martha’s Vineyard – Abstracted

Now there’s a textile wall art idea! I must go through some of my landscape photos to see if I can do something like this with one or more of them. I’m drawn to the large swaths of colour and the way the image emerges. Rachael Cassiani does this with paint – I would do appliqué and thread painting.

Another creative example I came across was –

Quilled Paper Sculptures by Sena Runa Embellish the Natural Forms of Everyday Objects and Animals

Sena Runa’s paper quilling is spectacular! I can’t imagine how much time it takes to execute what appears to be a simple piece as this poppy seems – it must have taken considerable time. Each piece illustrated in the article is breathtaking. Again I can see how. I might render something like this single flower into a textile piece  – where she has done the quilling, I would thread paint.

Lots of ways to experiment.


Modern Flowers

When I finished the first modern flower appliqué wall piece a couple of weeks ago I decided I wanted to try a second hanging – this one laid out on the horizontal with a border but having some the flowers spill off the piece entirely. Also I didn’t just want to repeat the flowers in the first piece – this time I decided to use layers of offset circles, again with leaves flowing through the space.

Modern Flowers – II

Early in the week I took the black/white leftover pieces from the first hanging, created a centre panel, then added a white-on-white mitred border; next I backed the pieced fabric using medium weight woven fused interfacing to stabilize the panel so it will remain relatively flat through the thread painting process. That worked well on the previous piece – Floral Collage – I decided to try it again on this larger piece.

I had kept the pile of small fabric scraps I used on the first flower appliqué on my cutting table – I didn’t have to go looking for more. This morning I cut various size squares from the scraps, added fusible web to each square, then cut out circles from 1″-6″ in diameter. What I have at the moment is a tentative layout. I think I want to add stems and more leaves in a somewhat lighter green to complement the dark leaves I have already cut out.

That’s it for today. Tomorrow I’ll fuse the individual flower elements, cut out stems and more leaves, play with arrangement, next fuse the whole to the background. Then I’ll start thread painting. The temptation is to simple outline each circle using a narrow blanket stitch but I’m not sure I’ll do that – I may decide to use doubled embroidery thread and straight stitch several rows close to the edge – I’m sleeping on that.

Double Convergence – Completed

Just Finished. Today I completed quilting the remaining wide border, created an embroidered label, attached a narrow hidden binding to the quilt edge and hand stitched it into place.

Double Convergence – Quilt Top

The quilt is relatively small – 45″ square – which means it could actually be a wall hanging or a smallish lap quilt/throw. I decided to finish with a hidden binding because I didn’t want to complicate the quilt top any further. The wide border mirrored the double convergence and that felt like it was enough.

Double Convergence – Quilt Back

I used the fabric from the back for the hidden biding – stitched it on the front using a 1/4″ seam, then folded the 1 1/4″ strip under leaving me with a 1/2″ binding. You don’t really see the invisible binding unless you’re up close and looking carefully.

A bit of explanation about the quilt back – I needed a narrowish insert to accommodate the quilt width. I had a small amount of ombre fabric left and decided a strip of ombre as it was worked perfectly – no piecing, except to extend the length of the strip. There’s enough interest in the fabric itself that it accents well.

That’s quilt #7 since the end of August – I’m planning one more for the Parrsboro show this coming summer. Now to turn to wall art pieces – I have lots of ideas, I just have to begin creating!


text

On Show in Parrsboro 2018

Last Saturday I travelled to Parrsboro for my 4th Annual exhibition of “Quilts As Art” show at the Art Labs Gallery.

Sign on the Sidewalk

It took about an hour and a half to hang the 8 quilts and 11 smaller wall art pieces. That’s my complete production for 2017/2018 – new since last year’s showing.

Quilts Hung

Hard to believe I manage to get so much sewing/quilting/machine embroidery done. That’s not everything I did make – there were a variety of garments: pants, jackets, tops that I constructed in that same time period – from end of August to mid-July of this year.

Two Wall Art Pieces On Display

There was an “Opening” later in the afternoon – a small attendance because the weather was so hot I’m guessing people in Parrsboro spent the day at the beach. Those who did come to see and talk about the textile art with me were interested and  appreciative of my work. Always fun to see how people react to it. The show lasts for two more weeks until August 17. Then I’ll head back on the 18th to bring it all home. I think I’m going to hang Federer somewhere in my place, the rest will be put away in my “quilt” closet (which is getting full).

I’ve already got work for next year under way. I pinned a new quilt this morning – ready to start quilting it. When that’s done I’ve got fabric for some summer pants (almost too late to bother making them this season). I’ll get those cut out and maybe one or two pairs stitched up.

Abstracts From Scraps – IV

The last one is just finished (except for the sleeve on the back for a rod/dowel to hang the  panel).

Fern 2

I’m happy with the results (in spite of the imperfections that pop-out at me). One thing for sure, in future I will use a fused stabilizer to keep the panels from rippling and then use fusible web to adhere batting to panel. It’s quite a bit more work, but I think the final panel will be the better for it.

Fern 1

Fern 2

Fern 3

Fern 4

Fern 5

Now I’m ready to move on.