This was my kitchen counter last Saturday as I was getting ready to make this year’s batch of Fruit Cake to give as gifts. The candied fruit, raisins, dried cranberries, and orange marmalade had all been soaking in dark rum in the large white Tupperware bowl (with secure lid) for a week. It was well marinated and ready to be turned into fruit cake.
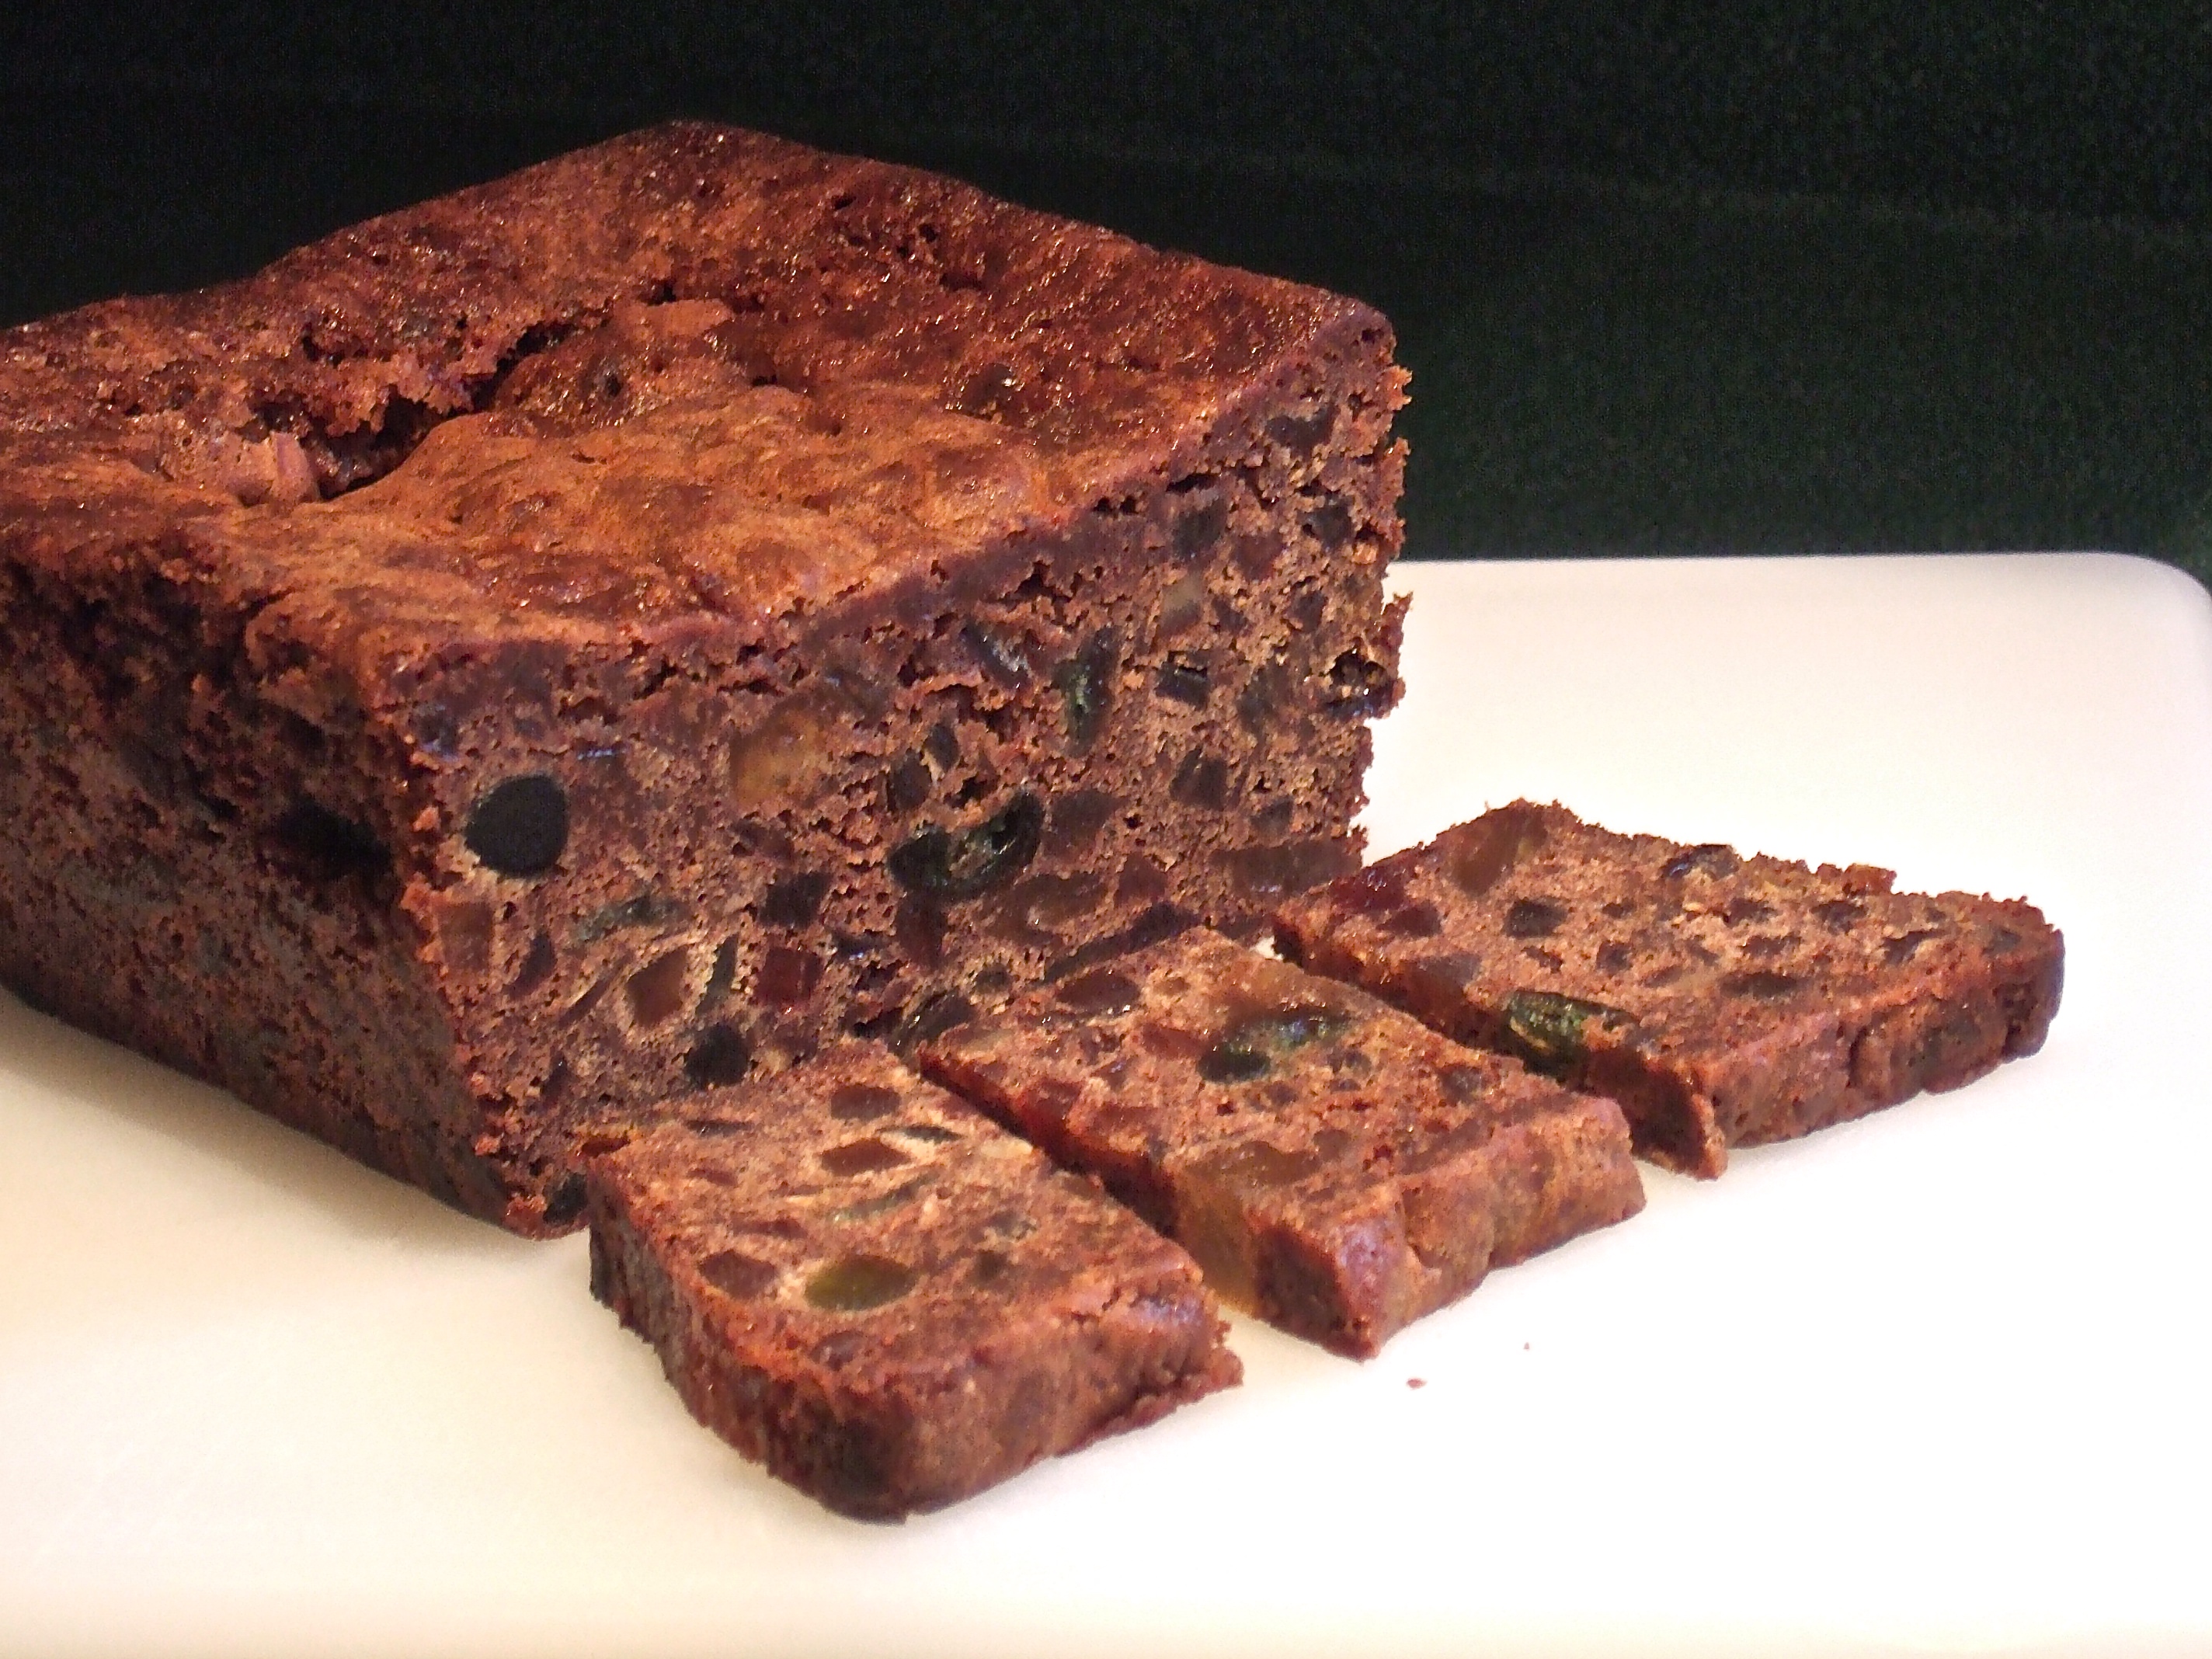
This is what it looks like after it’s been cooled for several weeks in the fridge:
Aged Fruit Cake
The point of making the cakes this early in the season is to allow the rum that has been incorporated into the fruit to slowly release into the cake – which it does by Christmas.
I end up with a very flavourful, rich cake with the fruit nicely distributed. I don’t brush the tops with more rum – that does’t seem to be necessary. The rum in the fruit softens the outsides so the whole cake is dense and dark and delicious.
I just had a friend in for coffee – she wants to make fruitcake for a few gifts. So I shared a wee taste with her so she could know what it comes out like. The cake got her stamp of approval.
We’ll be making those cakes together in the very near future, I have no doubt!
Last evening I was invited to dinner at the apartment of one of the two new Afghan immigrant families I am helping learn English. The occasion was a thank you to the group who sponsored them to Canada, including me for the time I spend with them each week.
The apartment is small, but in traditional Afghan fashion they had laid out the feast for 11 people on a tablecloth on the floor with plates etc. arranged around the perimeter. Two rice dishes, one with delicious lamb hidden beneath, the other with saffron and pistachios, kofta (tasty meatballs in a tomato sauce flavoured with spices I couldn’t name).
I just looked up a recipe:
For Meatballs (Kofta) – 1 lbs ground beef – 1 large onion, chopped in big pieces – 2 green chilies, chopped – 1 cup cilantro, chopped – 1 tsp garlic paste – 1 tsp salt, or to taste – ½ tsp black pepper – ½ tsp coriander powder – ½ tsp cinnamon powder – ½ tsp cumin, ground
For the Sauce (curry)
– 1 medium onion, chopped – 2 medium tomatoes, pureed – 2 Tbsp tomato paste – 1 tsp garlic paste – 1 tsp salt, or to taste – ½ tsp black pepper – ½ tsp turmeric powder – ½ coriander powder – ½ cup Yellow split peas/chana daal, cooked 90% – ½ cup oil
There didn’t seem to be the yellow spit peas in this version (although I’ve had Kofta that did). The tastes I didn’t recognize: turmeric/coriander in the sauce, the coriander/cinnamon/cumin in the meatballs. Delicious on the saffron rice.
There was also: A minty bowl of finely diced salad A spinach dish – Sabzi – I could see finely chopped spinach and onion, I assume garlic Some potato fries – which seems to be a common companion dish And a custard dessert with cherry jello on top
A lot of work for these young people to undertake.
The challenge, of course, was getting down to sit on the floor – none of us guests are young. At 80 I can get down and up again – I do it a lot when I’m laying out quilt pieces on the floor – but I’m past sitting on the floor, let me tell you! I could not find a comfortable position other than with my legs stretched out in front of me with my back supported by the sofa behind me – taking up too much space for this group and my feet in everybody’s way! I tried sitting on my feet, on my bum with my feet tucked in on my right, on my left, lotus position – I could sustain no position for very long.
I loved the meal and the conversation and friendship. I paid for sitting on the floor – this morning when I got out of bed, I could hardly move. Once my morning dose of Tylenol and Lyrica kicked in and after an hour of Aquafit in the pool I could finally move.
In spite of the sitting challenge, I will certainly do it again!
When I decided I wasn’t going to make a sewn project for the Knitting Group gals, I decided instead to put together jars of candied fruit in dark rum.
It’s the same concoction I use to make the fruit cake: candied fruit (the less expensive variety at Bulk Barn), raisins, dried cranberries, chopped up dates all drenched with half a 750 ml bottle of DARK rum.
I didn’t measure the ingredients, I just added them to my 27 quart Tupperware bowl with a lid – it ended up slightly more than 3/4 full. I did what I do with the Christmas cake fruit – I flip the bowl twice a day so the rum has a chance to drain through the fruit until there’s none left in the bottom of the bowl – between 5-7 days.
I bought a lot of fruit – I don’t know the quantity by weight – it was four of the Bulk Barn large plastic containers full, plus a small one I already had a home which I was going to use to make a sheet of Christmas Bars (recipe available if you click on the link). I ended up with 18 Mason jars full of candied fruit (my friend Ruby gave me her supply of Mason jars, I didn’t have to buy any).
Once I’d filled the jars with fruit, I divided the remaining half bottle of rum among the 18 jars (I only use Rum to make the Christmas cake, no point in it sitting around. I’ll buy another bottle next year.)
To be honest, I’m not going to bake the Christmas Bars – they’re lovely but none of us needs the added sweet. So instead my gift this year is this jar of candied fruit in rum.
A teaspoonful is WONDERFUL on a small scoop of vanilla ice cream! You could put a slice of pound cake beneath the ice cream and you’d have fancy dessert. These jars are small but I know there are many teaspoons full of pleasure in each.
Now I need to decorate the tops of the jars and label them. They’re just going to people who really like rum. I don’t plan on handing out any to someone who’s just going to put it in the fridge and forget about it – it’s just too good to be ignored.
BTW – I finished both aprons and the microwave potato bags today. That leaves the Kantha jacket to remake.
It’s mid-October – time to make the Christmas cakes.
Last week I bought the candied fruit, raisins, dried cranberries, dates, orange marmalade, a bottle of dark rum (the cost of everything had increased but I’m not complaining – I paid the bill and carried on).
Next I checked the recipe and made sure I had enough eggs, flour, brown and white sugar, baking powder and baking soda, vanilla, almond extract, spices (ground cinnamon, nutmeg, allspice, ginger, clove), molasses and baking chocolate.
I marinated the fruit in rum for a week – the amount of time it takes for a half-bottle of rum to be absorbed into the fruit (none left in the bottom of the big covered Tupperware container I use for that purpose). Today, I decided, was Christmas cake making day.
The IngredientsThe CakesA Testing PieceChristmas Cake 2022
I started by lining the pans with parchment (holding it in place with wooden clothes pins until the batter was added and smoothed). I measured out the dry ingredients, then the wet – both need large mixing bowls to hold the quantity I make.
I dumped the marinated fruit into my large lobster pot sitting in the sink (so I can reach in to mix the batter ingredients). I added half the dry ingredients but the mixture is so heavy that I called a friend to help (yesterday, she’d offered to do the mixing/stirring if I needed her – my right wrist can no longer handle the weight of the mixture – even wearing a splint my wrist becomes quite painful). The ingredients have to be mixed by hand because the mixture is way too heavy for a machine – it takes a sturdy wooden spoon or stiff spatula to do the job along with a lot of elbow grease). We added the rest of the dry ingredients, then poured in small batches of the wet until we had batter and fruit well mixed.
Last year I had a disaster – I’d overfilled the loaf pans and batter spilled into my oven creating a lot of smoke and a big mess. We were careful not to overfill the pans – looks like we put just the right amount into each – nine 2 lb loaf pans, six small ones. The cake bakes in a 300° oven for close to two hours – you can tell by the smell when it’s time to check on their done-ness. No spilling over this year.
I just had to cut a slice from one of the small cakes for quality control. Nice texture and nice taste.
I will now wrap the cakes in waxed paper, put each in a ziplock bag, and store them on the bottom shelf of my fridge for the next two months. That’s how long it takes for the moisture in the fruit to migrate into the cake. They’ll be given as holiday gifts!
The other day, Deb and I again this year made the Sweet Kugel – 4 of them to be exact. One for me, one for her, one for MaryAnn, and one for Marlene.
This time we had Deb’s 6 year-old grandson Huxley as an extra pair of hands – he made short work of peeling/slicing the apples using Deb’s handy dandy Apple Peeler & Corer! (This is a very kid-friendly recipe and project, it turns out).
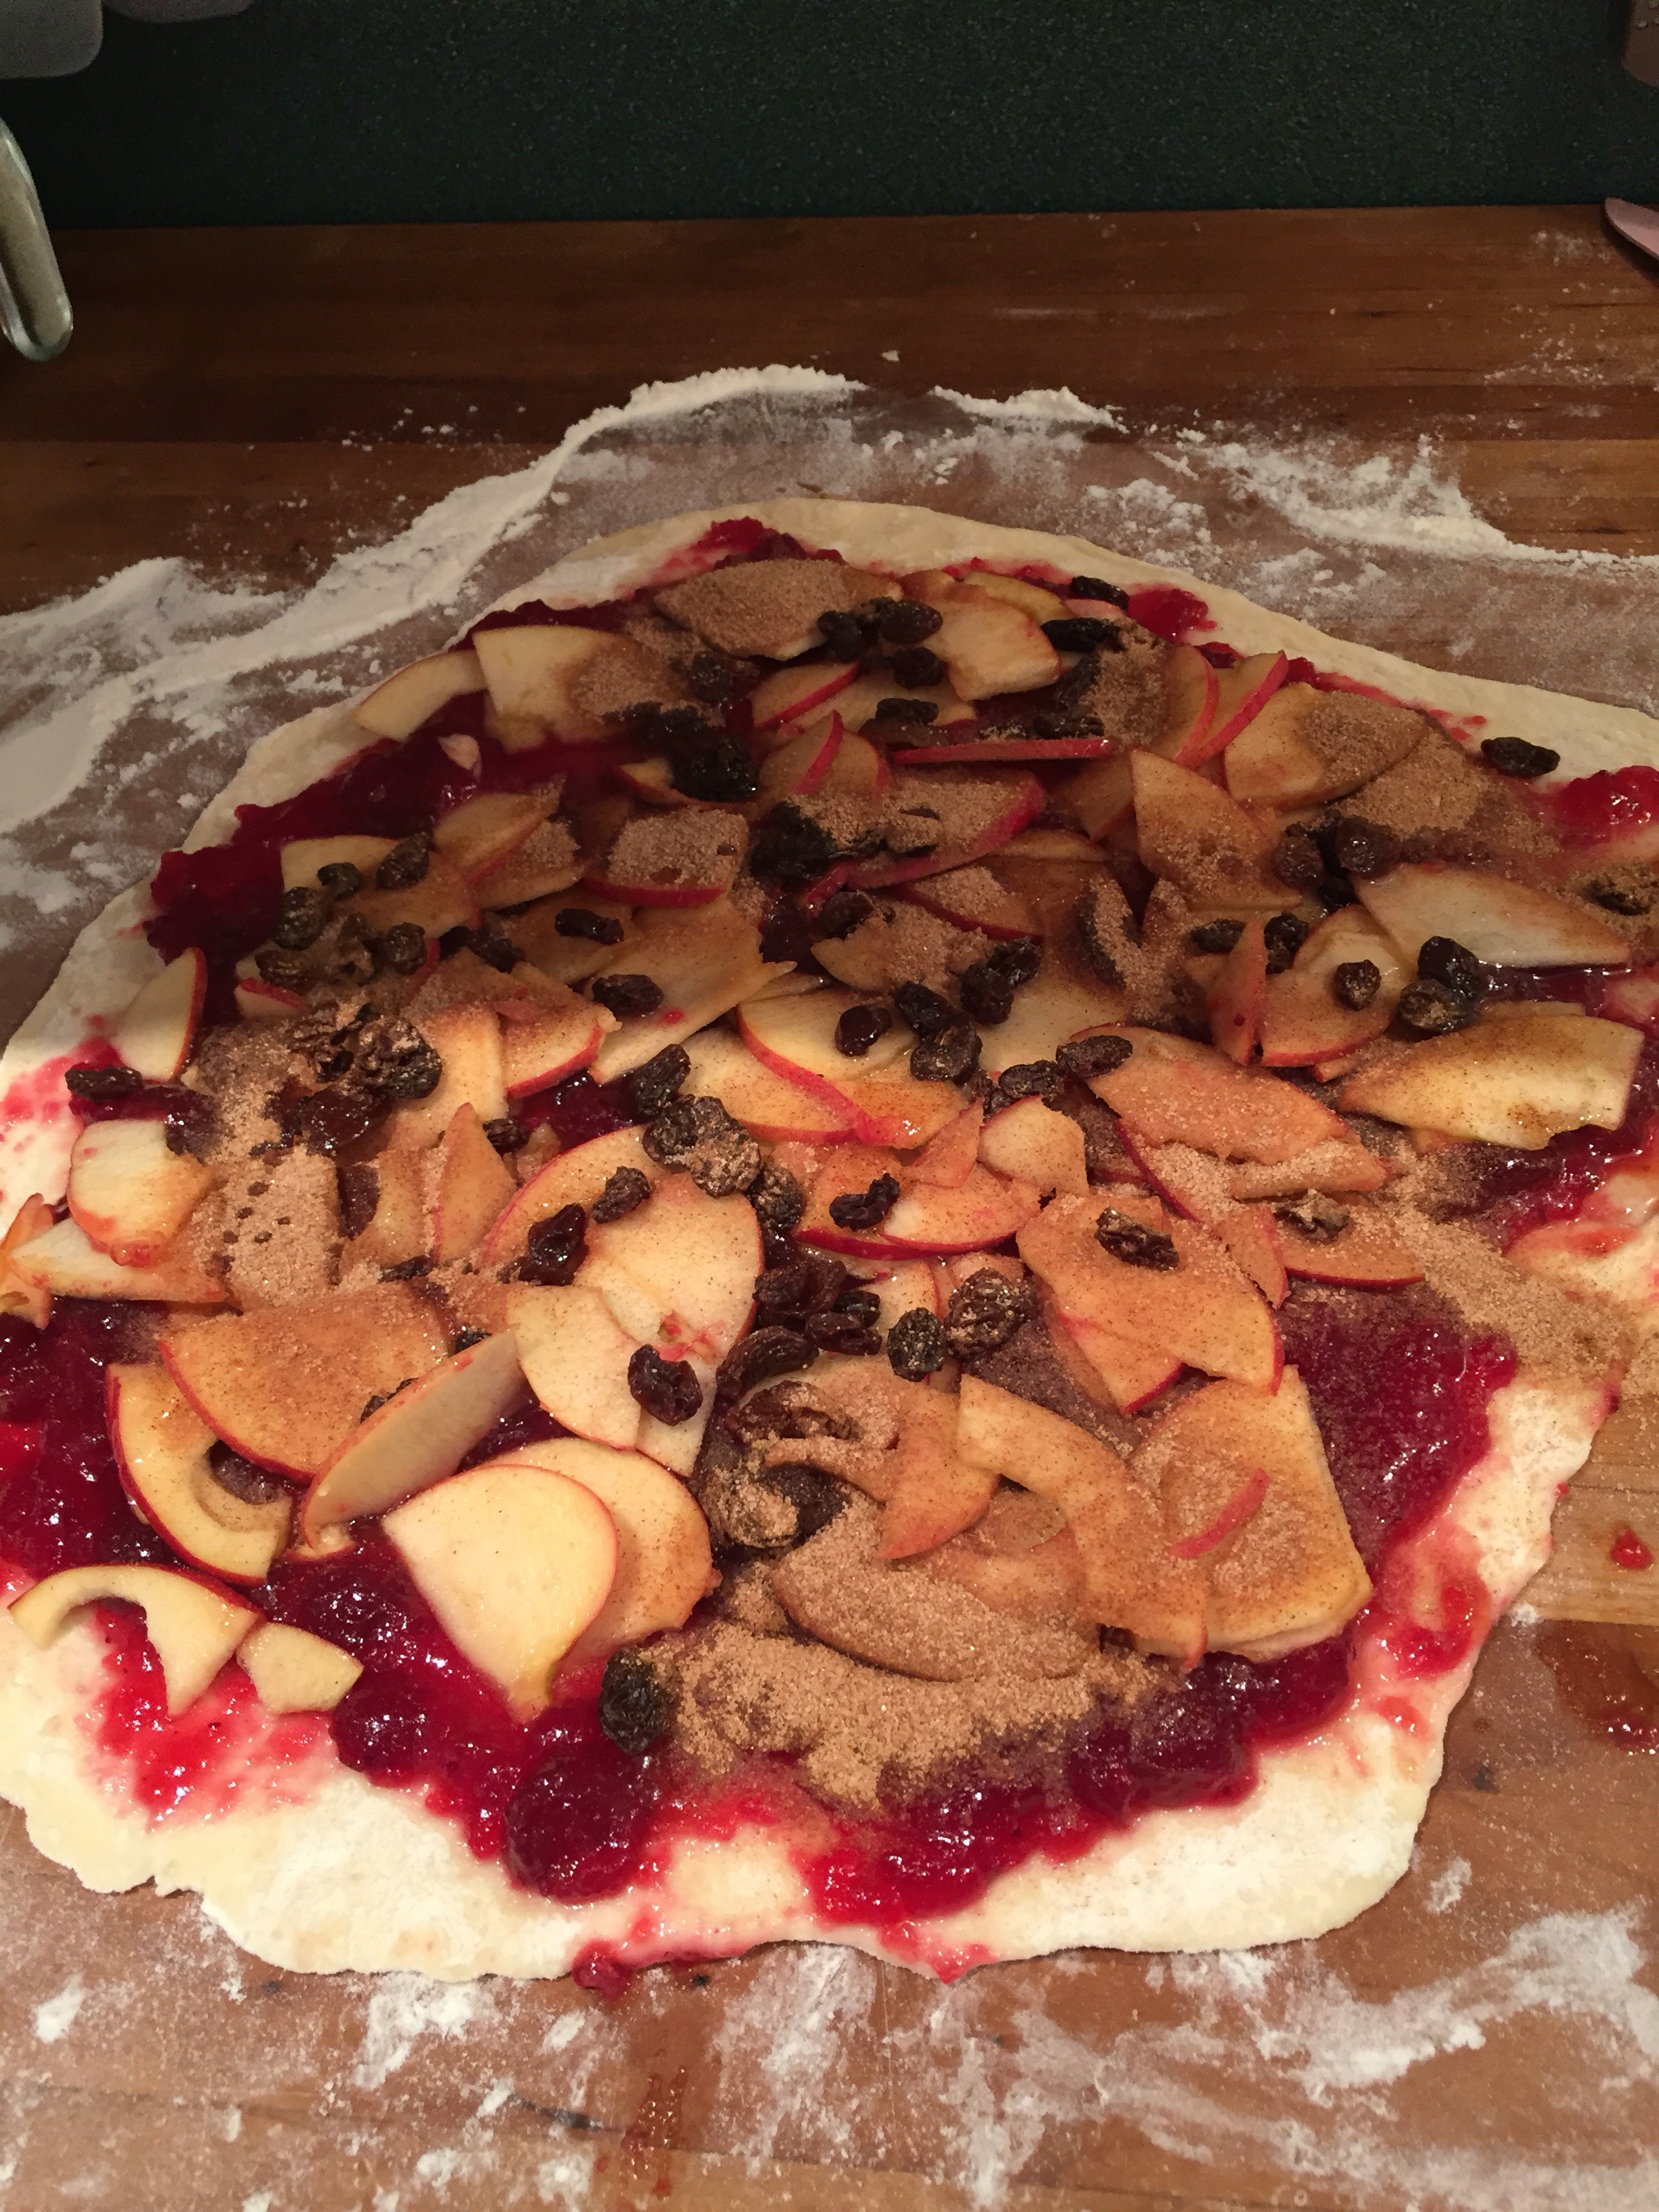
While Huxley was prepping the apples, I made the dough, cut it into four portions, rolled out the first.
Making The Kugel
Huxley topped the dough with strawberry jam and whole berry cranberry sauce, then he added a quarter of the apples, sprinkled raisins on top, I sprinkled the cinnamon and sugar on top of that, then flopped the dough around the topping and tipped it into the baking dish.
Huxley helped with all four kugels, making sure the one with the most apples was in his grandma’s dish.
The whole process didn’t take us long. We were done, washing up and all, in about an hour.
The kugels were left to bake for an hour and a half at 352°. I took them out and cooled them, then wrapped the one for me and put it in the freezer. The other three are in my fridge, each waiting to be sent to its proper home.
I don’t do a lot of Christmas baking – the fruitcakes and one other pastry – a large cookie sheet of shortbread topped with candied fruit, chocolate chips, shredded coconut, raisins, dried cranberries, chopped pecans all mixed together using Eagle Brand condensed milk! What could be bad about that, right?
The original idea came from a package of shortbread mix from Robin Hood Flour but they stopped making the kit a gazillion years ago. I have a great simple traditional shortbread recipe I use and add the topping and then I do my best to give this pastry away as fast as I can!
Christmas Shortbread Bars
Here is the recipe:
Mrs. Cooke’s Shortbread
(I double this recipe when I make my shortbread bars because I need enough shortbread to cover a large cookie sheet) Preheat oven 350° F
1/2 lb butter (at room temperature so you can cream it easily)
1/2 c white sugar (this year I will use coconut palm sugar which I’m sure will work as well since I’m avoiding white sugar entirely in my diet)
1 tsp vanilla extract (that’s real vanilla, please)
2 c. white all purpose flour
Cream butter, add sugar, vanilla, and last the flour; Mix well until you have a crumbly texture Dump onto a large non-stick (or parchment lined or Silpat covered) cookie sheet Press firmly, particularly at the edges Pierce with a fork to allow the shortbread to expand uniformly Bake for 15 minutes, then rotate cookie sheet 180° so the shortbread bakes evenly, then bake for another 15 minutes. The shortbread won’t be quite fully baked but that’s how you want it because you’re going to continue baking after you add the candied fruit topping. Let the shortbread cool for 10-15 minutes before proceeding
Candied Fruit Topping
1 – 11/2 c shredded coconut (unsweetened if you have it)
1 c of mixed candied fruit (with some chopped cherries and citron)
1 c Thompson raisins (you can certainly use sultanas if you prefer them, or even currents)
1 c chopped pecans (you could use walnuts, almonds, hazelnuts chopped)
1/2 c dried cranberries
1 c bitter-sweet chocolate chips (can also use semi-sweet – the point is dark rather than milk chocolate)
1 can (room temperature) Eagle Brand Condensed Milk
Put all the topping ingredients into a large bowl, add the condensed milk and mix as well as you can – it’s a sticky mess but is it ever going to be good.
Spoon the fruit/condensed milk mixture onto the shortbread making sure you spread it evenly to cover the entire surface of the shortbread (try getting as close to the edges as you can – don’t want to waste any of this Christmas bar).
Bake 25-30 minutes at 350° – until the coconut begins to turn golden.
Cool on a rack, then cut into bars. I cut the entire concoction into 8 portions – which in turn can be cut into 12-16 bite-sized bars. This stuff is SOOO rich you don’t want to serve more (although you’ll want to eat more).
I make these Christmas bars about three-four weeks before Christmas. Slip each of the 8 portions into its own small ziploc plastic bag, store them in the fridge until I give them away.
Let me know how it goes if you decide to try them – they’ll be an instant favourite – trust me!
Two hours to prepare the pans (lining with parchement), mix the dry and wet ingredients, add dry to the fruit and mix well, add wet to the whole thing and mix again using a very strong long handled spoon/spatula/whatever you have including hands! I put my lobster pot in one of my kitchen sinks so I can reach inside it easily. I kept licking, then washing, my right hand as I mixed the fruit and batter.
I have 9 two pound loaf pans and 5 small pans now in a 325° oven and it already smells divine!
The small loaves will cook in about an hour/hour and a half; the larger loaves will likely take between 2 and 2 1/2 hours. I’ve set the time on my watch and will keep checking the oven to make sure all is well there.
Because the cakes are all packed in tightly, it takes longer for them to bake – the great thing is this concoction is very forgiving and because I want it baked but moist, slightly underbaking them isn’t a bad thing. I’ll take the cakes from the oven when a wood skewer comes out clean.
I’ll add a photo when I’ve taken the cakes from the oven and put them on racks to cool. It’s a wonderful site. One Christmas thing checked off my list.
Canadian Thanksgiving was yesterday. Today it’s time to start making Christmas fruit cakes!
Last week I tried buying candied fruit – my usual Bulk Barn had none! Today, I checked out the store online, found another outlet – they still had “regular” candied fruit and red cherries (no “Delux” fruit mix, or green cherries, or candied pineapple). That’s OK, I bought extra red cherries, candied lemon/lime peel, Thompson raisins, dried cranberries, and date bits.
Preparing the fruit:
at least 2 lbs of mixed candied fruit (regular or deluxe)
1 lb of red/green candied cherries
1 lb Thompson raisins
whatever other dried fruit you like: dried cranberries, chopped dates, chopped apricots, etc.
a 500ml jar of orange marmalade (you could use grape jelly or strawberry jam) – DON’T leave this out
Next stop the liquor store to pick up a quart of dark rum. After some consultation with one of the guys who works there I chose a locally made dark rum he assured me would be “flavourful”.
~400ml of dark rum (I used Fortress Dark Rum – smelled good!)
I came home, dug out my 27 litre tupperware covered bowl, added all the fruit plus a 500ml jar of good orange marmalade, then poured in half of that bottle of rum (about 400ml).
I mixed the whole thing using a strong wooden spoon (the mixture is VERY heavy), sealed the lid on, and now I wait. Tonight I will flip the bowl over onto the top, tomorrow morning I’ll flip it back to sit on it’s bottom, I’ll keep turning the whole thing twice a day for the better part of a week. By the end of the week there is no longer any liquid rum – it’s all be absorbed into the fruit!
That gives me more or less a week to pick up the other ingredients – butter, eggs, bittersweet baking chocolate, molasses (none left in the house); I have good vanilla, almond and orange extract, white and brown sugar and flour (although I’ll probably stop at Bulk Barn and pick a bit more of each of those just to be sure I have enough).
We could do a “bake-along”. You can find the full instructions here if you’re ready to tackle some early Christmas preparation.
The “recipe” produces a very flavourful moist fruitcake, if I say so myself. I say “recipe” in quotes because the amounts of fruit and ingredients for the batter are just guidelines – this is a VERY forgiving recipe – you want enough batter to coat all the fruit but not a whole lot more. The amount of fruit I’ve got soaking is going to give me 10 2lb cakes + 6-10 small loaf cakes. Plenty to give away.
BTW just halve the amounts of fruit above (and use the amounts in the actual recipe for dry and wet ingredients) and you’ll get a reasonable amount of cake. I use the amounts of fruit above, and double the wet and dry ingredients! For me a fruit cake (plus something I’ve sewn or knit) constitutes my Christmas giving, so I make a large number of cakes.
This morning I managed to complete 24 more blocks (14 left to get me to 63 which I’ll get done tomorrow).
49 Blocks – 7 x 7
I’m not going for a traditional drunkard’s path layout – I want a relatively random layout with probably 5 complete circles (at the moment I have three) and the rest partial circles which creates the illusion of layers of circles. The colour flow is working out but I won’t be satisfied until I have all 63 blocks on the floor and I can photograph them and move them around.
If I stay with a 7 x 9 array (63 blocks) I will end up with a 40 1/4″ x 51 3/4″ panel. Since I want the final project to be close to the size of the other two quilts – 48″ x 64″ I can either do a narrow 1″ sashing with the dark blue grunge I used on the wedges and a 3″ border strip from the Skyline fabric. That gives me the width (40 1/4 + 2 + 6 = 48 1/4″) but short on length (51 3/4 + 2 + 6 = 59 3/4″). If I were to add a 10 row to the bottom, I’d end up at 57 1/2 + 2 + 6 = 65 1/2″.
Or another way to solve the size problem is to add two more rows and a column to make an 8 x 11 array (46″ x 63 1/4″), a wee bit shy on width and length but close enough to the other two that I could live with that. In this case I’d need 25 more blocks. I have the fabric to do that – I bought the end of the bolt, another 1 1/2m of the fabric, so I have more than enough to create the needed blocks.
What I’m liking about this latter idea is that it mirrors the more modern finish I’ve used on the other two quilts. To finish the panel with sashing and a border will make it look more like a conventional quilt even with a hidden binding.
So after I’ve laid out the 63 blocks and stitched them together I’ll audition the sashing/binding idea but I’ll probably take time to construct another 25 blocks….
Christmas Fruit Cake
Christmas Fruit Cake 2020
Canadian Thanksgiving was last weekend. I always make fruitcake just after Thanksgiving so two weeks ago I bought the candied fruit, raisins, dried cranberries, put it in my 27c Tupperware bowl with lid then added a pint of dark Barbados rum and left the mixture to soak for a week.
Today was the day. I’ve ended up with 10 2lb loaves (plus a single small cake) which will get wrapped in waxed paper, stored in a ziplock bag, and kept on the bottom shelf of my refrigerator for the next two months.
Right now, the cake is kind of “cake-y” but in two months time it will be dense and moist from the rum working it’s way from the saturated fruit into the cake. Just in time to give it away for the holiday.
That’s my single big Christmas preparation – all done.
This is my Fruit Cake recipe in case you want to give it a try. A very forgiving cake.
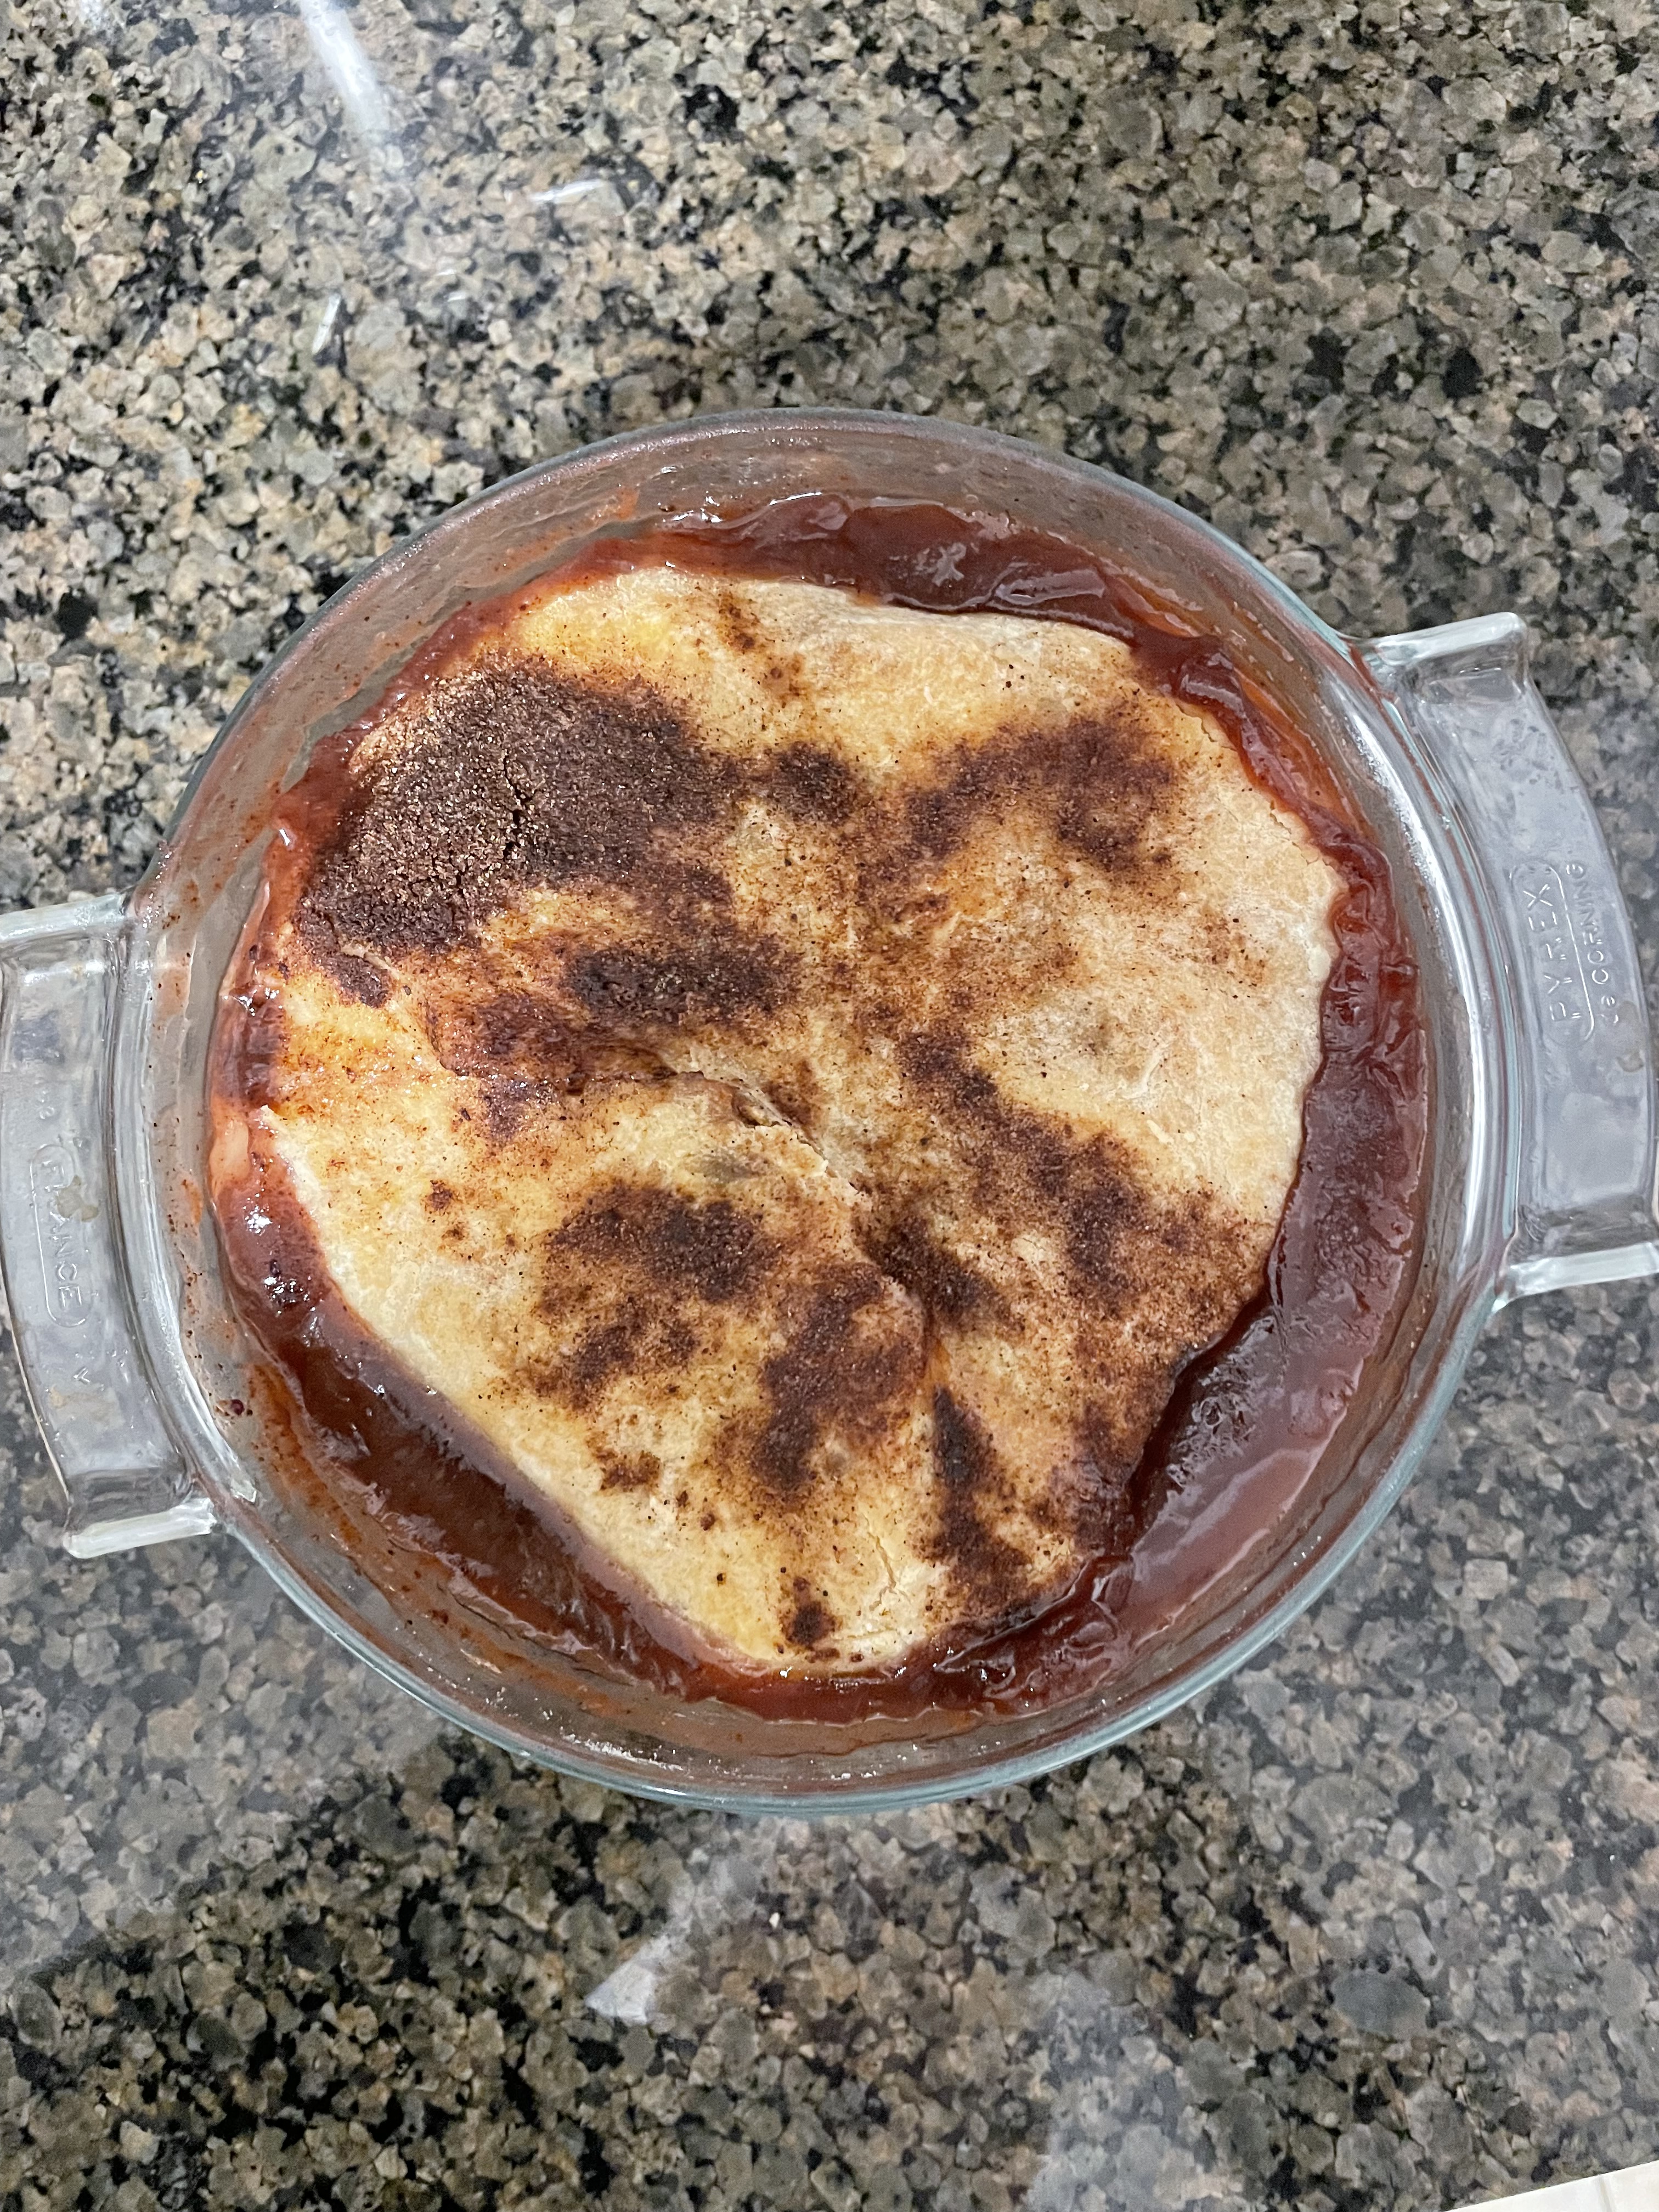
A couple of weeks ago, Saturday afternoon, I was watching America’s Test Kitchen on PBS. Among the dishes they made was a Torta Caprese – “an Italian flourless chocolate cake with finely ground almonds (which breaks up the heavy fudge crumb of most flourless chocolate cakes)”. They’re right – it does.
I went to the website to find the recipe: America’s Test Kitchen – Torta Caprese. I saved it, and printed it out. (If you can’t get to the recipe let me know because I created a PDF from the “print” pages and can pass that on.)
Torta Caprese
I was anticipating a very chocolate-y, light cake and it is.
Here is my torta caprese – I must explain why it doesn’t look like the one above (from America’s Test Kitchen).
Torta Caprese
First, there’s an ambiguity in the recipe – it calls for 2 cups (7 ounces) of almond flour – well, which is it? 2 cups or 7 ounces (and BTW my cup = 8 ounces, not 7, but I ignored that discrepancy.) I added 1 cup of almond flour at the appropriate place in the recipe, mixed it into the batter, and I thought the batter looked reasonably thick at that point but to be on the safe side, I added another 1/4 cup scoop of almond flour, just in case the batter really needed more. I’d say, having sampled the cake, that it’s just a tad on the dry side and next time I’d only add a single cup of almond flour.
Second, my springform pan is 9 1/2″ – I could have used a smaller diameter which would make the cake taller, or I could have baked it in a 8 1/2″ parchment-lined cake pan which would also have produced a taller cake.
Third, the recipe recommends turning the cake around half way through the baking. I did that, but had an accident! I was baking the cake in my convection toaster oven which is large enough for my spring form pan. I pulled out the rack to be able to reach the cake pan when the rack tipped toward the back of the oven, the cake pan tipped spilling some batter into the oven. I managed to right the pan and the rack and get both back in position. I left the mess in the bottom of the oven hoping I’d be able to clean it reasonably easily if it didn’t bake on too badly. So the top of my Torta is kind of wonky having been disturbed half way through baking.
But I have to say the cake tastes “right some good” as folks say in this part of the country. Served warmed (I’d zap a slice in the microwave for, say, 12-15 seconds), with a spoonful of a good vanilla ice cream – a lovely dessert for guests.
I’m planning on cutting the cake into small portions, freezing each separately, and eating the whole thing myself – preferably over a period of weeks.