Halifax Harbour

Several years ago (2010) I was on the Dartmouth side of the harbour taking photos with my two oldest great nephews. We stopped at the Woodside Community Centre and walked down to the shore. The harbour was shrouded in fog but the Halifax building tops rose above the fog and the low clouds were well defined on this dullish day.

Halifax Harbour 2010

I filed the image away as one of my better photos. I came across it a couple of months ago while perusing photos looking for images that might be suitable for wall art pieces. I stashed this one in that folder.

I enlarged it a bit, printed it on fabric and today I began assembling it. So far I have a base image, with a narrow inner border and piping. I’ve chosen fabric for the wide outer border. I haven’t yet begun any thread painting – I have a feeling this is one of those situations that wants less, rather than more. The challenge is I can’t take out stitching once I’ve done it because the needle holes show. So each stitched element has to be carefully thought out.

Halifax Harbour

I’m also still working on Morning Conversation but today this image called out to me so I worked on it instead.

Morning Conversation IV

I worked on the piece quite a bit filling in background – It’s just about there. I think I’ve decided I’m not going to use the fusible vinyl on the windows – it’s just too difficult to apply successfully and I think even though the vinyl I bought is “matte” the shine will detract from the two men.

Morning Conversation IV

I’m still debating whether to thread paint the background elements completely before adding the men – I will end up with stitching underneath that may show but the stop/starts of thread lines would be smoother because they’d be hidden beneath the final appliqué. I guess I can start on the left of the piece and get as far as I can there, then decide.

Blue/Green – Socks From Leftovers #3

These socks seemed to go faster than the previous two pairs made from leftovers – mainly because I was knitting sections of the variegated pattern then switching yarn. I wasn’t having to continually swap yarn after knitting just two needles to keep the spiral going. I’m sure my sense that the knitting went faster was an illusion but it was more satisfying to knit them this way.

Leftovers #3

And I like the resulting blended pattern more than I do the “striped” version that results from combining two different yarns.

Here are the two original patterns:

Blue Socks


Green/Blue Socks

Morning Conversation III

Making headway slowly. It’s the technical stuff that’s bogging me down – problems I’m not sure how to solve. I’ve kind of worked out the shop windows but now I need to do quite a bit of thread painting to make the elements I’ve decided to put in make some sense.

Morning Conversation

I’m still not sure whether I want to do more with the shop windows – I did buy a piece of fusible vinyl (matte finish) to apply to there but it’s very tricky stuff to work with because if you put the iron anywhere near it, it melts off leaving a mess behind. And because I’ve got elements outside the glass having to be applied afterward, I’ve taken the coffee shop window apart a number of times, and I’m hesitant about reapplying it to this latest version!

The gentlemen aren’t yet fused in place – not until I get the rest of the background exactly as I want it.

Morning Conversation II

I’ve walked around this piece for more than a week! There are still several decisions I haven’t been able to make and that stopped me from doing anything. This morning I pushed myself to do something.

I’d chosen fabrics last week – today, I finally started creating templates for each element, cutting it out and fusing it to the base. The gents and the sign/bush on the left are simply laying in position – they’ll be among the last elements to be fused in place. But I wanted to get a sense of how they look against this background and I’m doing OK so far.

Morning Conversation

The shop windows are the big challenge – the shops are both dark inside, but there is some light. I originally thought I’d be able to use organza to hint at the glazing, but it obscures what’s behind it – great for implying fog but not so good for glass windows. Small bits of plastic might work – the question is how to adhere them to the underlying fabric!

For now, my plan is to continue adding background elements – a couple more and then some thread painting to stitch the fused sections to the base and to add texture to the stones and pavement.

This is the original image to give you sense of where I’m going:

Morning Conversation

Striped Socks From Leftovers #2

Completed these socks Friday evening. Again, the two socks came out a reasonably matched pair even though I didn’t really bother to align either yarn.

Striped Socks From Leftovers

These socks look nothing like the original socks!

Courage Of The Morning Sun

Or this:

Purple Socks

Yesterday I began another pair from leftovers – this time I’m not going to interweave the yarns as I have for the previous two pairs, this time I’m planning on knitting a variable number of rows from each yarn in largish stripes to see how that will turn out. It will have the advantage of not having to change yarn every two needles as I knit in the round.

Morning Conversation I

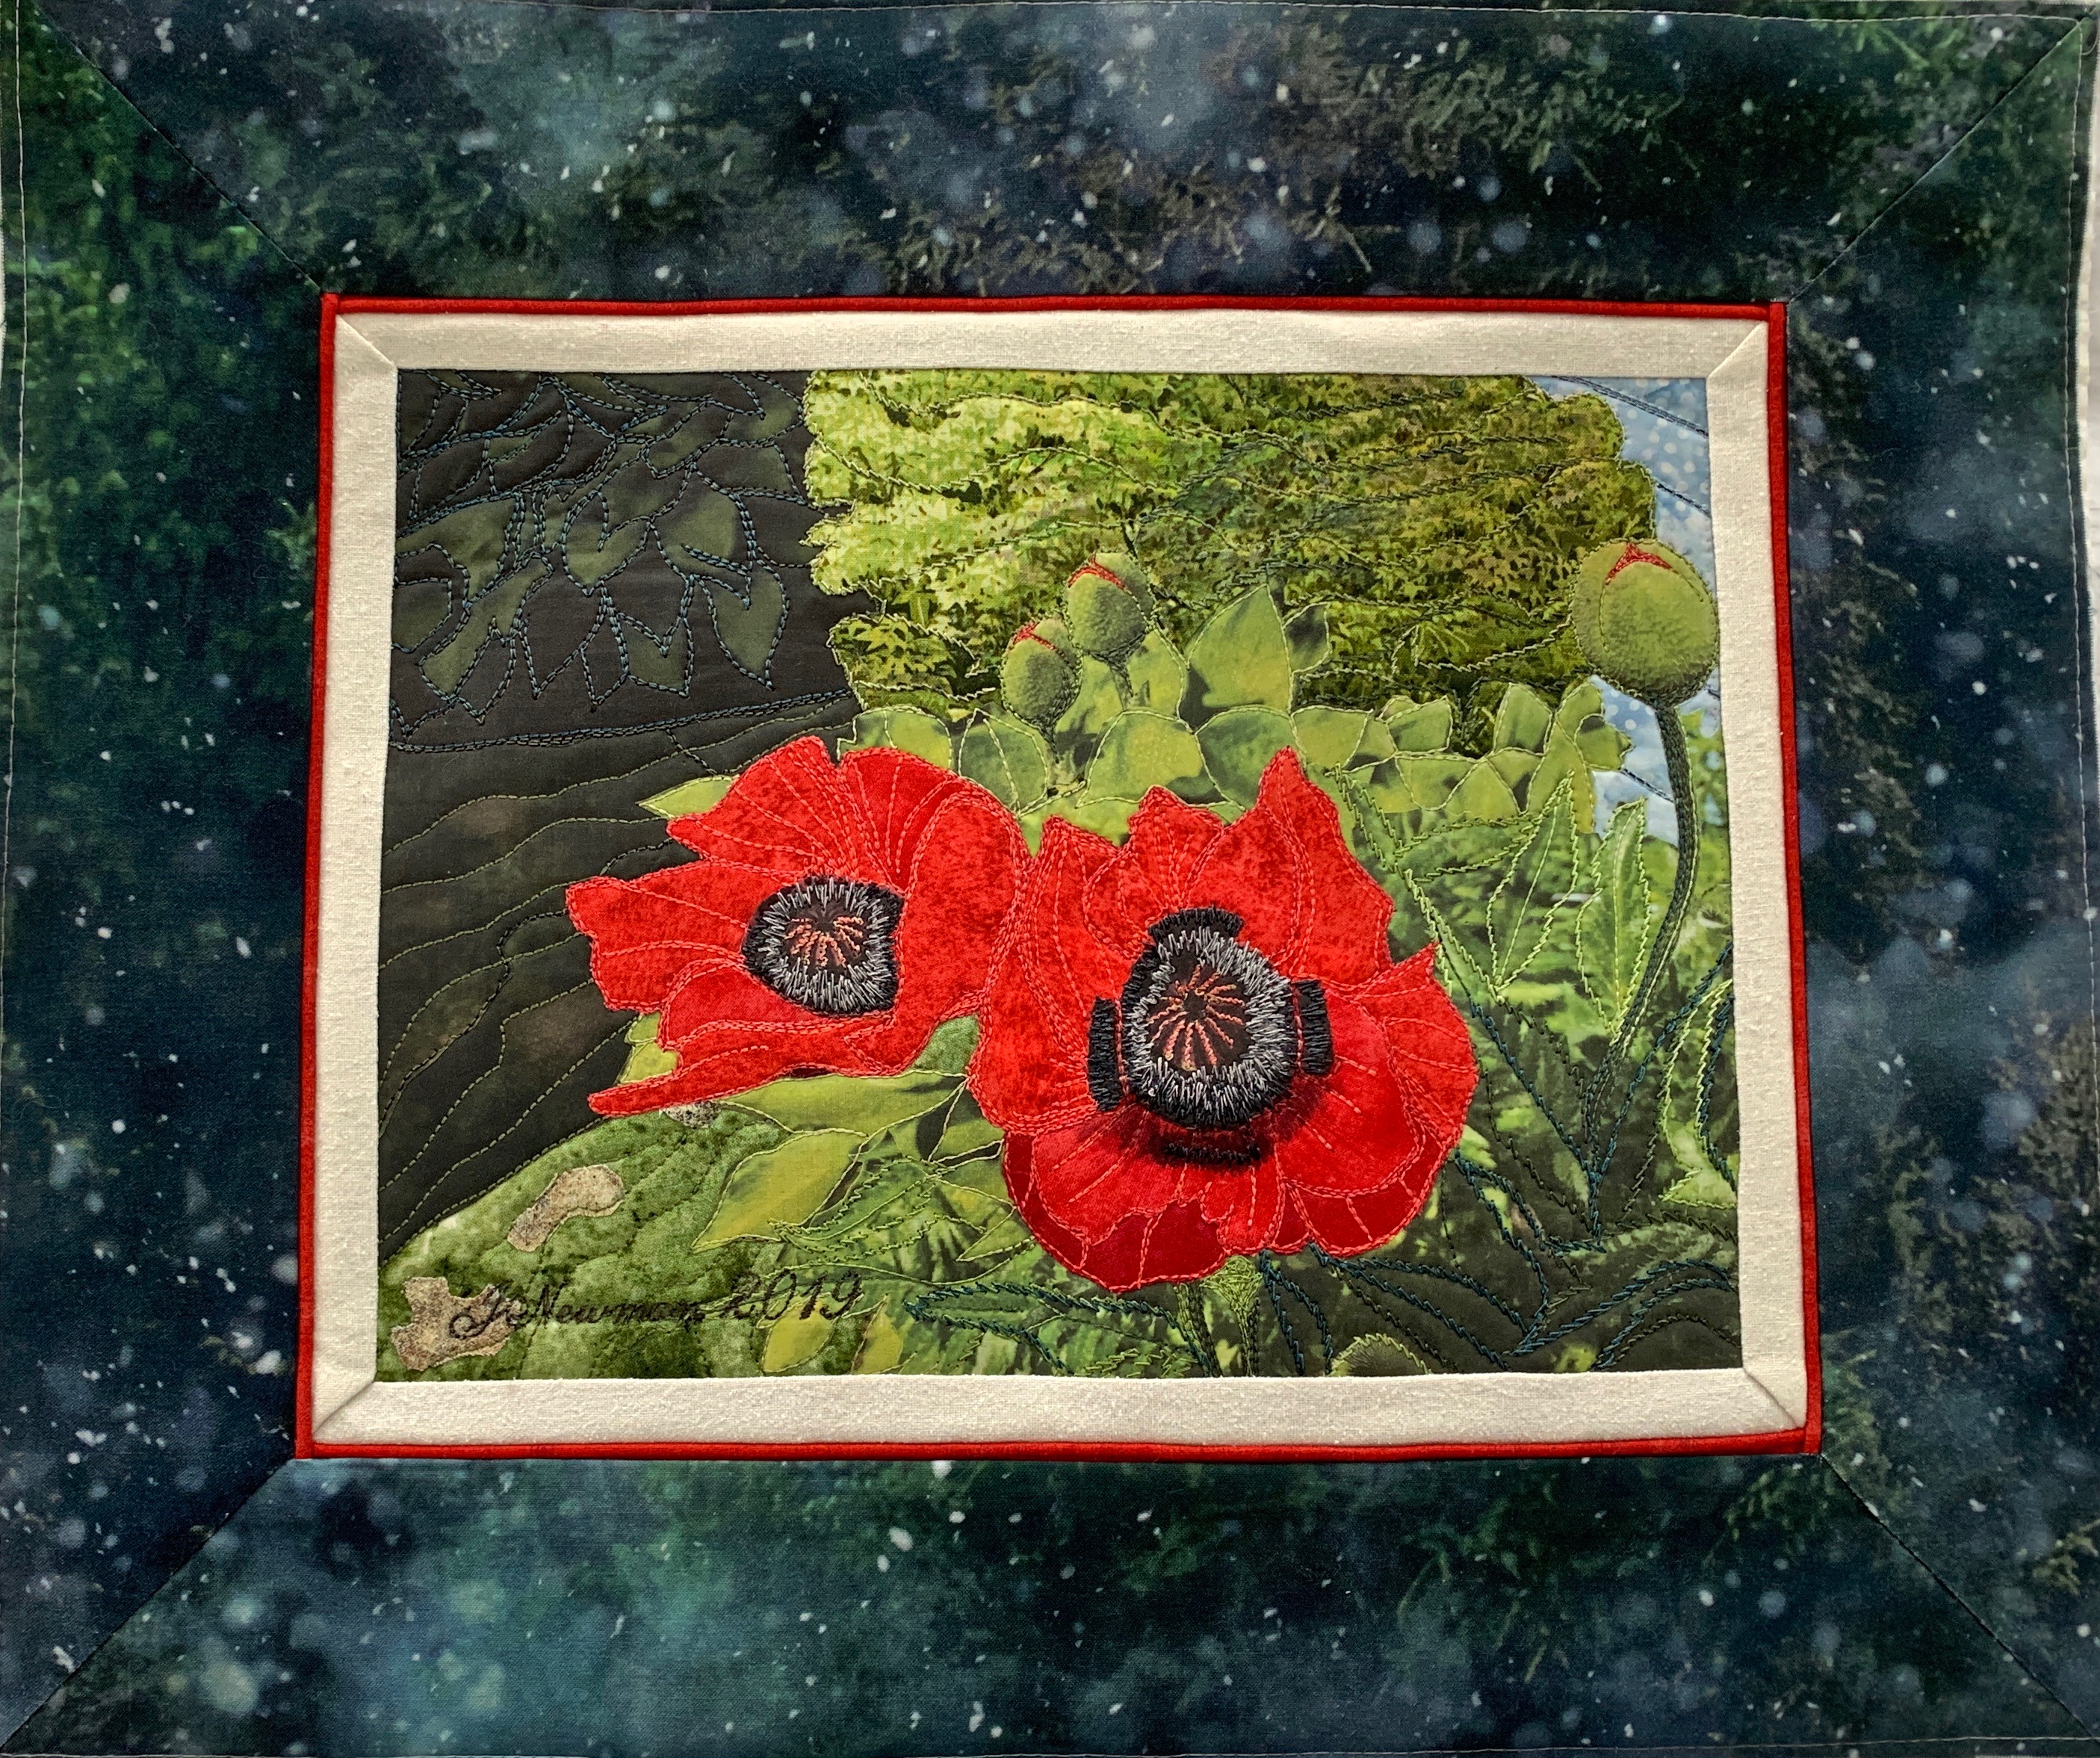
To begin – yesterday I completed Poppies – backing, hidden binding – all done. When I stand back from the finished piece, I’m pleased with how it turned out. I wasn’t sure along the way that I wasn’t going to scrap the whole thing, but after finding a fabric I thought would work as an outer border and overstitching some of what I’d done with blue embroidery thread, I feel the whole piece ties together. I’m particularly happy with the poppy centres – the texture there worked well.

Poppies – Finished

Today I turned to the second project – two men enjoying a sunny morning in the public square in Cortona, Tuscany. What captivated me when I took the photo was the gesture of the gentleman in the blue shirt – an absolutely Italian way of signalling I’m saying something important (and if you look closely at his other hand you’ll see a cigarette!).

Morning Conversation

When I laid out the piece, I moved the men from the left to the right side – it’s a balance issue – I felt the focus on the speaker was cut off when the men are positioned on the left – on the right, he’s open to the rest of us.

Morning Conversation – Underway

That move has meant I needed to reposition shop windows. In removing all the other people I’ve had to emphasize the hanging plant on the wall behind the men, the sign and tree bordering the left edge. I still have to figure out how to make the windows (without the advertising) work I a believable way. All challenges to be resolved.

The next steps, having sketched in details so I have a sense of where things should go, will be to fill in the large background elements – the sunshine and shadows on the pavement, the stone wall, the windows and doors,…

As always, it’s a matter of working from far to near, building up layers of fabric so the overlaps work. The last piece to be added will be them men themselves.

I picked out fabrics from my stash that I think will emulate the colour combinations in the photo. I will likely use marker on the grey grunge fabric to suggest the stone structure as a basis for thread painting detail. I’ve cropped the top of the shop windows so I don’t have to worry about store names, although I plan on placing the awning on the shop to the left.

The photo has served as inspiration – I’m not copying it exactly but by rearranging the elements I’m creating an image that feels more focused and balanced and less frenetic.

Poppies – Getting There

Made quite a bit of progress today – having decided to use the blue/green fabric for the border, I chose some blue/teal embroidery thread and overstitched in the dark green areas and while it isn’t sharp in the photo the stitching does tie in the blue of the border.

Thread Painting and Borders Almost Completed

Then I began working on the poppies – finished the centres, did some thread painting on the petals (may still do a bit more), added a bit of red stitching to the opening flower buds. Then I added the wide outer border and blind stitched the mitred corners.

Now I need to cut a piece of muslin for the back, and a couple of strips from the outer border fabric to do a hidden binding.

Poppies – Original Photo

Above is the original photo that served as inspiration for the textile piece. I think I’ve come close to capturing the vibrance of the poppies at the peak of their beauty.

Now to finish the piece and move on to the next one.


Poppies – A Better Border

I was at the fabric shop this afternoon to pick up some thread to thread paint the poppies – I didn’t have any good peach/orange red tones in my collection – I want to transform the blue-red colour of the appliqué to a more orange red, and while I was there I happened across a largish wall panel half of which was a blurred blend of blues/greens which I think will work better than the green fabric I bought last week.

A Better Border

I’ve pulled out some dark blue and teal threads from the collection to overstitch the dark green areas and connect them to the border fabric. And now I can get to work on the poppies themselves.

It’s hard to tell precisely what the colours are from the photo which makes the greens very green and the border blues more blue than they actually are. I do believe the tones in that border fabric as I see it in natural light will liven up the whole piece.

Finishing A Textile Art Piece

Evonne had a comment on “Poppies – Conundrum” with questions about the dimensions I use for bordering/framing a textile art piece. A couple of months ago I created instructions describing how I do the bordering/framing for the thread painting class I was teaching. I replied to Evonne providing a link to the instructions. I know most people don’t read the comments so here’s the link to how I finish a textile art piece:

creating borders

This is how Tropical Flowers looked when it was finished – a 1/2″ inner border, 1/8″ piping in contrasting colour (which I made), a wide outer border with mitred corners.

Tropical Flowers – Finished!

The process requires some careful measuring, first to establish the dimensions of the thread painted piece, then for determining the positions of the inner border, the piping, and the outer border. I find a heat erasable pen useful but it will disappear when you press each element so be prepared to have to redraw your lines. Drawing the lines in pencil works as well and the lines don’t iron out but be careful because you do have to stitch over those pencil lines or they will show and they don’t erase easily.

I also have found instructions for doing a “hidden binding” or a “pillowcase turn” to finish the textile art piece. I have used both depending on the piece, although most recently I’ve been doing a hidden binding finish since it keeps the muslin backing from showing when the piece is hanging on the wall.