One More Pair Of Socks


Don’t know how many pairs this makes – somewhere in the vicinity of 350, I’m guessing. This pair is for my chiropractor who wears the previous two pairs he has. I’m happy knitting for people who love wearing my wool socks!

That’s it for now with men’s size socks. Back to socks for women. They go faster.

Modern Quilt

IMG_4361

Just finished piecing this top for a “modern” quilt. What makes a quilt “modern”? Bold colours, improvisational piecing, layout, asymmetric design….

These are the fabrics I originally bought for the 2015 Craftsy Block of the Month quilt that I was going to make along with Nancy (@ Sew With Vision) but truth be told, I don’t particularly like that BOM quilt and the thought of working on it for a year wasn’t appealing. So I started looking at photos of non-traditional quilts and decided this one would do for a start.

I pulled more fabric from my stash so I was working with 20 fabrics in all. The intention was to create a colour flow on the diagonal, with the entire set of coloured blocks also on a slight slant. To make the coloured blocks pop, I sashed them with the background fabric so the whole has the appearance of a stained glass window. The combination of large and small blocks also added contrast to the whole.

Now to come up with something interesting for the back. I’m thinking a crazy quilt strip would work with this piecing. We’ll see once I sit down with the fabrics (I have enough left for several more quilts!) what actually comes out. That’s the fun part of this kind of quilt-making – I never quite know what I’m going end up with – that’s what I think was wrong with the BOM quilt – I really don’t enjoy following a recipe – I will continue to download the instructions for the blocks to see what new techniques I might pick up, but I’m not going to make those pieced blocks.

Art Quilt #3 – Toward the Future

IMG_4323

Click on photo to see detail.

I didn’t take a lot of photos along the way – in part because this project has been sitting around since last April – I knew what I wanted to do with the piece, but somehow it just didn’t make it to the top of my list until about 10 days ago when having finished the third pair of pants I thought it was time to do something with this quilt art work.

Finished dimensions: 18″ X 21 1/2″; it’s a “mixed media” piece – the foliage and the boys are photos printed on fabric (the printed foliage cut and pieced to create the canopy), the foreground elements are pieced quilting fabric to blend with the rest of the materials. The “matting” is raw silk; the border – batik. The boys and the background are two different photos – I had to fussy-cut them from the 8 1/2″ x 11″ printed fabric sheet so I could appliqué them into this background – two young lads walking toward the future created an interesting image, I thought.

To begin with I intended creating the foliage using a variety of green fabrics but nothing was successful – the colours were wrong, didn’t blend, didn’t look like leaves/trees. In the end, I opted to do this piece as mixed media, combining photography with appliqué quilting. I was happy with how the foliage turned out.

To enhance the intensity of the colour of the boys outfits I used oil pastels; permanent markers were helpful for blending thread colour into the fabric. The point was to end up with as realistic an image as I could manage using whatever materials let me do that. I decided not to be inhibited by any “rules” for doing art quilts. I did what worked to create the outcome I was after.

This art quilt I’m keeping – now to find a place to hang it. 

———–

March 28 2015

I follow the work of Melody Johnson – an art quilter who backs her “quilts” with a painted MDF board. I thought that an interesting idea and decided to try it on this quilt:

IMG_4516Definitely gives the piece a more finished look. I like how the blue border lightens the fabric “frame” and gives a strong edge to the work.

I have to take another look at “Asparagus Field” and think about whether I want to do the same thing with that.


Another Winter Snow Fall

It snowed again last night – a light, dry snow which drifted onto my back deck. When I tried to open my back door this morning to see how much drifting had occurred I could open it just about 2″ – that was it. The drift came about a third of the way up the door!

You can see my shed is being buried – I love the “hat” on the roof; I just hope the roof will bear all that added weight.
IMG_4309
The drifts would be over my waist were I to try to come from around the side of the house. I decided I couldn’t get to my back door to shovel it myself.

IMG_4310

My neighbour Verne did it for me around noon. So now I can open the door. However, I’d have to be determined to “plough” my way through the drift if heaven forbid I had to get out.

IMG_4312

Second Pair of Pants

Yesterday I completed the pants in Twill – I wanted to see how the pattern would turn out in a less giving fabric than the denim I used (which has a lot of give).

The front is great – no fullness on the sides below the bum, just a straight side seam.
IMG_4302

The side view is also good. The pants are about 1/2″ too long – I may take them up after I’ve washed them – I hemmed them at a 27″ inseam (my usual inseam is 27 1/2″ – given the way these pants fit I’m guessing I should use a 26 1/2″ inseam for hemming – I know my legs aren’t shorter!)IMG_4304

And the back fits nicely as well. So I guess this pattern is a keeper as it is.IMG_4305

A useful addition to my wardrobe.

That’s it for pants for now. On to other stuff.

Eureka!

In a comment on my Muslin #3 – Pat mentioned another pants fitting system she’d tried successfully. I decided to give it a go – Fit for Art Patterns: Eureka! Pants That Fit. I went online, found the pattern – it arrived last week – I went to work.

pants-that-fit

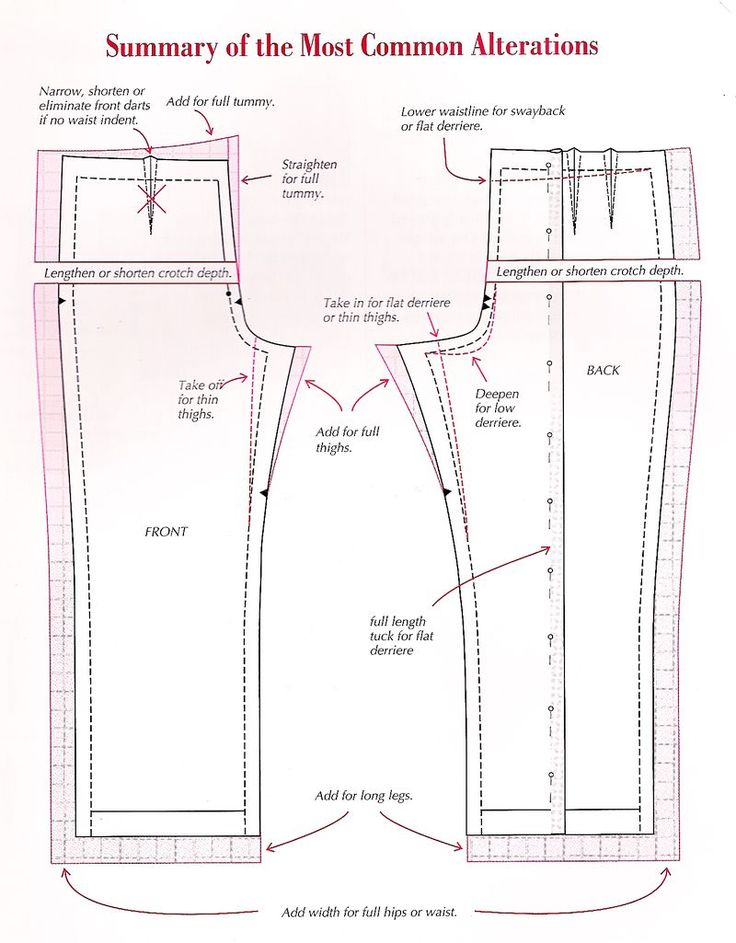
First I read the booklet to get an idea about how this system works. They (Carrie Emerson, Rae Cumbie and Sarah Veblen ) start out by saying Sewing pants is easy.  I agree – getting a comfortable, flattering fit is the challenge! Their system is based on three prevalent body types – their template pattern includes one front and THREE different backs – one for people like me – no bum, a second for a reasonably rounded ass, third for  “full” bottoms. What they’ve done, in other words, is make some of the most common pants adjustments:

adjusting pants

In Back 1, they’ve lowered the back waistline, decreased the crotch depth, slightly deepened the crotch curve, taken in the upper legs – all the adjustments I’d have to make for a pattern to fit my body shape. The sizing chart suggests for my measurements I make a Back 2 (for regular bums) but I knew that would be a mistake, so I chose Back 1 (for no bums) and traced both the front and back onto tracing paper. I decided an XS would work for the back but I made a combination of XS/S for the front.

In the booklet they recommend leaving a back opening for fitting – no good for me – I can’t pin that myself when testing the muslin, and in the end I’m going to have a fly front, so I set up the pattern tracing with a fly front. The template also has a straight waistband – I used the curved waistband I had used to construct the earlier muslins which fit quite comfortably just below my bellybutton. Then I cut out a muslin.

I sewed in a zippered fly front (Sandra Betzina’s technique – I’ll never put in a fly front any other way – this is SO straightforward), stitched up the centre back seam, the side seams, then tried the muslin on. The centre front seam didn’t quite come together – that meant I had to widen the front side seam about 3/8″ on each side. The legs were still a bit full through the thigh – I tried taking them in on the side seam – that introduced some pulling into the back, I put the side seams back and took the leg in on the inner side seam – the muslin still didn’t hang quite right but I had a hunch if I just took a smidgeon from both inner and outer leg when I redrafted the pattern I’d be OK. I marked on the muslin where I wanted the top of the waist to land, subtracted the waistband width (2″), marked that, (then added back 5/8″ to get the cutting line for the top of the pants. I finished the muslin by adding a waistband just to see if I was right about the location of the waistband top edge – I was!

muslin #4


Once finished, I could tell the back seam needed to be made a wee bit fuller (~ 3/8′) and the crotch a wee bit deeper – both back and front (~ 3/8″).

So I now set about redrafting the pattern with adjustments – this time using Swedish tracing paper so I’d end up with a durable pattern. Working from my traced paper pattern, I added 3/8″ to the front at waist (gradually decreasing from the waist to the belly line – I only needed the extra at the waist), I took my “crotch curve” (this came from a package: The New Magic-Fit Master Pattern for Pants – a pants fitting system from 1984!) and dropped the crotch a bit and increased the fullness of the centre back seam 3/8″, I slightly reshaped the thighs on the side and inseam slimming them to the knee line, I straightened the leg from knee to hem.

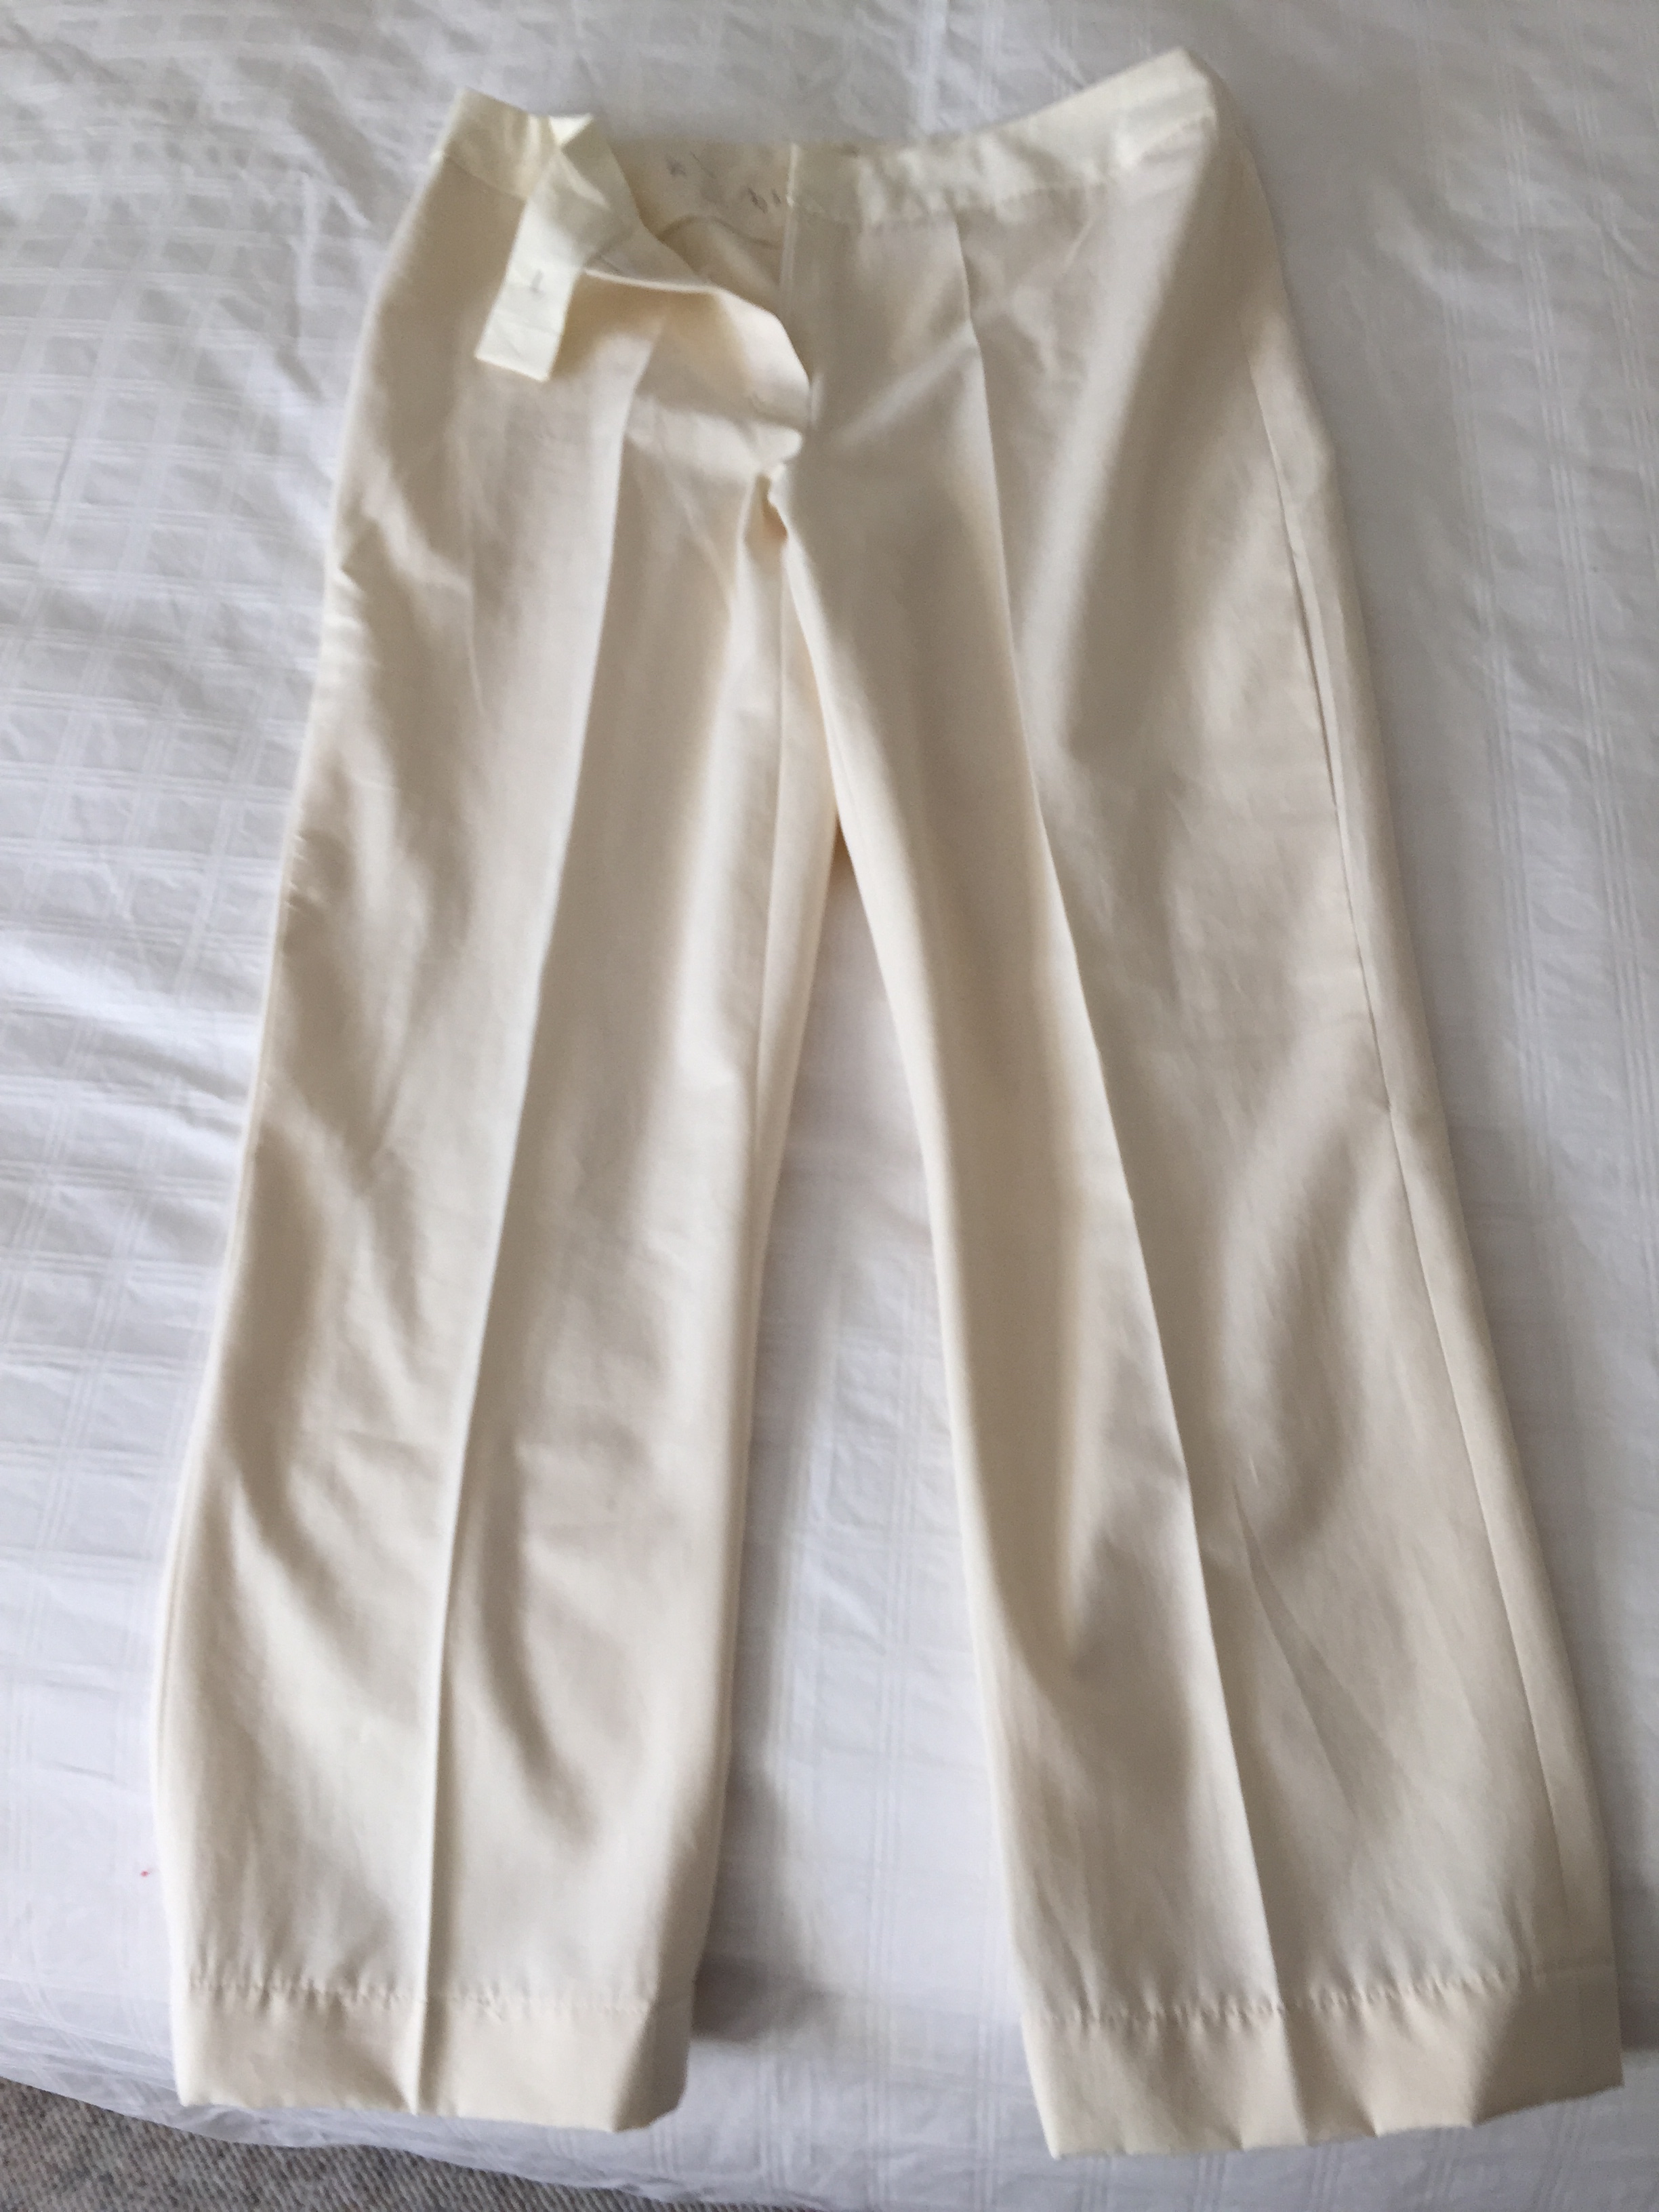
Yesterday, I cut out the pattern in an 8 weight denim (light-medium weight) and  got to work. I finished the pants this afternoon.

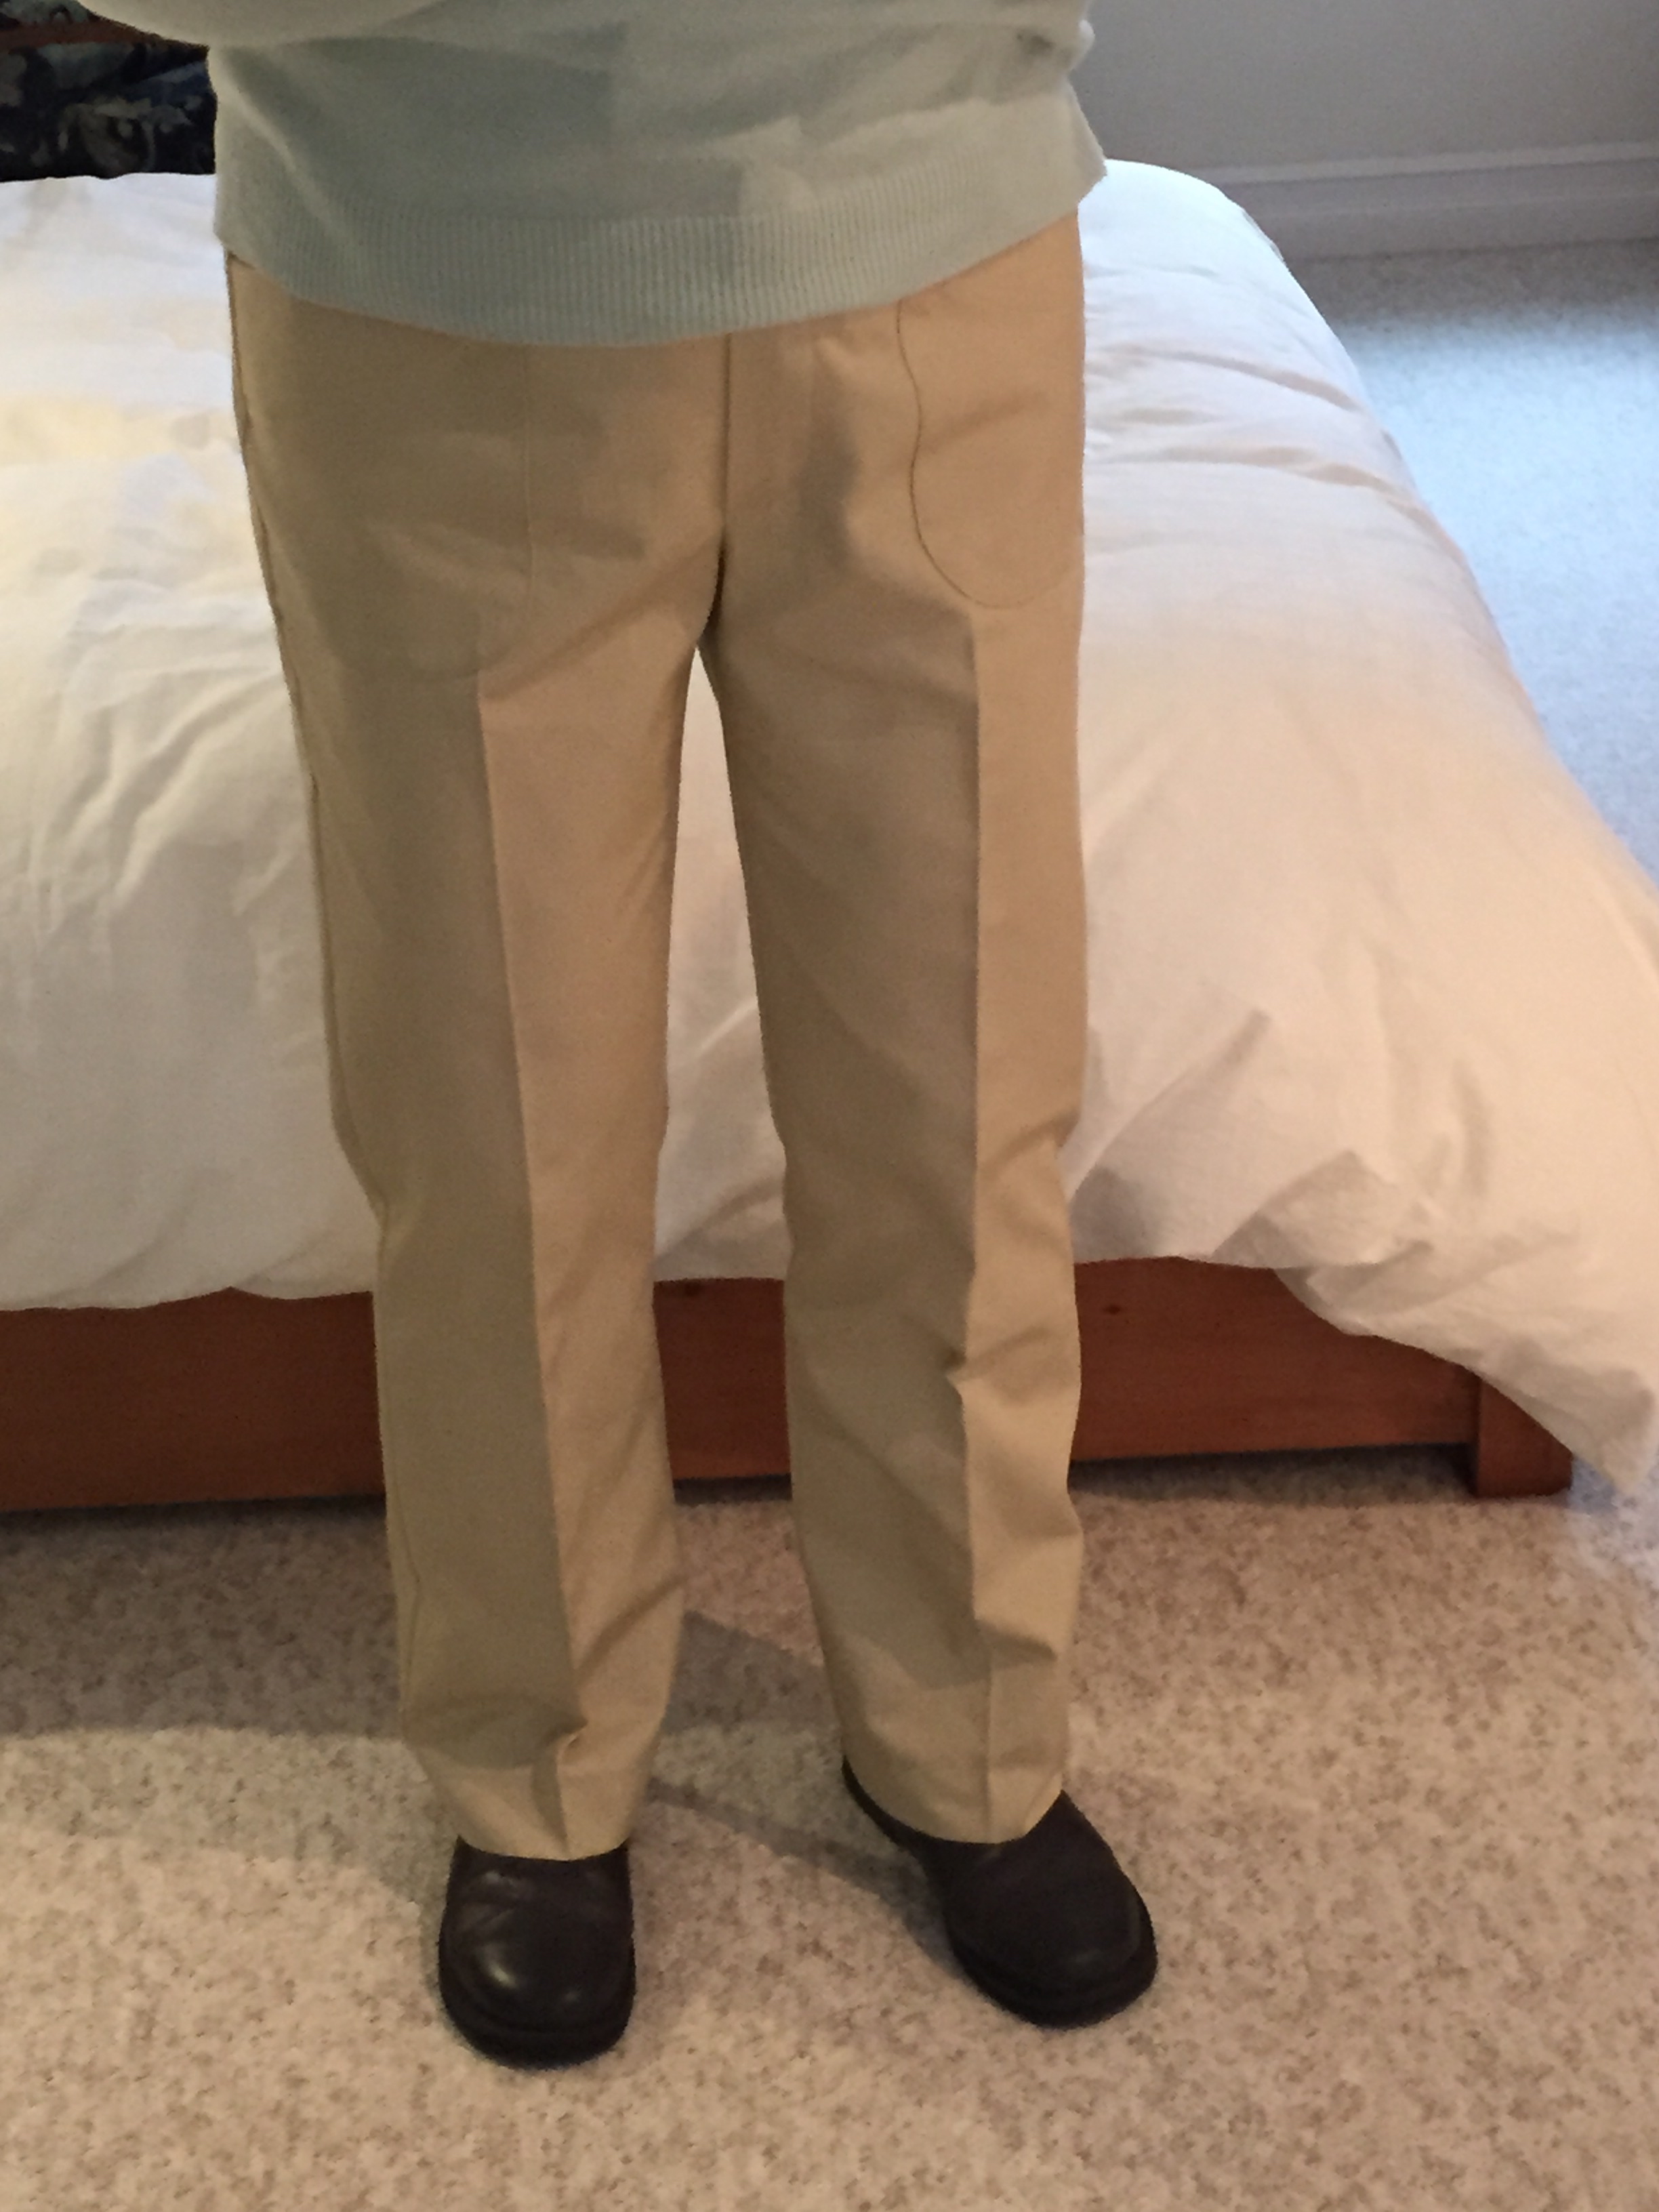
I have to say, this is probably as close as I’m going to get to the fit I’m looking for. The front falls straight with no extra fabric in the thighs:

IMG_4282

The side seam is straight down the middle and no dipping under the bum:
IMG_4276

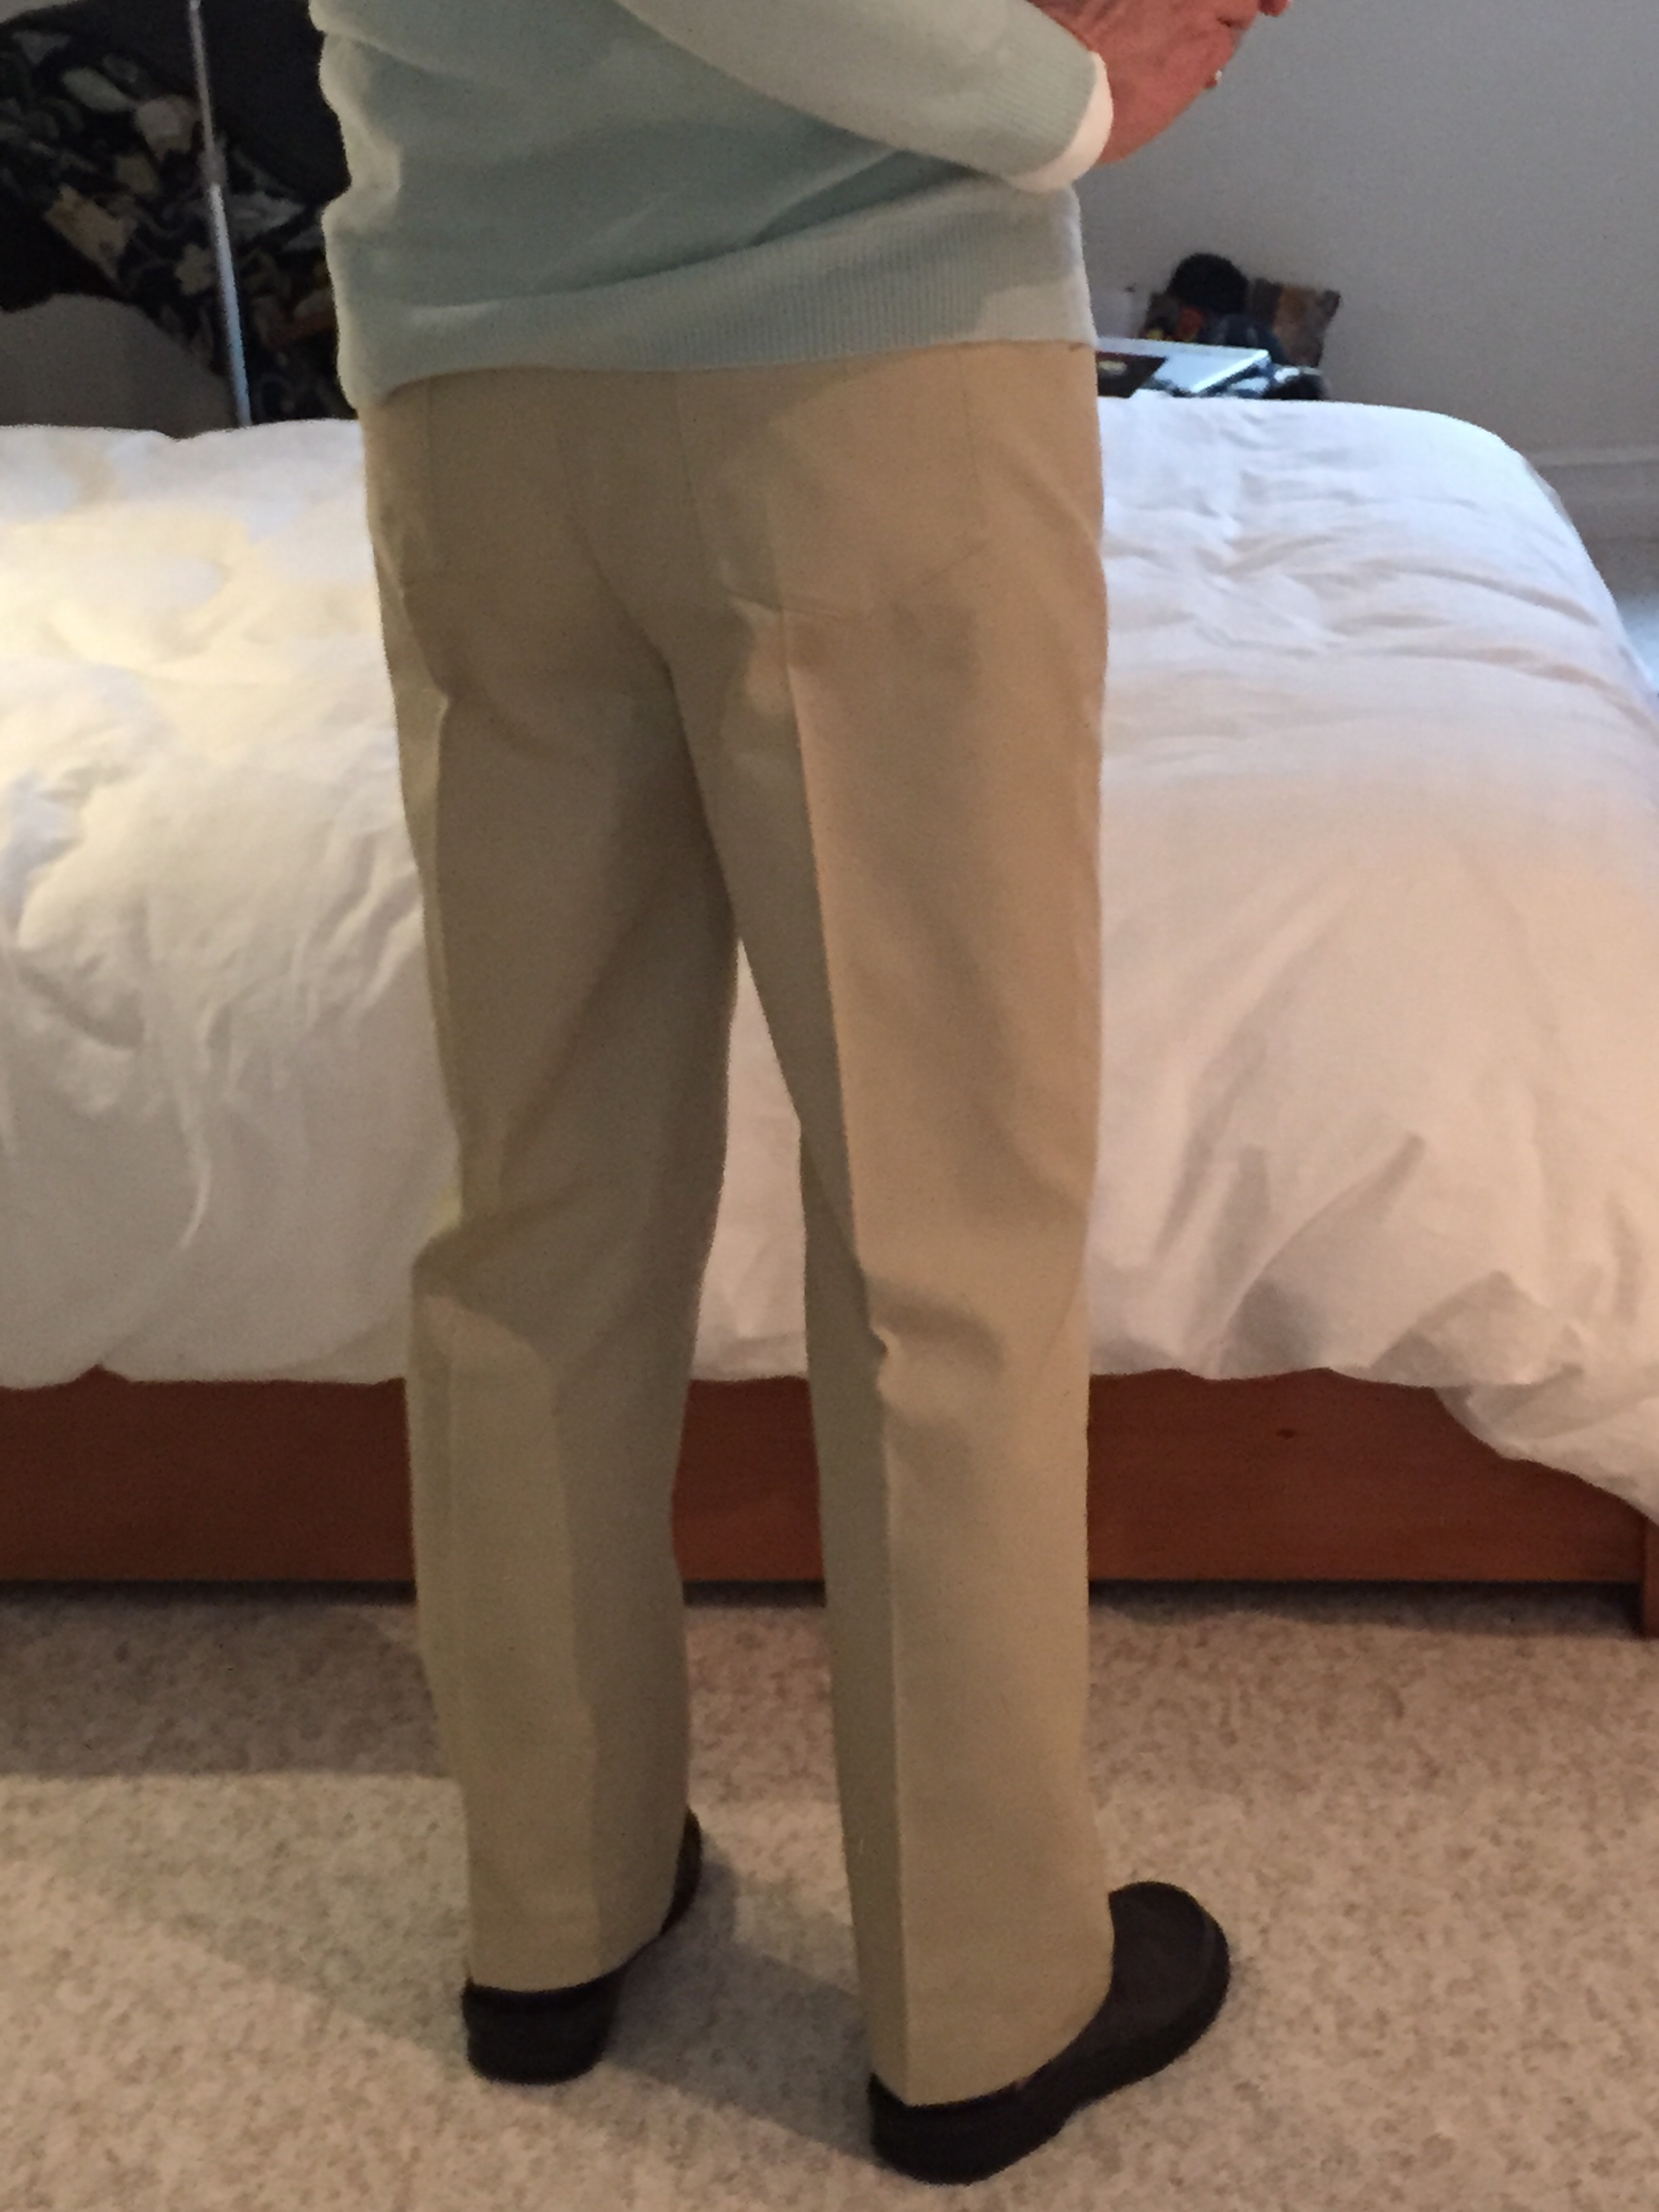
And the back falls straight.

IMG_4286

The pants are comfortable, I can sit in them without having them pull in the back, the thighs are about the right width.

These pants are a smidgeon long – (I used my standard 27 1/2″ inseam but I think with the depth of the crotch I could use 27″); however, I know, with washing, the denim will shrink a bit in length even though I washed it before I used it. This way, the pants will end up the right length!

I added pockets to the outside of the front, and pockets to the back. So these pants are a cross between trousers and jeans. I incorporated a tab on the front of the waistband to accommodate an off centre button – (a centred button chews the front of my sweaters – off-centre I’m fine).

Now to try another pair in a twill.

A Walk in the Sun

IMG_4253
OK. so I went for that walk in my neighbourhood. There are a couple of locations I visit and revisit through the seasons to photograph the trees and shrubs. I love these five trees -I have a collection of pictures of them through the years – I loved the diagonal shadows they were casting today.
IMG_4260
At one point, I stopped and looked back – there were my footprints in the fresh snow.

.

-8 But a Glorious Day!

IMG_4250
It’s a minus 8 outside but the day is simply gorgeous.
I sit here enjoying the view from my living room window, my Amaryllis in full bloom, the drifted snow on my back deck, and I feel happy.
My neighbours have been complaining about the weather, but I learned many years ago while living in Winnipeg to dress warmly and head out to enjoy the sunshine. Just what I’m going to next.

IMG_4243