The Japanese monpei are working pants constructed in such a way that there is no waste fabric – you cut triangles from the waist area which you use for the crotch. It works – with a few caveats!
This gives you an idea how the pants are constructed. Click here for a link to the original set of instructions. (I’ve added notes and some numbers to the instructions – click here for my additions.)
Here’s what they look like finished.
The Front
The Back
This is actually my second try – I followed the instructions for the first try – cutting triangles from the “top” of the rectangle panels (3 1/2″ for the back crotch gusset; 1 1/2″ for the front crotch gusset). Because the panels use your hip measurement to calculate the width the waist on my first try was WAAAAY too small.
Fortunately, I had enough fabric left that I was able to start over – this time working with the complete rectangle (because my waist is almost the same as my hips) and cutting a single gusset for each leg (constructed by making the front and back gusset pieces into a single gusset piece). However, I didn’t have quite enough fabric for the legs – I cut 12″ from the bottom of the first try and added them to the bottom of the legs on this second try to give me enough leg length. I was going to do some decorative stitching to make the seam appear to be intentional but in fact you don’t notice the leg lengthening seam so I’ve left well enough alone.
I used rayon fabric I bought in Bali in 2014 (where do the years go!). It’s a lovely weight and drapes nicely. I’d say the monpei turned out rather well. I have to look at some of the other rayon in my stash and see if there’s enough of another piece for a second pair of pants.
I didn’t quite follow the instructions – I didn’t cut fronts and backs of legs separately, I cut single panels for the front/back leg – no side seam. A next pair will have a side seam because I want to add front pockets and they’ll work best if they side of the pocket is incorporated into a side seam.
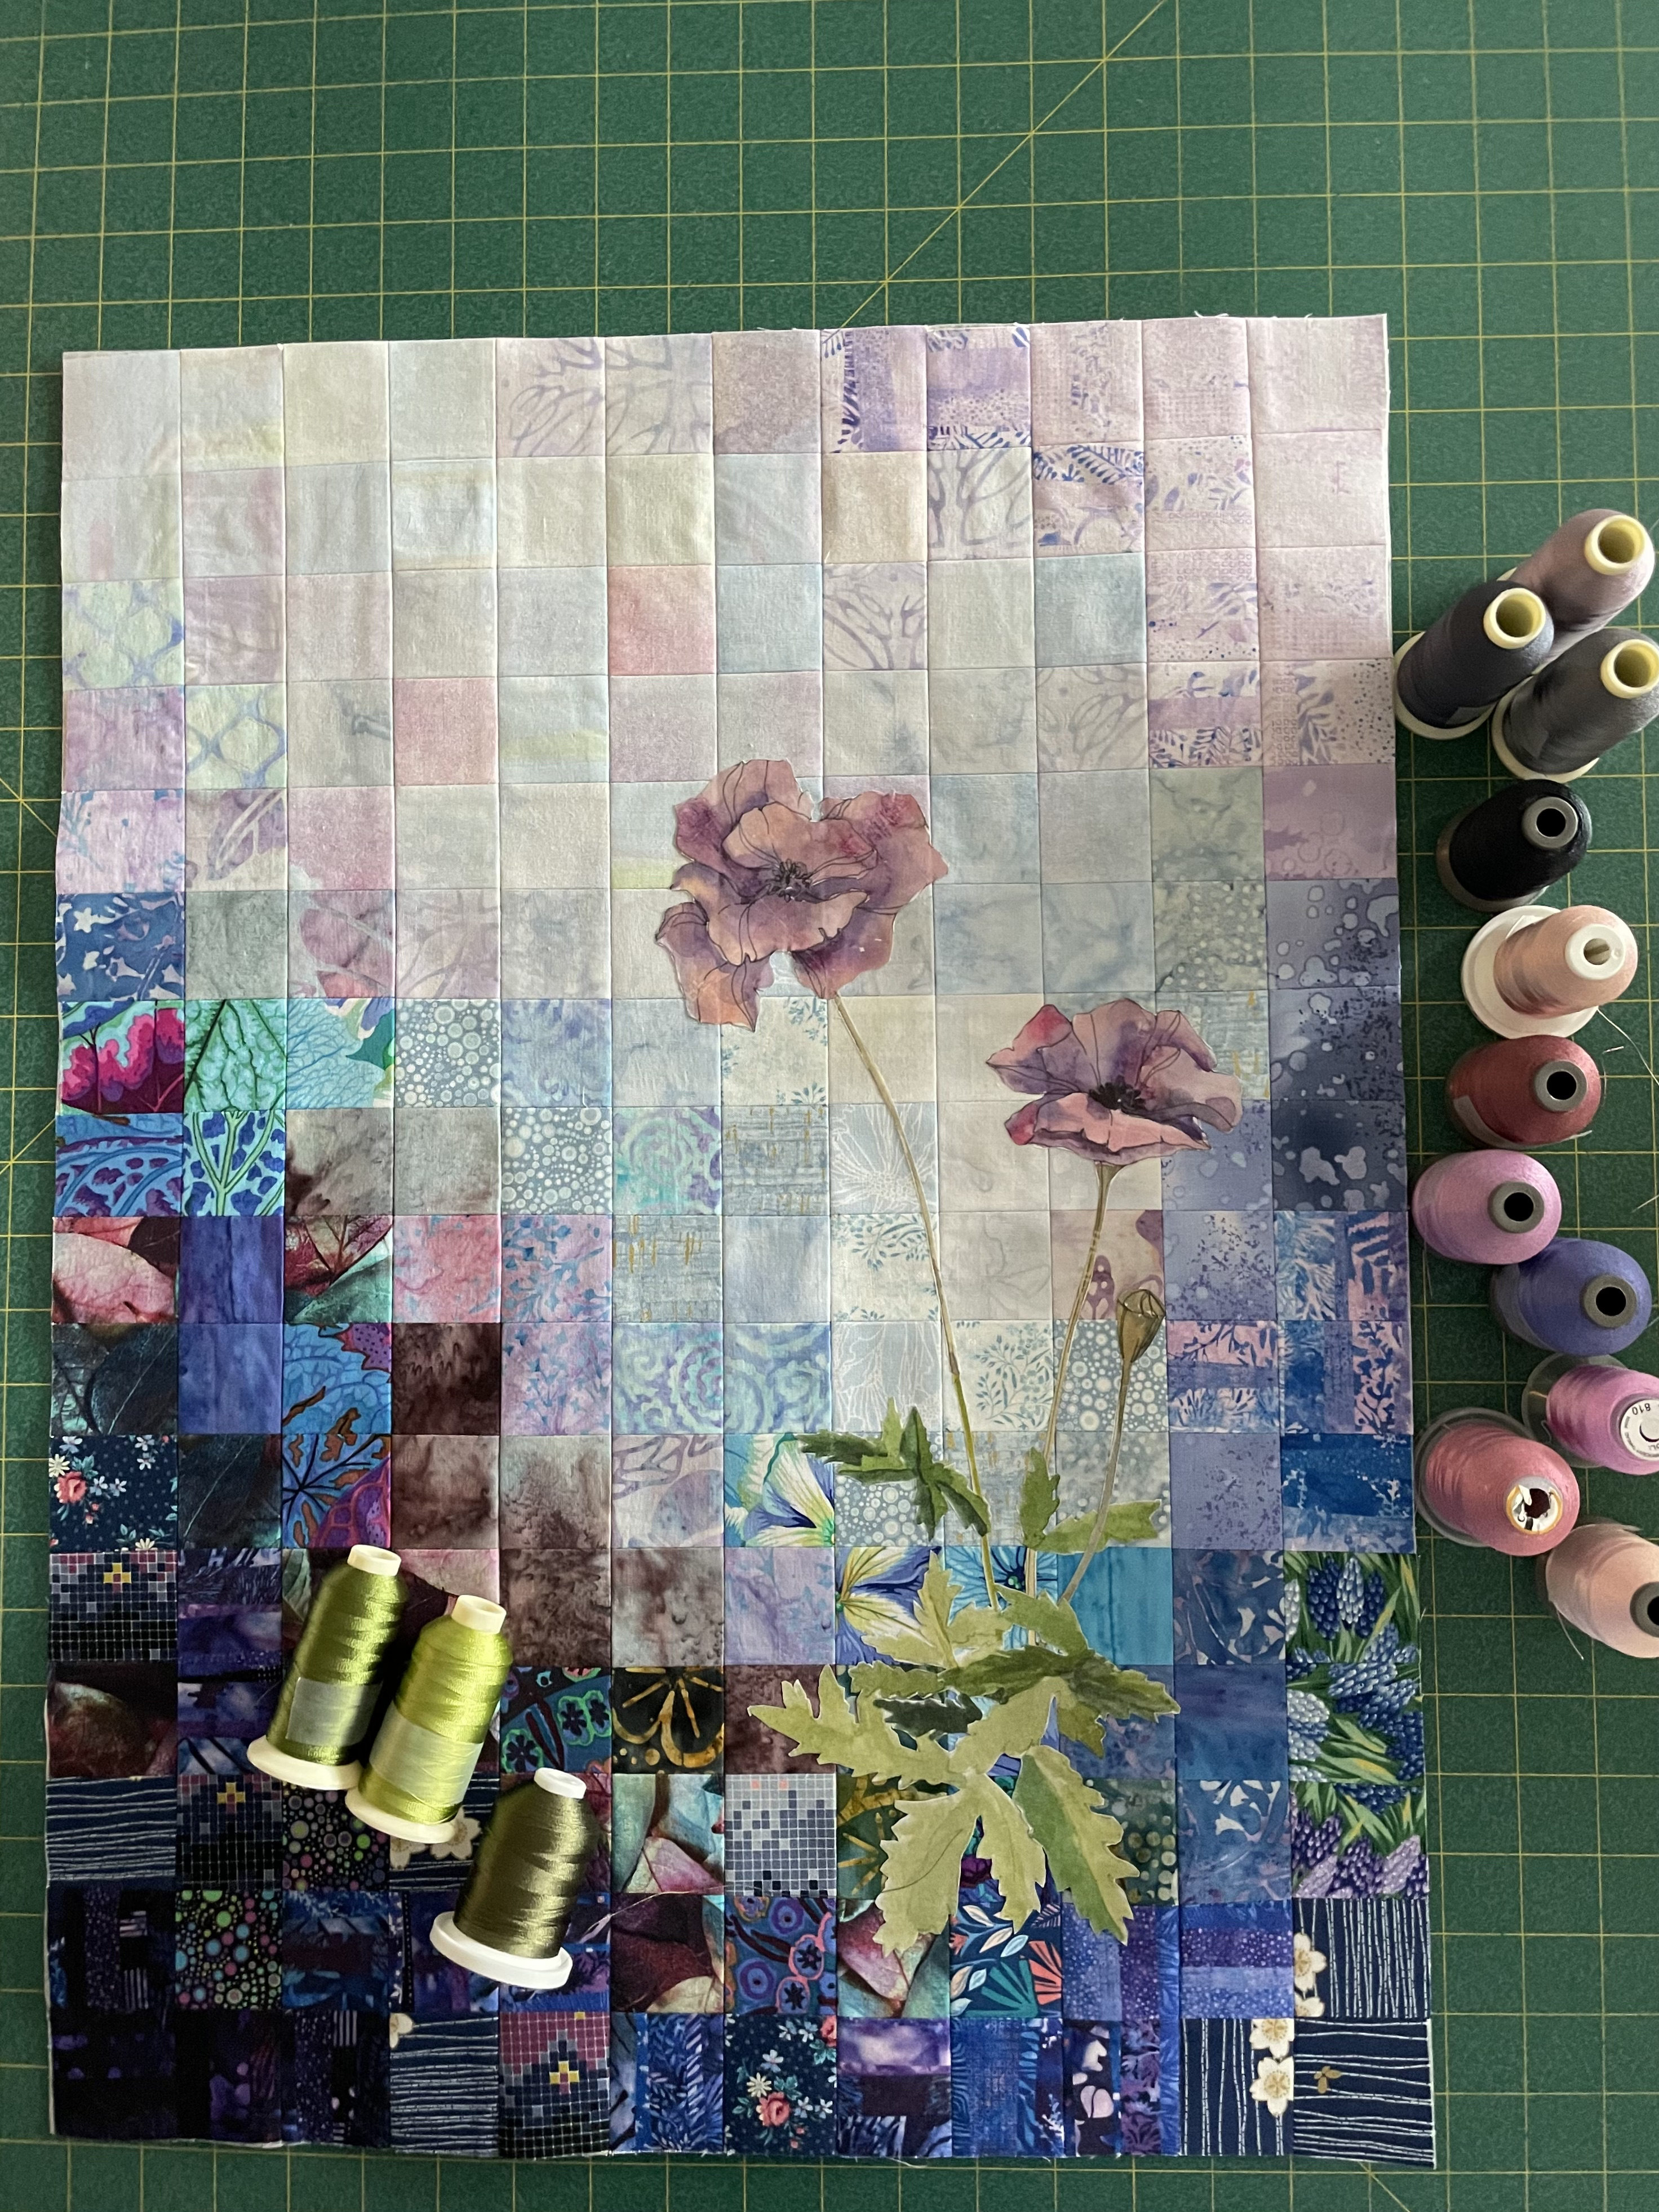
This is the current state of my wall art piece. The purple poppies are pale. I could remove this fused appliqué, print new poppies, darken them with permanent markers, or work with the current appliqué and see whether I can intensify the colour by thread painting. I don’t know which to do yet, which is why I have done nothing, so far. Stopped. Dead.
Immobilized, I spent two days this past week reading “Prediction: A Pandemic Story” by Michael Lewis. While about our current pandemic, he grounds his narrative (as he always does) in presenting the stories of people who were reading the tea leaves based on what they were able to deduce about what happened in the 1918 flu outbreak, the asian flu I experienced in 1957, the impact of SARS in 2003, the swine flu epidemic that didn’t quite happen in 2009, which predisposed them to know another uncontrollable pandemic was inevitable and the steps they began taking to mitigate the anticipated disaster.
I read the book in two days – on my phone (I prefer reading on my iPhone rather than holding a book in my hands). I had a headache from so much reading, but I couldn’t stop.
Having lived through the past 18 months we know about the US government ineptitude but the reality as seen through the experiences of his central “characters” is compelling. “If only…” I kept saying to myself; so many people could have avoided becoming seriously ill, the numbers of deaths could have been so much lower, the impact on the economy would have been so much smaller.
In some ways, it’s too soon to write the book – we have not come to any end point in the pandemic, and Lewis’ “resolution” at the end is weak – of necessity because the pandemic is NOT over. Who knows when the disease will finally die down globally because until it does the virus will continue spreading and mutating.
I have also begun an online course offered by The World Bank: The Hidden Side of Energy Access: Understanding Clean Cooking. Who knew that 4 billion (yup, billion) people lack access to modern clean cooking options that allow them to cook conveniently, reliably, safely, and affordably. The problem is using non-clean energy sources impacts health, gender, climate, and environment. The costs of pollution from cooking with wood and charcoal, in other words, using unclean cooking sources, are enormous.
Not something I’ve ever thought about. I pull some stuff from my refrigerator, prepare it, cook it, without giving it a second thought. So I decided I’d learn something useful from the course. Well, I am, but oh, is it frustrating. This has got to be the most poorly designed learning experience I’ve ever tried. A number of years ago I participated in a World Bank course on climate change which was very engaging. Interesting reading, video, discussion. I gave the course quite a bit of time and learned some useful things. Here, each module consists of a collection of powerpoint slides with a gazillion acronyms (which I can’t remember – even MECS – modern energy cooking services – is stretching my brain. Then there’s MTF – the multi-tier framework for cooking – a tool for assessing the affordability, safety, convenience and availability for cooking). The course is all about memorizing stuff. Even the “discussion” forums are about regurgitating the dense content from the slides. The navigation is completely unintuitive, I’m forever fighting to find my way from one part of a module to the next.
Fortunately, there is a report on which the course is based. Here is a link to Access To Modern Energy Cooking Services. In our current climate crisis it’s probably useful to know something about this particular global factor which in some ways affects us, too.
I may quickly work through the remaining three modules, foregoing the exercises, quizzes and “discussion” to get an idea of the arguments. But I think I will take time to read the report – I have little patience for watching powerpoint slides – I’m a reader – I make sense through reading.
There are just not enough hours in a day to keep up with everything – the political news, learn new stuff, be creative….
I have to decide what to do with the Purple Poppies and then just get on with it!
This story goes back at least 45 years! When I lived on Braeside Lane in the late 70s I found myself experiencing a definitely audible “hum”, particularly in the middle of the night, which drove me crazy. It sounded like a very large diesel truck idling just outside my building.
A low frequency hum, almost a vibration, just on the threshold of human hearing. It’s not particularly loud. In fact, you might not have even noticed it yet – but once you do, you can’t stop hearing it. It sounds like a truck, idling on the street in front your house. Or the atmospheric din of an airplane flying overhead, that never gets further away. You can hear it when you’re outside, but it seems louder indoors, and particularly at night, when you’re lying in bed. Maybe it keeps you awake.
If you do hear it, you’re among the roughly 4% of the world’s population affected by “the Hum”, a frequently reported but little understood global phenomenon.
I struggled with the “hum” for a couple of years before finally I had the brilliant idea to call the acoustic engineers at TUNS (Dal) to see if they were aware of the “hum” and what they knew about it. Not much, it turned out, but they were interested.
Two guys came to my house with some fancy recording equipment for me to use after, say, 2:00am to see if I could capture the noise that for me was so audible and irritating. I recorded the “hum” for a week, after which they came back, collected the microphone and recorder, and analyzed the recordings.
Then they reported back to me. They could definitely detect a low pitch noise (somewhere around 40Hz – they were actually more specific but it’s been so long ago I can’t actually remember the precise number) around 5-10 decibels – loud enough for some people to hear even at that low pitch. They had no idea what the source of the sound was but they assured me it was real.
My Braeside Lane townhouse was constructed on bedrock – a continuation of the Halifax bedrock on which the Fairview Cove Container Terminal was built – so it was not inconceivable that the vibration made by the large cranes or the idling container ships docked at the port, particularly at night, might be transmitting a sound through the bedrock and reaching my house.
No way to prove that theory but I took comfort in knowing the “hum” was a real sound.
I was fortunate, in that I discovered a “node” of that vibration that happened to occur at the foot of my bed, about the diameter of a 15″ platter. Well, that helped a lot – a silent spot in the middle of the thrumming low pitch vibration was a godsend – I was able to sleep comfortably with my head at the foot of my bed and be oblivious to the “hum.” (Although it took some time to feel comfortable/safe sleeping with my head in the middle of the room!)
When I moved to Winnipeg a number of years later, and was looking for a place to live, the first thing on my list of things to watch out for was any “hum”! The realtor and I would visit a place during the day. I’d ask for silence as I walked through the house or apartment trying to listen for any “hum” particularly in the bedrooms. I wasn’t surprised to encounter a variety of “hums” – refrigerators, air conditioners, traffic, railway lines – a city is full of “hums”. I was trying to listen for that unidentified low pitch “hum” I wanted to avoid. I drove the realtor crazy asking to return to a location late in the evening so I could listen to the ambient sound before I’d consider purchasing. I finally found a condo on the Assiniboine River that fit the bill – I was never bothered by the “hum” during the four years I lived there.
When I returned to Halifax in 1997, same thing. House hunting, making sure I wasn’t also buying a “hum” to go along with the house. Again I was lucky. My Chelsea Lane townhouse, although built on the same bedrock as Braeside Lane was further from the container terminal, and “hum” free. I wasn’t bothered by any “hum” for the 20 or so years I lived in it (there was a large CBC radio antenna not far from my place, but I never encountered a “hum” emanating from it).
In August 2016 I moved into an apartment building, 6th floor (top floor), checked for “hums” – thought I’d managed to escape once again. However, on Oct 19, two and a half months later, as I was returning to bed from a trip to the bathroom at 3 in the morning, I was assaulted by a very pronounced “hum” – it persisted for the rest of the night and into the next day. I could hear it – I could feel it thrumming in my head. I could block it out if I turned on the radio, which I did. It wasn’t the highway traffic on the other side of the building – that was intermittent, and besides I really didn’t hear the vehicles, even when standing on my balcony. It might have been the air circulating fans on the roof close to my apartment – but then why hadn’t I heard them when I checked before moving in?
The “hum” was everywhere in the apartment, I could not find a silent node anywhere. I tried identifying the pitch of the “hum” using the keyboard on my iPad. It seemed to blend as a harmonic with F/F#/G two octaves below middle C – I’d lose the “hum” when I played those notes, although I couldn’t pin it down precisely (C1 – three octaves below middle C has a frequency of 32.70 Hz – which is close to the acoustic range mentioned in the Guardian article; it’s also a harmonic with F so it’s possible the base pitch of the “hum” is somewhere around C1 with harmonics further up the scale).
The “hum” never quite subsided, but I discovered an App for my iPad – White Noise – which produced a range of backgrounds to block offending noises. The sound which worked best for me, believe it or not, was the ambient sound of the International Space Station! That, combined with “grey noise” which I was able to pitch closer to F2/F#2/G2 worked to mask the “hum” – so just before turning out the light, I’d turn on White Noise and run it for the night. It allowed me to fall asleep. I used the App nightly for a couple of years and then the “hum” seemed to disappear. I stopped turning on White Noise before getting into bed.
The “hum” returned last evening! At 9:40pm – there it was again – that loud low pitched thrumming – I actually went outside to see if I could see a large diesel truck idling nearby – nope, no vehicles anywhere near the front of the building. Even turning up the volume on the TV couldn’t block the “hum”. I was getting ready to turn on White Noise when around midnight the “hum” subsided. I went to bed and was able to fall asleep.
However, this morning, it was present still, although at a lower level. I can ignore the “hum” during the day – I keep the radio on, listening to CBC or some podcast or other. It generally doesn’t bother me too much in the evening, either, the volume of the TV (to which I knit) generally masks it. And I have discovered that the programs delivered by Brian Cox (professor of particle physics in the School of Physics and Astronomy at the University of Manchester) put me to sleep quite quickly! As does David Attenborough. I’ve recorded a collection of programs by both men, which I set to play for a half hour, to mask any disturbing “hums” which might interfere with me falling asleep.
I’m waiting to see if the “hum” is present again this evening! It was very loud and irritating last night. I have found ways to mask it, making living with it bearable.
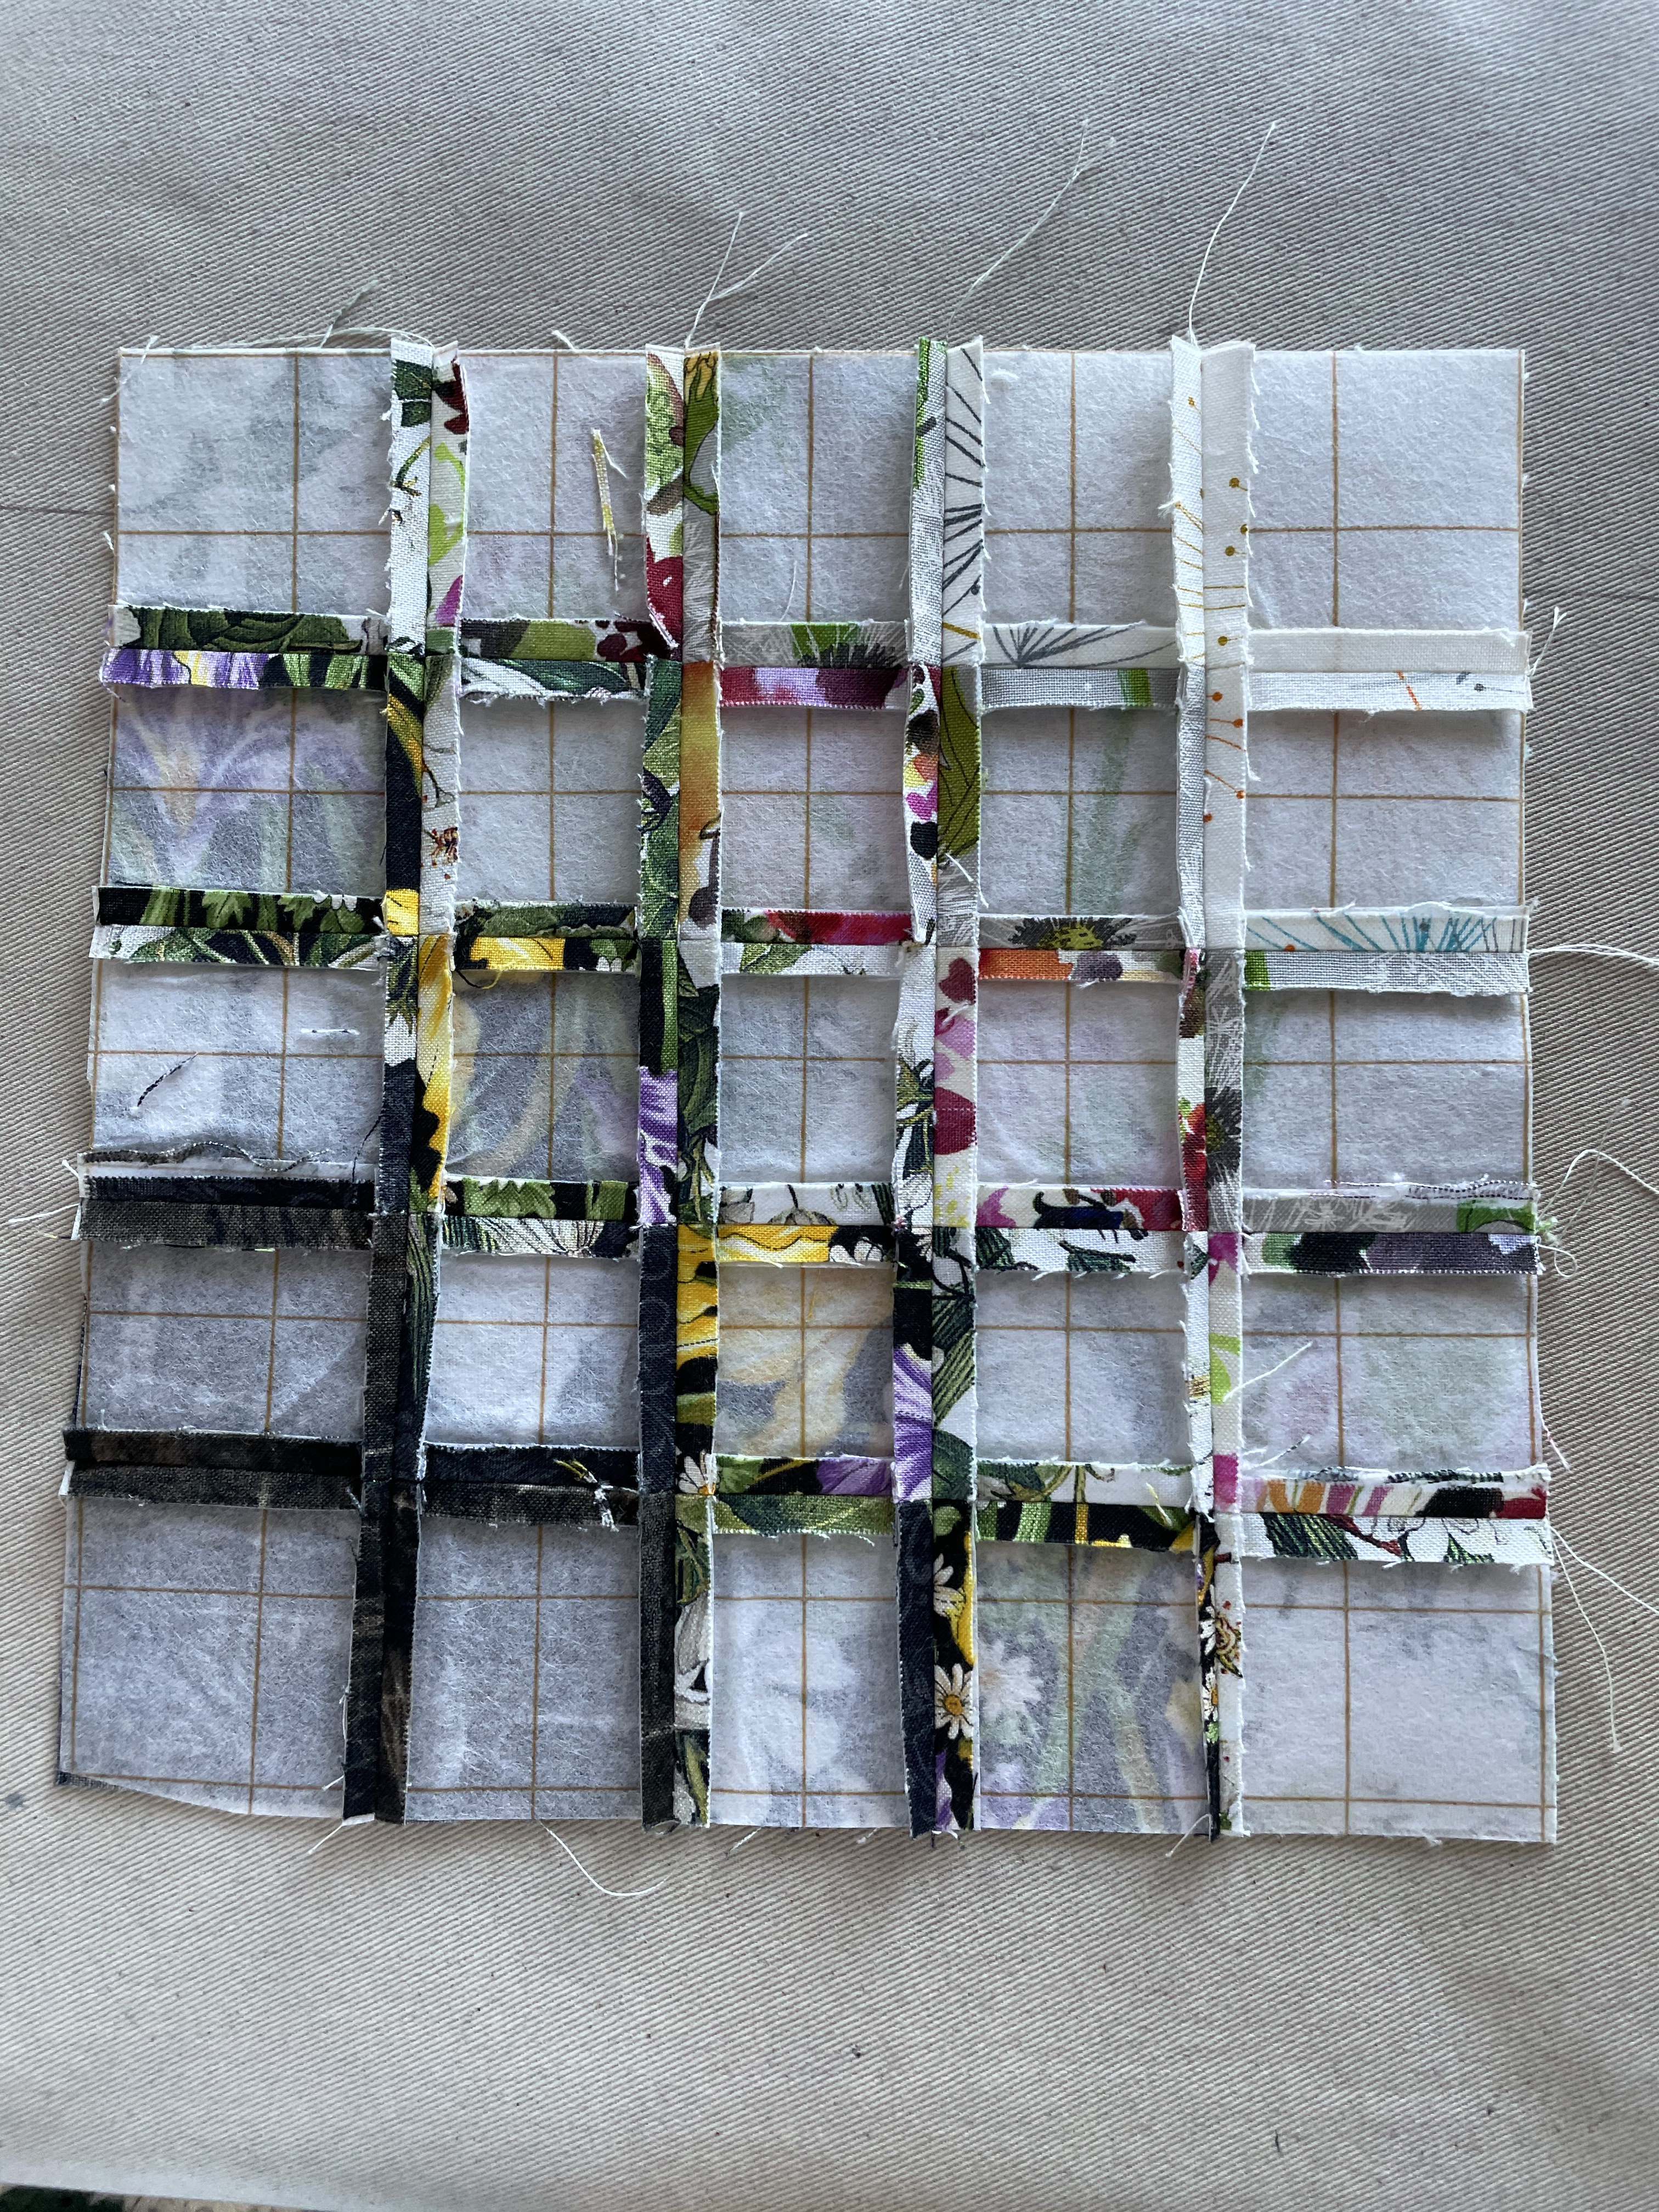
I started the morning by cutting a gazillion 2″ squares of fabric from the many strips and scraps I’d collected which I hoped would help me fill in the background on the wall art piece. I needed a lot (although I didn’t count what I needed but I’m guessing it must have been close to 140 squares (the panel is 16 X 12 = 192).
Then I began laying them out, a few at a time, trying to create some kind of flow to the background.
As you can see the pieces are pinned to the fusible interfacing – I didn’t want to fuse them until I was certain I had the colour flowing as I wanted it – nothing jarring. I still have to walk around it some more before I start pressing the squares in place. Likely on the weekend I’ll get to that.
I didn’t plan it, but I like is the way the dark fills in a slightly off-centred “U” shaped space at the bottom, and when the panel is sewn together and the blocks end up at 1 1/2″ the light colours should blend reasonably well.
So how do I plan to fill the empty space? With a couple of California poppies!
The image looks small but its height is 14″ – the panel will finish at 18″ X 24″ (it’s currently 24″ X 32″) so the flowers in relation to the background will be a better fit. I would print this image on fabric (using my inkjet printer), then fussy cut it carefully before fusing it to the background, and thread painting it in place.
There is another possibility I’ve been working on – I’ve created a machine embroidery of 4 yellow poppies which are also ~ 14″ in height which I could embroider in position directly on the background:
I printed it out, roughly cut it, to see how it would look on the background
Impossible to tell which might be best until I get the background sewn. The current limitation I have is my largest hoop will create an embroidery 360mm in height (just over 14″). If I decide to use the embroidery, I may have to rework it by splitting it in two in order to enlarge it – not sure how well that will go but if the 14″ is too small it’s something I may have to try.
Next step is to fuse the squares in place, then construct the background panel.
The dogwoods have been spectacular this year. I never really noticed before how many there are around the city. This one is in my friend Mary Ann’s front yard. I love the hint of pink with the magenta edge. This tree is in a shady spot but it gets sunlight mid-afternoon. Here the sun is both catching some of the flowers directly while others are backlit. Makes for an interesting photo.
This dogwood is in another friend’s backyard. It was in full splendour a week ago.
I’ve driven past a number of glorious pink trees – just not taken the time to stop and grab some photos. Too busy getting somewhere. At least I noticed them.
I noticed the daisies beside the big rock next to our driveway on the weekend but didn’t stop to catch an image. The next couple of days were overcast but when I returned home from my morning Aquafit class the sun was bright and the daisies smiling. I parked the car and got out so I could grab some shots. I cropped several photos but lost the shadows on the rock which contrast with the daisies.
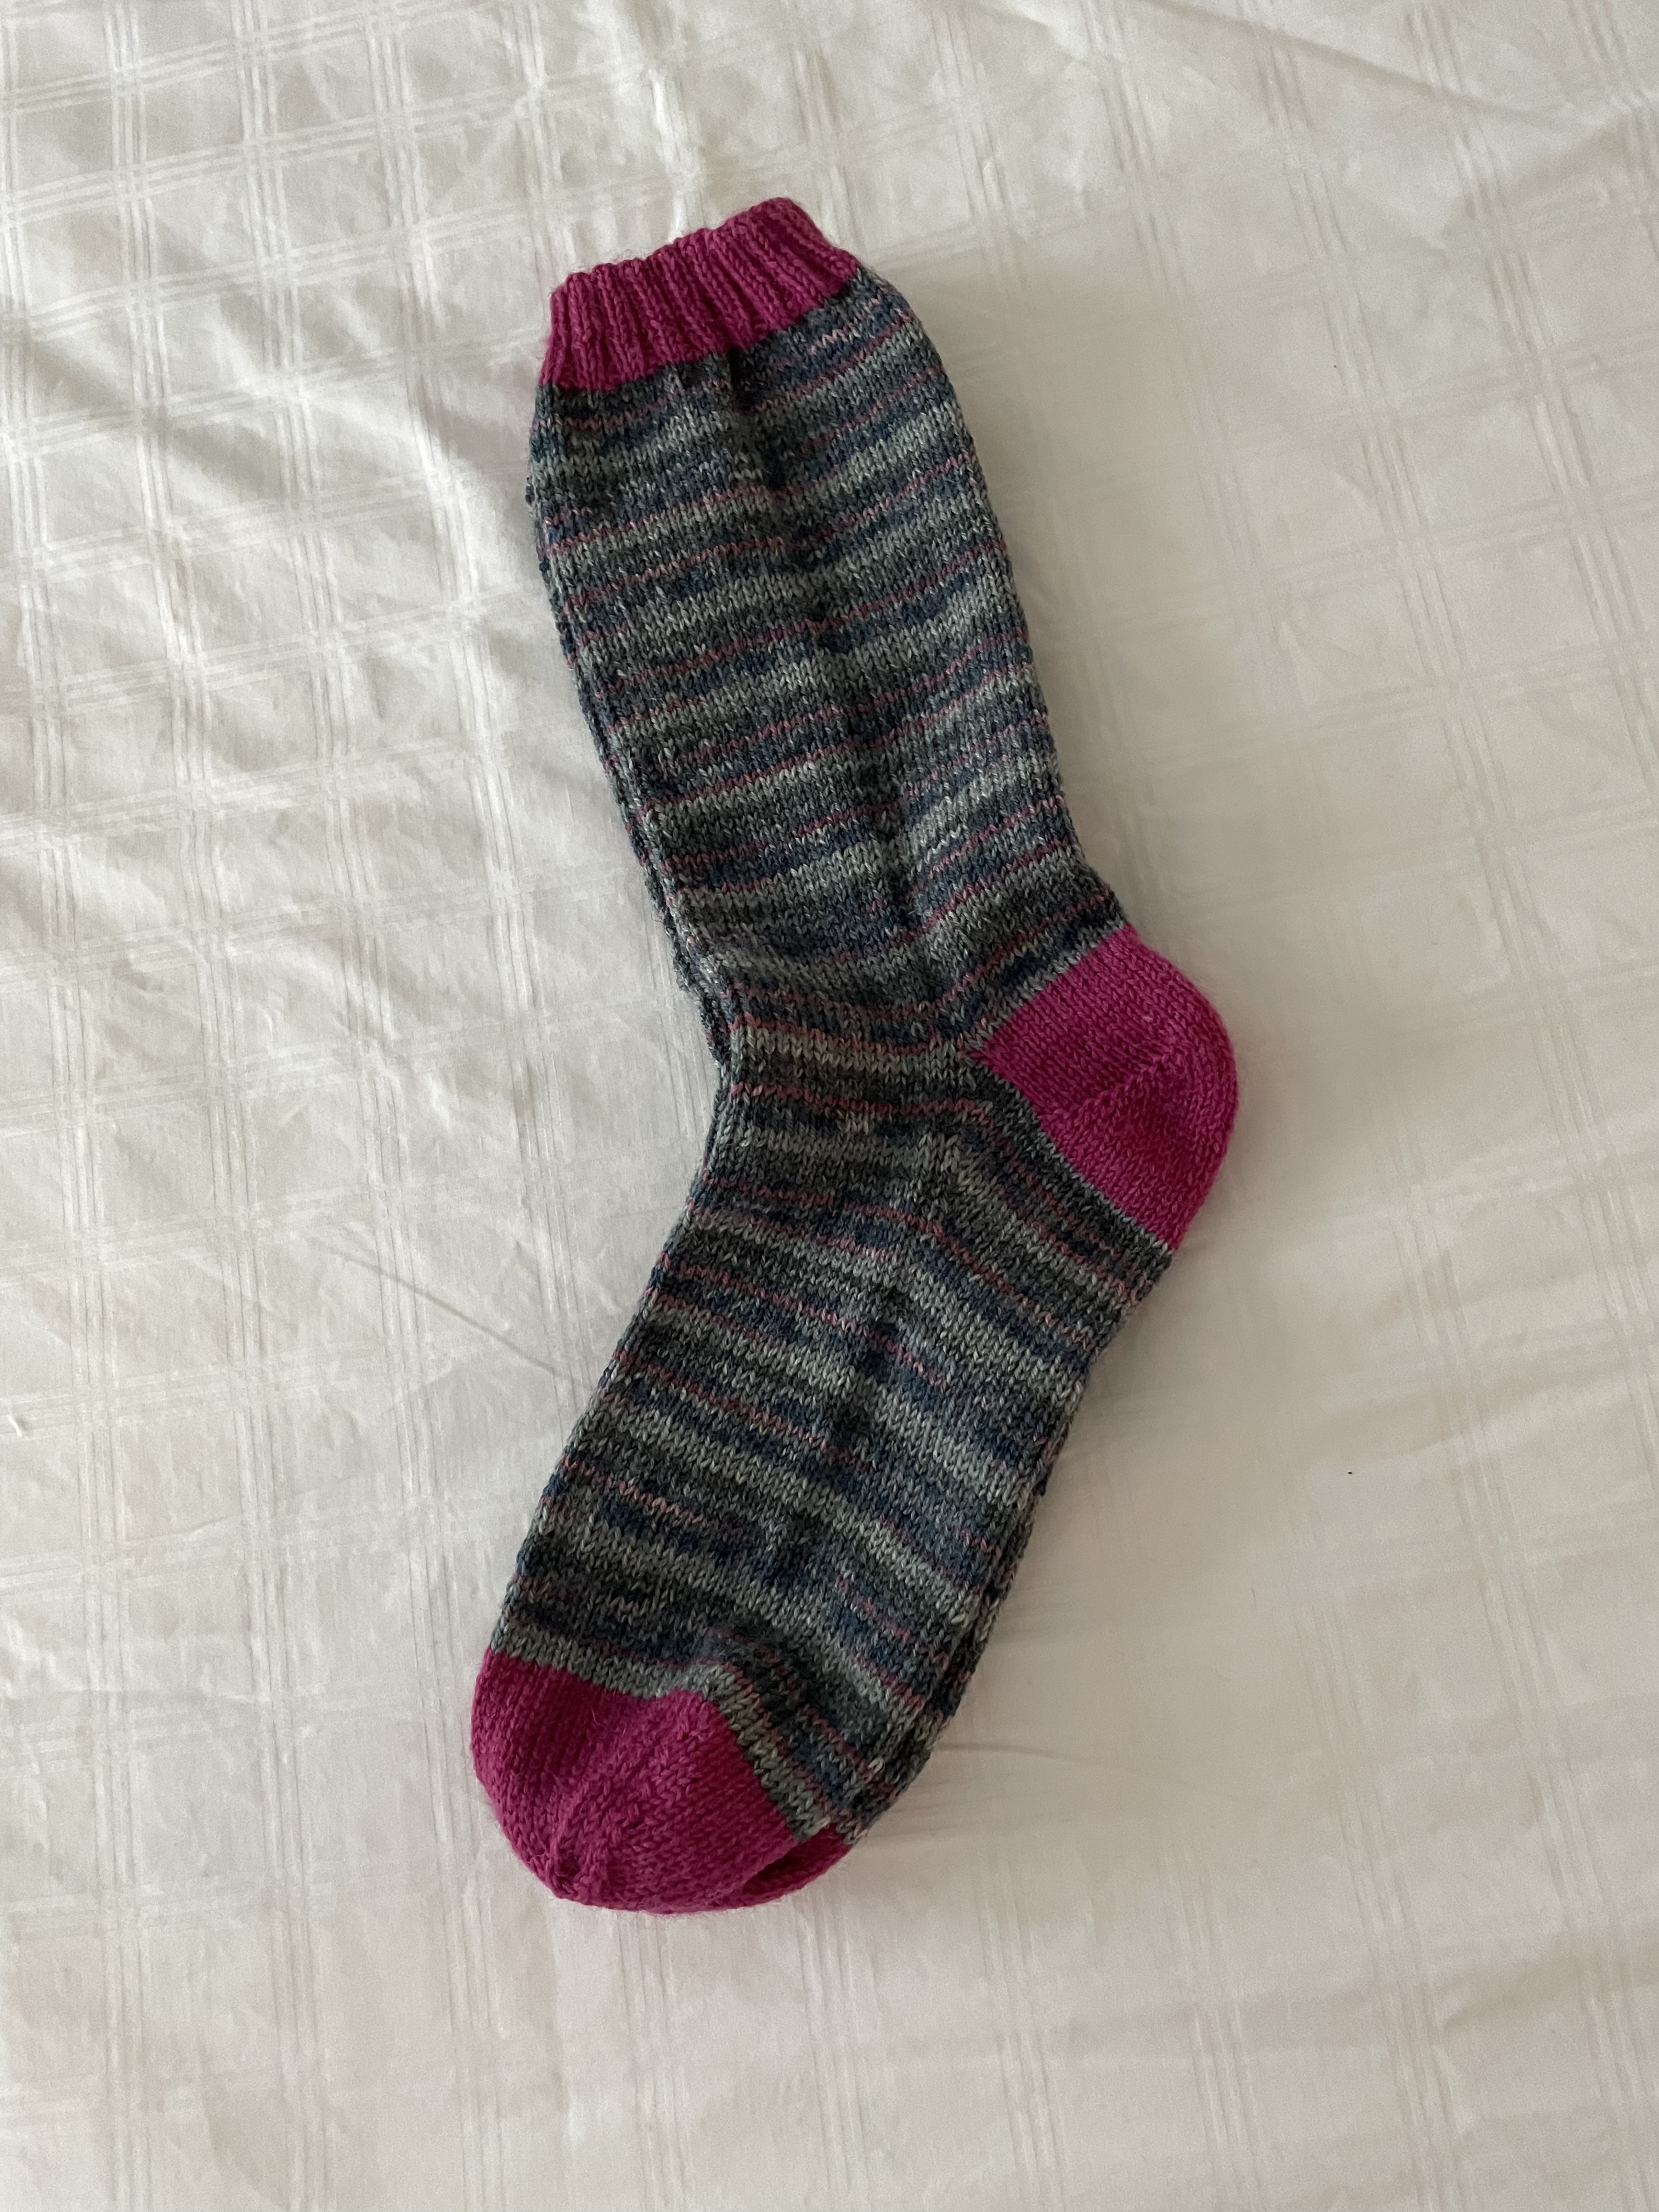
I just keep knitting. I CANNOT sit in front of a TV without something in my hands that doesn’t require my full attention but lets me feel productive. Finished this pair of socks a week ago. They’re not as drab as they look, there are hints of magenta and navy blue in the variegated yarn. They weren’t too boring to knit as some socks are from time to time.
This pair finished, I started on the next. I’m ready to turn the heel on the first sock, this evening.
I last posted June 22 – just over two weeks ago. Where have the days gone? We’ve had some lovely weather, some not so lovely weather (but I bet folks on the west coast would have given anything to have had a few cool, foggy, misty days – so no complaining).
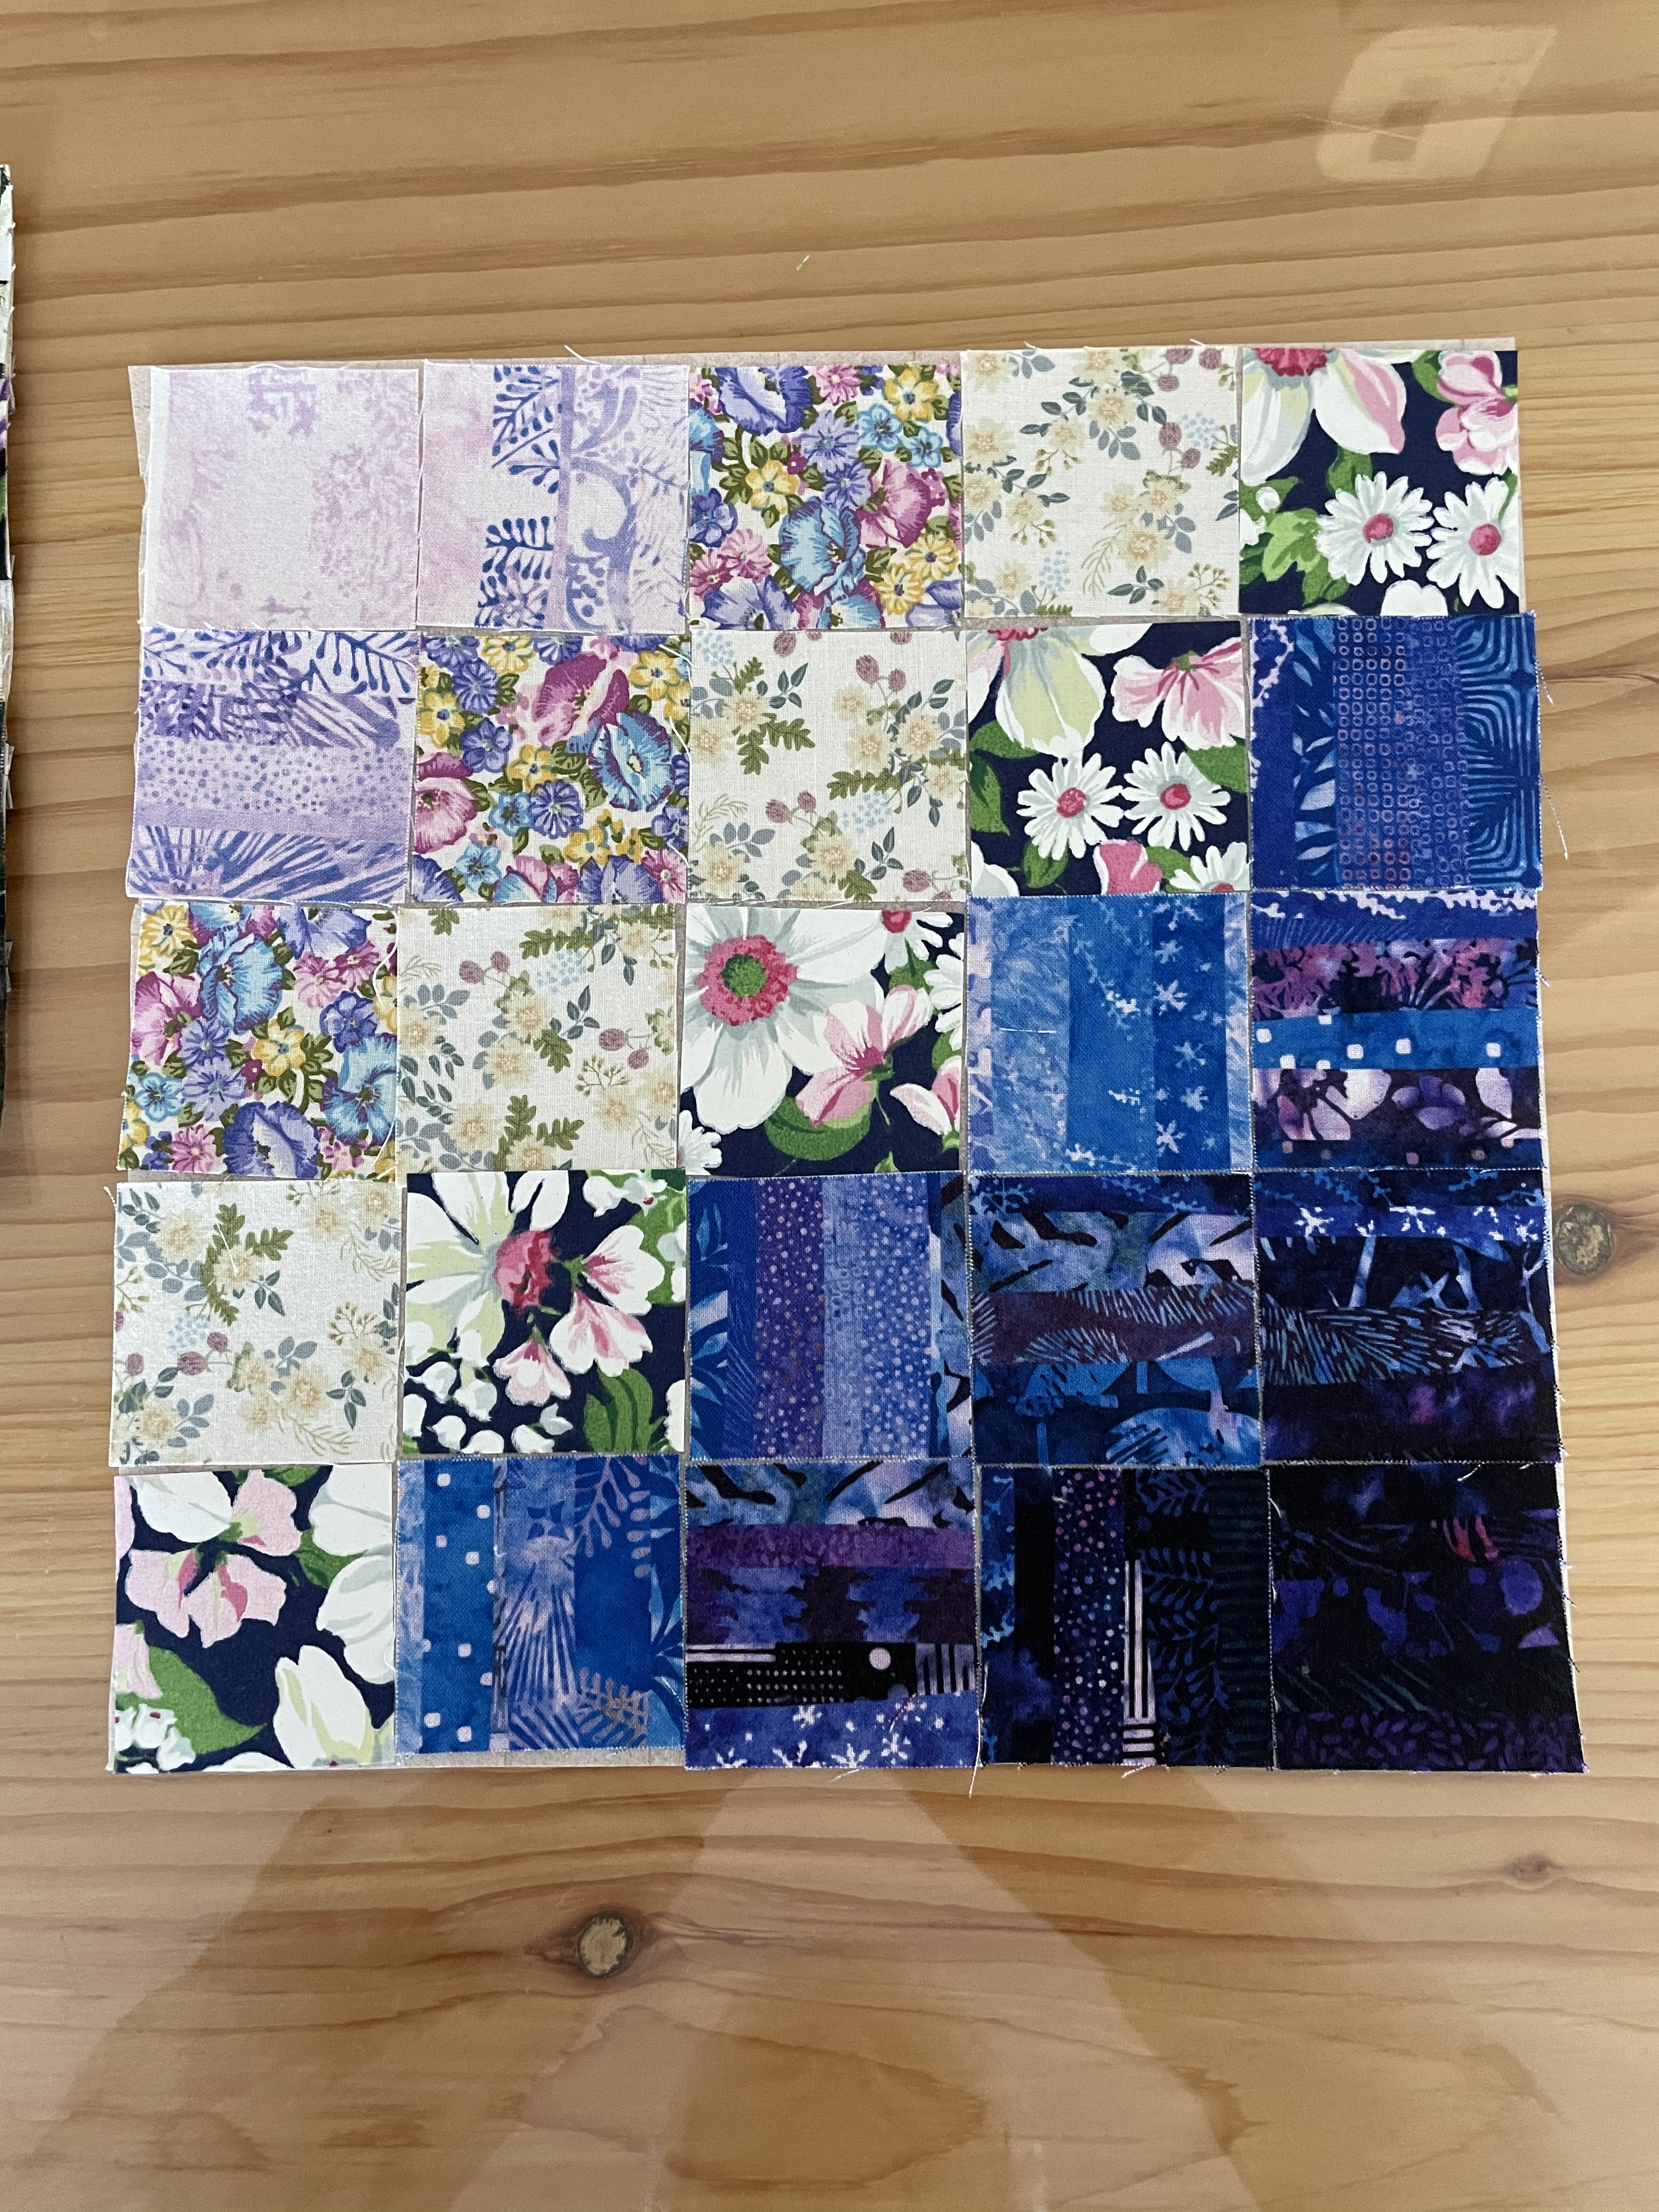
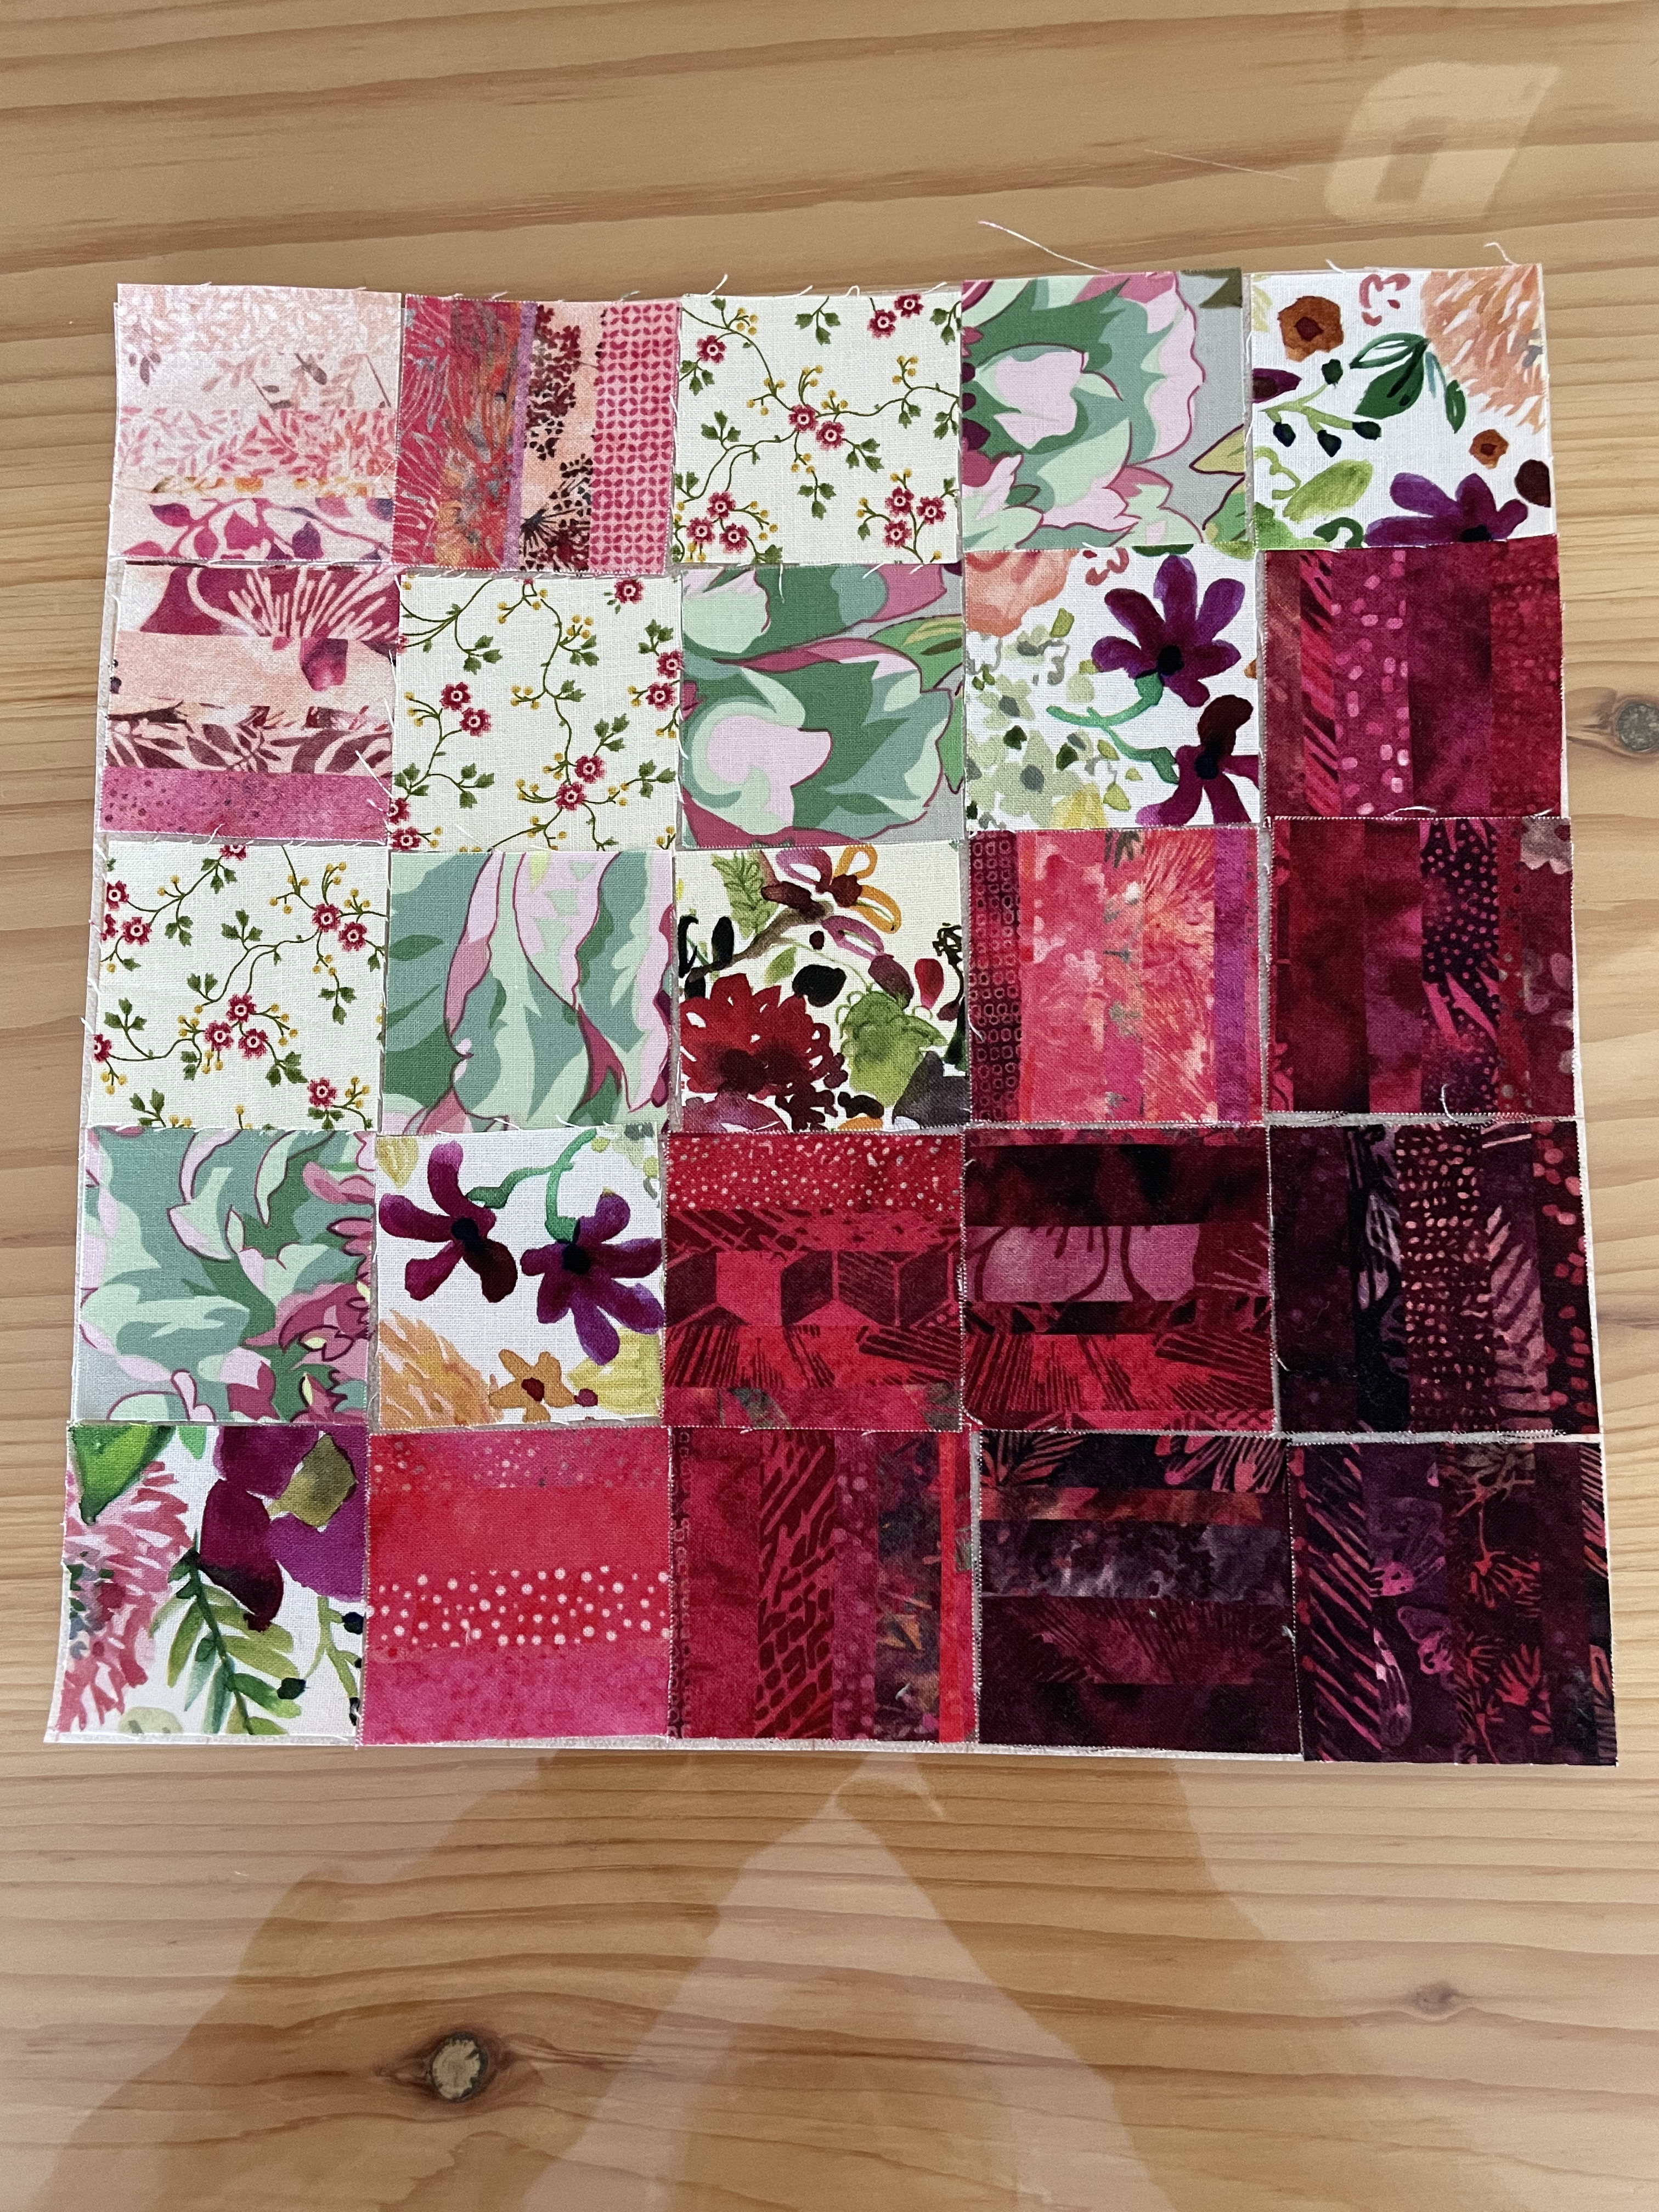
I’ve been working away at the usual stuff – I was teaching a class on building a table runner/wall art textile piece using “postage stamp” squares. The class was originally scheduled for late April/early May but didn’t happen because of our COVID-19 lockdown. But I’d prepared some samples to illustrate possibilities.
Block 1
Block 2
Block 3
I’d planned a 5 X 5 array but when I’d sewn one of the blocks together (the top block #1) it finished too small to be useful for a table runner – a 7 X 7 array would be better. So I created some instruction for the gals outlining how to prepare for the class, what to bring, etc. I did not add to my samples or create new ones – they could get the idea from what I’d done.
The first day the women chose from their plastic sandwich bags containing their 2″ squares and arranged layouts for their table runners, pressed the squares to a piece of quilters grid fusible interfacing and began sewing the blocks together by stitching the rows, shaving off the fold, pressing the seams open, then stitching the columns, shaving off the fold, and pressing those seams open. The technique gives you perfect joins which you don’t always get if you just sew blocks together in the usual quilting fashion. The interfacing also adds a bit of firmness to the panel which is useful in a table runner.
Back of my Block 1
The class met this past weekend – ten days after the first session – to finish the piece. The gals needed to decide how to put their five blocks together, what kind of sashing to add, and borders to finish the piece. All three of the women got the tops completed, one was able to add batting and backing – she finished the piece using a pillow case finish (laying backing and top right sides together and sewing a 1/4″ seam around the outside leaving an opening for turning the piece right side out).
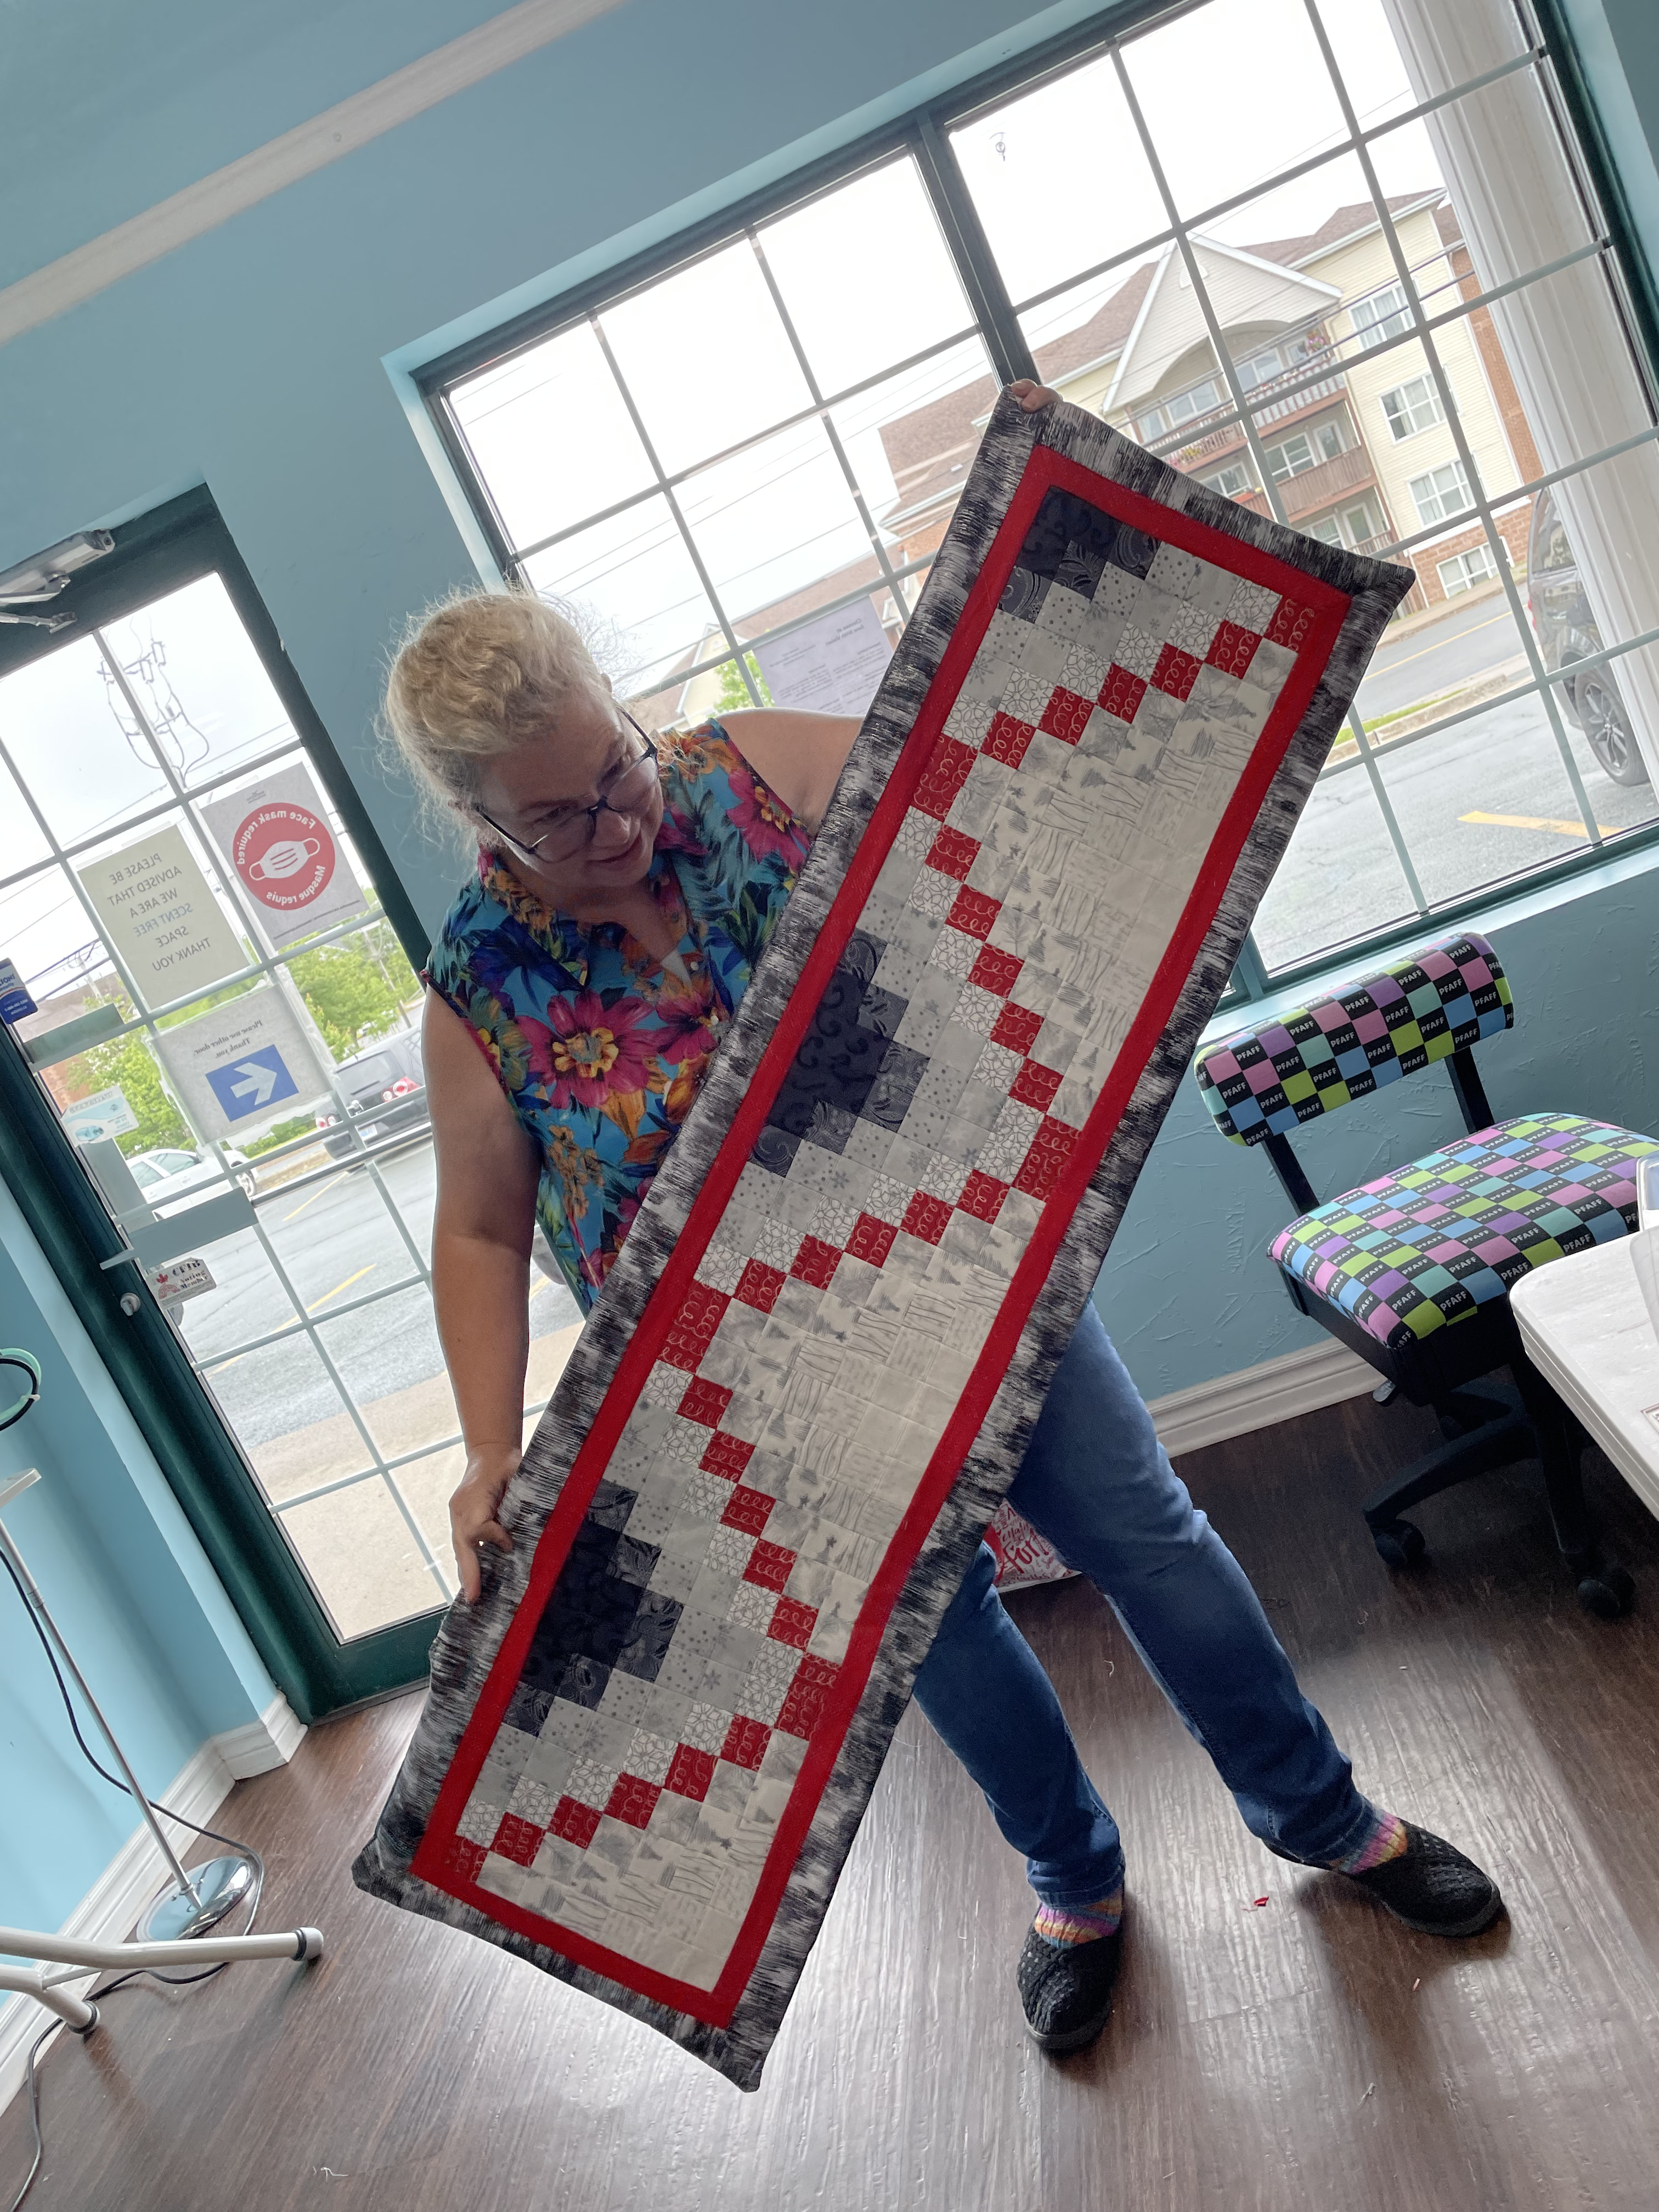
A Christmas Table Runner (Not Yet Pressed)
Another had nearly finished a bed runner – just needed border for the top and bottom ends.
A Bed Runner In Progress
(The third had her top and backing pinned right sides together when we ended the afternoon so I wasn’t able to get a picture.)
In the meantime, I’d started work on a wall hanging:
Only to discover that although I have hundreds of 2″ fabric squares in a wide range of colour, I didn’t have fabric to fill in the light portions of the layout! I’ve had to dig through scrap boxes to come up with more possible fabric bits. My plan is to build a graduated background, then to embroider a large flower of some kind (not another iris, maybe a yellow poppy) to overlay the light side of the layout. However, right now, I’ve got a pile of small light fabric pieces on my cutting table and I’m still walking around them. I hope to return to the piece this weekend.
Because I was stuck I turned to pants making, once more. I had washed, dried, and pressed a piece of beige linen cotton blend fabric and wanted, this time, to make a loose wide-leg pants. I took my previous pants pattern, hauled out a pattern I had for pyjama bottoms, laid one on top of the other aligning the crotch seams, then drafted a new pattern with the higher waist of the pants and the wider legs of the pyjamas.
However, when I put the pants together I made a BiG mistake – I forgot the pattern didn’t need a waistband – because the body of the pants incorporated the waistband – I just needed a waistband facing! But instead I added a waistband and faced it – which of course made the body of the pants too long. They looked dreadful. I was about to throw them out but a friend wanted to try them on. They fit her better but would have still needed adjusting, so I took them back, and the next morning removed the waistband, added back the waistband facing, shortened the legs (which were also too long even with the shortened body).
Wide-legged Linen Pants
All I can say is, they’re wearable. They’re comfortable but they certainly make me look like a dumpy old woman! The front fits OK. The back drapes funny so I’m going to have to revisit my “pattern” because I want to make another pair.
So while I haven’t been blogging, I’ve still been sewing, really.