I last posted June 22 – just over two weeks ago. Where have the days gone? We’ve had some lovely weather, some not so lovely weather (but I bet folks on the west coast would have given anything to have had a few cool, foggy, misty days – so no complaining).
I’ve been working away at the usual stuff – I was teaching a class on building a table runner/wall art textile piece using “postage stamp” squares. The class was originally scheduled for late April/early May but didn’t happen because of our COVID-19 lockdown. But I’d prepared some samples to illustrate possibilities.

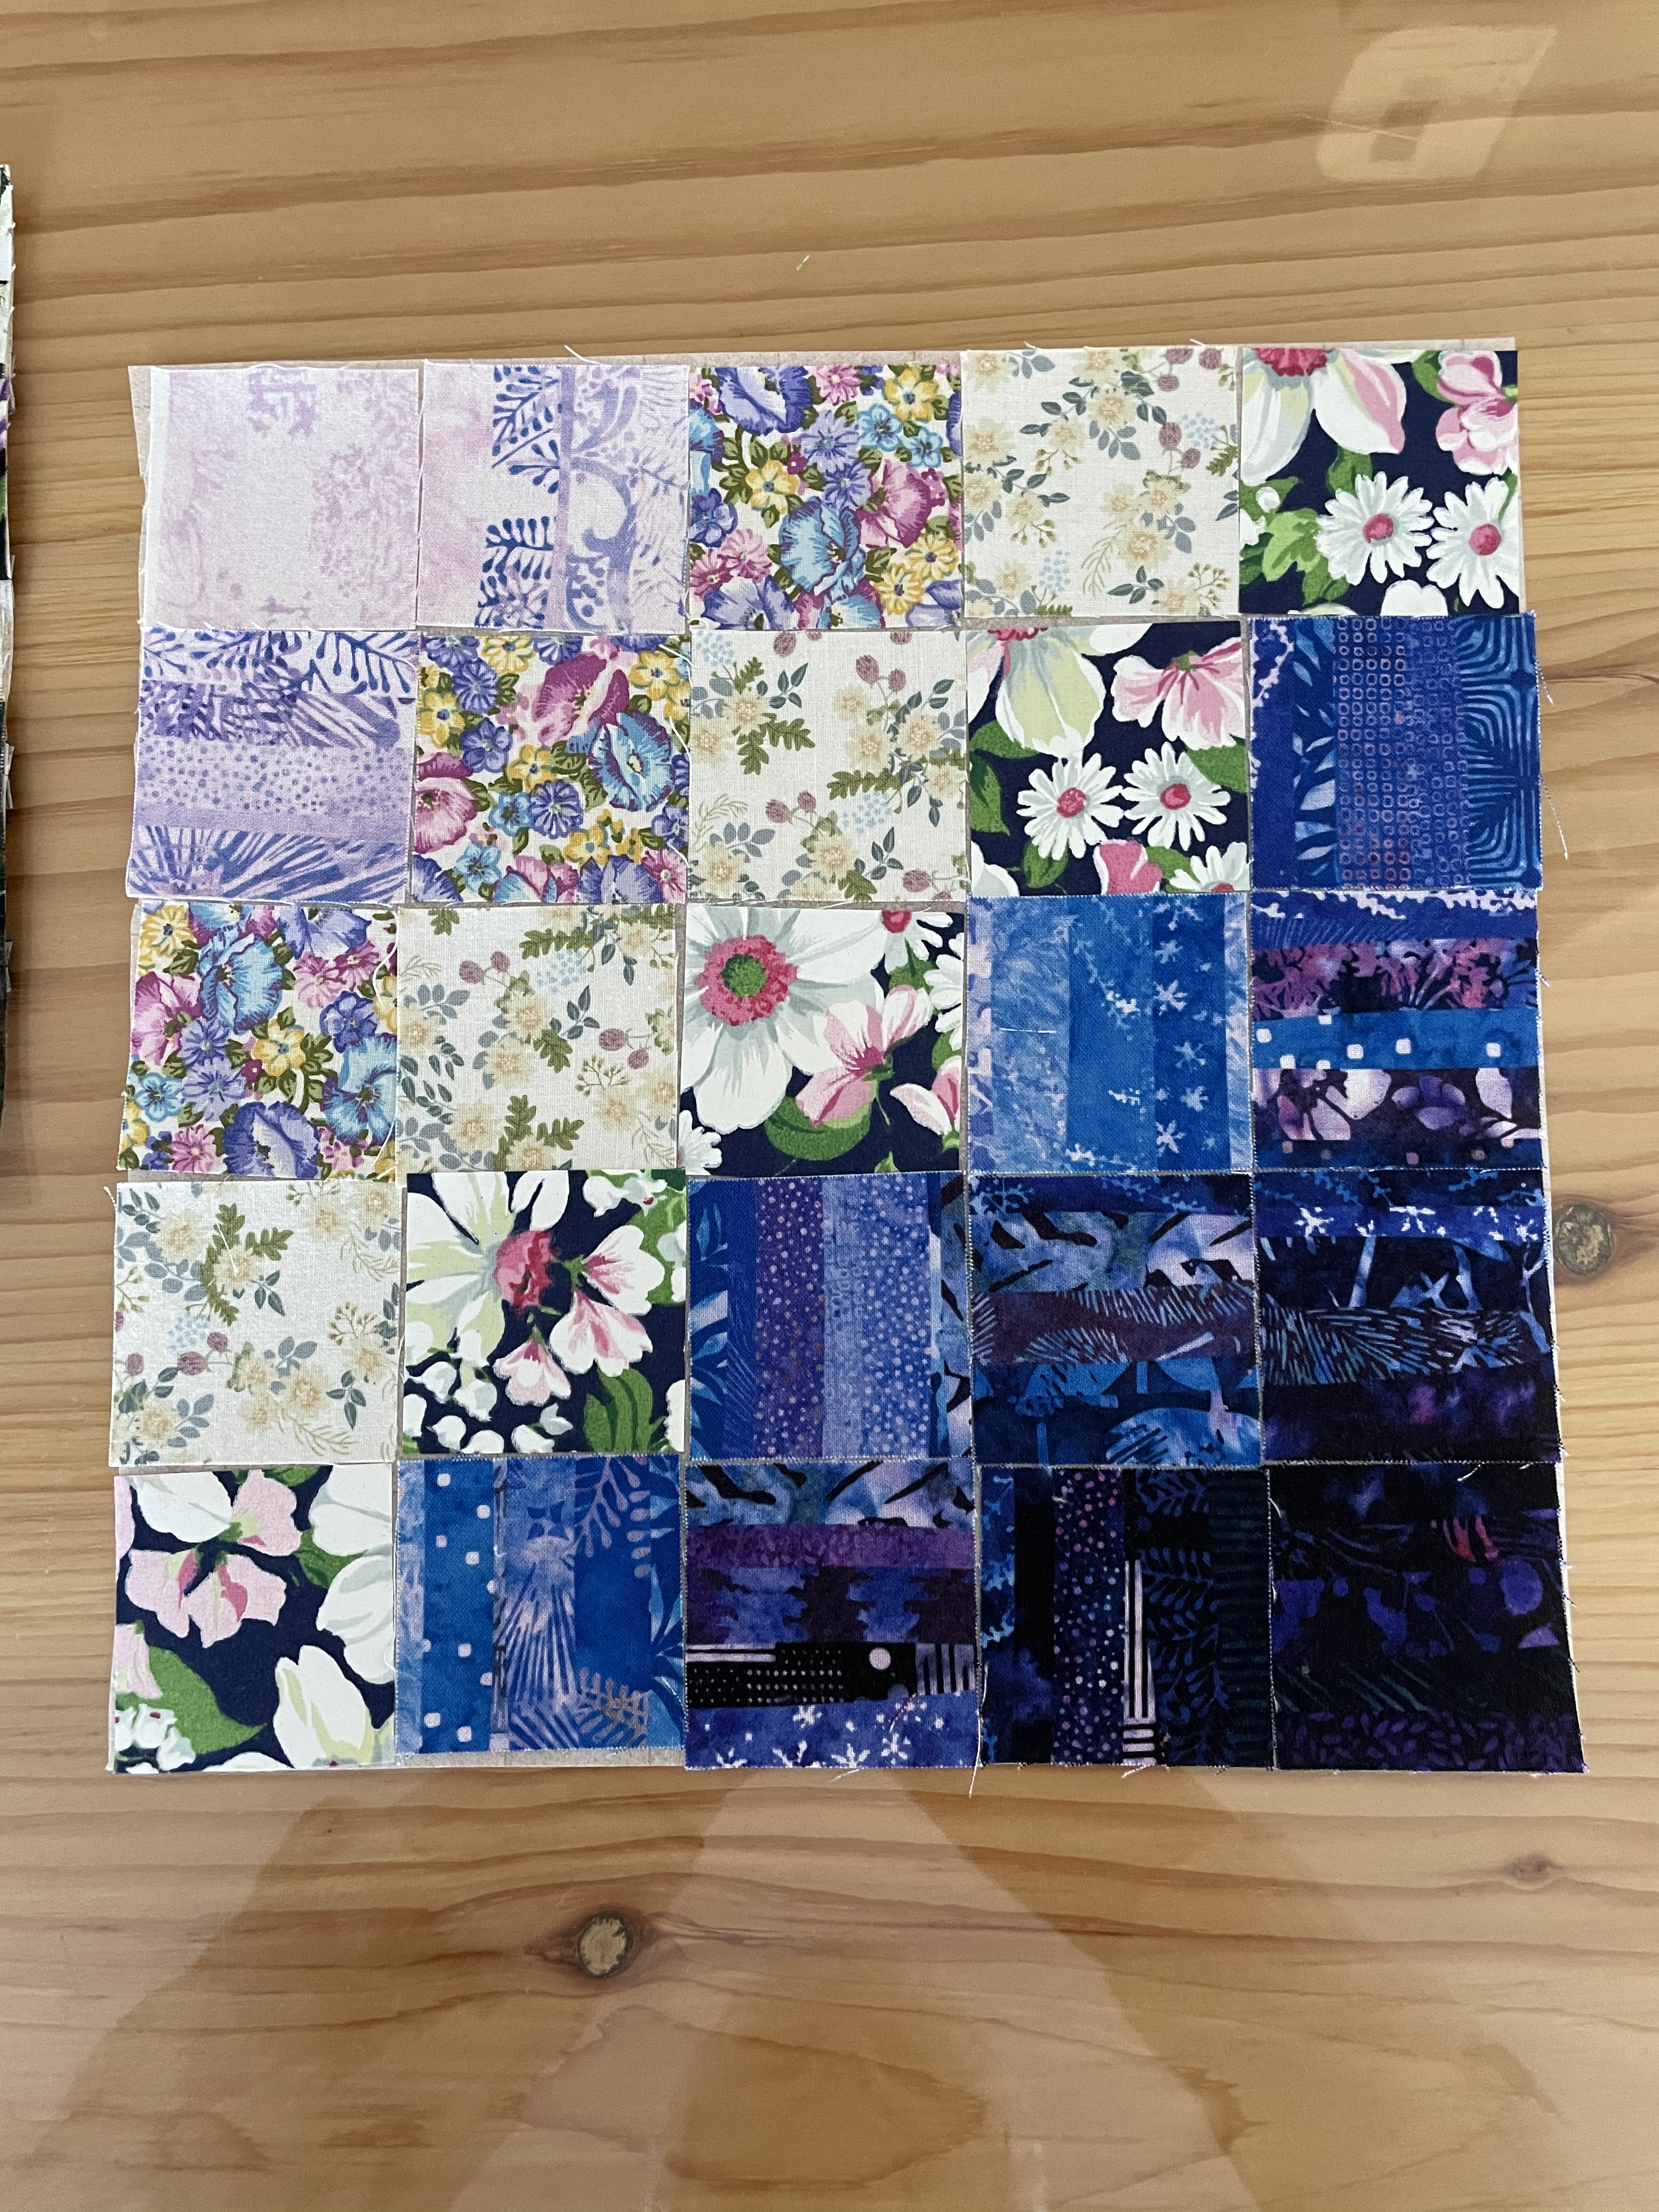
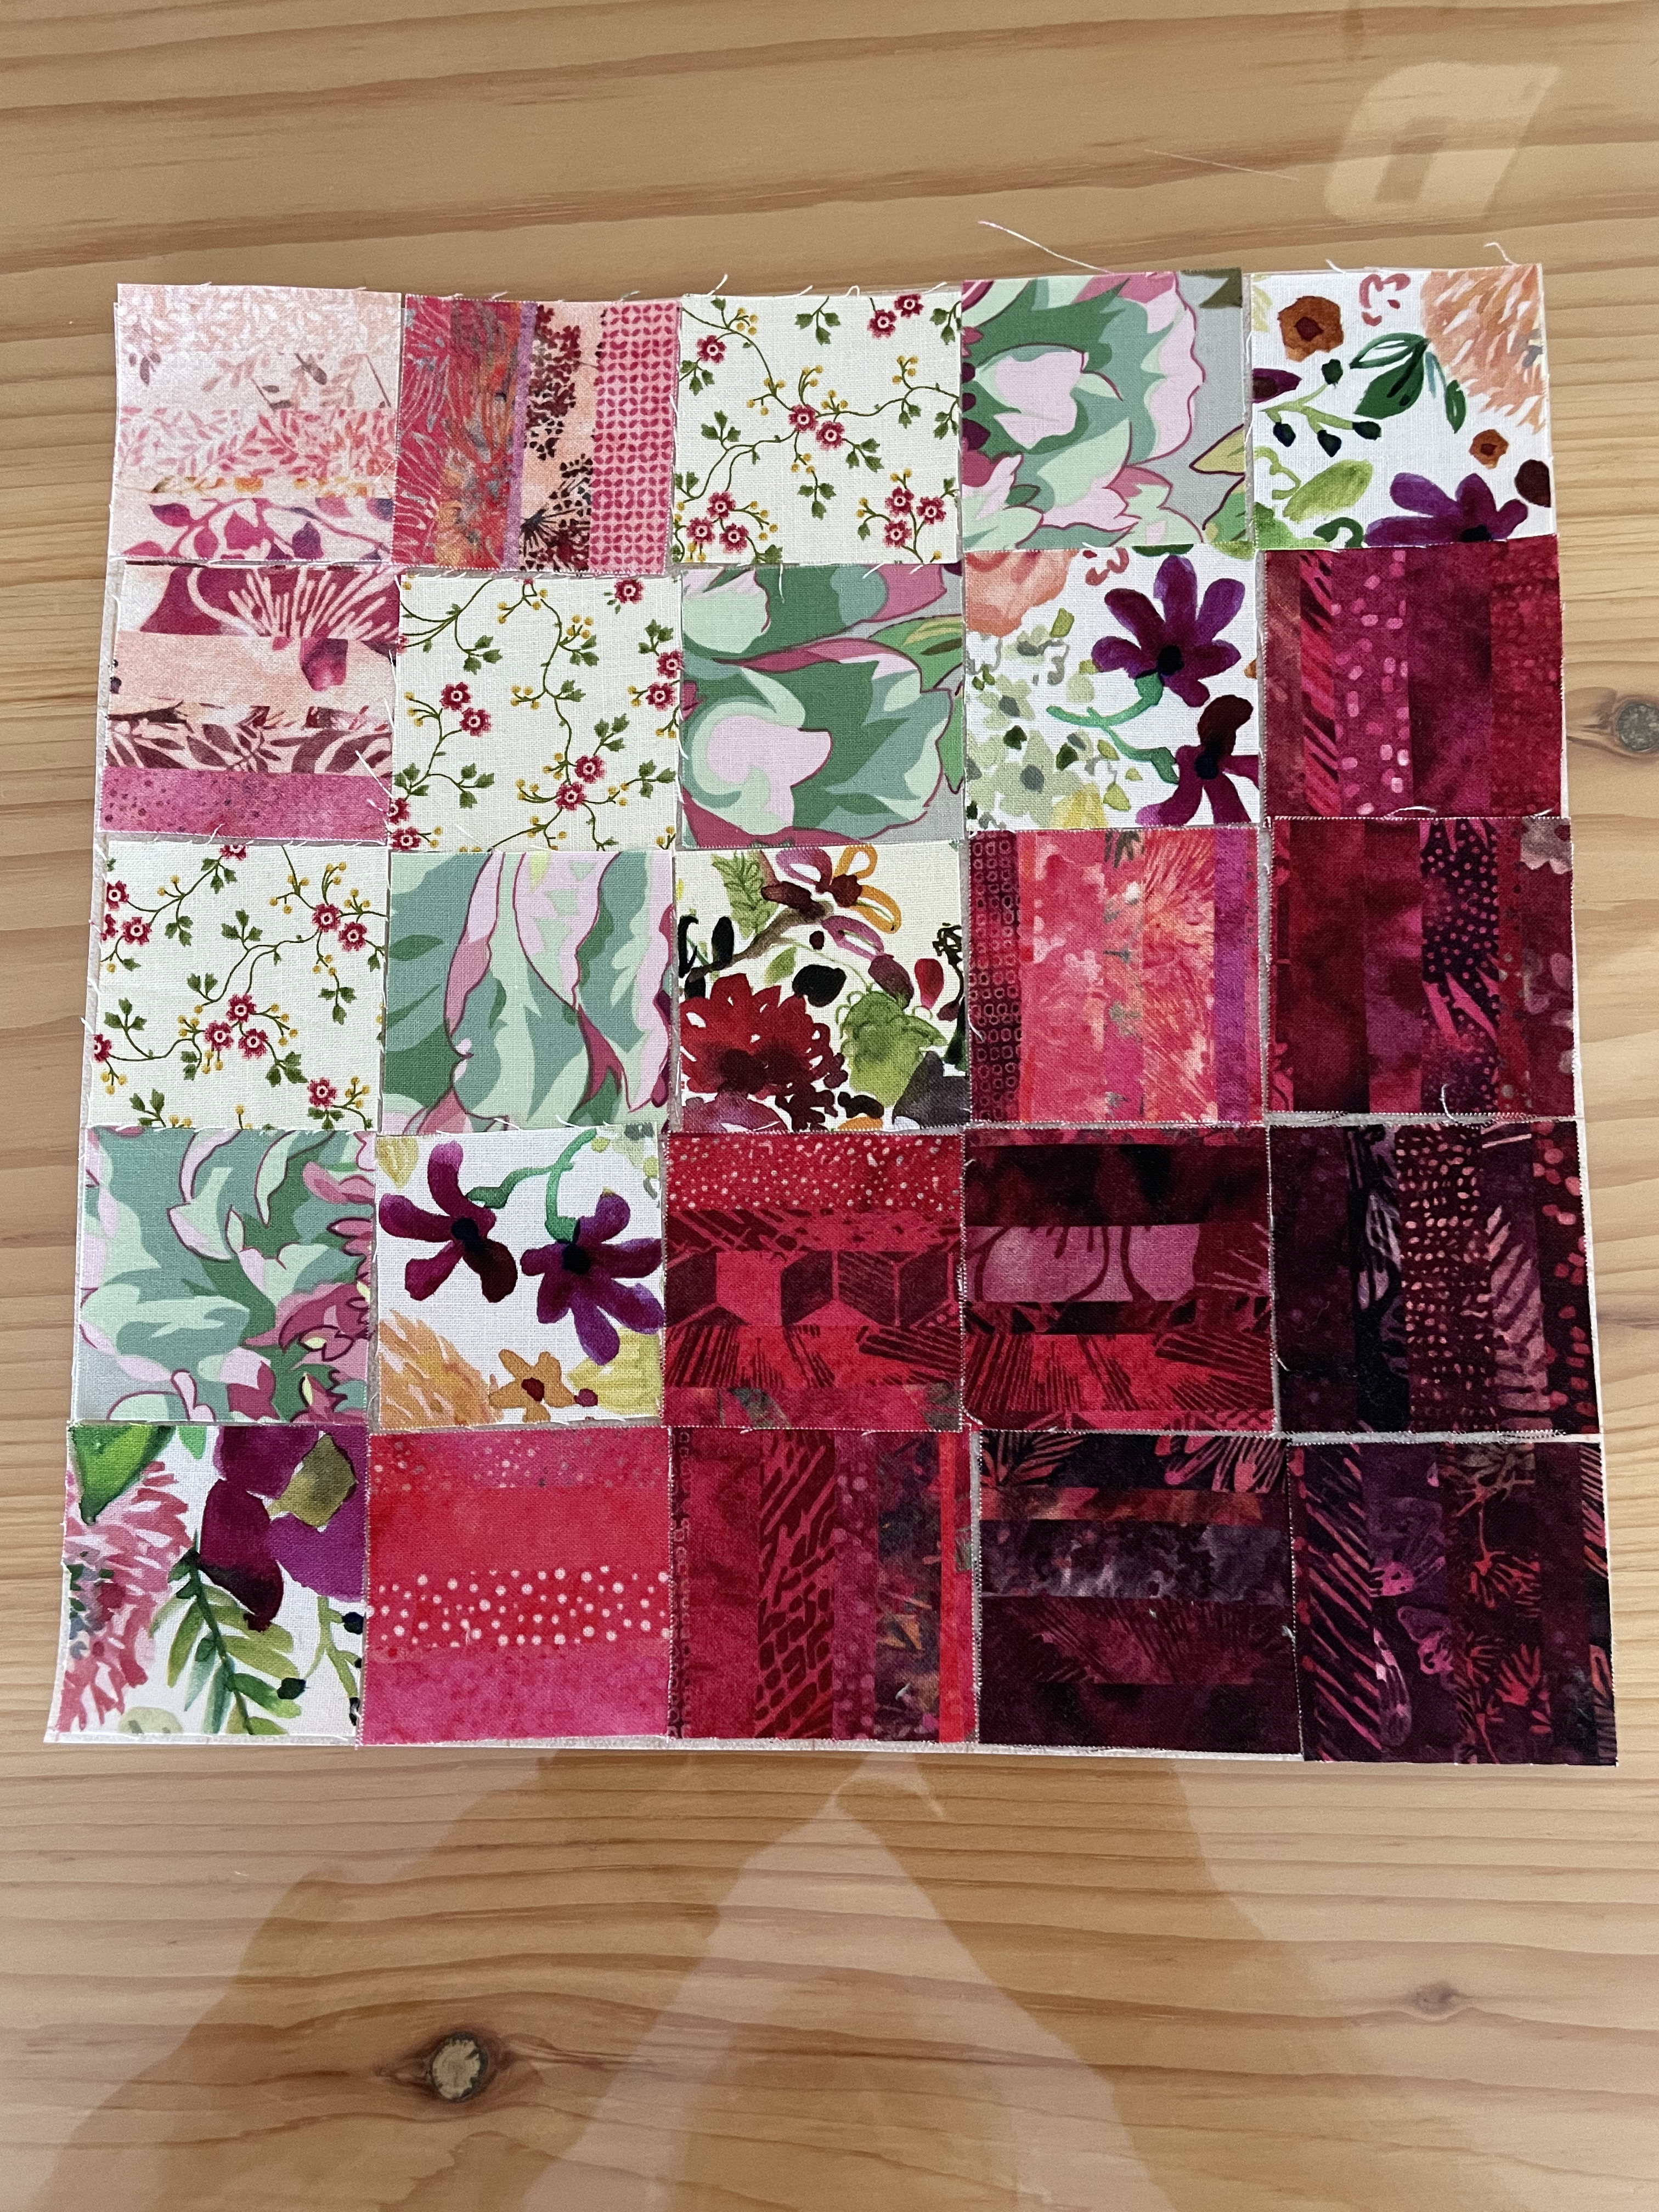
I’d planned a 5 X 5 array but when I’d sewn one of the blocks together (the top block #1) it finished too small to be useful for a table runner – a 7 X 7 array would be better. So I created some instruction for the gals outlining how to prepare for the class, what to bring, etc. I did not add to my samples or create new ones – they could get the idea from what I’d done.
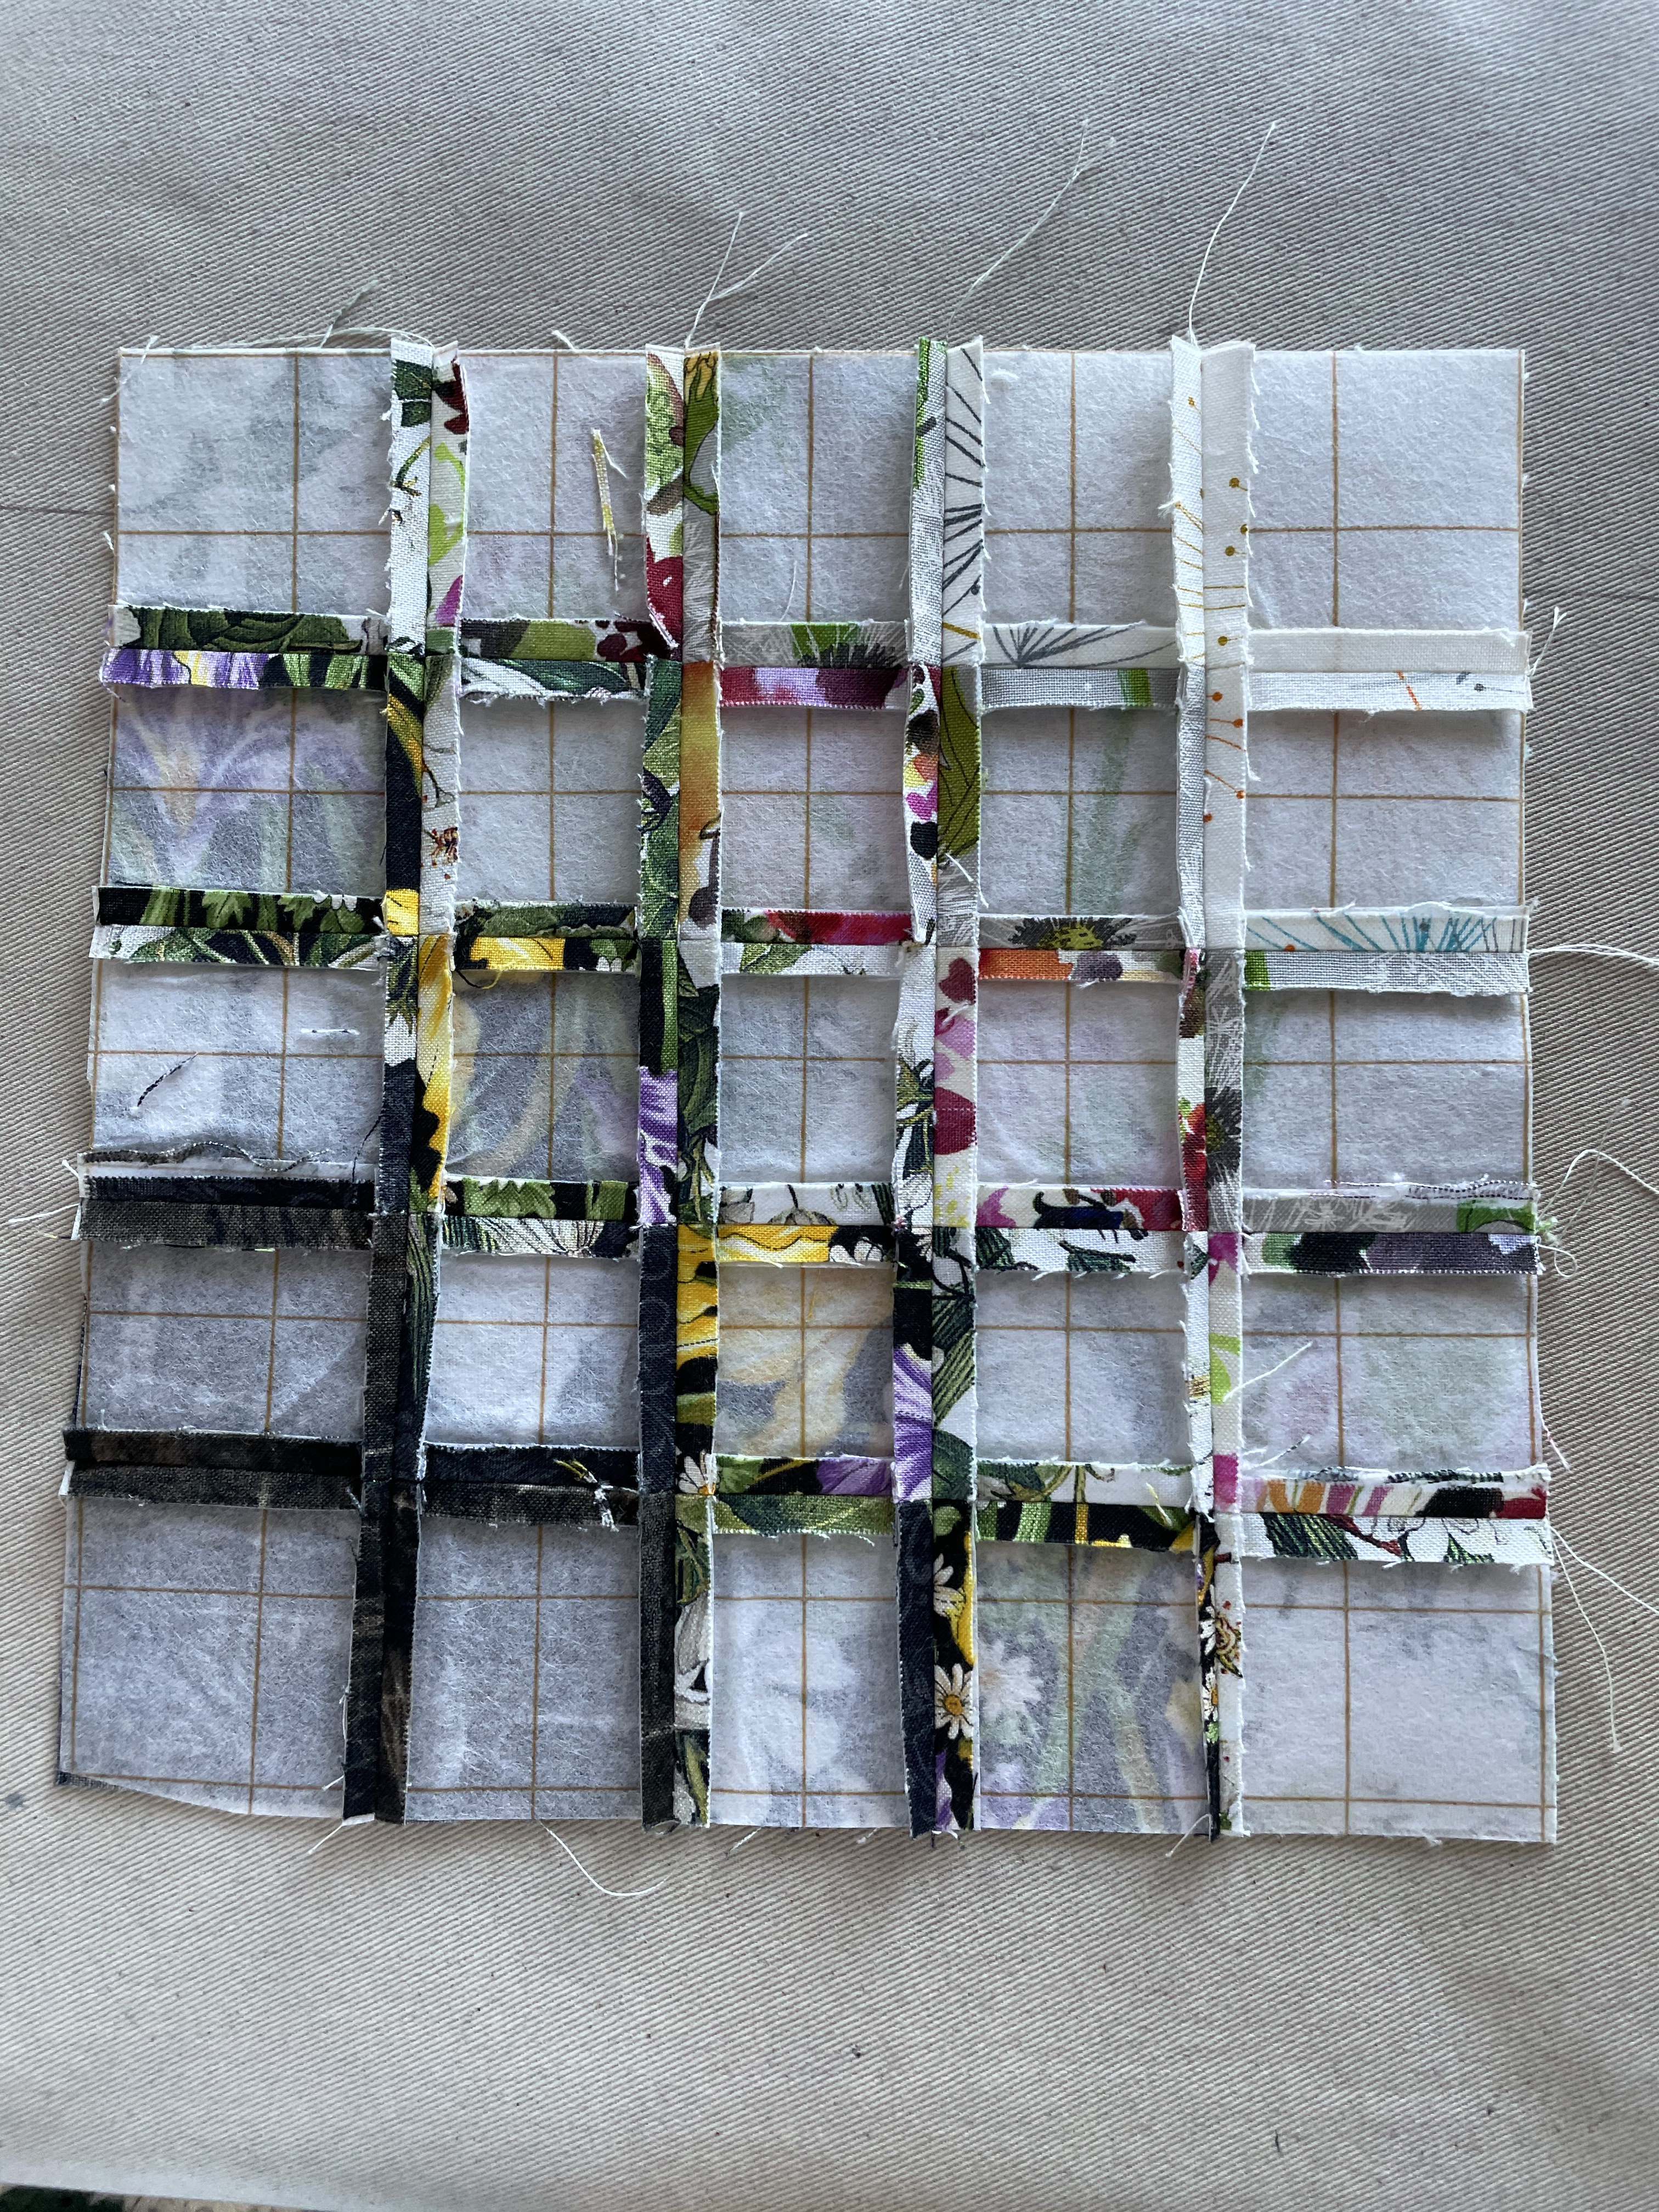
The first day the women chose from their plastic sandwich bags containing their 2″ squares and arranged layouts for their table runners, pressed the squares to a piece of quilters grid fusible interfacing and began sewing the blocks together by stitching the rows, shaving off the fold, pressing the seams open, then stitching the columns, shaving off the fold, and pressing those seams open. The technique gives you perfect joins which you don’t always get if you just sew blocks together in the usual quilting fashion. The interfacing also adds a bit of firmness to the panel which is useful in a table runner.
The class met this past weekend – ten days after the first session – to finish the piece. The gals needed to decide how to put their five blocks together, what kind of sashing to add, and borders to finish the piece. All three of the women got the tops completed, one was able to add batting and backing – she finished the piece using a pillow case finish (laying backing and top right sides together and sewing a 1/4″ seam around the outside leaving an opening for turning the piece right side out).
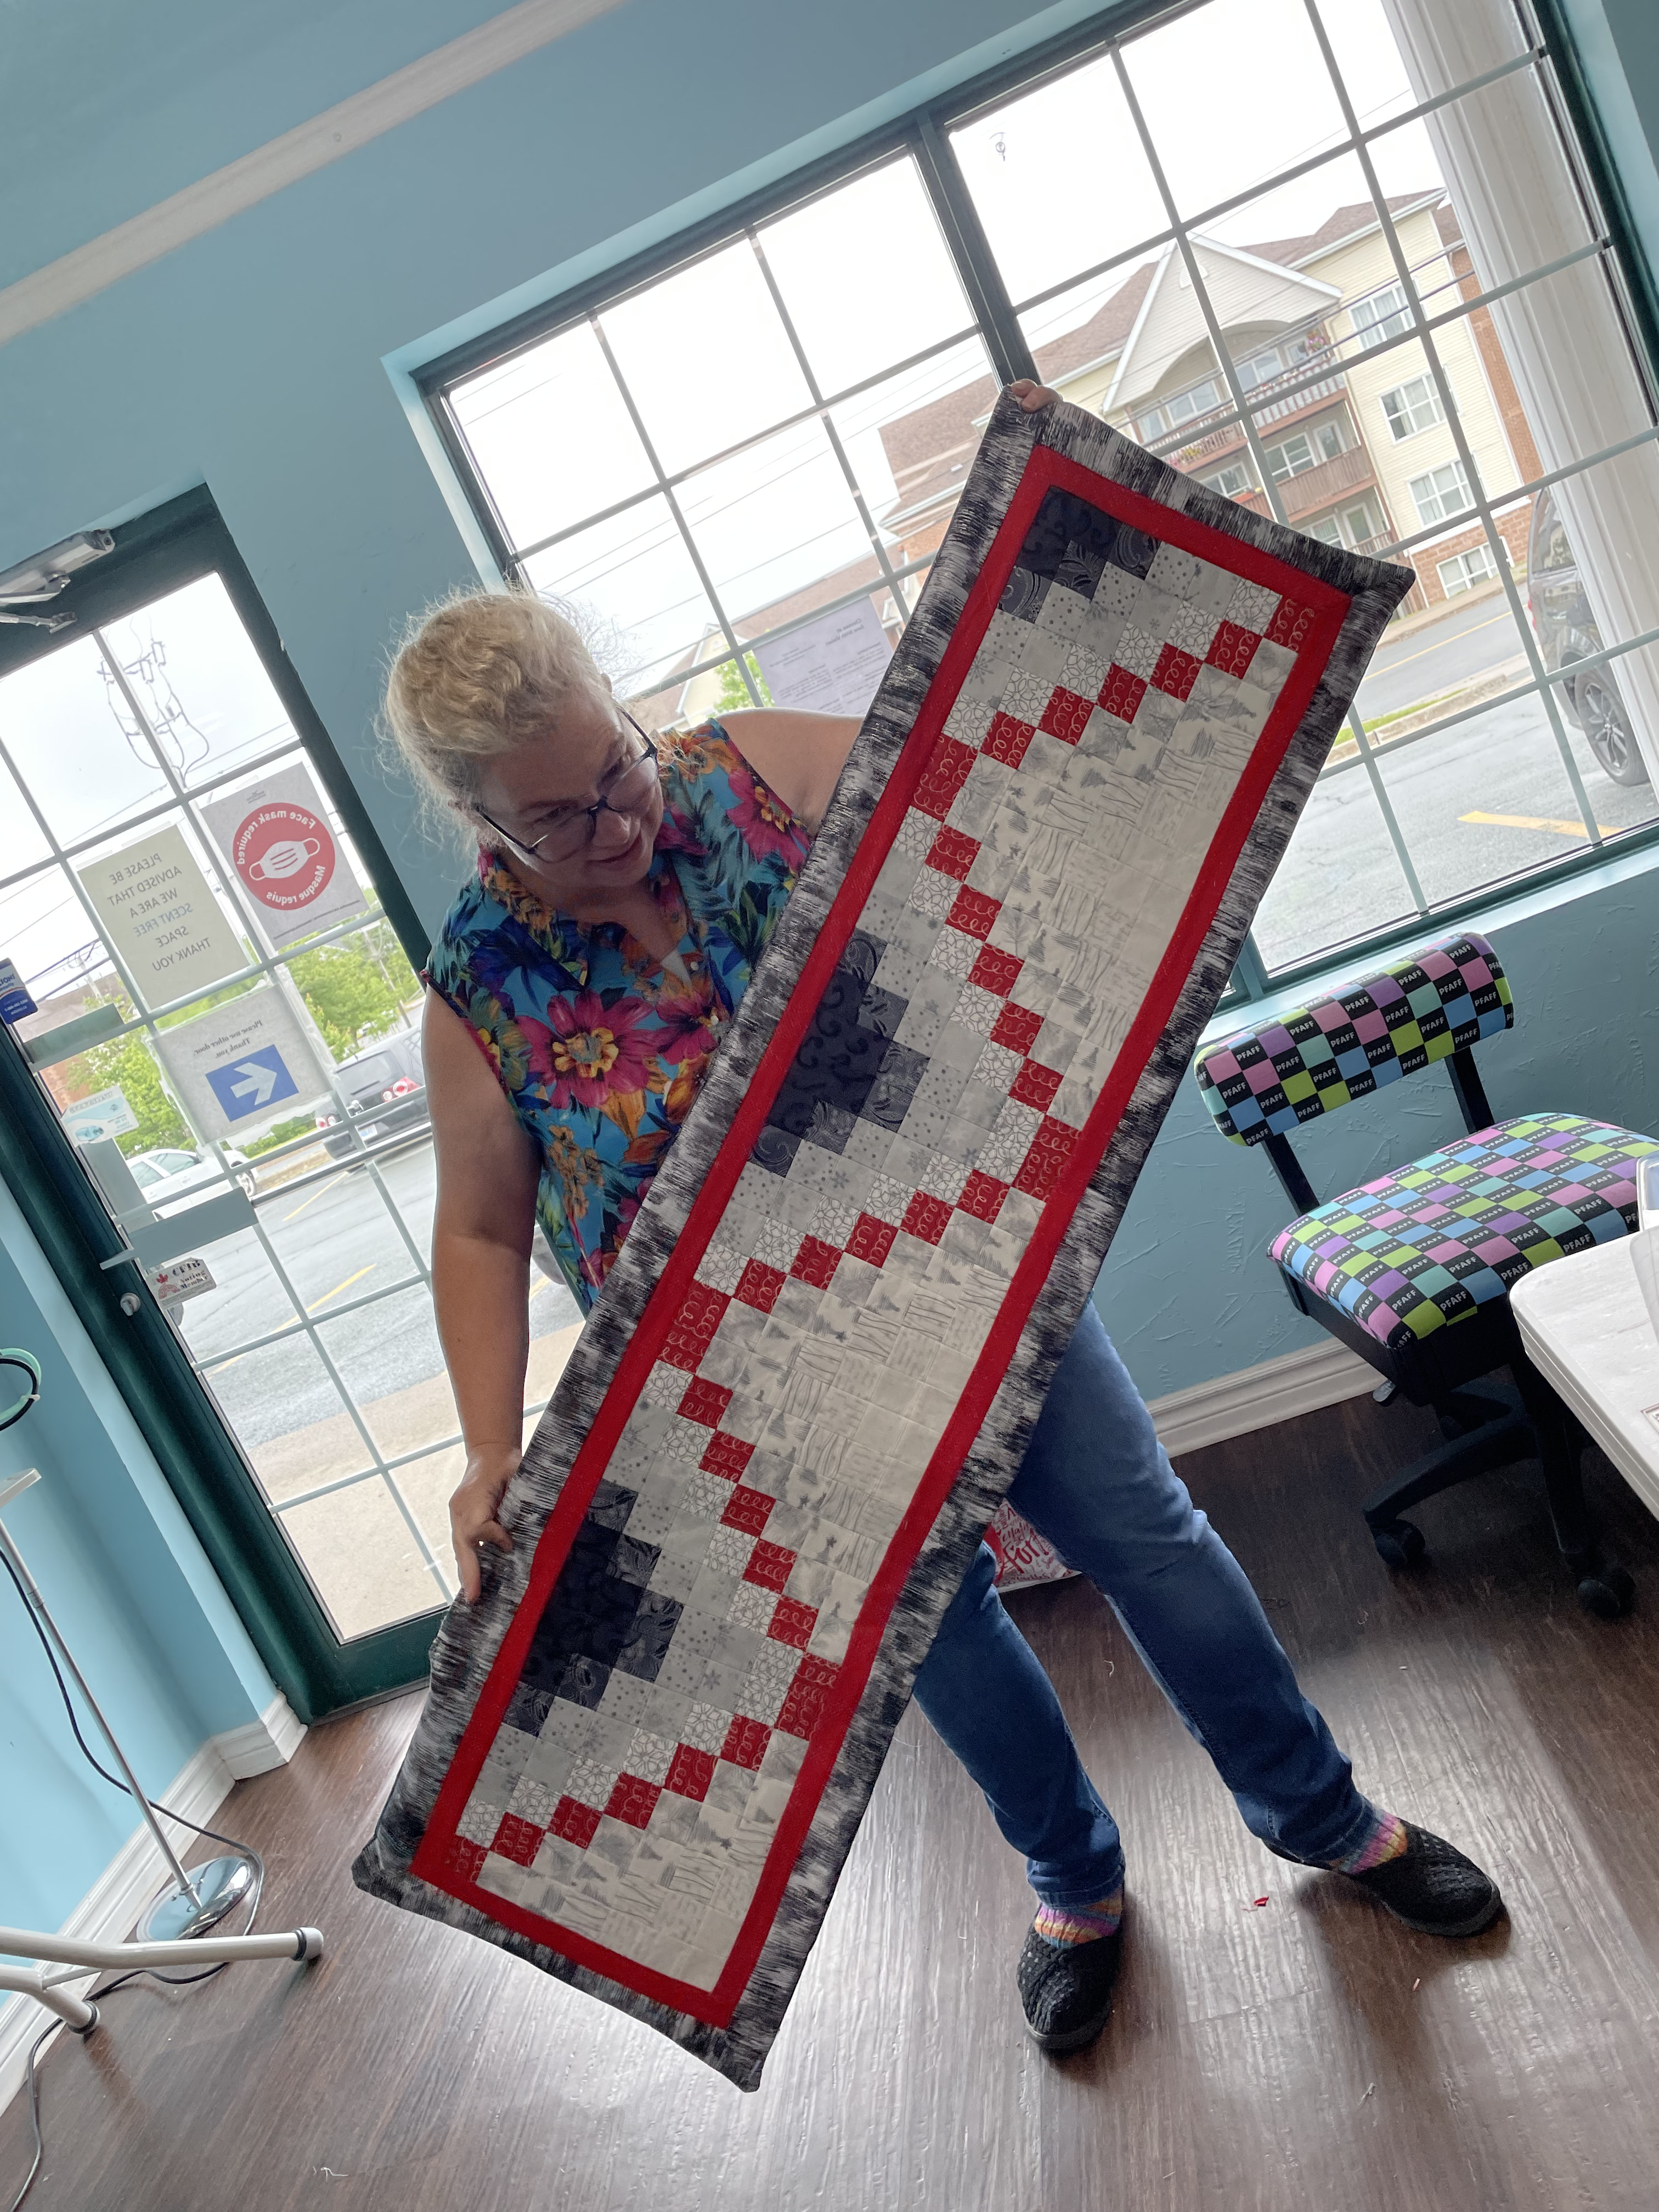
Another had nearly finished a bed runner – just needed border for the top and bottom ends.

(The third had her top and backing pinned right sides together when we ended the afternoon so I wasn’t able to get a picture.)
In the meantime, I’d started work on a wall hanging:

Only to discover that although I have hundreds of 2″ fabric squares in a wide range of colour, I didn’t have fabric to fill in the light portions of the layout! I’ve had to dig through scrap boxes to come up with more possible fabric bits. My plan is to build a graduated background, then to embroider a large flower of some kind (not another iris, maybe a yellow poppy) to overlay the light side of the layout. However, right now, I’ve got a pile of small light fabric pieces on my cutting table and I’m still walking around them. I hope to return to the piece this weekend.
Because I was stuck I turned to pants making, once more. I had washed, dried, and pressed a piece of beige linen cotton blend fabric and wanted, this time, to make a loose wide-leg pants. I took my previous pants pattern, hauled out a pattern I had for pyjama bottoms, laid one on top of the other aligning the crotch seams, then drafted a new pattern with the higher waist of the pants and the wider legs of the pyjamas.
However, when I put the pants together I made a BiG mistake – I forgot the pattern didn’t need a waistband – because the body of the pants incorporated the waistband – I just needed a waistband facing! But instead I added a waistband and faced it – which of course made the body of the pants too long. They looked dreadful. I was about to throw them out but a friend wanted to try them on. They fit her better but would have still needed adjusting, so I took them back, and the next morning removed the waistband, added back the waistband facing, shortened the legs (which were also too long even with the shortened body).
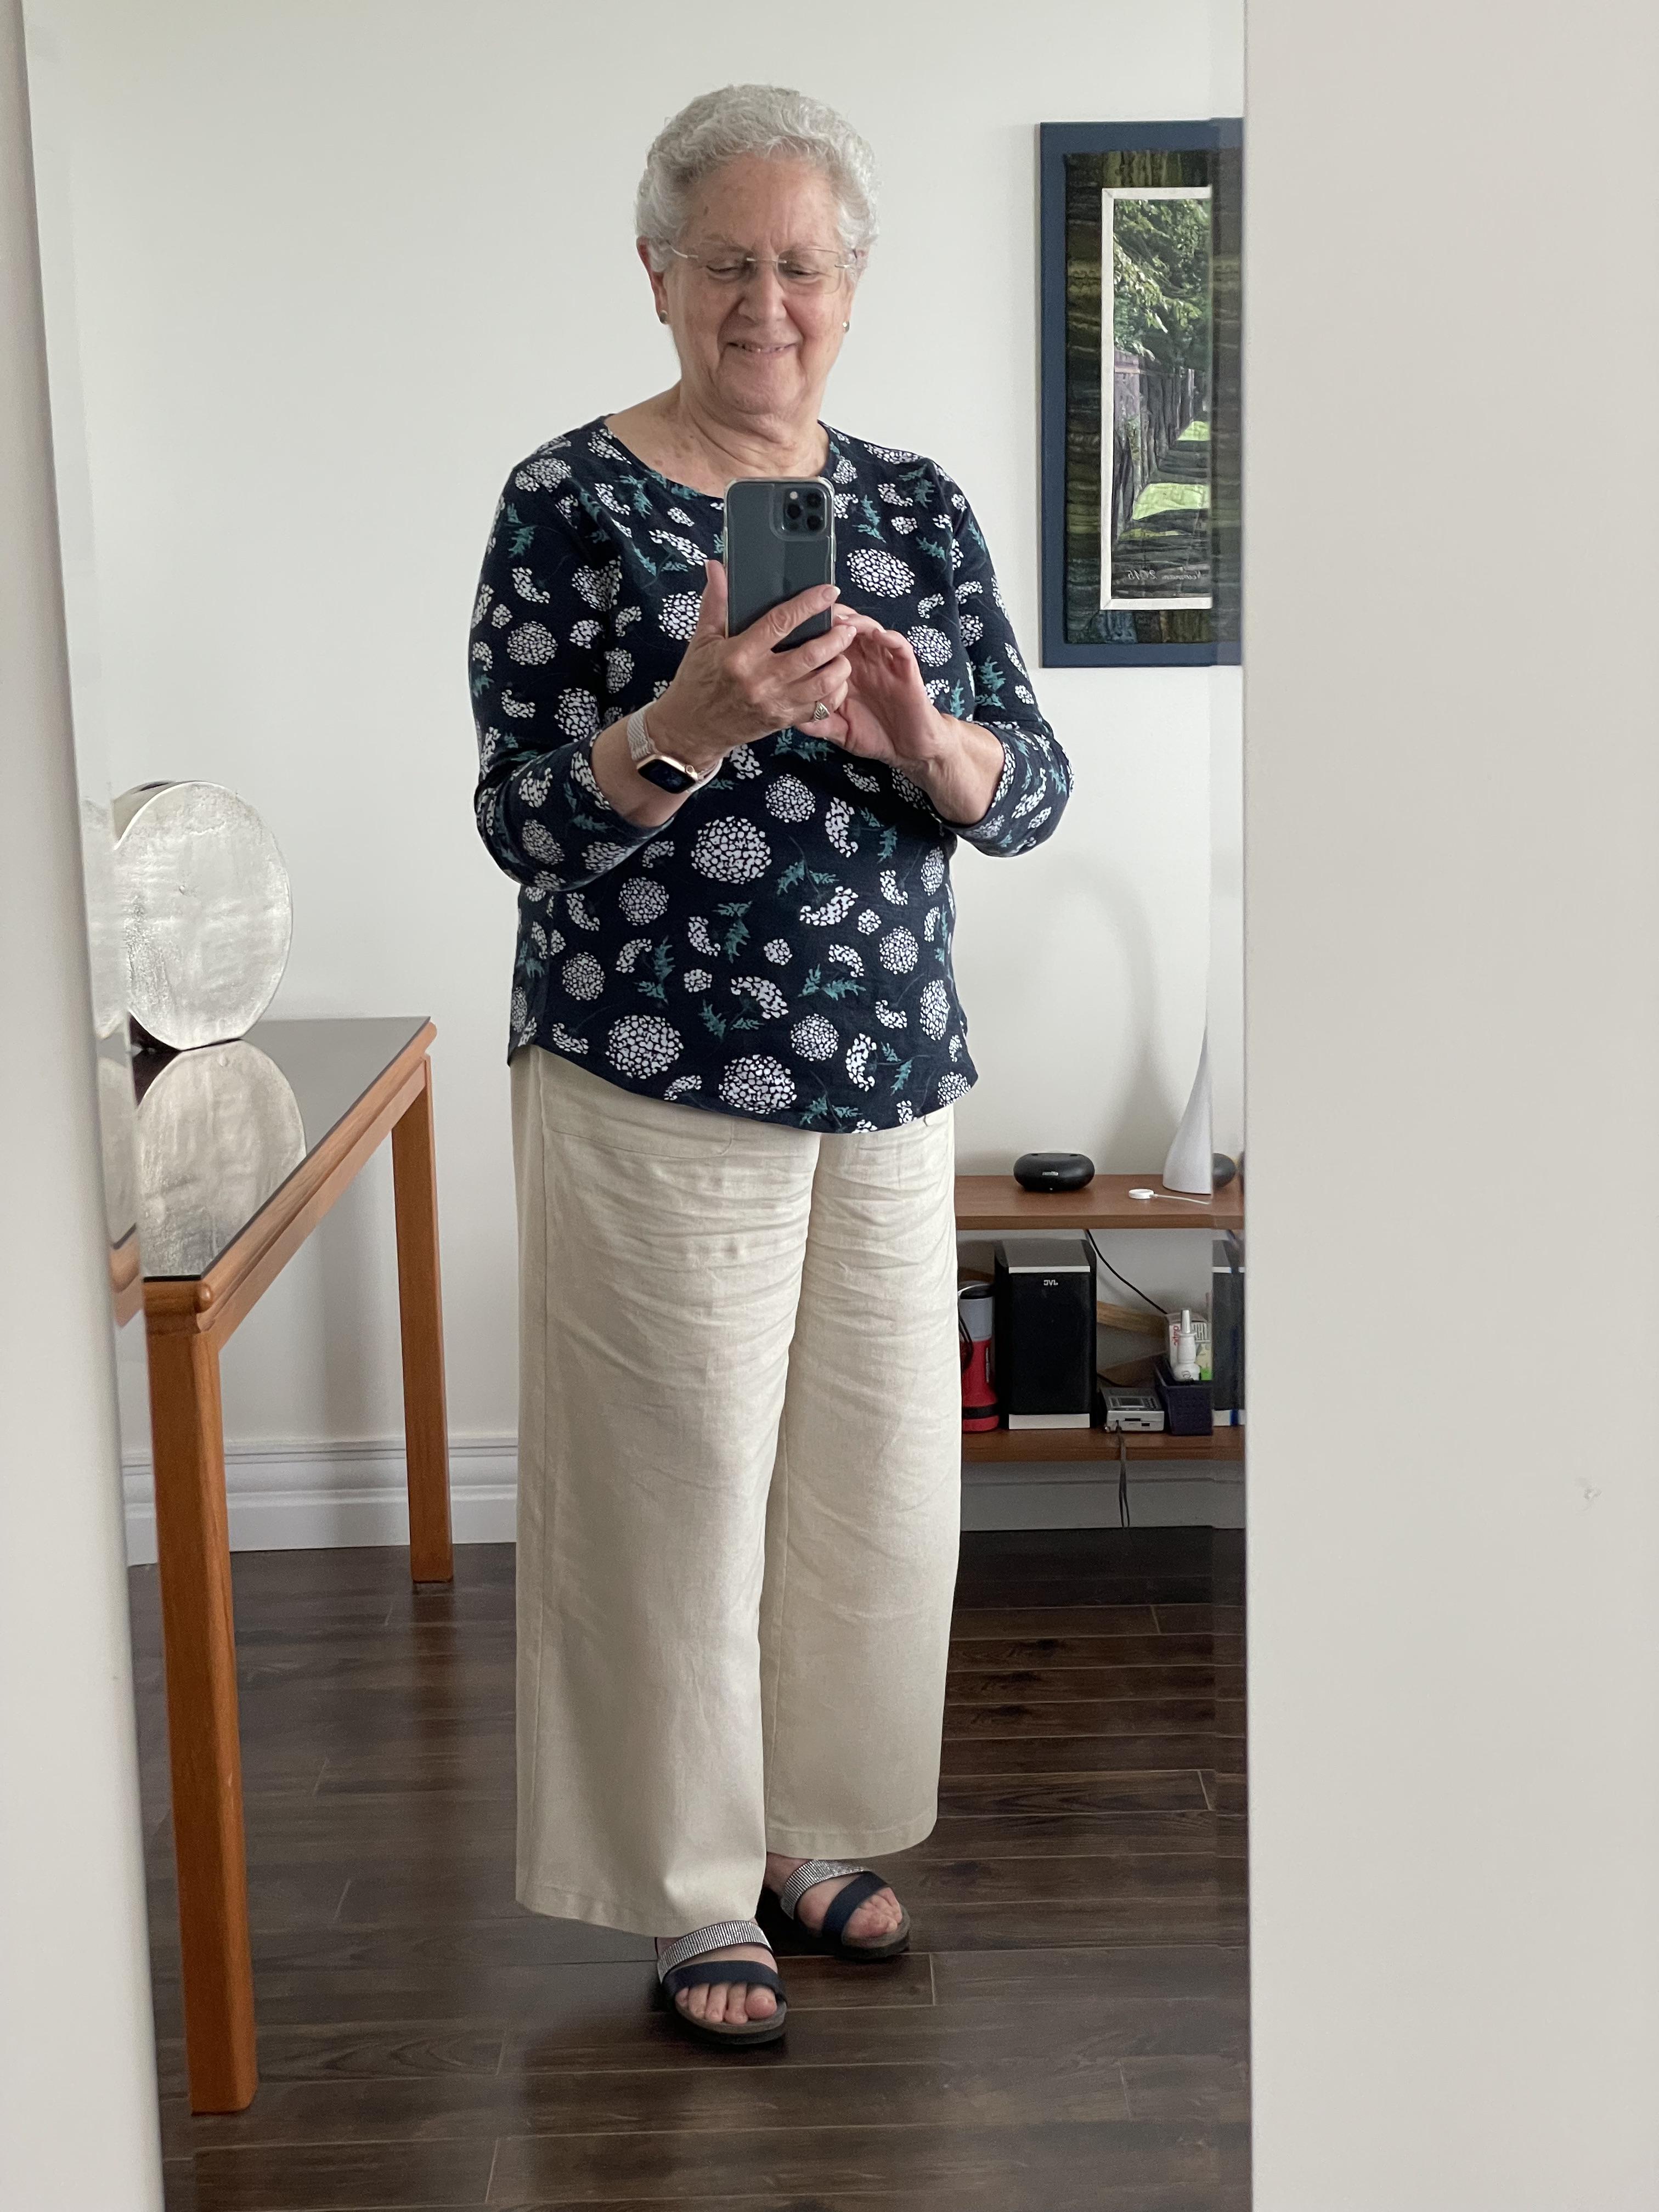
All I can say is, they’re wearable. They’re comfortable but they certainly make me look like a dumpy old woman! The front fits OK. The back drapes funny so I’m going to have to revisit my “pattern” because I want to make another pair.
So while I haven’t been blogging, I’ve still been sewing, really.

It took me about four tries to make the perfect wide leg pants. I drew my own pattern on the butcher paper Amazon often uses for packing material (which is perfect)(and free) and just kept tweaking it and tweaking it. The zipper foot on my ancient Husqvarna is long gone so everything got an elastic waistband, which I prefer, anyway.
I was so happy with the result, I made over a dozen pairs in all different fabrics and I’ve gotten lots of compliments on them.
My advice is to get the fit on your booty perfect and not worry too much about the fit in the front–it’s going to get wrinkled when you wear it, anyway, and will be concealed by the longer tunics, etc. that pair so well with them.
I am in awe of your results but I am still trying to figure out the exact technique. They are all perfect aligned.
Bernie, Here’s the technique – the 2″ squares are placed on a gridded fusible interfacing and pressed in place. Then the interfacing is folded in one direction and stitched 1/4″, seams pressed open; then folded in the other direction. stitched 1/4″, seams pressed open.
Perfect results every time. Great for small projects like table runners and wall hangings. A bit too stiff for a quilt.