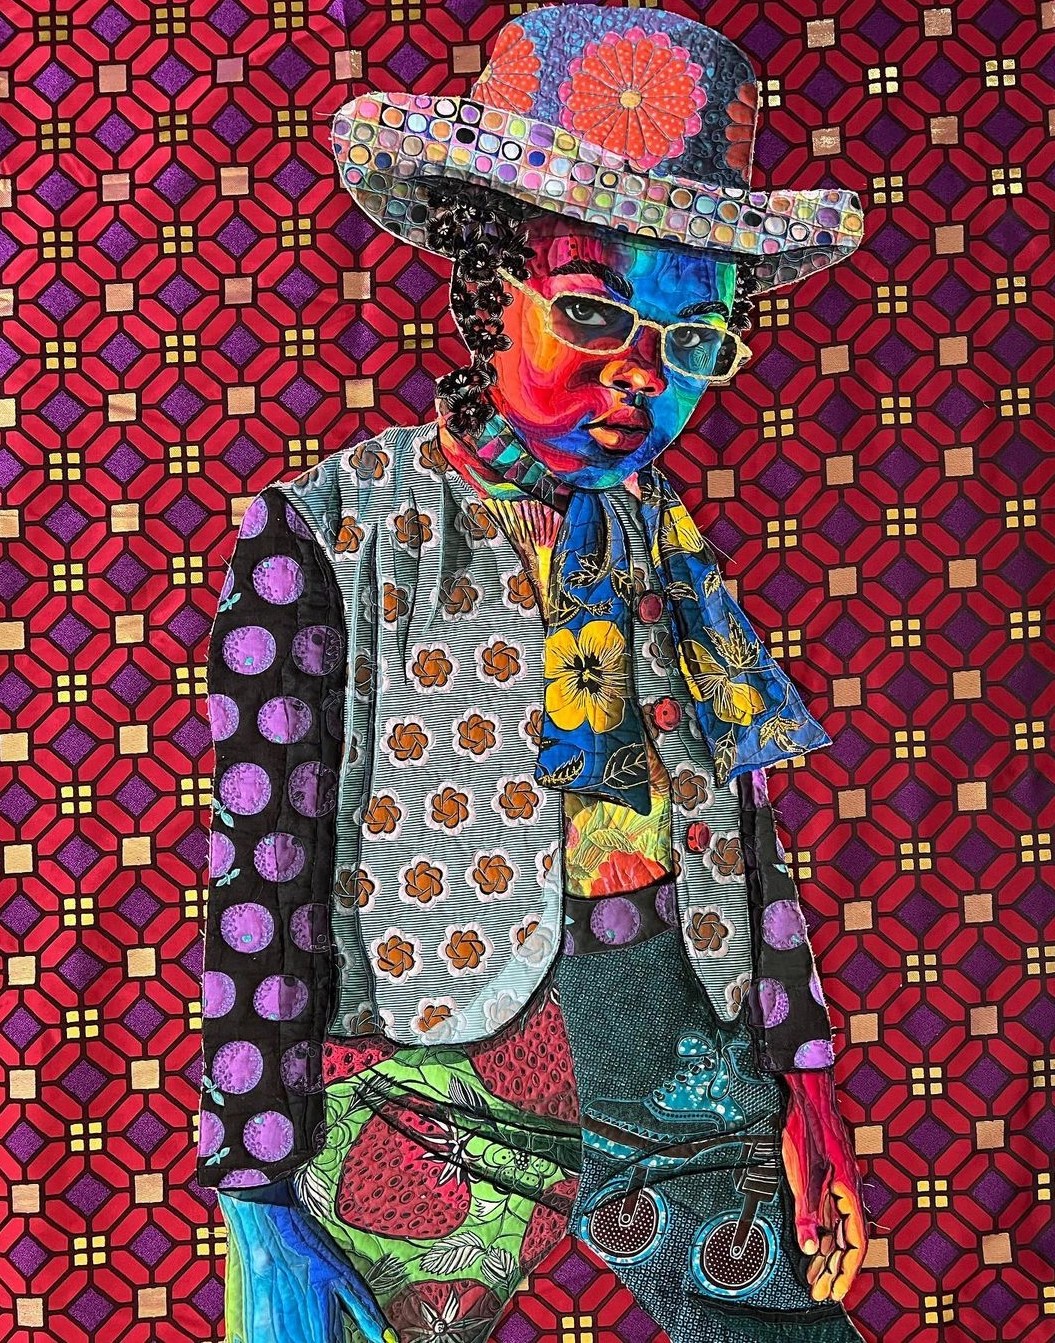
Detail from “If I Ruled The World, Imagine That” – Bisa Butler
Carefully examine the work and the decisions in this example of Bisa Butler’s textile art. [Detail of “If I Ruled The World, Imagine That” (2022), cotton, silk, wool, metallic brocade, and velvet, quilted and appliquéd, 102 x 51 inches].
This complete piece is large 102″ x 51″ – the width of a king size bedspread and 2/3 the height. This portrait is one section of it and still you can see how amazing her decisions are regarding colour pattern and background!
As much as I enjoy creating image wall art, I can’t begin to think in the manner and scale that Butler does – notice the roller skates on the pants, the hair, and glasses frames, the shadowing on the vest, the detail on his hat. Her wild choices of fabric, her amazingly done appliqué work, the juxtaposition of patterns are simply wonderful. My works are small – hers are massive!
After doing the laundry, emptying the dishwasher, repairing a small hole in a cashmere/merino knit sweater, putting last night’s dishes in the dishwasher, reading email, making the bed, shower and dressing, having breakfast (late as usual), I finally got to the Drunkard’s Path blocks. I sewed all 24 small ones, as well as the remaining nine large ones.
I assembled the blocks into rows: one large block, two small ones. The centres of the small blocks are leftovers from the grey “L” shaped pieces used to make the blocks on the top. I used scraps from my many boxes of different sized scraps to cut out 3 1/2″ squares from which I removed the quarter circle corner (with the help of an acrylic template of the appropriate size).
3 1/2″ Drunkard’s Path blocks are actually difficult to sew! I pin the centres together, then try pinning the ends, but because the fabric pieces are small it’s hard to twist the ends into place, pin them, keep the ends aligned when you start sewing. The curve is also difficult because there is very little maneuvering room. It’s all about pressing and trimming after sewing and not using the blocks in sets of four to make circles because quite likely the curves won’t align nicely. So I chose to offset the curves of the small blocks against the large one, although I aligned one curved edge against the larger block’s curve and trimmed the resulting row so I’d have a straight edge when I attached the next row.
Ten rows weren’t quite enough. I used up the leftover six blocks – three at each end, and finished with a piece of grey fabric that is going to be the inner sashing. My strip is 3″ longer than the quilt top – enough to let me set up the sandwich with the backing larger than the top all the way around.
I’ve cut the sashing and the backing to length. I need to make joins in the sashing so they are long enough and I need to spray starch (with Best Press) the backing fabric making sure all wrinkles are out of it when I go to set up the sandwich.
Tomorrow afternoon I should be able to finish the backing and set up the quilt for quilting!
I’ve been stuck this week on the Drunkard’s Path quilt. I went through my stash and although I have several large pieces of grey fabric the colour or patterns just weren’t right for what I’d done with the quilt top. So I went shopping for more fabric! Here I am trying to work from the stash (to use up some of it) and my artistic sensibility says I need to go shopping.
I bought two metres of a grey print fabric during the week, but I still couldn’t get to work – something was stopping me. I did cut out the elements for twenty 3 1/2″ Drunkard’s Path blocks as well as ten 6 1/2″ blocks with the intention of combining them in some way and I began sewing the blocks together but I’ve not made much headway.
Today I took a “vacation” day with a friend. We drove to Mahone Bay (an hour away from Halifax) – a lovely sunny day (if chilly) – the roads were a mess mid-morning when we left (from the freezing rain and snow we had last night). On our way back we stopped at Heidi Wulfraat’s Woolworks shop to look at fabric. She carries the complete Free Spirit line of fabrics. I love seeing the entire collection. I happened on a grey batik, however, which suddenly explained my inaction – I just wasn’t happy with the other backing fabric I bought!
On the left is the first backing fabric (light grey with dark crosshatchings) I bought earlier in the week – it’s now going into the stash – it will be perfect for some other quilt, just not this one. The grey/white batik at the bottom of the pile above I bought today. The Drunkard’s Path block example is what I’m planning on doing for the strip to extend the width of the backing – with sashings from the darker grey and the teal batik.
Tomorrow, I am determined to sit down and finish both the large and small Drunkard’s Path blocks, add sashing and the backing!
I still don’t have a quilting embroidery – but once the quilt sandwich is assembled I should be able to some up with something suitable.
Patsy wondered whether I could fix holes in the feet of her socks. I’d have to see, I told her. Depends on the size and location of the holes. (These were socks she bought from me to give to her daughters, I thought, a couple of Christmases ago – looks like she kept a pair for herself! Well loved, I could see.)
Well, not only were there substantial holes in the ball of the foot, the heels were threadbare, as well. No point in trying to reknit the holes. Better to salvage the legs and reknit new feet.
I went to my leftover yarn stash to see whether I still had a ball of the original yarn tucked in there. No luck, didn’t find any. I did find another pattern that looked like it would complement the original pattern. I cut off the feet just at the start of the heel, and reknit new feet.
It takes 4-5 days to knit a length of leg – so 8-9 days, say, to knit a pair of legs. Half the job done. It’s worth my time and effort to salvage legs and knit new feet. She’ll get another couple of years wear from these like-new socks.
The match between the two socks isn’t absolutely perfect, but close enough that if I didn’t mention it, I’m not sure Patsy would even notice the discrepancy.
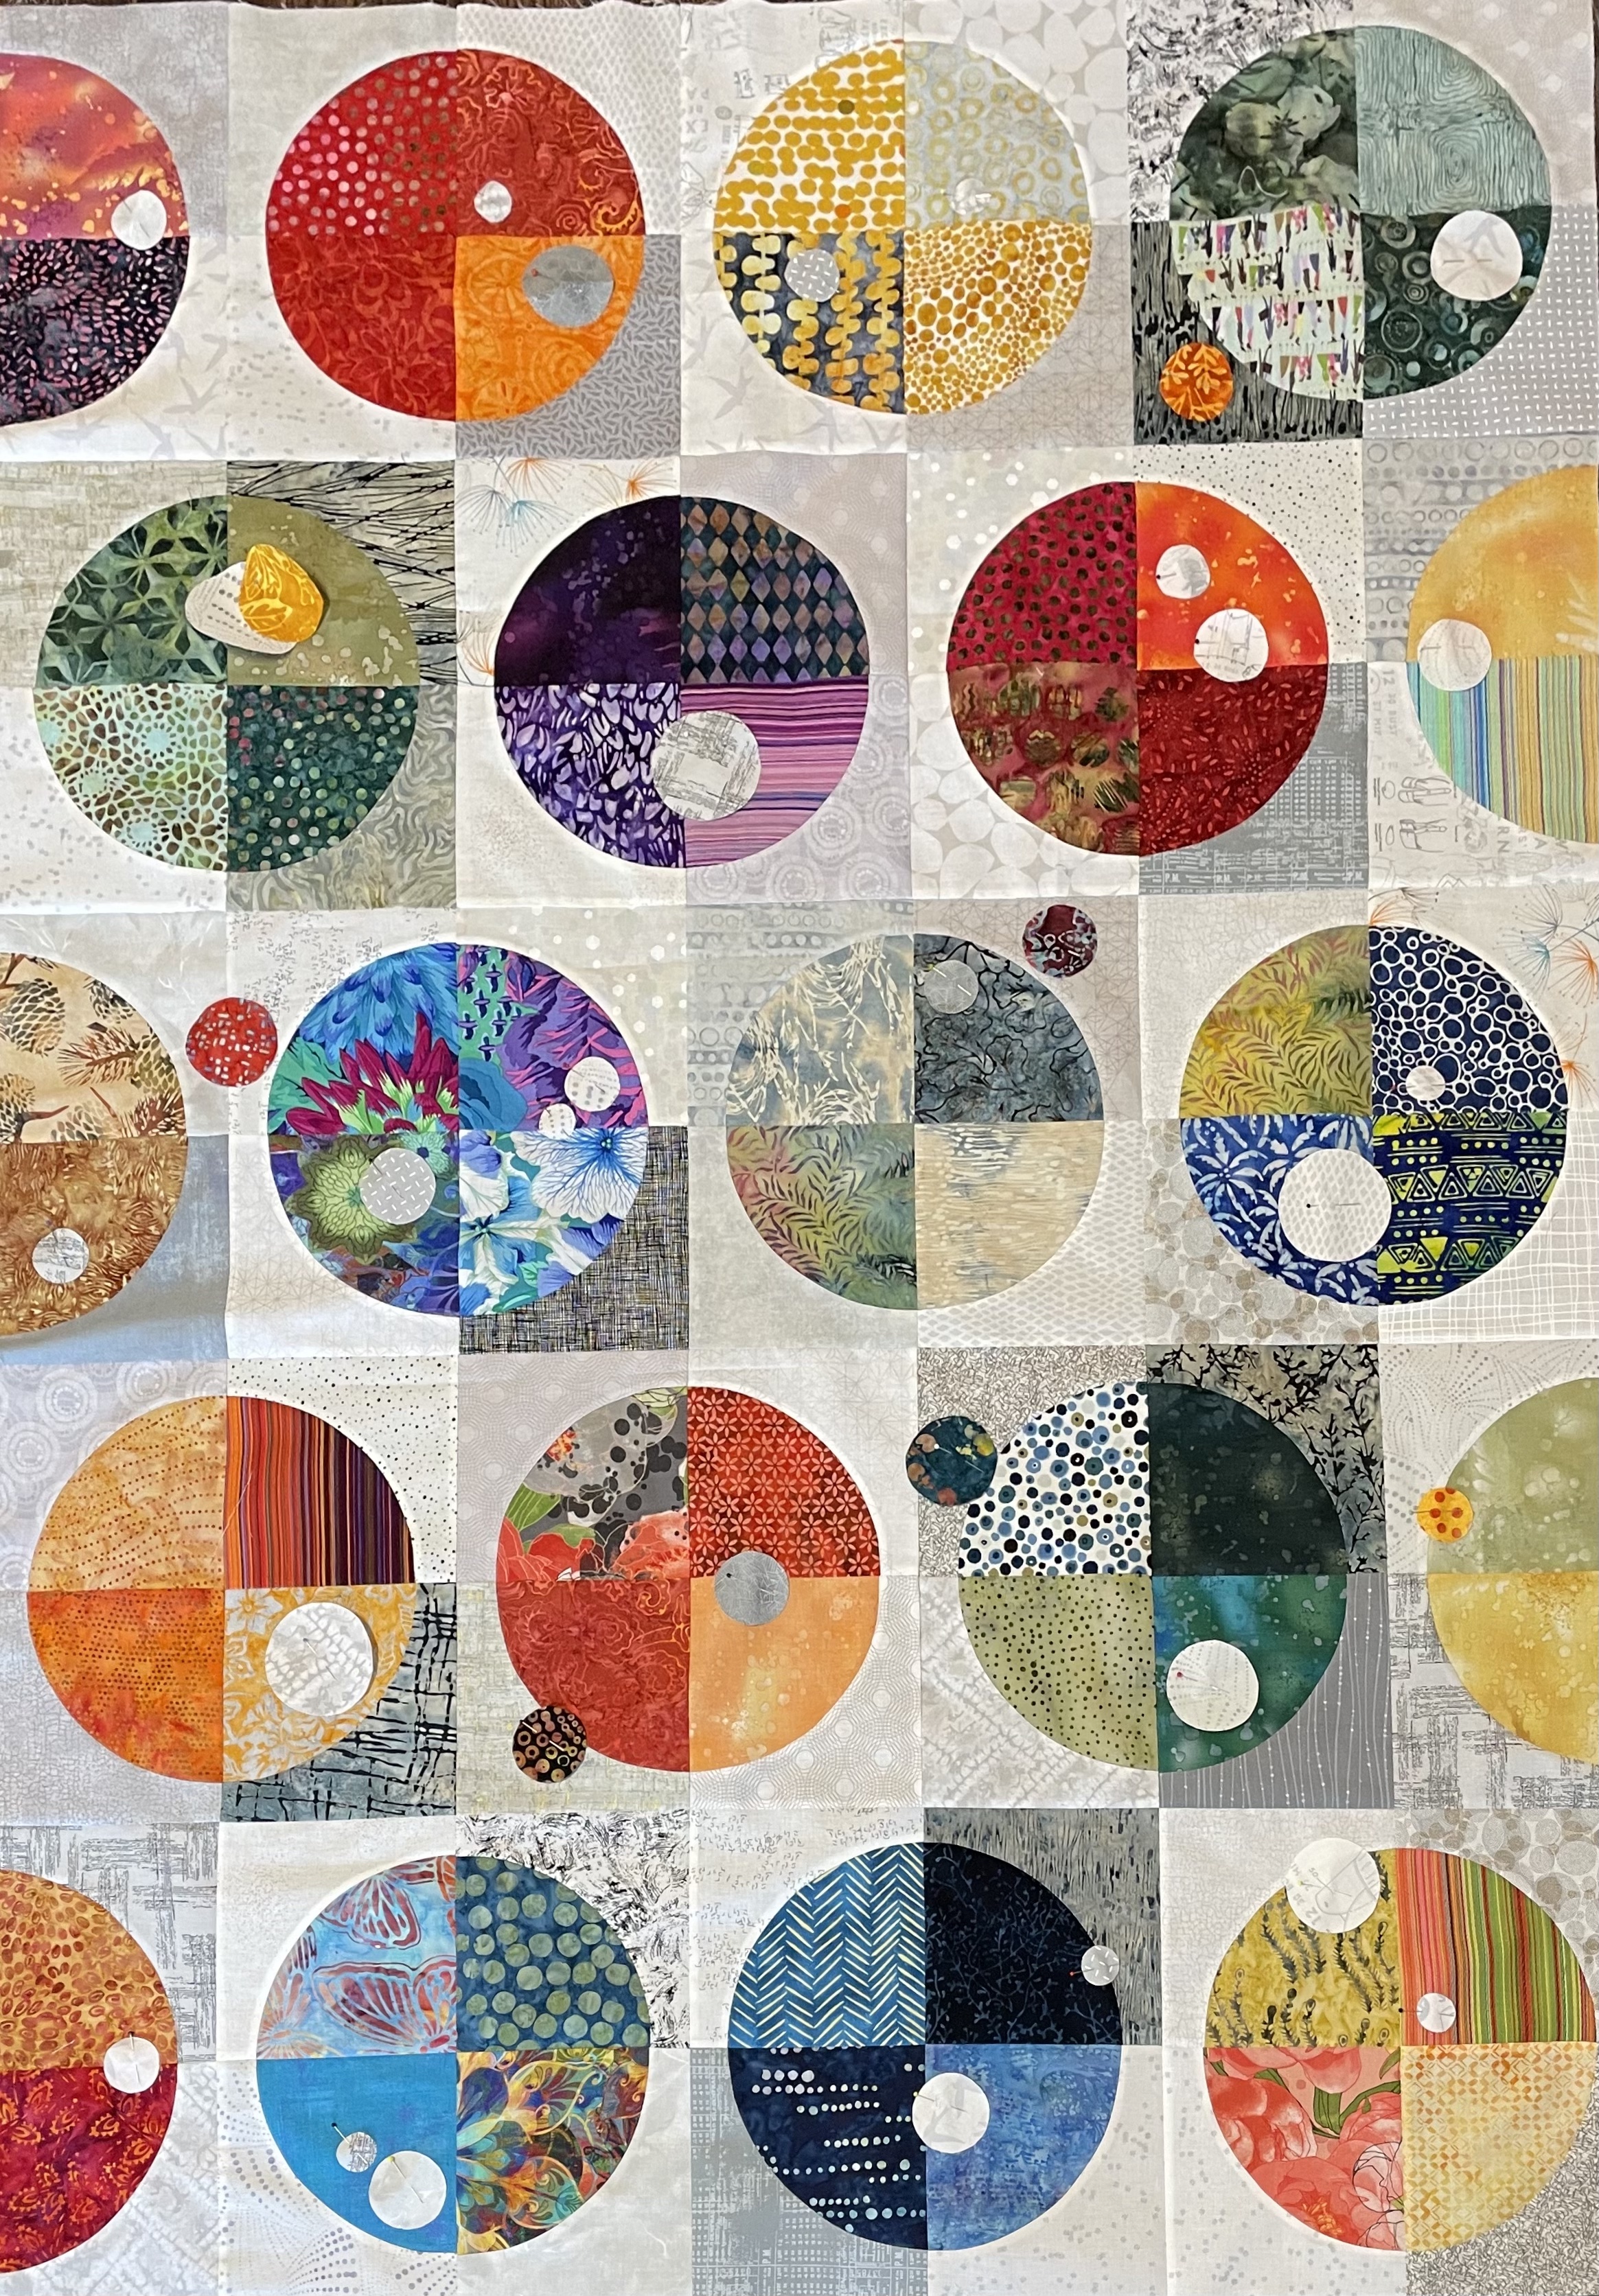
Here it is (for now). Today, I added a narrow batik inner border and a wider grey print outer border, both with mitred corners. Two things: the dark batik, which has sort of circular shapes, echoes the colours in the circles (Planets). The medium grey (with a darker grey print) blends the background elements.
The only uncertainty here are the small “Moons” bleeding into the borders (pinned in place). I definitely intend having them, the question is do I have enough or are there too many? Are they in the right places? I still have some somewhat larger ones – I tried a couple but they were too strong.
I spent most of my morning working with ideas for quilting the top. The finished circular block (made from 4 individual blocks) is 300mm x 300mm. I have a 260mm x 260mm hoop which will let me embroider a circular design that will fit within the circles (which are 250mm in diameter). However, the background presents a problem. I can stitch-in-the-ditch around each block element but I feel I still have to fill each corner with something. I could do that as separate embroideries – two blocks at a time, using a 360mm x 200mm hoop. I could also try creating a design that will embroider in the 360 x 350 hoop (the reversible hoop) but that hoop presents unique challenges because trying to match any line that crosses the midline is very tricky. When I’ve used that Grand Dream hoop in the past I’ve made sure the design elements come to the centre but not across it. The circles make that difficult to do. It’s a problem I still have to sleep on.
My next step is to make a final decision about the small “Moons”, fuse them in place, and edge stitch them. While I’m doing that, I have to come up with something for the quilt back. I don’t have enough of the grey border fabric to do a pieced back with that fabric alone – although I can use it along with other fabrics. I still have 7 unsewn Drunkard’s Path blocks and a bunch of smaller grey quarter circle elements I can add to the collection.
I just finished the decorative edge stitching on all the small circle appliqués. Slowly and carefully – using 50wt rayon embroidery thread (top and bottom).
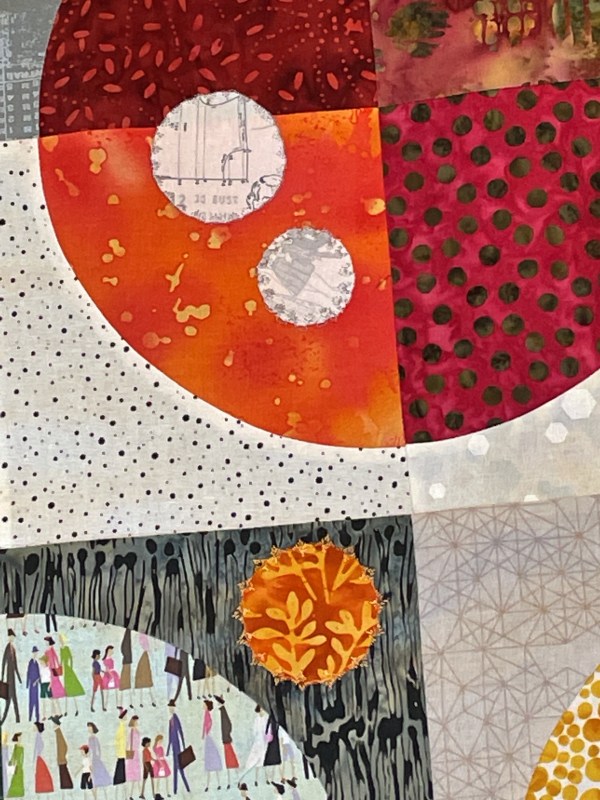
Detailed Views
In these detail photos you get a sense of the decorative stitching done along the circumference of each small circle. I used a silver grey thread for all the grey circles, and blended in a complementary thread for each coloured block.
Last night I added fusible web to the back of 9 grey fabric strips, then cut out circles of varying sizes from each. I placed them on the panel, then decided I did need a wee bit of colour against the grey so I added just a few coloured circles in the background. I’ve pinned the circles in place; next I need to press them, then edge stitch using decorative stitches with contrasting thread.
The addition of the small circles pushes the large circles back, foregrounding the small circles. I’m hoping the addition of the bright narrow inner border with a wider outside medium grey will stabilize the whole panel. I’m also thinking I might add just one or two small circles through the borders as well – we’ll see.
Not much to say here. Just another pair of socks. These have a home already. My friend Patsy has a friend who is willing to buy a pair of hand-knit socks. She wears a size 7 shoe so I’ve made the foot on these a wee bit smaller than I would normally hoping they’ll fit without having to shorten them for her. I’ll send them via Patsy when I’ve finished adding new feet to a pair of well-worn socks of hers.
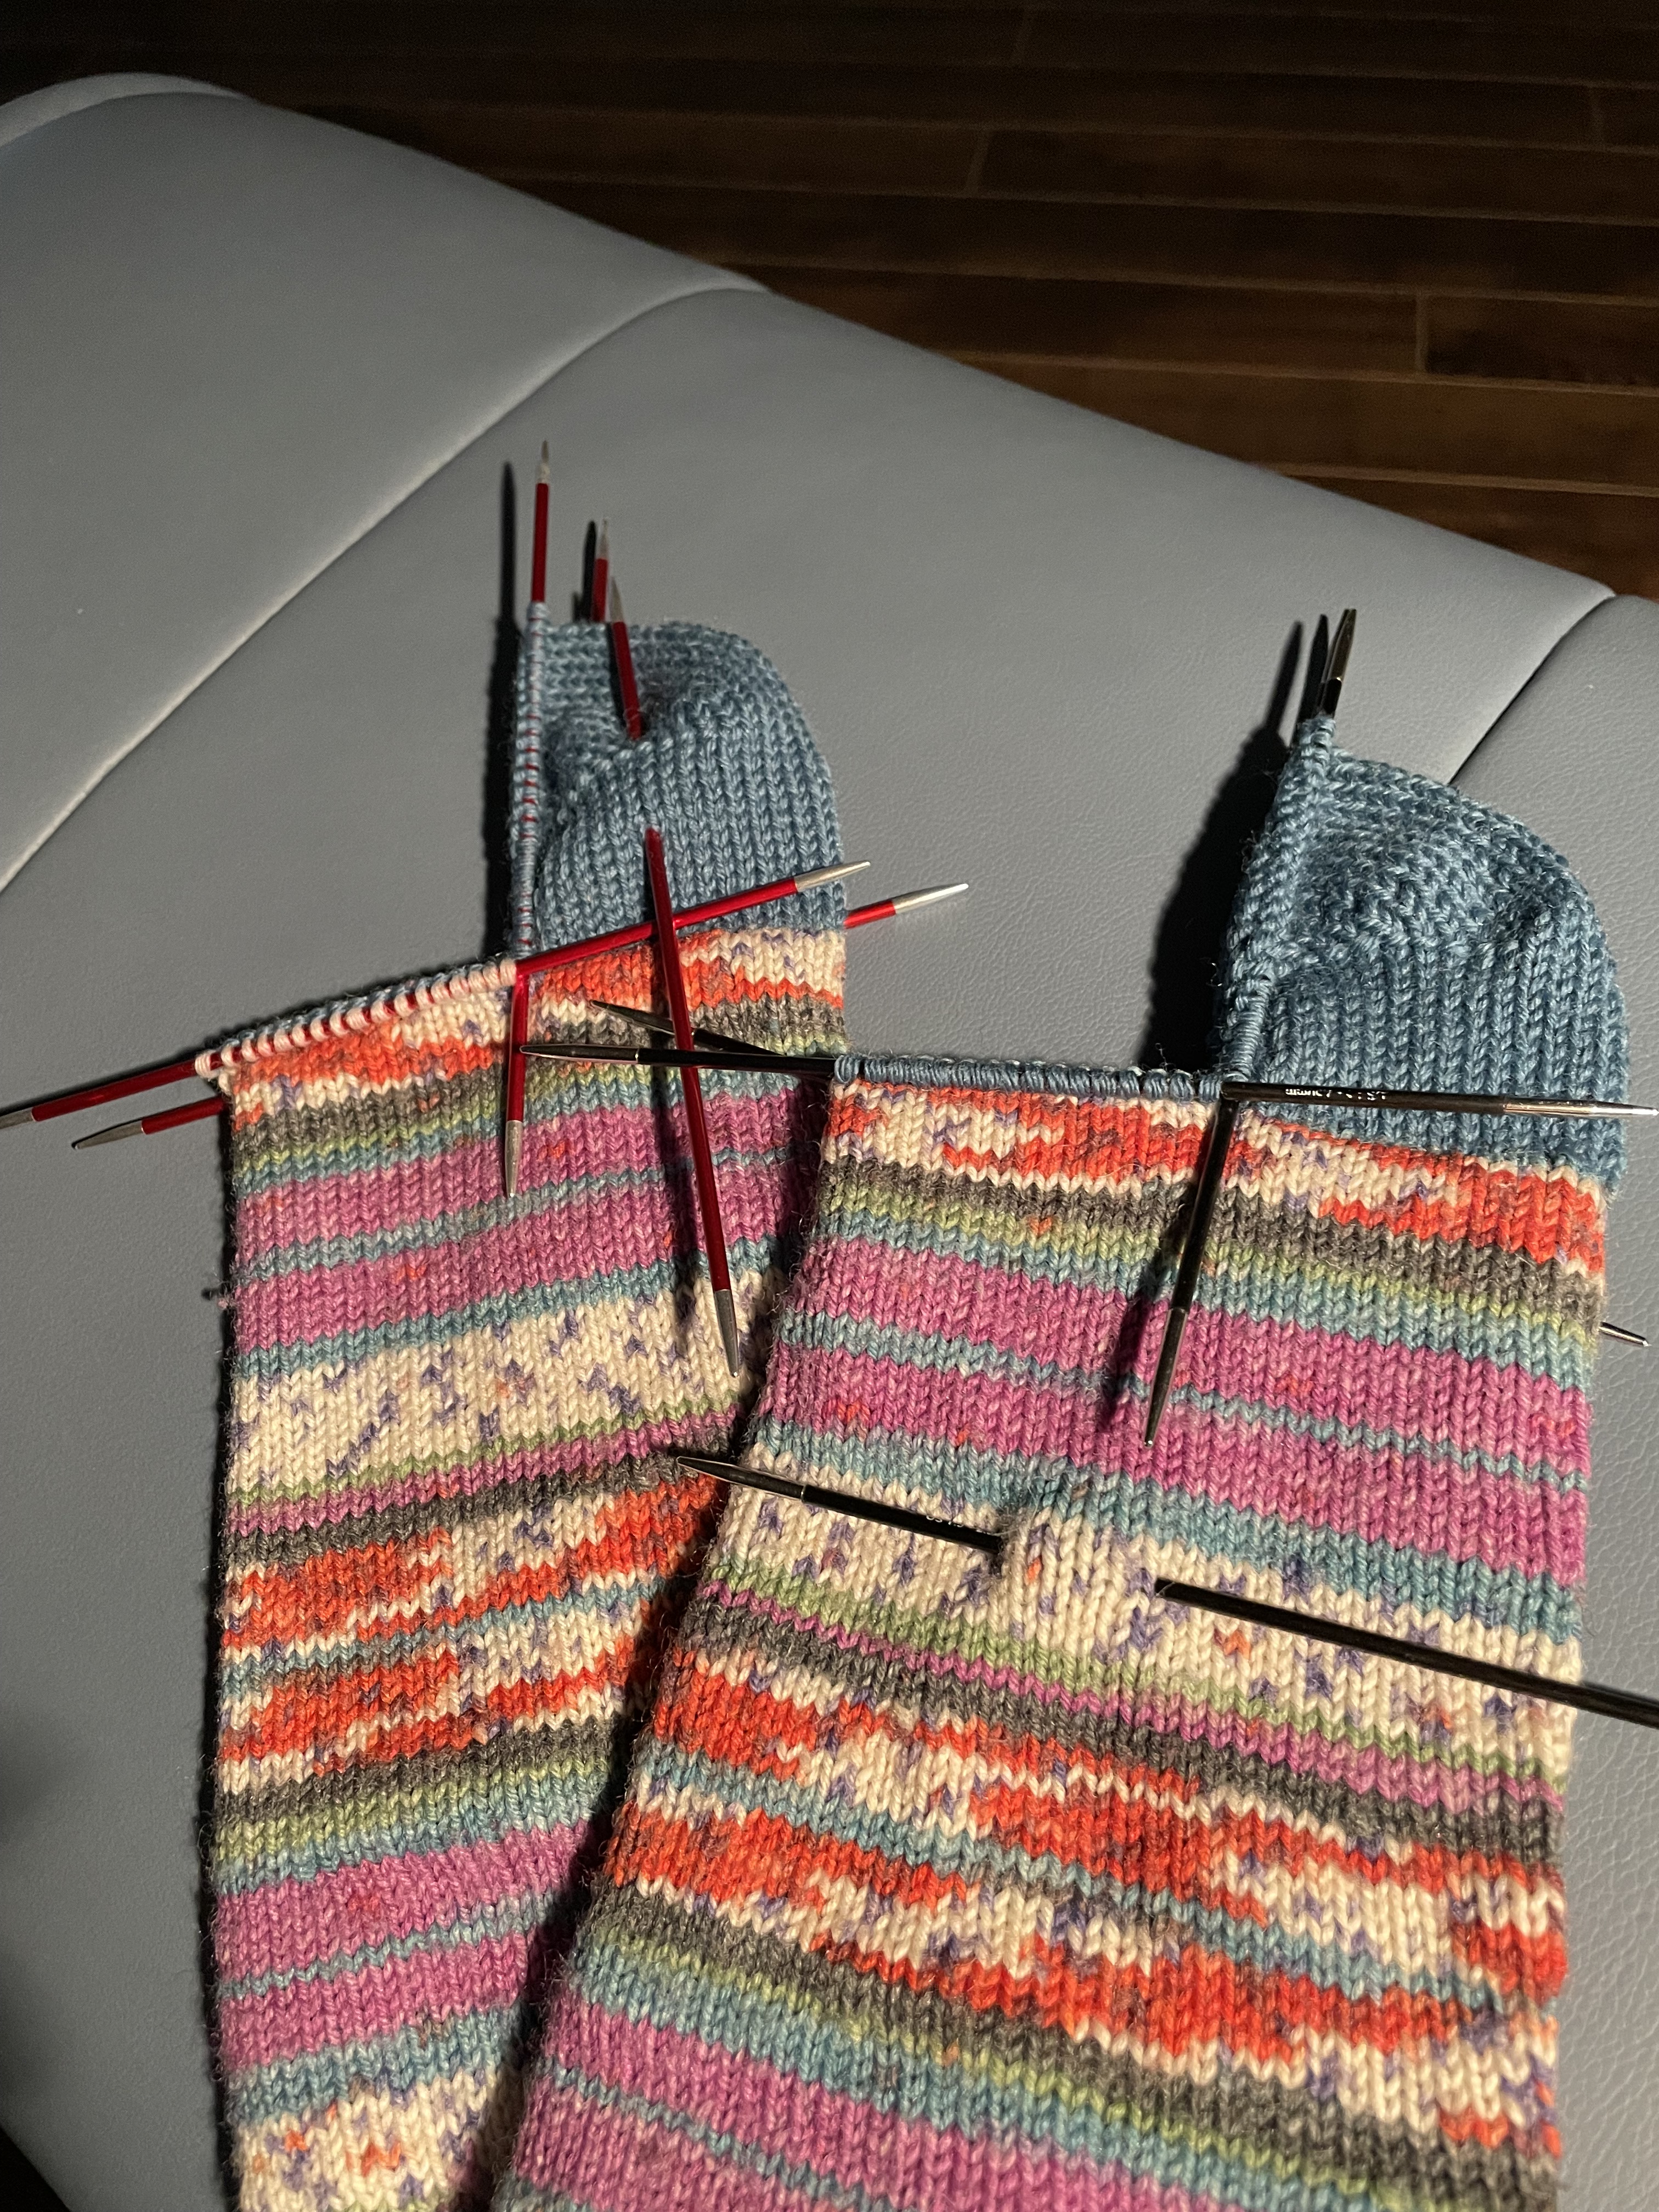
Legs Salvaged With New Heels
I cut off the worn feet, picked up stitches on the legs, knit new heels on each. Last night I knit the gusset on one of the socks then spliced in another variegated yarn – sort of close to this pattern. I don’t seem to have any leftover from this particular ball of yarn so I’m using whatever I have. There’s enough yarn in the ball to knit two feet but I’m not sure I can get the two feet to match. They’ll be inside her shoes so I’m not worried about any mismatch that happens.
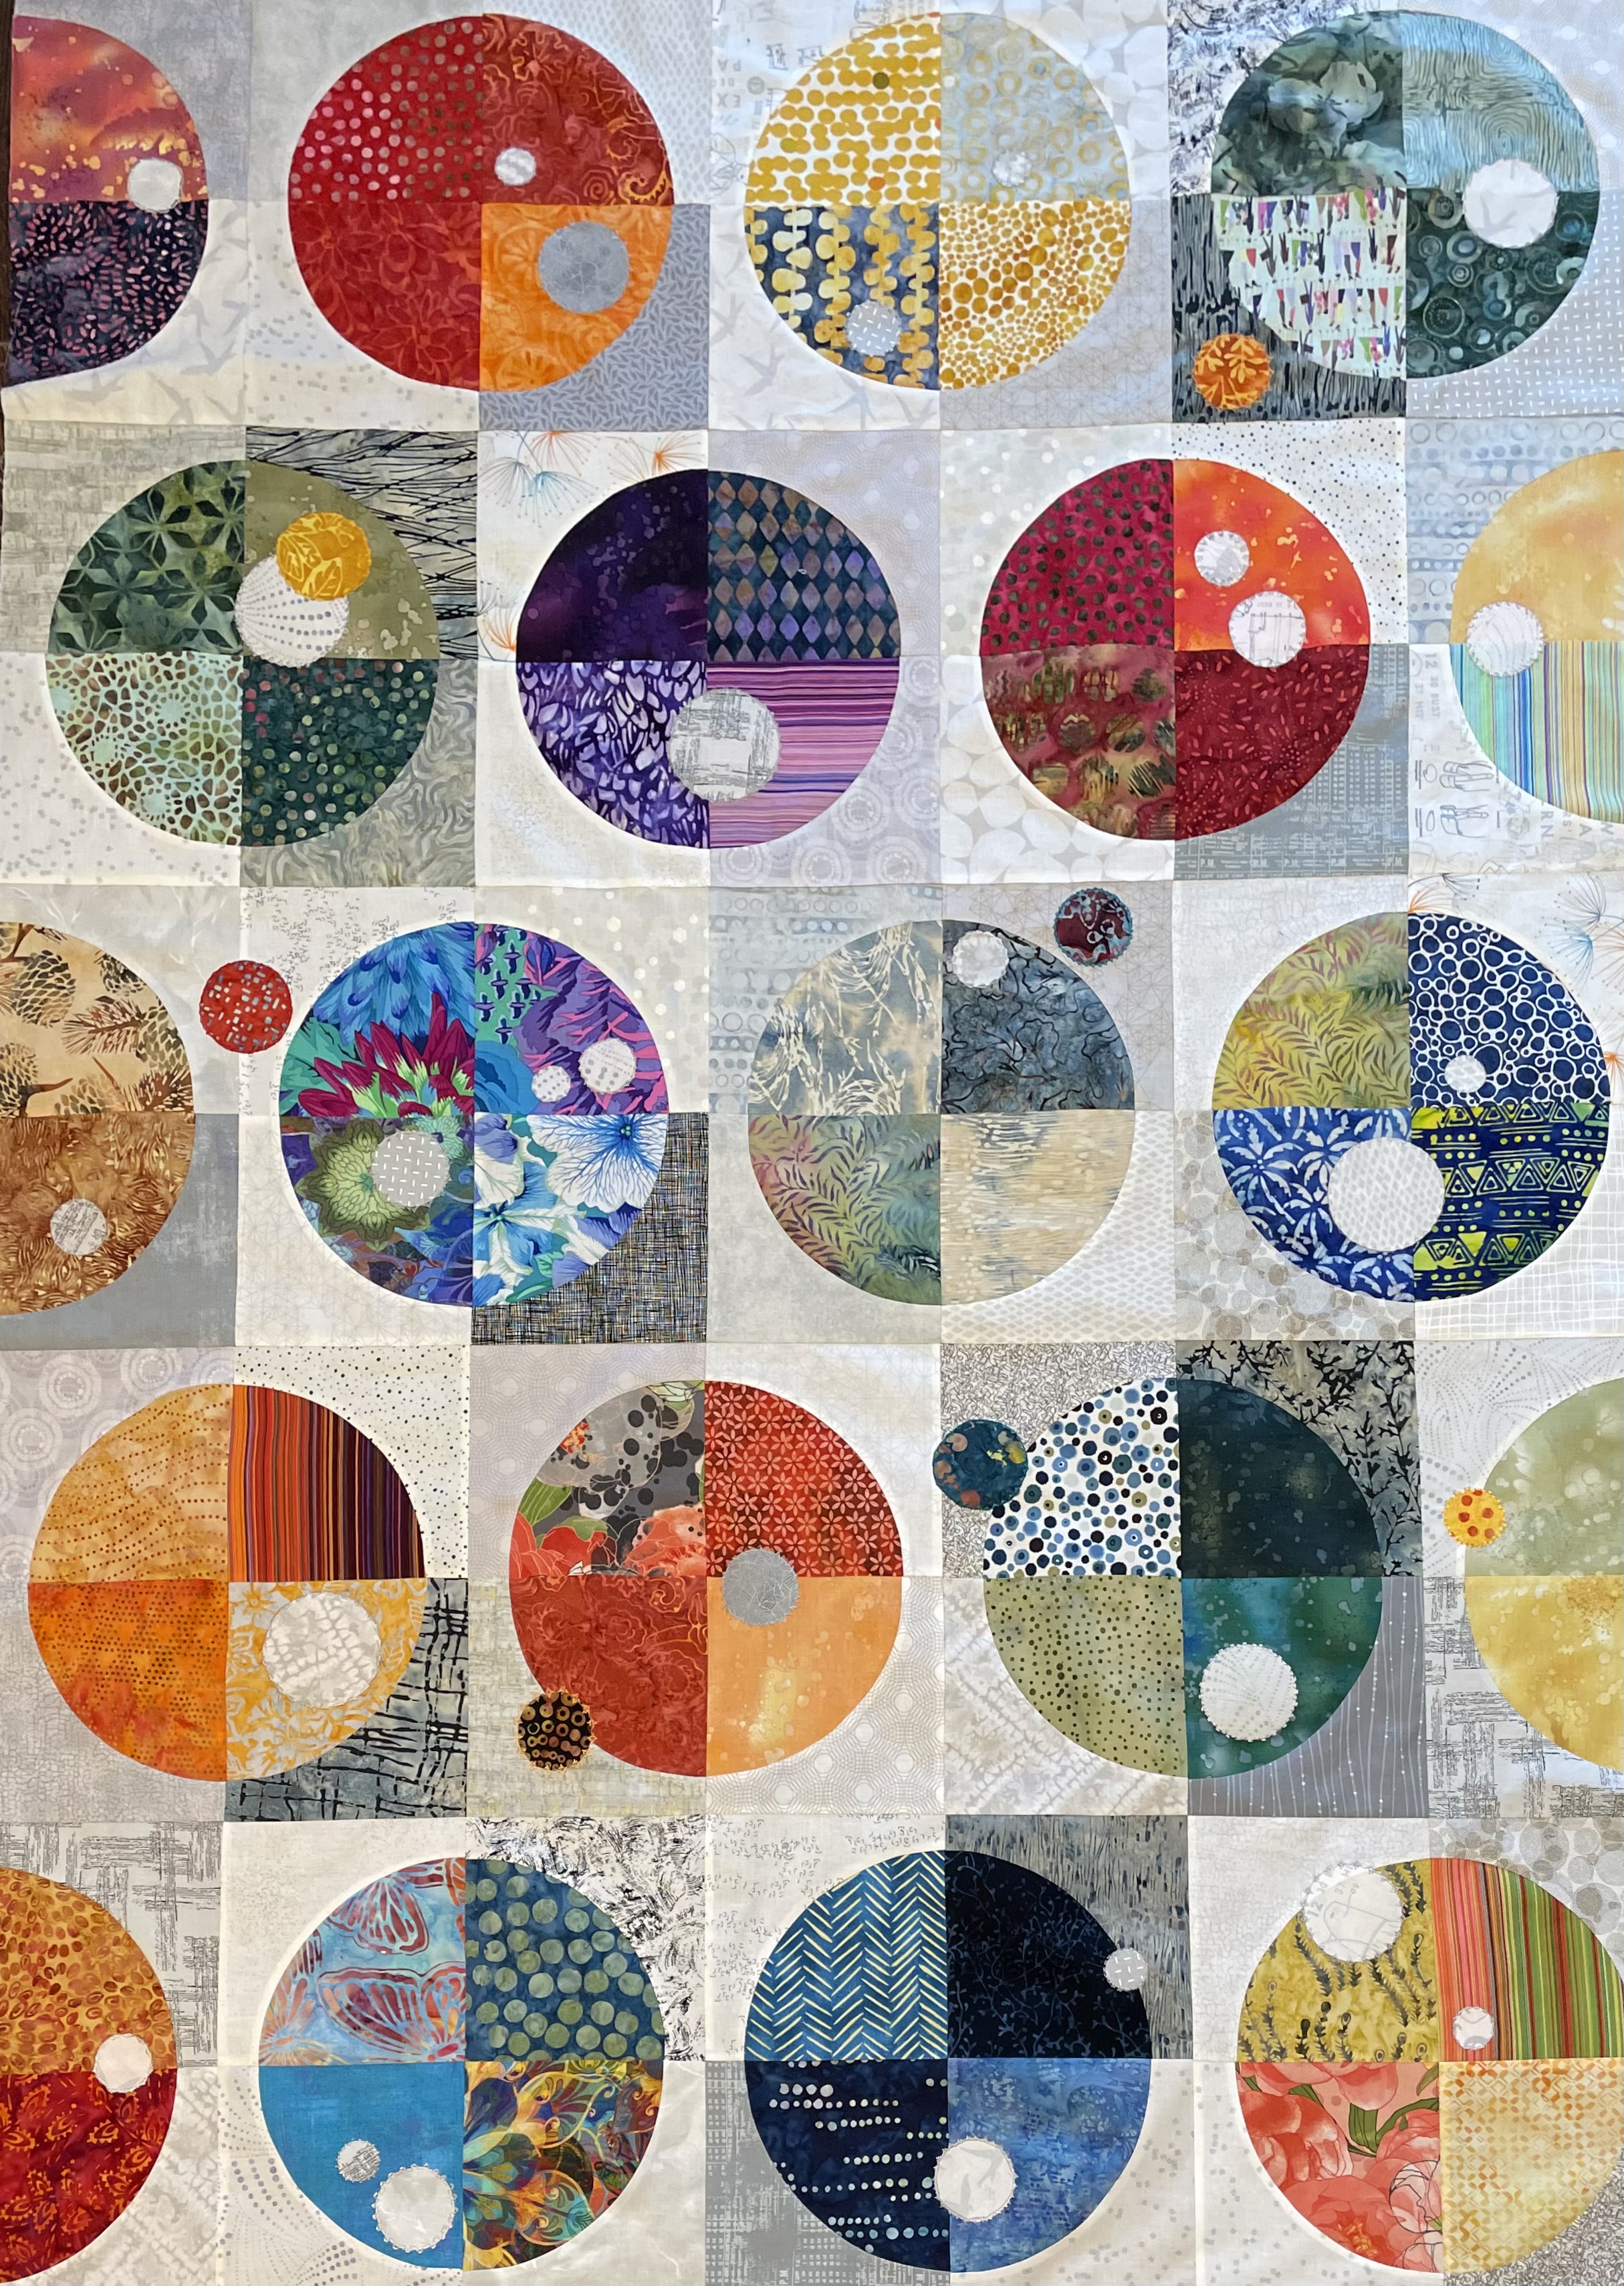
With a healthy amount of rearranging of blocks I finally settled on this array and sewed the panel together. It always surprises me how different everything looks when it’s all sewn together. The joins are not perfect but they’re more than passable – always an accomplishment when sewing curves that have to join on the circumference. I’m also happy with the distribution of the grey background colour flow.
My next idea is to appliqué smaller grey circles (in three different sizes) randomly on top of these circles to break up the regularity of it all. I’ve selected 10 of the greys I used in the background, I cut 4″ x 15″ strips, now I have to apply fusible web (Pellon 805) to the back each, then cut out circles. My plan is to use bright threads to edge stitch these small circles in place.
I’ve also picked out a bright batik that echoes the range of colour in the panel to use for a narrow inner border, then add a medium dark grey wider outer border.