Black Silk Pants

IMG_4509

I’m starting to get organized for the San Francisco trip in April. I had a phone call last weekend from Elke (Sandra’s assistant) about the workshop, wondering what questions I might have. I told her I was determined to come home with a perfectly fitting pair of pants!

In the meantime, the Saturday night we’re having dinner at Sandra’s home and apparently it’s a “dress up” affair – not too dressy, but not jeans, either. I have that lovely silk embroidered shirt I made in July from the fabric my friend Mary Ann gave me. And I have a black silk crepe top. All I needed was a pair of black silk pants!

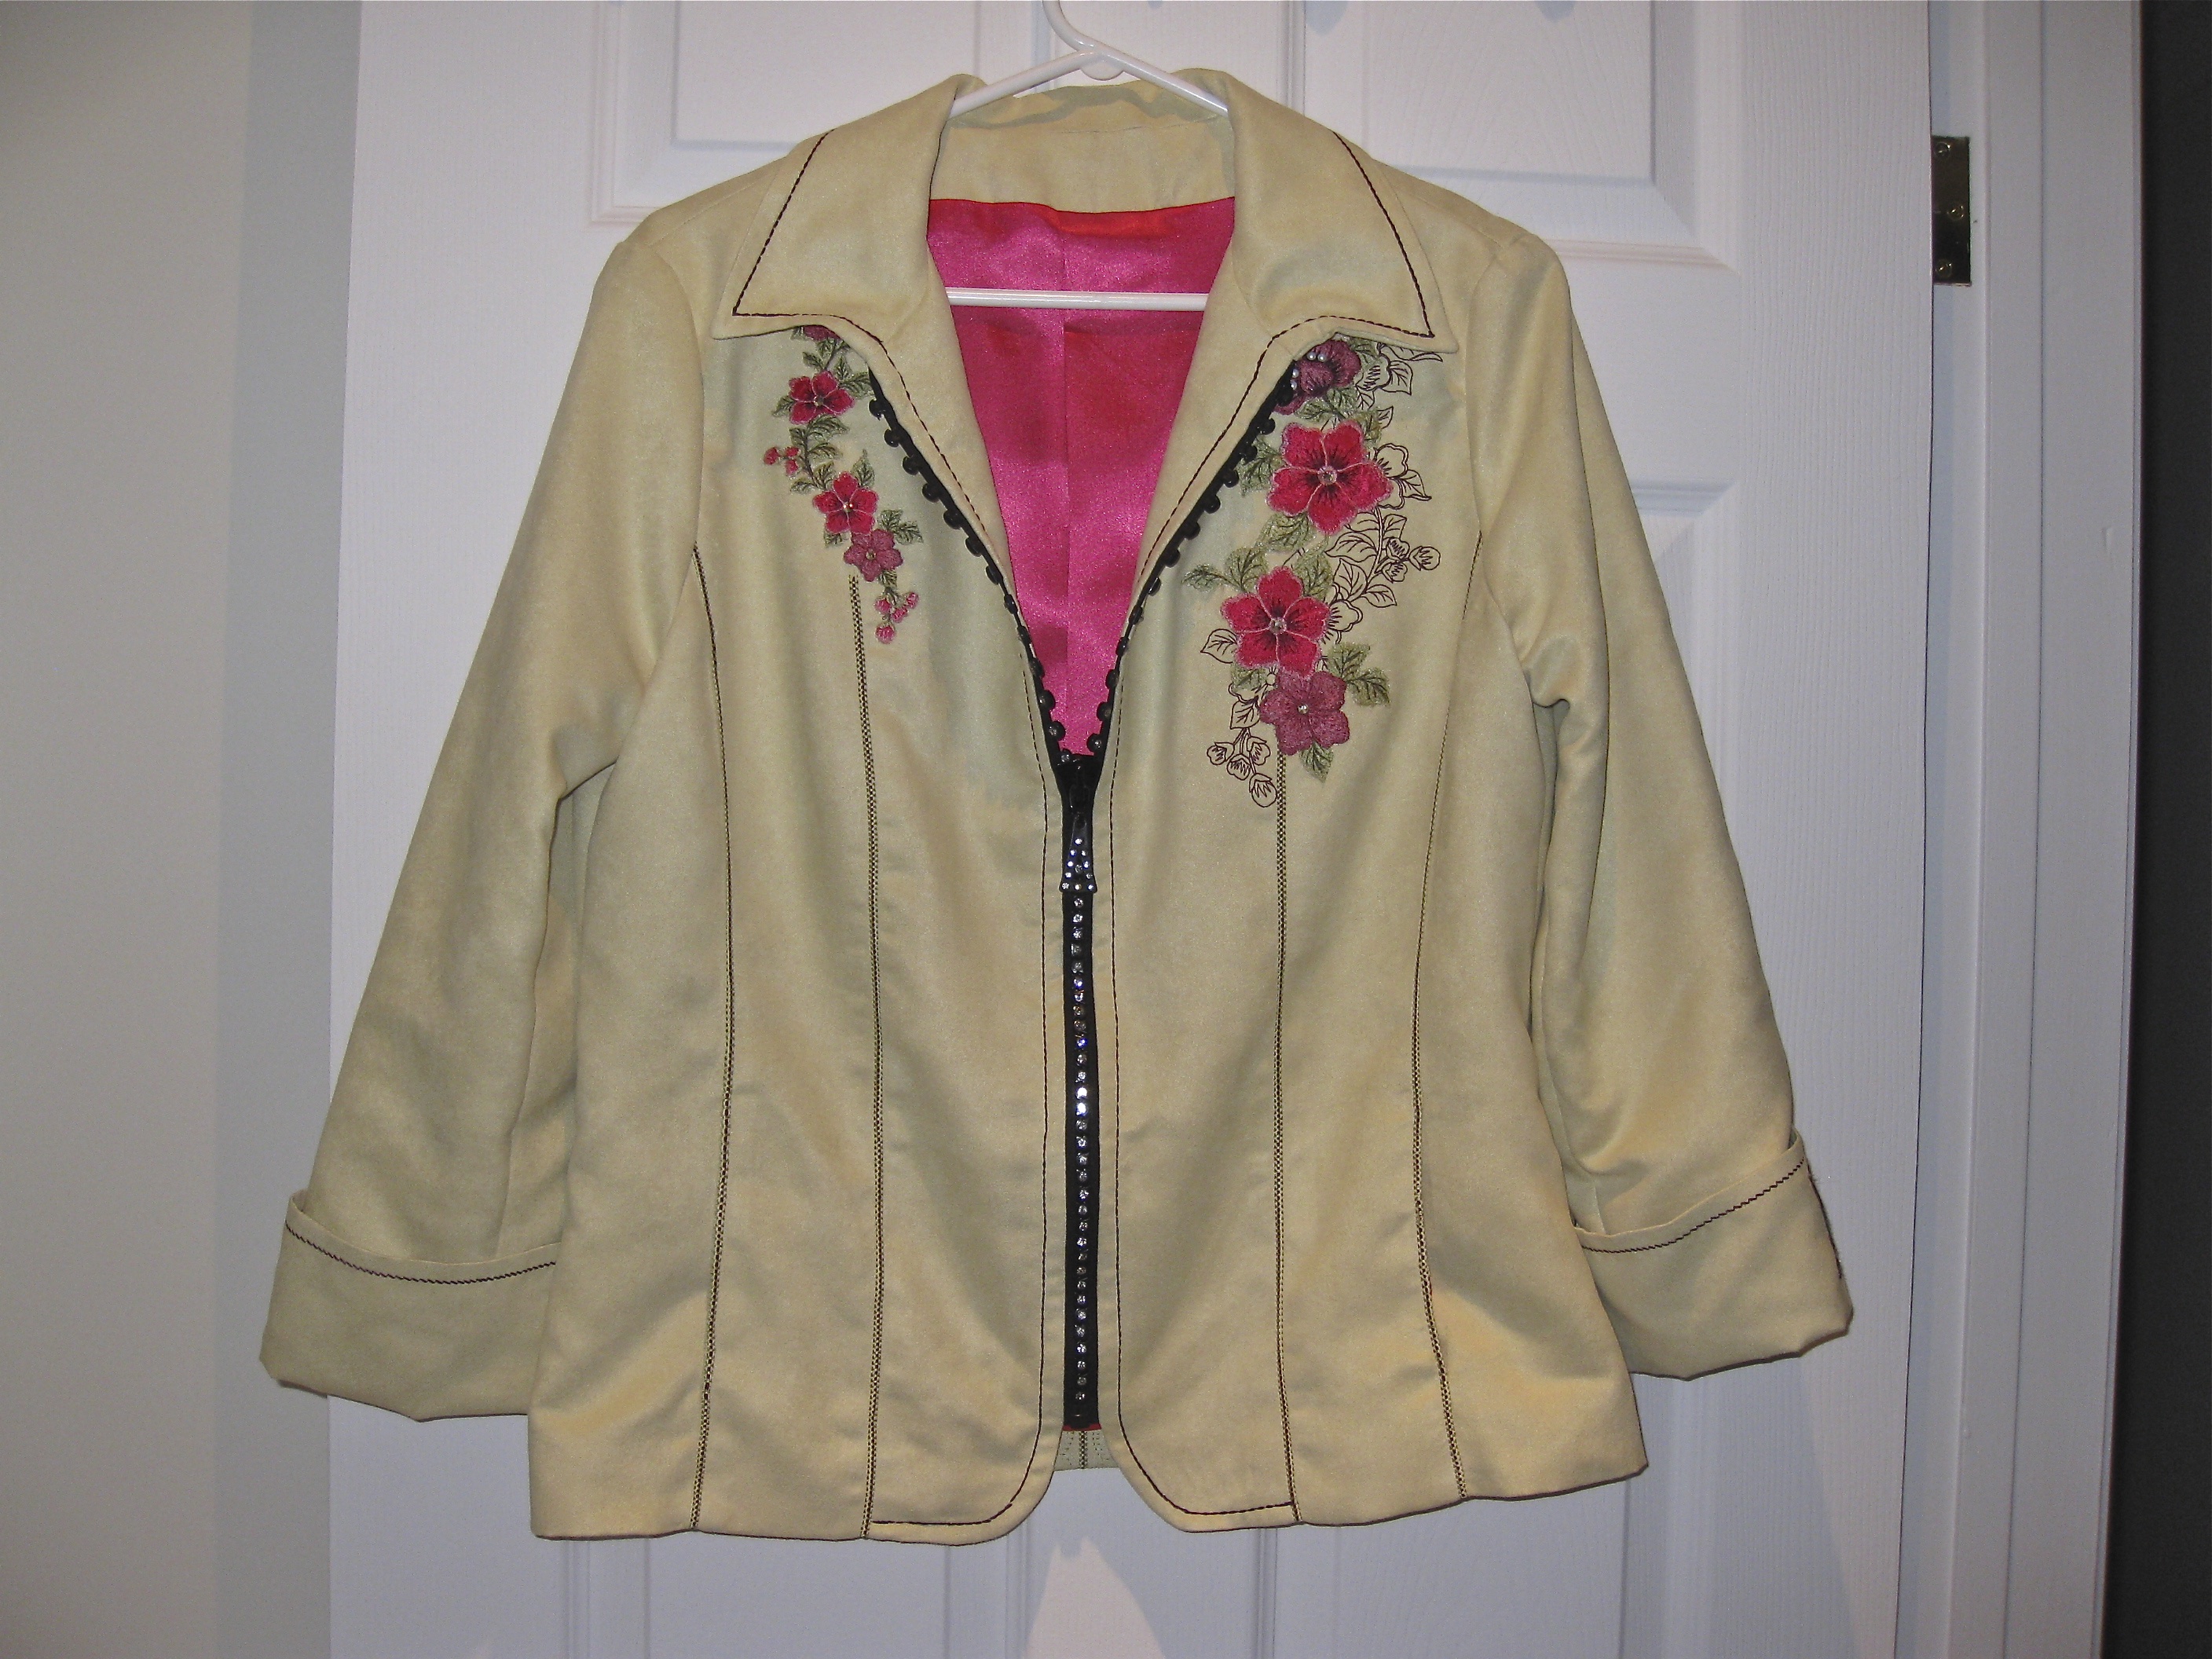
I’ve had 5 yards of black silk in my stash for 20+  years – my sister Donna brought it for me from Thailand – I’d just never used it. The silk was a light weight shantung so I thought the pants should be lined. It just so happened I had some hot pink silk lining fabric which I’d bought a couple of years ago in Florida to line my Faux Suede Appliqué jacket. However, I found a better lining fabric, used it on the jacket, and put this lining fabric away.

IMG_0840This seemed a good use for it – I had enough for the pants (with a bit left over for lining bags, I imagine). IMG_4522Nobody will ever see the lining, but I’ll know it’s there and having it makes the pants drape nicely.

I used the modified pattern from the palazzo pants (don’t ask my why I didn’t use the Eureka pattern – I just didn’t think of it – I think I was originally thinking of a wider leg than I actually made).

All in all I’d say these pants turned out rather well. That notwithstanding, I know I’m still going to learn a lot about fitting pants. And in all likelihood I might wear these pants 2-3 times beyond this one occasion. So I wasn’t worried about a lot of tailoring detail – just made sure I had deep pockets on the front so I can carry my phone!

IMG_4513


Ornithogalum

IMG_4505

As I was leaving Superstore yesterday I walked past a display of potted plants and this one caught my eye. It’s not like I need another plant! But this one was so interesting I couldn’t resist it – it looks as if it should keep blooming for quite a while.

When I got home I looked it up: Ornithogalum. It’s a plant from the Asparagus family native to South Africa. I realize I have some white Ornithogalum growing in my side garden bed – the problem is the leaves all end up drooping and I don’t think I’ve had too many flowers.

This plant is a perennial bulb so once it’s finished flowering I will try to keep it going until the leaves die back and then put it in a cool spot (outdoors in the evening during the early fall) and see if I can’t get it to flower again next winter!


Blue Socks


Nothing fancy – I had a ball of soft blue/grey tones. Extended the yarn by creating stripes with the navy yarn at the ankle – threw in a couple of yellow rows just before turning the heel to liven it up. 

No name on these.  Just added to the sock stash.

Modern Quilt II – Finished

Finished the quilt today. I wasn’t sure how to quilt it – initially I was planning on echoing the curves at 1/2″ intervals but the shape of the curves in each block is quite different and I thought the finished stitching wouldn’t resonate from one block to the next. So in the end I set up an open embroidery design (240 mm x 240 mm) which had to be embroidered using my 360/350 hoop which stitches half of the design, then gets turned 180 degrees and the second half of the design is stitched. By changing the top thread colour (I used a “blendable” thread) to blend with the predominant block fabric I was able to have the stitching present but not too dominant. 

Happy with the finished quilt. Definitely got a lot of practice sewing curves – which is what I was going for.

Still enough fabric left from that set of batiks to make one, and maybe two, more quilts. 


Spring? – No Definitely Winter!

2:30 – There’s a hint of sunlight – the snow has lightened – time to clear out the trench I dug this morning between my house and Joan’s. 

I get the front step cleared and decide to head toward the parking lot, somewhere on the other side of some deep drifts. 


I dig straight out from the house – a single shovel width, then I have to make a right turn, into the drift! I keep digging, each foot forward is six shovelsfull – a little off the top, dig a bit deeper until I finally reach the pavement.

I’m about 2/3 of the way to the parking lot (that’s filled with drifted snow), when Vern comes by on the way to his backyard (can’t get his back door open) to shovel a path for Sophie, his golden lab. 


I persuade him it’s futile, he should help me finish my trench, then I’ll help him dig out his front door so Sophie can get out into the parking lot. 

We get my trench dug, then start on Vern’s – Donna comes out to join the shovelling gang. 


We dig our way from their front doors, past my car (that’s what’s peeking out of the snow on the left) .


This is me, in my snowsuit, in my trench – you can see the snow has drifted well above Donna’s and my heads! God knows where the snow plow will put the snow! There is simply nowhere for it to go. And I don’t expect we’ll get dug out tomorrow – probably not for a couple of days. And the weatherman’s calling for more snow on Saturday.

Shovelling My Front Door Open

I was able to push my storm door (which opens out) wide enough to squeeze through. Dressed in my one-piece ski suit (which I bought at Frenchy’s for $6 several years ago), shovel in hand, I began moving snow off the stoop, then the step, then the pavement. That’s as much as I did – a narrow path to my neighbour Joan’s to clear away the snow from  her front door, too. Although we’d not get far, I felt we should be able to get out the front door!

It took me 15 minutes to shovel this small path – you can see how deep the drifts are. Later today (should we be lucky enough that the snowfall stops) I will have to shovel my way around the drifts to get to my car which is nearly buried now so I can clean it off. I don’t imagine we’ll see a snow plough around here anytime soon.

In the meantime I will work at keeping that small path from filling in with blown snow.


Spring?


Here we are two days away from spring and the snow on my back deck now reaches a quarter of the way up my living room window; the drift is nearly to the top of the fence and no end in sight. I’d open my back door and use the snow as a refrigerator except I’d not be able to close the door again!

The snow is still coming down heavily, blowing and swirling and the drifting is increasing in depth. I haven’t looked out my front door – I could see my car nearly buried from one of my upstairs windows. 

Ok, this is my view from the front door!


It’s going to take days to dig out! And we’re expecting more snow on the weekend. 

Can you imagine being down south and arriving home to this – not even being able to get in the house.

It’s a great day for sewing!

Modern Quilt II – Improvisation


Saw a photo of a wall hanging on Pinterest based on large “wonky” curves. I’ve never really tackled curves except on the princess seams of a jacket where you have to join a convex edge to a concave one. Curve sewing seemed a good thing to learn to control. The technique is the same here as it was on the jackets except the curve is more exaggerated making the sewing more complicated in order to have the seam lay flat! 

The curves are also improvisations cut with a rotary cutter – no pattern, no templates, just free-form cutting. The first few cuts were nerve-wracking – what shape curve to cut, from where to where,… It took a couple of blocks before I started to get the hang of what I was trying to do. 

I started with 12″ blocks of each fabric, paired them up, and began cutting. I swapped the corner of one block with the fabric beneath – each cut yielded two blocks each consisting of two different fabrics. I realized on the first pair of blocks I needed to insert a thin accent strip in the block – so two curved seams! When I finished each block the outer edges were no longer straight – the blocks needed to be trimmed and squared. The resulting blocks ended up 10.25″ x 10.25″.

To join the blocks I used 1″ sashing giving me 1/2″ separations between each block. The borders are 2″ strips.

I bought backing fabric this morning (before the snow starts falling this evening). Tomorrow will definitely be a sewing day.  I’ll have to think about what improvisation to use for the back – it should be something that suggests curves!

Modern Quilt – Completed


So many decisions – what colour for the background, how to arrange the coloured blocks, what width for the sashing, where to position the “floating” small blocks, what kind of design to use for the quilting, whether to quilt all the blocks or just some, what coloured thread – solid or variegated, same for all blocks or different, matching or contrasting, what colour for the binding, one colour or with an accent or two?

Improvisational quilting needs lots of decisions at each step of the process – that’s after deciding on the overall dimensions which affects the size of the individual elements, and how many will be needed.

That’s what I love about improvisation – I have no idea how my idea will turn out. The fun is building the quilt and seeing it unfold.

This quilt ended up with 154 quilted “blocks” quite a number of them partial blocks at the edges because having rotated the whole quilt 30 degrees the edges were on a 60 degree diagonal. Because I quilt in the hoop (using my embroidery machine) that was a lot of repetitive hooping – it took quite a bit of time. 

I finished the quilt this morning. I’m happy with how it turned out – it’s a keeper. The colours  coordinate with my bedroom decor, and it’s long enough to cover my toes when I pull it up to my shoulders.

Now to come with an idea for the remains of that fabric collection – I figure I have enough for at least three more quilts!

Oh, and here is the back:


Socks Again


There seems to be less and less yarn in the 50g balls – I seem to be having to improvise more in the feet these days even for a sock to fit a women wearing a size 7 1/2 shoe! Anyway, I like how this pair turned out. I was able to use up a couple is smallish balls of leftover in yellow and red.