I have the panel assembled – two pieces joined off-centre with a narrow strip. It was obvious the resulting panel needed something more – gulls! So I searched for silhouettes of gulls online. There are lots of them. I downloaded a bunch in various sizes and flight positions. I need both right-flying and left-flying birds.
What I have in place at the moment are paper cutouts so I could judge position and size. I need to make two of the birds smaller – the one in the centre needs to be a bit bigger. Otherwise, I think three is all I want or need. My plan is to print them on fabric, fussy cut them, then fuse them in place.
In the end I chose to join the fabric pieces with straight lines – I’m intending to do quite a bit of thread painting particularly through the “sand” and “sea” elements with gently curved lines (using doubled rayon thread for emphasis) which I’ll stitch over the seams to obscure them a bit.
I did another stitch sampler – this time horizontal rows of embroidery stitches (of which this machine has MANY – particularly when you consider you can modify both length and width of each of the 500+ stitches). No ribbon or lace – just the stitches themselves in rayon embroidery thread.
Then I turned the panel into a drawstring bag large enough to carry a pair of shoes, or my knitting, or whatever I need a bag for. Finished size: 10″ x 13″.
What’s different about this drawstring bag is the way the channels are formed. Many years ago I was given a Japanese drawstring bag made with such channels. It’s a more refined way of finishing a drawstring bag. So I’ve been making mine this way for a long time.
A year and a half late – my Pfaff Creative Icon 2 sewing machine arrived two days ago! Development delays, computer chips unavailable, pushed the delivery of these machines way back. Some were sent out to preorder customers in later December – I opted to wait for the second batch (hoping that any glitches remaining in the software and mechanics would be worked out).
Got the call that my machine had arrived on Monday while working at the test kit assembly facility – I picked it up late in the afternoon, took it home, unpacked it, plugged it in, and played with it after supper until close to midnight.
The icons are different, and they’re located in different places from my original Creative Icon and it took me some time to find things I was used to using. Yesterday I was at it again and had a better time making the work flow. Today, I did what I always do when I get a new high-end embroidery/sewing machine – I made a bag for my foot pedal and power cord so I can slip them within the machine opening when transporting it.
Bag For Foot Pedal and Power Cord
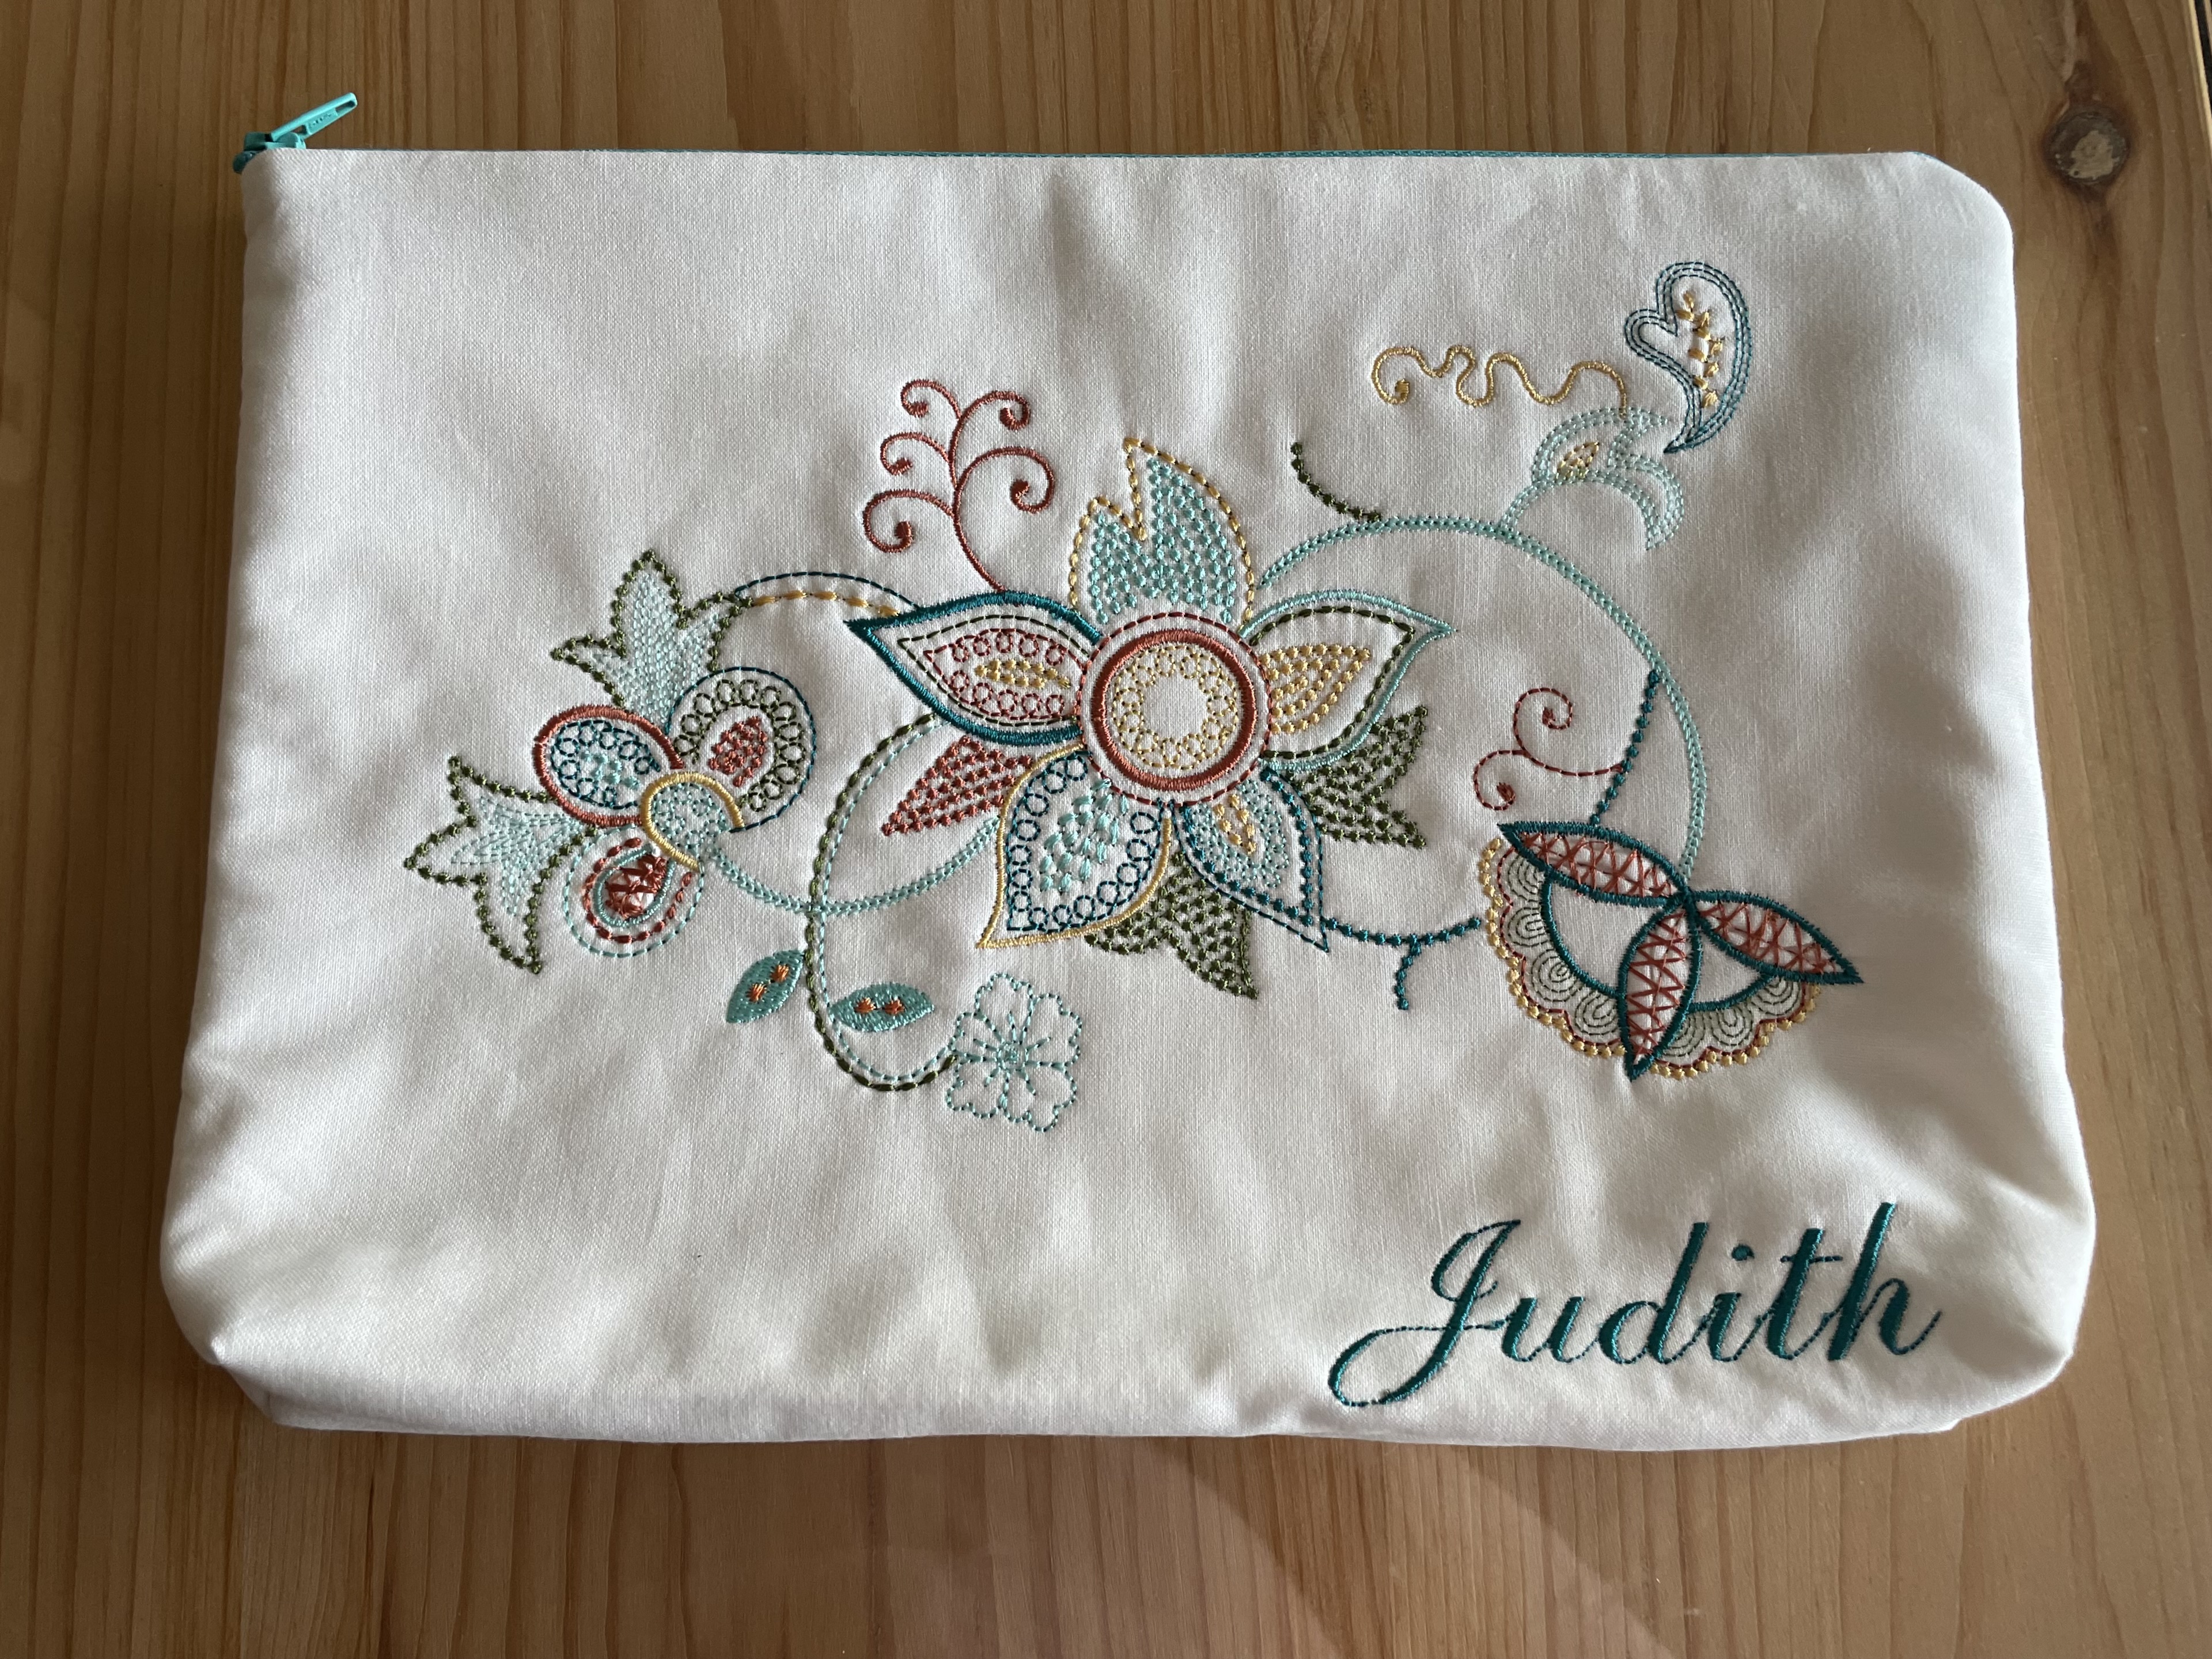
I used the same embroidery I’ve used before, in part, because I wanted to see how accurately it stitched out – the irregularities were my fault (not the machine’s) – I used batting and not stabilizer behind the fabric, I used the universal needle that came with the machine (instead of changing it for an embroidery needle) – and both of those decisions resulted in some pulling of the fabric and loose stitches when they caught on the embroidery foot. Otherwise, the embroidery worked out well, with all the bits matching up as they should. I quickly turned the embroidery into a zippered bag.
The second task today: I’m teaching a class in early April on “Using Your Machine’s Stitches” – intended for folks who have relatively simple machines and rarely explore all the possibilities of their mostly utility stitches (but it also could be of interest to folks who have a “cadillac” like I do and also don’t explore all their stitches, either).
To set up for the class I sat down with a piece of Kona cotton fabric (with tear-away stabilizer) underneath and a new 75 embroidery needle. I started embellishing the fabric using doubled embroidery thread (to make it stand out more strongly) and only the utility stitches (which I edited for length and width) on my machine:
Utility Stitches Sampler
Now here’s where I’m trying to become acquainted with my fancy new machine. Notice the grid projected onto the sewing area in the upper right of the photo! That’s the new feature of this machine – it has both a camera and a laser projector which allows me to line up my stitching precisely – I began with a chalk diagonal from corner to corner. After I stitched that line, keeping the pink guide line centred on my chalk line, I was able to add subsequent rows using the grid, without having to draw any further lines. I stitched over a piece of narrow blue satin ribbon; I also stitched a narrow piece of lace in place (not yet done when I took the photo). I filled the entire piece of fabric, then trimmed it. My plan is to use it to make a zippered bag. I could use undecorated fabric for the second side, but I think I’ll do a second piece using embroidery stitches probably in horizontal lines as an example of what that can look like.
I’ll be busy learning this new machine for the next couple of weeks. I have a physical printed users manual alongside the digital one I can access on the machine! I’m trying to figure this all out by invoking my knowledge of how my previous Creative Icon works and predict from there. I’ve made quite a bit of headway since Monday night!
Yesterday, I cut 7 1/2″ squares from the fabrics I’d collected from my stash to do a second wall art piece. What I see in my mind’s eye is something to suggest sky/sea/sand in two unequal panels: a wider light one, and a darker narrower one, joined by a dark strip graduated from lighter at the top to darker at the bottom. At the moment, the blocks are the same width – that’s because I don’t yet know where I want to place them – some of the dark pieces on the left will get cut into narrow strips and integrated into the fabrics on the right. When I’ve worked out colour placement, I’ll sew my two strips (I want a finished length of around 42″) then trim the one that will be on the right to 5 1/2″ – 6″. I still need some kind of lighter sand colour fabric for the top of the narrow insertion strip dividing the two panels – have to look for that today.
Latest Socks
Finished these socks two days ago – definitely bright! Into the “give-away” stash. I have a number of pairs of yellow socks in my sock drawer; no need (no room) to add another!
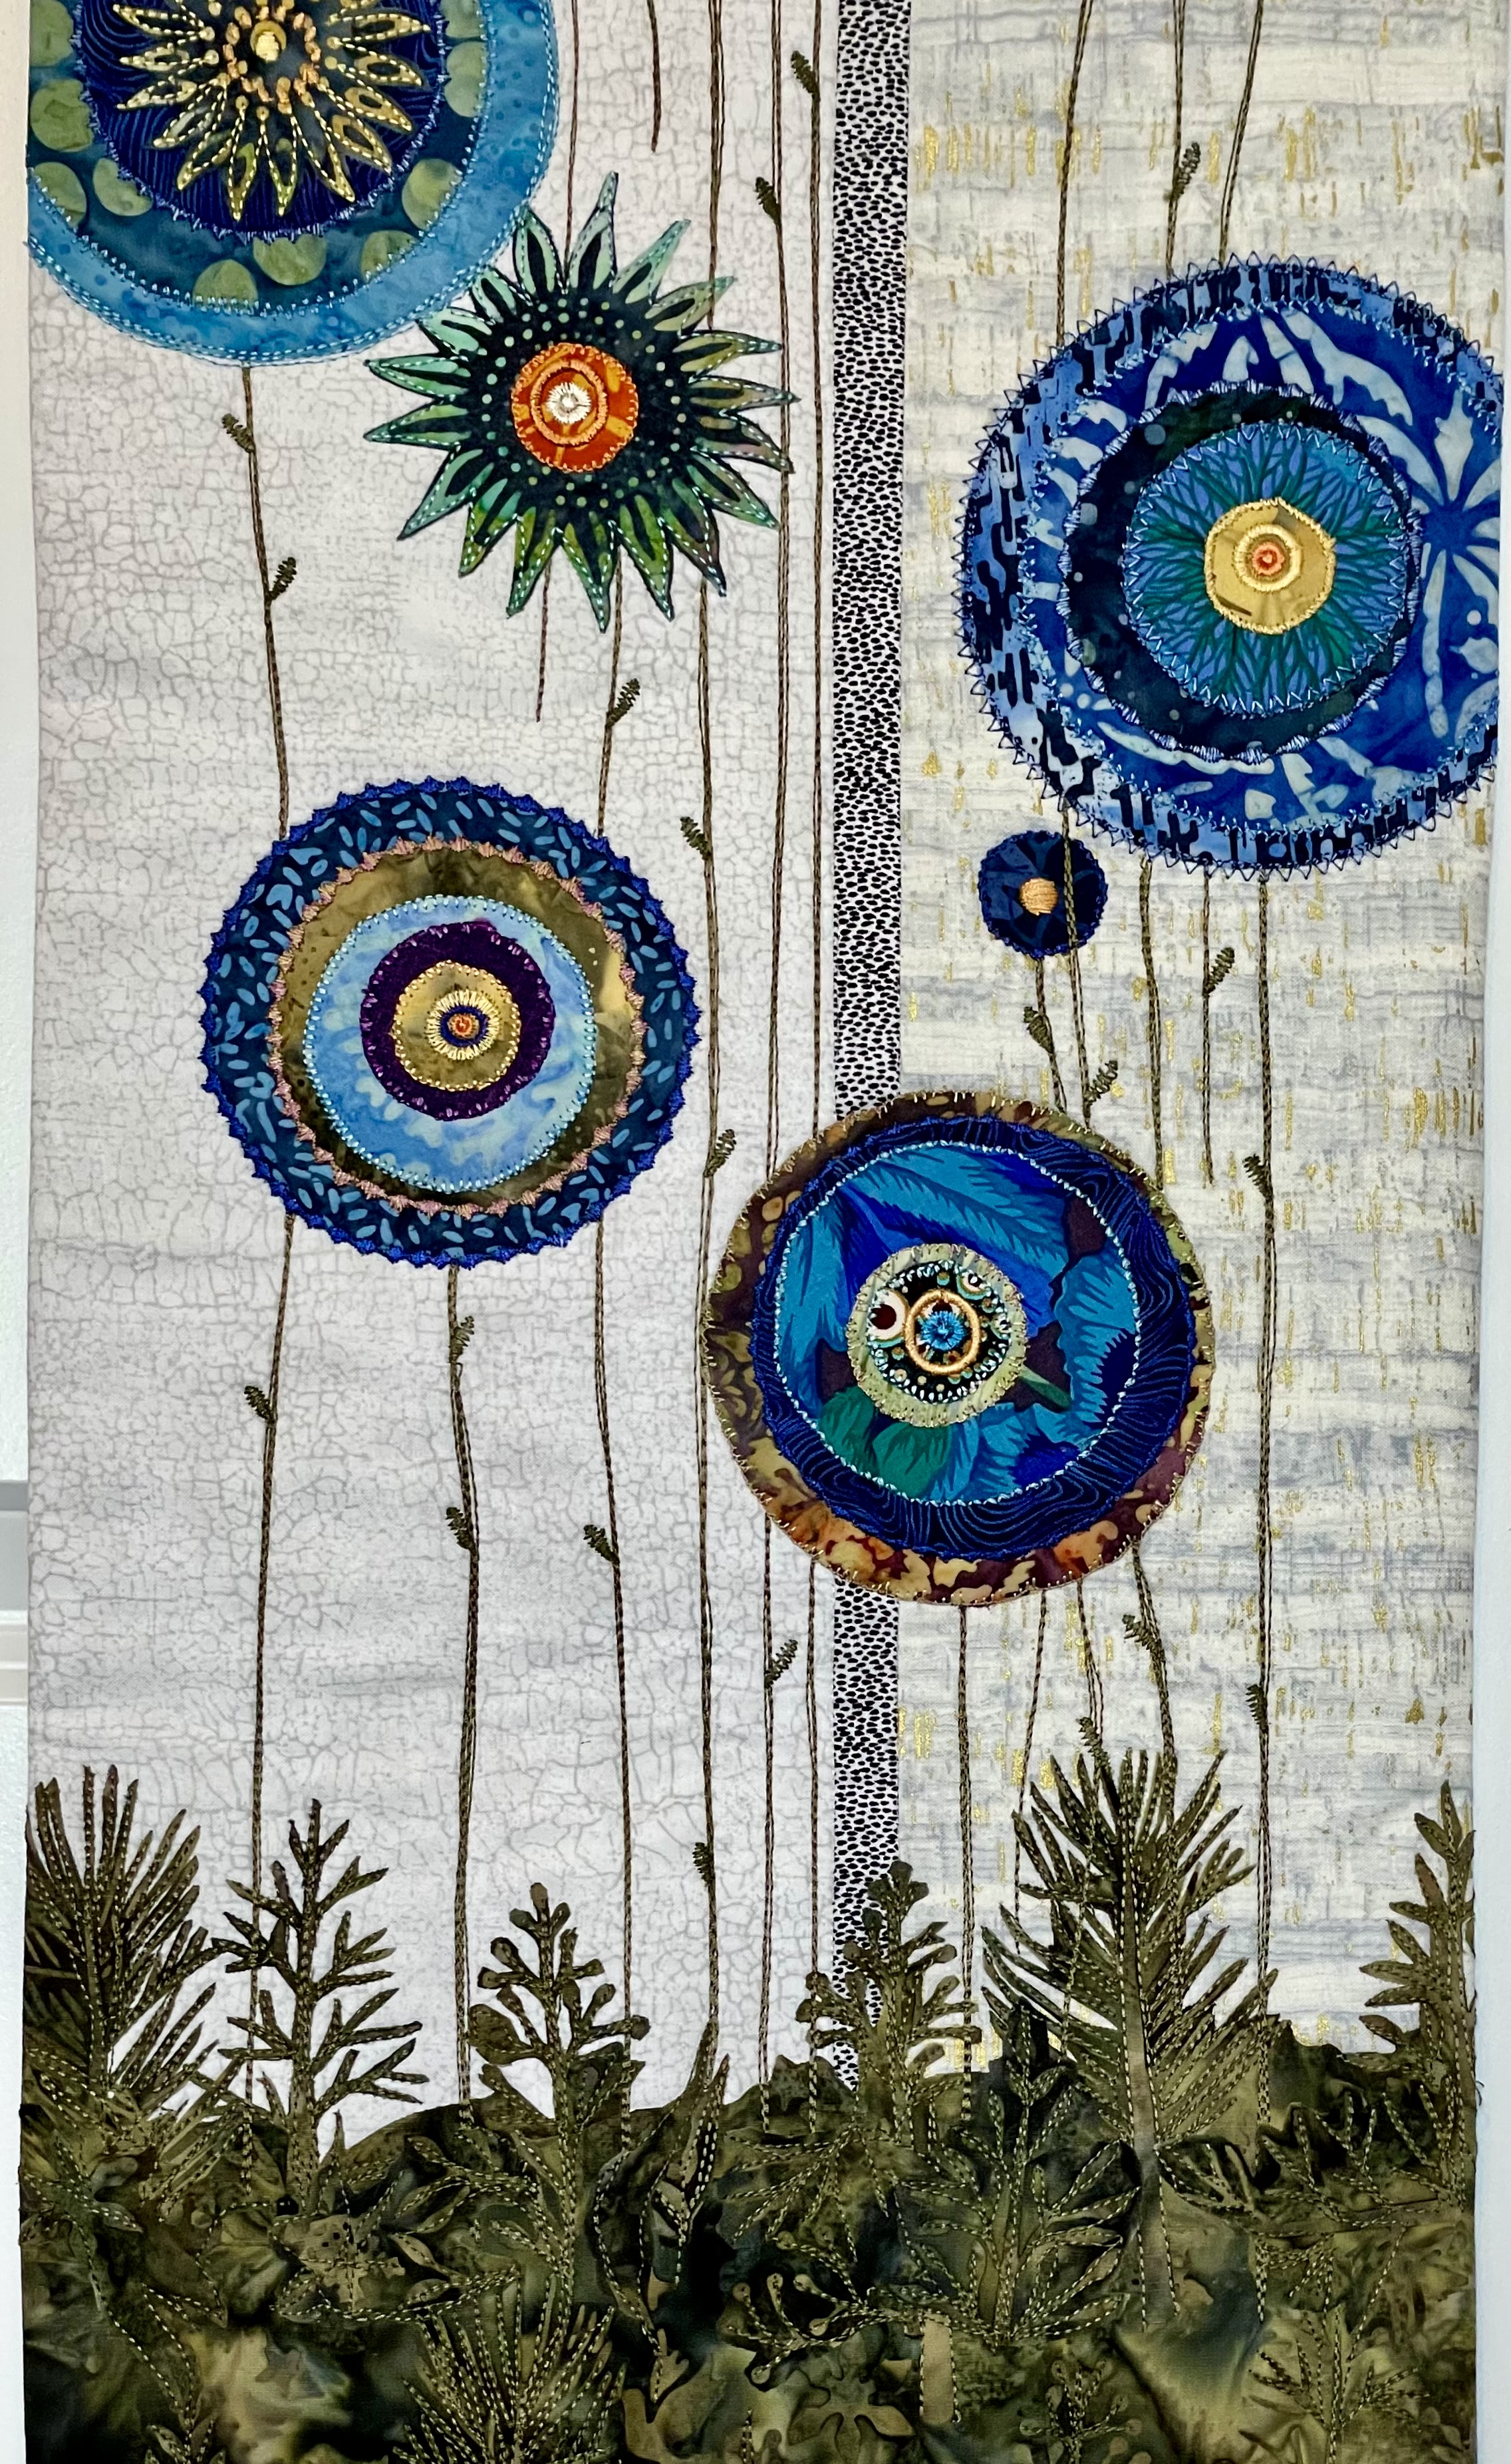
Just finished (well, I’ve still have to hand stitch the hidden binding in place). It took several days to do the thread painting – using decorative stitching around each fabric circle, embellishing the flower centres with embroideries, adding leaves, and stitching the detail in the foreground at the bottom of the piece.
Detail
Here you can see more of the stitching detail – many decisions: what thread colour, which stitches, stitch dimensions. Most of the centre embroideries I’d already set up from a previous floral hanging but they had to be adapted to fit these smaller centres.
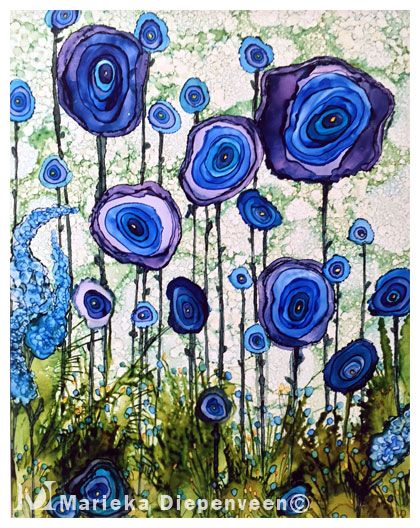
This was the image that inspired the piece:
By Marieka Diepenveen
The piece by Marieka Diepenveen is a watercolour. I particularly liked the irregular concentric blue flower shapes and the tiny leaves growing out of the variable green vegetation. I added more colour and adjusted the dimensions and my circles are regular. My vegetation was dictated by the batik I chose to use which had greenery shapes. I might try another where the flower shapes are irregular….
As Russian invaders have central Kyiv in their sights, Ukraine’s warriors say that they will not submit. To this end, I offer a Ukrainian interpretation of Churchill’s famous clarion call from the last world war:
“We will fight on our streets, we will fight in our villages, we will fight atop the black soil of our fields, we will fight for Kyiv. We will never give up. We will never surrender.” – Yuri Polakiwsky. Lviv, Ukraine (Mar 2 – from the Globe and Mail)
A Ukrainian soldier walks through debris on the west side of Kyiv, on Feb. 26. DANIEL LEAL/AFP/GETTY IMAGES
Here in Canada our “sacrifices” will be miniscule in comparison to those Ukrainians will have to make over the weeks, months, years to come. May they have the fortitude and bravery to sustain the initial loses and the determination to mount a long and sustained insurrection. May those of us living in a “democratic” world have the fortitude and bravery and determination not to forget them and to continue providing the support they will need for a very long time!
Almost two weeks ago a friend in my building died. At 10:45 on Sunday evening she called me – she wasn’t feeling well. I promptly went to her apartment – I was fortunate, Kathleen had been able to get to her door and unlock it so I could get in. I took one look at her, called her son, then called 911.
She was having a heart attack. She hadn’t called her son – she hadn’t wanted to disturb him so late at night. I made it clear he’d better come as quickly as he could. Meanwhile as I was waiting for her son and the paramedics to arrive I found her medications and her health card which I knew the paramedics would want.
I’ve dealt with emergencies before so I was familiar with how paramedics handle the situation. What I wasn’t expecting was the question one paramedic asked her son as they were leaving – “If her heart stops in the ambulance what do you wish us to do?” It turned out Kathleen had a DNR which her son knew about. But I realize I don’t!
I’ve spent the past couple of months getting my will, my power of attorney, my personal delegate documents in order for my niece who has agreed to act on my behalf. I’ve thought about longer range contingencies like having a terminal disease or failing cognitive function and discussed with her the kinds of decisions I am authorizing her to make. I never considered an emergency!
My niece lives in Toronto. I have a sister who lives closer in Halifax. However, were I to be having the kind of emergency I responded to that Sunday, I’d call neither of them. I’d call Deb who lives in my building. My emergency could be such that I can’t get to the door to open it – I have to make sure Deb has a key (that’s on my immediate TO DO list) so she can let herself in.
When we were discussing this she mentioned that in the home where her mother had lived in Manitoba each resident had an ERIK (emergency response information kit) on the side of their fridge. We tracked down the document online but I didn’t like how it was laid out. I went looking for a NS equivalent and came across the VON (Victorian Order of Nurses) version which they call “Vial Of Life” because the emergency information document is handed out in a vial with a bright red sticker on it to be kept in the fridge (between the mustard and ketchup, I presume). The form had precisely the information an emergency responder needs: who to contact, health conditions and medications taken, allergies, where the medications are located, the health card number.
I filled one out for myself and have put it on my fridge along with a signed and witnessed DNR. I made copies of both documents for the gals in the knitting group – none of whom had such documents for themselves. I’ve been passing out the documents to anybody who’s interested.
You don’t have to be an old person to have this information on the side of your fridge – having it in an easily accessible location makes it much easier for somebody else to help you out if you have an emergency.
Take a look. It can’t hurt you to fill in these forms for yourself and for anybody else in your household. It makes dealing with an emergency a lot easier for whoever is the person having to respond on your behalf! Trust me.
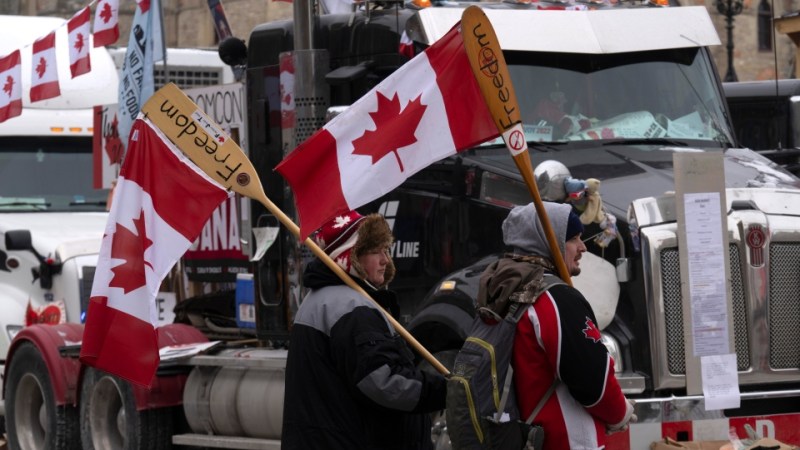
“Never take your freedom for granted”, “People in Canada look at freedom with a sense of entitlement…there’s always the danger someone will come take it away”, “You have to fight for your freedom … those principles of liberal democracy … you have to decide whether they’re worth fighting for!”
Ottawa Protest (photo from CTV News)
That’s not a week after the trucker convey people were using the very same words with completely opposite meaning!
I was stunned by the stark contrast Bilak’s words created. His words underlined how juvenile and selfish the people involved in the Ottawa protests actually were/are! Unfortunately Matt Galloway, the host, made no comment about that juxtaposition – was he even aware of it?
I wonder what the truckers have to say about Ukraine – are they prepared to fight FOR democracy, against REAL oppression?
I’m guessing they’d be driving their trucks towards the Russian border.