Not Your Grandmother’s Quilts!

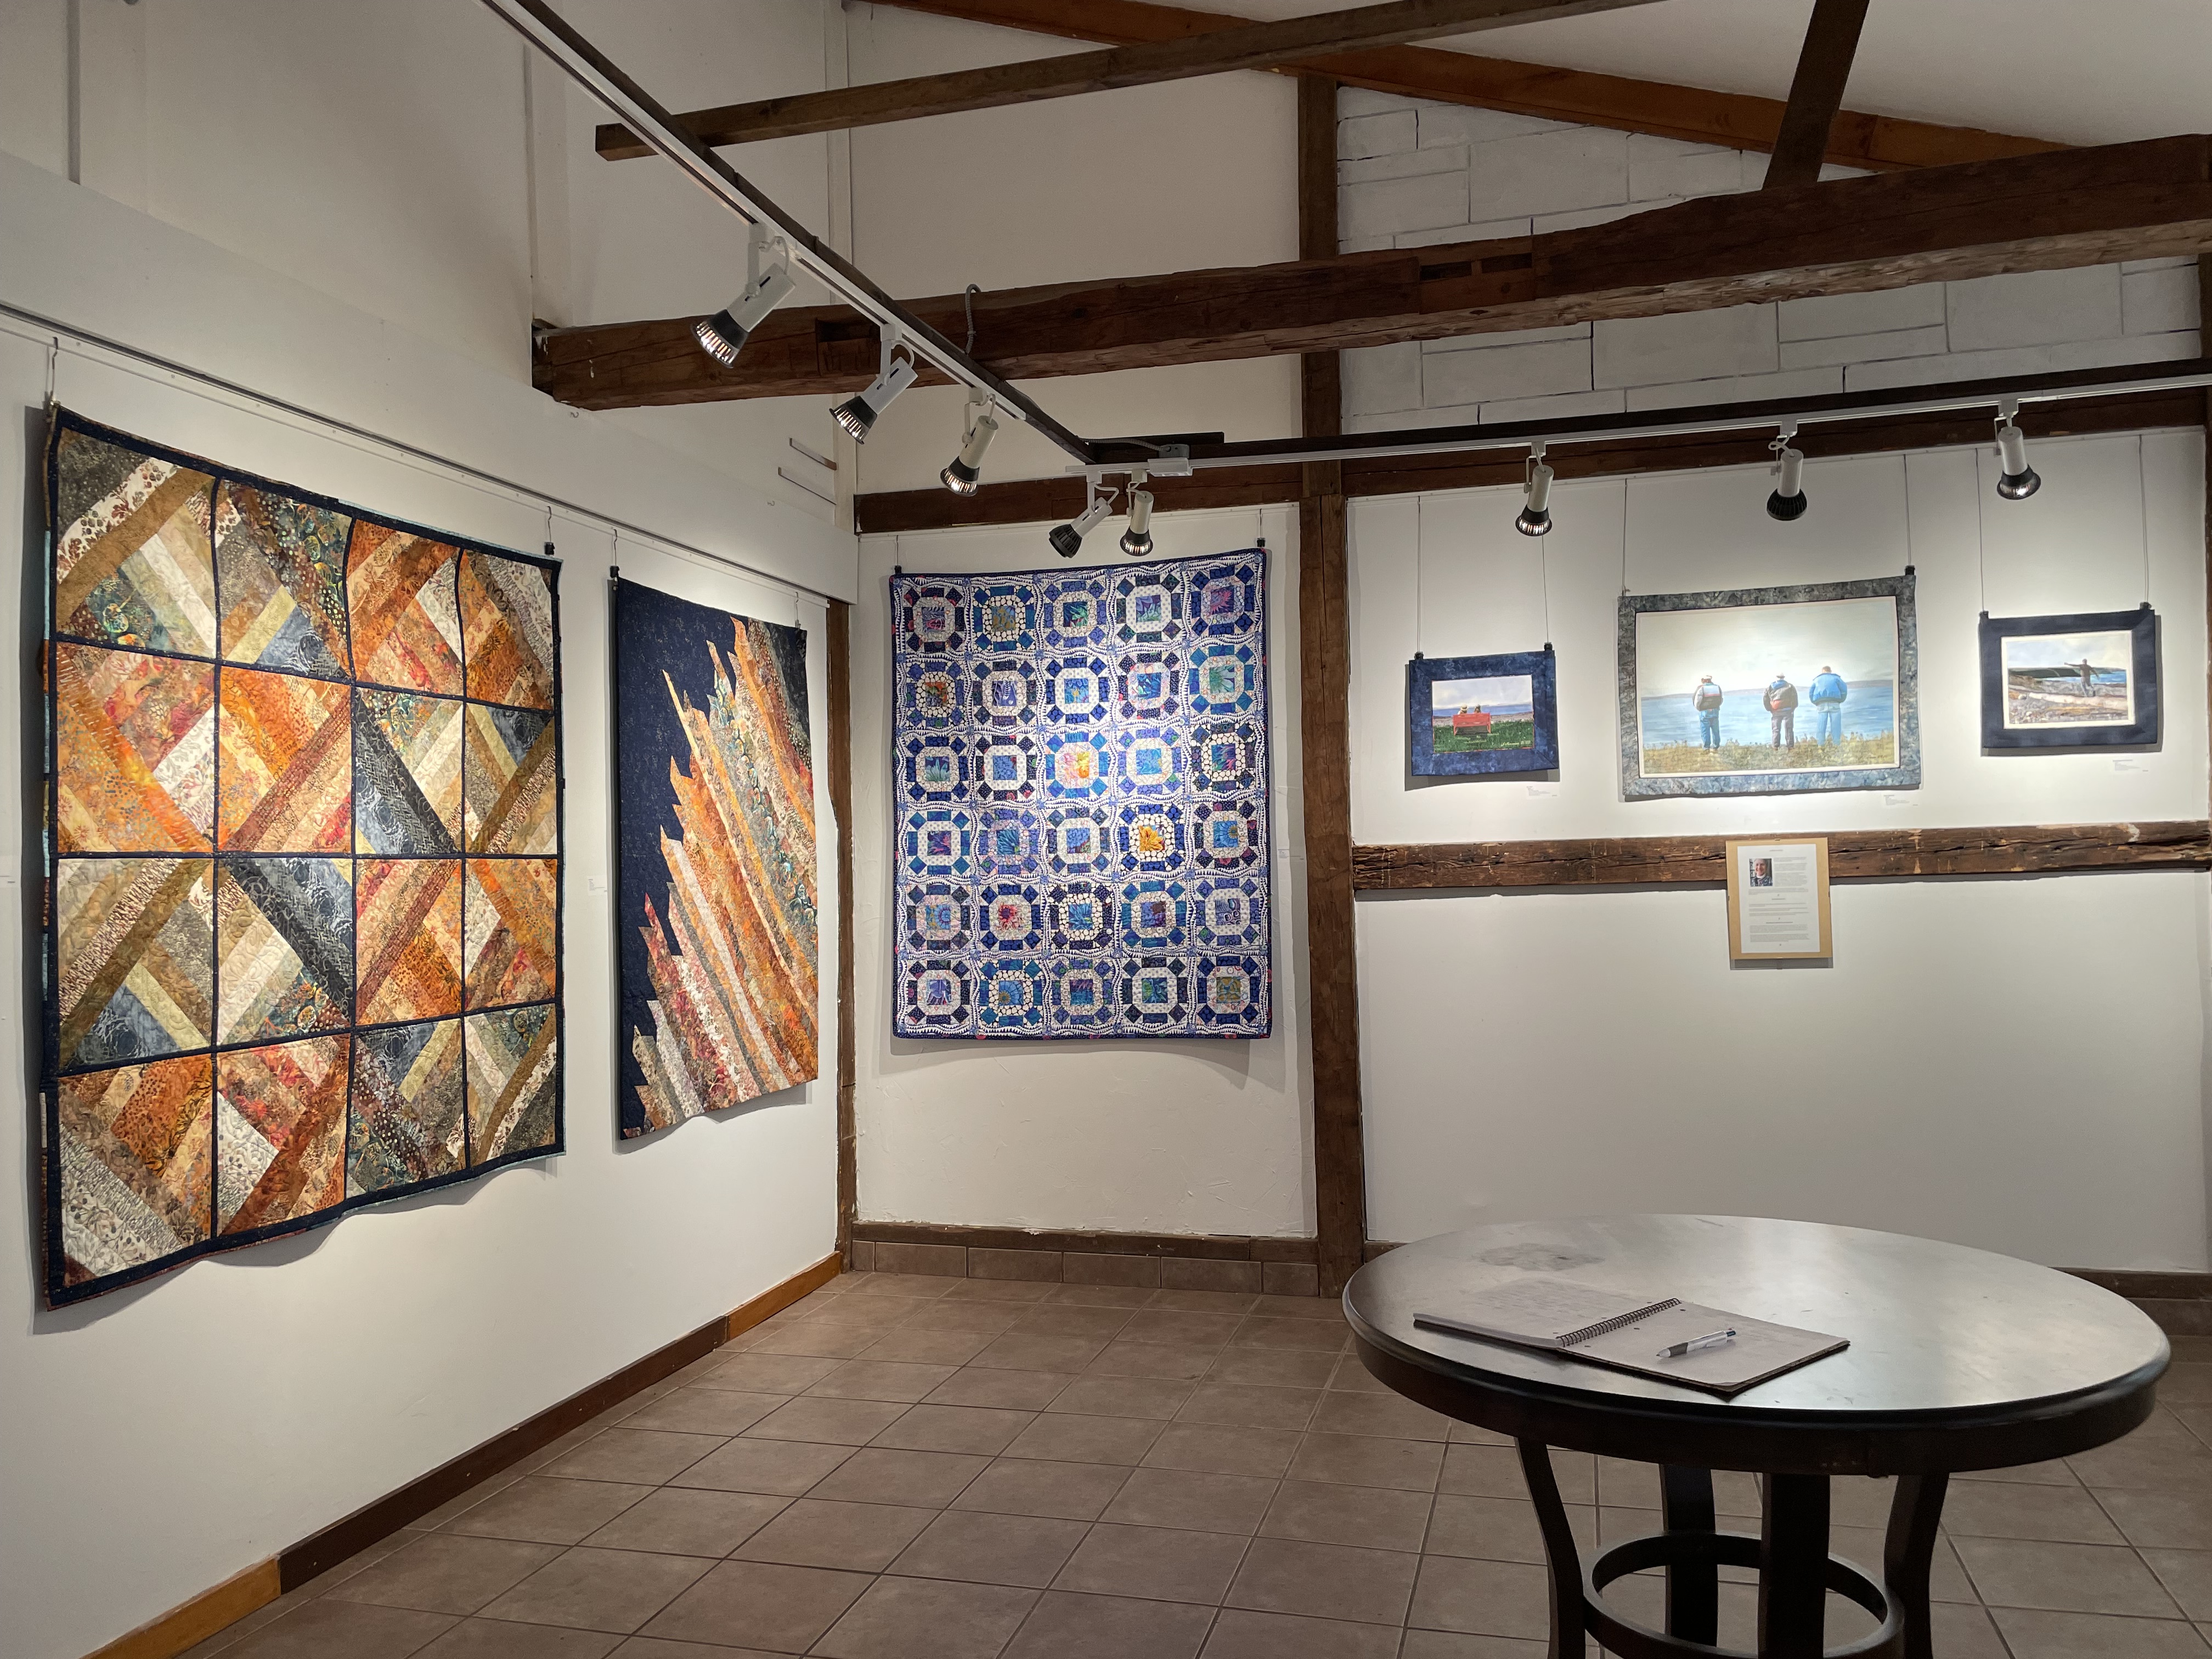
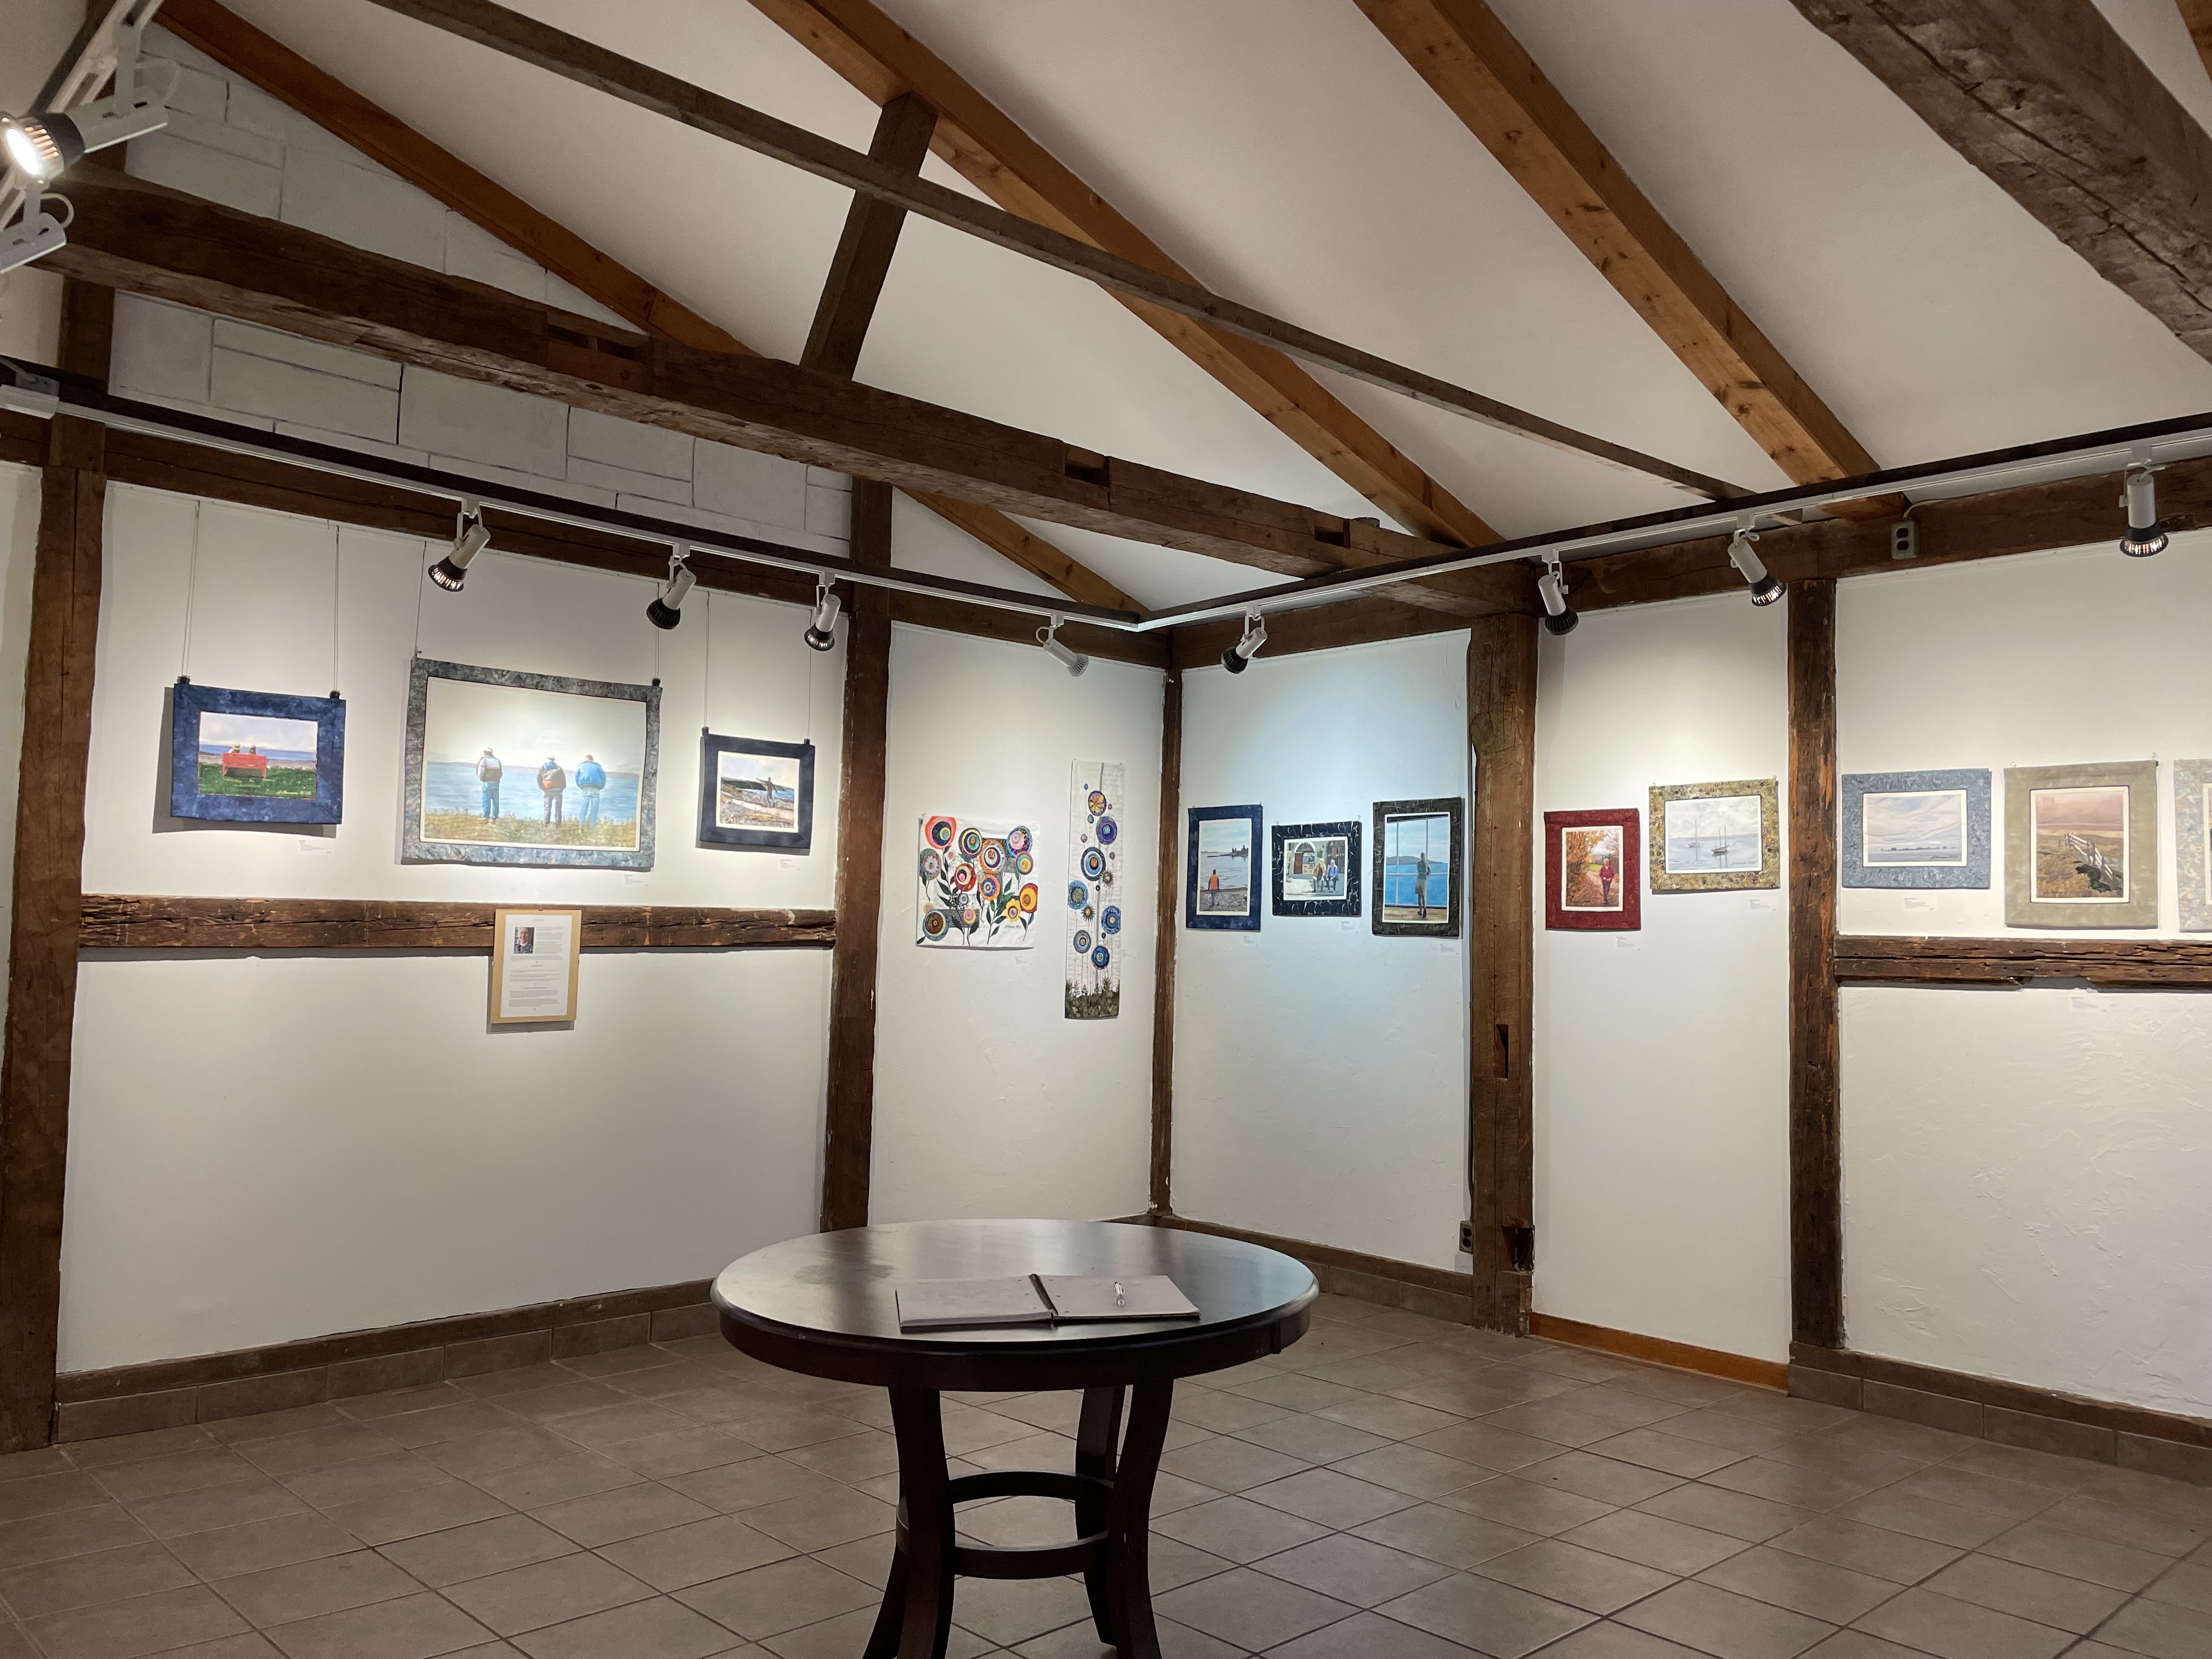
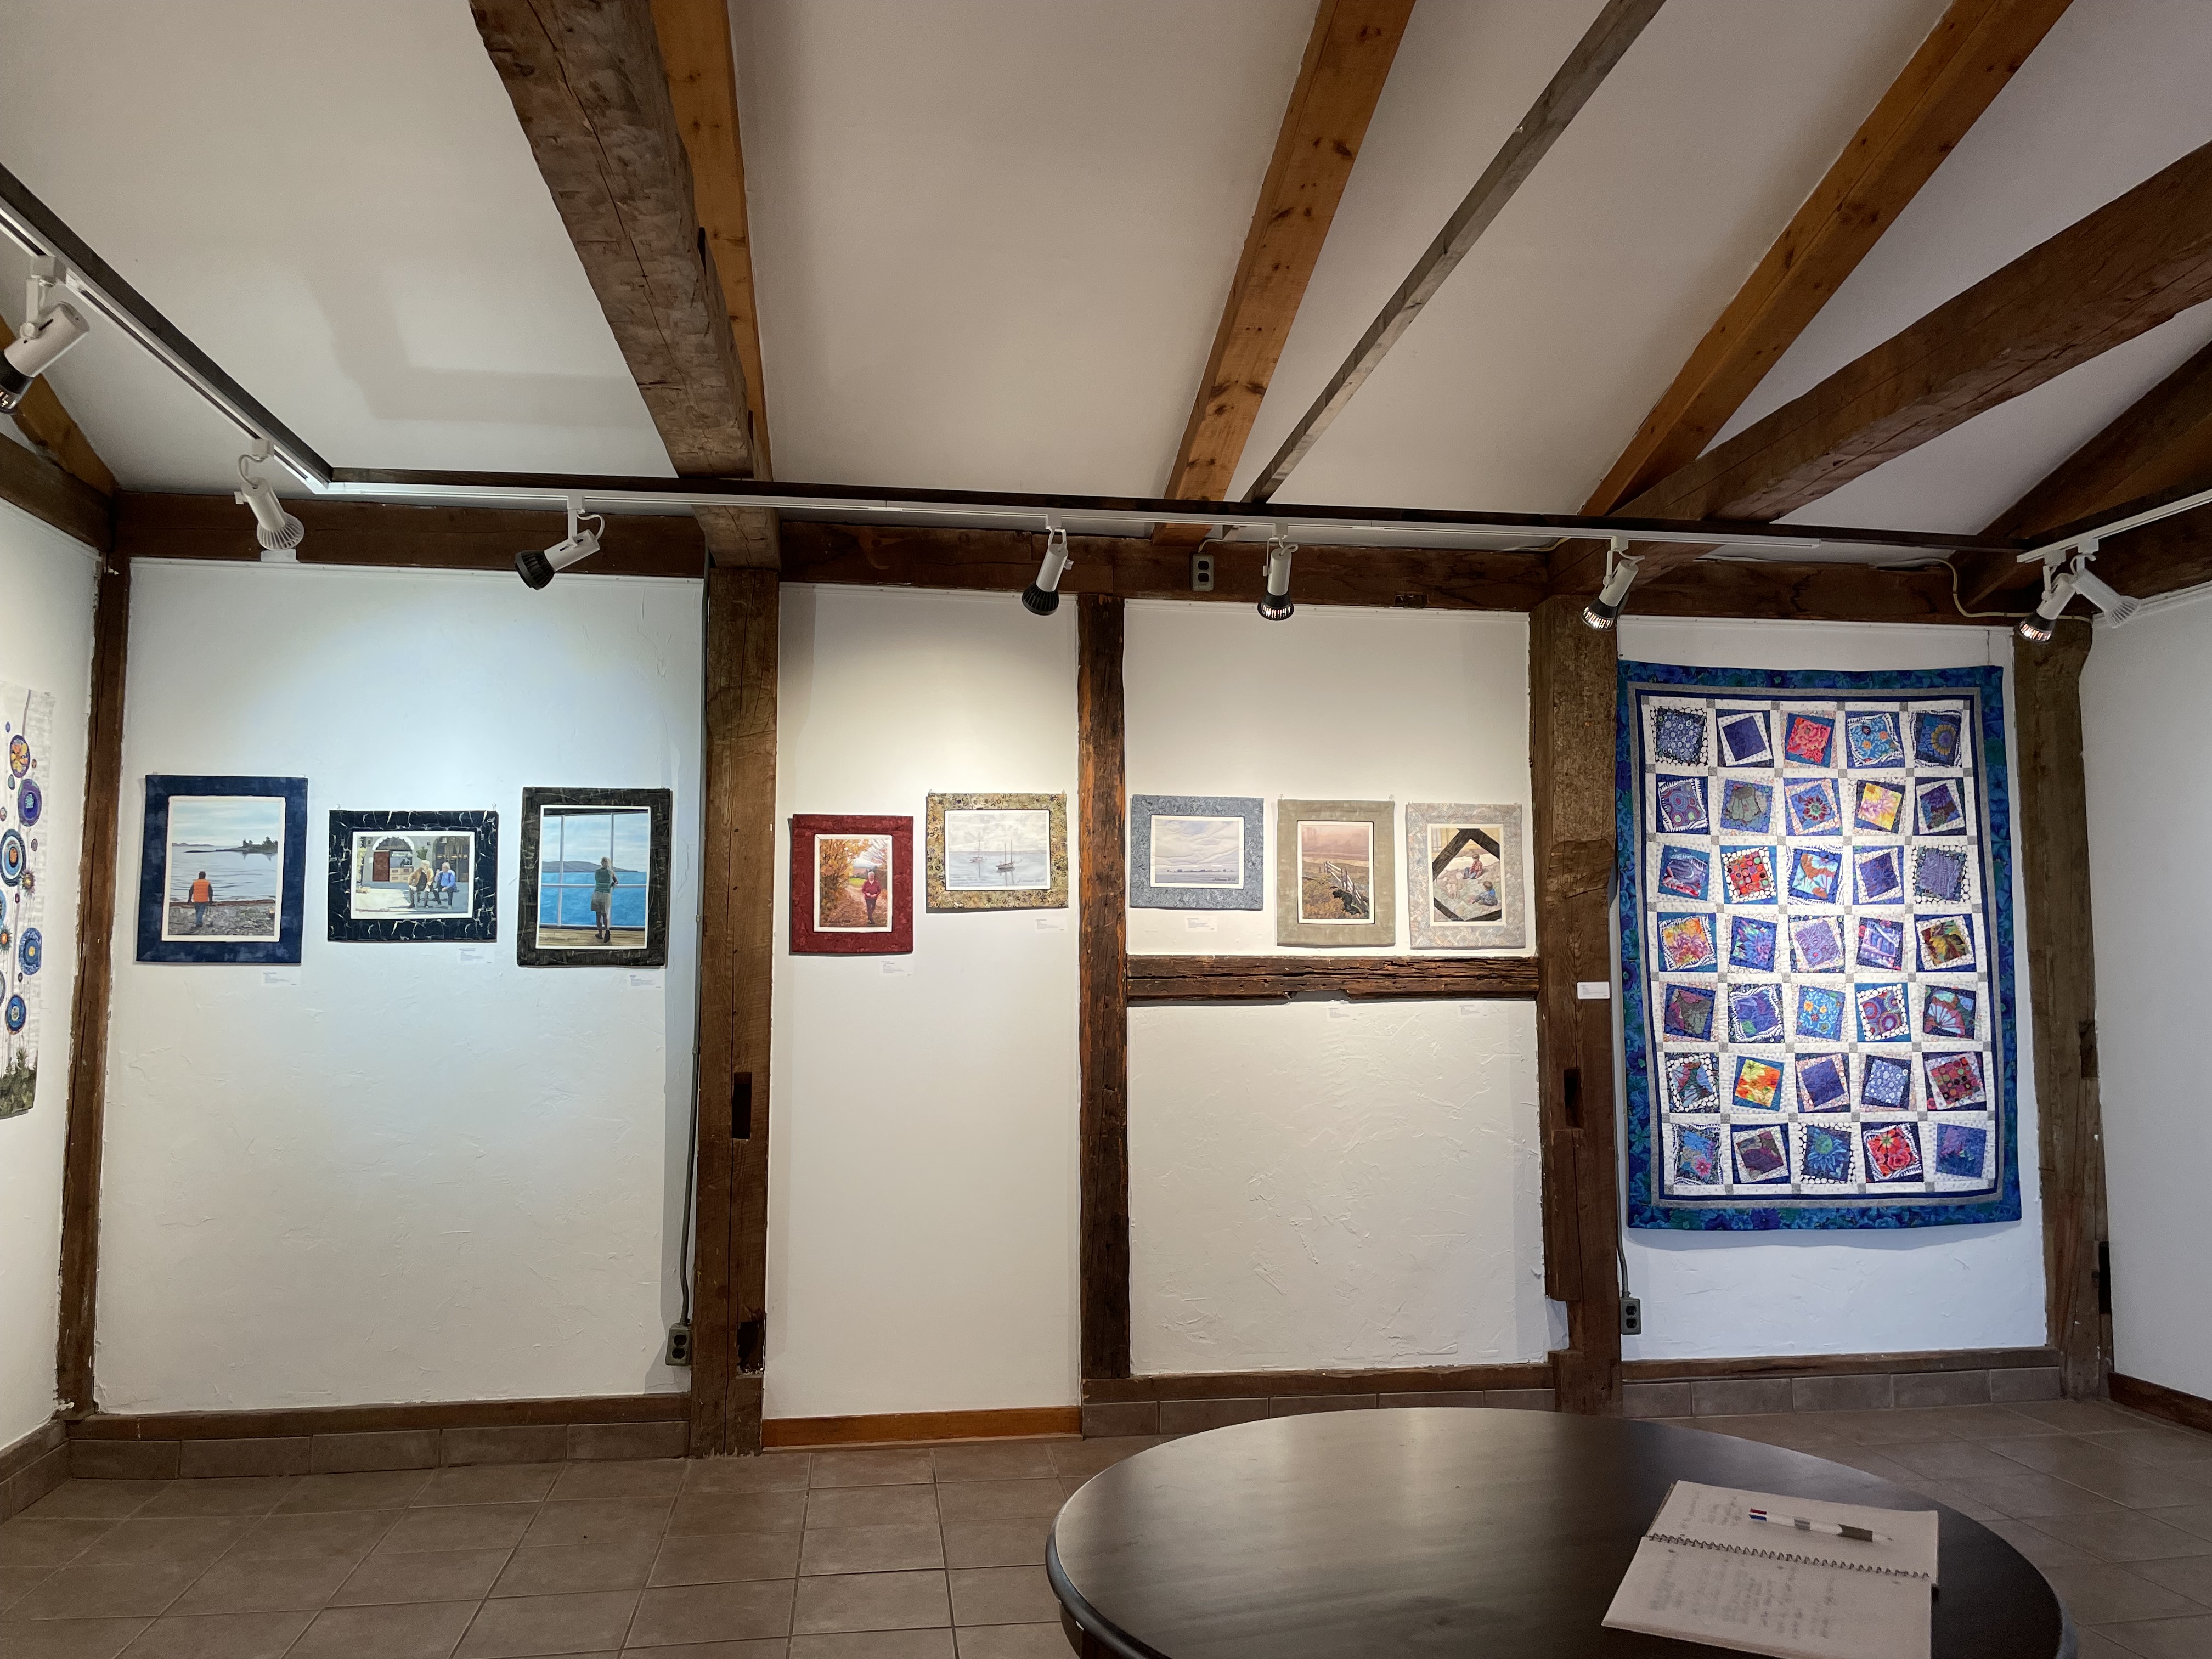
Today I hung my quilts and wall pieces at the Art Labs Studios & Gallery in Parrsboro. I didn’t hang everything I took with me, opting for the “less is more” principle. Nevertheless, I’m delighted with how the show looks.

I spent the afternoon as “artist in residence” to chat with folks who dropped by for the “opening” – there were probably a dozen visitors who stopped to look, half of whom actually wanted to learn more about the works themselves. Lovely conversations with each of them.

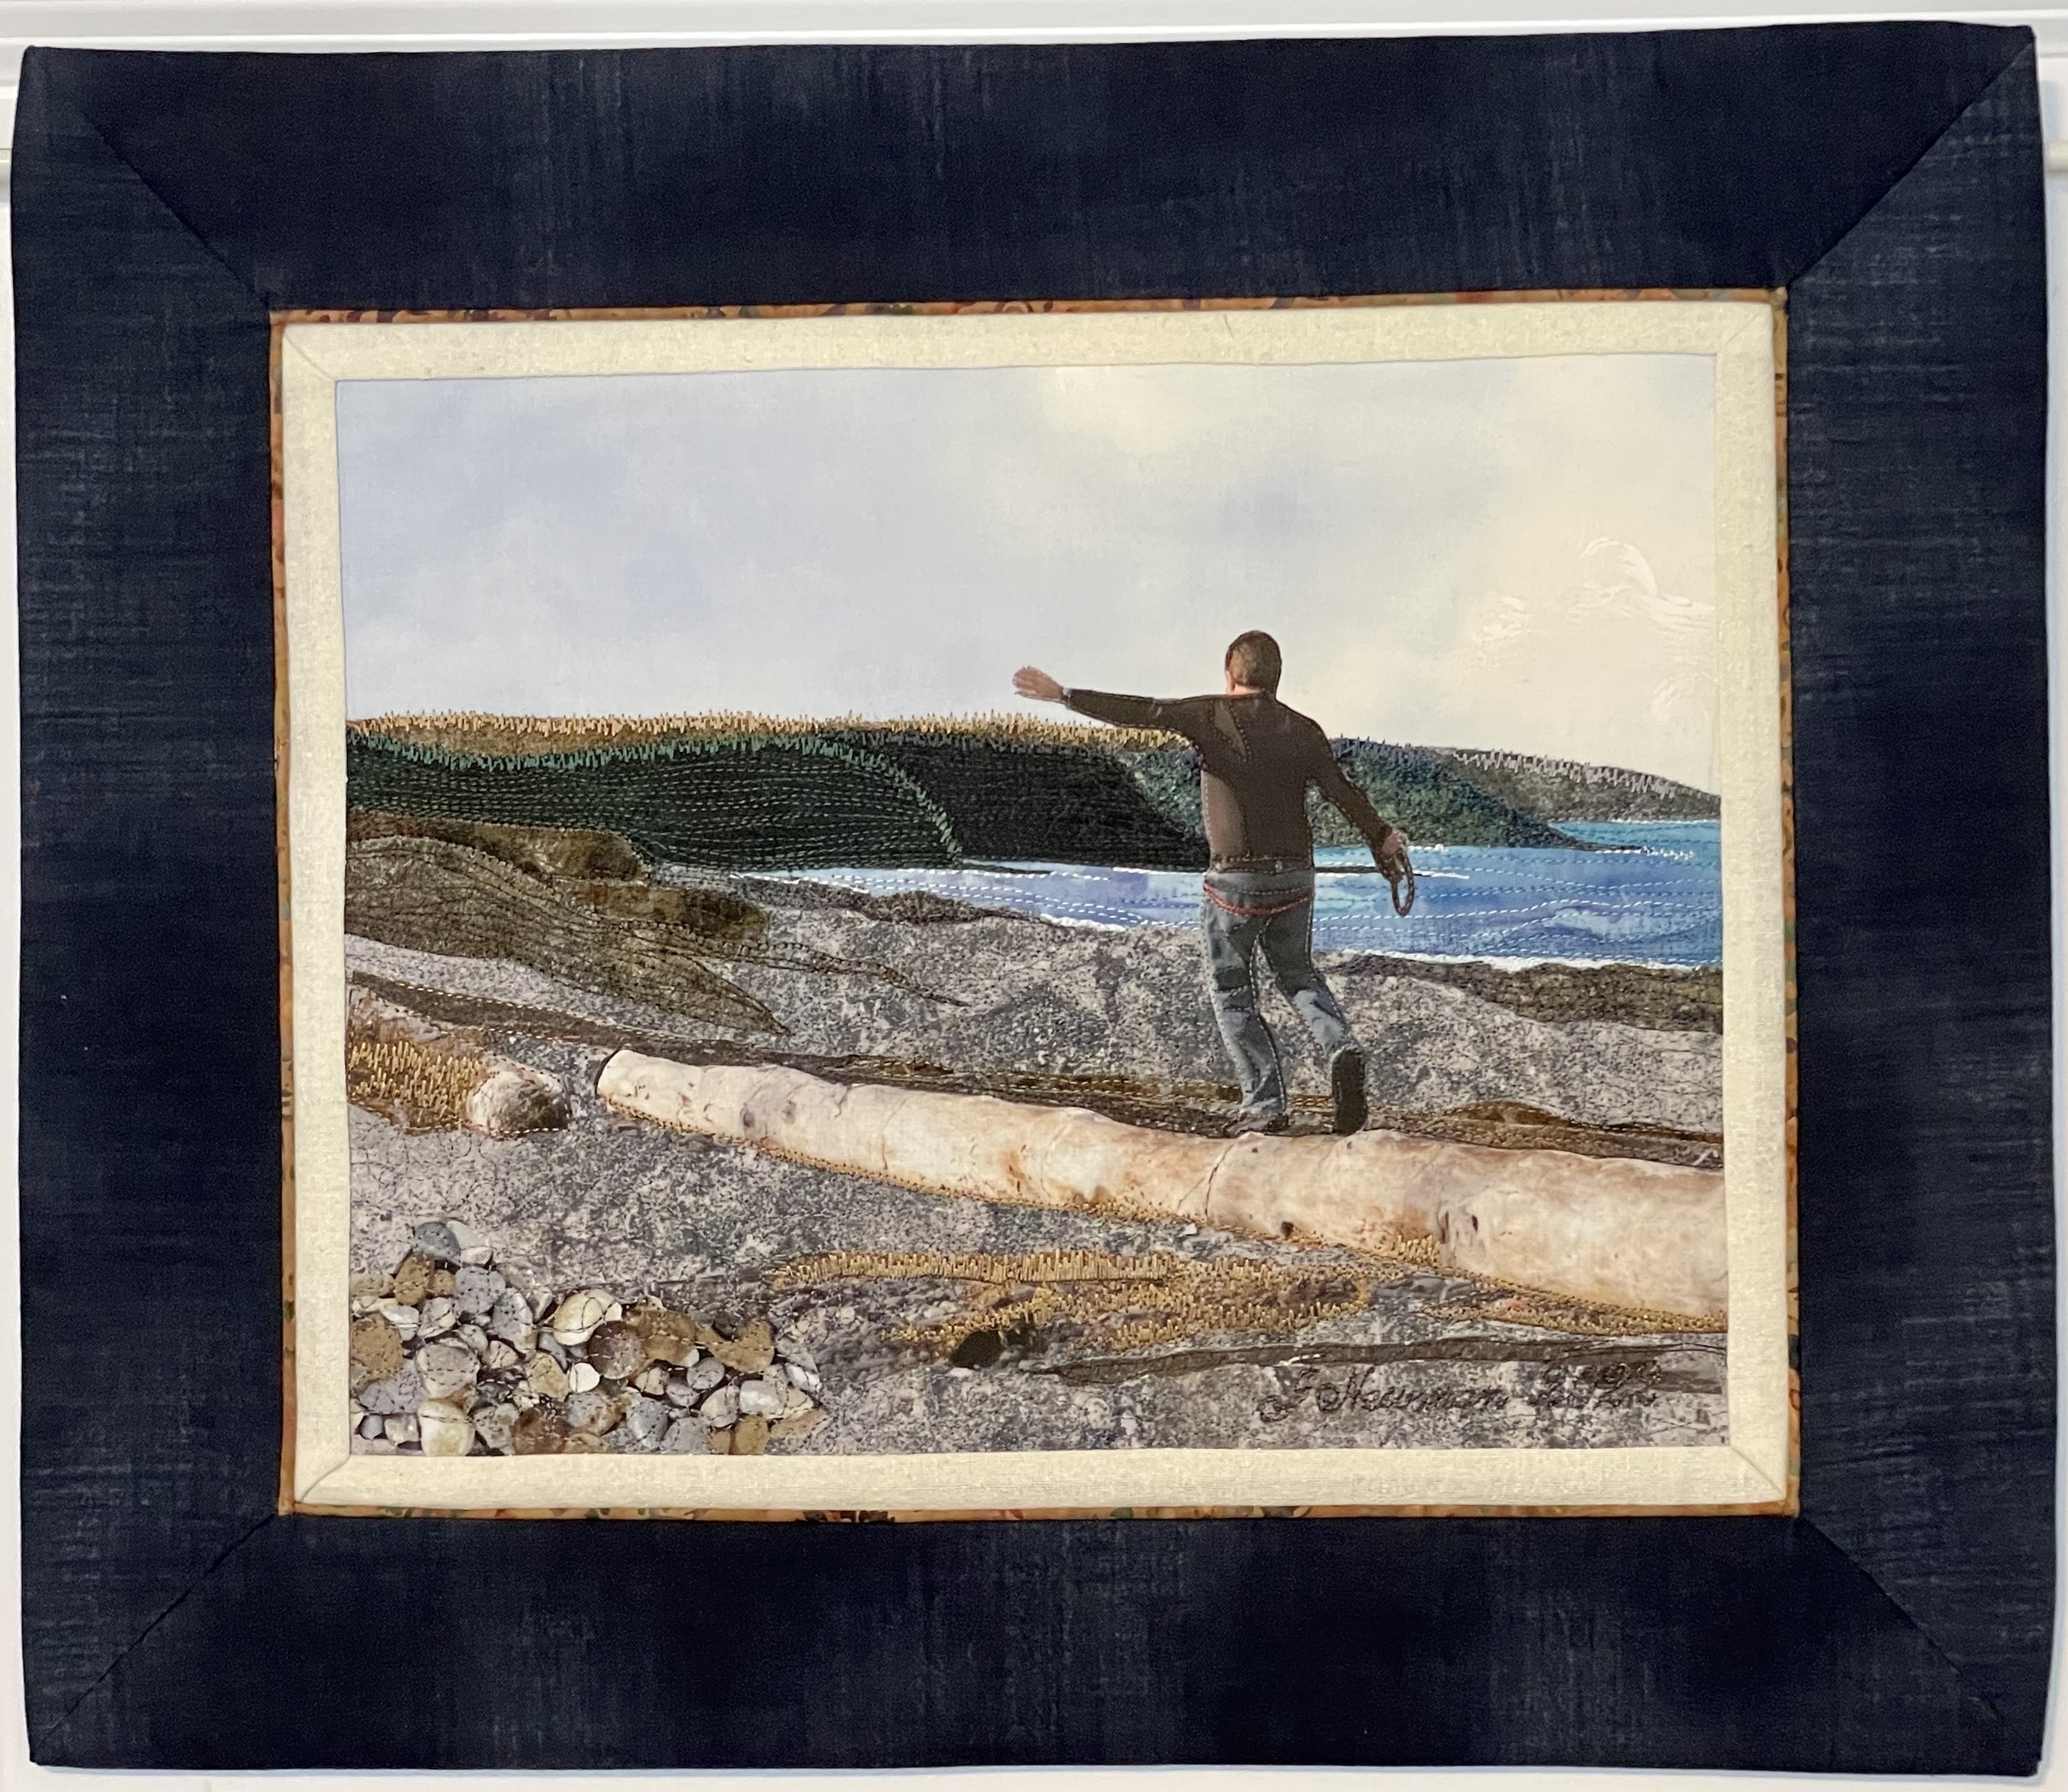
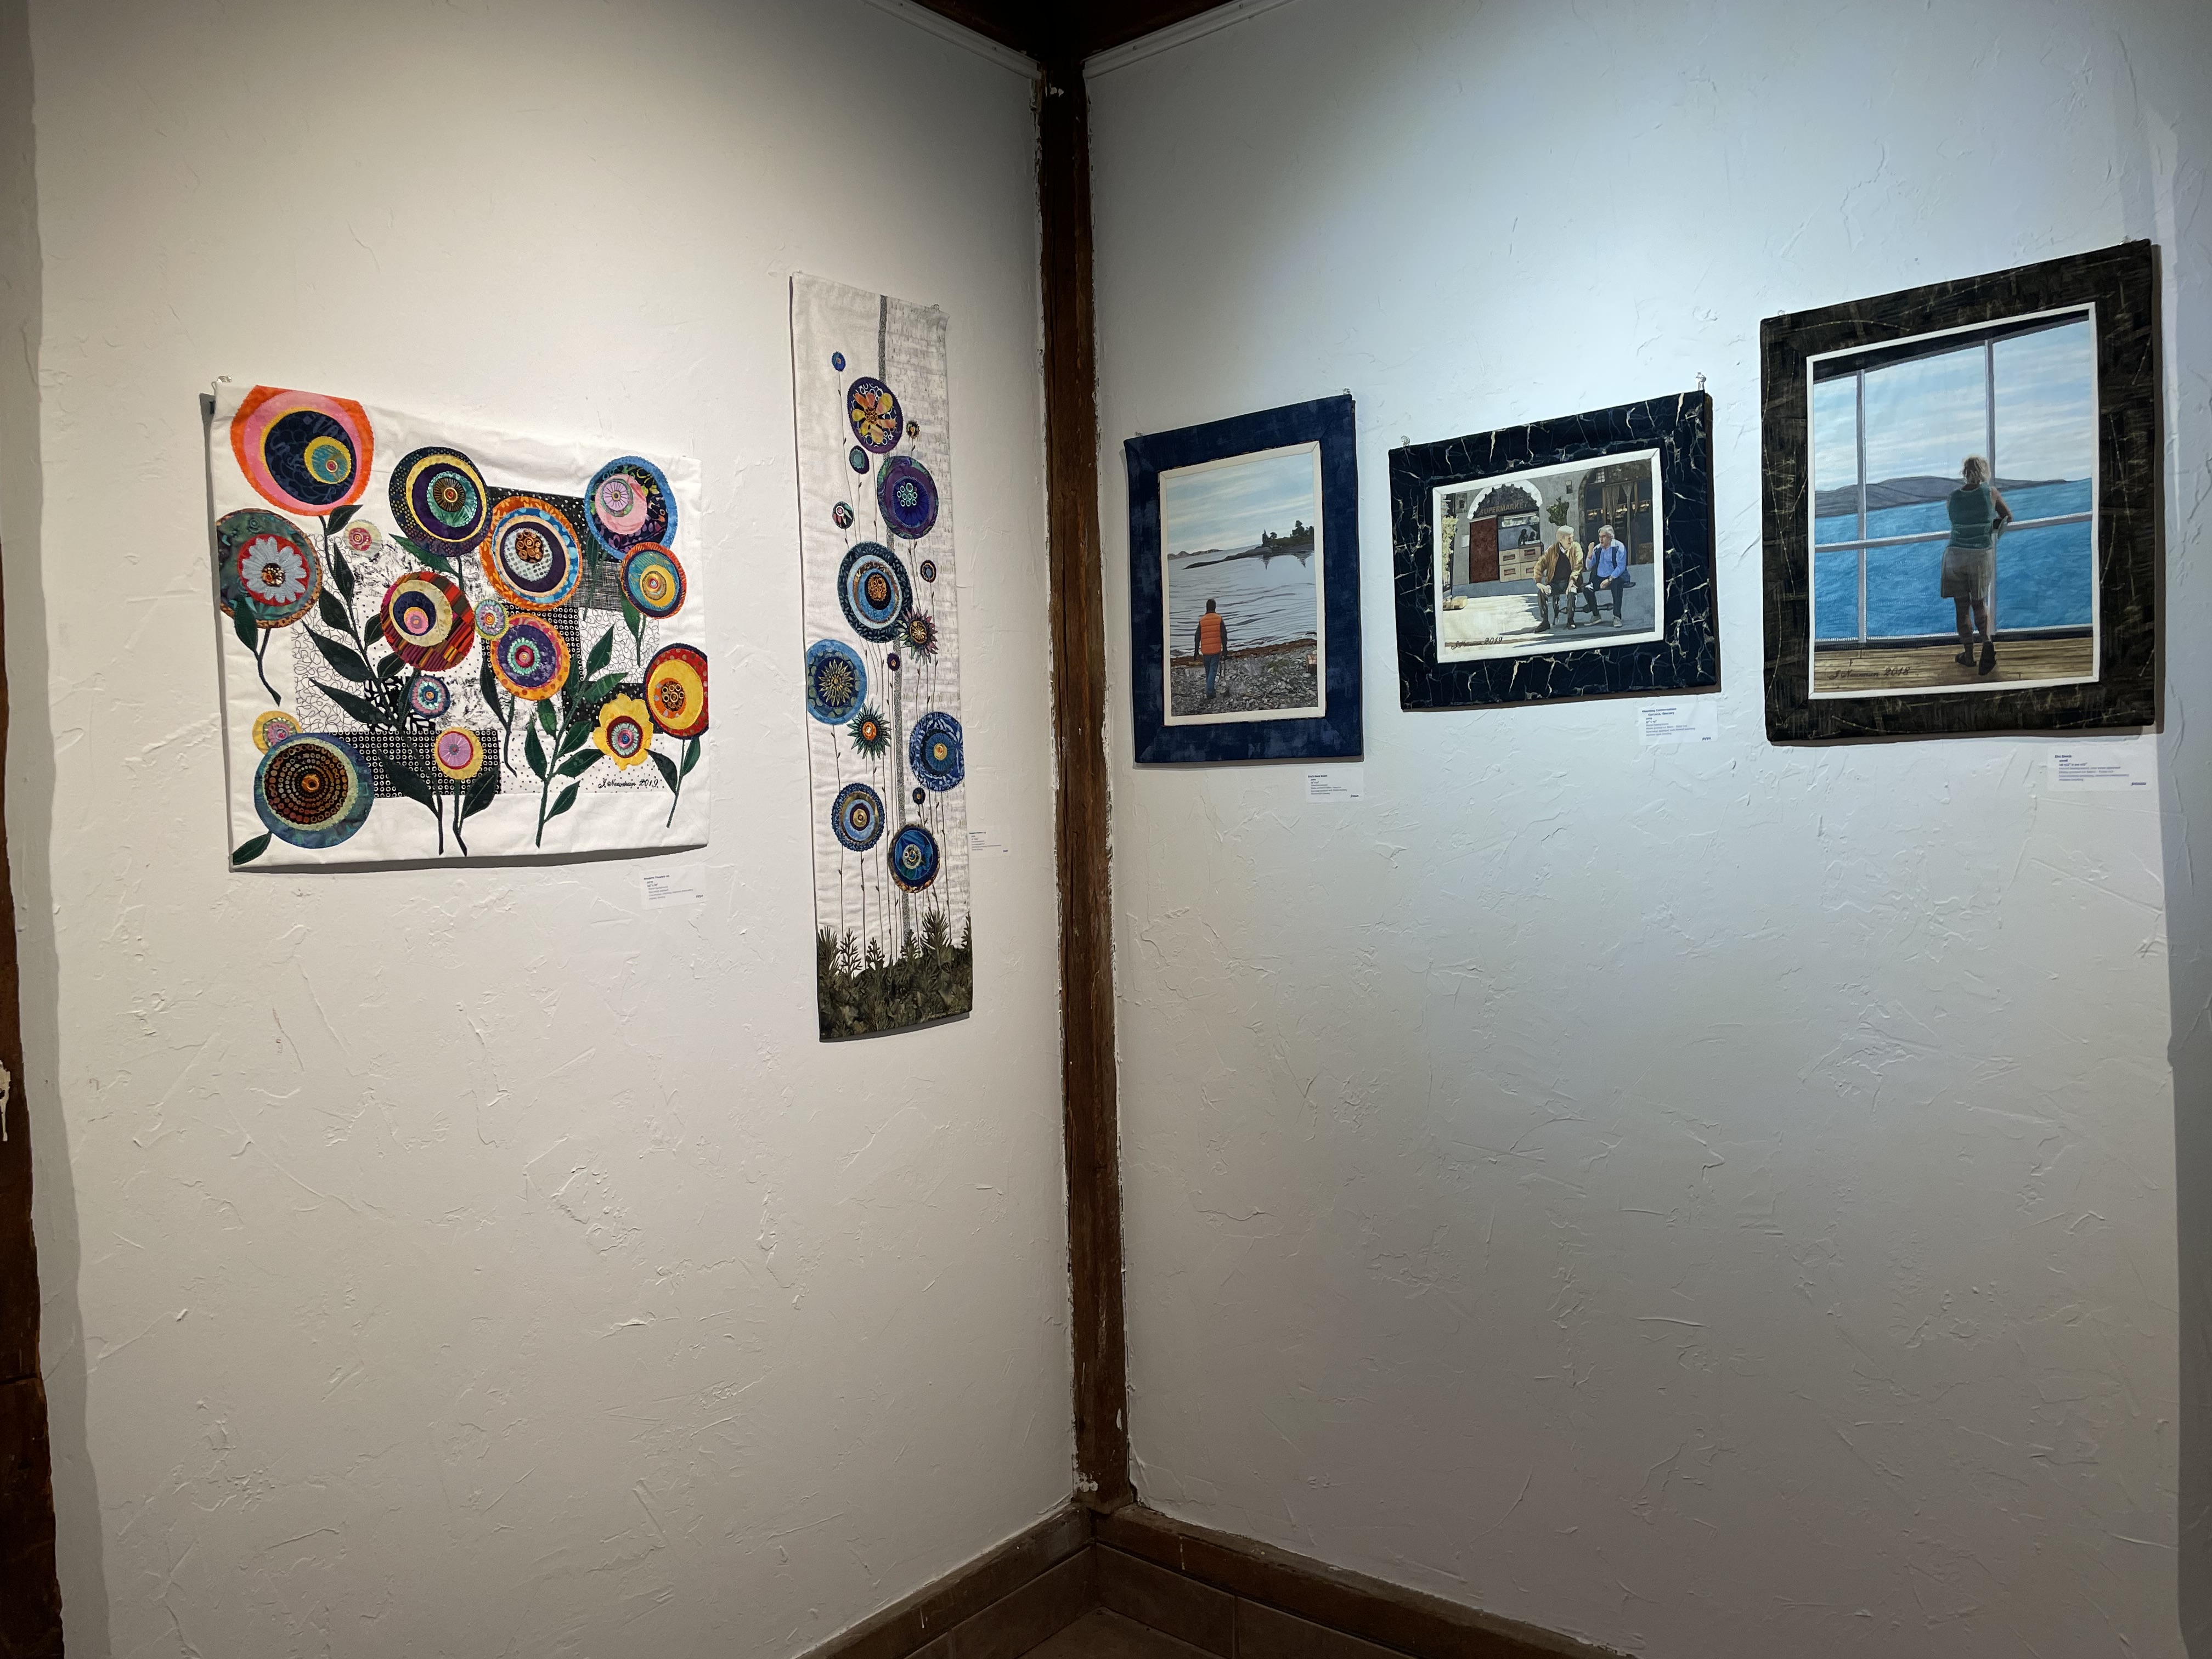
This year, I wanted to show the new quilts produced since last summer as well as a “retrospective” of what I refer to as “the portrait” pieces – the wall art based on my photos where I print elements of a photo on fabric and embed them in a pieced background. The initial reaction is always that you’re looking at a photo and then only when you step closer do you see you’re viewing a textile/thread piece.

The show hangs until late in the afternoon of August 18 in Parrsboro NS.

121 Main Street, Parrsboro NS

If you’re considering a day trip to Parrsboro make sure to stop for lunch at The Pier / Harbourview Restaurant in Parrsboro. Ruby and I went there just to have their lobster roll – it won’t disappoint you!

Lobster Roll (after taking a big bite!)

A nicely toasted (buttered) hotdog bun FILLED with chunks of fresh lobster seated on some lettuce (OK, so there wasn’t any chopped celery, but we didn’t complain because there was so much lobster). We added a single kids’ portion of fries which we shared (just enough for two without having to feel guilty about eating them).

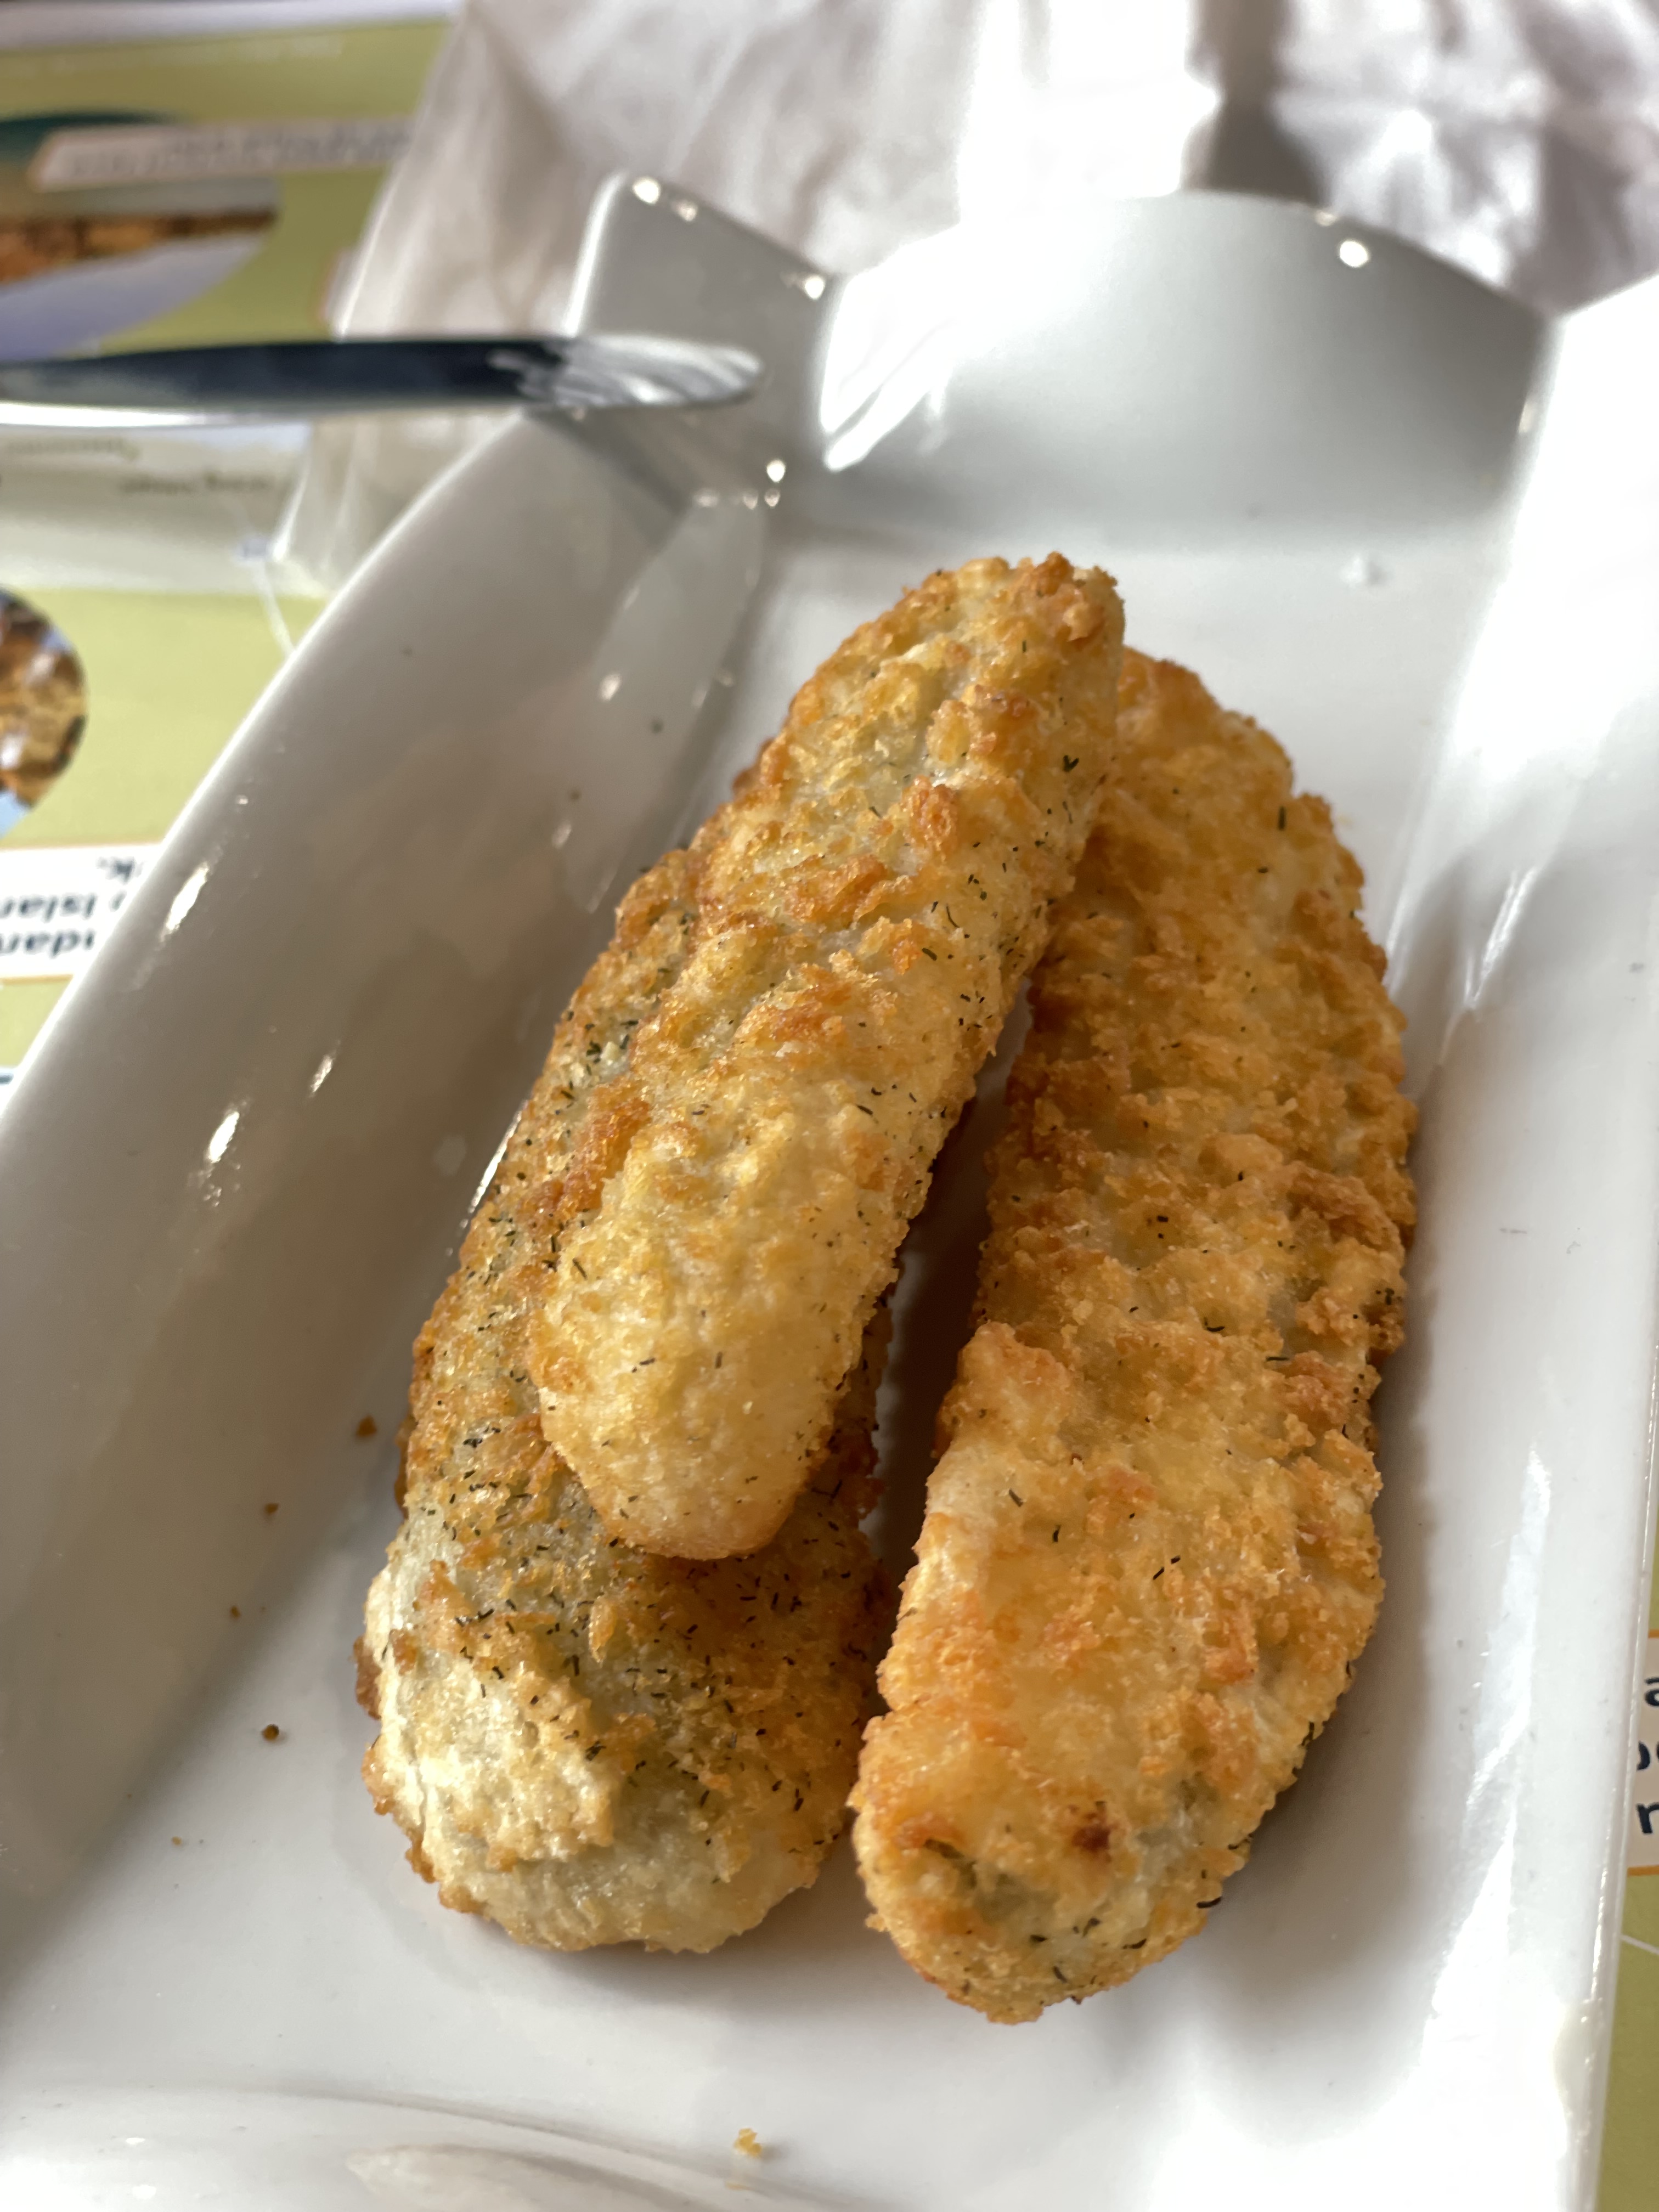
We started with the deep fried battered dill pickle – yes you got that right – a Pier Restaurant invention, I think. Crazy but surprisingly tasty. Ruby had never had anything like it so I ordered some. Comes with tartar sauce for dipping.

Deep Fried Battered Dill Pickle

On our way back to the city we stopped at “The Egg Lady” – to pick up 5 dozen fresh eggs for a friend of mine. Laid today, they’ll last her for several weeks.

The Egg Lady

We didn’t stop at Five Islands Lighthouse Park today, or go up the hill to That Dutchman Cheese Farm. We did stop at Masstown Market for chili for a light supper on the way home to round out the day. (You could have a terrific order of Fish and Chips at their Fish and Chip Boat if you can handle more fried food).

In spite of some rain, we had a lovely day.

Two New Tops

I made another knit top after finding this striped cotton knit in my stash – the last cotton knit in that drawer. I added a bit of flare because the knit was light with a soft drape. However, the fabric was difficult to work with, I made sure I had stretch needles in my serger, my quilter and the coverstitch machines, but the fabric edges curled forcing me to pin closely at the edges in order to have the seam edge lay flat! I’ve gotten very used to not having to pin – taking time to pin the edges practically doubled my sewing time.

And it’s a very warm day today so I decided to wear the heirloom top. I didn’t realize I’d set it up with a slightly dropped shoulder (that’s because I drafted the pattern from my other lightweight cotton top which has a dropped shoulder) but if I don’t say anything about it, nobody but an experienced sewer would notice it. It will be comfortable on this hot day. (This is the best of several photos I took – I didn’t manage to smile in this one which was the clearest image of the shirt!).

Socks and Heirloom Top

I also finished the latest pair of socks (added to the give-away stash) and the pull-on shirt I made using the heirloom panel I created a couple of weeks ago. I’ve since added five small mother of pearl buttons to the centre of the heirloom embroidery to draw attention to the stitching. It’s a light, loose hot summer day shirt. The only problem – the fabric I used for the heirloom panel is a slightly yellower colour than the rest of the shirt. Nobody will notice it. And I’m hoping a washing or two with oxyclean will whiten so the panel will blend with the rest of the shirt!

Patience & Perseverance

My patience and perseverance were tested yesterday. The other day, I pulled out some Marcy Tilton t-Shirt fabric I’d bought last year – time to use it to make up a couple of shirts. I went through my collection of t-Shirt patterns and decided to try out the Connie Crawford’s “Perfect Knit Sloper” that I’d picked up a couple of months ago. When the sloper arrived, I opened it, and drafted a sloper on Swedish cloth, using my measurements. This is the first time I’m trying out this sloper so I know I’m making a muslin.

I cut out a t-Shirt – using Janet Pray’s technique for turning a t-Shirt into a “swing” shirt (a shirt that is flared at the bottom)(15:25 – 21:55 on the video). Cut a couple of pieces of grosgrain ribbon a bit longer than the shoulder seam (to stabilize the shoulder), then serged the shoulder seams. So far so good. Next comes the neckband. I cut out the neckband the size suggested in the sloper pattern and serged it to the neckline. First problem – I had a couple of spots where I didn’t have the neckline and band aligned perfectly – I opened those spots and restitched them.

Tried on the garment to see how the neckline looked – dreadful – the band stuck out in the front – the band was too long. I thought the neckline was a bit higher than I liked, so I carefully removed the neckband (being extremely careful not to cut or pick the fabric), recut the neckline 1 1/2″ lower in the front, then reattached the neckband. The band was still too long, so I carefully removed it (being extremely careful not to cut or pick the fabric), shortened it by 2″, distributed the fullness of the garment neckline (stretching the band as I attached it to make it fit), basted the two together this time, then once I was sure I had the band and neckline aligned, I serged the seam! Finally the band laid flat and the fabric edges matched. I pressed the band seam toward the garment and top stitched it (to hold the seam allowance flat on the t-Shirt) 1/8mm from the seam using a narrow-edge foot.

Now to attach the sleeves. I carefully aligned the right sleeve with the sleeve opening on the t-Shirt, sewed it in place – didn’t like the sleeve header – the top of the sleeve stood up rather than lay flat. I unpicked the serged seam, flattened the top curve of the sleeve an inch, reattached it (this time basting it first) then serging the seam. I recut the second sleeve and serged it.

I serged the side seams; they were fine, until I tried on the shirt – too much flare! So I removed a wedge from bottom portion of the side seams.

Last, I used my coverstitch machine to do the bottom and sleeve hems (stitching a wee bit narrower than the fold and trimming back to the seam using my handy duckbill scissors.

Wearing the Finished t-Shirt

“Why?” you might ask do I bother making t-Shirts – because I can’t buy t-Shirts with sleeves long enough to cover my old lady arms.

This t-Shirt turned into a L-O-N-G project. I was determined not to give up and throw the whole thing in the garbage! But constructing it – a muslin, I kept reminding myself – definitely pushed my patience and perseverance to the limit! I wore it today and got complements on it.

Sewing the second t-Shirt was simple and straightforward – I made the adjustments to the sloper pattern, cut it out, basted, then serged the seams. The neck band lays flat, the sleeves headers are smooth, it’s not too full at the bottom.

The View – Completed

I still have to stitch the hidden binding on the back but other than that, this project is finished. Yesterday I’d finished applying the piping and border only to realize I’d forgotten the light inner “matte”! Having cut the piece to size I wasn’t going to take it apart and rework it. Besides, the contrast between piping/border makes the image itself pop quite nicely.

I’m definitely happy with how the gals worked out on the bench and that I was able to show their bums on the seat. Not obvious in the photo is the shadow under and behind the bench which grounds the gals – it’s much more obvious in the piece itself.

I’ll work on the hand stitching later this afternoon. That’s it for “portrait” wall art pieces for now. Time to move on to more garment sewing.

The Wedding Gown

I said to myself, before I started these alterations, if I ruin the dress, I’ll replace it! That gave me the courage to proceed.

I started with the front opening. Michelle is tall, very thin, with a small bosom. So when she moved, the front gaped and she felt exposed. I wanted to stitch the opening closed but she was adamant the opening remain.

I shopped for a bit of nude mesh which I found at Fabricville. I cut a triangle long enough to support the gap further toward the neckline, pinned it in place then hand stitched it (very small stitches with Aurifil 50wt thread in white). Can’t see my stitches. I stitched the edges of the triangle on the inside as well. Then I added a sheer white polyester bias tape across the top edge to prevent the mesh from stretching much. That should do the job.

Second, I took up the shoulder straps an inch. I though I’d have to carefully remove beads and pearls, but I got away without having to do that – I was able to fold the strap 1/2″ and stitched the fold securely to itself. You have to look very closely to see where that join is. That adjustment should help with how the neckline fits as well.

Finally the two nude inner skirts. First, I had to figure out the length of the innermost skirt at the front, mark that length around the whole thing then cut it being VERY careful not to cut the lace and tulle layers. Next, measure the second skirt 2″ longer and cut it. I think the two skirts are still bit long in the centre back (that’s because at the waist the inner skirts dip down about an inch and a half below the centre front) but I was afraid to cut the skirts too short – we can always cut more – I can’t add back what I cut off!

I’ve decided not to hem the bottom edge – this dress will be worn once, the fabric doesn’t fray, and no point in doing a turned hem if I have to cut off more.

So far, I don’t think I’ve ruined the dress. I’d say, it’s done until Michelle tries it on. If I’m lucky she’ll be happy with my alterations – my wedding gift to her.

The View

Bay of Fundy

This is the second piece I decided to work on. I photographed the bench on the beach at Huntington Point in 2007. I’ve always wanted to turn it into a textile piece but it needed people sitting on the bench.

A couple of summers ago I was doing the day trip thing with a friend. We stopped at the Tangled Garden near Wolfville and I people watched. There were a couple of young women sitting on chairs near a picnic table. I asked if I could rearrange their chairs and photograph them from behind. I’ve been playing around with the relative size of the gals and the bench to get the proportions in balance. I’m close. Although now that I’ve mocked up the sky, the bay, the faint line of shore in the distance (needs to be much narrower than the strip I’ve got place holding it), the rocky beach and the grass, I think the bench and the women need to be a bit larger for the image to work as I imagine it.

Next steps: add fusible web to the pieces of fabric, trim them to size; thread paint the setting, print the gals and the bench to size, fussy cut them and place them in the scene. To make the image work, I need to build the shadow cast by the women and the bench coming toward the foreground (the direction of the shadow dictated by the position of the sun on the young woman’s hat). I don’t know whether to do that with permanent markers or ink pencils – I’ll have to experiment before I decide.

Now I really need to get on with that wedding gown!

Huntington Point Beach

Huntington Point Beach

The piece is finished — well, almost. I think I want to take apart the bottom right corner and see if I can straighten it just a wee bit. I may not be able to, but I think I have to try.

I’m pleased with how the work turned out. You have the impression of the dried seaweed blown against the driftwood log and the dried grasses on the gravel beach itself. You can see the headlands recede into the distance with the sun illuminating the top of the nearest ridge.

The colours in the piping bring out the blues and golds from the image and the very dark navy frame lightens it. From a distance, the log glows because it’s sun bleached.

My next job is to make some adjustments to a beaded lace wedding dress — take up the shoulder straps a tiny bit, replace the skintone mesh in the front cleavage slit with a longer piece (bringing the two edges a smidgeon closer together), finally cut the train from the two underskirts leaving just the lace and tulle train at the back and hemming the underskirts. That’s for tomorrow.