
Well the small rhododendron thinks spring has arrived! It’s been blooming for a week – that’s because it’s so cold, the flowers were slow to open but they last longer!
Month: May 2014
Knit Dress

Thinking about summer (it still hasn’t warmed up here – I continue wearing wool socks!). I was in the fabric store last week and came across this bright knit on sale. Found a simple pattern for a plain t-Shirt dress. Very quickly cut out and sewn together. I used my new serger to “cover stitch” the hems. The dress doesn’t look like much on the hanger, but it drapes softly on the body.
There was enough fabric left over to make a t-Shirt as well.
Socks…

Finished this pair the other evening – one of the Opal Sweet ‘n Spicy yarns. I am now working on the last ball of that yarn, then I’ll have to go yarn shopping or start improvising using all the leftovers I have packed away (I don’t enjoy working with the leftovers because there is no surprise there).
Latest Socks

Another pair of socks finished. It’s not obvious in the photo, but there’s a mylar (metallic silver) thread through the socks which makes them sparkle. I was going to keep these but I’ve put them in the give-away pile. And started another pair in shades of blue and purple.
Kimono
Since my trip to Portland last spring, I’ve been purchasing bolts of old silk kimono fabric from Ichiroya Kimono Flea Market in Japan. I learned about the silks from Ann Williamson, the wonderful clothing designer in Portland who pieces amazing jackets and other pieces of clothing with these silks. I now own 8 bolts – they’re sitting in my stash waiting for time and inspiration to work with them. Having discovered Ichiroya I signed up for their newsletter which comes weekly.
This week’s newsletter is about a kimono and obi fashion show in Paris held by Hinaya – an obi company in Kyoto. There are photos of kimono and obi combinations. I’ve copied two to showcase here – I just love the colours and patterns in these two sets of garments. I can imagine how wonderful it would feel to be wearing these outfits. 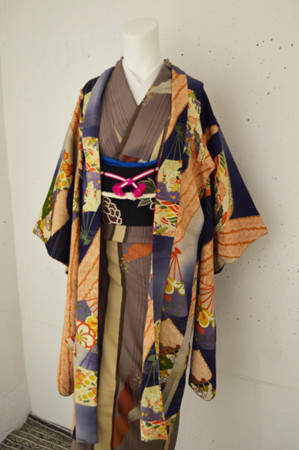

Midnight Sun

There’s a story behind this wall hanging. I first saw a photo for a wall hanging kit by Lonni Rossi: Sunrise in the Garden in the Keepsake Quilting Catalogue:

I was going to buy it except the kit would have cost me over $100 by the time I paid exchange, duty and shipping! I thought that was a bit expensive for the amount of fabric I would be getting. I could see the hanging would be simple to do – wide strips of 7 fabrics with a circle appliqué. I cut out the picture and stuck it in my collection of interesting possibilities but never expected to actually make it.
Until Monday, when I was in my local fabric shop and came across a collection of black/white/red fabrics (Black and White and Current 5) and immediately saw some possibilities. I bought small quantities of each of five of the collection (there are 14 fabrics in the whole collection), came home and quickly created the piece. I pieced the top, added quilt batting and did a bit of free motion quilting to attach the batting to the top, not a lot, though. I did a “grass” stitch around the circle to finish it off.
I wanted to know a bit more about the designer Lonni Rossi, so I googled her. I found instructions for Enchantment at Midnight on her website.
 So if you happen across some fabrics that would work you can download instructions for making the wall hanging using the link above. I didn’t need instructions for the hanging, but I found Rossi’s instructions for doing a “blind binding” useful. That’s how I chose to finish my hanging:

Rossi suggested 3 1/2″ strips for the binding – I had already cut 2 1/2″ strips for a conventional binding, so that’s what I used. Worked out fine. I added a label this morning to the back of the hanging – it’s not my design, although it’s my interpretation of it so I didn’t put my name on the front.
One other thing – I slipped a 4″ piece of foam core board into the bottom of the quilt before completing the backing to keep the corners from curling and to add a bit of weight. It made hand stitching the binding a bit difficult but not impossible.
All in all, I though the hanging turned out surprisingly well.
Boats in Halifax Harbour

Went for a walk in Point Pleasant Park last Sunday. As we rounded the point there were the sailboats having a leisurely sail in the harbour. Perhaps they were racing. In the background – McNab’s Island with the lighthouse just visible.
Another “Face”

Every time I visit my next door neighbour I find myself sitting in a chair where I can see this “face”. I finally took a photo. It keeps watch over her back yard – I wonder whether it has conversation with the cats that visit to sit on her sunny patio.
Satsuki Quilt
 I bought a Kauffman “Japanese” fat quarter bundle called “Atmosphere“ from Craftsy – I don’t usually buy quilt kits – I prefer to improvise but the colours in this fabric collection looked as if they would blend with my new bedroom chair (which they did). The quilt is simple, long wide strips for the centre panel with short strips to finish the “row” – the rows are alternated. The point was to showcase the colour gradation from one end of the centre portion of the quilt to the other. The border was pieced from strips of the remaining fabric in the collection.
 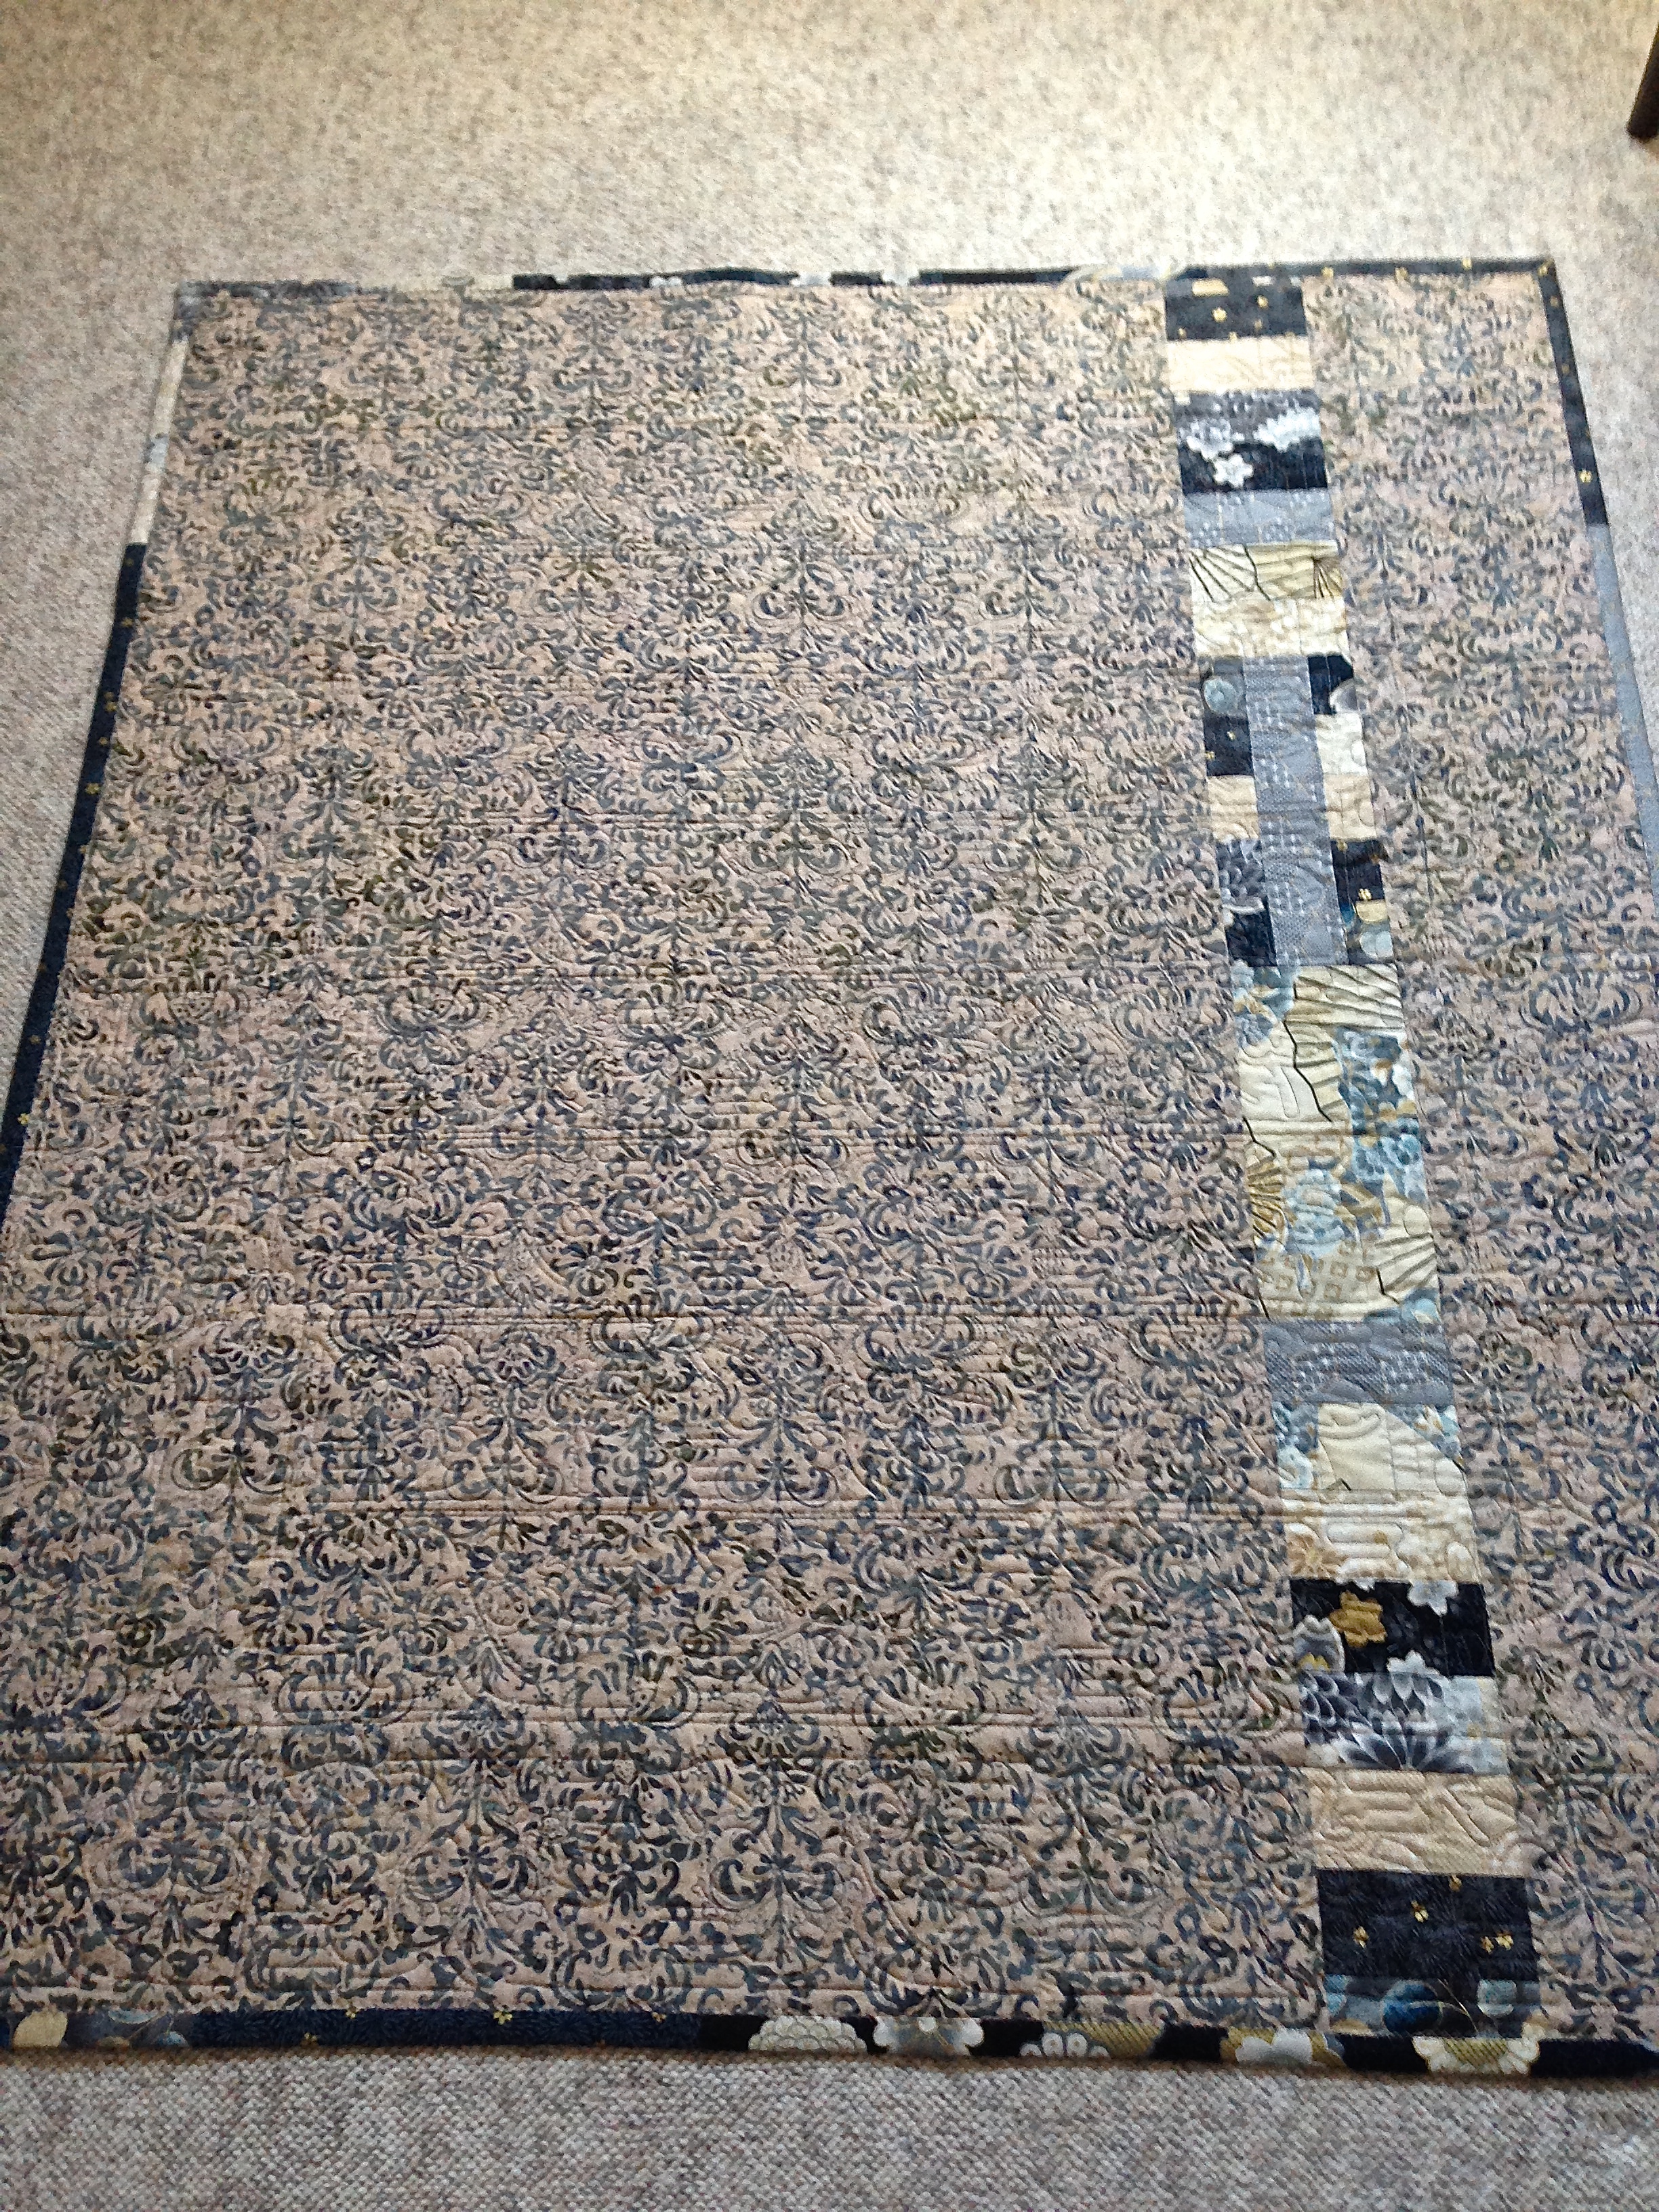 The back of the quilt uses a batik fabric I happened to have in my stash – the right shades to work with the patterns on the front. I needed to widen the back so I added in a strip using scraps from the Kauffman fabrics. There was barely any of the Satsuki fabric left over (just small pieces of two of the lighter fabrics)!
  I quilted “in the hoop” using a design I created from an image I had. I sized it to fit within the width of the central panel strips, using three repeats for each of the eight panels. Then I adjusted the size of the embroidery to accommodate the border width and length. I used a Sulky blendable thread which worked with both the light and dark fabrics.
Quilting Without a Pattern I

Here is the first of the Joe Cunningham quilts – he calls the idea “The Three Crazy Sisters“. The quilt is based on a three-strip block – in his example, the three strips were all cut 2 1/2″ wide. I adjusted that: two strips were 2 1/2″ wide, the third was 2”. What he did was improvise the middle strip – used a second colour (only) of whatever length to which he added a piece of background to make the strip the same length as the other two in the block. I did the same, most of the time, but sometimes I used the pieced strip on one side.
I made 35 blocks, then laid them on the floor and played with the layout. I alternated direction of the blocks – horizontal, vertical, horizontal… When I was done, I pulled three blocks and added in solid blocks – it’s the red one that draws the focus for the quilt.
I used leftovers from the Japanese Quilt along with more of the Japanese indigo wax katagami fabric I bought at my local fabric store (meant for garment sewing, but lovely for quilting).

I used a second of the indigo wax katagami fabrics for the back, along with leftover blocks from the front. I used a third katagami fabric for the binding with a strip of red batik as an accent.
