Watercolour/Colourwash Pieces – Completed

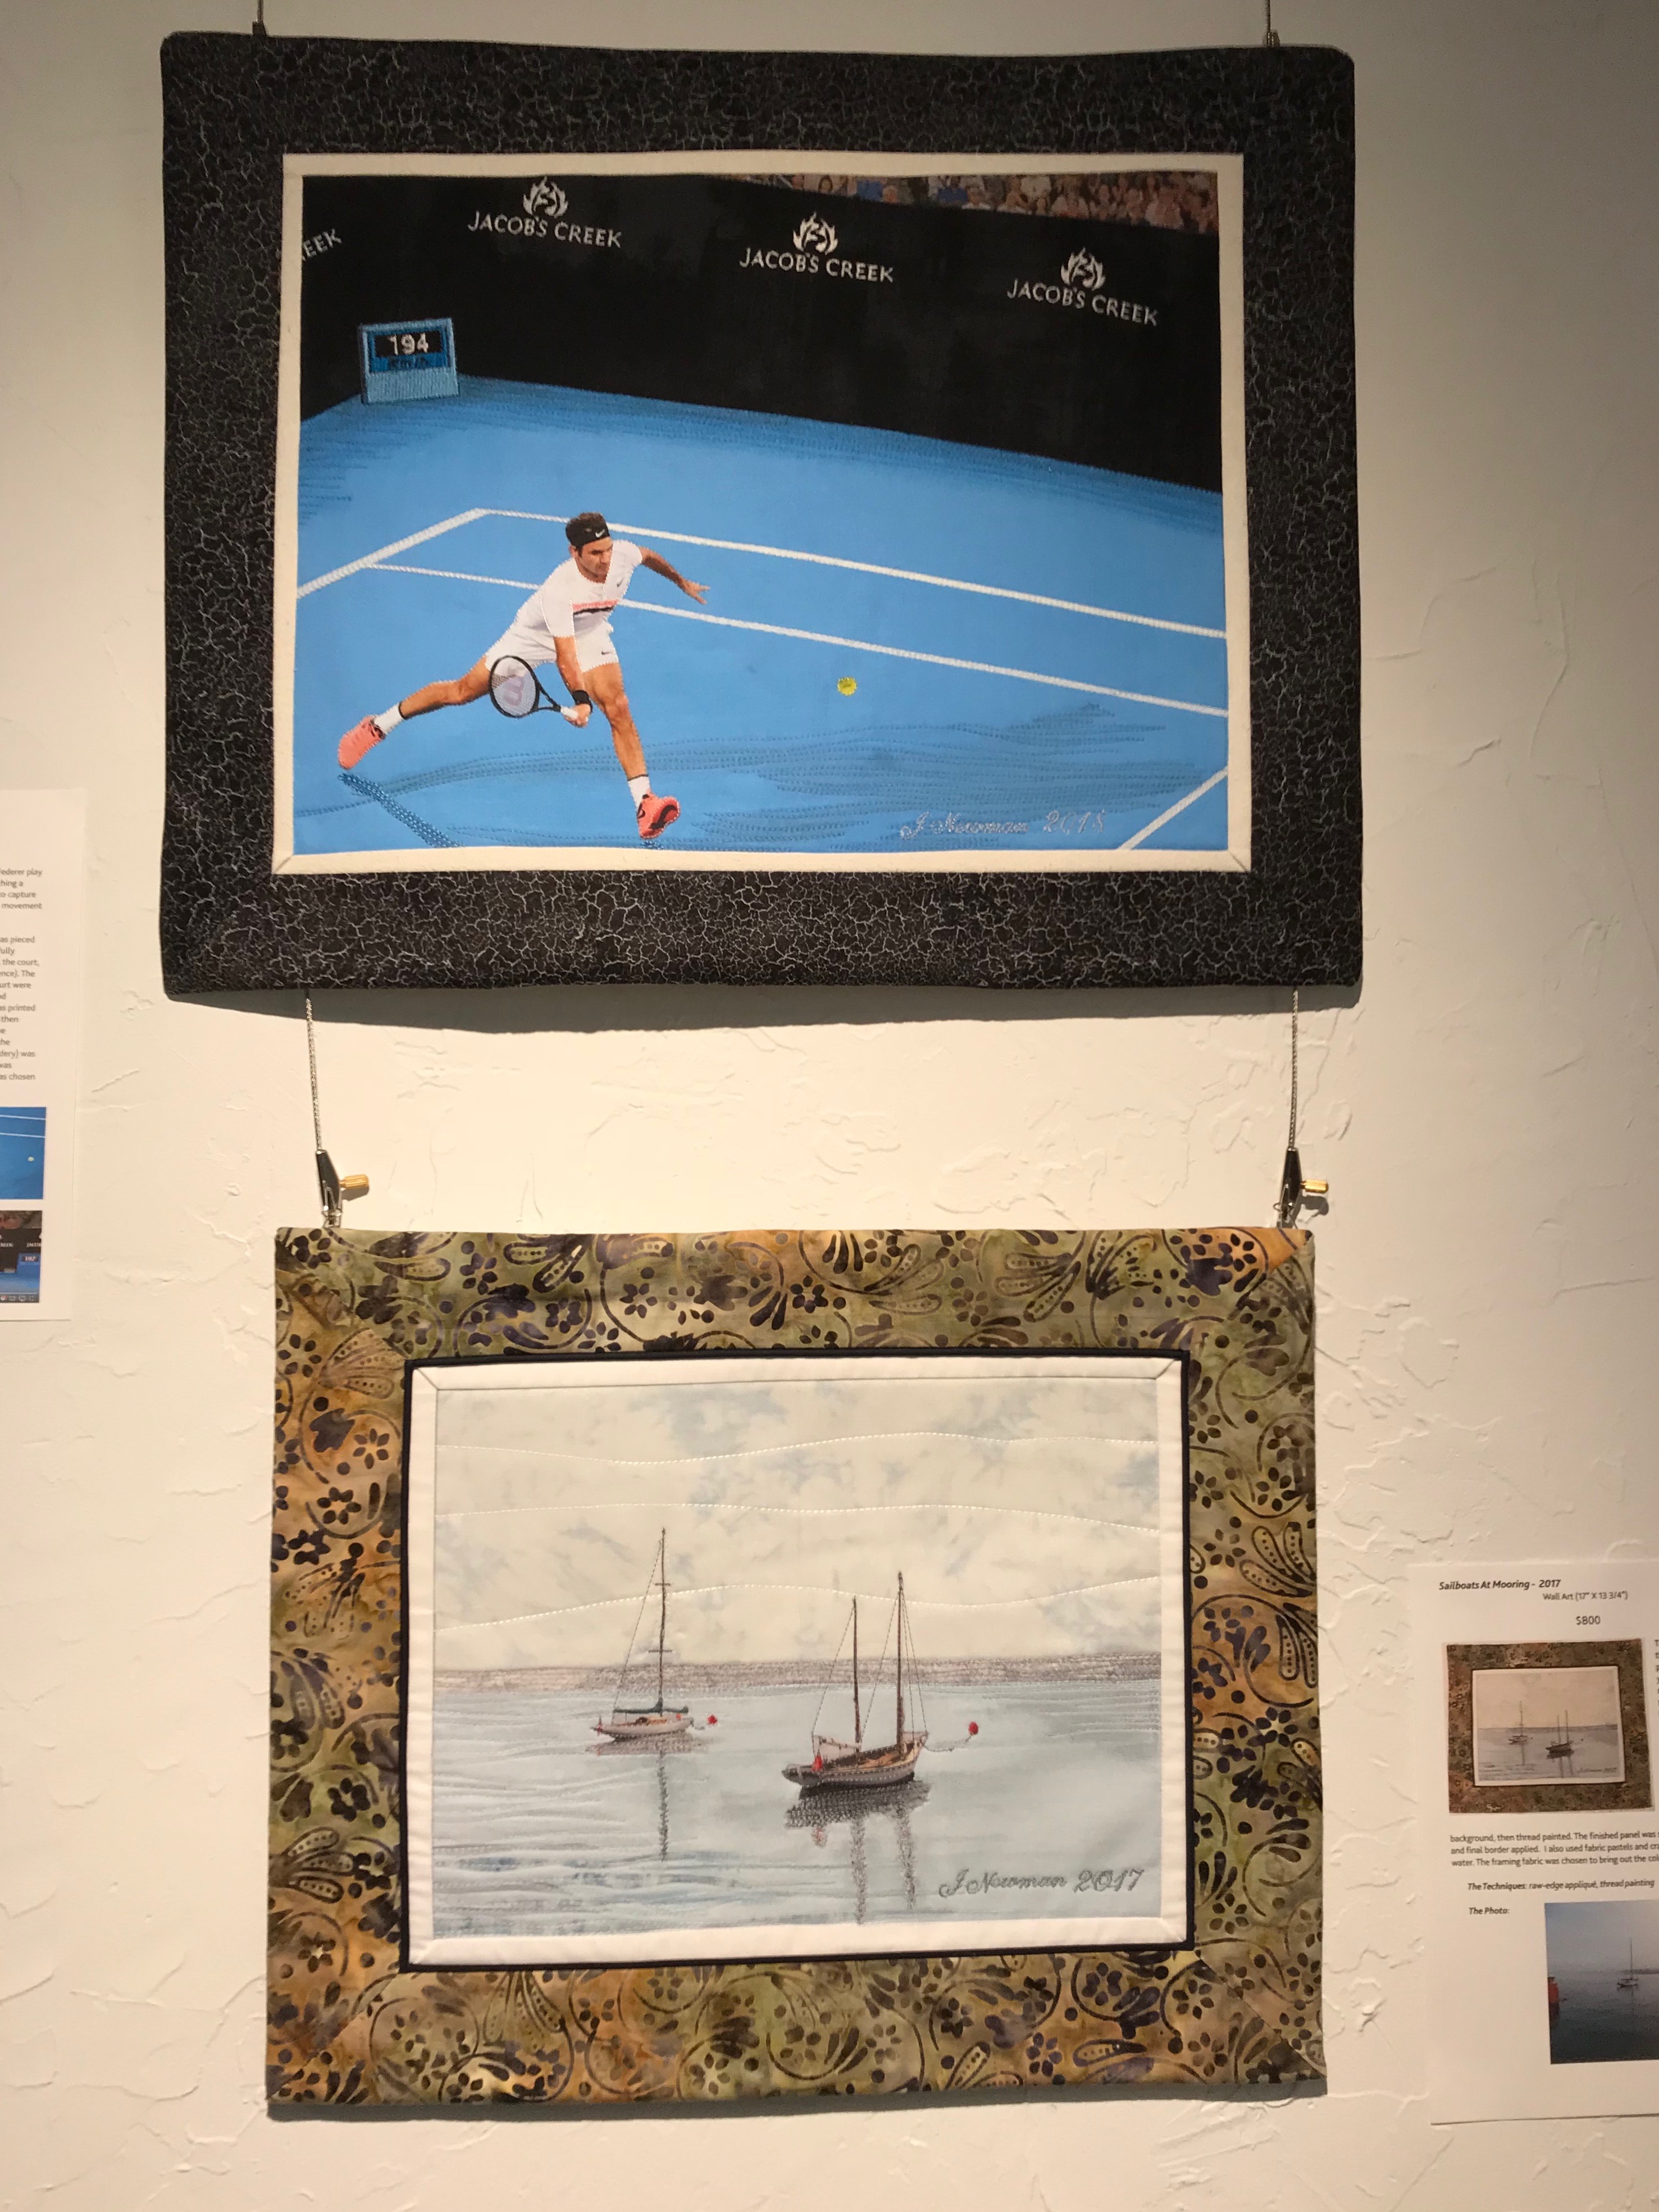
The finished colourwash panel – complete with inner raw silk border, rust piping and black crackle frame.

Blue Garden With Butterfly

I’m pleased with the colour distribution on this piece and the small butterfly appliqué adds a place for the eye to land.

I undertook a second panel for the class – this time I cut my fusible interfacing grid into 8″ strips, taped them to the cutting table, laid out my squares, fused the squares to the interfacing (easy to do because the strips were narrow enough to carry and place on my ironing board), stitched the three panels together, then continued systematically stitching the small blocks – cutting the interfacing as I went so I could press the seams open (which precludes stitching in the ditch as a finishing quilting).

Garden in Pink

I wanted to add some kind of focus element in the centre of the panel but I didn’t want another butterfly and I didn’t have anything else to place there so I’ve left it as is, for now. Should I come across an idea or an image of something small enough and from the right colour palette I can always remove the backing panel and add it to the work.

Next, in preparation for the Wednesday workshop, I cut a gazillion (around 2000 actually) 2″ blocks in as many shades of dark, light, and medium print fabrics as I was able to find either in my stash or from my local shops. I bought 4″ strips from width of fabric which yielded two 2″ strips – one I set aside in my stash, the other I cut into 20 2″ squares.

I’ve colour sorted all the blocks into sandwich bags placing bags with similar colours in larger ziploc bags so there is some order to this collection. I also cut a 26″ x 24″ panel of fusible interfacing in preparation for the class, and using the grid on the non-glue side as a guide, marked 2″ squares on the glue side so it’s possible to visualize the layout (the grid lines are very difficult to see when I’m working on my dark green cutting surface).

So I think I’m now ready for the Wednesday day-long class. Week 1 we’ll assemble the watercolour/colourwash panel; Week 2 we’ll turn it into a finished textile hanging – inner sashing, piping, outer frame, even an embroidered signature.

On Show in Parrsboro 2018

Last Saturday I travelled to Parrsboro for my 4th Annual exhibition of “Quilts As Art” show at the Art Labs Gallery.

Sign on the Sidewalk

It took about an hour and a half to hang the 8 quilts and 11 smaller wall art pieces. That’s my complete production for 2017/2018 – new since last year’s showing.

Quilts Hung

Hard to believe I manage to get so much sewing/quilting/machine embroidery done. That’s not everything I did make – there were a variety of garments: pants, jackets, tops that I constructed in that same time period – from end of August to mid-July of this year.

Two Wall Art Pieces On Display

There was an “Opening” later in the afternoon – a small attendance because the weather was so hot I’m guessing people in Parrsboro spent the day at the beach. Those who did come to see and talk about the textile art with me were interested and  appreciative of my work. Always fun to see how people react to it. The show lasts for two more weeks until August 17. Then I’ll head back on the 18th to bring it all home. I think I’m going to hang Federer somewhere in my place, the rest will be put away in my “quilt” closet (which is getting full).

I’ve already got work for next year under way. I pinned a new quilt this morning – ready to start quilting it. When that’s done I’ve got fabric for some summer pants (almost too late to bother making them this season). I’ll get those cut out and maybe one or two pairs stitched up.

Wind Waiting – Almost Finished

I spent the entire day working on the pilots wall hanging. It took a good part of the morning strengthening the white caps on the Bay of Fundy which is always windy. More difficult than doing this embroidery work without the pilots in place – I had to work up to the edge of a figure, end the thread, start again on the other side. When done in the right order it’s clear sailing.

Then I took a deep breath and started stitching around the colour areas. Here they’re shown on the black and white prints on paper. My plan was to stitch around the outlines of all the coloured areas using coloured thread to blend with the fabric in the clothing.

pilots-detail

Somewhat more difficult to do on the machine than with a pen! Click on the photo below and you’ll see the stitching – I didn’t quite capture as much detail as I did on paper, but the stitching does bring out the boundaries between the differently shaded areas. You don’t notice the stitching when you  stand back but it’s evident when you’re close up.

Version 2

Stitching Detail

I added an inner “mat” using 2 1/2″ raw silk strips, carefully positioning them and stitching them in place (with mitred corners folded and pressed).

Now the piece needs a border/outer mat. I have several sets of 4 of various fabrics the question is whether any of them actually enhance the piece or do all of them detract and I should go shopping for something better.

This is a dark border:

img_8266

Dark Border

Here is a lighter border:

img_8267

Light Border

This is a medium border that brings out the blues and greys – what I can’t decide is whether it’s too busy or not.

img_8269

Medium Border

This is one to sleep on. I need to see all three in daylight – then it will be easier to assess the colours and degree of busyness of the batik pattern.

Maybe I should bring out some solid Kona cotton and give that a try – I find “storm” a very useful colour – I’ll do that tomorrow.

Wind Waiting

I’ve begun my next project – this is a photo I took at least a dozen years ago when I was still paragliding. Retired, I had time to spend in Parrsboro (a two hour drive from Halifax) hanging out wind watching with these three paragliding pilots.

On this particular fall day we’re at Fox River (I think it was) on the Bay of Fundy across from the Valley Coast (able to see from Blomidon to Cape Split) feeling the strong wind whipping up the waves and inflating our jackets. It wasn’t a flying day! Wind much too strong.

Paragliding pilots are patient people – we spend a lot of time chasing wind which is either too light or too blustery. We hung around this location for quite a while before deciding to try further down the shore where we might find conditions a bit calmer.

What I love about this image is the three guys on the edge of the bank (about 100′ above the beach which is where we’d have landed had we been able to launch), patiently and calmly contemplating the weather. They’ve been here before with weather like this. Brian, the one on the left hasn’t even bothered to take out his wind gauge to check windspeed.

pilots1-2

Wind Watching

So this fabric wall art piece will consist of the background of white-capped waves with the bank in the foreground extended downward a bit further than it is in the photo. And then there are the guys. A week or so ago, I isolated each pilot and enlarged him. Last evening, I converted each image to black/white so I could see the contrasts more clearly. Last evening I outlined each photo so I could get an idea of how many different fabrics I might be looking for to construct this image – a lot of bits of closely related colours are going to be needed. This will necessitate a careful going through my scrap boxes and pulling out everything I think might work.

pilots-detail

Pilots rendered in black/white and outlined

I will have to print these images and outline them a second time – to give myself a copy I can cut apart, using the bits as templates for fabric pieces. The men are close to 11″ tall – they’re going to be quite large. I’m going to have to use that height to calculate the dimensions of the finished piece – I haven’t done that yet.

I’ve had the original printed photo at the right side of my desk for the past two months. I’m beginning to actually work on it. Next choosing fabrics, then bringing out my half sheet of styrofoam insulation to use as a pinning board.

This project is definitely underway. I expect it will take a couple of months to complete.

Midnight Sun

IMG_2894

There’s a story behind this wall hanging. I first saw a photo for a wall hanging kit by Lonni Rossi: Sunrise in the Garden in the Keepsake Quilting Catalogue:
sunrise in the garden

I was going to buy it except the kit would have cost me over $100 by the time I paid exchange, duty and shipping! I thought that was a bit expensive for the amount of fabric I would be getting. I could see the hanging would be simple to do – wide strips of 7 fabrics with a circle appliqué. I cut out the picture and stuck it in my collection of interesting possibilities but never expected to actually make it.

Until Monday, when I was in my local fabric shop and came across a collection of black/white/red fabrics (Black and White and Current 5) and immediately saw some possibilities. I bought small quantities of each of five of the collection (there are 14 fabrics in the whole collection), came home and quickly created the piece. I pieced the top, added quilt batting and did a bit of free motion quilting to attach the batting to the top, not a lot, though. I did a “grass” stitch around the circle to finish it off.

I wanted to know a bit more about the designer Lonni Rossi, so I googled her. I found instructions for Enchantment at Midnight on her website.

Enchantment at MidnightSo if you happen across some fabrics that would work you can download instructions for making the wall hanging using the link above. I didn’t need instructions for the hanging, but I found Rossi’s instructions for doing a “blind binding” useful. That’s how I chose to finish my hanging:

IMG_2899

Rossi suggested 3 1/2″ strips for the binding – I had already cut 2 1/2″ strips for a conventional binding, so that’s what I used. Worked out fine. I added a label this morning to the back of the hanging – it’s not my design, although it’s my interpretation of it so I didn’t put my name on the front.

One other thing – I slipped a 4″ piece of foam core board into the bottom of the quilt before completing the backing to keep the corners from curling and to add a bit of weight. It made hand stitching the binding a bit difficult but not impossible.

All in all, I though the hanging turned out surprisingly well.