The Invitation

I’m organizing our December show at The Ice House. Usually I do a winter theme but this year I’m changing it to a miniature show. There’s no theme so everyone is free to do whatever they like! The only requirement is that all the work is 6” x 6” in size. 

My immediate reaction was to reply “Thanks for thinking of me, but I don’t work with anything that small…” however as I considered Brandt’s invitation I thought “that’s an interesting challenge” so I began playing with an idea.

6″ x 6″ – #2

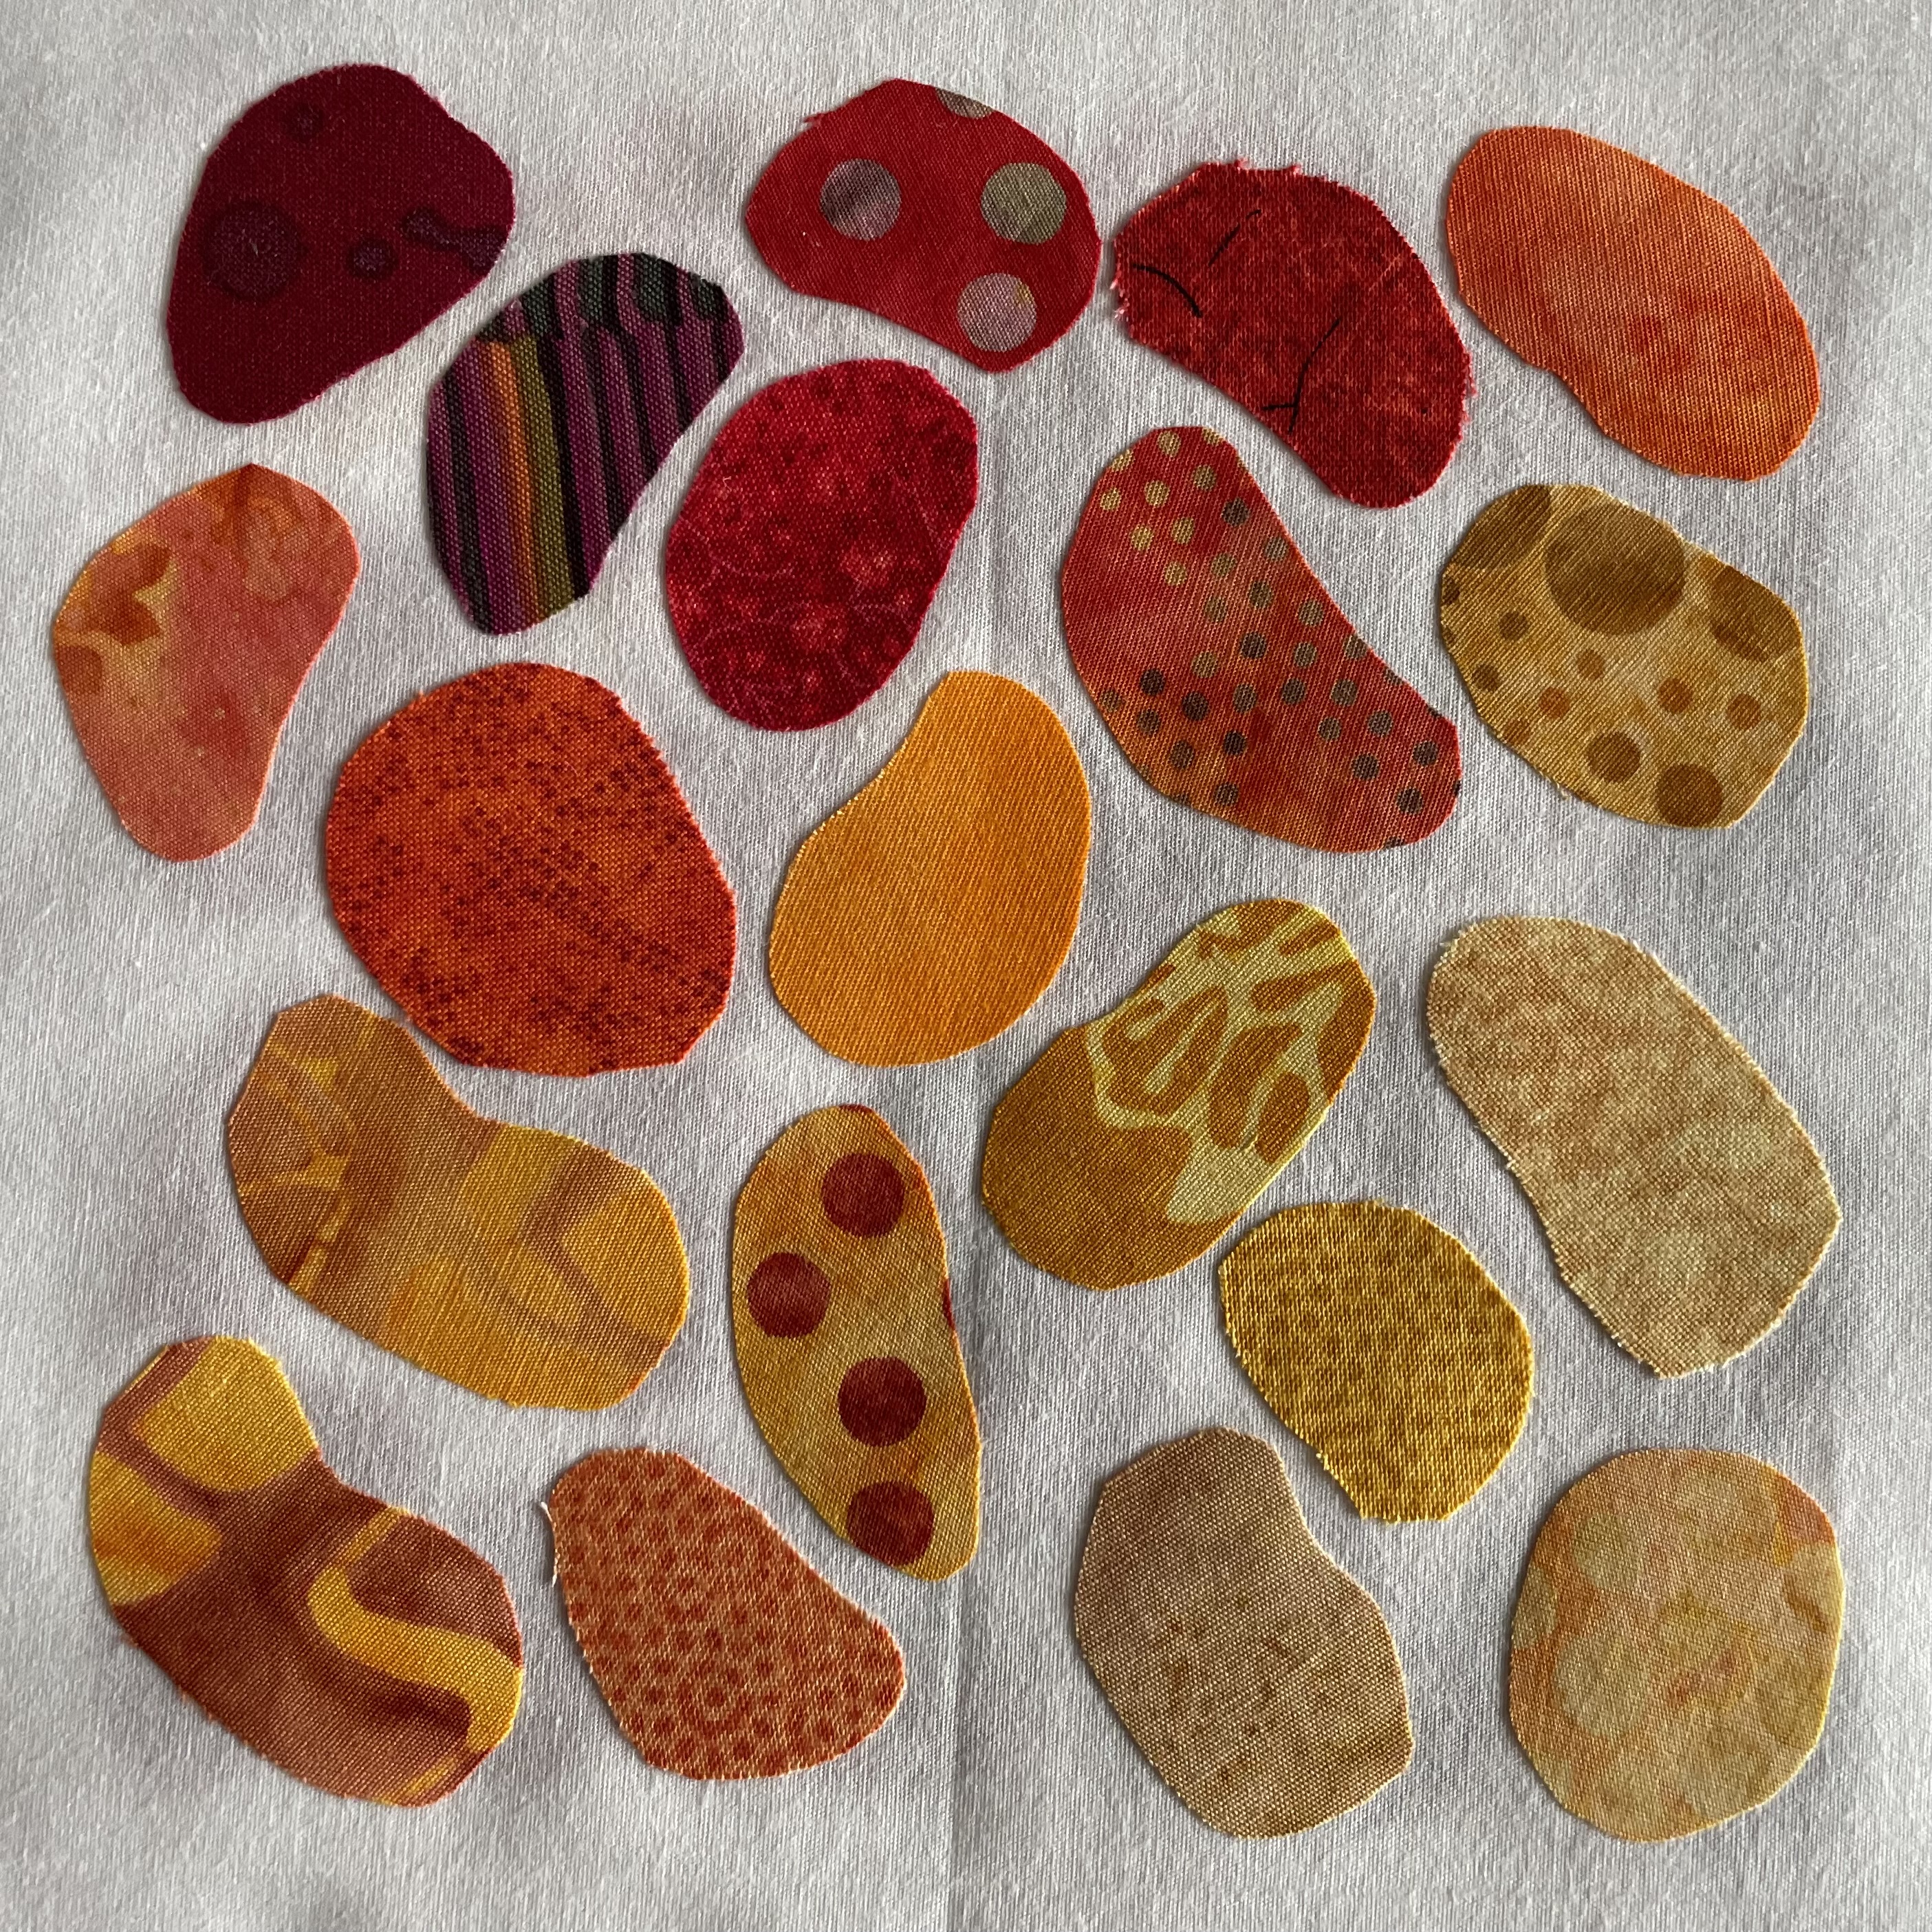
I cut out a 10.5″ x 10.5″ square of white fabric, then went to the box of scraps with fusible web already applied, pulled out the bag with red/orange/golden bits and cut out “bean” like shapes. I drew a centre 6″ x 6″ block, then filled the space.

6″ x 6″ – #1

This is actually the first block I tried – after fusing the beans in place I edge stitched each, changing thread colour as I went along. The stitching took time, but it went reasonably quickly – fast enough that it was worth trying more (hence the second incomplete panel above).

Each piece needs to be signed. I sign my work with a machine embroidered signature. On a piece as small as this, the signature needs to be small! I spent several hours trying various fonts in my embroidery software but none is set up to create a stitched signature small enough. I wrote out my signature, tried using it as background to create an embroidery – those didn’t stitch out well either. I went back the lettering function on my machine – I got closer but size is still a problem.

After stitching a dozen or so variations of a signature (Newman 2022) I settled on one which I tested a couple of times.

Embroidery for Signature

Although I had tested the embroidery, when I finally added it to the completed panel it didn’t work out as well as I’d hoped. You can barely discern what’s there. So it’s back to the drawing board to see if I can work out something better.

The second challenge is how to finish each 6″ x 6″ piece – Brandt suggested I try mounting them over a 6″ x 6″ canvas – so I’ve ordered a dozen in that size to see whether that can work.

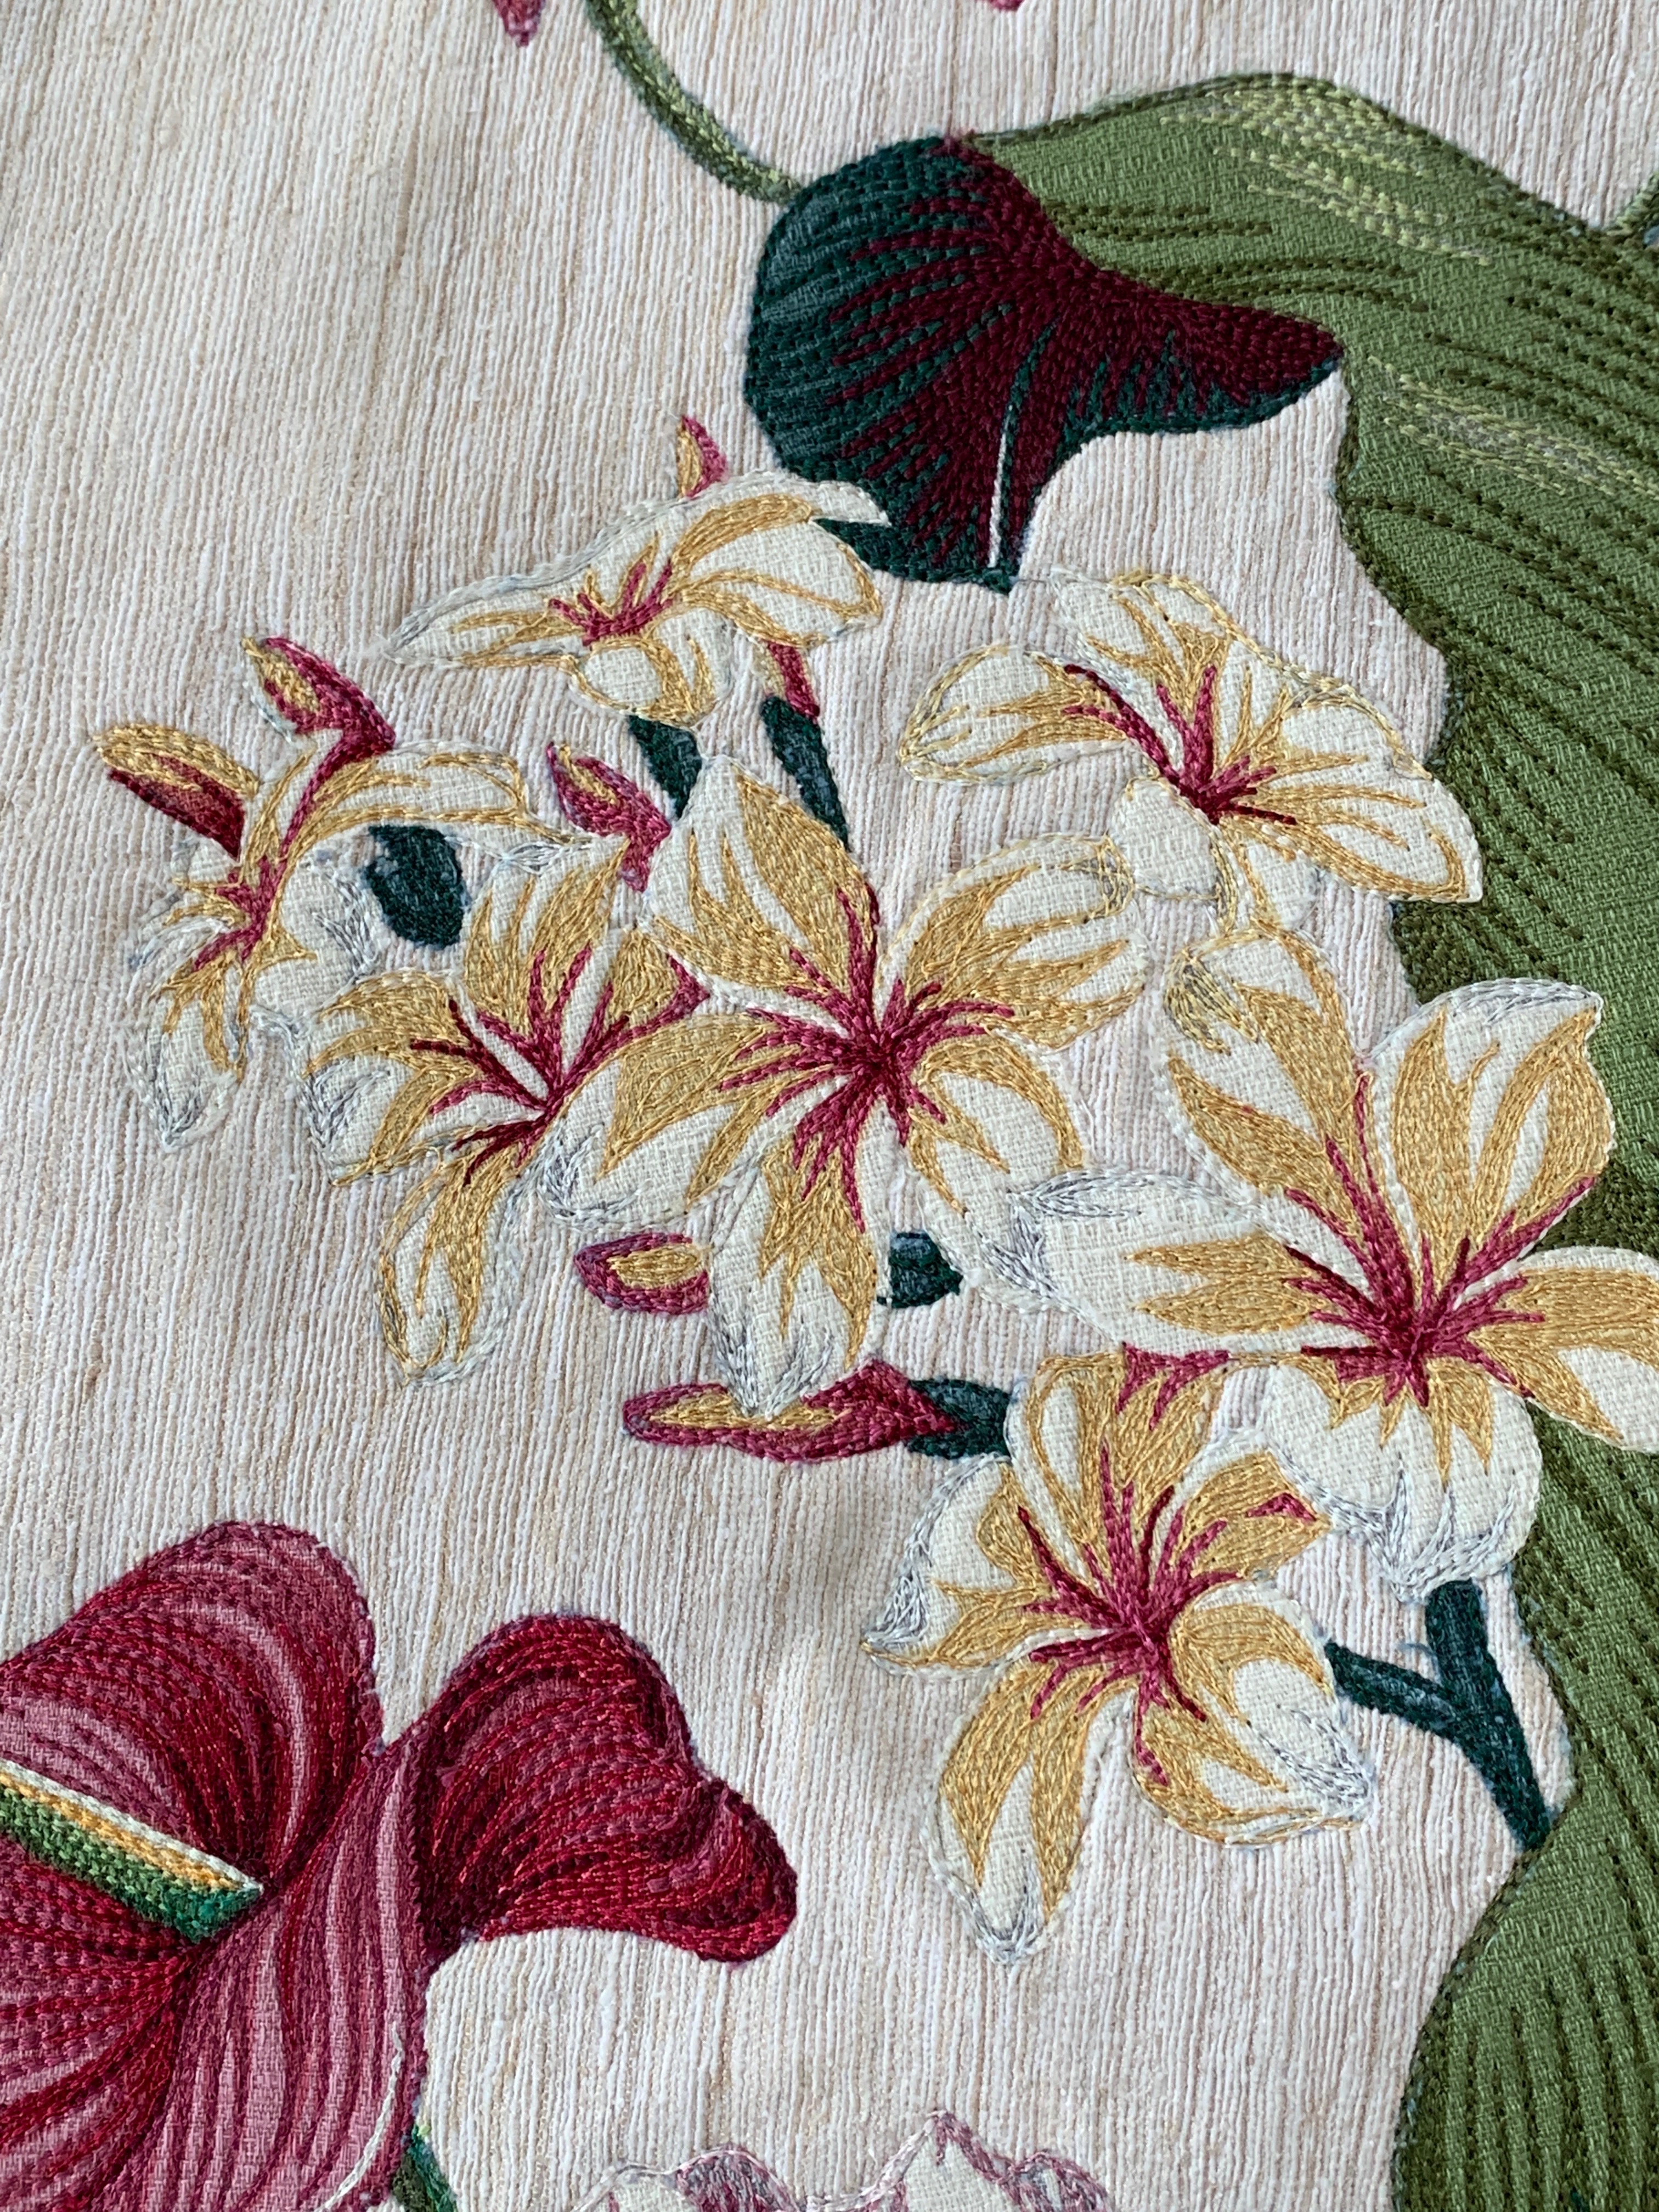
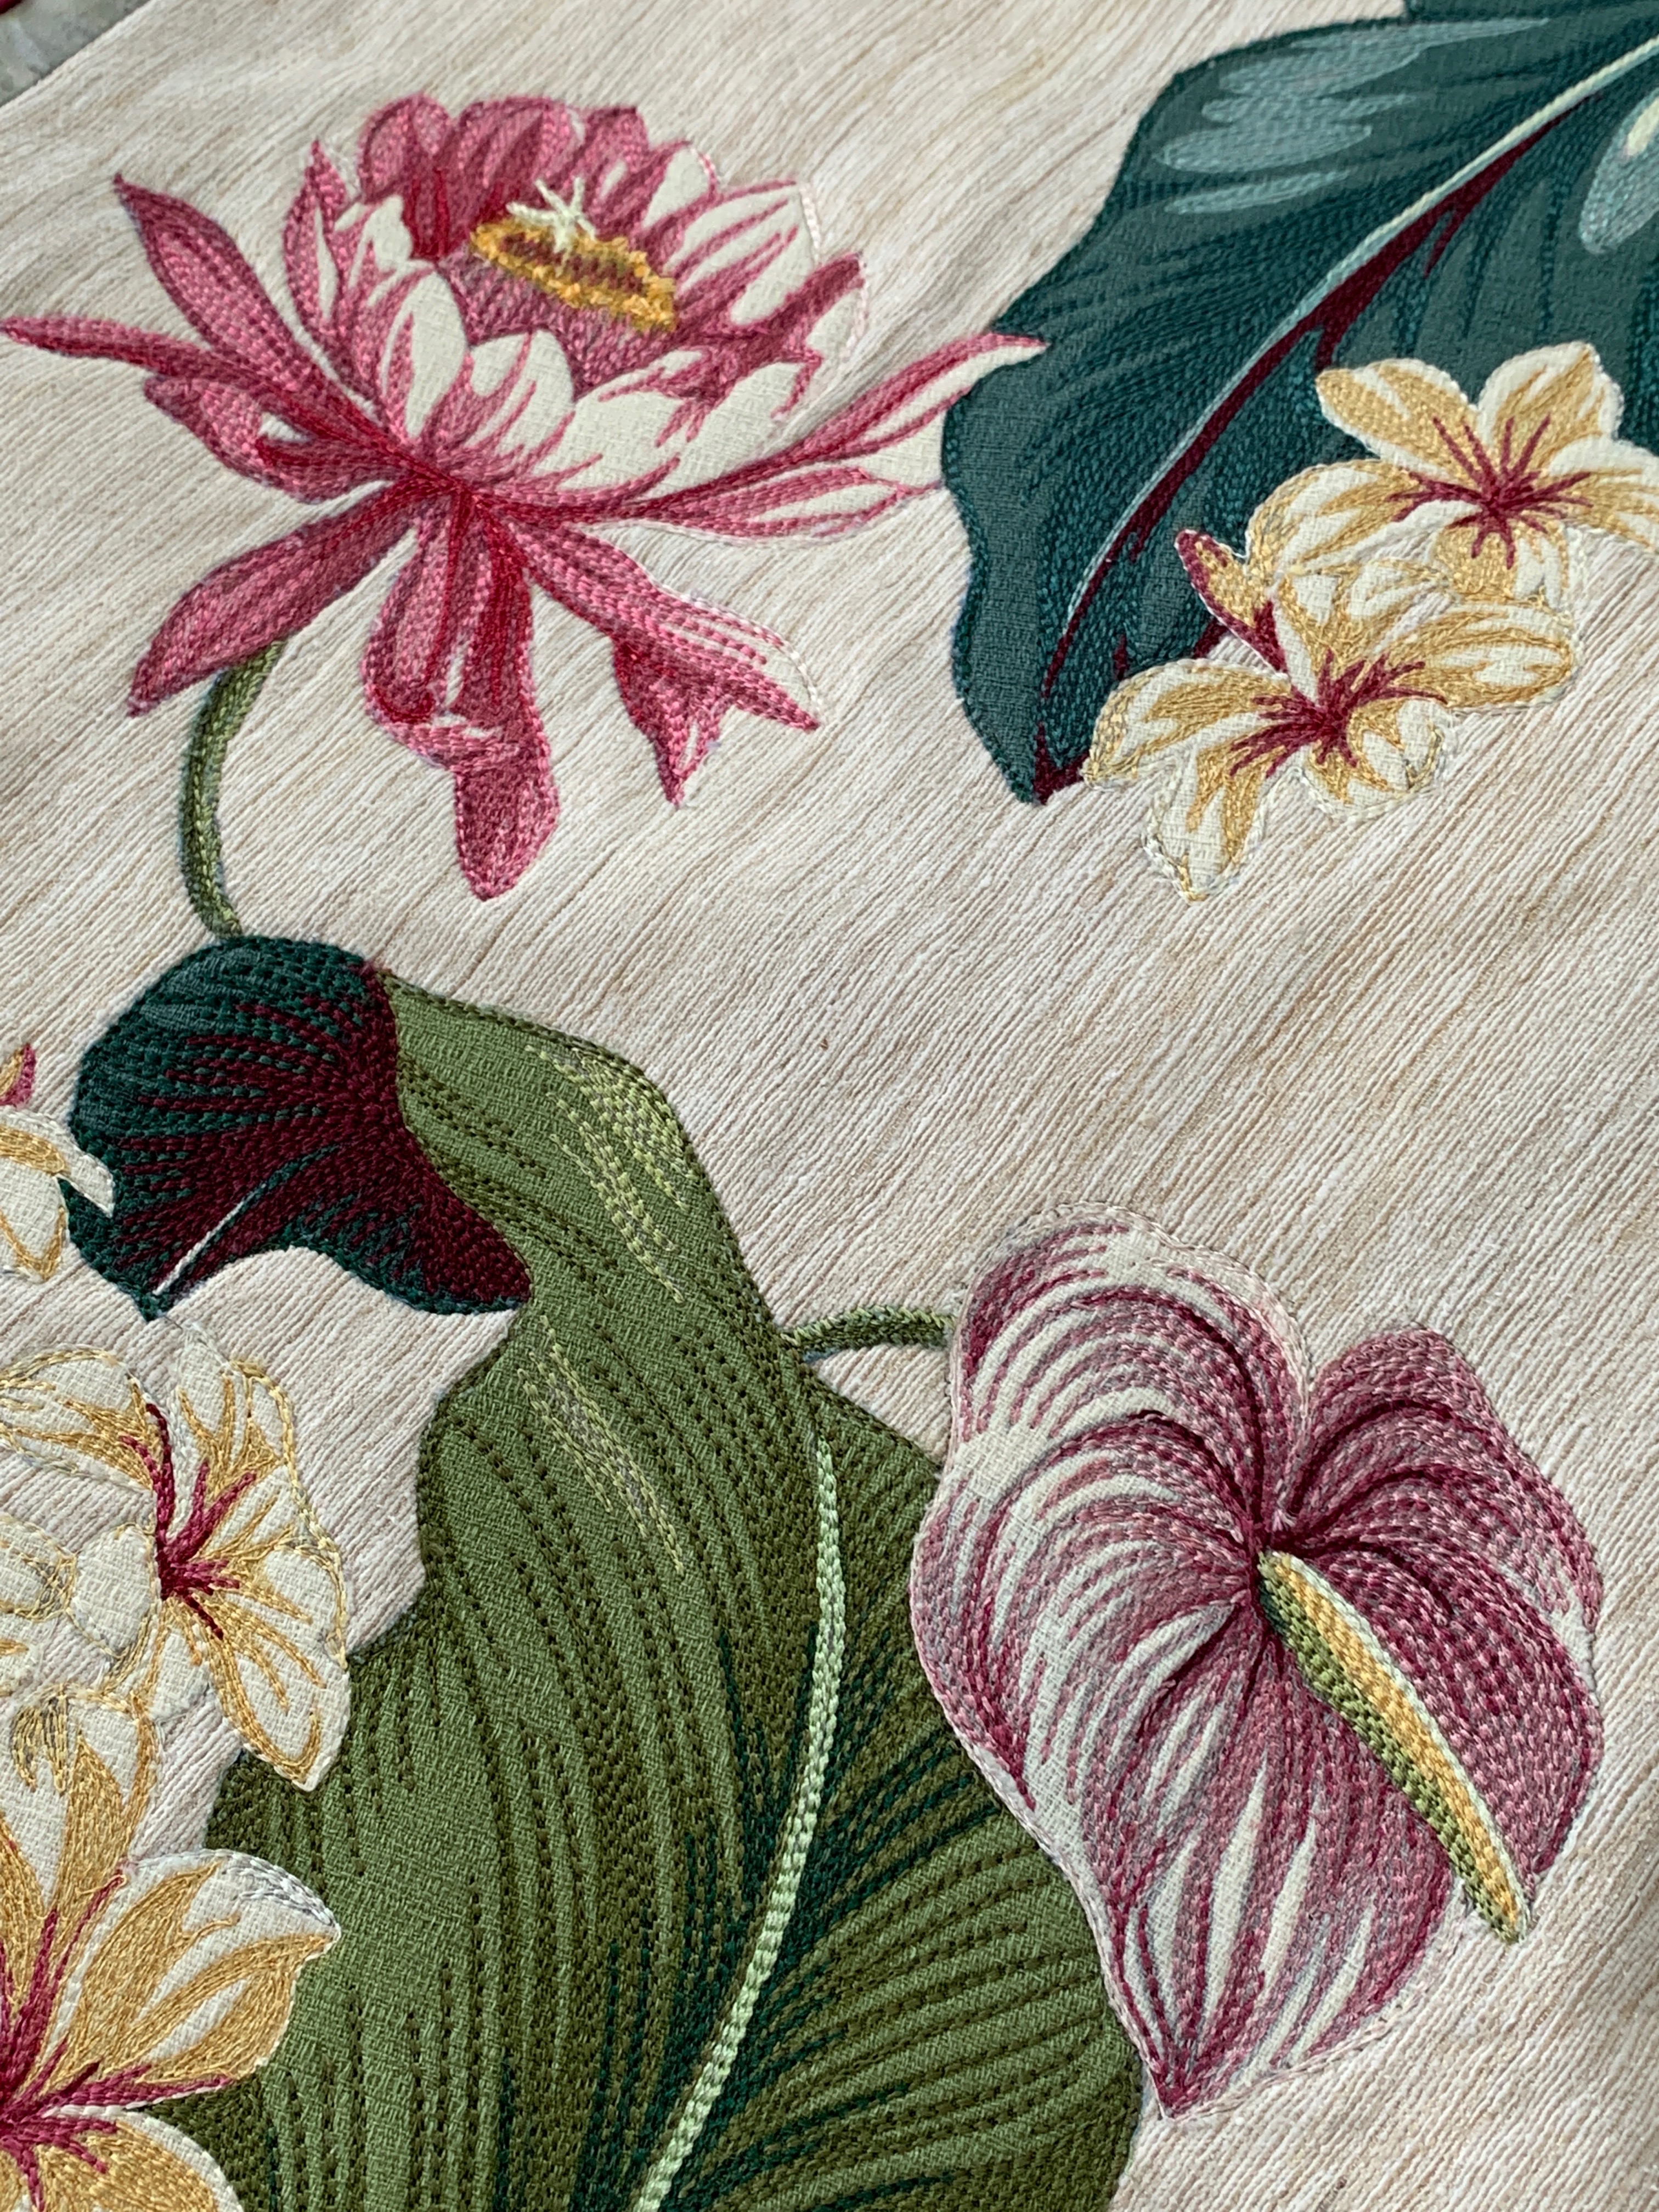
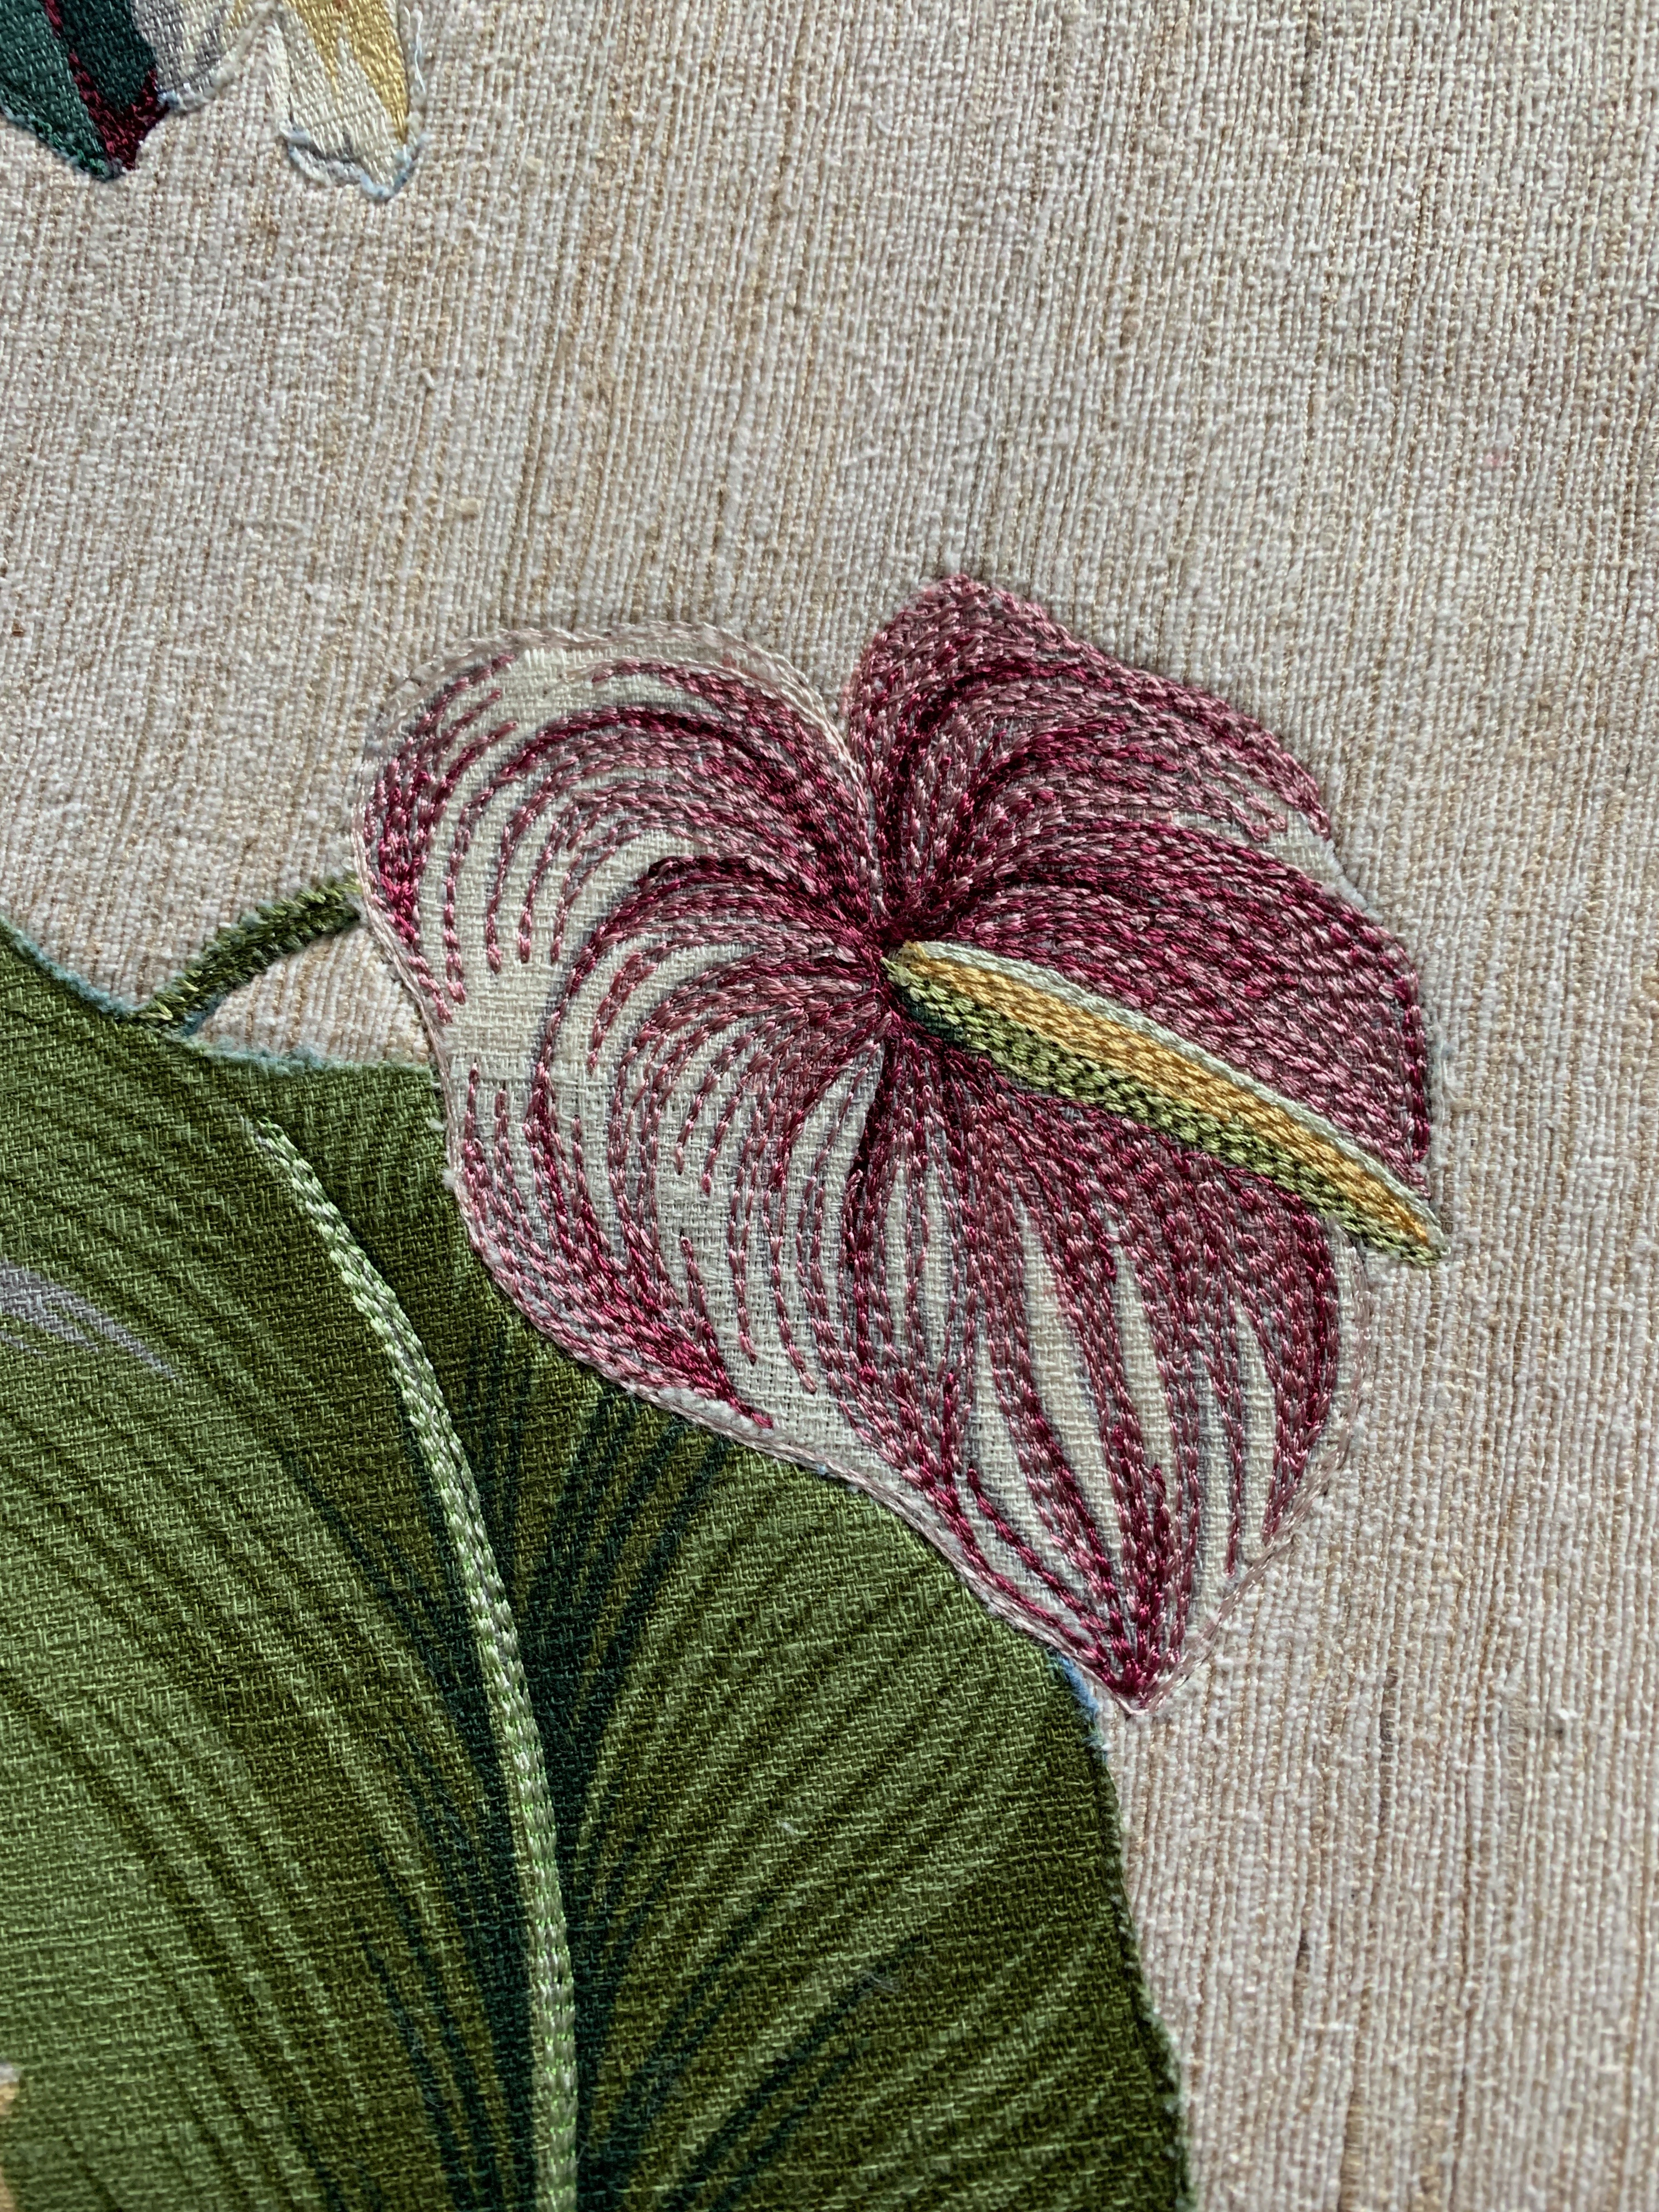
In the meantime, I have a bunch of ideas – appliqué flowers in this small format based on those I’ve done before, crazy-quilt blocks, tiny quilt blocks using a variety of piecings,… there are lots of possibilities. In the end Brandt wants up to 10 pieces of art – I’ll likely end up making quite a few more than that as I experiment with the size.

I had been wondering what to work on next!

At Five Islands

Immediately after giving up on the Diamonds Quilt, I turned to a new wall art project: At Five Islands.

I’ve written about my visit to the Five Islands Park this past July. While at the park, I managed to capture a photo of my friend Ruby who had been on the trip with me:

At Five Islands

I knew I would turn the photo into a piece of fibre art. I started by enlarging the photo so I could make the panel 15″ x 12″ and have Ruby still be prominent. Next I dug out a bunch of fabrics and scraps from the stash trying to match colour.

At Five Islands – Picking Fabrics

Then I sketched in some features (using a Friction pen which will disappear when I fuse fabric elements in place).

At Five Islands – Sketching The Scene

This morning I started cutting small bits of fabric to “paint” the scene:

At Five Islands – Preliminary Layout

Nothing is fused in place yet. I’m still trying to get the feel of the layout. I can see I need to squash the vertical aspect quite a bit because I want Ruby’s head to be well above the landscape behind her.

The challenge with this piece is getting the feel of the wet mud flat of the Bay of Fundy at low tide. Yesterday I painted a piece of fabric using an acrylic wash but the colour is much too bright for the scene. I need something quite a bit darker; I also need to cut away much more.

St. Margaret’s Bay

I have been studying a couple of my watercolour paintings of the ocean – I’ve spent hours in front of them trying to understand how to set up the mud flat. Because the water reflects the sky it has to be the same colour – it’s the subtle shadowing of the “land” elements that make us read “water”. With watercolour, the water is painted first with the darker land elements added after the water has dried. I need to do the same with my piece – lay down the water fabric then add strips representing “mud” on top. The thread painting will fill in the flow of the remaining surface water on the mud.

Next step is to add fusible interfacing to each of the small fabric pieces, shape them, then fuse them in place.


Bargello Table Runner IV

I finally finished the 57″ x 16″ Bargello table runner last evening. It took me several hours over two days to stitch the whole thing in the ditch – that was because I was changing thread colour and having to stitch on the zig-zag.

Bargello Table Runner – Finished

I thought about quilting the piece in the hoop for quite a while – doing an edge-to-edge style of design along the length – but I decided it would detract from the bargello detail. In this case, I also stitched through the backing, which meant I needed to add a binding. I chose a 1/4″ binding on the front but 3/4″ hand stitched down on the back.

The original Bargello piece is also finished – it’s the inverse of the longer table runner with a dark, rather than the light, centre.

Bargello Table Runner I

I’m teaching a class in two weeks on how to improvise a Bargello block and how to think about layout for a table or bed runner, a cushion, a wall hanging, or a quilt. The point will be to understand how the quilting version is derived from wool on canvas work and uses the same math principles.

For the class, I will need to set up another Bargello piece so I can demonstrate forming the tube stitched from 10 strips, cutting, and laying out the Bargello array. Better think about that in the next day or two.

Here are instructions for this table runner –  Download the PDF

Two Projects – Same Fabrics

I finished the hand work last evening on this project – what started out to be a central motif for a medallion quilt, turned into a wall art piece.

Finished Wall Art Piece

I added the bright, strong narrow outer border and finished with an embroidered signature (on the bottom right side) and hidden bindings. Finished size: 20″ x 24″ – a good size for a wall hanging.

Today, I assembled the blocks for the original lap quilt project – a simple but colourful construction which I began at the sewing retreat. The half-square triangles used in the wall hanging came from the corner offcuts from the quilt blocks so you can tell how small the half-square triangles really are.

My intention is to add a 3″ light grey border using one of the paler fabrics from the panel with no narrow border but I’ll see over the weekend when I get back to this whether that will seem right, or not.

Same fabrics, two very different feels. That’s what I love about working with textiles – I’m never sure how any project will turn out – I start with an idea, a stack of fabrics I think will work together, and see what emerges.

Medallion Quilt II – Comment

Just on the phone with a very close friend who thought my medallion panel was striking just as it is – make an effective wall art piece, she thought.

Medallion Quilt – Centre

I certainly wasn’t seeing it that way – in my head I was working on something much larger. Now I have to rethink the whole thing. Maybe just one more border in a darker grey to finish it off?

Decisions, decisions….

Magical Garden – Colourwash Quilt II

This past couple of weeks I’ve been teaching a class on improvising wall art and I’ve been working on four Skinny Quilts/Banners myself as part of that project. The other day when I finished embellishing each panel (although I still have to bind each one), I thought about another project that might interest the gals.

Magical Garden

Last spring I attempted a watercolour quilt – made from many 2″ blocks cut from small print floral fabrics to use the colour in the squares to “paint” a canvas. I have many bags filled with 2″ squares (light, medium, dark) and thought this might be an idea to interest the women.

I laid out an array (9 x 12) creating a colour flow across the surface, stitched the  pieces together and took it to class yesterday to share with the women. Today, I decided to finish the piece with a narrow inner border, a piped border, and a wider dark border.  I’ve added a hidden binding and backing – I just need to do the hand stitching to tack the binding in place.

The photo doesn’t do the panel justice – the prints are all quite sharp and showcase the colour flow rather better than the photo would suggest. Looks like this might be a go for January. The women all thought it would be fun to attempt something like this.

Art Lab Showing 2019

Drove yesterday to Parrsboro, NS to set up a show of 22 quilts and wall art pieces which will hang in the Art Lab Studio and Gallery until August 30.

I’m always amazed at what my work looks like when hanging together like this – I can see just how much I accomplished in a year.

The reaction of the visitors yesterday at the opening was encouraging – people were interested in how I constructed the wall art, particularly those pieces with photo elements printed on cotton.

It seems the favourite pieces, they got a lot of attention, are the modern “flower” appliqué hangings. I thought the “banner” pieces might generate interest but the flowers seem to be winning out.

Until I saw the show hanging, I hadn’t realized how much turquoise featured in my work this year. It shows up in quite a few of the quilts and hangings as a highlight colour.

Tropical Flowers – I Can’t Believe It’s Finally Done

I finished thread painting yesterday afternoon. I added a muslin backing and hidden binding. This morning I hand stitched the hidden binding in place. After all this time (I actually started this raw-edge appliqué piece on May 17, 2018) I have it completed – absolute done!

Tropical Flowers – Finished!

The project sat around for months while I worked on other things. I started thread painting this piece on Jan 8, 2019 because I was teaching a class on thread painting and had to have something to work on myself. I got into the thread painting seriously after Jan 17 – when I completed the framing (I’d done that early in the process because I wanted the women in the thread painting class to see how I go about finishing my work). I spent time filling in leaves, then flowers. In the beginning, each leaf took a day or three to complete.

I was sure I’d taken on more than I’d expected when I started out. But as days went by I could see I was making headway. Jan 20 – one leaf finished; Jan 22 – a second leaf; Feb 11 – I got back to the piece (after working on some new quilts and planning two wall art pieces) and finished an Anthurium; Feb 12 – more progress; Feb 13, Feb 17, Feb 18, Feb 20 – I continued thread painting elements until yesterday when I stitched the last of the Plumaria!

People often ask – “How long did a particular piece take”? It’s not a simple question. As you can see, I started this piece on a whim back in May, it sat around for several months before I returned to it. The thread painting was slow going to start with but as I made progress I was able to stick with it for longer. When nearing the end I worked on and completed elements in a single sitting (although I felt tension in my neck and upper back).

You can’t see the thread painting in the upper photo – here are photos of the detailed work:

Epiphyllum – Detail


Plumaria – Detail


Anthurium – Detail

I feel a weight lifted having finally completed this work. The gals in the thread painting class are meeting again on March 5 – my piece is done. We’ll spend time that day working on framing and finishing, even if their thread painting isn’t completed. I want to create motivation for finishing their projects.

Tomorrow I’m going to return to Poppies which I began Feb 4. Time to get back to that and to Two Men in Cortona.


Tropical Flowers – An End In Sight…

An end is in sight – I’m now working on the last elements – the Frangipani/Plumaria flowers. Are they ever tedious to work on. I’ve managed to stitch the dark red/medium red central elements of all the flowers. I’ve just finished the yellow petal colour on two of them!

Frangipani/Plumaria

That leaves two small clusters of two/three blooms and one larger cluster of 7 flowers/6 buds to do. I’m going to work on the small clusters first – getting those done will make the task seem smaller. I’ve reached that point in the project where I just want it done. I’m tired of the careful, meticulous stitching. I want to get on to other projects including a couple of pair of corduroy pants that have been on the to-do list for quite a while.

This is it for today. I’ll get back to this tomorrow – maybe I’ll manage to get the two smaller clusters done which will leave just the larger one to complete – maybe on the weekend. Yeah!


text

Tropical Flowers VI

I wasn’t planning on working on this anthurium but I had the medium pink thread on the machine so I started stitching. Once that colour was filled in, it just made sense to carry on with the pale pink and then finally the white. My plan was to fill in the grey using colour and I think the shading works well.

Anthurium 3

To see the contrast, here is the panel before I’d done any thread painting – you can see this anthurium is almost entirely shades of grey. In the finished flower, a hint of grey is still apparent but the overall sense of the flower is rose pink.

Tropical Flowers – Before Thread Painting

I’ve made headway with the epiphyllums as well – here’s the lower one with the darker greys thread painted with the deep rose thread pair. Maybe later this afternoon (its a full-blown blizzard outside – not leaving the apartment today) I’ll get back to it.

Epiphyllum – Thread Painting In Progress

It really is a blizzard – visibility is much worse than the photo below suggests – I can’t really see the trees across from the parking lot. It’s turning to freezing rain – I can hear ice pellets hitting my windows. Expected to continue as freezing rain until this evening when the temperature will get above freezing but there won’t be much melting until Friday/Saturday when it will be warm enough to rain (which is forecast).

Blizzard

This is winter life in Nova Scotia – freezing rain followed by snow followed by freezing rain – makes for very hazardous driving conditions. Everything is cancelled today – no school, no university, the games centre is closed, and on and on. Good thing my freezer is stocked – lots of soup and chili. Just keeping my fingers crossed the power stays on!