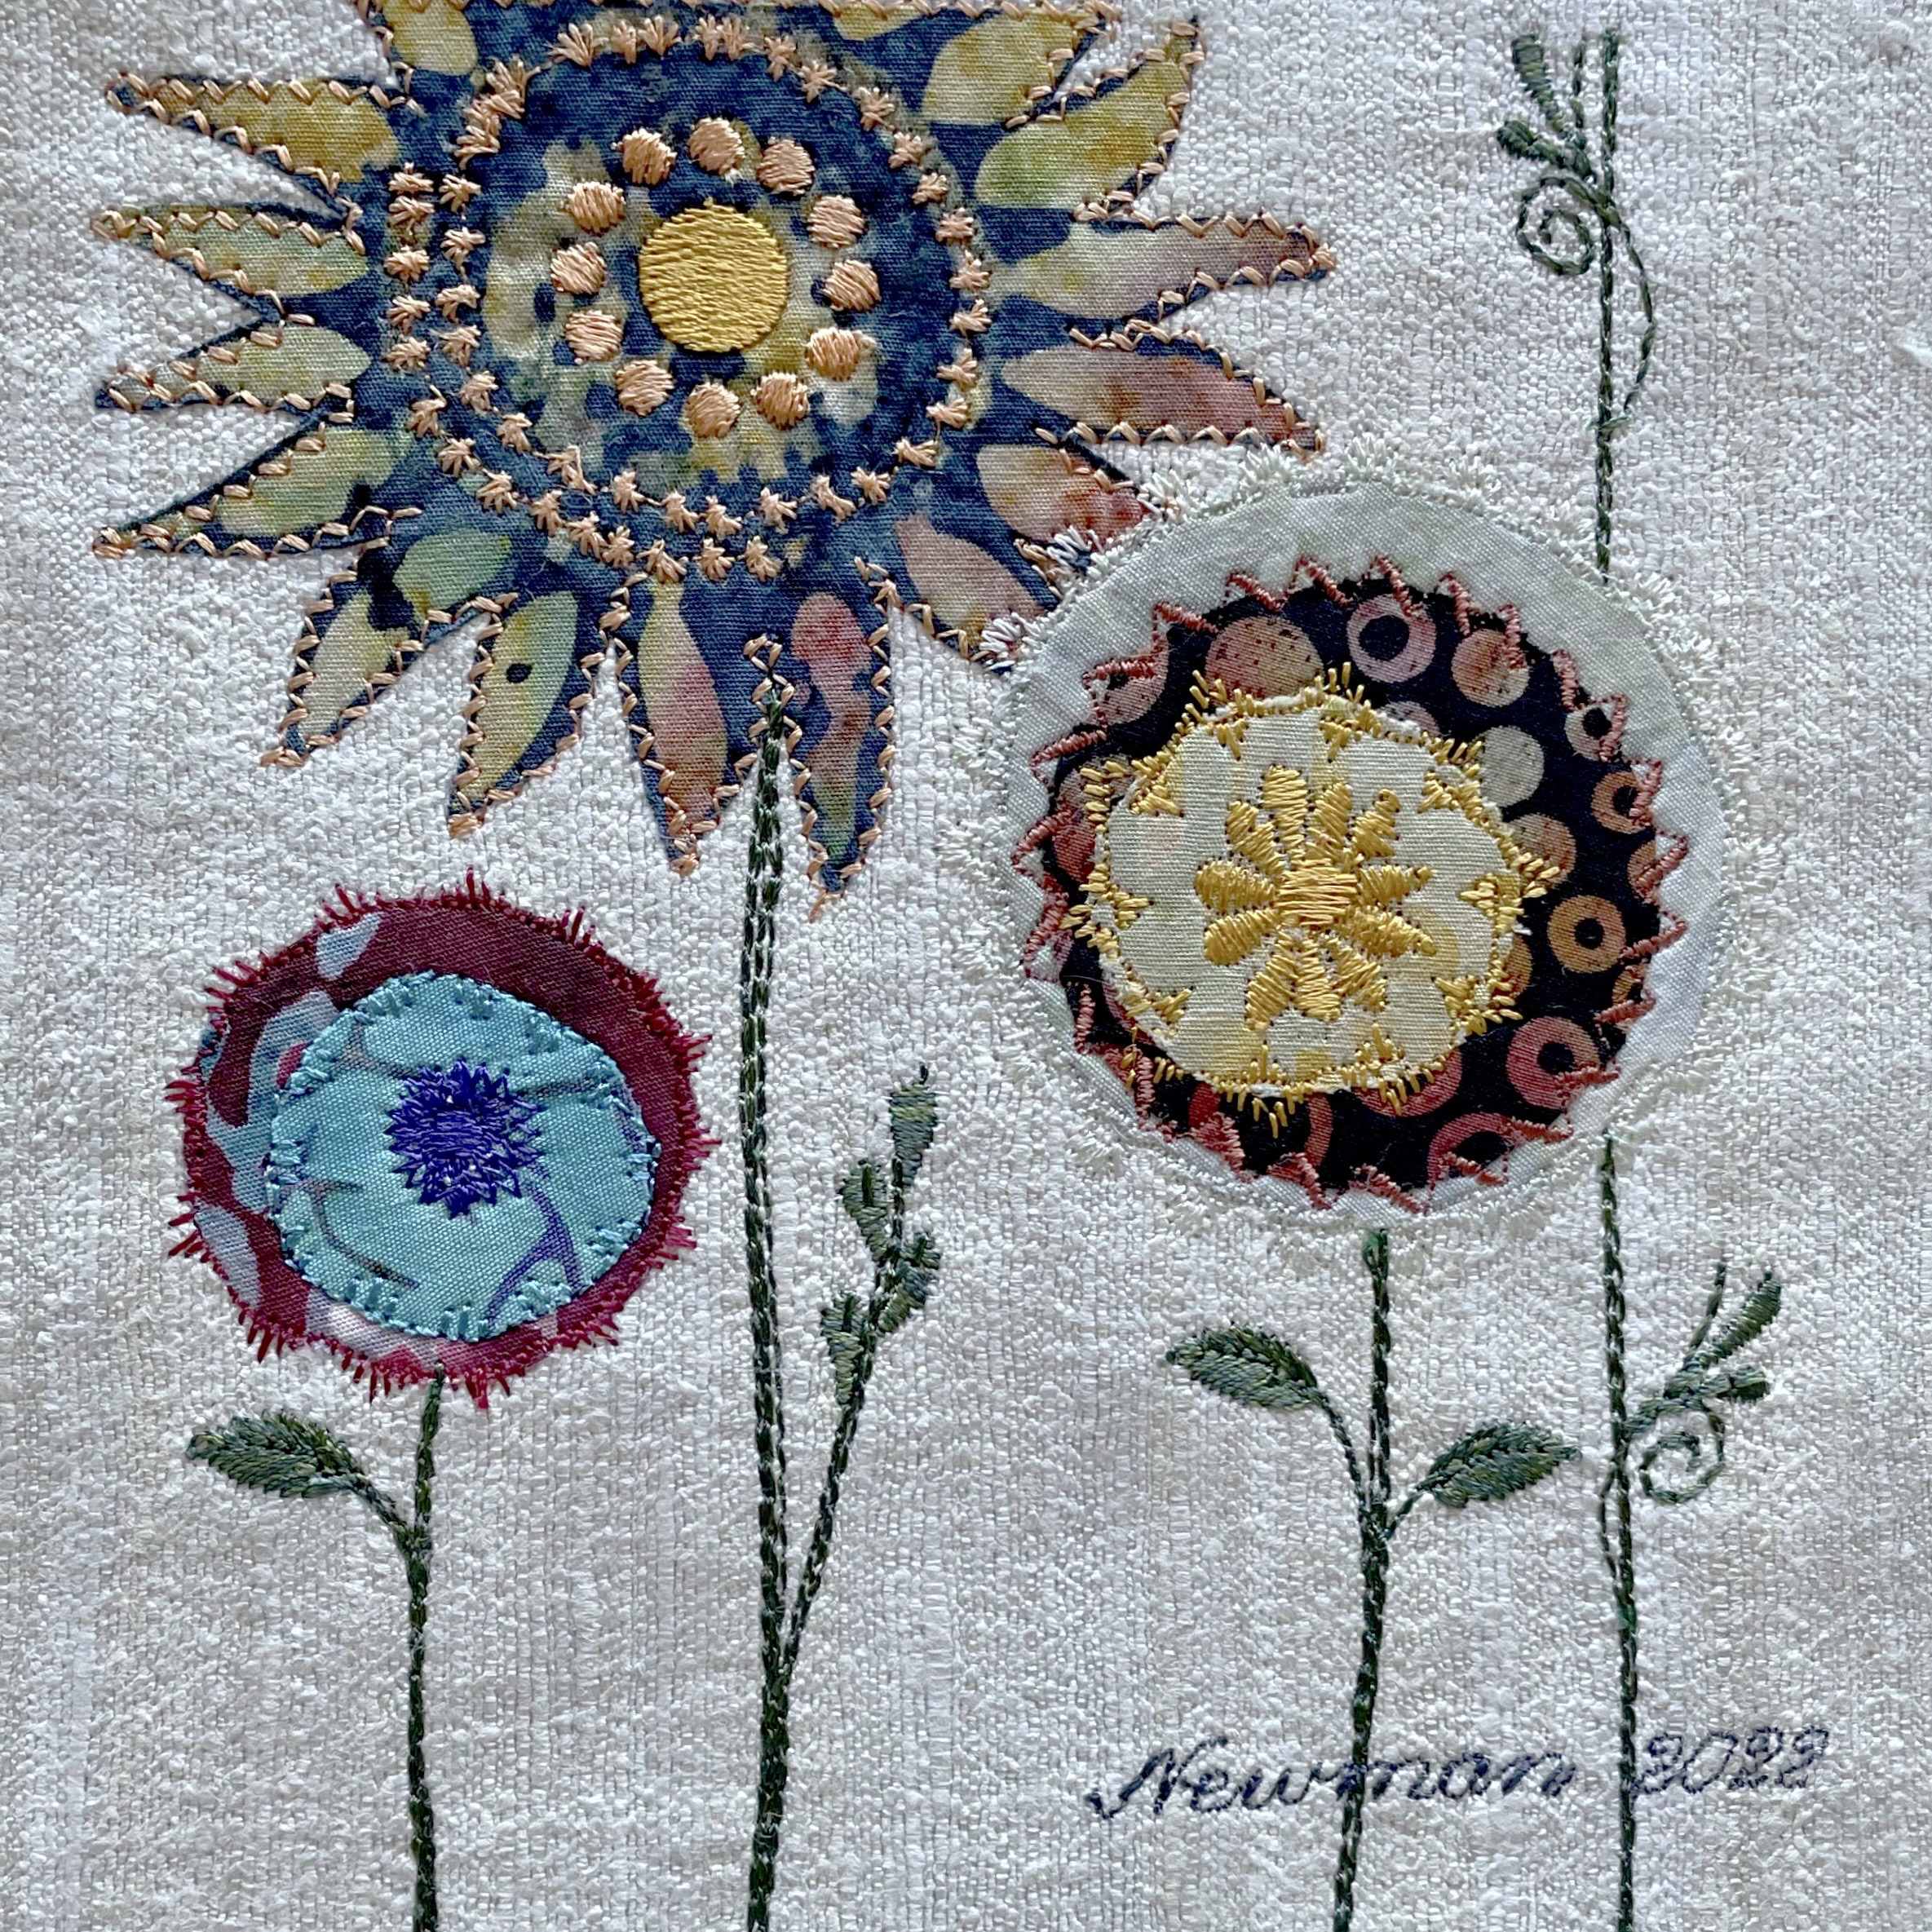
I finished up the panel I was working on yesterday and completed a second today. I’ve got a better handle on how to make the outline flower stand out by how I position the underlying circles and setting the leaves so they appear to be under the flower petals. I also downsized the signature a bit so it’s less prominent. I think this idea is now working.
I left for Truro around 4:30. The drive took just under an hour. I’d taken a friend with me – conversation always shortens the trip. We had time for coffee (and a sliver of peanutbutter cream pie – yum!) before Christene Sandeson, the person with whom I’m sharing the gallery space for July/August at NovelTea Cafe, arrived.
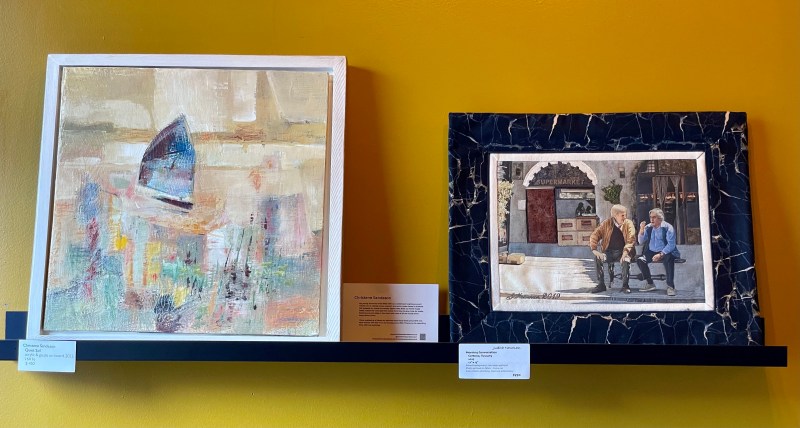
We got work straight away – each of us laid out the work we’d brought, tentatively placed it on the various display shelves then moved pieces around to better balance size and colour against one another and against the background walls. Didn’t take long – we were finished in less than 45 minutes.
Without discussion we intermingled our work – it just seemed to look better with Christene’s and my pieces side by each rather than trying to cluster each of us separately. We were both happy with how the final hanging looked.
We’ll meet again at the end of August when we arrive to take down the art. Perhaps we’ll make time then to have coffee or a meal together!
The ViewHuntington BeachOn Deck / Two Boats / Study In Pink
I see it’s been three weeks since I commented on what I’ve been working on – that’s because I’ve been busy with all kinds of stuff, including a short trip to Toronto (more about that tomorrow), picking up the quilts in Parrsboro, knitting socks, and I don’t know what else. Time has disappeared on me.
On the way back from Parrsboro last Saturday I stopped at the Joy Laking Gallery in Portapique. As always, her paintings are worth a stop. What also caught my attention was her front porch – gorgeous iris beside the path:
Blue Flag Iris
This flower will likely become a 6×6 piece in the near future. And on her front stoop:
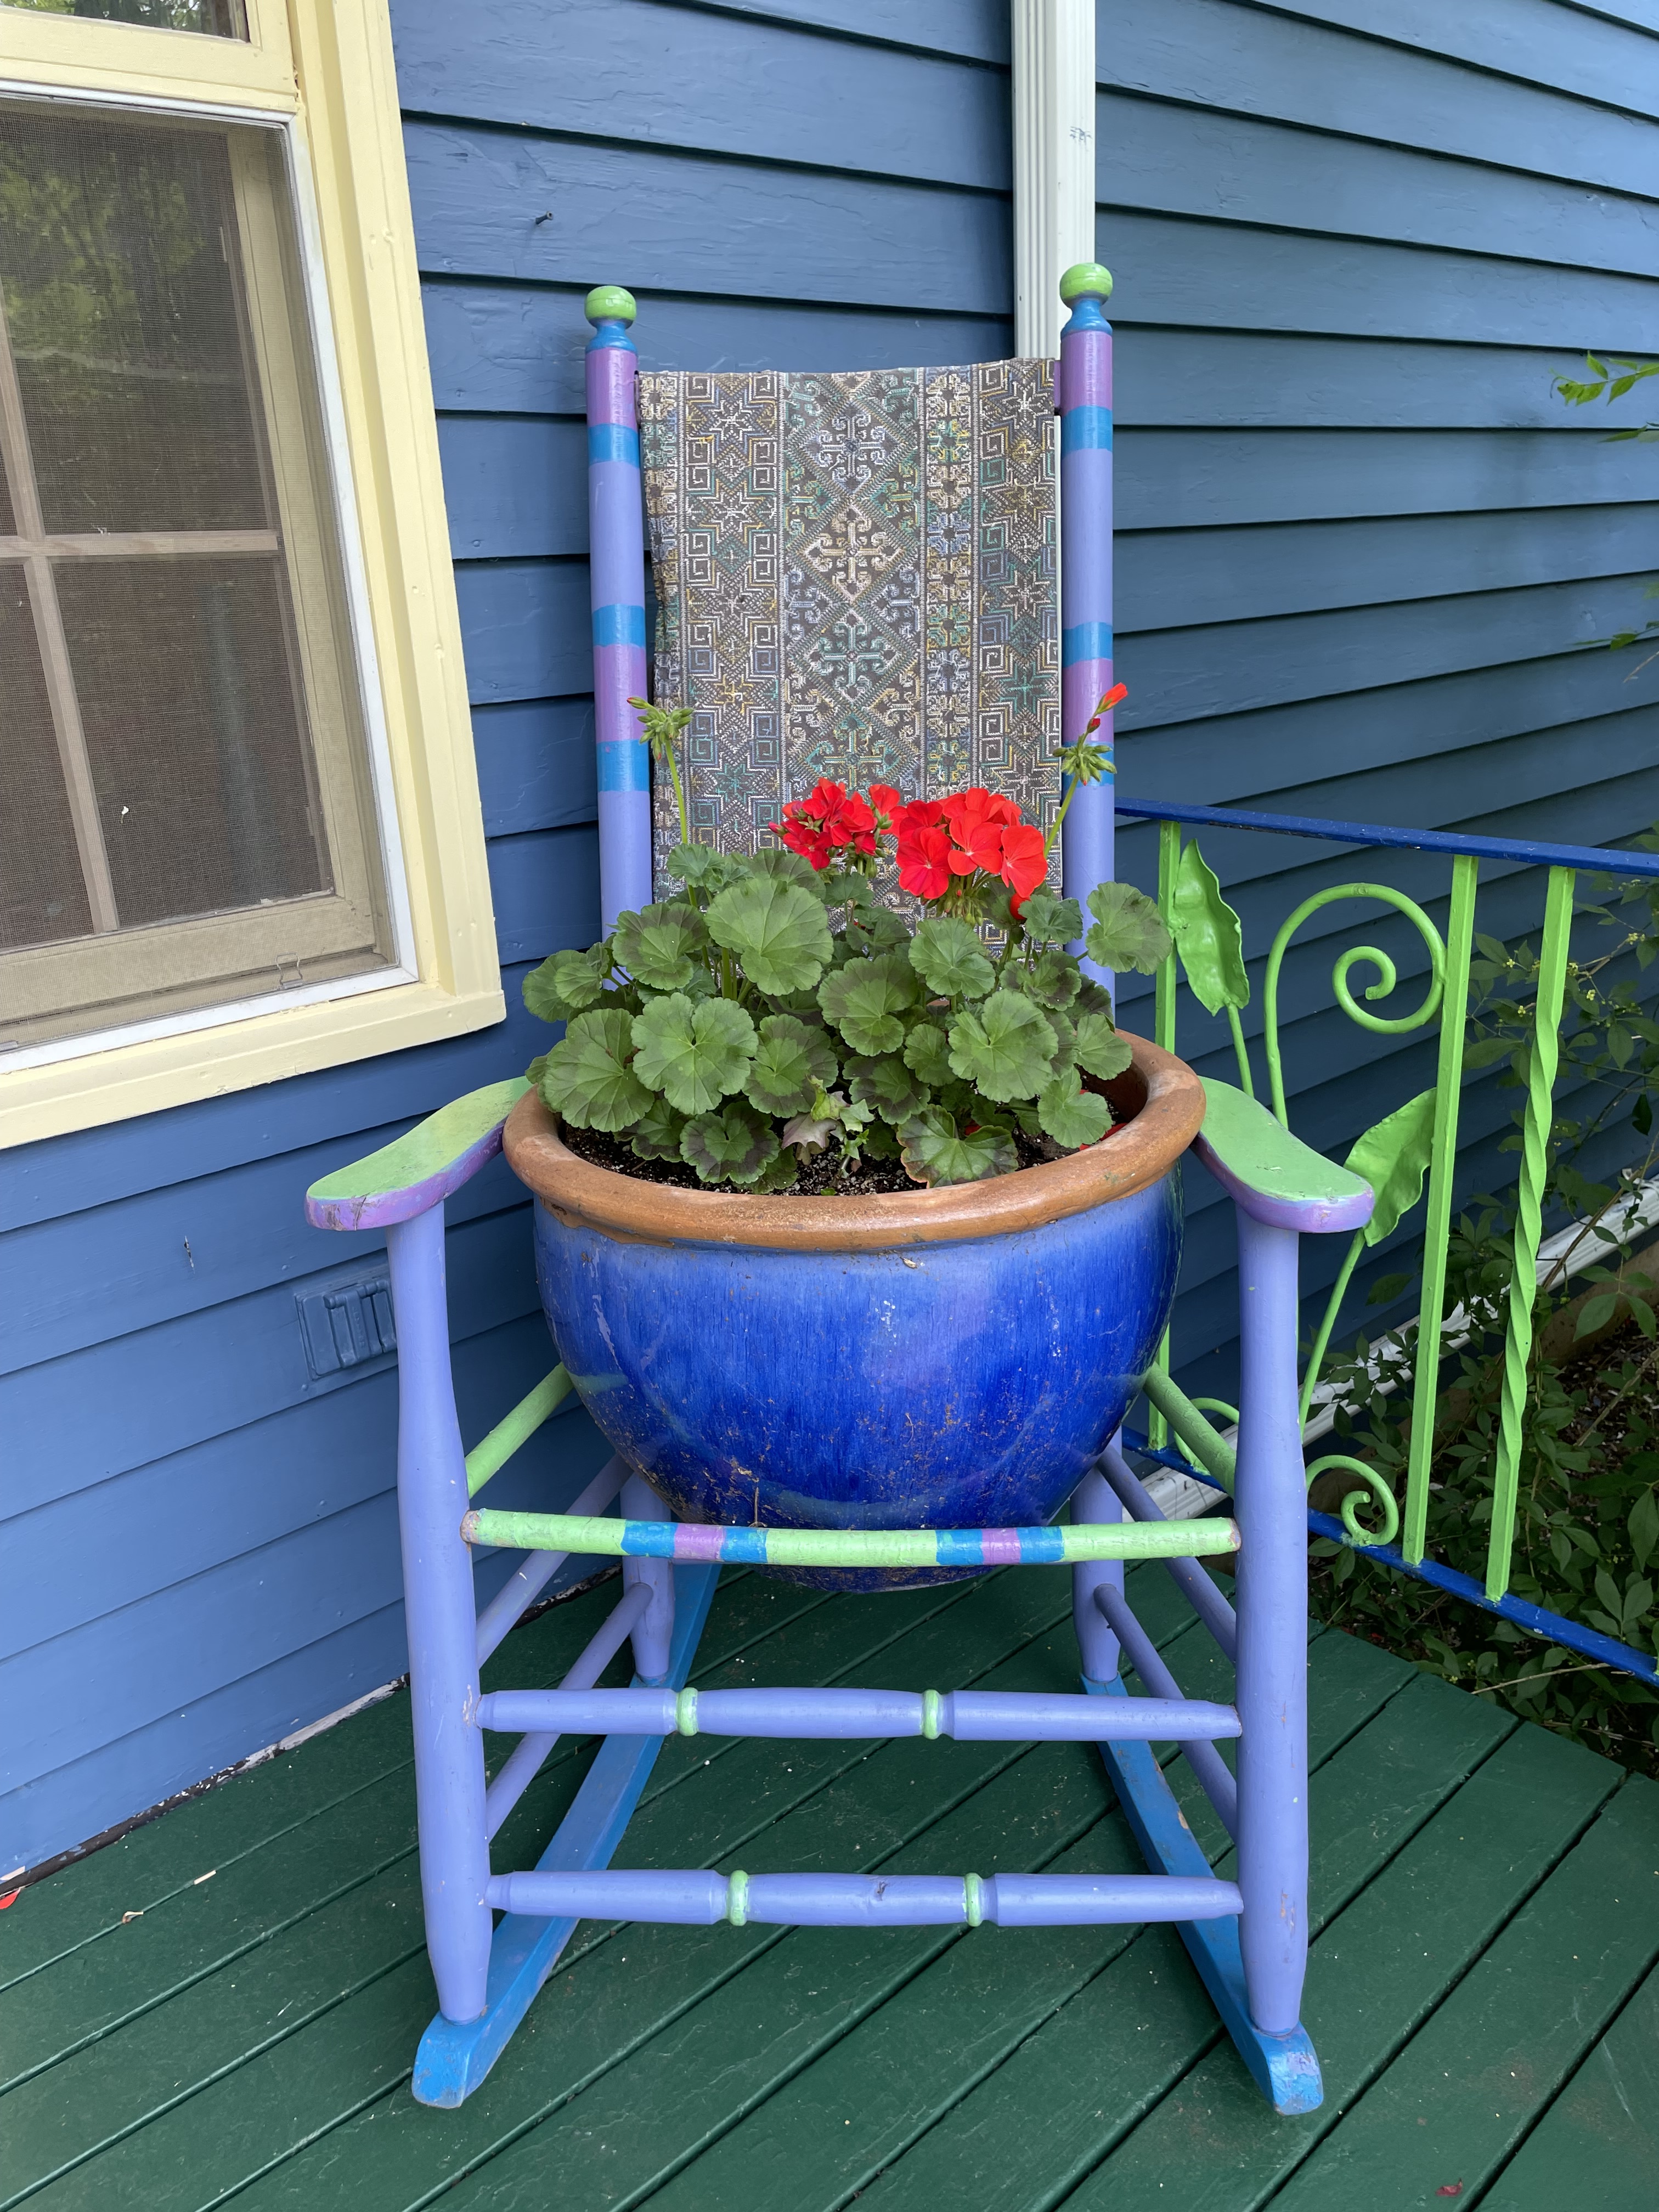
Geraniums
Love the colour composition. I can see this photo becoming a photographic hanging (without the downspout in the background).
In about an hour I leave for Truro to hang nine photographic wall art pieces (plus three others) for the next two months in the NovelTea Bookstore and Cafe on Prince Street.
Ready For Showing
I stabilized each hanging with a piece of foamcore that extends 1/4″ below the hanging so that it can sit on a shelf without impacting the lower edge of the hanging. I’ve put a note on the foamcore saying it’s a temporary solution so I can display the piece, it can be removed for hanging (or not). Textile hangings are, of course, soft not rigid. To display them on shelves I had to improvise a solution. This seemed the easiest way to accomplish that.
I’ll post picture of the show in the Cafe Gallery when I get back.
The show was hung on Friday morning after our two hour drive from Halifax to Parrsboro. I’ve shown in the gallery enough times that knowing what I wanted to hang, where, required little deliberation. I knew I’d brought exactly the right number of pieces to display.
The show consists of eight lap size quilts, accompanied by two panels each with an array of 6×6 pieces – a total of thirty pieces of textile art. A respectable amount of work.
As you enter the gallery space
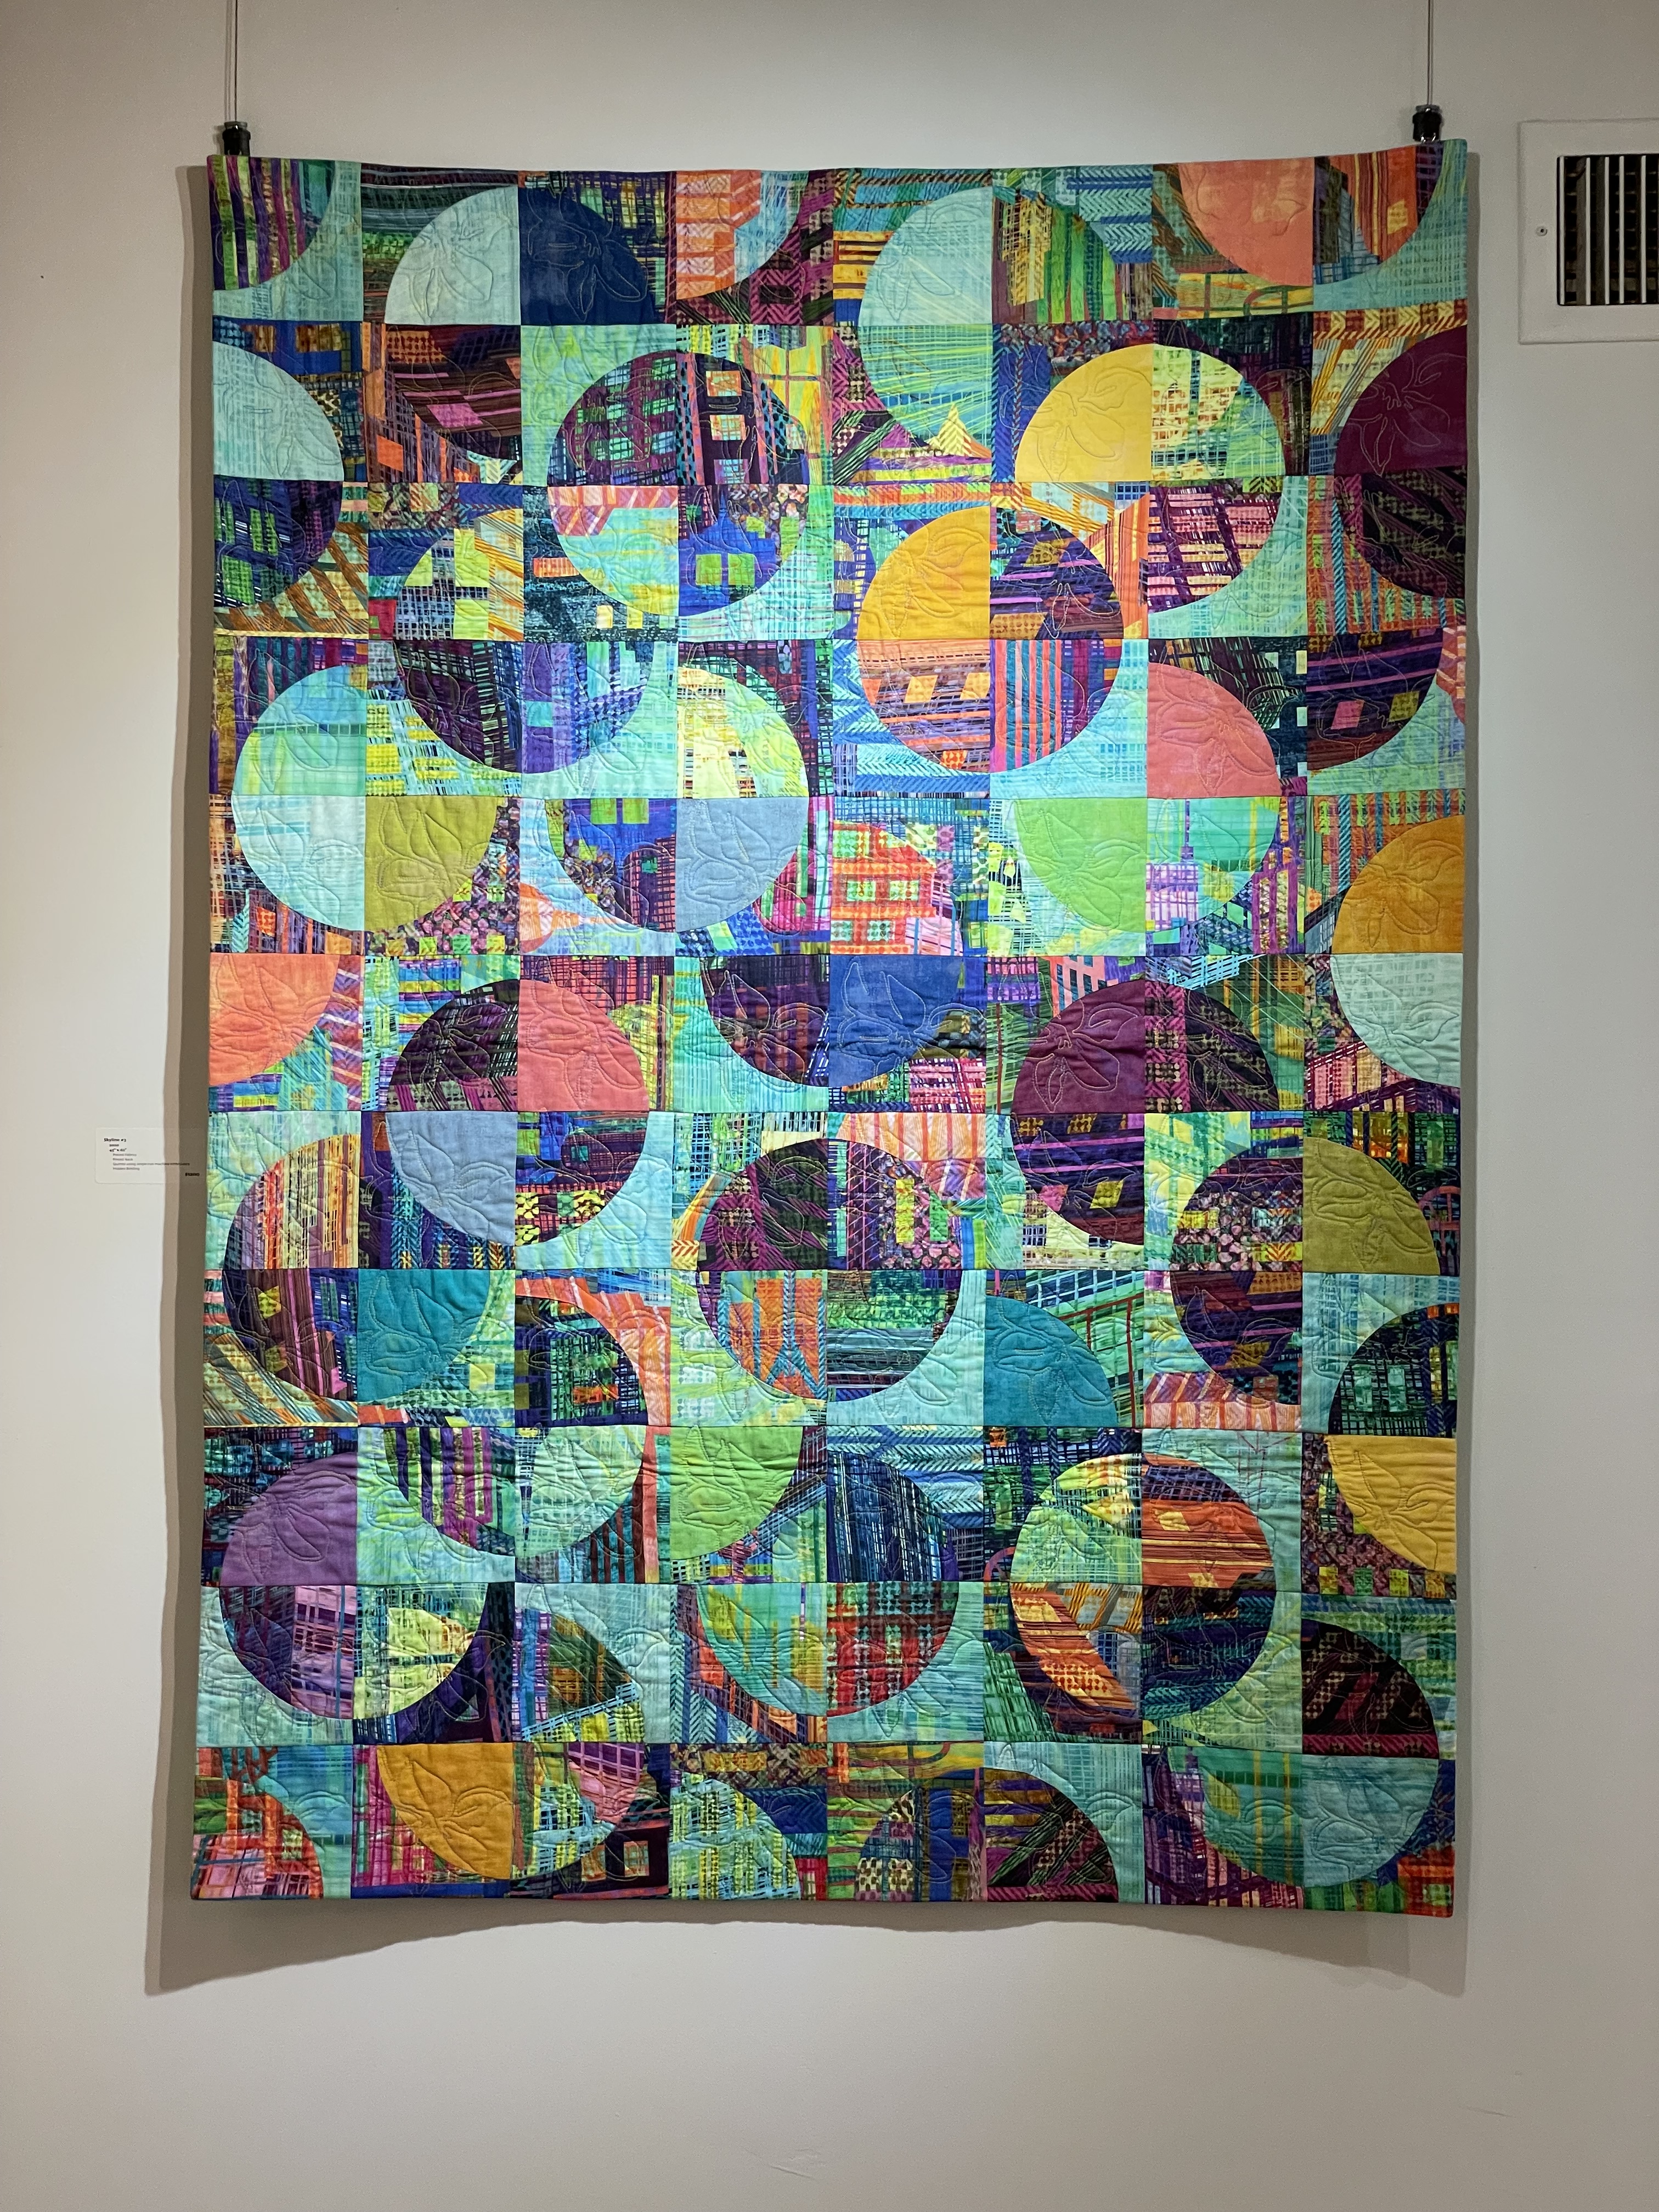
On your right as you enter the Community Gallery you find the four Drunkard’s Path Blocks quilts: Let the Trumpet’s Sound, Drunkard’s Path #5, Skyline #3, and Planet’s With Moons (from right to left). It doesn’t immediately strike you that all four quilts are built using the same block construction, but if you look closely you see the basic quilt block is the same in each.
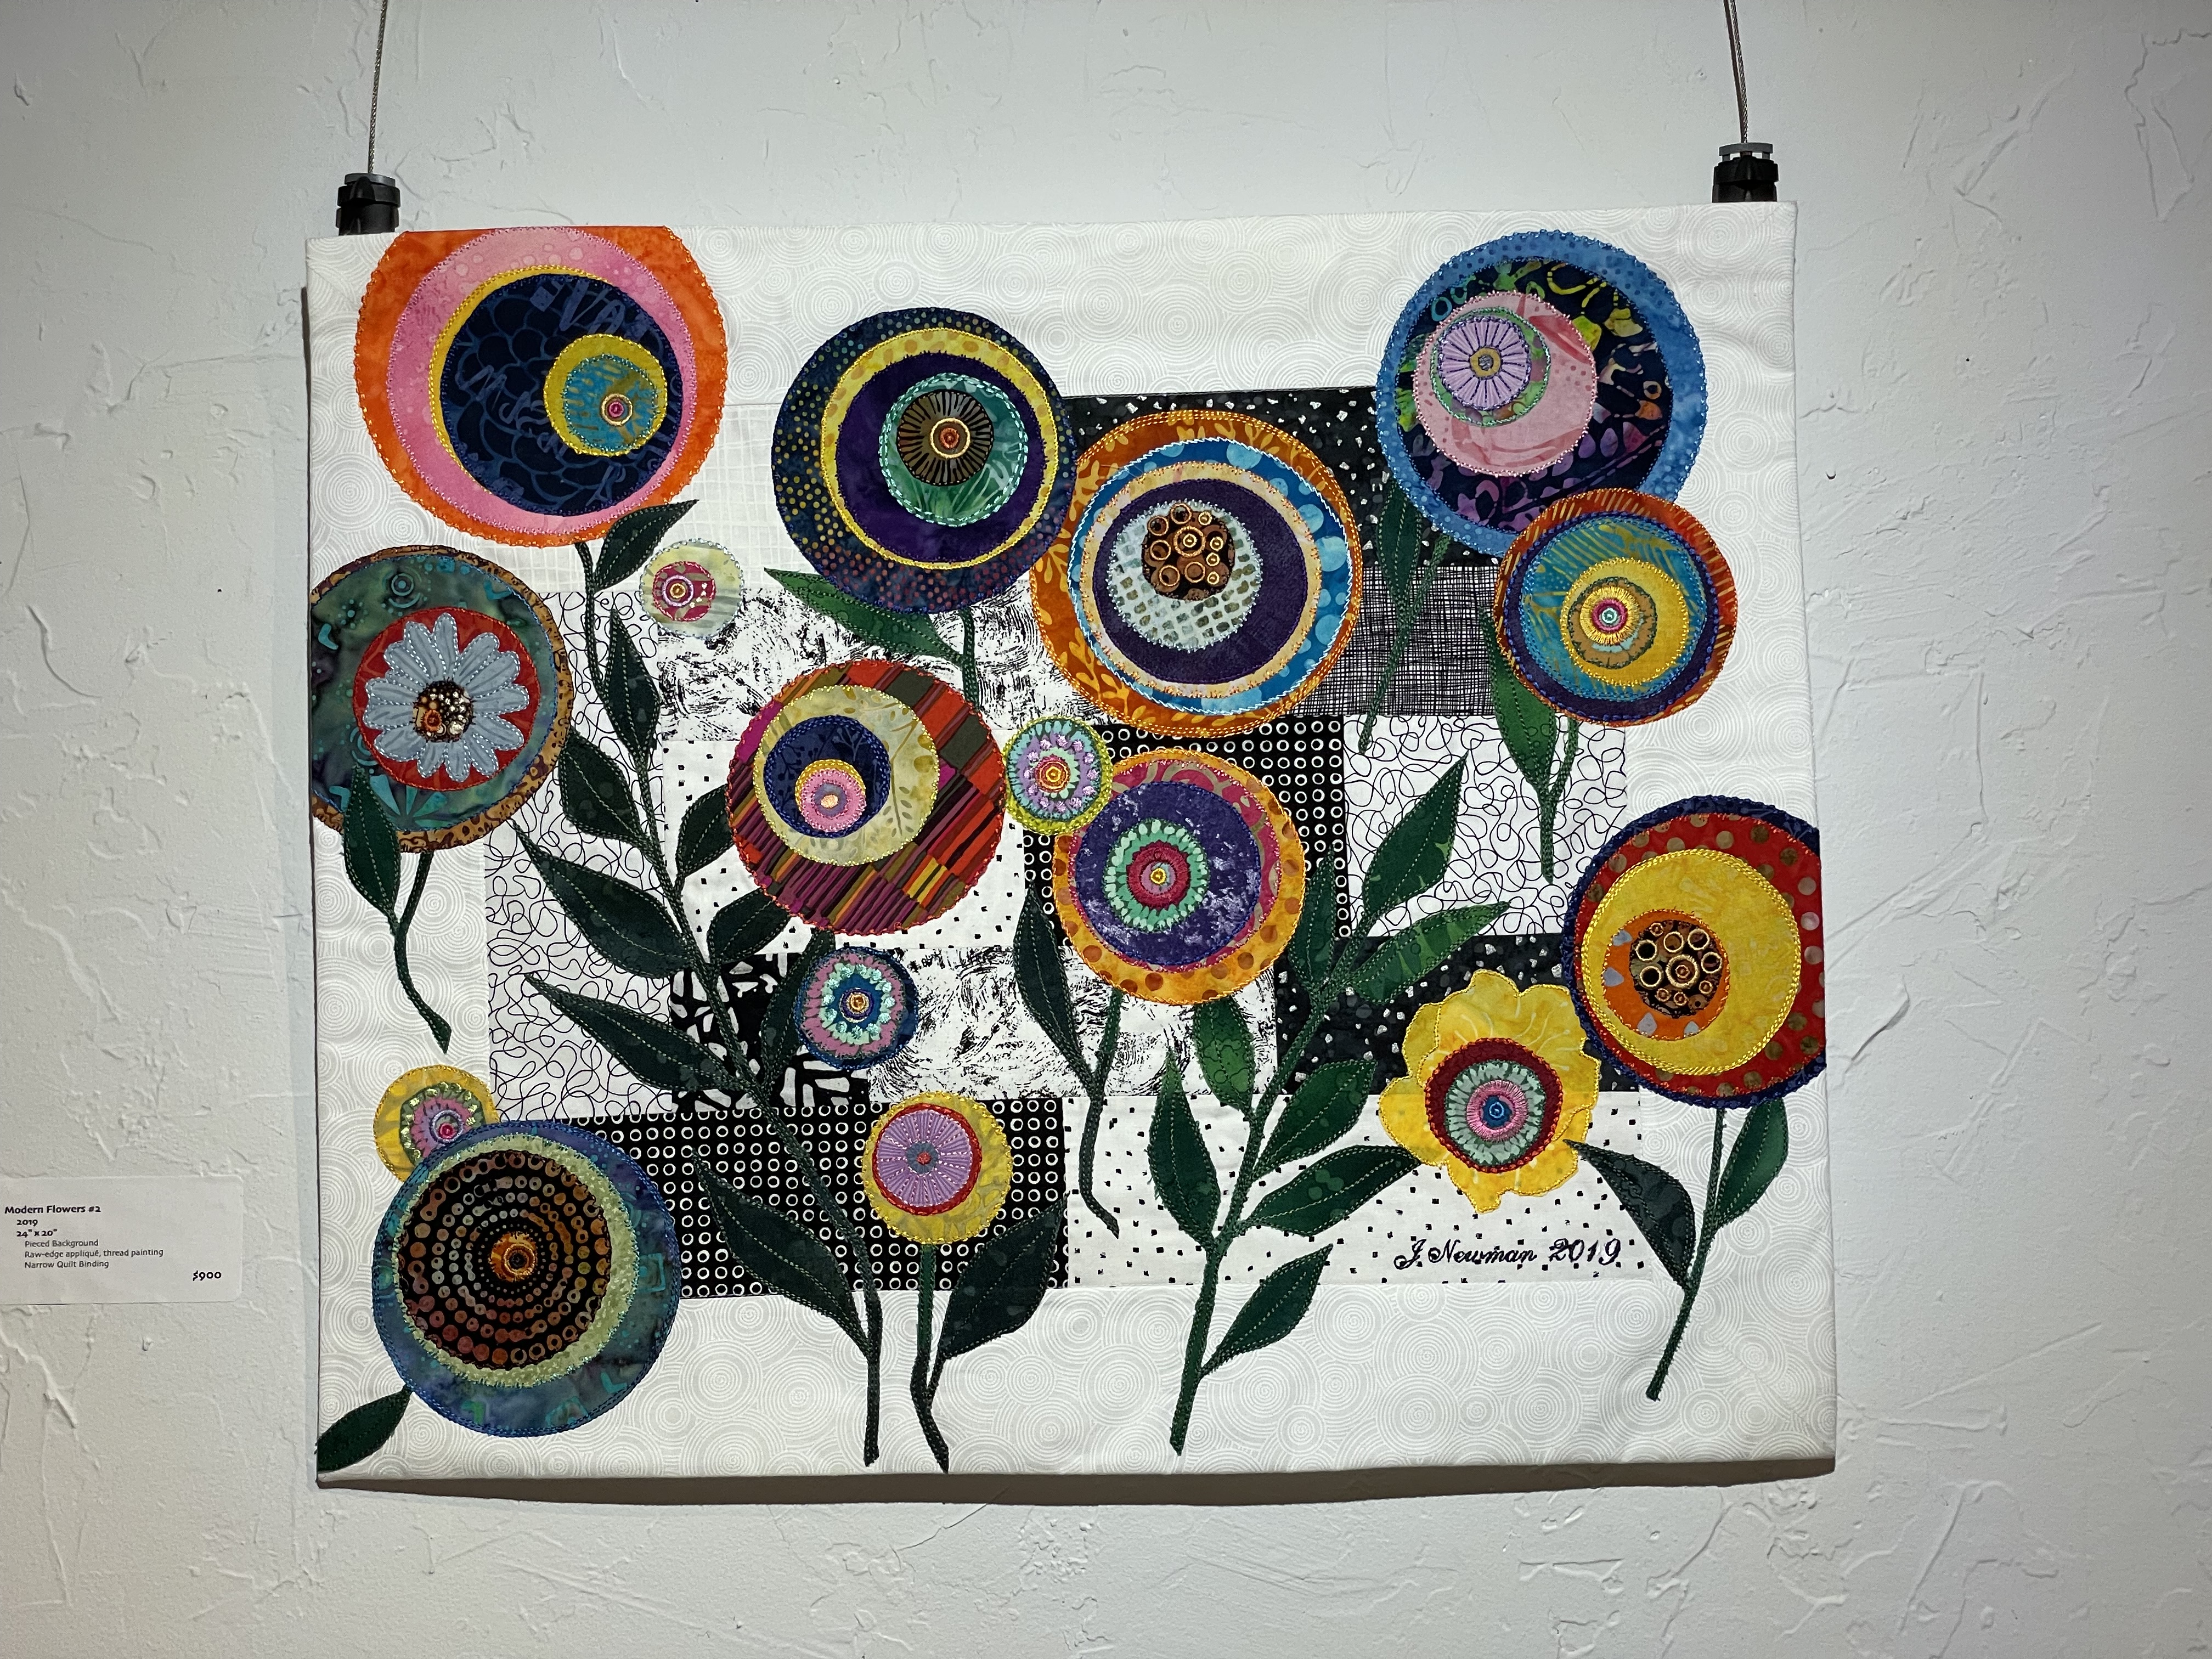
The “Modern Flower” Pieces
Turn to your left and you see the “Modern Flower” pieces – a couple of larger raw-edge appliqué works with the 6×6 pieces on a panel in between. On the end wall (on the left) I chose to hang the Asian Strips piece, showcasing the use of the asian print leftovers I used to assemble that quilt.
The “Convergence” Quilts
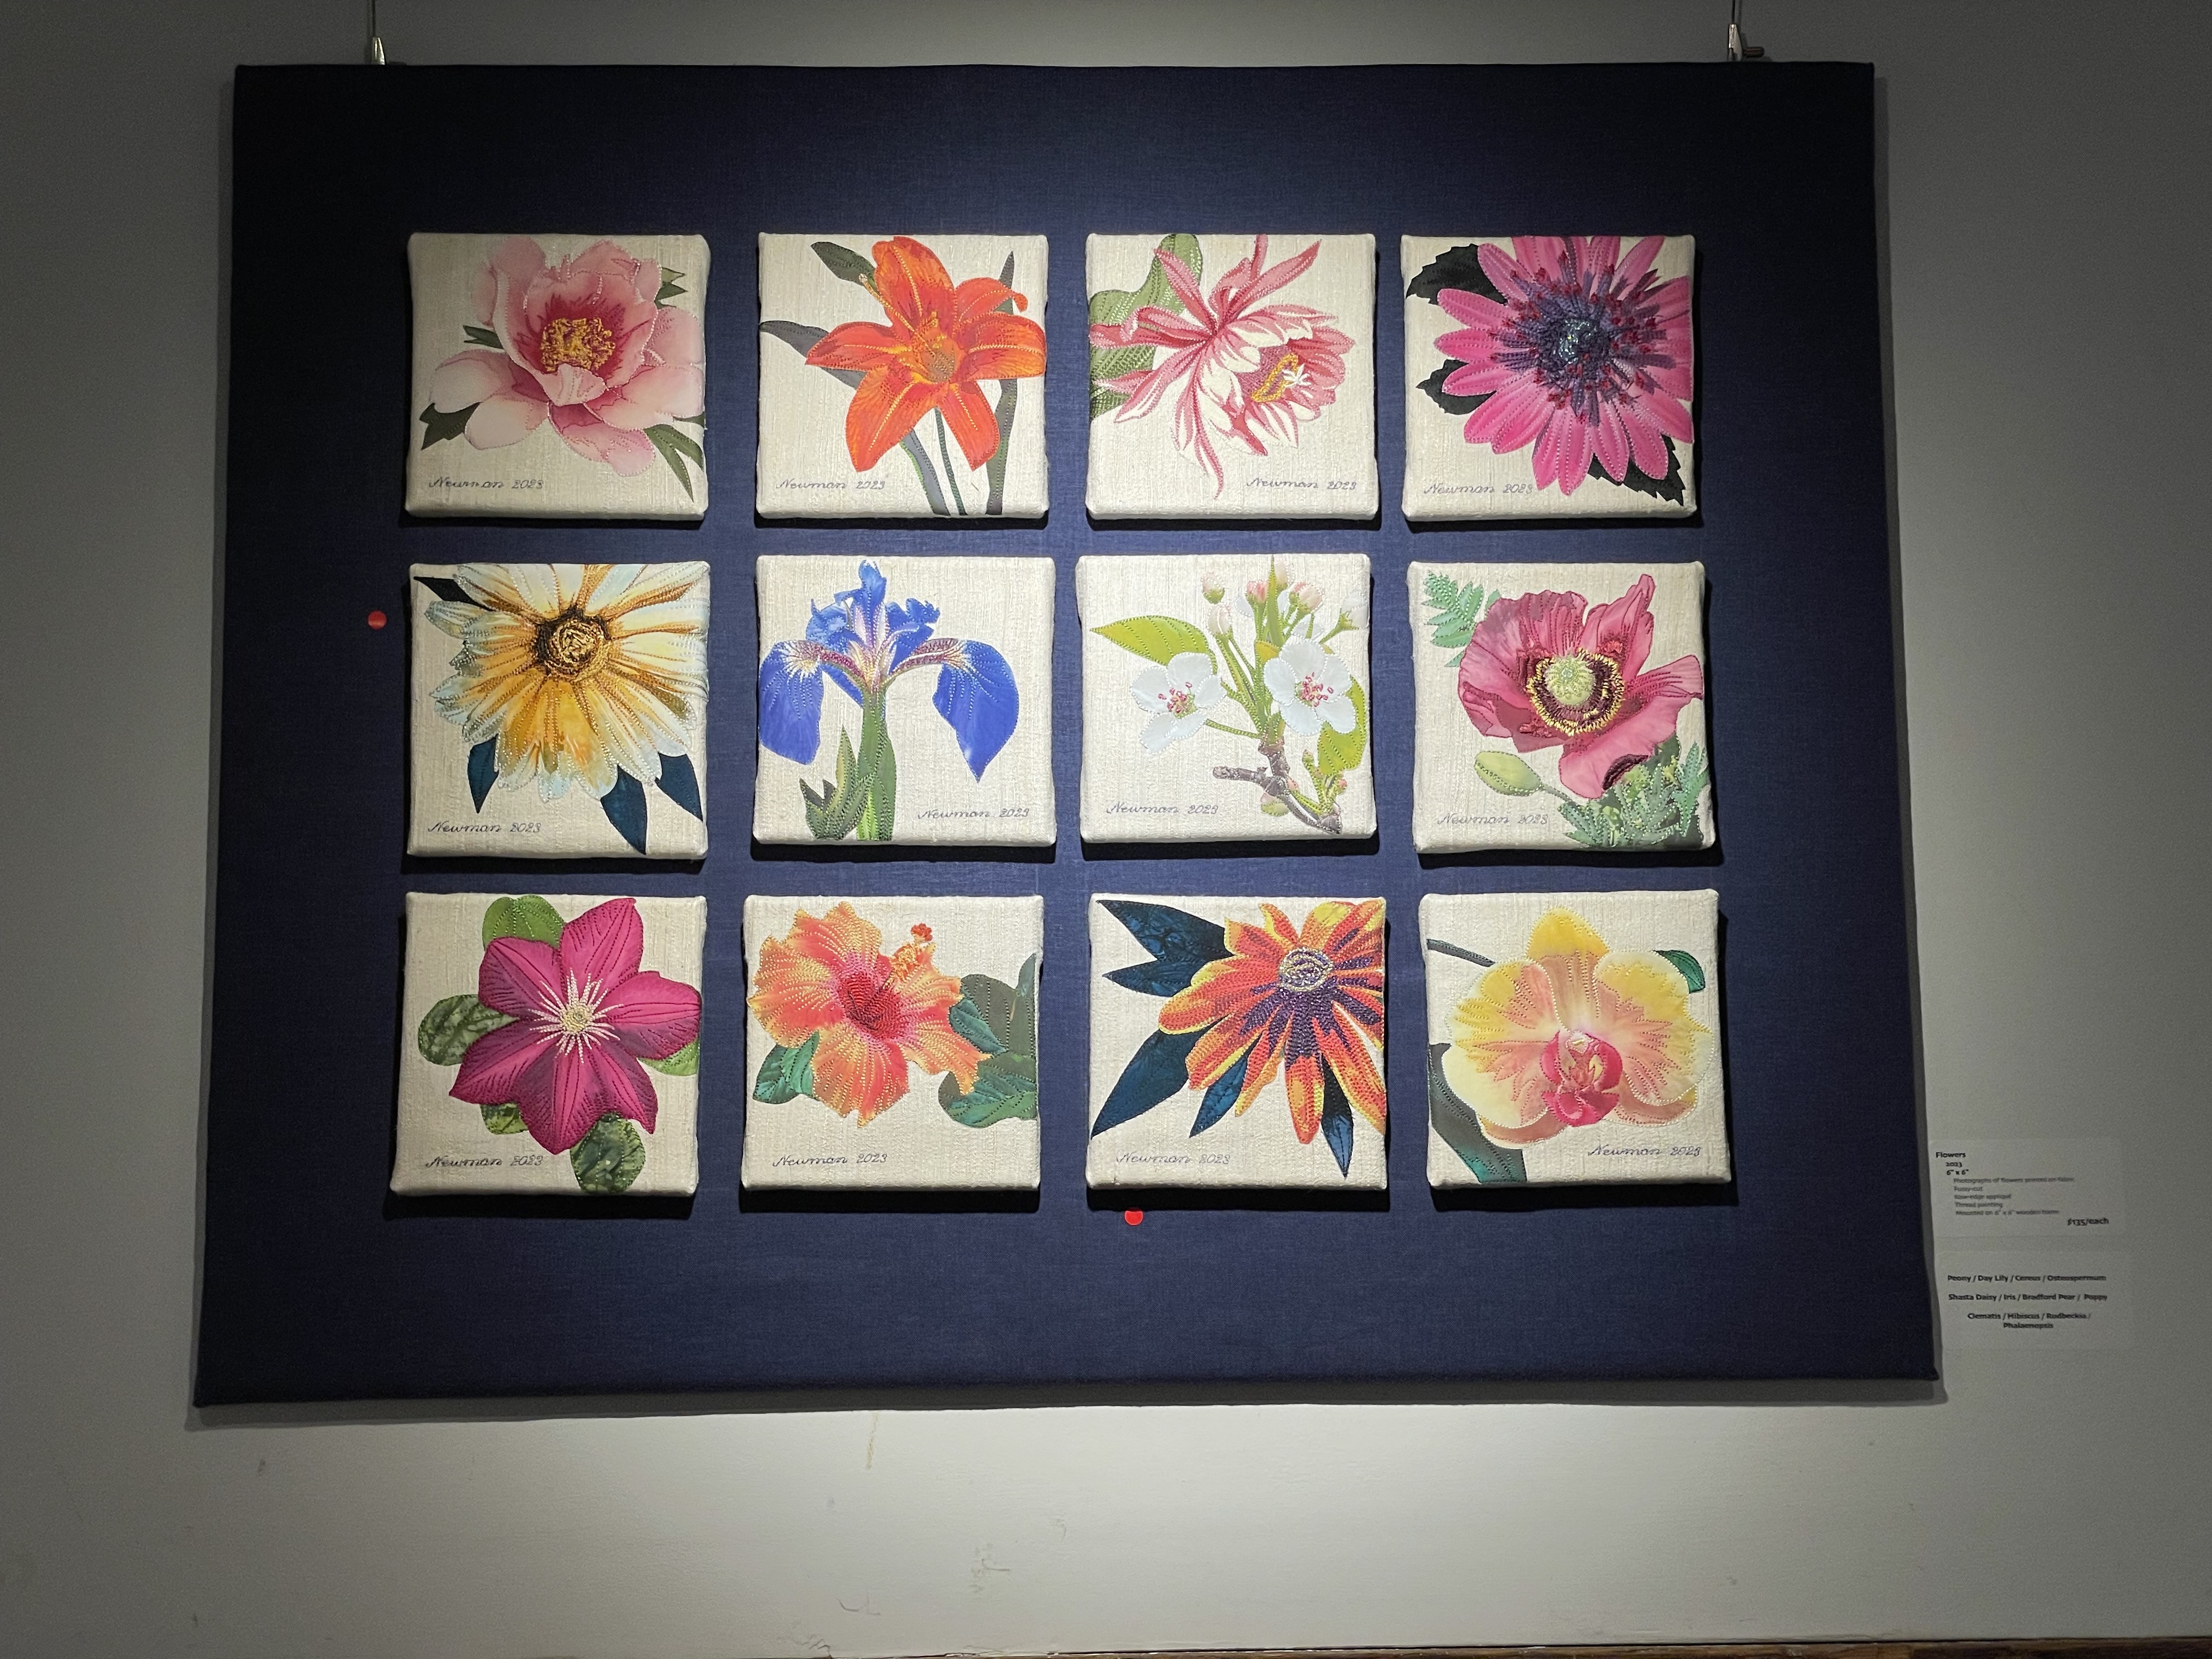
Again, turning to the left you see the “Flower” 6×6 panel above the horizontal post (three have sold so far!), followed by the Convergence quilts – Convergence Quilt #4, #3, and #2.
It always amazes me to see the quilts and small pieces hung in the gallery – the collection has such a different impact than seeing the art one quilt at a time. The technical work slips into the background as the visual impact takes over.
I spoke to a number of people at the opening during the afternoon, all of whom were interested in the decision-making that goes into each work, whether a lap quilt or a small 6×6 piece. People always want to know how long does it take – it’s an unanswerable question – there’s no way to account for the “thinking about it” time that goes into each textile work. The execution, the cutting out, the piecing, the quilting, the embellishing, the binding are all straightforward aspects of making this art. I can predict reasonably accurately how long each phase will take; but the thinking about it is out of my control – it takes as long as it takes.
The show is hanging in the Art Labs Community Gallery (121 Main Street) in Parrsboro NS until late afternoon on Thursday, June 15. If you happen to live near Halifax, or near Parrsboro, do drop by. In addition to the Community Gallery the four resident artists display their work as well. It’s worth a visit.
If you make it a day trip from Halifax, I’d recommend leaving around 9:00 am, driving straight to Parrsboro, visiting the gallery, then having lunch at the Harbourview Restaurant. After lunch mosey your way back, stop at the Five Islands Lighthouse Park to take in the ocean view. Further down the road visit Lowland Gardens – they always have some unusual plants there. You can’t drive back to Halifax without stopping at Masstown Market – fresh produce, great ice cream, good chili if you’re hungry. Depending on how long you take at each stop you should make it back to town between 6:00 – 7:30. You’ll have enjoyed the day.
PS – all of these pieces are for sale. If you’re interested in knowing more about any of them, email me: newman.judith@gmail.com.
I thought this piece would be easy and straightforward – not so. The first thing I had to do was tone down the reflection both in the flower and on the leaves – I used Derwent Intense watercolour pencils to shade away the white. That gave me better overall colour to work with.
I started thread painting by outlining the leaves and leaf veins. Then onto the flower. Using a strong yellow I stitched the highlights on the petals. Next came the dark red at the throat, then the brighter red of the centre. I wasn’t intending to fill the entire centre area but an edge stitching at the red/pink boundary was jarring and left the red centre very dull so I took it out and reworked the area – filling it in. After that, I added the pink, and stitched the pistil. I needed to create a stitch for the stigma (of the pistil), and another for the stamens, I filled in the style of the pistil in a darker red.
Up close there is more stitching than I’d prefer, but when the piece sits next to the other 7 completed pieces, the flower shading stands out and the piece fits in with the others.
I’ve had a couple of ideas rattling around in my head for a new series of ten 6″ x 6″ pieces. I can use them at the summer showing at the NovelTea Cafe in July/August and whatever doesn’t sell there (I’m not expecting much will) will be ready for the 2023 Christmas show in Tatamagouche at the Ice House Gallery (I know Brandt is planning on doing 6 x 6 for a second year – last year’s show looked terrific!).
I have an interesting collection of seascape photos I’ve taken over the years. I have pulled them from my digital photo collections and stuck them in a folder on my desktop. The idea would be to crop each photo to 6.4″ x 6.4″ (that would allow the print to just come sightly over the edges of a 6 x 6 canvas), print each photo on fabric, back it will fusible interfacing to stabilize it so I can thread paint the image. I haven’t tried that yet – but it’s on my to-do list.
Green Bay, NS
I also have a collection of interesting flower photos. At first I thought I’d try printing those on fabric as well, but the paper print I did the other day wasn’t vibrant enough to stand as a background for thread painting. Instead, I decided to try a single flower image, cropped, from which I could piece a flower on a pale background.
Today I cut a 9″ square from some pale linen I had in my stash. I used a heat erasable pen to mark a 6″ square at the centre. I selected some fabrics, then started cutting. I arranged the pieces of fabric, pinned them in place and began thread painting.
Rudbeckia Flower
This piece took me about five hours to make. I took a couple of shortcuts since I was just playing around. I didn’t bother putting fusible web behind the fabric before cutting it out – a big mistake! I’ve ended up with fraying edges because there is no glue to secure the layers to one another. Next, the leaf at the bottom is in a bad location – I must remember to keep enough space free on the background for a signature. Also, the beige linen background is too “flat,” too “dull.” I definitely want to use to what I have left of the light coloured raw silk I used for the previous 6 x 6 works.
I also want to expand the flower to 7″ – a half inch more on each side so the petals and leaves wrap around the sides of the canvas. In this prototype I cropped the flower and leaves at 6″ – which makes it difficult to get a clean line at the canvas edge. I also need to think about embroideries specific for each flower centre. By the time I got to adding an embroidery here I knew I was just trying out the overall idea and didn’t worry too much about placement. I am going to have to be more precise with whatever I do at the centre of each flower.
I mounted the finished flower on a 6 x 6 canvas, then took the finished piece to show my friend Deb. She thought the idea was definitely worth pursuing. Because I like Rudbeckia flowers I will do another one for the collection.
Nothing on for tomorrow – I intend to do a second prototype taking into account what I learned today.
I finished the edge stitching, embroidery and leaves/stems on the last of the ten pieces this morning. I removed the excess stabilizer from the back and pressed each block.
Now each needs to be mounted on a 6×6 stretched canvas panel. I still have to decide whether to place batting beneath each before securing the silk to the back of the wooden frame. I’ll cut out a few pieces of batting and see how it looks. I also have to trim the silk panels to remove excess fabric so they’ll attach smoothly to the framing.
That’s for another day.
I survived Hurricane Fiona – the NE winds howled and pounded rain against my windows for a couple of hours. This storm was as severe as Hurricane Juan in 2003 – even though landfall was about 150kms from Halifax (Fiona came ashore at Canso) – in 2003 the city took a direct hit. Nevertheless winds here were strong enough to do significant damage. We were given ample warning – emergency measures folks were concerned about damage from falling trees because they still have all their leaves. They weren’t wrong.
I didn’t suffer a power outage, although a good portion of the city is still without electricity and for some it will take days before repair crews can get to them. A friend came over this morning to shower and do a bit of laundry! She’s hoping to have her power restored before Wednesday (which is her predicted date!).
I’ve been procrastinating the past week – no idea why – but today I got back to the two 6×6 pieces I had 1/2 finished and completed them.
There are now six. [The outline is done with a Frixion heat-erasable pen. I’ll remove it when I’m ready to mount the individual pieces on the 6×6 stretched canvas frames.]
6×6 Six Finished
I have another couple of hours this afternoon – there are four 6×6 prepared – I’ll get a start on the edge stitching for a couple of them.
It’s taking about three hours to do each block what with the edge stitching on each piece of fabric, free motion stitching in the stems, stitching the leaves (which are decorative stitches) and embroidering the centres (which is taking way more time than I expected – for some reason my top thread is fraying when I’m embroidering so I get stops where I have to clean up the mess, backtrack the embroidery, then continue stitching.
So far, the signature is stitching out without breaking the thread! After I’ve pressed the block, I’ve redrawn the 6″ outline with a Frixion (heat-erasable) pen so I know where my edges are.
Three more left of the original six I prepared. When those are finished (in about a week or so) I’ll layout the remaining four.
Finished this pair of socks on Friday and began a new pair that I think I might keep. The stash keeps growing – I will definitely have plenty of socks to share for Christmas. Last week I contacted the gal who wanted 4 pairs of socks from me two weeks before last Christmas – I told her this was the time to place her order. She said no socks this year. Do I really believe her? When she asked last year I just squeezed her order through – I had to take one pair, remove the toes, lengthen the foot by an inch, reknit the toes – she was lucky I had enough time to do that. I’ve already put aside a couple of pairs with someone’s name on them. I’ll just keep knitting as usual.
The Christmas Show Challenge
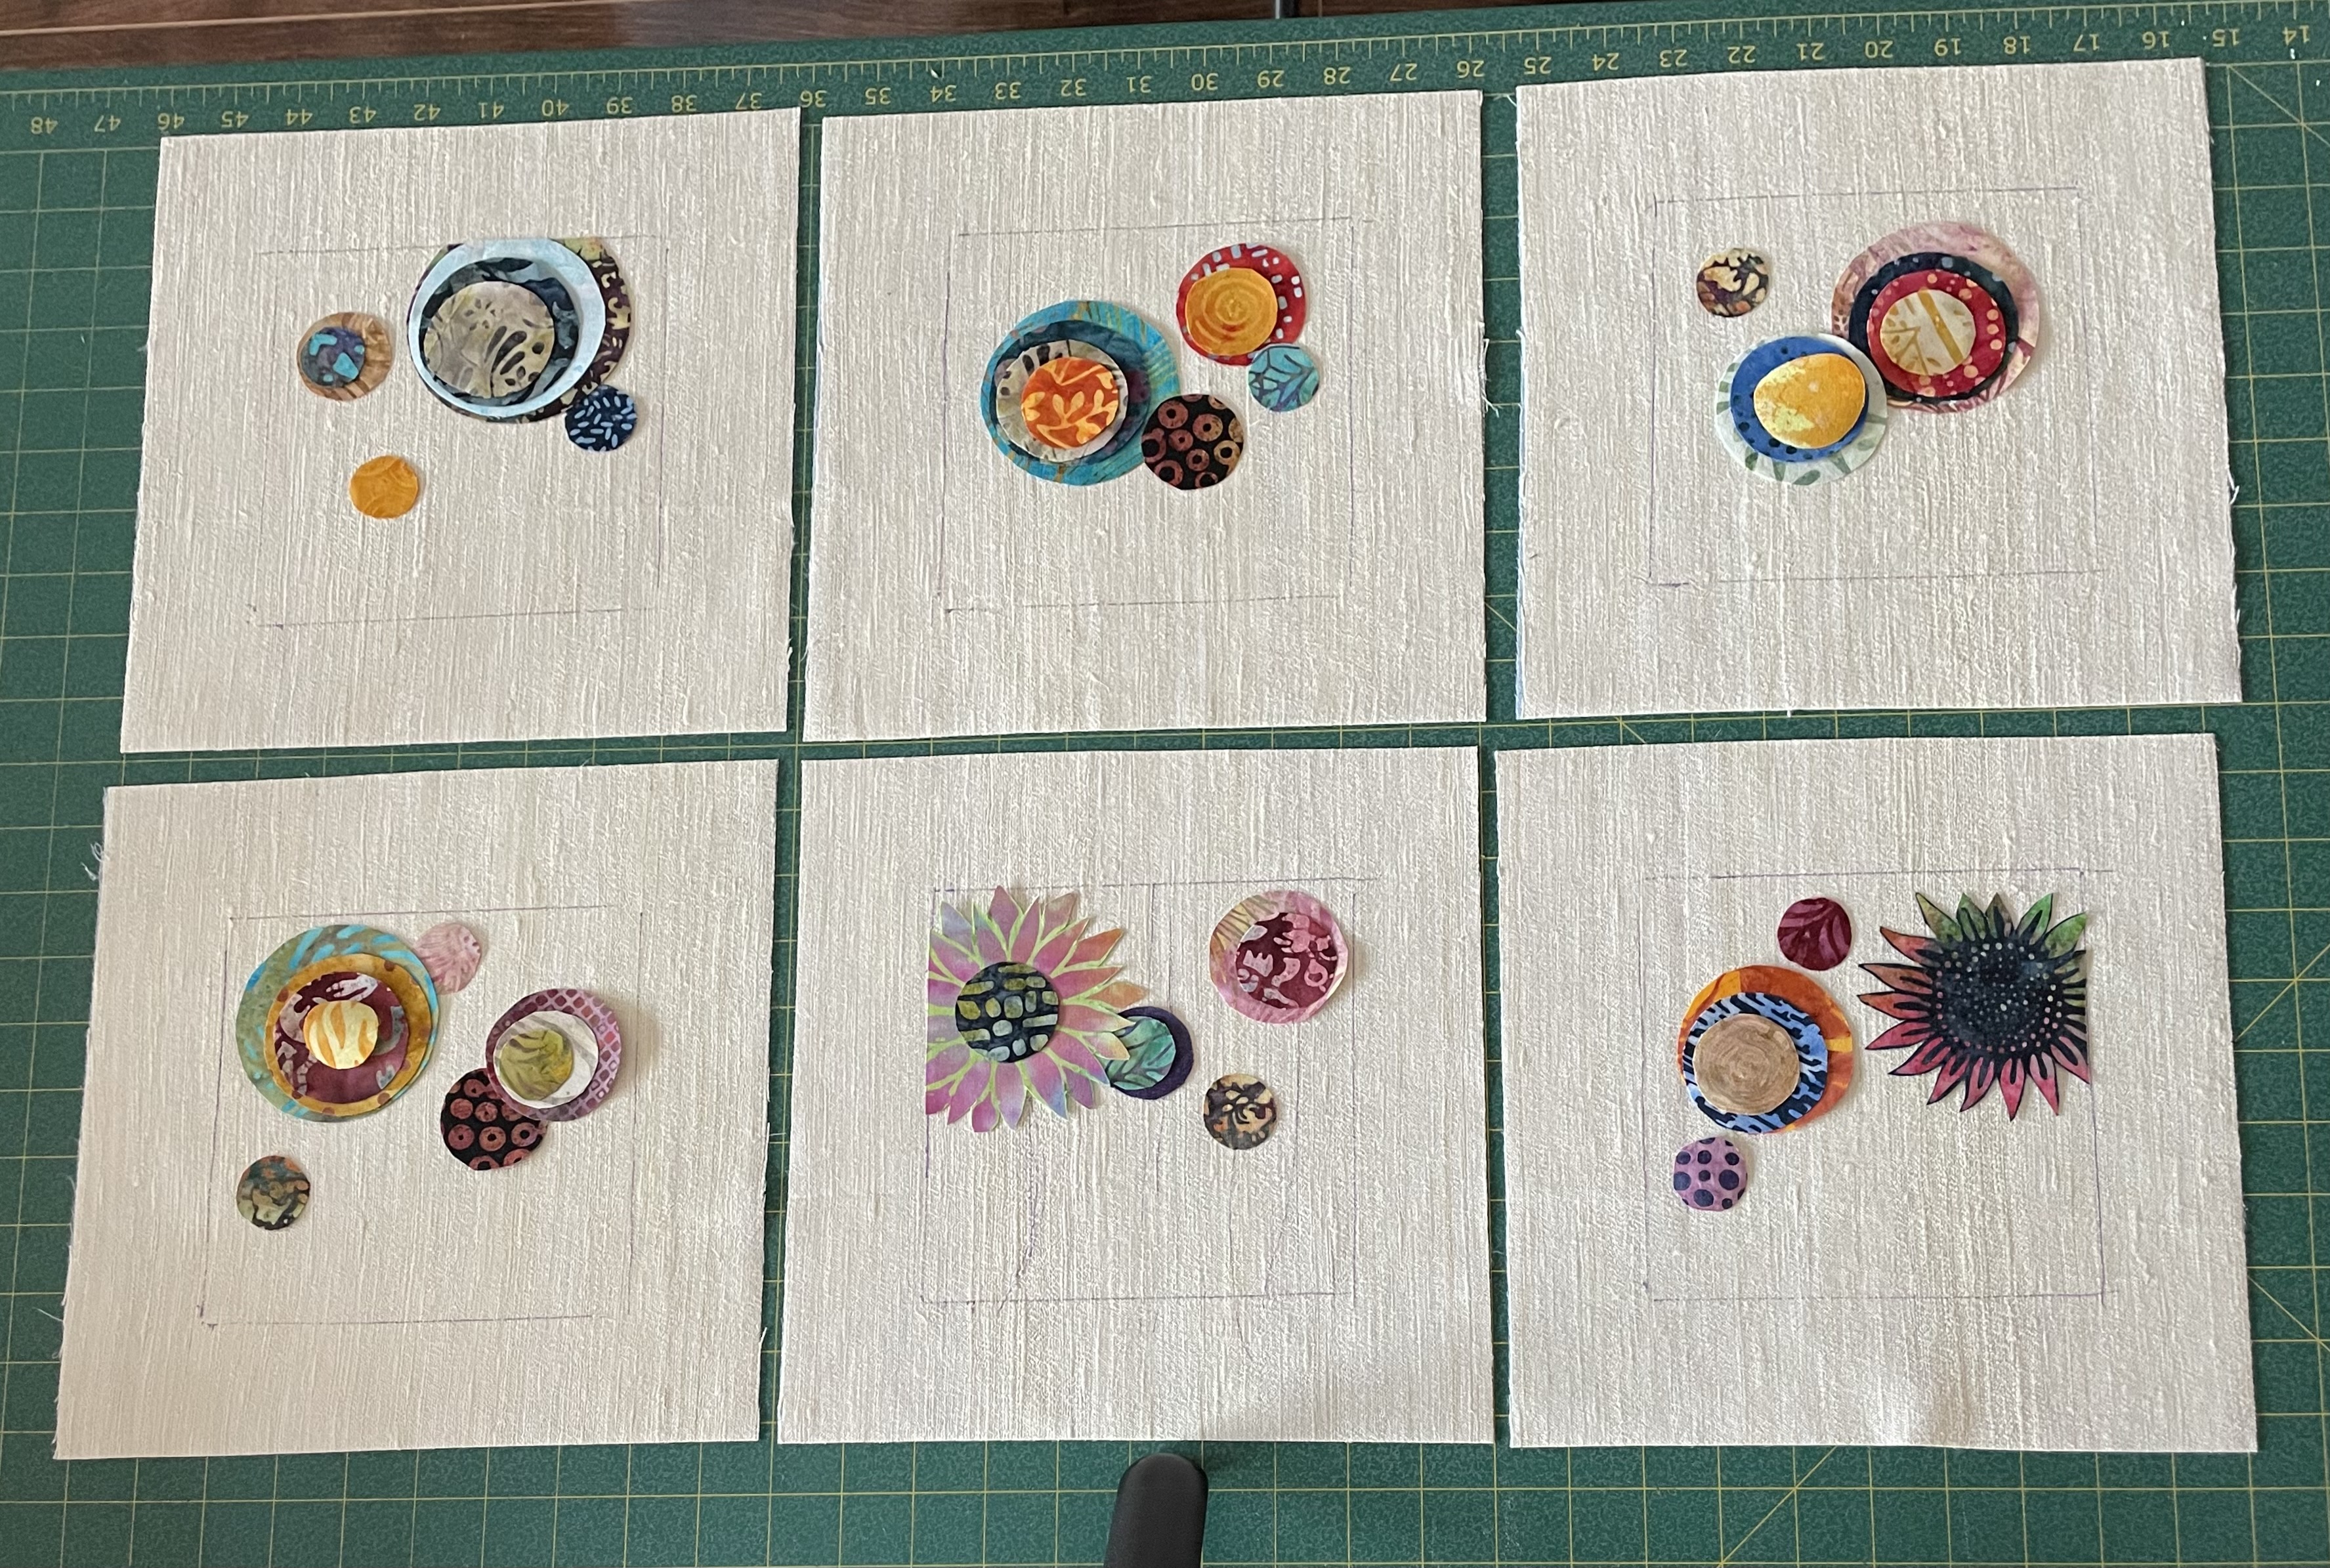
I finally made a decision regarding the 6″x6″ blocks – to use the textured raw silk for the background, to fuse batik circles of various sizes to the background to simulate “modern flowers”. I cut out ten 10″ blocks from the raw silk I have on hand, backed it with sewer’s dream to stabilize it, marked 6″ squares in the middle (using a heat erasable pen). Next, I added fusible web to a pile of batik scraps and cut out a lot of circles. I have started arranging and fusing circles to the raw silk.
Six Blocks Laid Out (but not yet fused)
Because all ten blocks will be shown next to one another, I’ve worked to vary placement, even cropping some of the flowers so the appearance of the blocks is different. I have to edge stitch the cropped edge so there are no raw edges at the edge of a piece.
I’ve completed one of the blocks
First finished 6″ Block
The slight wobble at the bottom of the block will be eased out when I mount the fabric over the stretched canvas.
Looks like each block will take me between 2 and 3 hours to embellish. It doesn’t look like a humungous amount of stitching but it takes more time than you think to edge stitch each bit of batik, then to add stems and leaves, and signature. The stems are free motion. The leaves are decorative stitches each requiring careful placement. The flower centres are embroideries which want precise positioning and often involve thread changes. It all takes time.
I’ve got another block sitting on my machine waiting to worked on tomorrow.