I Managed To Do It!

Finished Strip For Quilt Back (half)

After doing the laundry, emptying the dishwasher, repairing a small hole in a cashmere/merino knit sweater, putting last night’s dishes in the dishwasher, reading email, making the bed, shower and dressing, having breakfast (late as usual), I finally got to the Drunkard’s Path blocks. I sewed all 24 small ones, as well as the remaining nine large ones.

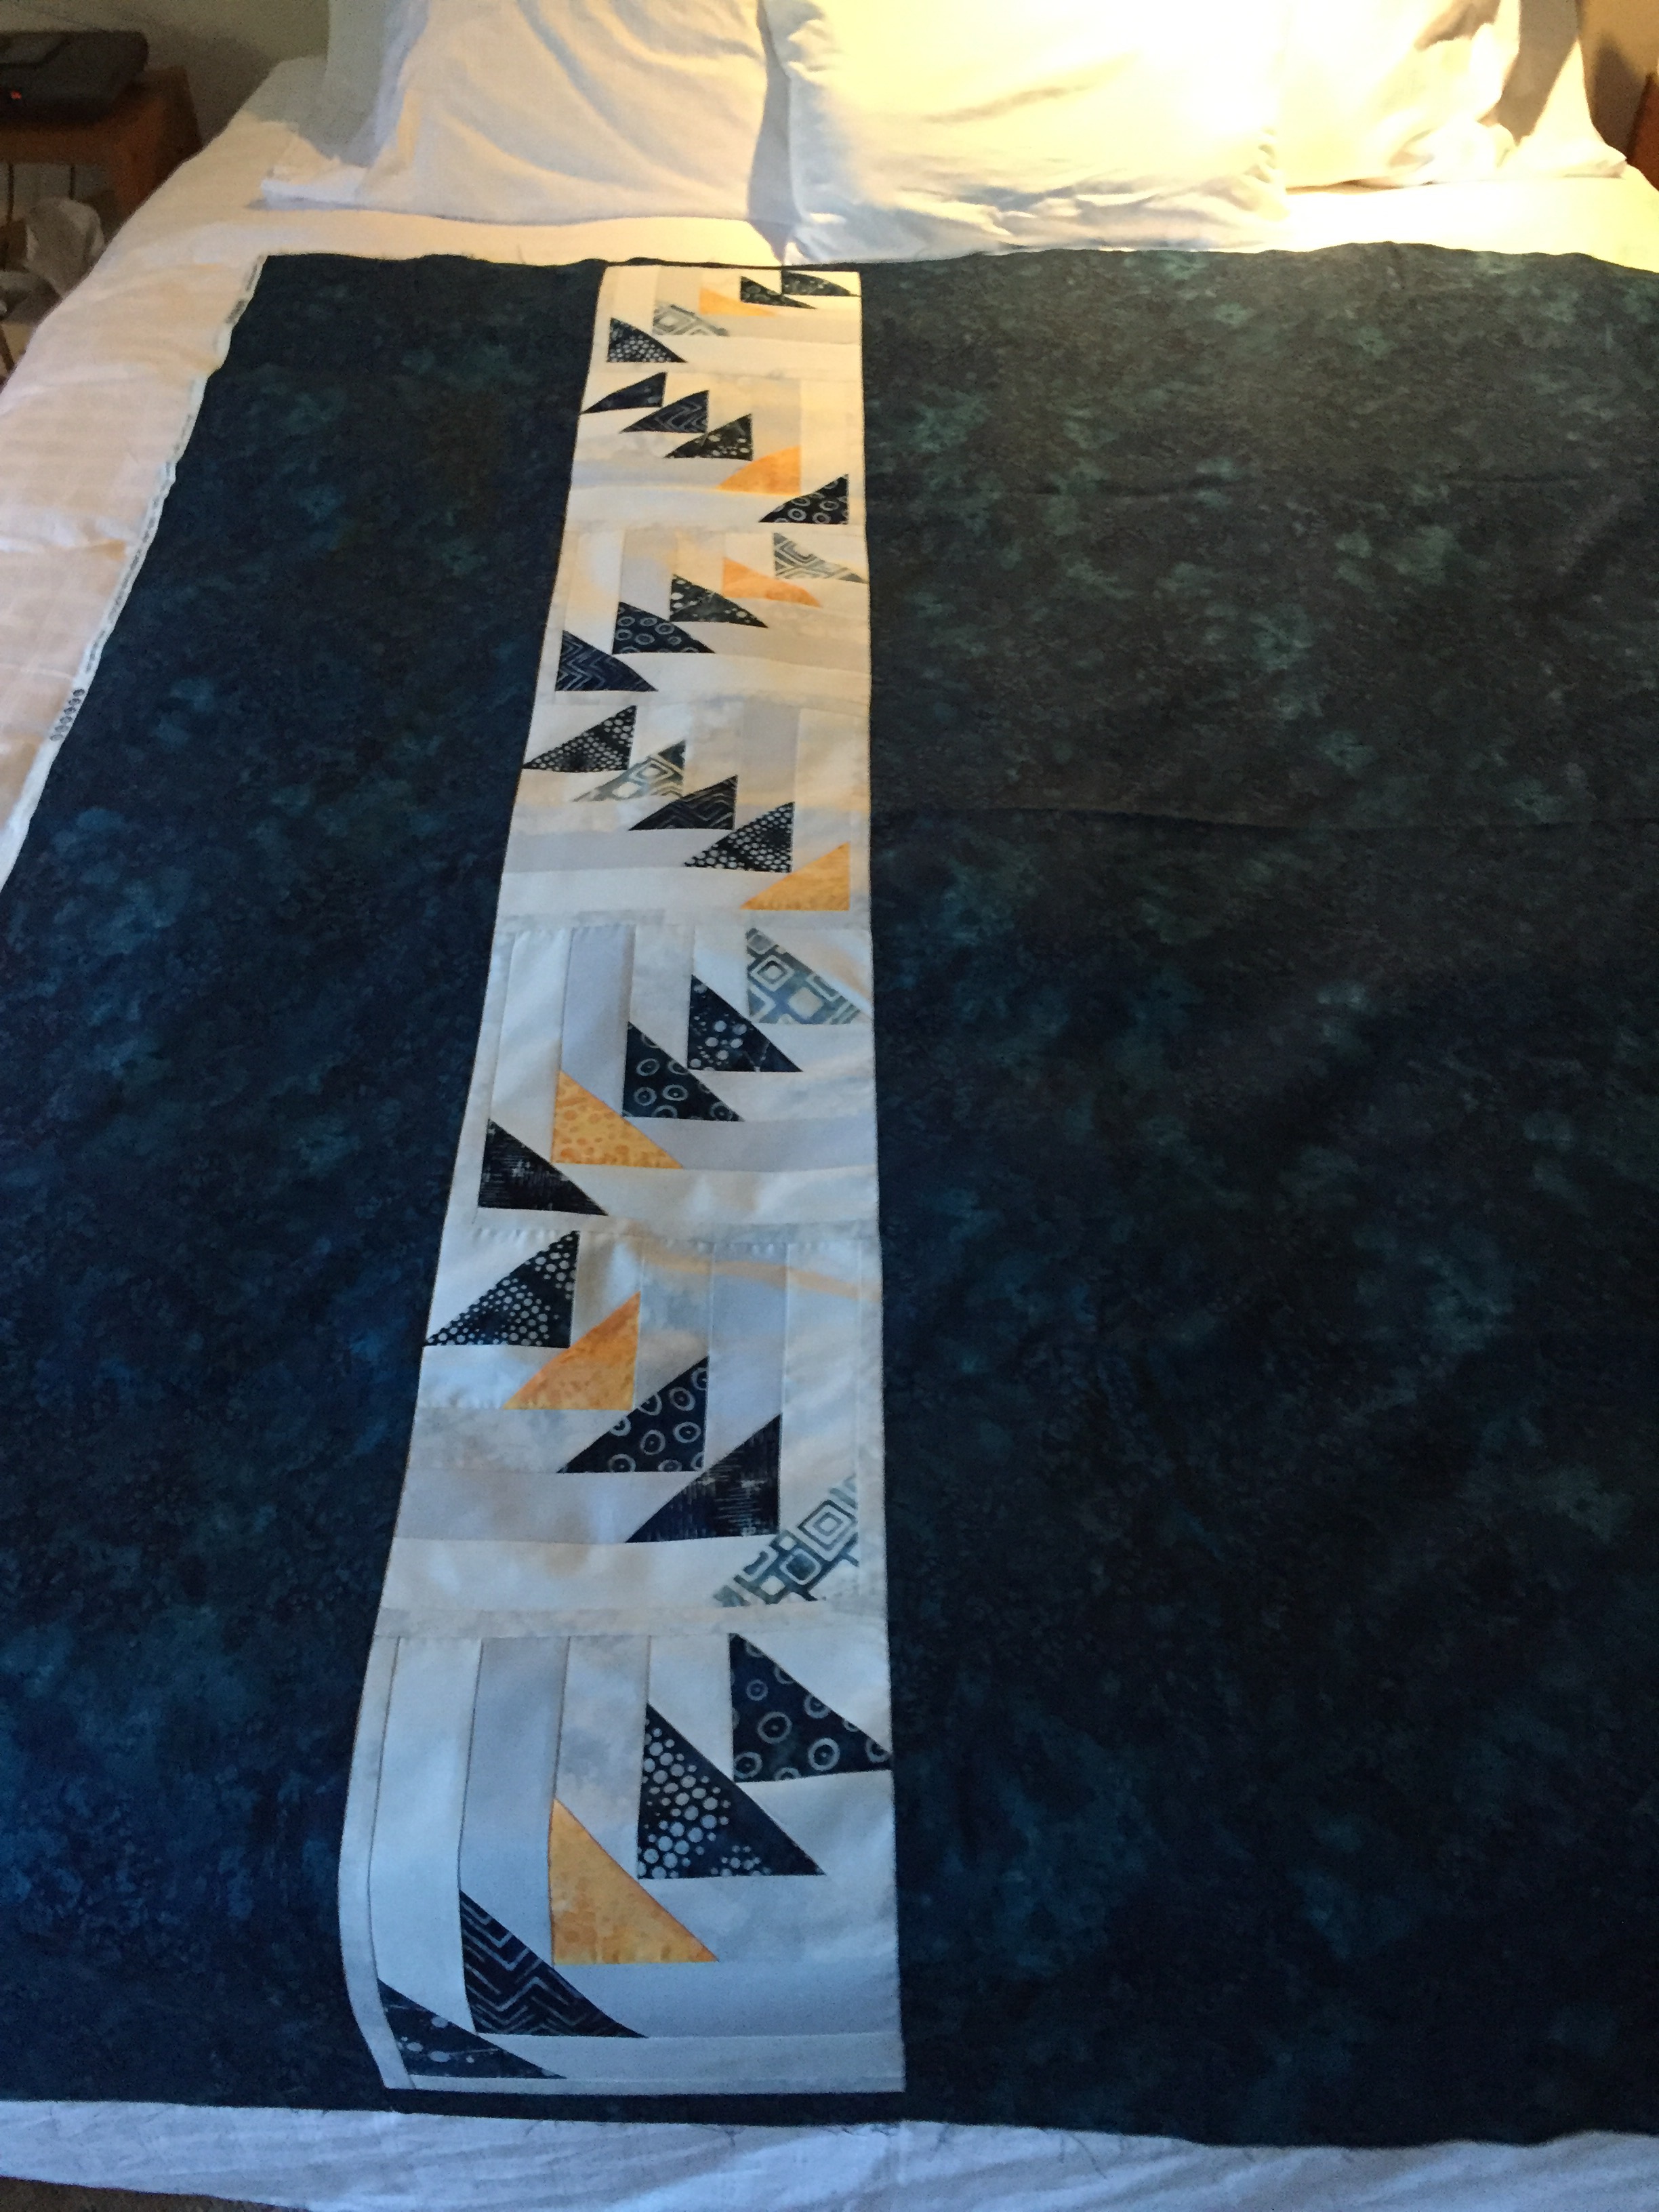
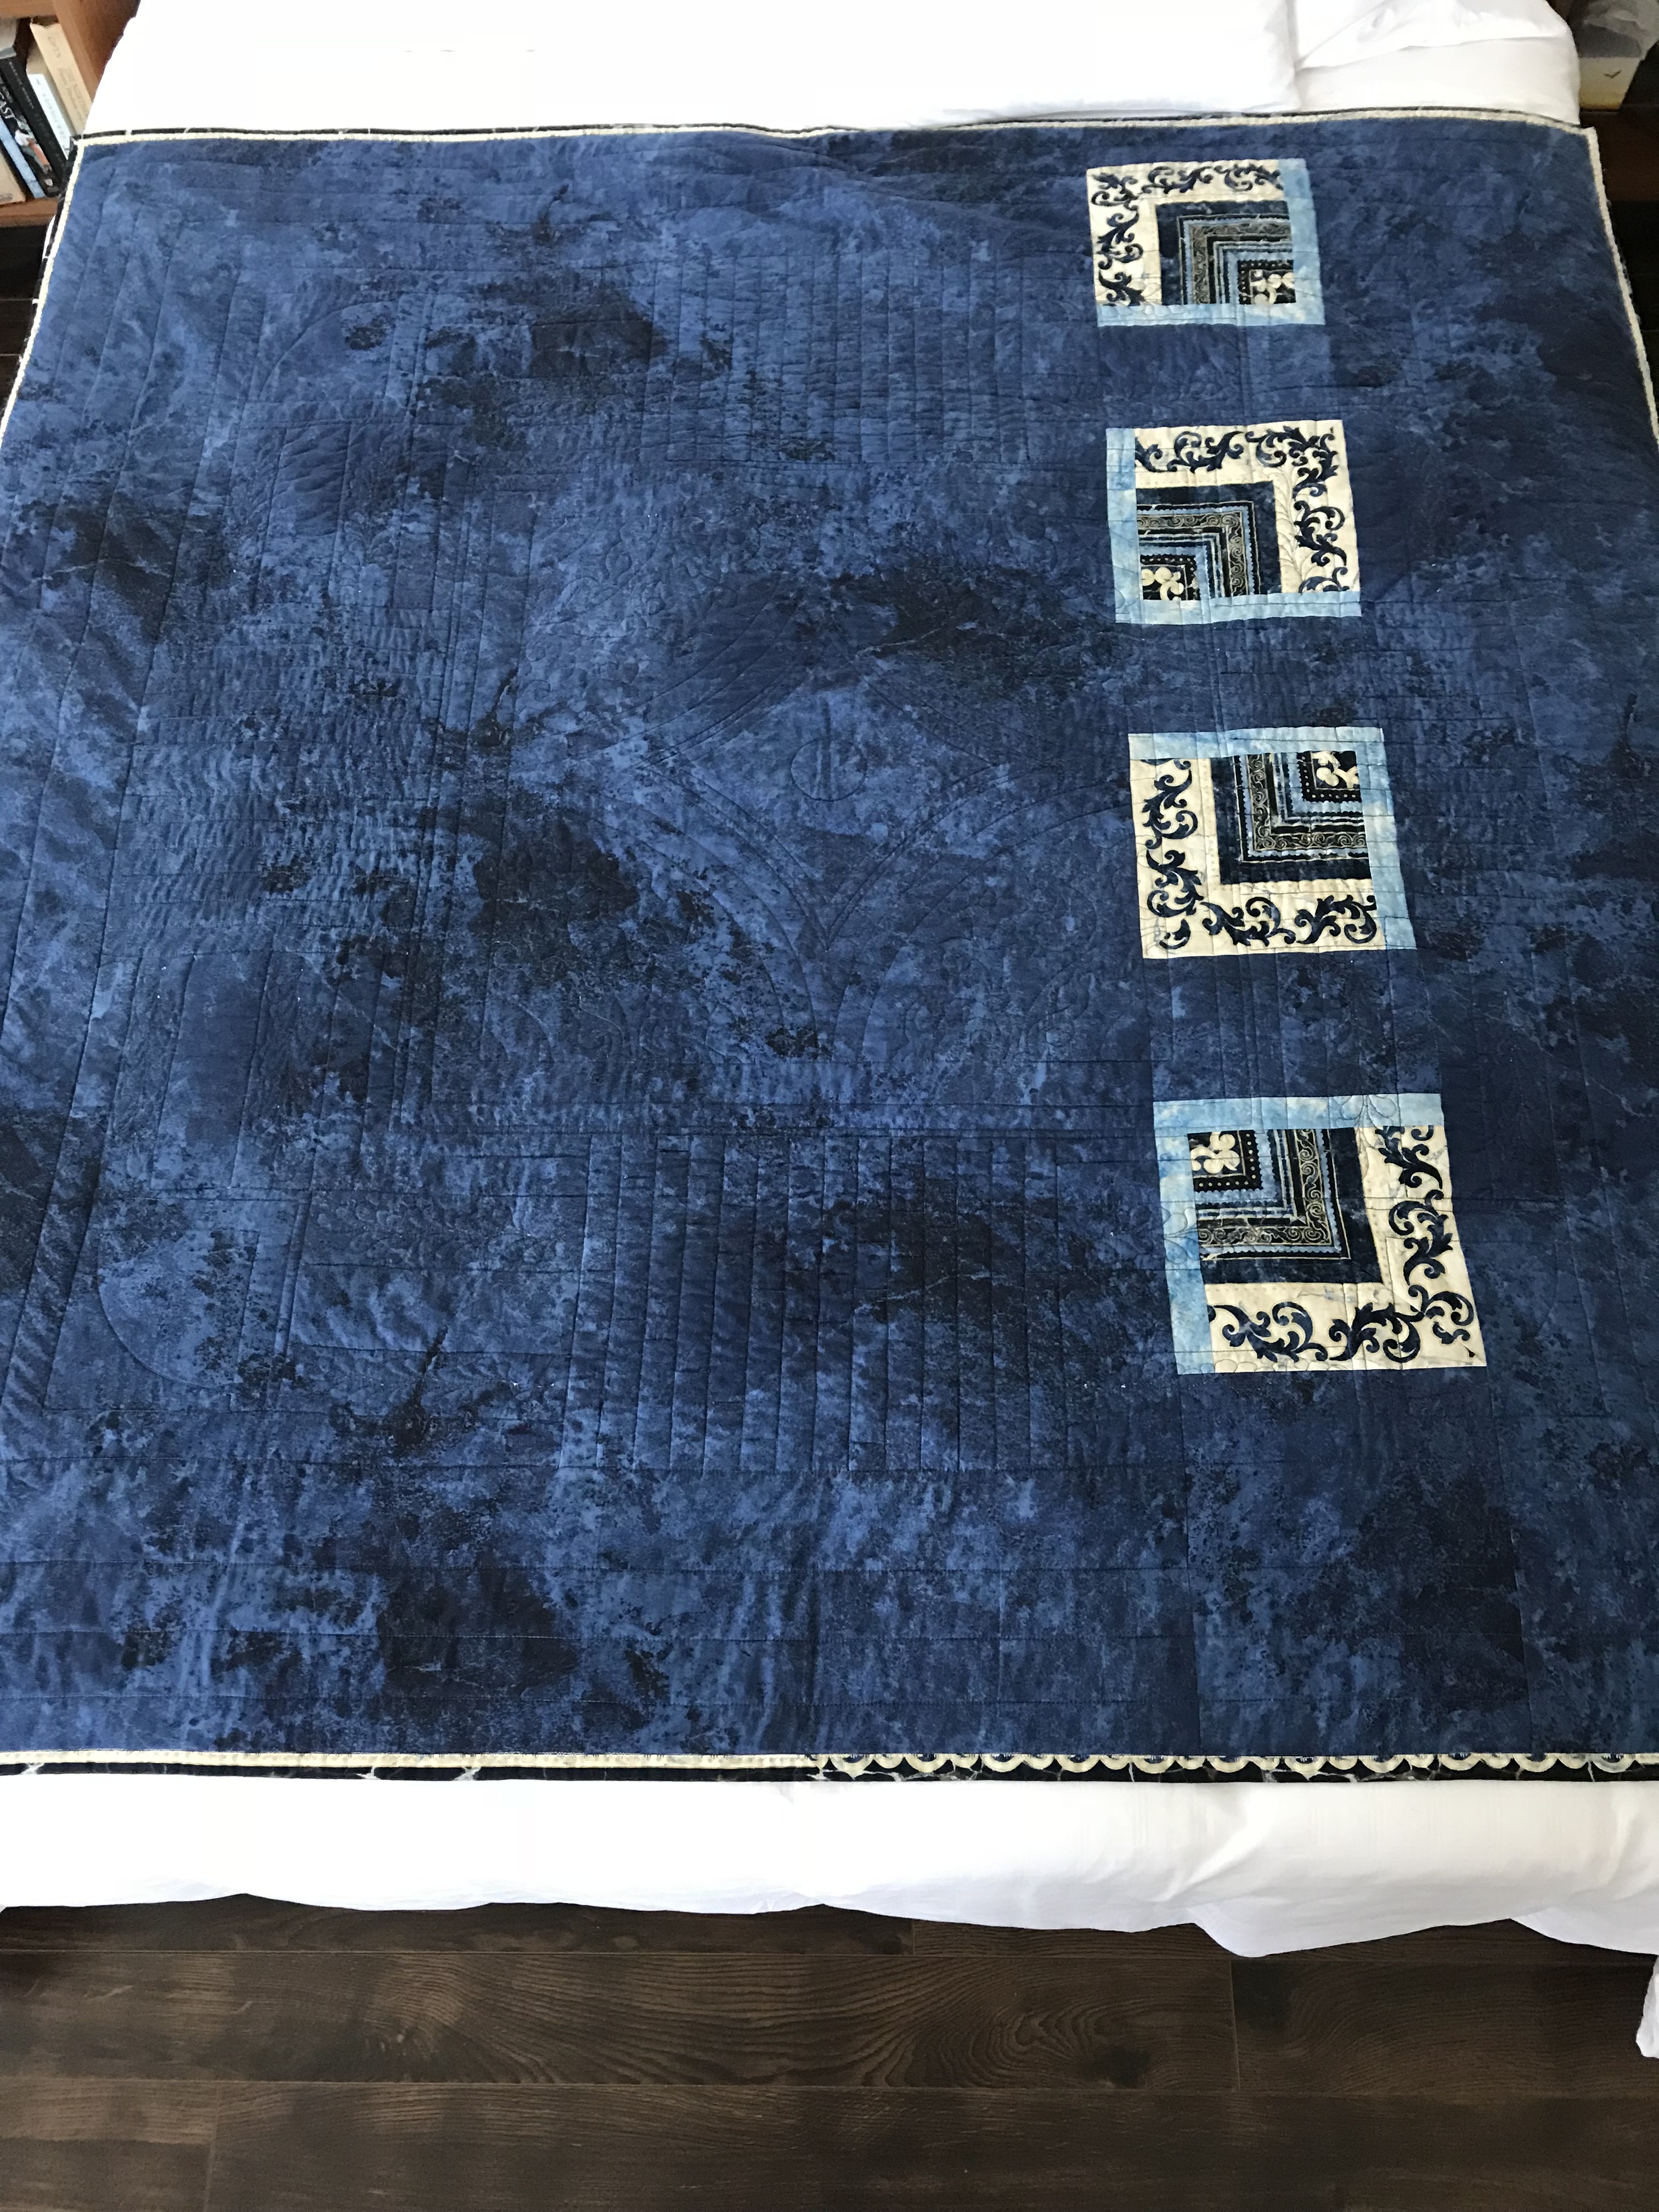
I assembled the blocks into rows: one large block, two small ones. The centres of the small blocks are leftovers from the grey “L” shaped pieces used to make the blocks on the top. I used scraps from my many boxes of different sized scraps to cut out 3 1/2″ squares from which I removed the quarter circle corner (with the help of an acrylic template of the appropriate size).

3 1/2″ Drunkard’s Path blocks are actually difficult to sew! I pin the centres together, then try pinning the ends, but because the fabric pieces are small it’s hard to twist the ends into place, pin them, keep the ends aligned when you start sewing. The curve is also difficult because there is very little maneuvering room. It’s all about pressing and trimming after sewing and not using the blocks in sets of four to make circles because quite likely the curves won’t align nicely. So I chose to offset the curves of the small blocks against the large one, although I aligned one curved edge against the larger block’s curve and trimmed the resulting row so I’d have a straight edge when I attached the next row.

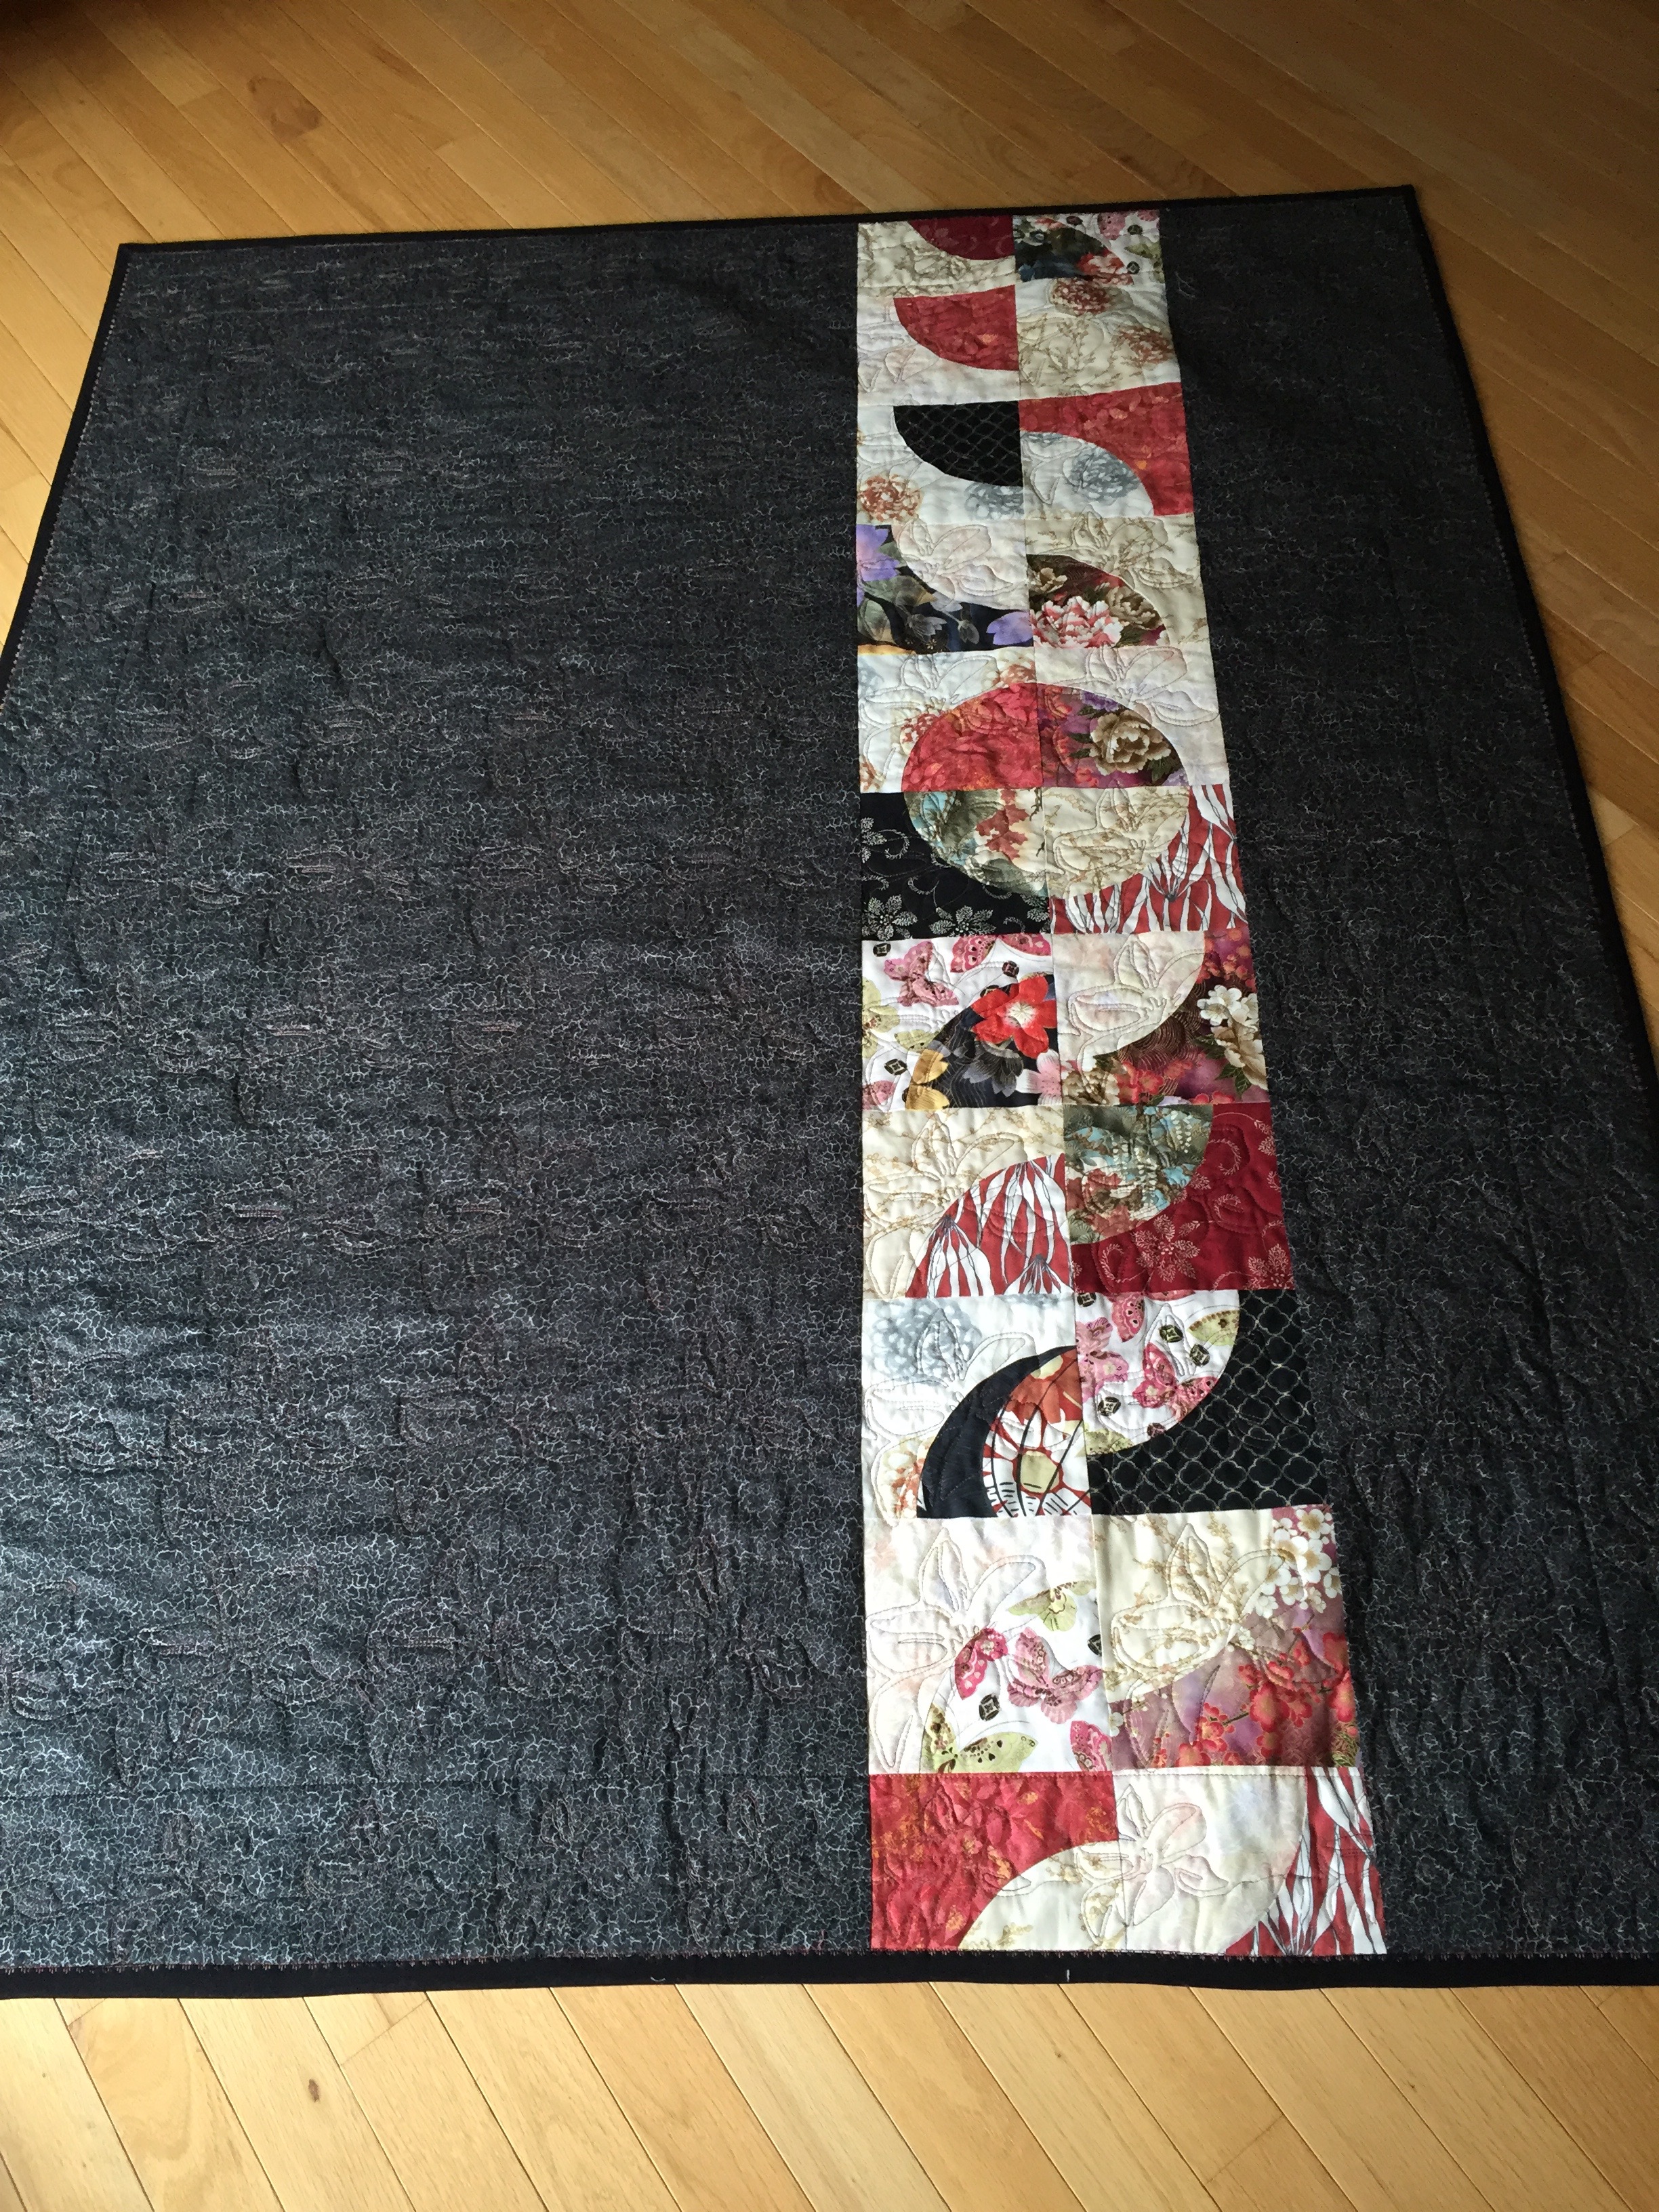
Ten rows weren’t quite enough. I used up the leftover six blocks – three at each end, and finished with a piece of grey fabric that is going to be the inner sashing. My strip is 3″ longer than the quilt top – enough to let me set up the sandwich with the backing larger than the top all the way around.

I’ve cut the sashing and the backing to length. I need to make joins in the sashing so they are long enough and I need to spray starch (with Best Press) the backing fabric making sure all wrinkles are out of it when I go to set up the sandwich.

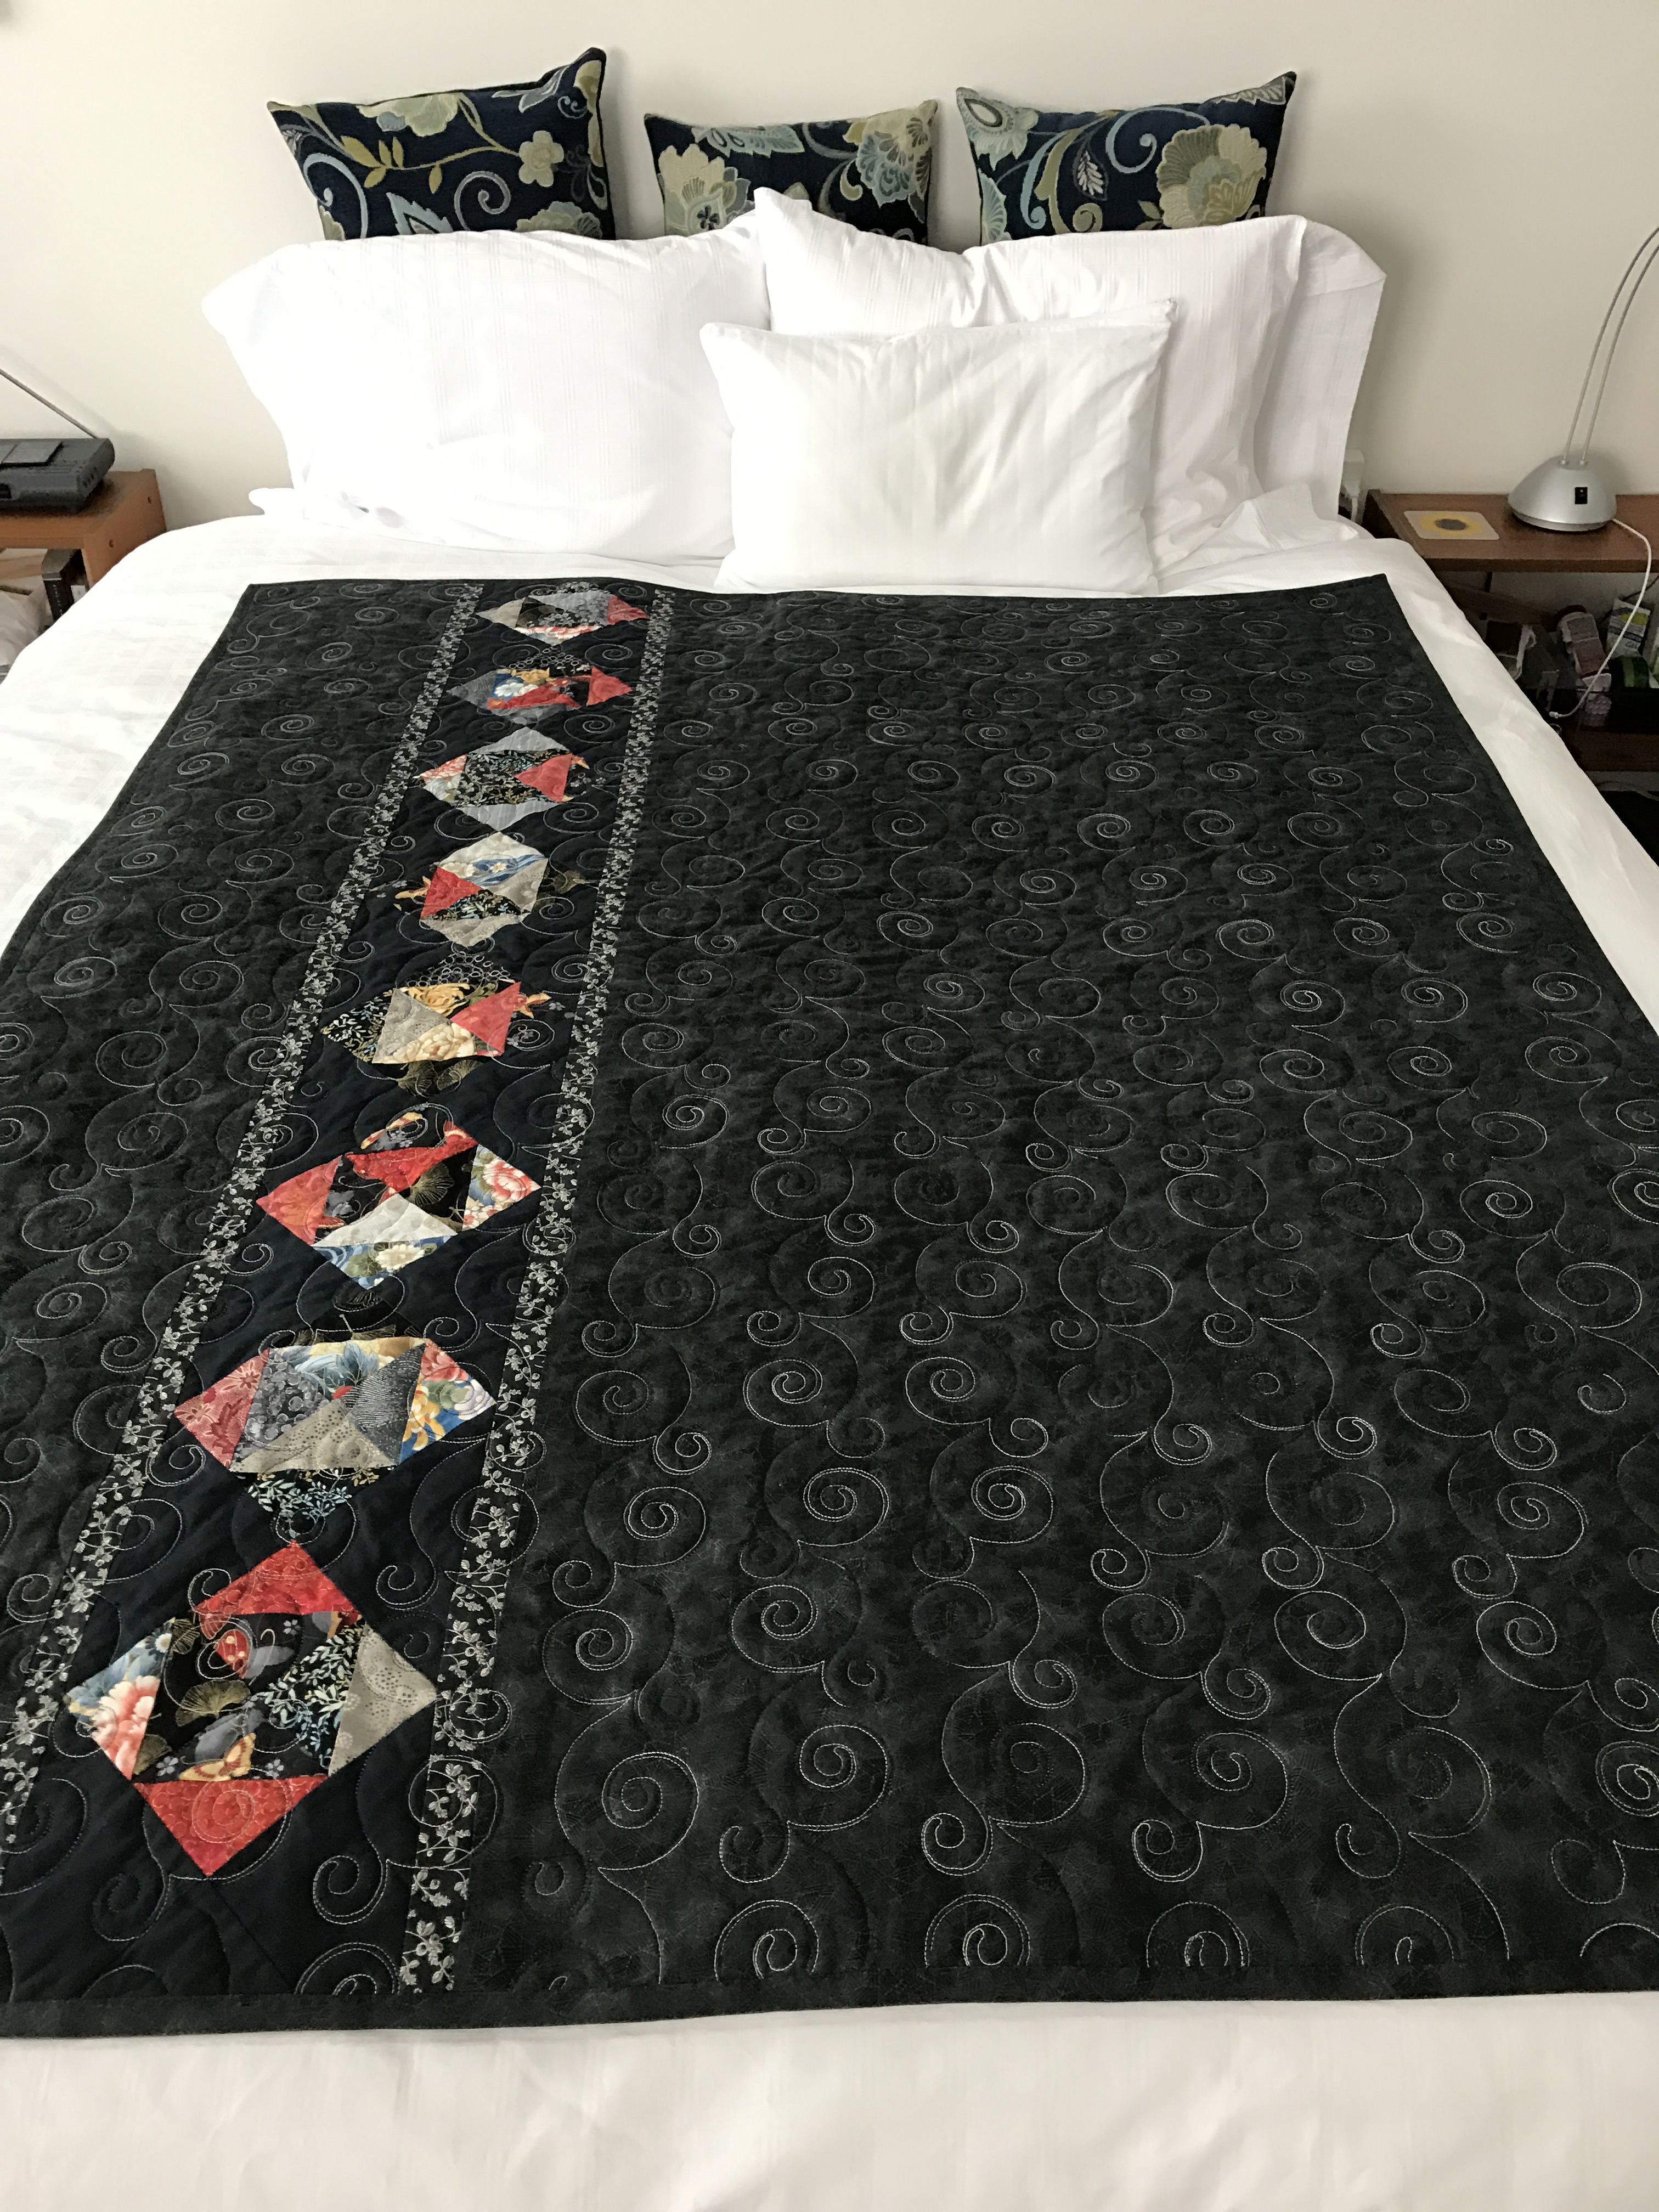
Tomorrow afternoon I should be able to finish the backing and set up the quilt for quilting!

Drunkard’s Path – Quilt Back

I’ve been stuck this week on the Drunkard’s Path quilt. I went through my stash and although I have several large pieces of grey fabric the colour or patterns just weren’t right for what I’d done with the quilt top. So I went shopping for more fabric! Here I am trying to work from the stash (to use up some of it) and my artistic sensibility says I need to go shopping.

I bought two metres of a grey print fabric during the week, but I still couldn’t get to work – something was stopping me. I did cut out the elements for twenty 3 1/2″ Drunkard’s Path blocks as well as ten 6 1/2″ blocks with the intention of combining them in some way and I began sewing the blocks together but I’ve not made much headway.

Today I took a “vacation” day with a friend. We drove to Mahone Bay (an hour away from Halifax) – a lovely sunny day (if chilly) – the roads were a mess mid-morning when we left (from the freezing rain and snow we had last night). On our way back we stopped at Heidi Wulfraat’s Woolworks shop to look at fabric. She carries the complete Free Spirit line of fabrics. I love seeing the entire collection. I happened on a grey batik, however, which suddenly explained my inaction – I just wasn’t happy with the other backing fabric I bought!

On the left is the first backing fabric (light grey with dark crosshatchings) I bought earlier in the week – it’s now going into the stash – it will be perfect for some other quilt, just not this one. The grey/white batik at the bottom of the pile above I bought today. The Drunkard’s Path block example is what I’m planning on doing for the strip to extend the width of the backing – with sashings from the darker grey and the teal batik.

Tomorrow, I am determined to sit down and finish both the large and small Drunkard’s Path blocks, add sashing and the backing!

I still don’t have a quilting embroidery – but once the quilt sandwich is assembled I should be able to some up with something suitable.

Decisions, decisions!

Quilt On The Go – VI

This is the completely edge-stitched, bordered top panel.

Bordered Panel

The photo doesn’t do this panel justice – I have nowhere to hang it and photograph it in a way that allows me to align it perfectly. I laid it on my bed and adjusted the sides as best as I could with my photo software. But you get the idea here.

The narrow chartreuse inner border was a good idea – it brings out the brighter greens. The wider darker blue grunge border stabilizes the blues in the panel. I’m also happy with the subtle diagonal flow in parts of the piece.

Now to build a back

Fabrics For The Backing

These are the two main fabrics I’m planning on using – I also want to build in a bit of piecing using the blues and greens from the top. That’s a job for tomorrow.

Yesterday I sat down at my iMac to play with my Pfaff TruE3 embroidery software to discover it won’t run on my recently updated operating system!

The first line problem is the dongle driver which is incompatible with Catalina (the new OS 10.15); there may be problems further in I don’t know about and can’t know about until I get past the registering of the dongle.

It infuriates me – I bought the software for a whopping amount of money a year and a half ago and now I can’t use it. I immediately contacted Pfaff TruE3 Embroidery Software support who replied they had no information on whether the dongle manufacturer was planning a dongle driver update! TruE3 was only compatible with Mojave (10.14). No help there, obviously.

So by the weekend I’m in a bind – I can stitch out embroideries I’ve already created but I can’t modify them to any great extent and I can’t create anything new.

I’m going to have to ask around among the women I know who have invested in Premiere+ and see if I can spend a bit of time on their computer creating a design to quilt this new quilt with – that’s if that software will actually run on an updated Mac!

Purple Passion – Quilt Back

Assembled the back for Purple Passion yesterday. The point was to use up leftovers and retain enough of the purple grunge fabric to be able to bind the quilt without having to buy more fabric!

Purple Passion – Quilt Back

I used leftover blocks from the quilt top, cut in half to assemble the narrow pieced strip, then used large blocks of the leftover fabrics to create a wide strip. I decided this time not to insert the strip but to use it as a panel on one side, instead.

Then I set up the quilt sandwich – I’ve described how I do this somewhere in the blog but can’t find the specific post. When I started quilting, I would tape the quilt back to the floor, lay the batting on top, then position the quilt top, smooth out the whole thing and pin.

Pinning The Quilt Sandwich

But getting up and down has become difficult – it’s an age thing – and one day I tried rolling each layer on a pool noodle, and working on my dining room table. That made assembling the quilt sandwich quite a bit easier.

One day it dawned on me that 1 x 4 boards would provide some weight and allow me to apply a bit of tension to each layer as I progressively pinned the sandwich. That’s what you see here. Each layer is rolled on a board, the layers placed on top of one another. I will pin the exposed layers, roll that part up and continue pinning until I’ve reached the other end, taking care to keep the quilt back as smooth as possible. I’m working on my cutting table which is a good height for this step – I don’t have to bend over as I did on my dining room table – much easier on my back.

I’m now ready to begin pinning. Once that’s done, I will stitch-in-the-ditch to stabilize the sashing and outline the narrow drop shadow border. Then I’ll quilt each block once I’ve created an embroidery for this quilt.

Quilt Back

Quilt back is also completed. I used the leftover bits to create four blocks like the ones on the top, and inserted uncut blocks of the original strips. With sashing I was able to get a 12″ strip to insert in the back. Now I’m ready to assemble the quilt – I’ll get that done later today. My next task is to create an embroidery design for quilting the quilt.

Quilt Back

The back looks wrinkled even though I’ve pressed it, but it will be taut once I’ve pinned the layers together and hooping each block to quilt it will tighten all the layers so the quilt will lay flat.

Quilt Backs

Yesterday, Melanie McNeil (Catbird Quilt Studio) posted a piece on pieced quilt backs.

That got me thinking about the piecing I do for quilt backs. She says she prefers a solid back (her quilts are bed size) – I prefer the adventure of piecing (I generally make lap quilts). The challenge for me is to get away with a single length of quilt backing fabric and filling in the width with leftovers from the top, retaining something from the character of the top but at the same time creating a new piecing. Most of my back piecing involves a wide strip, although occasionally I’ll do a block of some sort surrounded by backing fabric – it depends on just how much backing fabric I actually have to work with!

Here are some quilt backs:

#1 – This is the latest quilt (Improv Quilt) – a strip/block because my strip wasn’t long enough and I fortunately had just enough backing fabric to border the strip converting it to a block.

Improv Quilt – Back

#2 –  An opportunity to try some flying geese. The original blocks were all in shades of indigo but I decided to insert one gold triangle in each and it made a huge difference to the strip.

#3 – From the red/black/white strips quilt. The quilt top looks like three Venetian blinds with a red background. The grey backing reflects the fabrics used in the piecing from the top, with the red accents.

#4 – This back was for the Starburst Quilt: I had no fabric leftover from the quilt top so I decided to use  other indigo fabrics highlighted with the turquoise and green elements.

#5 – The inspiration for this quilt back came from a quilt by Weeks Ringle – it backs the Pick-Up-Sticks Quilt:

#6 – This is the back of the Medallion Quilt: I had just enough of the border fabric leftover to create these four mitred blocks. I decided to rotate them rather than keep them all facing the same direction. Spaced them out, offset top to bottom, with backing fabric because I had a lot of it.

Quilt Back

#7 – This back is from the Grey-Yellow Quilt: I had a lot of half-square triangles left over from the front. I decided to array them as a spiral. The panel is offset top/bottom, and left/right. My quilts are all modern quilts – they need asymmetry to look “right”.

#8 – This back is from Improvisation #6 – Asian fabrics, drunkard’s path quilt. I had several slightly smaller blocks left over. I decided to do a more conventional drunkard’s path layout with single complete circle near the top of the strip.

#9 – The back of the Asian Strips Quilt: I did the piecing of the on-point squares, added the filler and realized I still needed border/sashing to offset the insert strip from the backing fabric.


Obviously I have many more quilt backs I could showcase here, but these are enough to illustrate how I see a quilt back. All of my quilts are “double” quilts – they can be used either side – for me, that’s part of the challenge/adventure of improvisational quilt making.