Asparagus Field – 7

20130918-232107.jpg

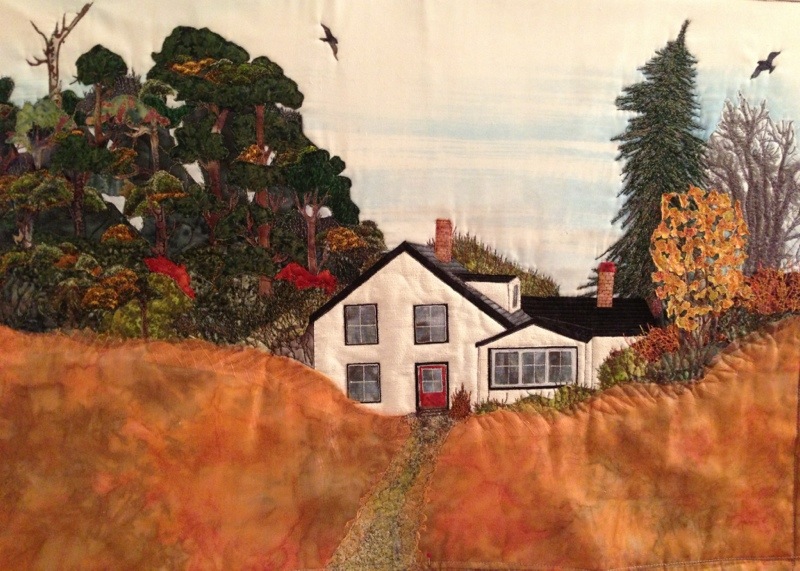
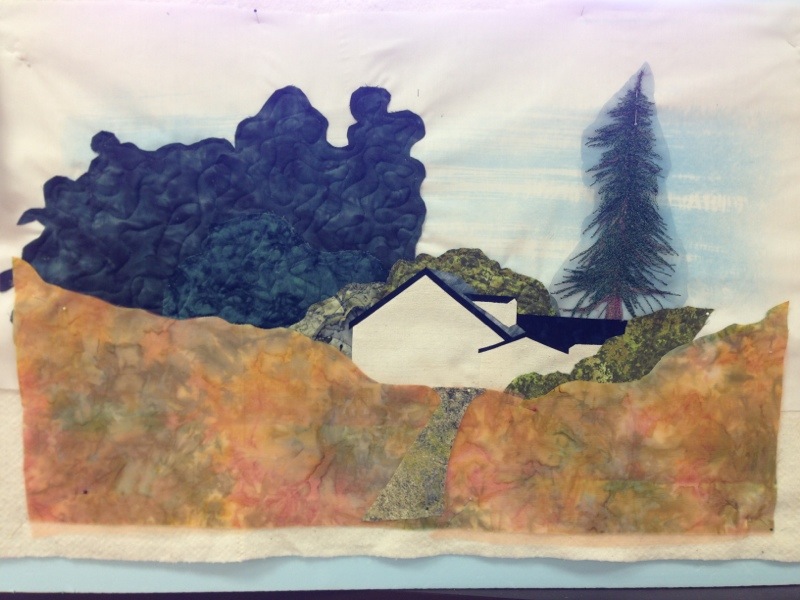
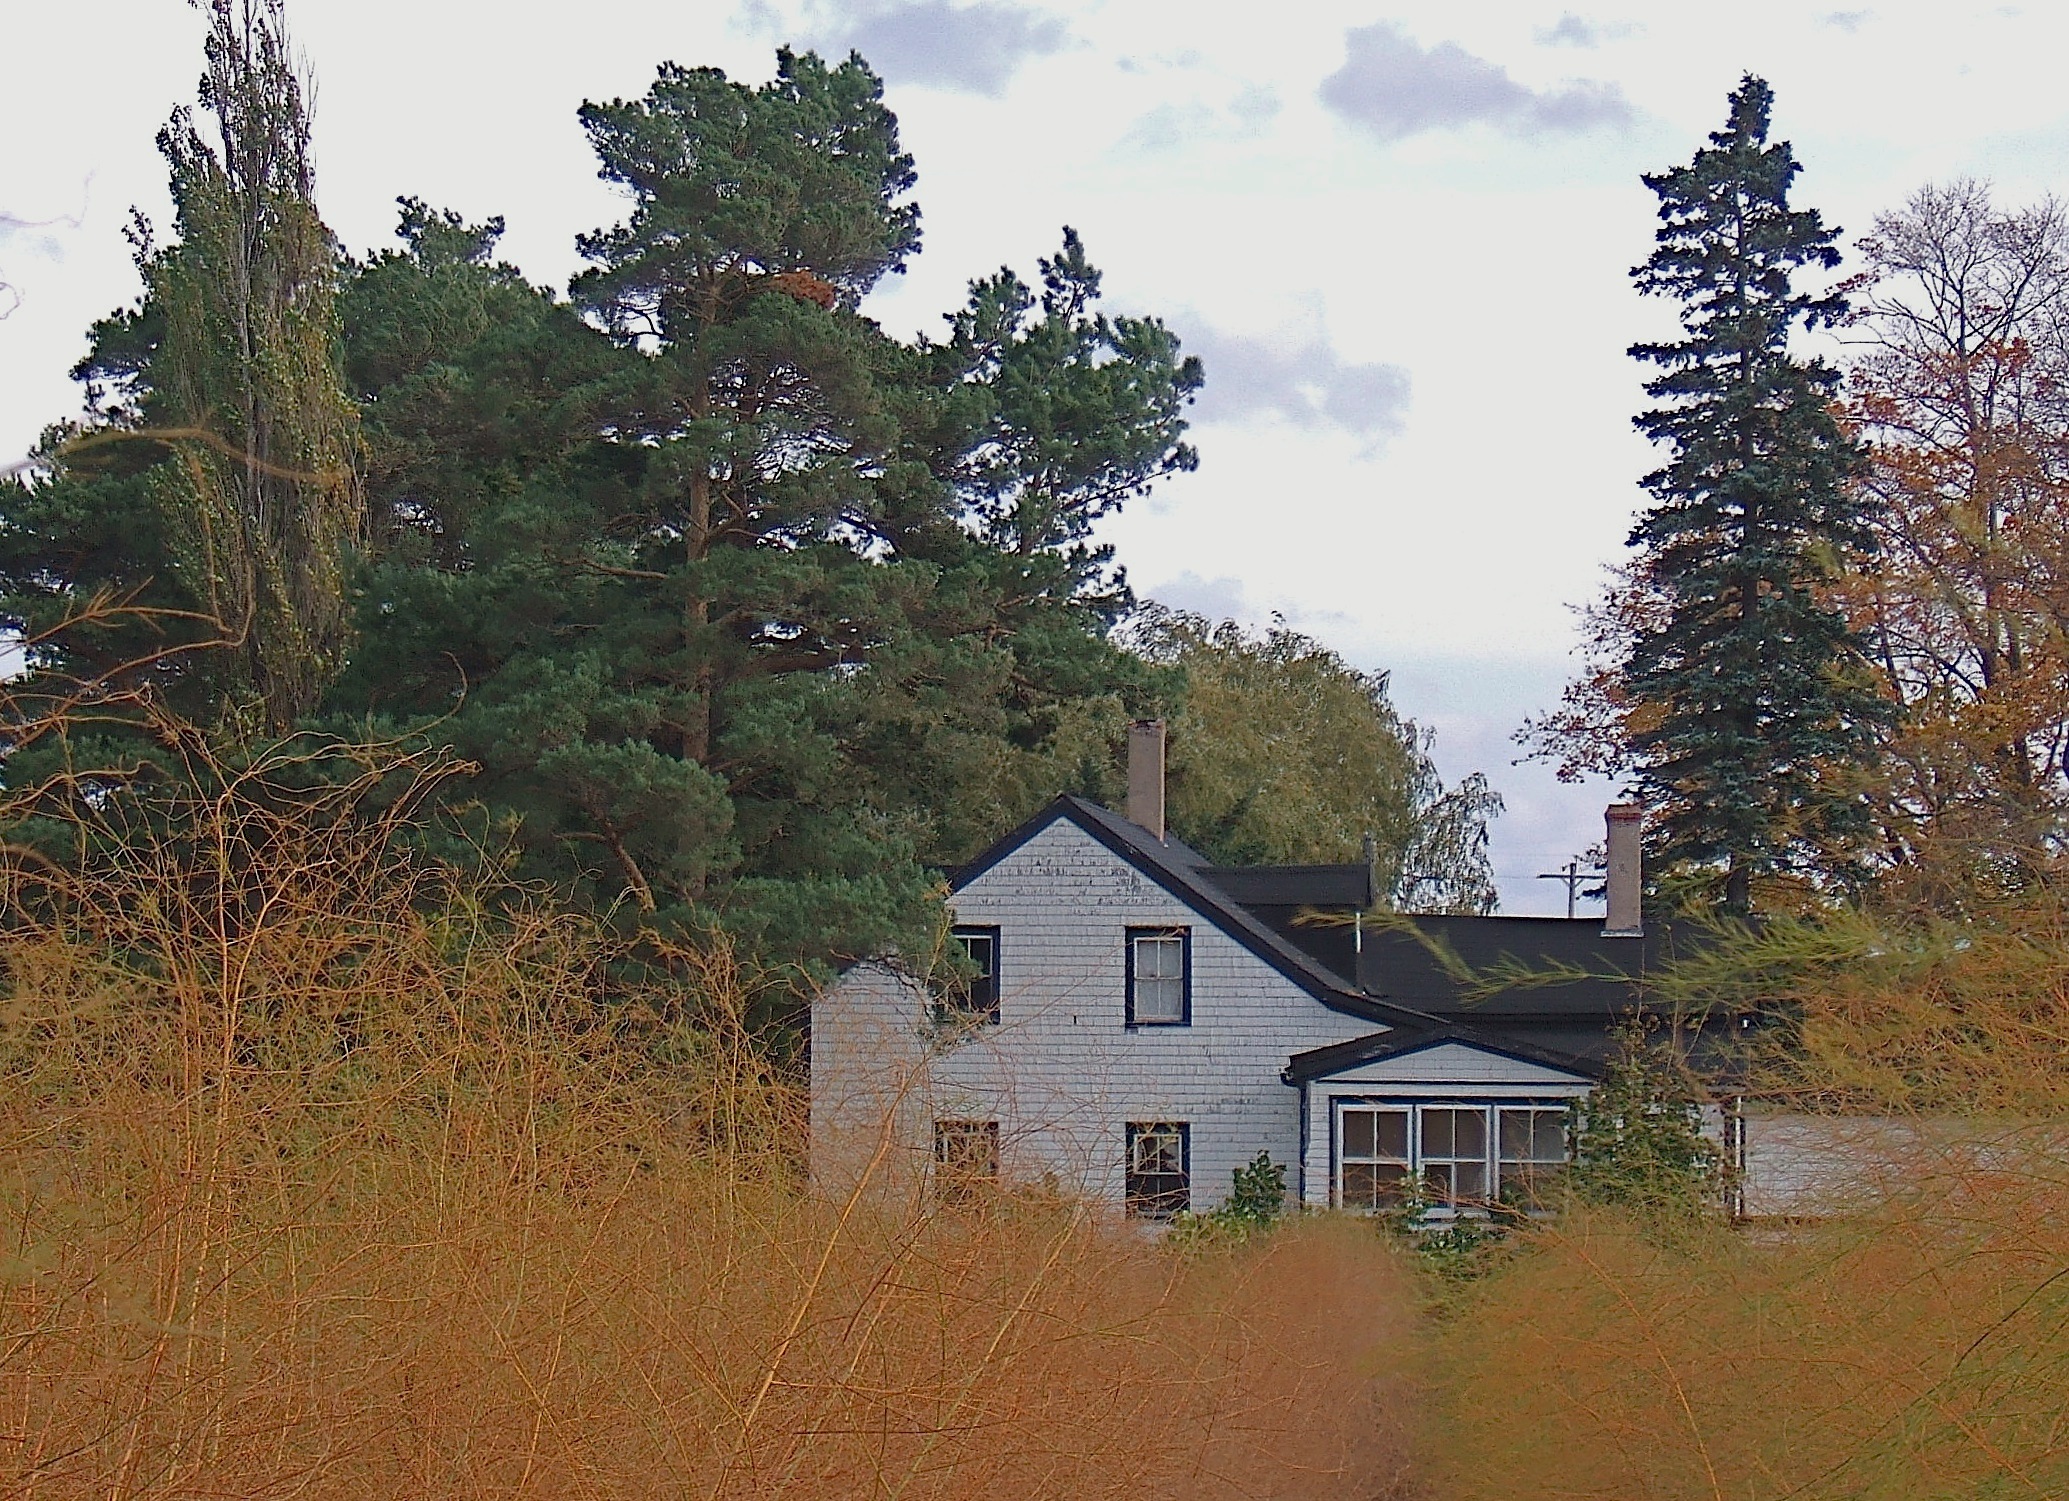
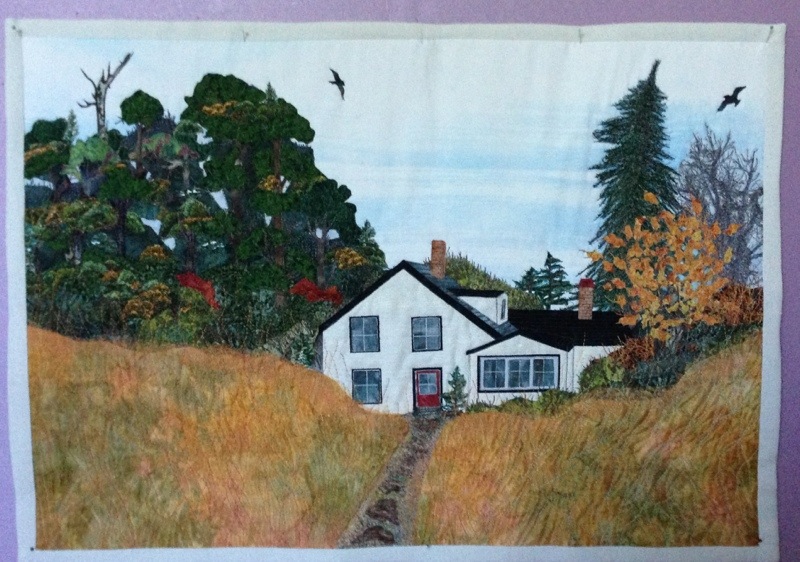
The detail stitch work is done. Today I worked on the asparagus field; it turned out to be easier to do than I thought it would be – I think the practice I did yesterday definitely helped. I also picked out the stitching for the small shrub beside the front door, and replaced it with something more recognizable as a small evergreen tree. I also added a few small evergreens just behind the house to provide a bit more Interest to the skyline.

Now I have to figure out how to “frame” the piece – I think I’m going to add a 2 1/2″ “frame” with piping on the inside edge (using the batik fabric I used as the underlay for the asparagus field). That’s for tomorrow.

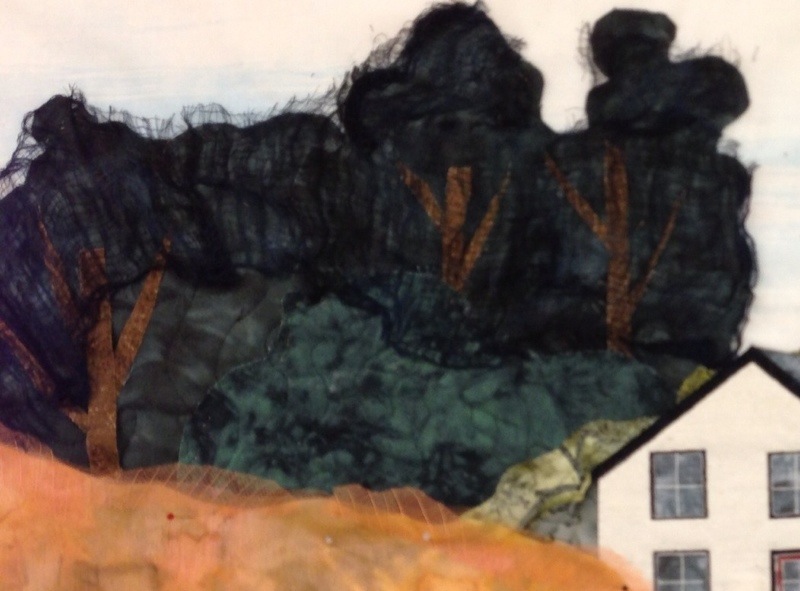
Have I ever learned a lot about how to think about an art quilt piece. Some aspects of this quilt were done out of order – in part because Laurie was moving us along so we’d have the batting covered by the end of the workshop. I now realize the sky should have been tied down first – that would have avoided the big bubble in the sky fabric. The “woods” on the left were out of synch – the dark underlay should have been much less extensive so that the tree elements could have been positioned against the sky with sky showing through the trees. Also that would have allowed a more irregular skyline. The asparagus field in the foreground should not have been added until everything behind it was almost complete – I had to fight the free motion stitch work because the asparagus was already present.

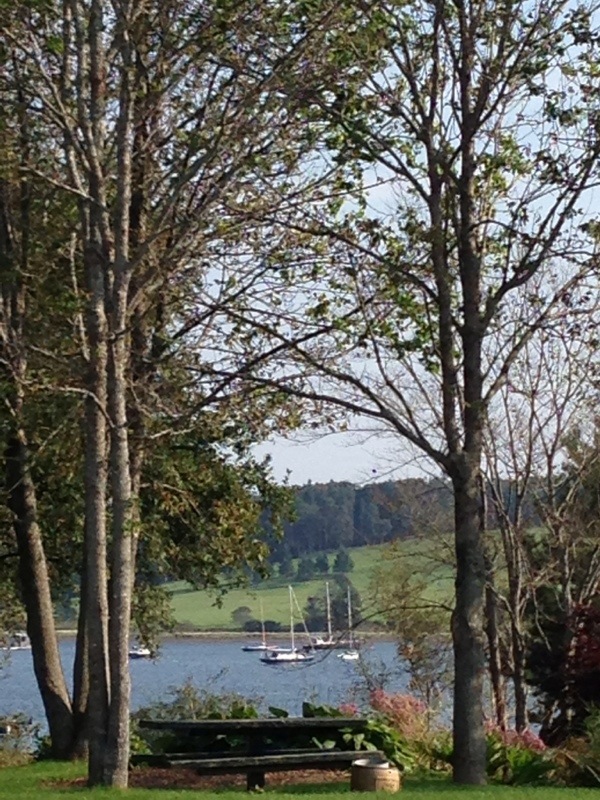
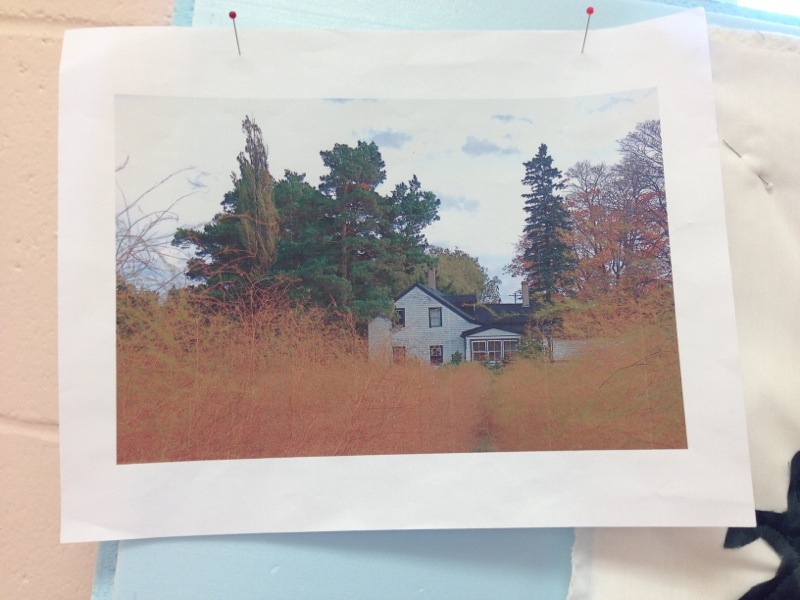
Last, I came to realize in the beginning I was too tied to the tracing of the photo – this kind of art quilt needs a lot of improvisation. The original tracing is mainly to help set out the large areas of a piece – the details, however have to be invented as the work unfolds. It’s also clear that I need to carefully study a photo before I begin – just how carefully I didn’t appreciate before I began.

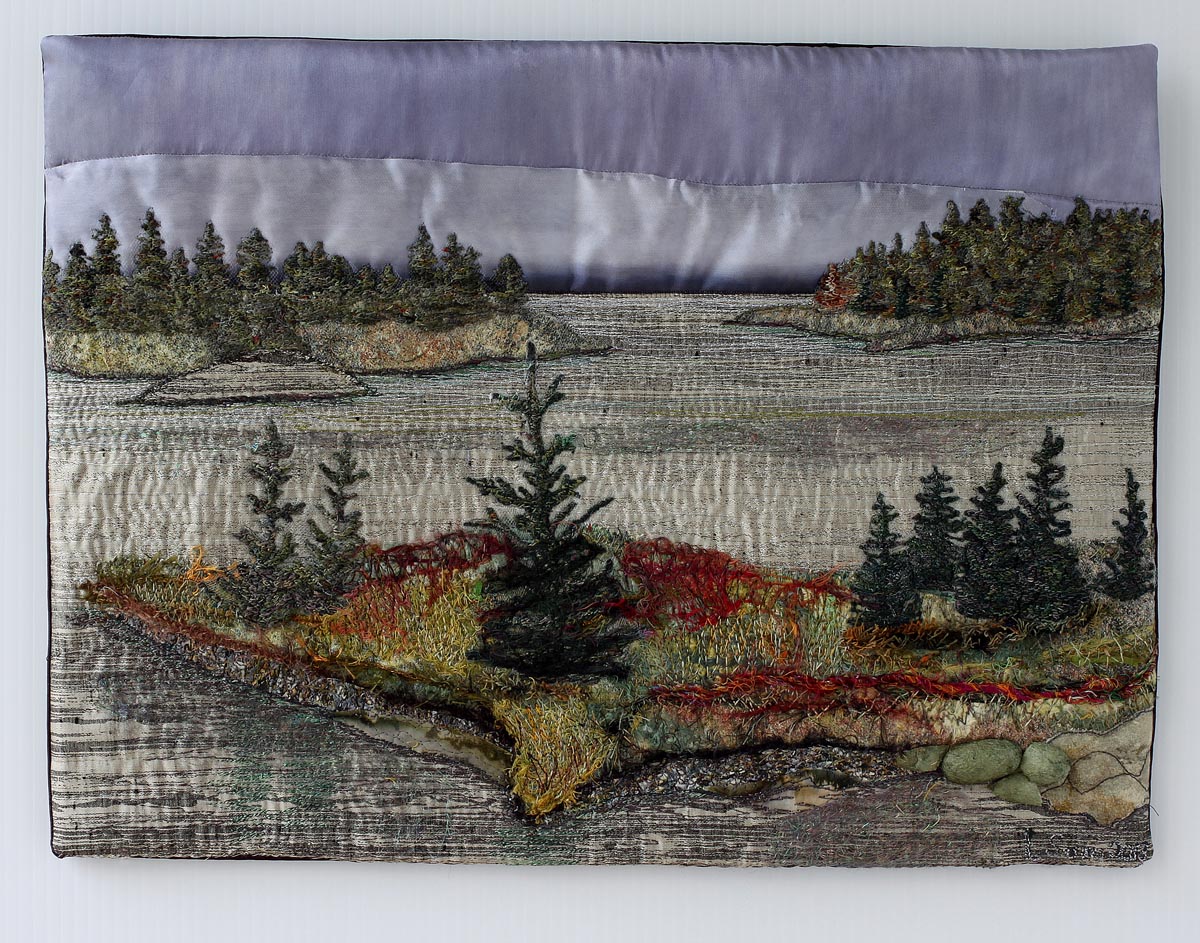
There will be one last photo once I complete the piece.

Asparagus Field – 6

Made more progress today – I dug out my copy of “Birds of North America” to find flight profiles of some local birds which I used to create a couple of birds (remember I needed them to cover dark spots in the sky). I started stitching the trees on the left – the tree trunks, the foliage – realized I should have removed much more of the green underlay Friday night when I was taking all that stitching out! At the moment you can see the tree trunks close up, but they don’t show from a distance because they’re lost against that dark green underly. They need something to give them texture (not thread painting, I don’t think – although I’ll try a sample), in the end I may just live with what I have – this, after all is a learning experience.

Tomorrow – gotta tackle the asparagus field itself.

20130916-215205.jpg

Asparagus Field – 5

Worked on the trees and shrubs on the right side of the piece this morning:
20130915-095554.jpg
Also added texture to the roof, although it doesn’t show in the photo.
Next, those trees on the left!
Oh, and I fixed the bubbling in the sky – I split the interfacing in the back to allow me to spread it a wee bit, enough to let the sky lay flat.

Asparagus Field – 4

Took a close look at the quilt last evening and decided to do something about the MESS on the left hand side – it was 10:00 pm when I started to pick out the stitching (and there was A LOT). When I looked at the clock it was 3:00 am! This morning I looked again and thought about adding “sky” to break up the blob of dark green on the left – definitely better.
20130914-153713.jpg

Later, I went to Atlantic Fabrics to see if I could find a bit of wide white lace to add bits to make it seem as if the sky were peeking through the leaves. I’ll do that now – after the doubles tennis match which Canada has just won – it’s now 2:1 Canada/Serbia in the Davis Cup tie. One more day to go – Canada “might” just win this series.

Here is the updated piece:

20130914-190319.jpg

Asparagus Field – 3

Here’s the project at the end of the afternoon:
20130913-180433.jpg
I managed to get the entire surface covered, the “asparagus” in the foreground placed and tacked down. The big move forward this morning was the bare deciduous trees on the right side. I learned a lot doing that. I had some “eyelash” yarn which I sandwiched between a pale blue batik fabric and some tulle. I then tacked the yarn down and added to it with some free motion embroidery. THE problem, is that I should have used just the tulle – top and bottom; I’d intended the trees to be in front of the spruce behind the house – but when I tried trimming the backing fabric from the branches, I couldn’t get close enough, so I had to remove the branches on the left side, and extend the branches on the spruce to overlap the bare trees – a valuable lesson!

Then I played a bit with the trees on the left of the piece – what I’ve got there right now is a big mess. I have to spend some time looking at it and looking at pictures of evergreens to see if I can resurrect those trees, or whether I will have to cover them over and start them again!

The asparagus field now needs a lot of free motion embellishment – I’ve done some work on the path to the house, but the large expanse of field will need some experimenting – I want to maintain the featheriness of the asparagus, but there also has to be hints of the stalks. I will have to work on a sample to see whether I can get the effect I want.

I stopped at this point this afternoon, packed up all the stuff I’d brought. Time to stand back and think about the embellishing detail.

Finally, we did a “show and tell” – each piece pinned to a styrofoam slab, stood on a ledge, so we could stand back from the work and really look at it from a distance. We were all justifiably pleased with how the quilts look at this point – they all need a lot more work, but everybody got the surface covered, with the beginnings of the embellishing. We’ve agreed to finish the quilts, and send photos to Laurie and one another when we’re done.

It was a great five days!


It poured today. I have no pictures of Lunenburg. I simply came straight home after we finished up. I’ll post photos as I continue working on the piece.

Asparagus Field – 2

The project continues. Today I worked on the house, creating a door, windows, and adding chimneys – by building up the elements rather than cutting into the building facade and placing the elements behind the openings – that’s because the raw silk I used for the building frays so easily.
Next I incorporated the house into the setting, stitching it in place with a fine monofilament thread.

20130912-172352.jpg
I also stitched the tall spruce in place and trimmed away the organza from the edges – next time I’ll know to leave a lot of organza around the element – it was difficult cutting the excess away because I had little to hold on to!
I’ve also played some more with the asparagus field – adding in leaf vein pieces along the top edge and beside the path. I’ve added a second layer of the orange/gold organza to blur the detail of the fabric beneath – tomorrow I will need to stitch all of it in place to hint at the stalks, but not make them too obvious.
I have also begun working on the evergreen trees behind the house – I added tree trunks and a couple of major branches (which will be mostly covered up when I’m done) – I put a layer of cheesecloth over the trees in the background to suggest the spiky branches of the trees, it may need a second layer and something more in the trees nearer the house.

20130912-172914.jpg
And of course, there’s still some kind of bare deciduous tress needed on the right side – still no idea how to construct them,
First thing tomorrow morning we’ll put our projects on display to see how far everyone has got.

20130912-172259.jpg
My piece is really beginning to look like a real picture:

20130912-173150.jpg


And a couple more pictures of Lunenburg – it was a lovely sunny day today – supposed to be a hurricane tomorrow!

20130912-173336.jpg

20130912-173400.jpg

Asparagus Field – 1


20130911-211741.jpg

Asparagus Field (North Canning, NS) – Photograph (by Judith Newman)


OK, I started “the piece” yesterday – cut the batting and stabelizer to size, prepared a piece of fabric for the sky, started to create a tall evergreen using free motion stitching on hooped organza.

I finished the tree this morning – Laurie in the meantime trying to push me to “get the batting covered.” By that, she meant start placing the fabric for the sky, put in fabric for the trees, lay out the pieces for the asparagus field… I traced the shapes for the main spaces, used the tracings as templates for cutting the fabric.

Next step – I stitched these elements in place, then filled each element with some widely spaced free motion work. ( The asparagus field in the foreground can’t be positioned and stitched in place until everything behind it is in place – the house, trees, shrubs…)

I next started on the house – the focal feature of the piece. More difficult than it first appears because I was using some raw silk for the building – it frays terribly so I had to back it with “steam a seam” (a paper backed iron-on glue) to stabilize it. Whereas the house made yesterday was constructed by cutting out windows and using fabric behind the openings, this building will have to be done with appliquéd windows and doors, each small feature created separately. I was able to construct the main elements of the house this afternoon – the details will come tomorrow.
20130911-211436.jpg

The right hand side of the piece needs to be filled with leafless deciduous trees – I still have no idea how to go about that.


And a few more pictures of Lunenburg:

20130911-212049.jpg

20130911-212102.jpg

20130911-212123.jpg

Sample #2

A lovely day that began with a goofy mistake. I arrived at the Lunenburg Fire Hall a bit early. It was sunny (although still cool) and as I was waiting for the others to arrive, I decided to walk across the parking lot to the water’s edge to photograph the ships in the harbour, so I got out of the car and locked it – keys still inside! Thanks goodness for CAA. I had the car open again within a half an hour. Fortunately, that wasn’t a sign of how the day would unfold.

We began with Laurie showing and explaining to us a recent art quilt piece – a beach with a family of five, ocean, hills in the background, the seaweed high tide mark… A very lovely image and as usual beautifully executed. No photos, however.

Then we explored some new techniques by “constructing” a small house. It was interesting to see how the building is assembled from many layers. The other women completed the house and stopped there. But I still had a spare background from yesterday, so I added the house, quickly created two evergreen trees and a bush to add some further interest. Then I put in a path (using free motion embroidery to set up paving stones. I began adding “grass” but didn’t get the whole space thread painted (this after all is just a sample). Finally, trimmed the edges and bound the piece – still needs hand sewing on the back.

20130910-193738.jpg

Notice also, the mullions in the windows and the edge of the roof which were also thread painted.

So with a bit more work when I get home, Sample #2 is actually a tiny art quilt. (It could use a chimney on the roof, I think and I may add one when I get a chance.)

We spent the rest of the day doing some prep work for the larger pieces we’re each working on. First, Laurie gave me a transparency created from the photo I gave her. I decided, in the end, to try the asparagus field. The transparency is put on an overhead projector, projected on paper tacked to a wall. The main elements are quickly sketched in. Then the tracing process is repeated on large sheet of tracing paper. These two tracings are used as templates and to reference the overall composition as the piece unfolds.

Next comes painting paper with fabric ink which when dry is transferred to a wide strip of poly-cotton fabric to be the sky. The sky is laid out on top of the paper template, and I next spent some time auditioning fabrics for the various elements in the picture.

I will need lots of trees – some will get created using the cobweb lace we learned yesterday. I spent the afternoon creating a tall evergreen tree (I got about half-way through it when it was time to leave, I’ll finish the tree tomorrow.)I used an pale blue organza fabric as the base, since the top of the tree will be against the sky. My free motion stitching is improving rapidly, I’m relieved to say.

So tomorrow, I’ll take a picture of the work in progress so you can understand how it’s unfolding. I also hope to begin constructing the house which will be the focal point of the work. The real challenge is going to be the asparagus field. I have a batik with yellow, peach, soft greens. I intend to overlay that with some golden/orange organza, but I need something more – whether it’s dyed cheesecloth in a suitable range of colour, or whether I will do thread painting on the surface, I’m not sure. I did pick out thread colours that will work and I had brought a metallic thread in the right shades – I’ll have to do some experimenting to see what might work.


Oh, and a couple more pictures of Lunenburg:20130910-195403.jpg

20130910-200306.jpg

Sample #1

This is all kind of like “Karate Kid” the original version where Mr. Miagi is teaching Daniel karate by having him do a variety of tasks – the whole results from assembling the parts. Creating a landscape quilt is like that – many small techniques that get incorporated into a larger whole.

We worked on “cobweb lace” – you cut fabric into rather small pieces (using a pinking rotary cutter blade), lay them on a piece of cling wrap, place a piece of cling wrap over them, hoop the three layers, and free motion stitch on top of that. You remove the cling wrap by placing the piece you’ve just created between two pieces of paper and press with a hot iron.
20130909-172143.jpg
What you have is a potential tree. Place one or more of these together you could have a denser tree or a shrub.
20130909-172159.jpg
Second technique: zigzag free motion – that gives you a longer stitch because the needle is moving as well as the fabric – great for grass, or tree trunks. My problem is that the sewing machine I brought is a quilting machine and it only does a straight stitch! So I tried it out on one of the other gal’s machines.

Third technique: paint fabric dye on paper, let it dry, then press (paint side down) on a poly-cotton blend fabric – a sky.

So with these three techniques I made my first sample thread painting:
20130909-170151.jpg
Not perfect, but pretty good for a first go.


It was a gorgeous Nova Scotia September day, today. I took a few moments after class this afternoon to capture a couple of images of Lunenburg:
20130909-171927.jpg

20130909-171950.jpg

Art Quilts

A sudden change of plans – I was at Sew With Vision – the Pfaff shop not far from my house to pick up some ball-point needles for my embroidery machine (to sew knit fabric) on Thursday. It turned out that another quilter was at the shop that morning, practicing “free motion” embroidery – she was going to be attending a 5-day workshop with Laurie Swim – a quilt artist who makes amazing art quilts.

incomingfog

This one is called “Incoming Fog”. Check out her site – there are lots of images there of quilts she’s done.

Anyway, I emailed Laurie that evening asking her to put my name on the list for the next workshop – figuring this one was full, when I got an email back saying there was one place still available. This was yesterday – the workshop starts Monday morning! I spent the rest of the day sorting through my photos to choose a couple of possible images that might make an interesting art quilt, went through my stash of fabric to find a stack to take with me, then the thread (variegated, embroidery, specialty), and collected up my tools. This morning I packed all that stuff up ready to take with me tomorrow.

I’ll report each evening on how this all unfolds. I cancelled all appointments this coming week. Should be a great time.

Below is a sample of the images I’m taking with me:

asaparagus house cropped  Asparagus Field

second beach cropped  Launch at Second Beach

blomidon cropped  Blomidon from  Avonport