Yesterday a friend asked me to shorten a T-Shirt for her using my Coverstitch machine – that’s the machine that does those two close rows of stitching at hemlines on ready-to-wear clothes. Expensive sergers have the capability of doing a coverstitch. My Baby Lock Evolution serger does, but it’s time consuming and a pain to convert from serging to coverlock and back, so a number of years ago I bought a Janome coverstitch machine! I now use my Baby Lock to serge, and my Janome to coverstitch. (My advice is if you don’t have a serger and are looking for one – buy a good mechanical serger that just serges and a separate coverlock machine to hem – together they’ll cost quite a bit less than a computerized serger with coverstitch!)
In the factory, hems are cut precisely and the coverstitch hem is done so the hem edge is enclosed in the stitching. I find it hard to achieve that 100% of the time because you’re sewing blind when you’re stitching the coverstitch – that is, you’re sewing from the outside of the garment, the raw edge is hidden underneath as you’re stitching, you can’t see it, so I do my best to fold and press the hem exactly, measure the hem depth, and set the “fence” on my coverstitch machine to that depth. But invariably I’ll miss a spot or two. On garments for myself, I don’t worry about it too much – I’ll hand tack the spots where I missed, but I did want this job to be done well. So I opted for not cutting the hem, but stitching it first, then trimming off the excess.
To do that I used my duckbill scissors. You may not have seen scissors like these before but if you’re a serious garment sewer they’re very handy to have.

I have two pairs – a larger one and a smaller one. I use the larger ones on heavier fabric and the smaller ones on very fine. They work by snugging up against the stitching from the underside and cutting close to it just missing the stitches themselves.
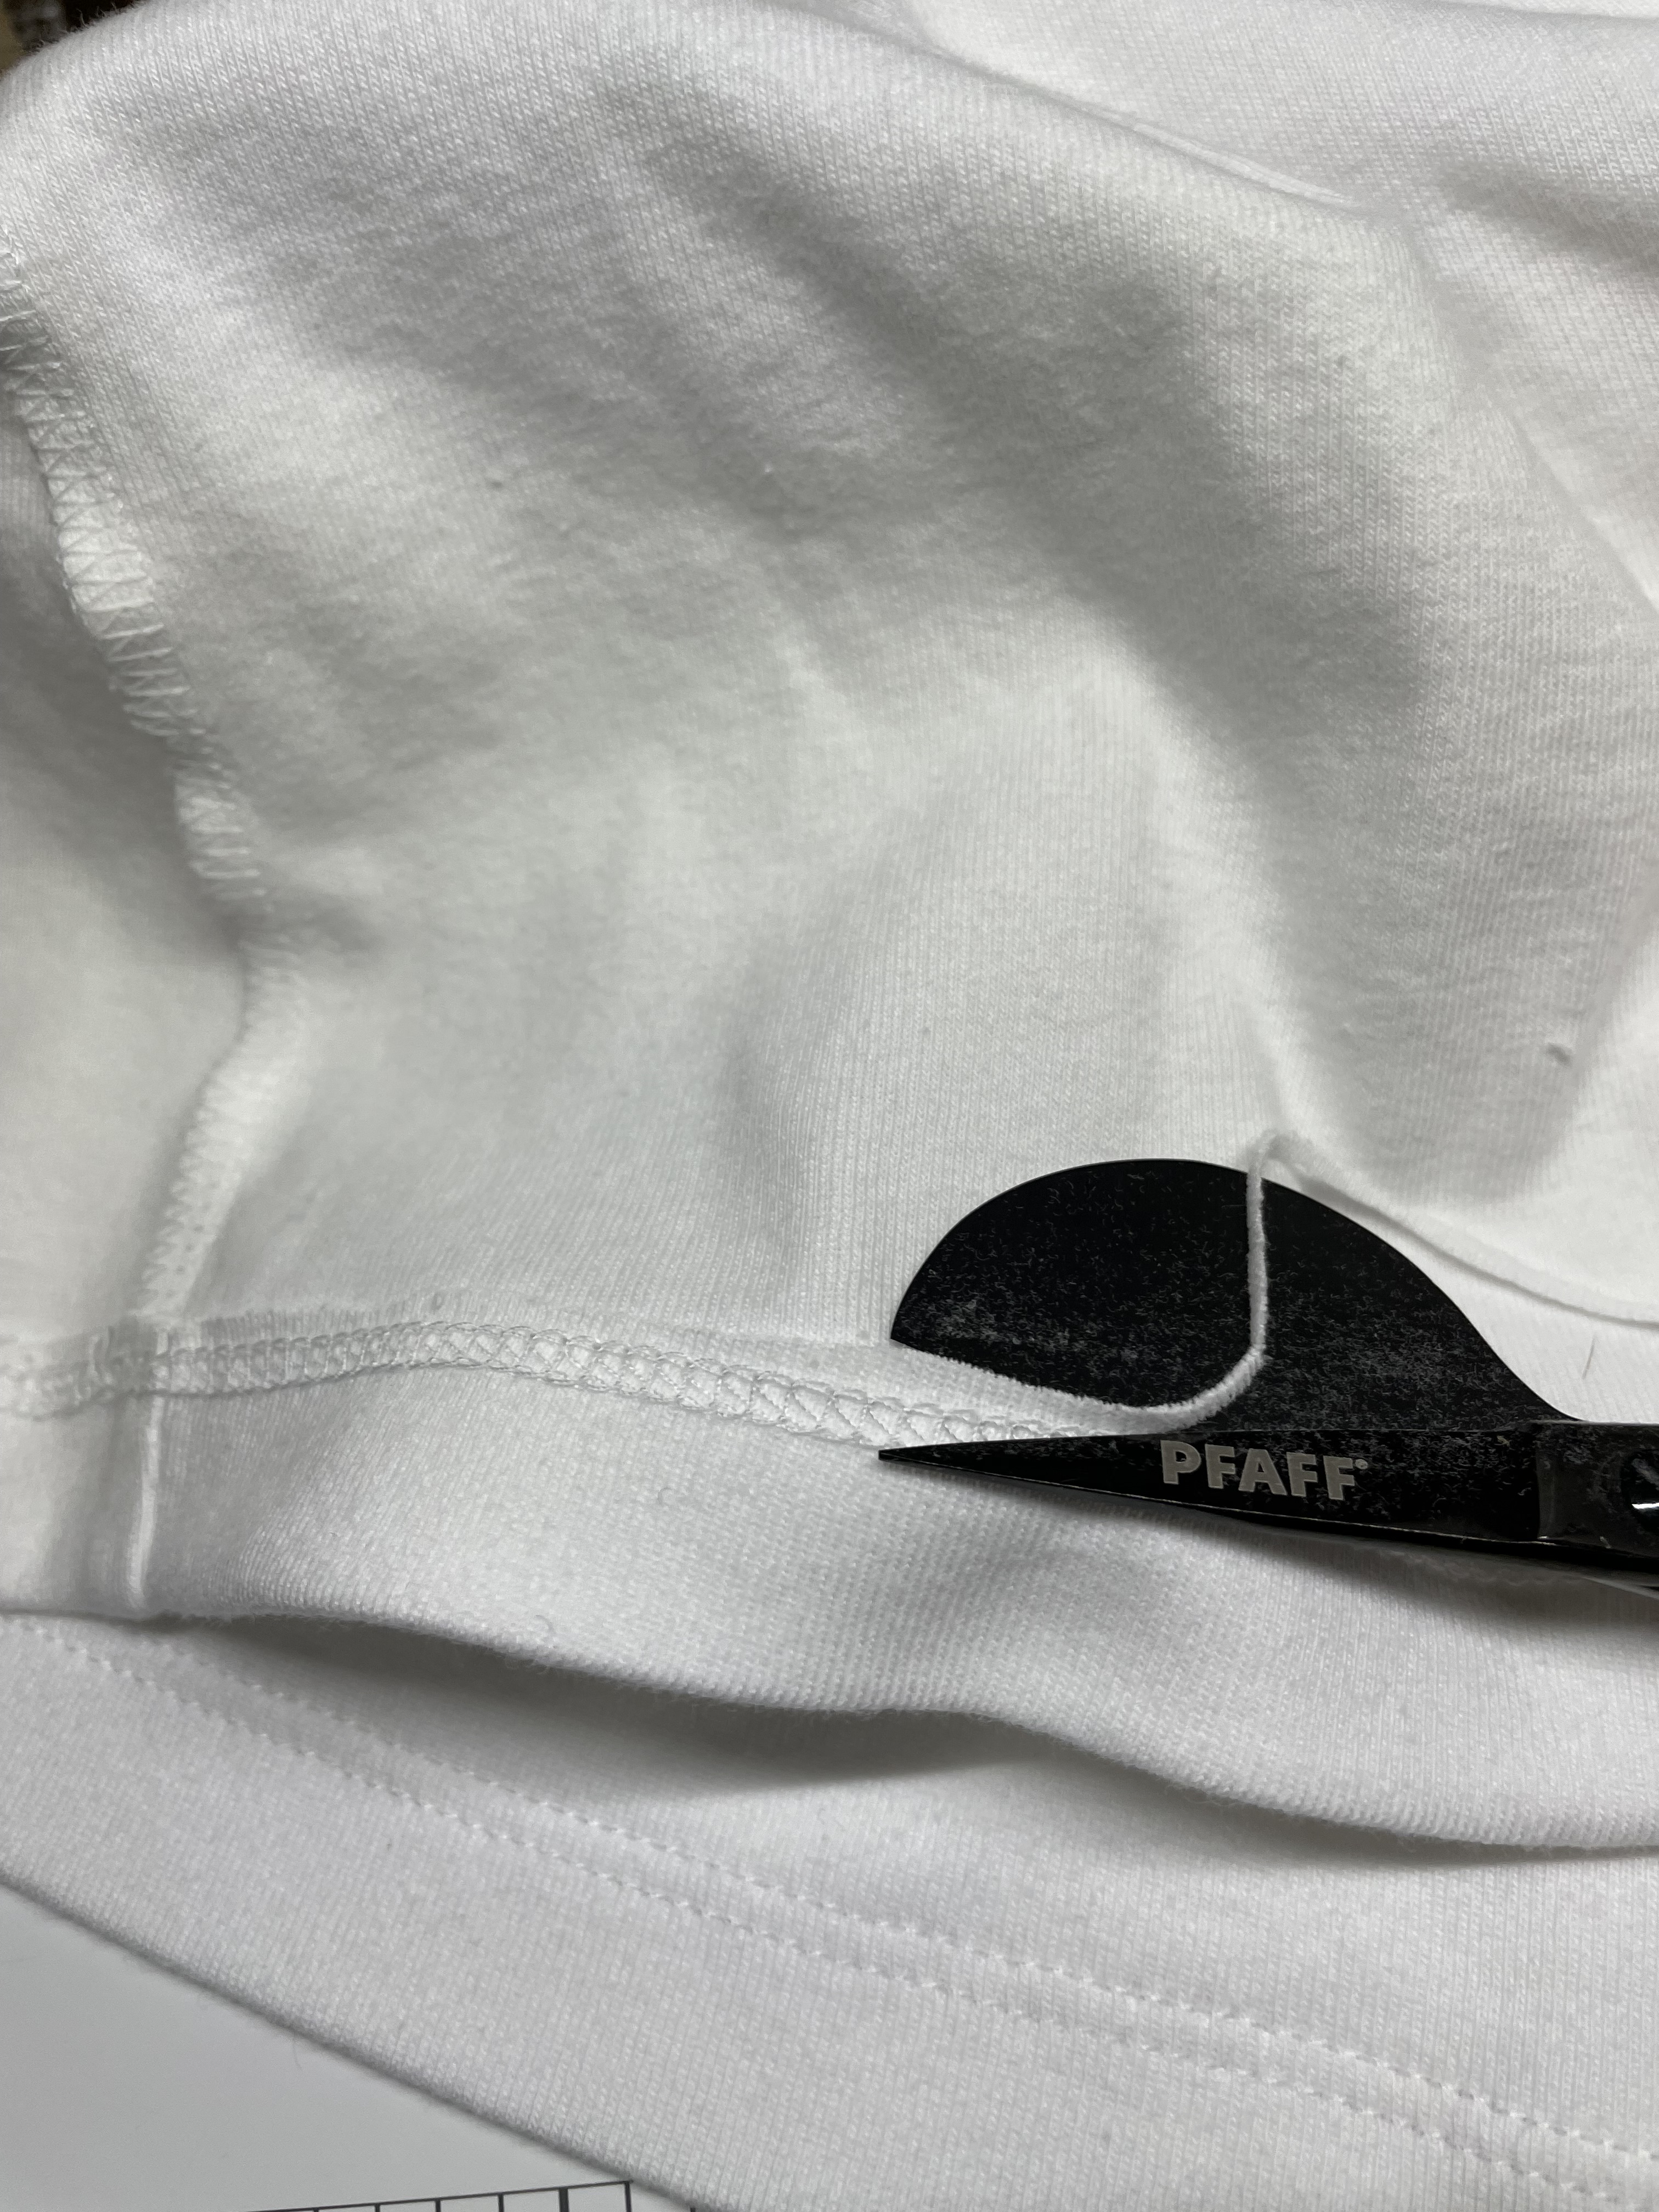

That’s easier said than done, however, because the pointed blade is on top of the stitching obscuring it, making it difficult to see precisely where you’re cutting. It’s easy to nick the stitching. What I figured out today was if I trimmed the hem more or less in the vicinity of the stitching (I used the duckbill scissors for that), then I could come back, and, holding the hem over the index finger of my left hand which makes the excess fabric beyond the stitching to stand out, I could trim the small amount that was left very close to the stitches without cutting the stitching! In other words I took the time to cut twice, the first time a rough cut, the second time against the hem stitching. It worked – I didn’t cut any of the stitching!
Lord knows why I didn’t figure that out before today!
[BTW – duckbill scissors come left-handed as well as right-handed! Here’s some information about using them: https://www.ageberry.com/duckbill-scissors/]
