Diamonds – Laid Out

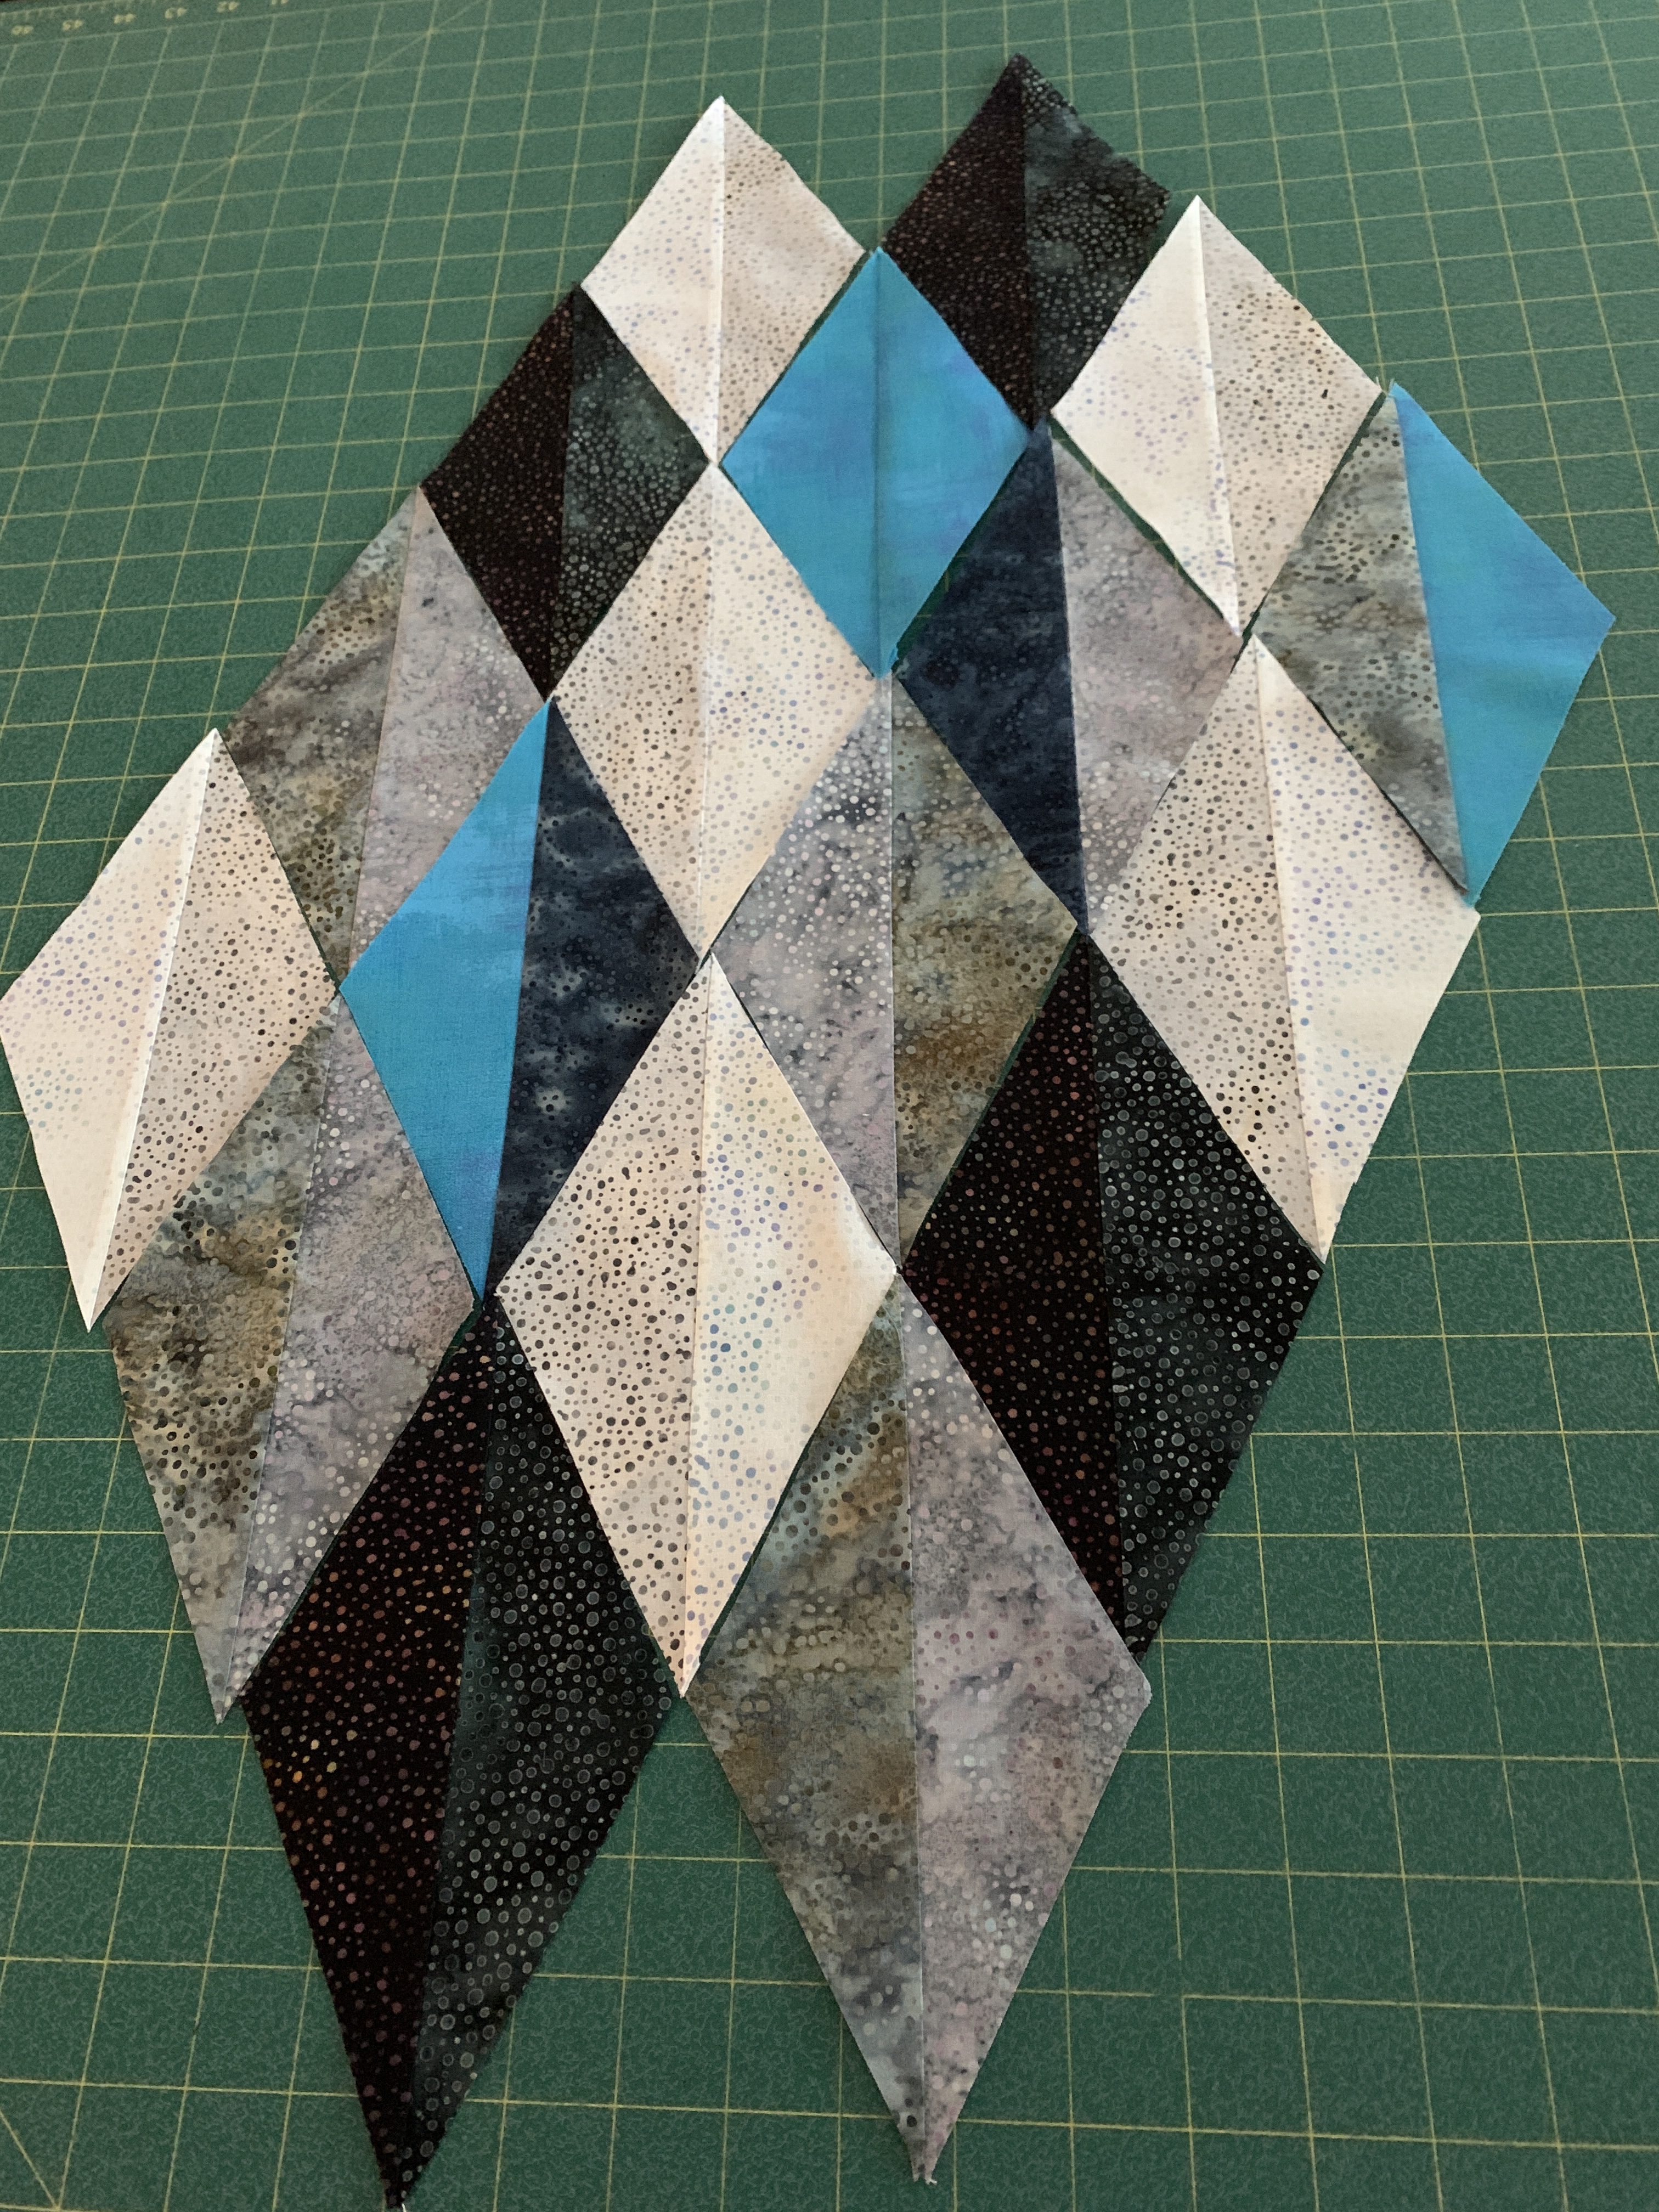
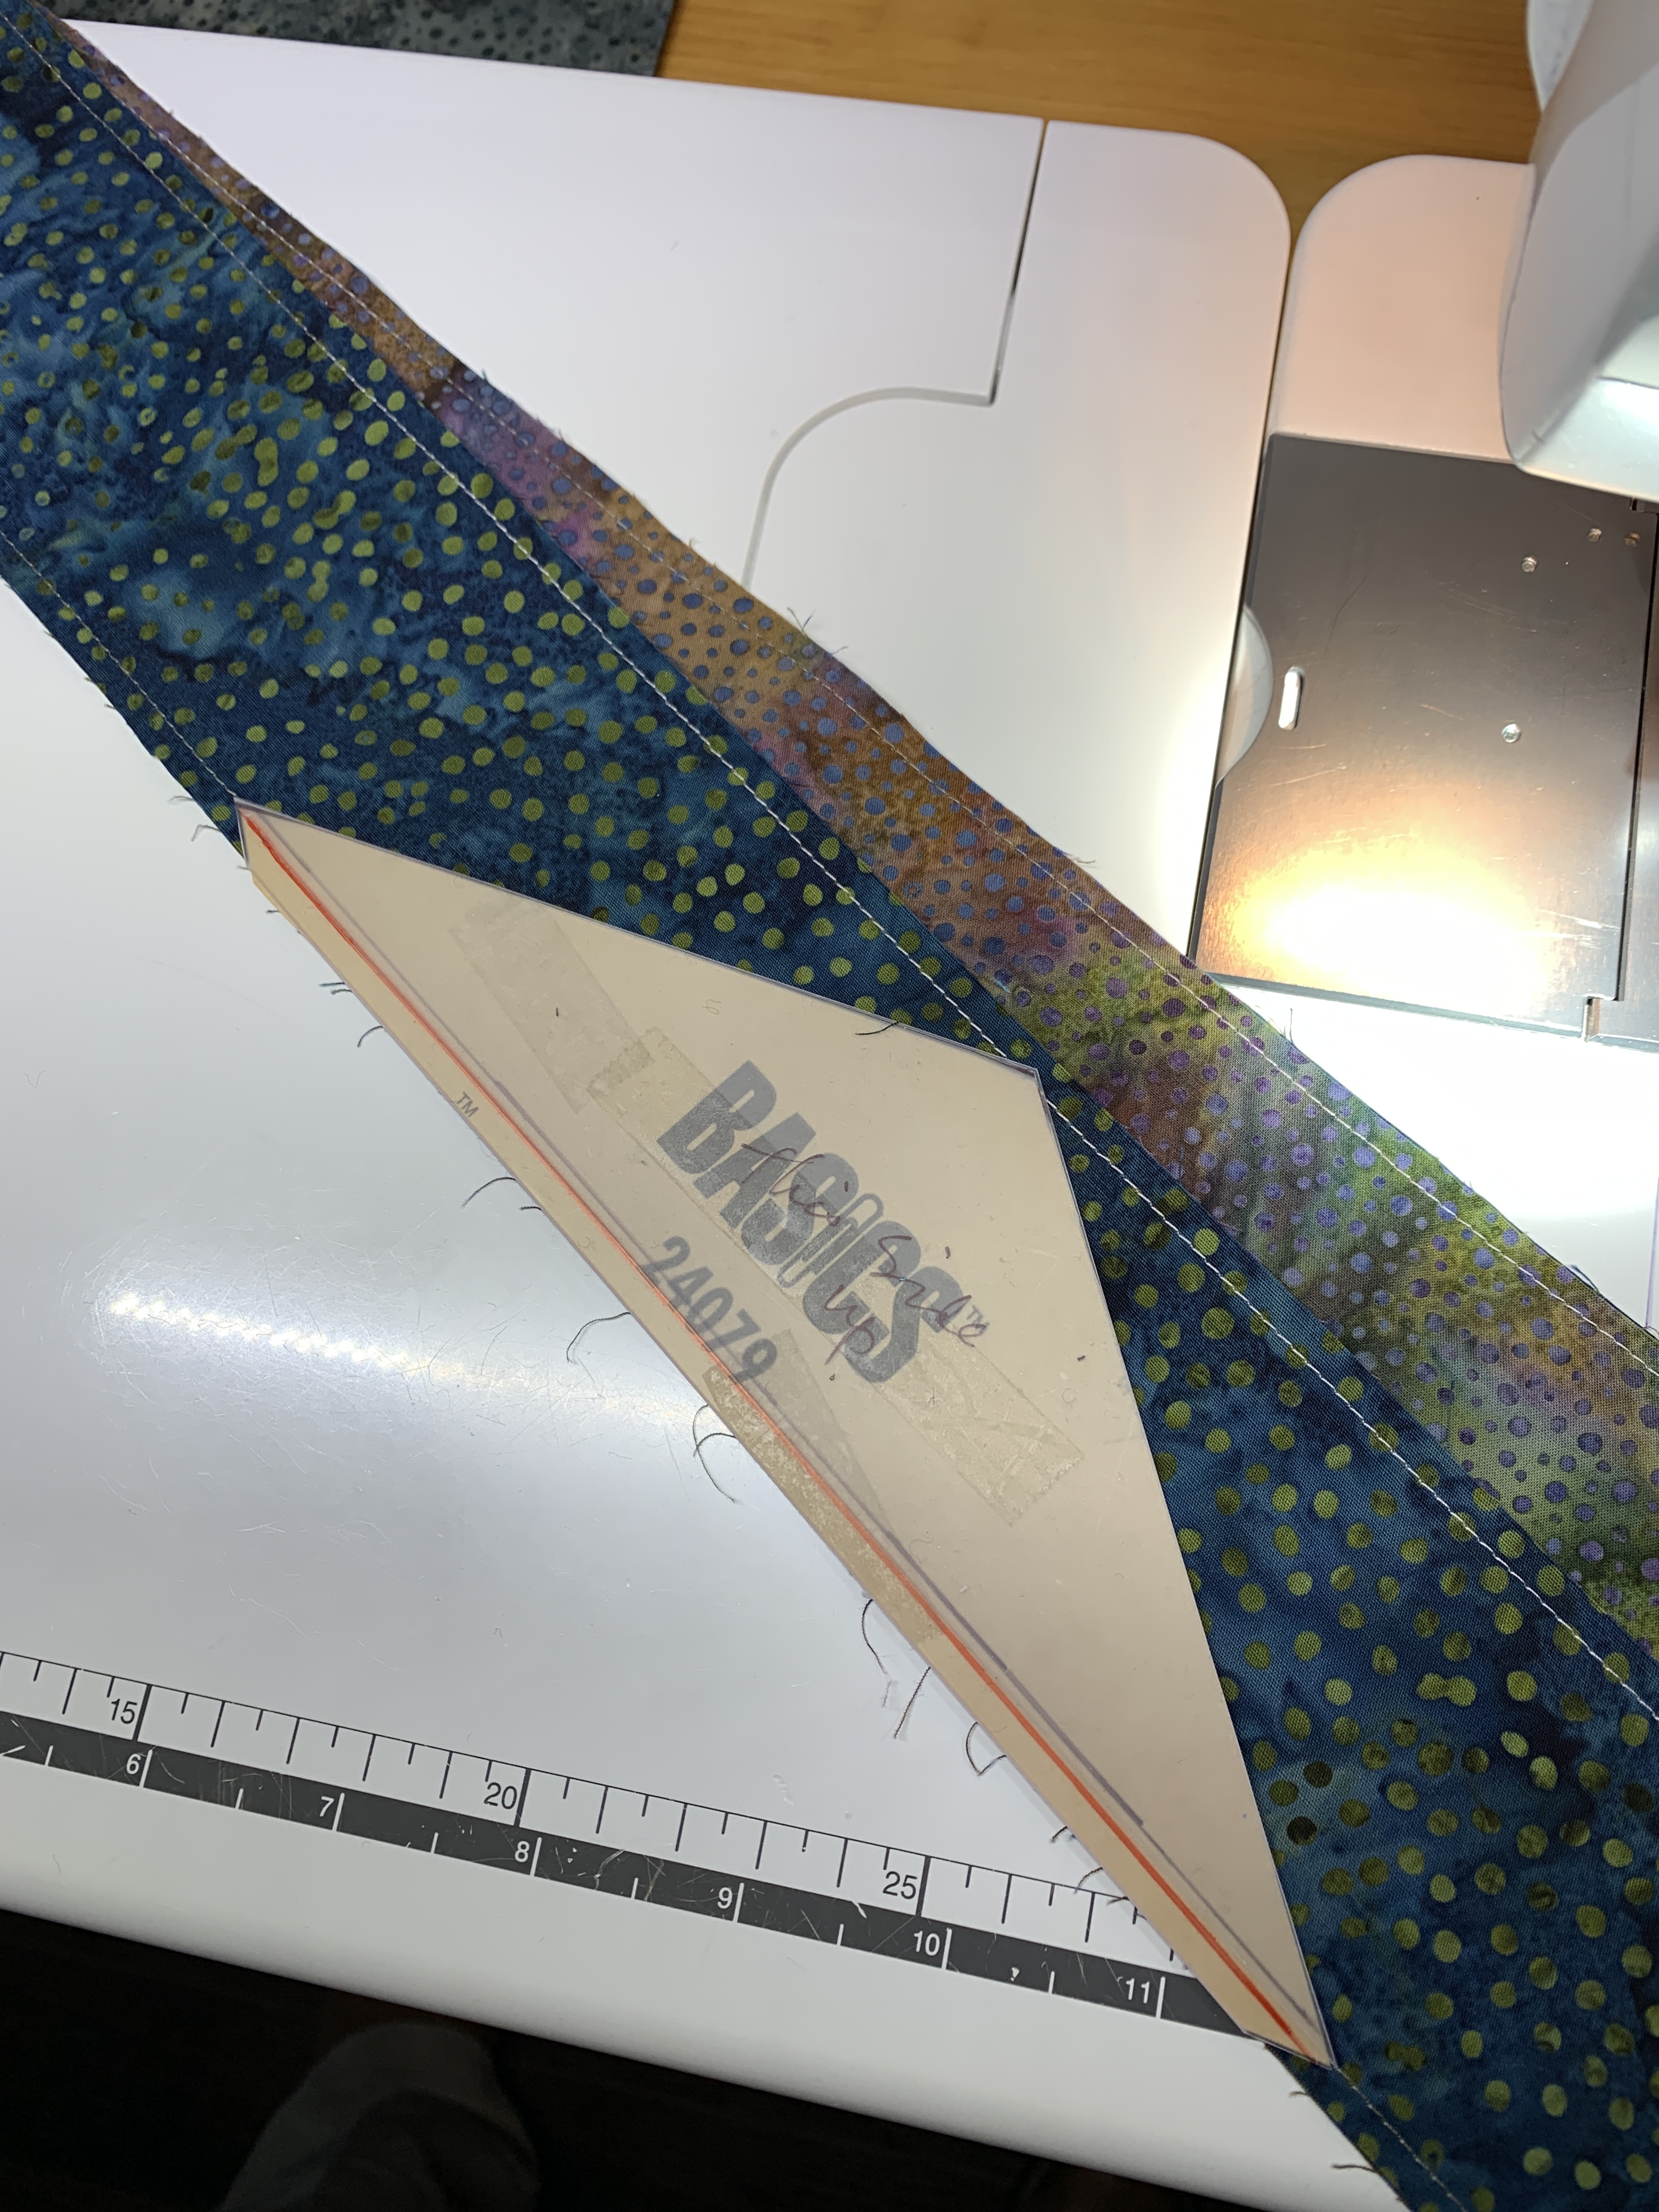
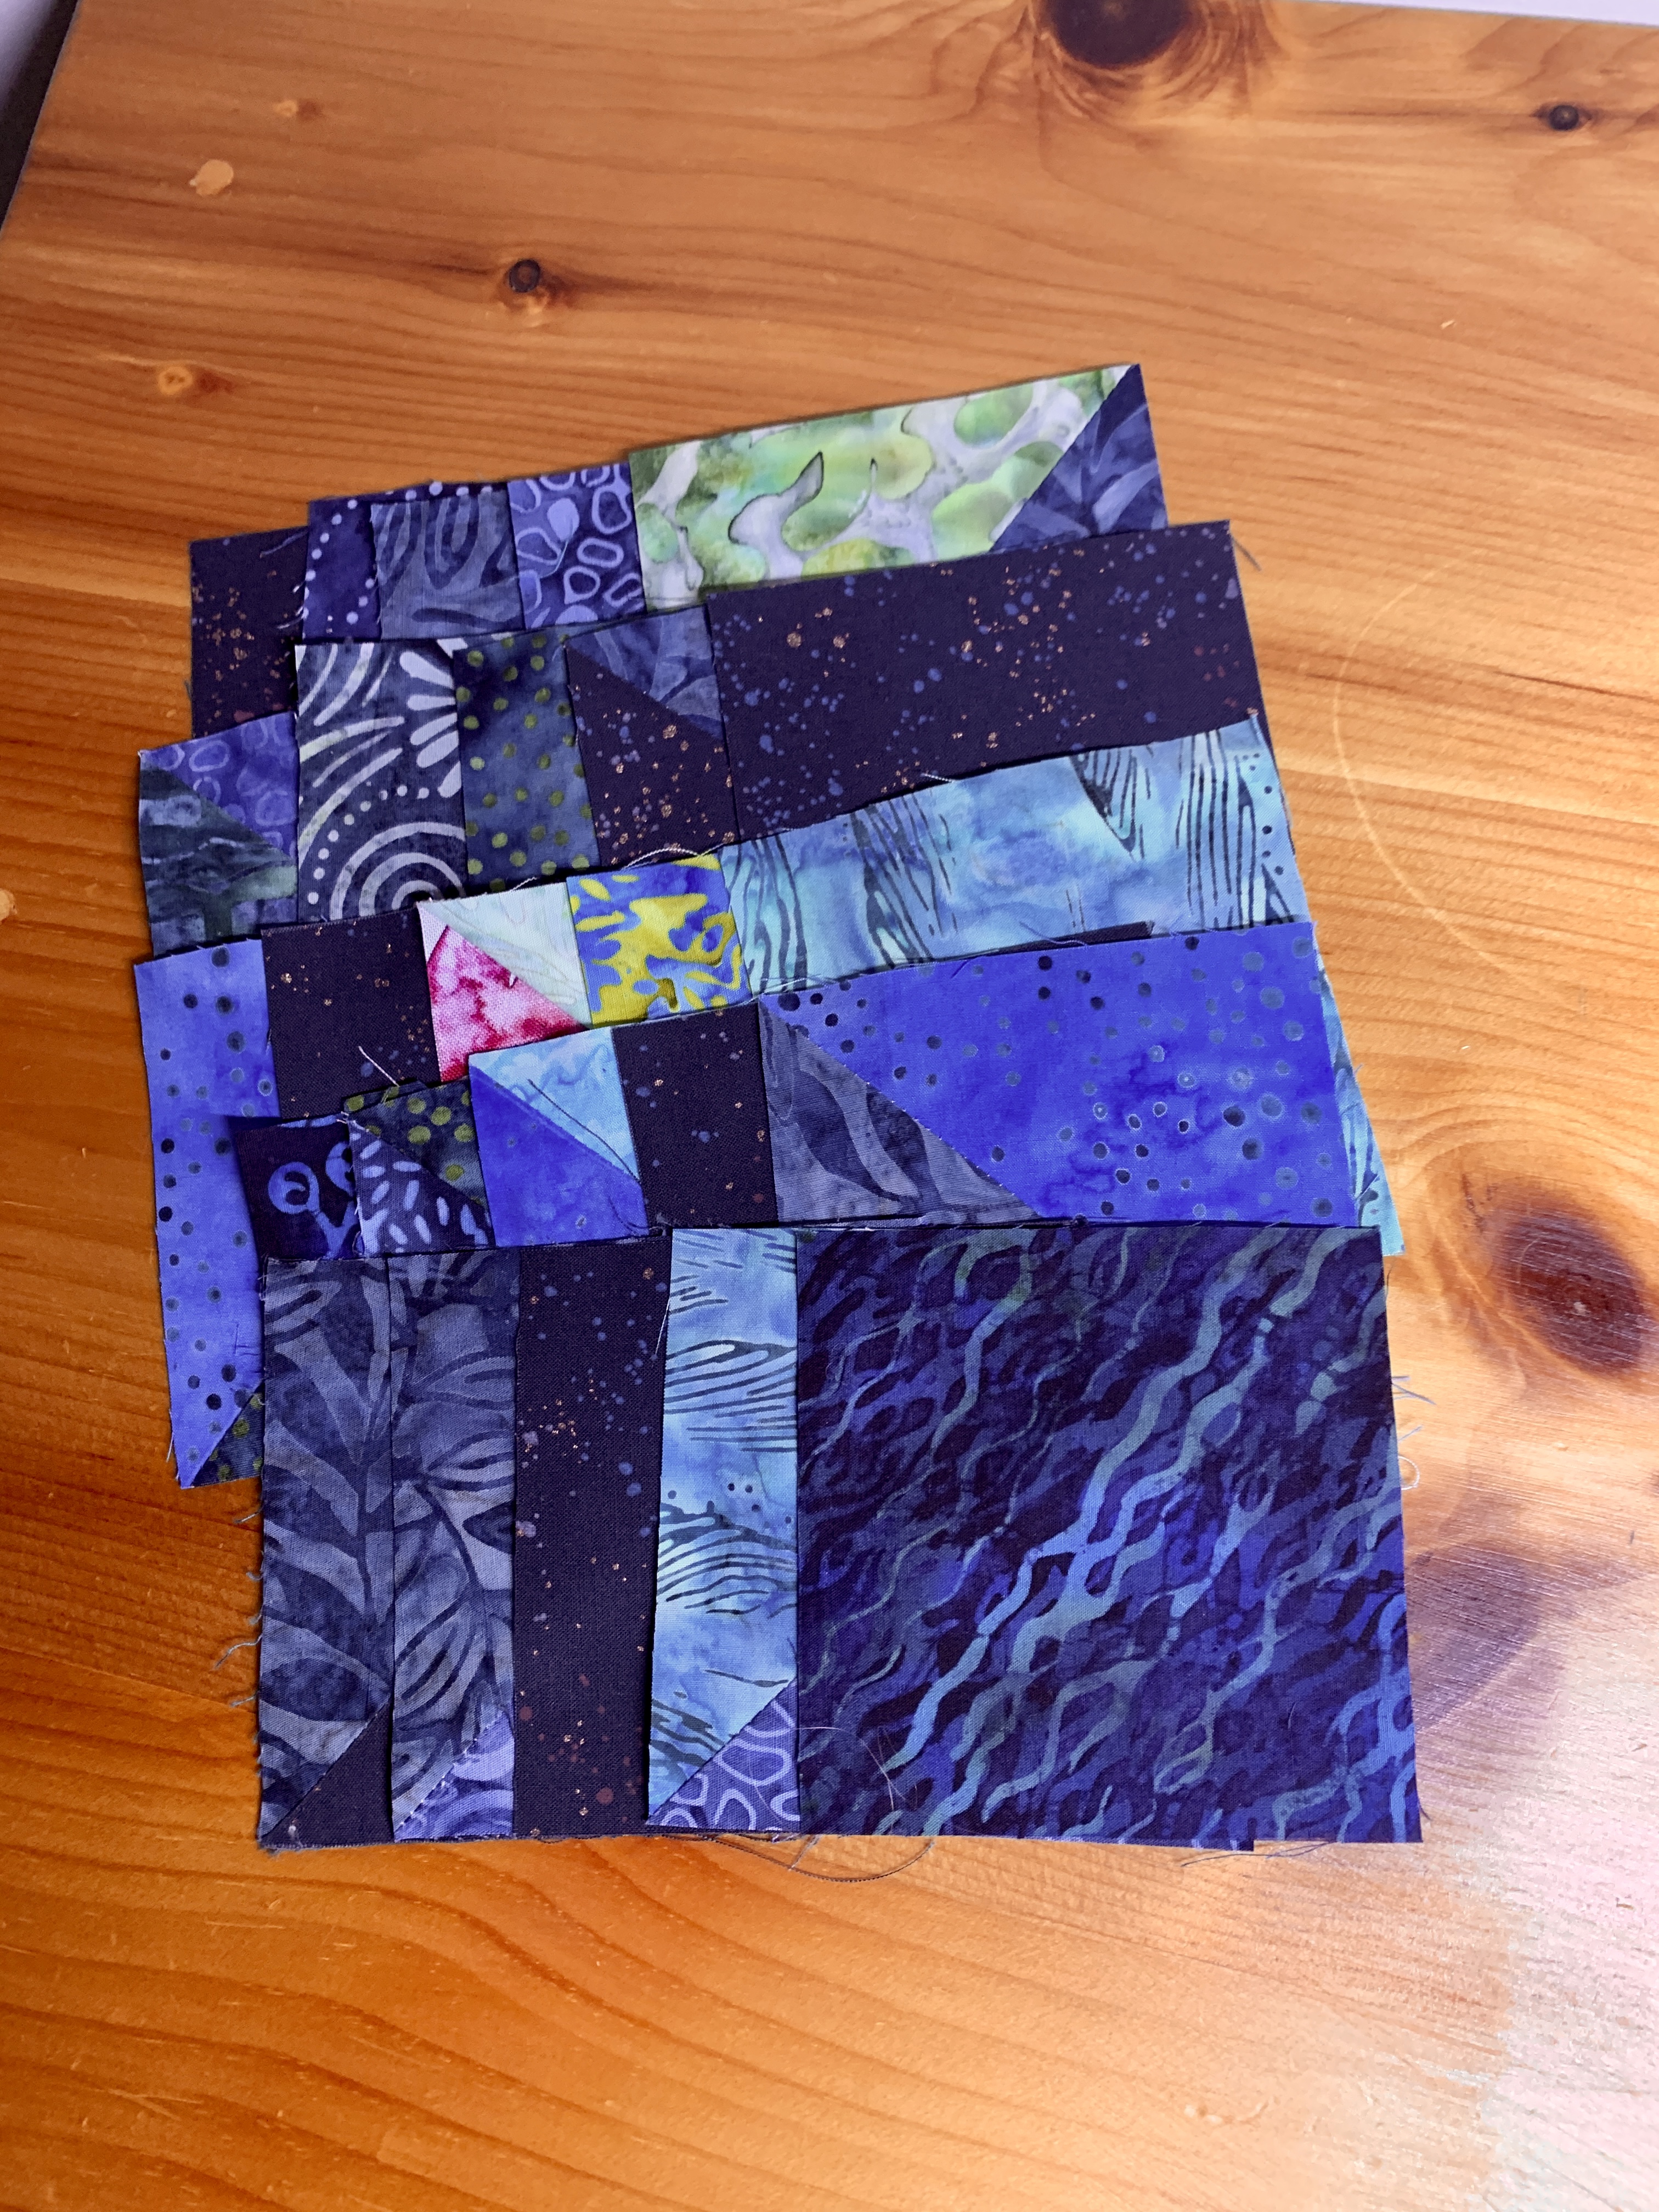
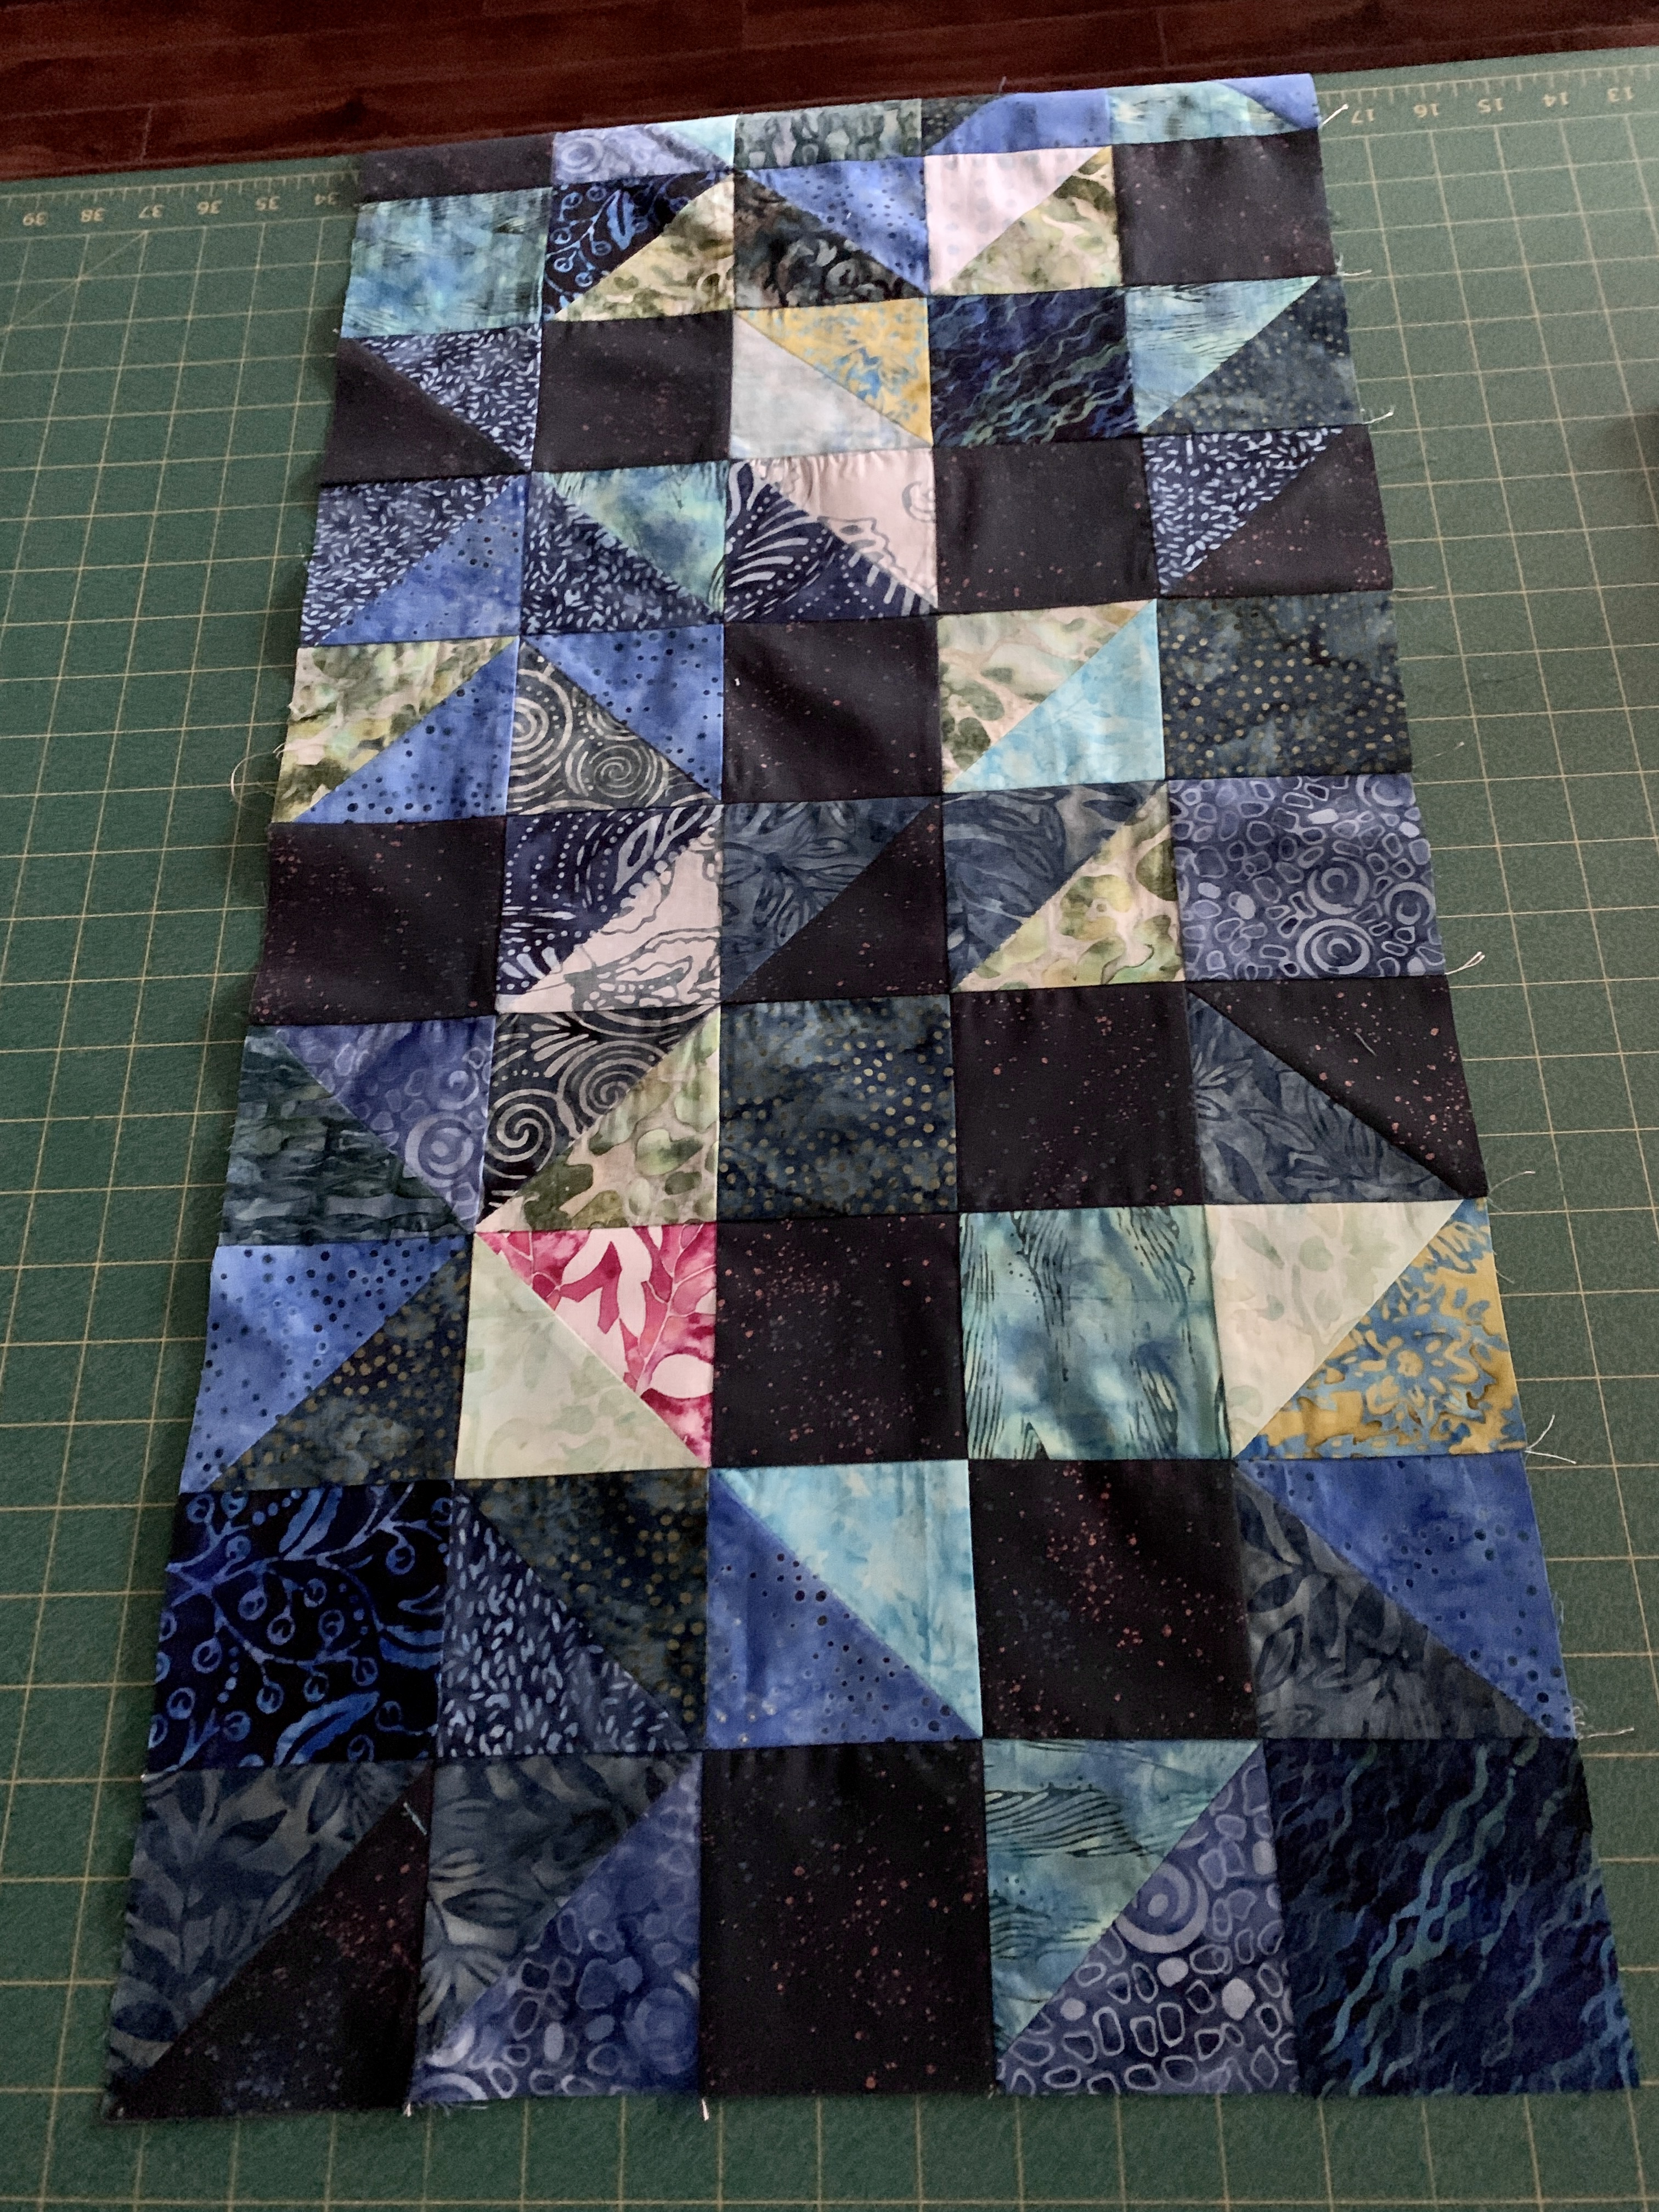
I finished sewing the strip pairs, then cut out the diamonds and when I laid them out this is what I had – definitely DULL!

First Layout

I do believe even if I had set up the strip pairs differently my outcome would have been the same – too many lights and darks and very few medium. The colour differences turned out to be much too subtle to allow me to do anything more with them.

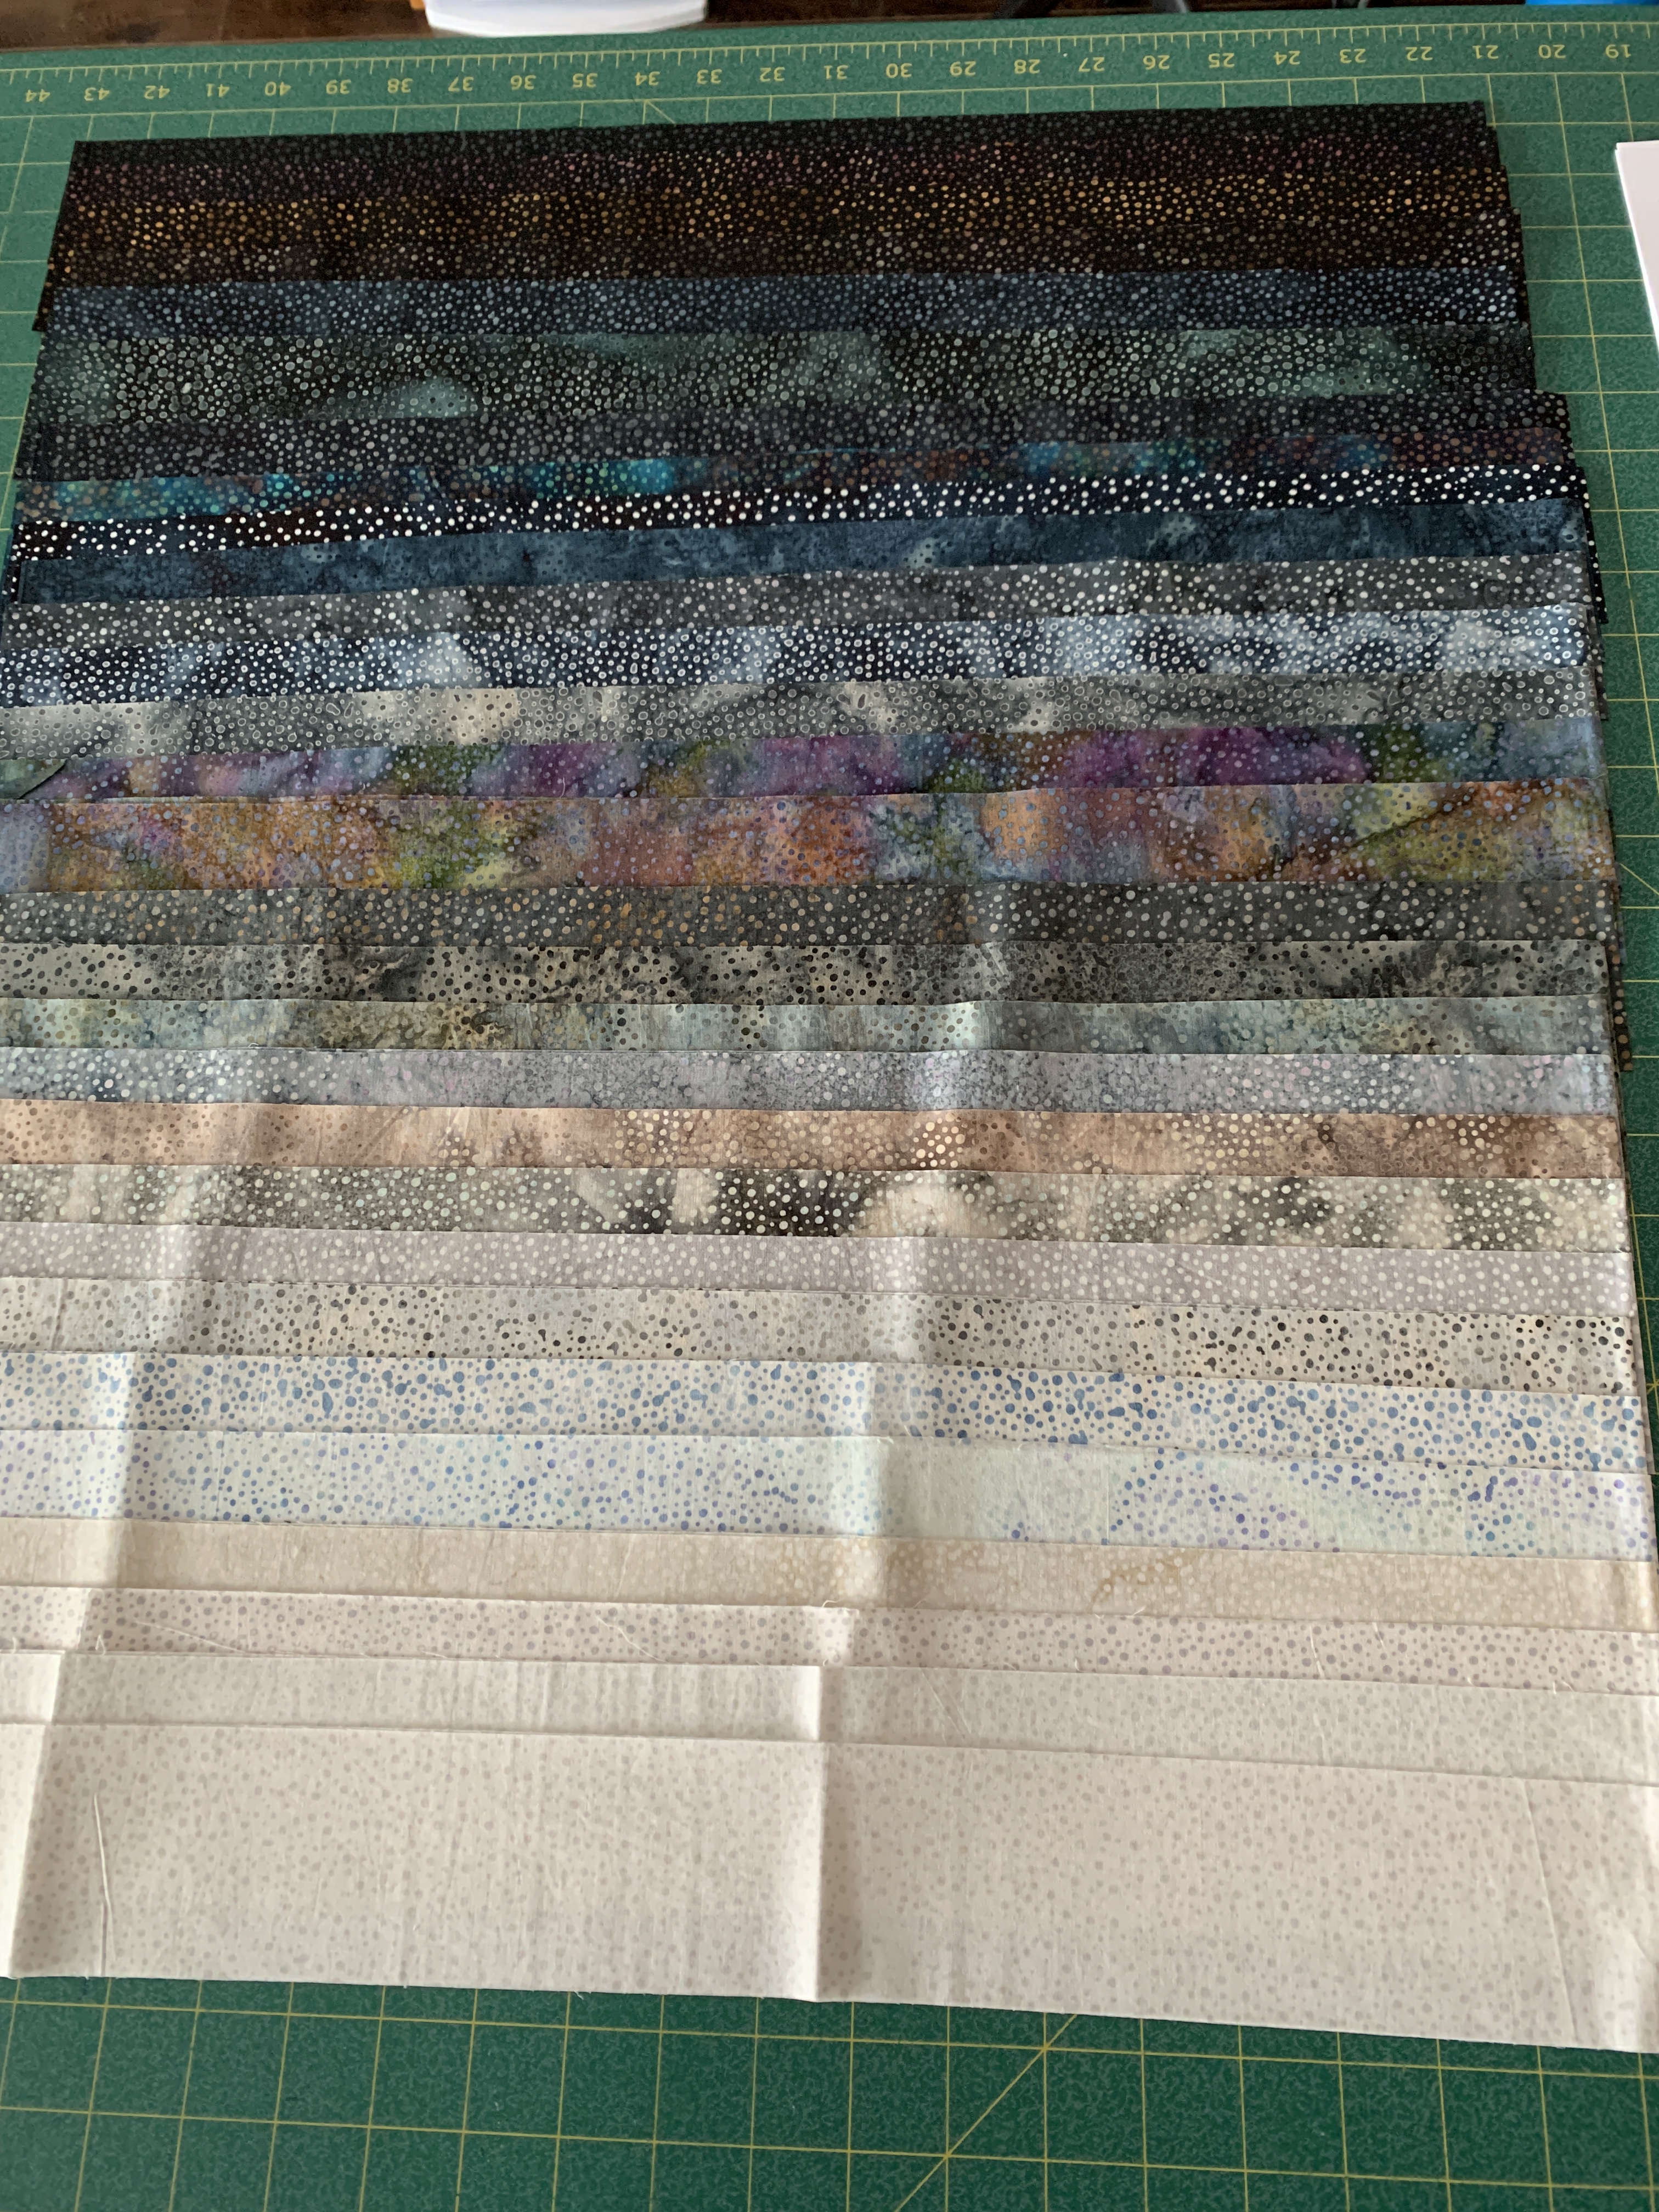
Possible Substitutes

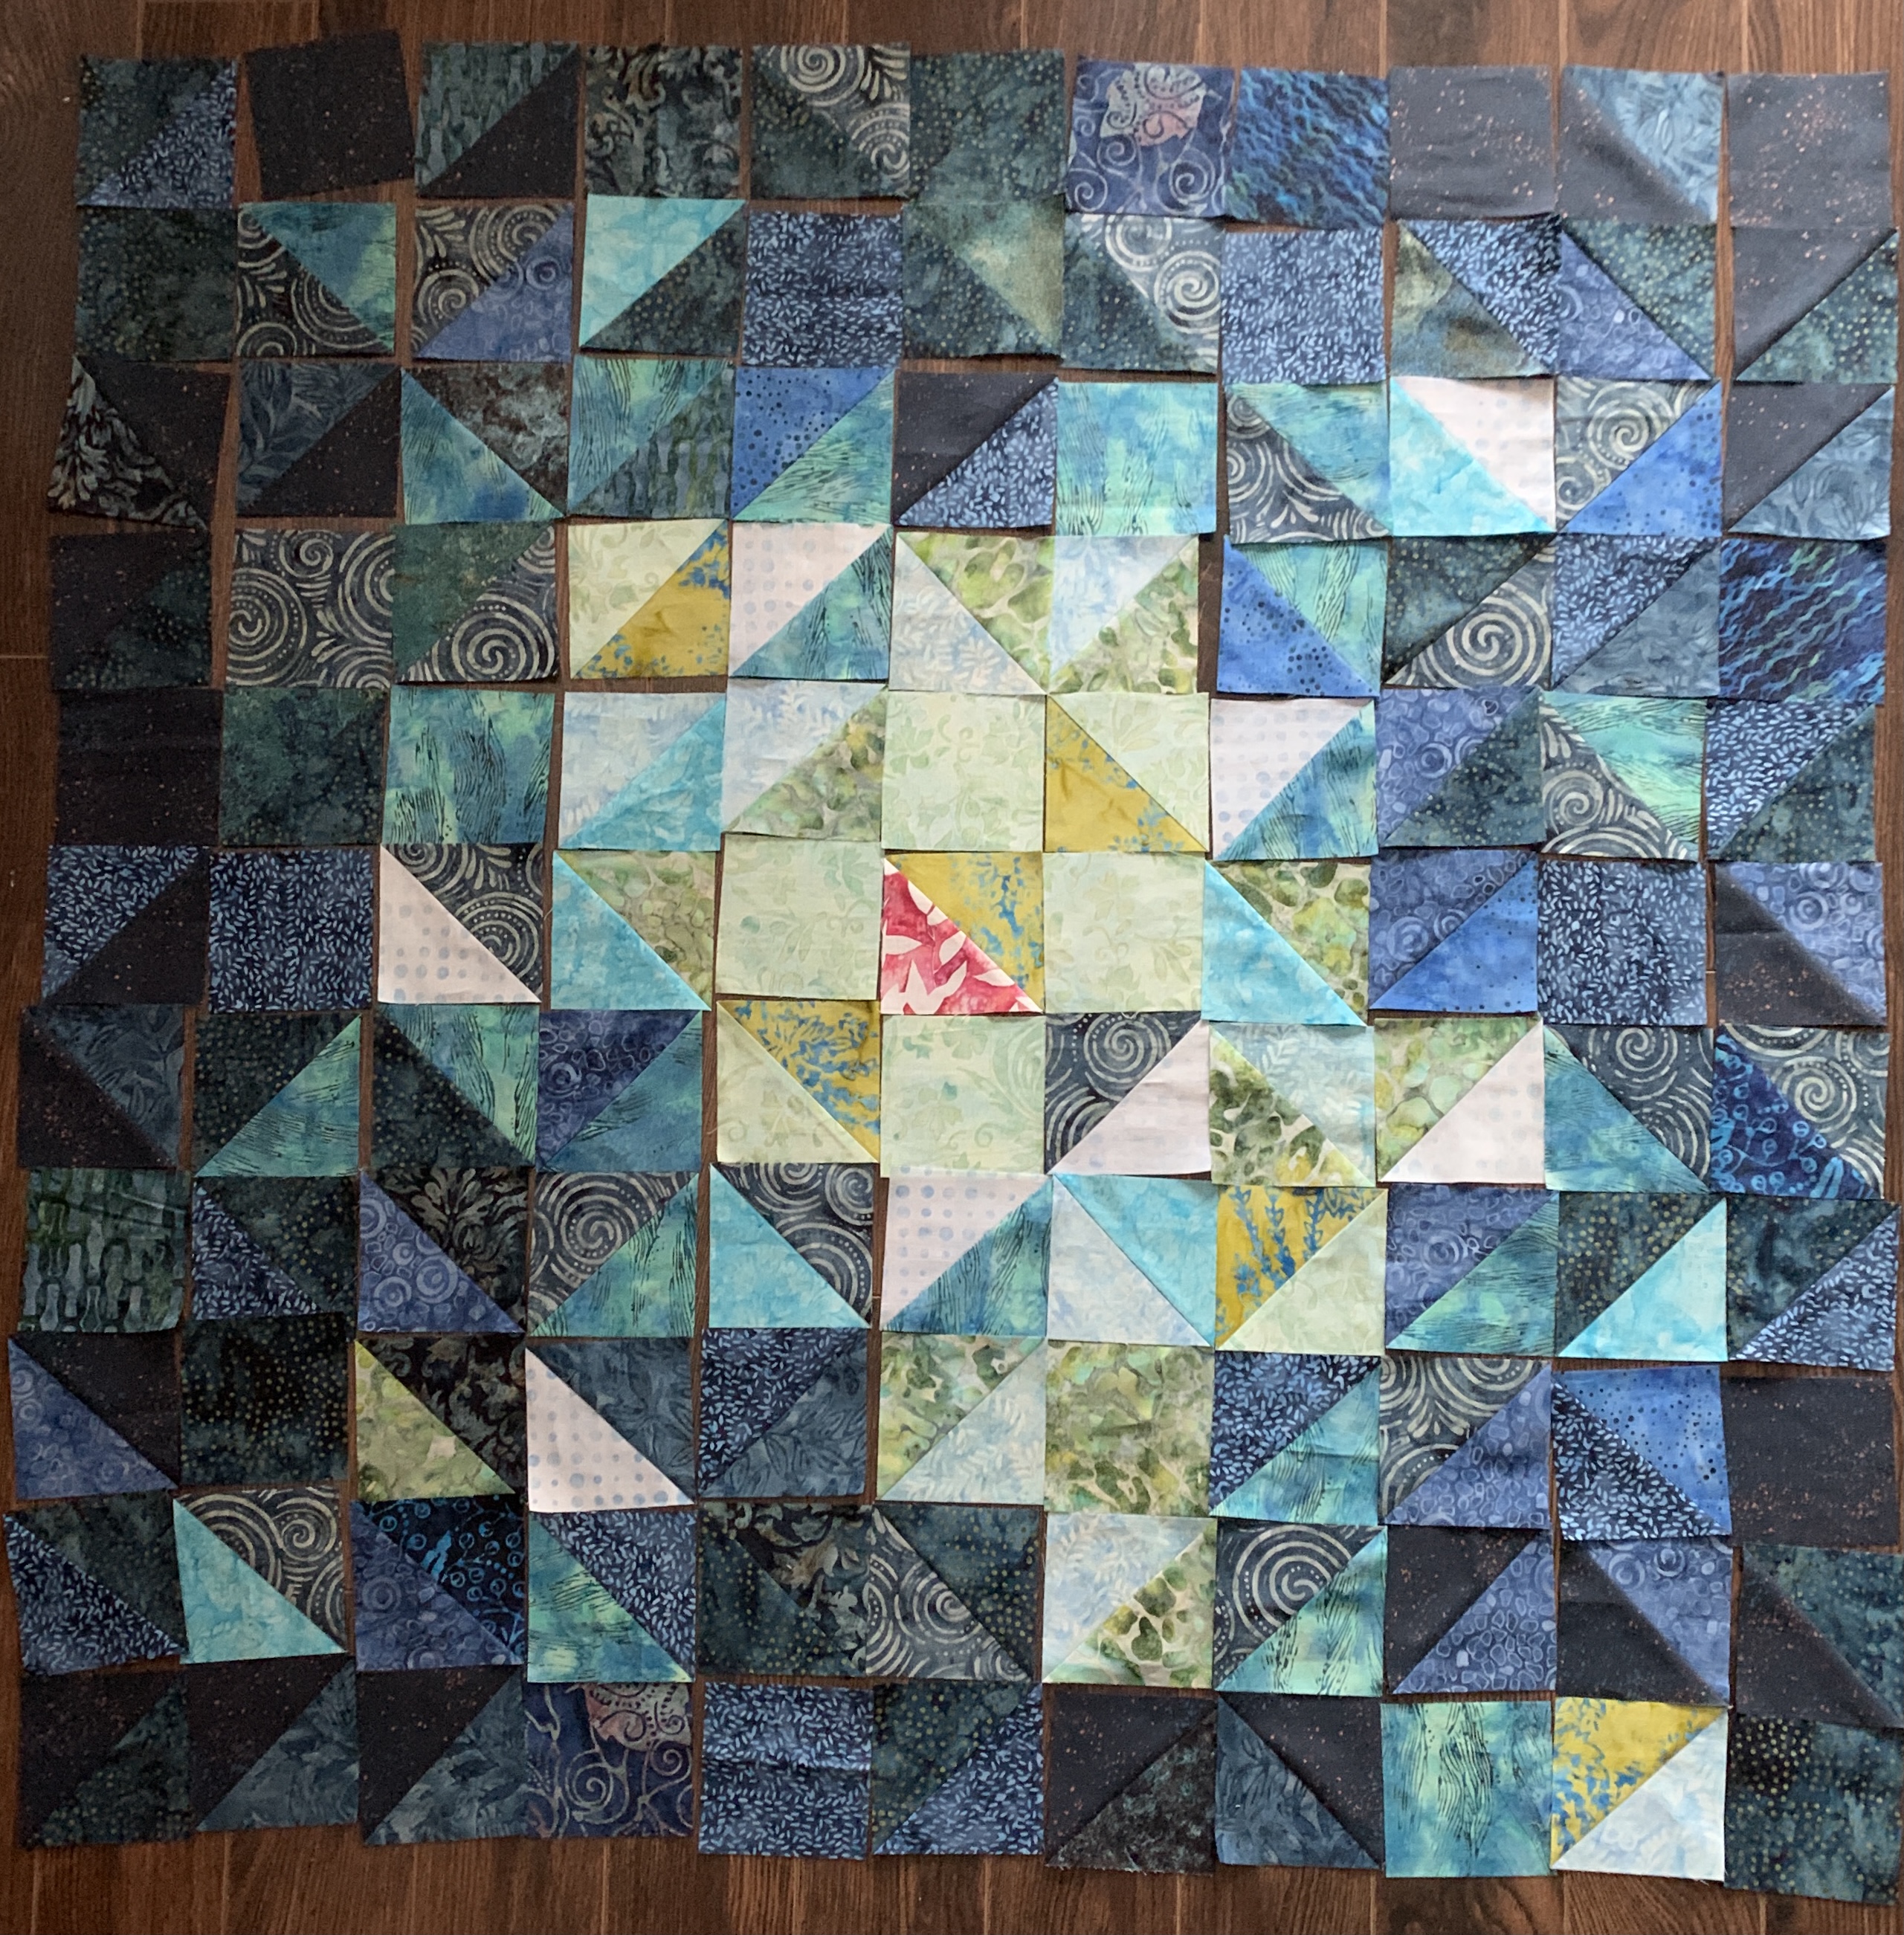
I felt I needed to add more colour – I grabbed some Grunge fabrics and some Fossil Fern to brighten the layout…
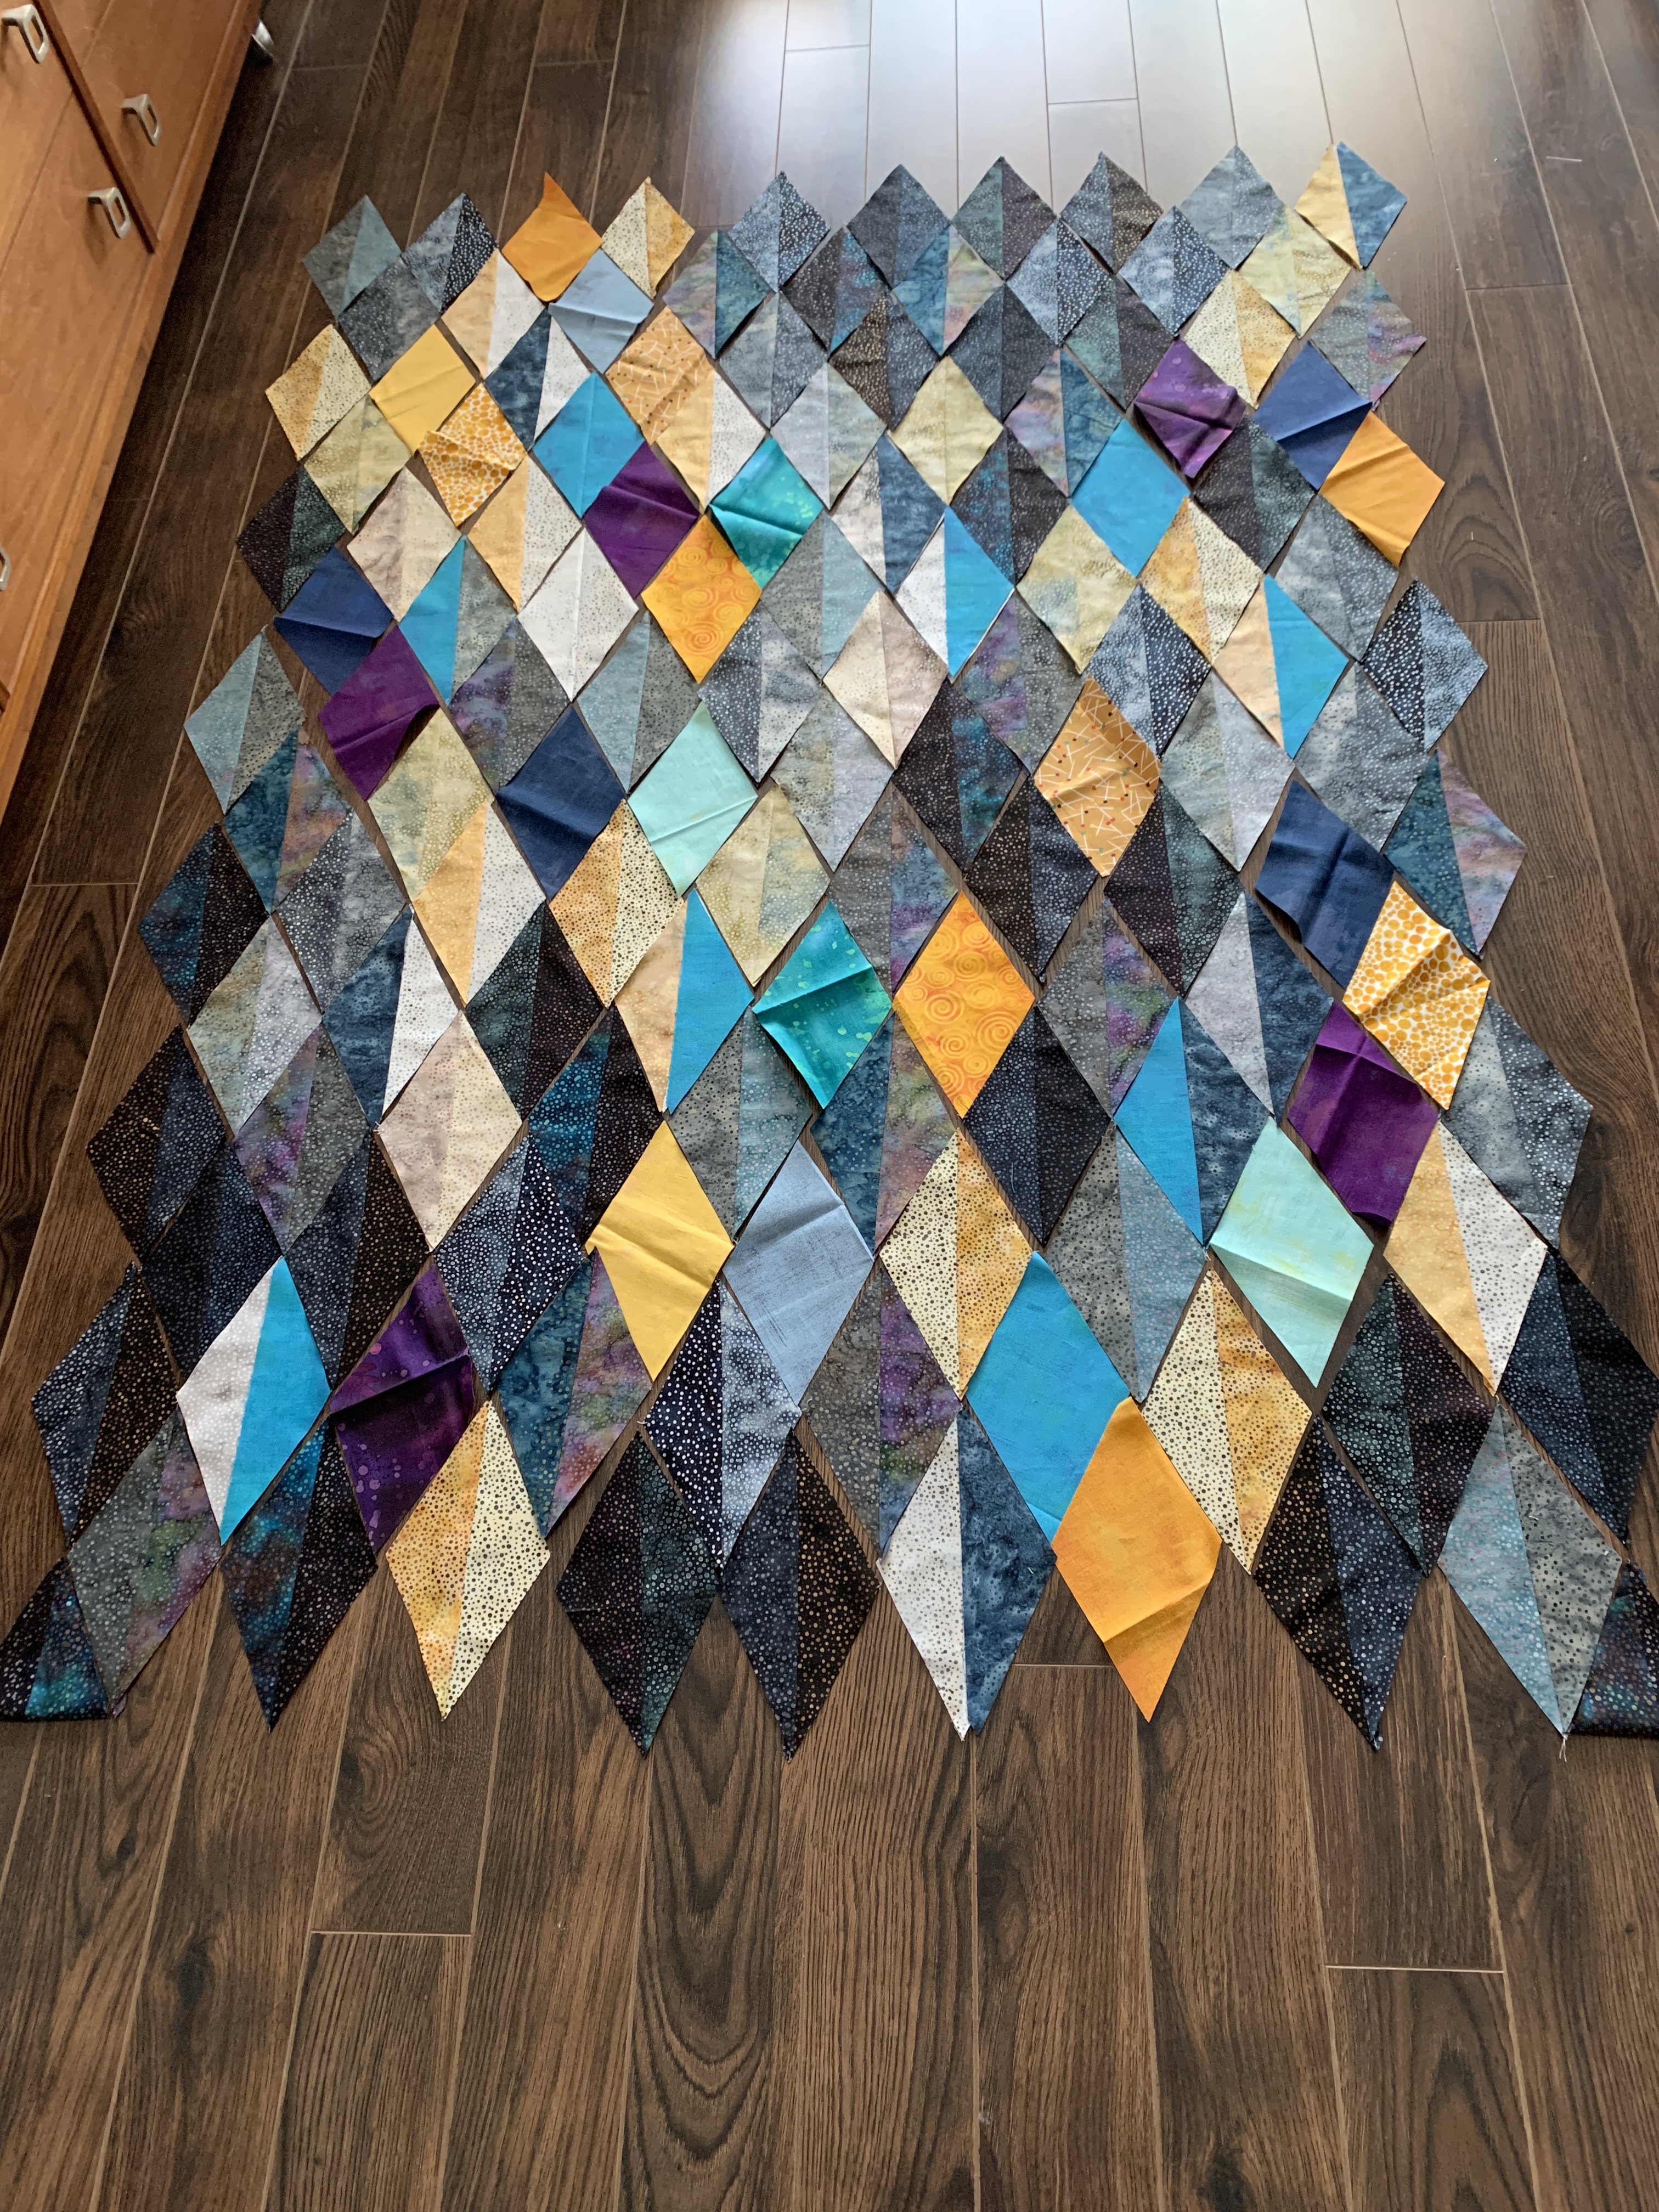
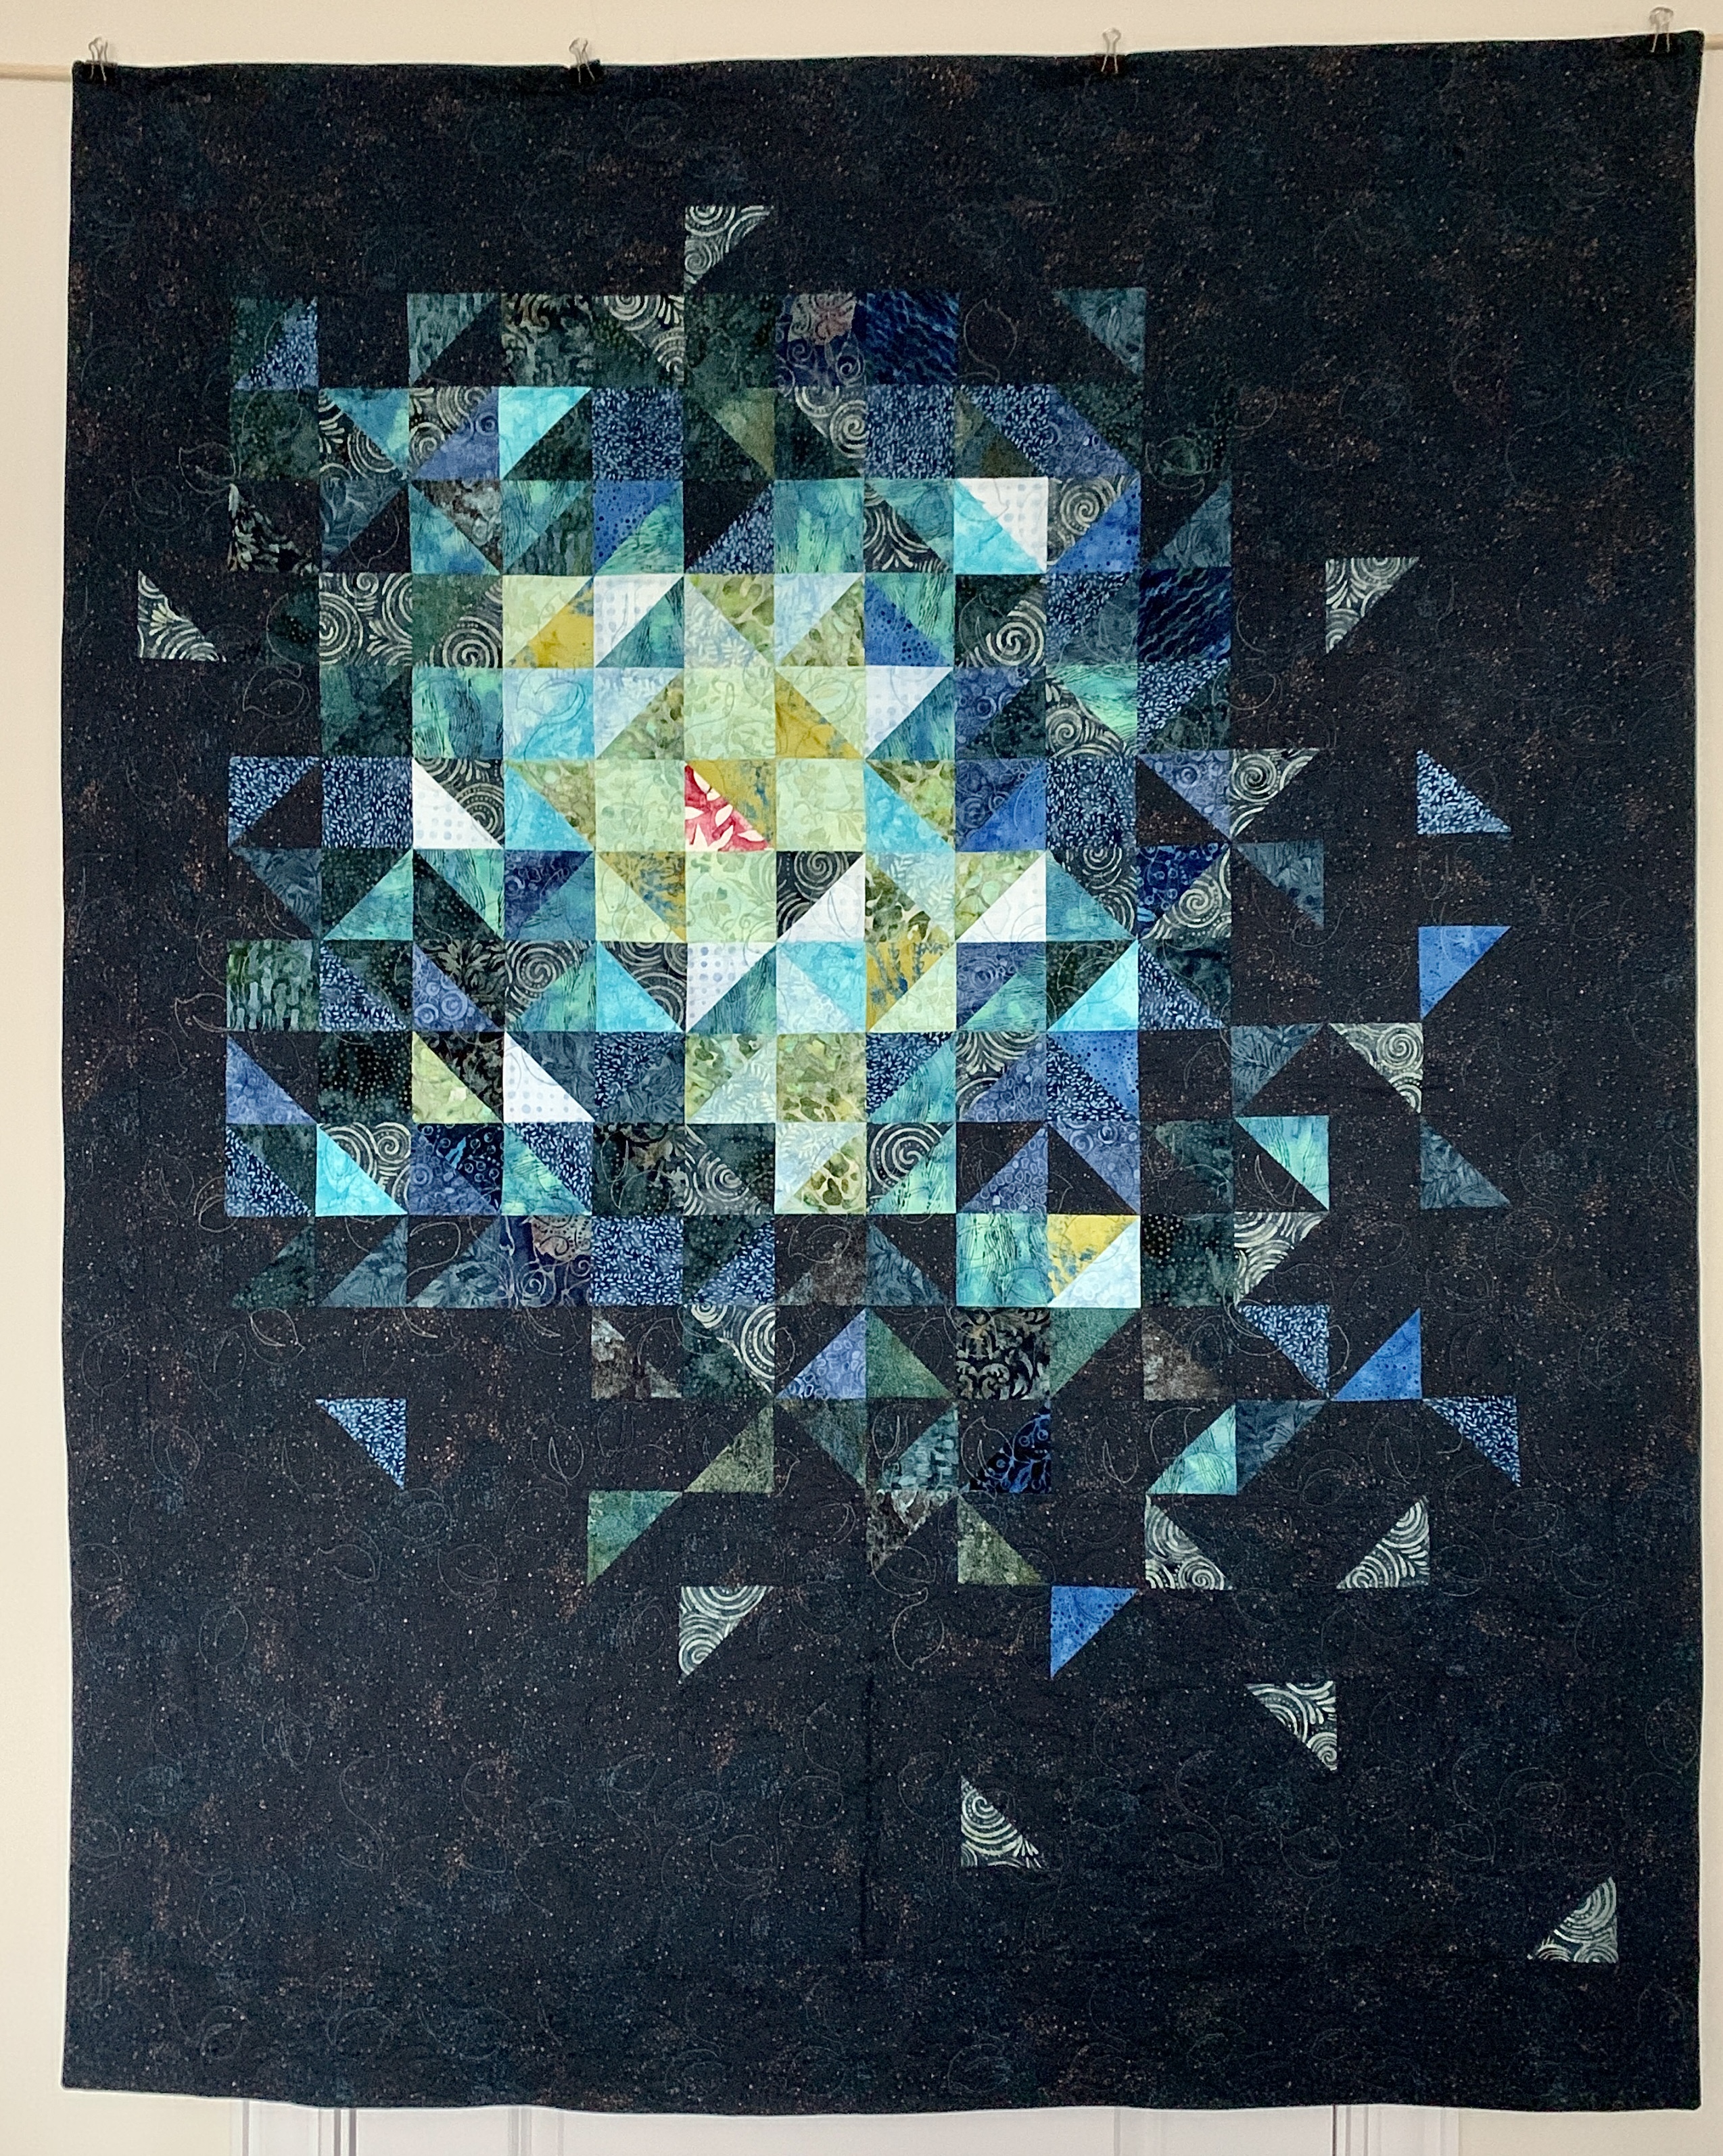
Definitely Brighter

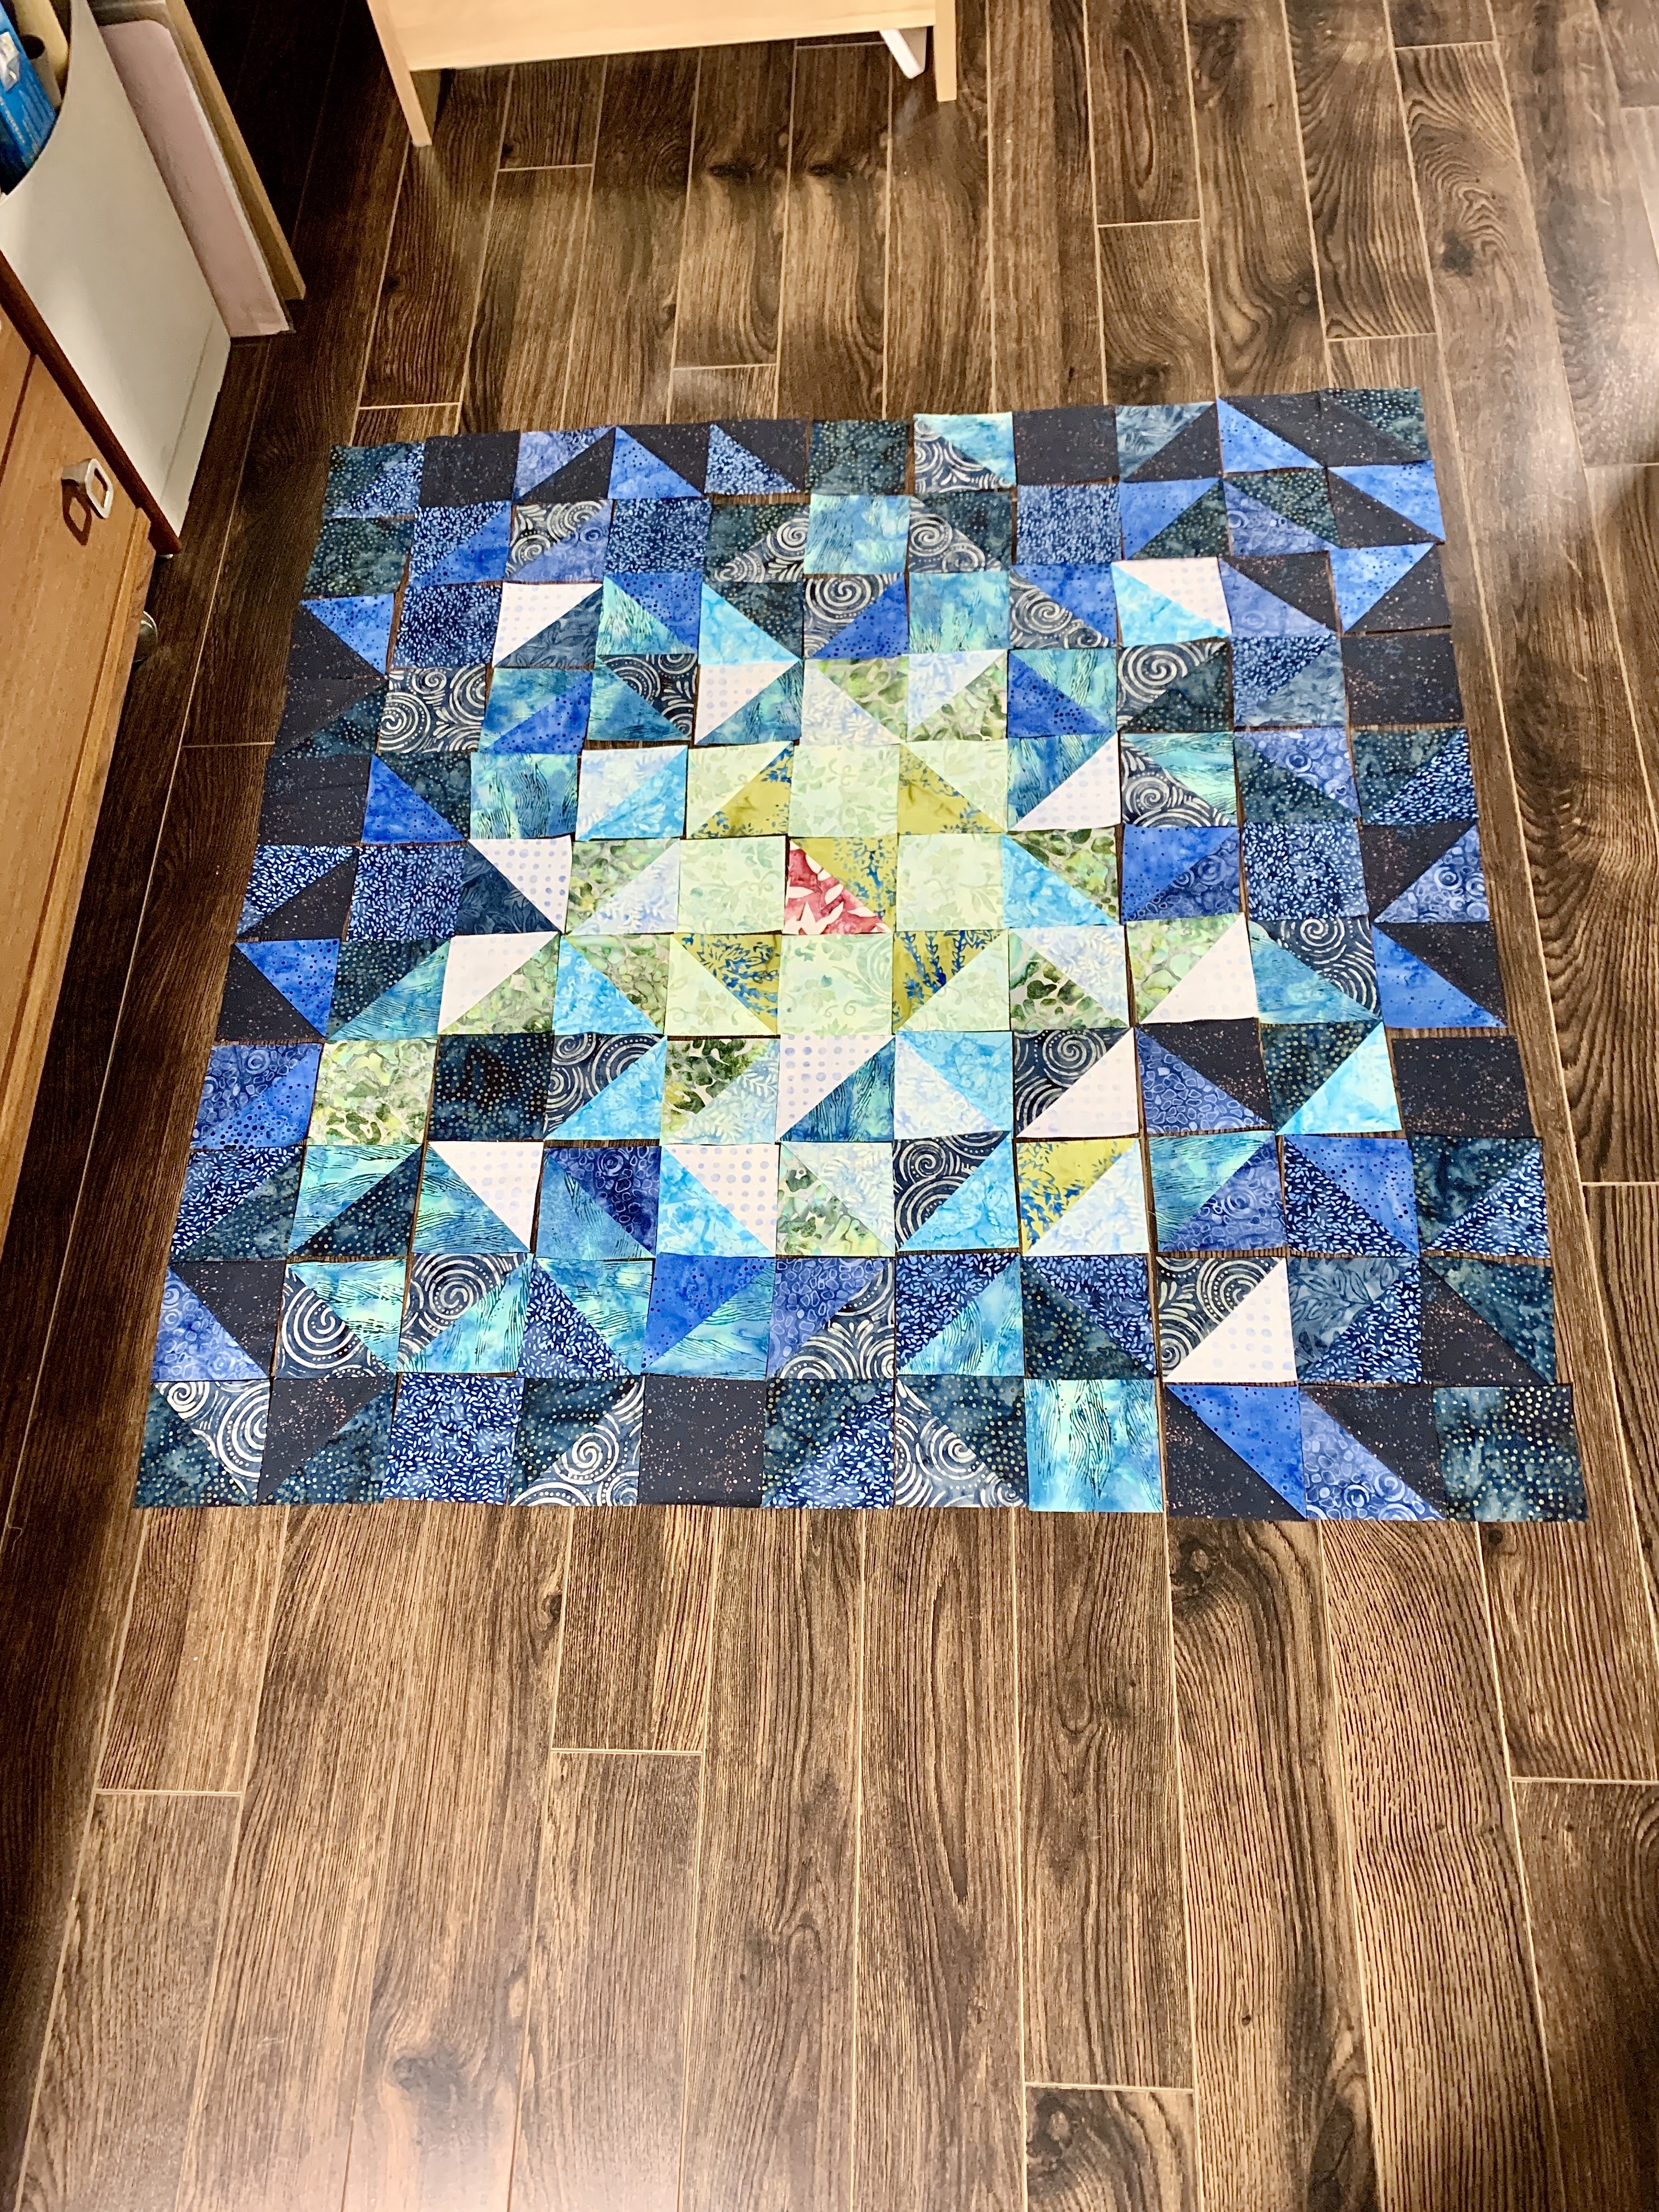
I found myself removing the light diamonds and substituting the other fabrics – this is my layout for the moment. From here, I need to pick up the diagonal rows, and press all the pieces before sewing those rows together. I should also add another row to the bottom so that my row ends with full diamonds on the two bottom corners (at the moment I’m place holding with half diamonds – I have enough light diamonds that I pulled out to move pieces around and reinsert 10 diamonds. That will allow me half diamonds on all the edges with the corners being the ones belonging to the set.

The other question I’m pondering is whether to try finding another fabric in a very different colour for a central focus – I don’t have one at this point. I’d intended the turquoise to be my focal colour but with all the other colours now added that’s not happening. I could make one large turquoise diamond but I think it would overpower the rest, particularly since there aren’t clusters of very small diamonds in the array (which I really don’t want to do) to offset the ones I have.

I also ave no idea what fabric to use for the border half diamonds! Should it blend? Should it contrast? I have lots of turquoise Grunge – my original thoughts were to use that for the bordering, but now I’m not so sure. I may have to shop for a dark dots fabric that will blend with what I have; pretty sure I don’t want anything too bright.

I’ll simply carry on for now, pressing and assembling the diagonal rows….

Diamonds – Finally…

After weeks of walking around these forty 2 1/2″ fabric strips, I finally managed to get started.

Remember, I’m trying to create a quilt based on diamonds, from a jellyroll of 2 1/2″ strips.  I came up with a way of combining strips to end up with a reasonable size diamond and a possibly pleasing colour flow.

I paired up strips close in colour, then sewed three pairs along one edge. I stopped to create a diamond template based on the 4 1/2″ width (twice as tall as wide) using a file folder (for stiffness) and cut out three diamonds from the sewn dark pair, which left me with six half diamonds from the off-cuts. I laid the diamonds out on the two other uncut strips to see how the this would look.

Dark Diamonds On Uncut Strips

I could immediately see that if I stitched the second side of each pair, when I cut out a diamond, the off-cut would also be a stitched diamond (same size) that I could open and press rather than trying to sew two half diamonds (which is difficult!). So I sewed the second side of the medium and light pairs and cut them into diamonds:

Diamonds From Three Strip Pairs

The contrast between the light/medium/dark was stark so I introduced the turquoise Grunge fabric I was intending to use as a contrast – as half diamonds and as a full diamond (If I decide to use full diamonds in turquoise I will cut them as diamonds, not as half-diamonds).

Before sewing more strip pairs together I made a better template using quilting template plastic, backed it with file folder cardboard, marked the seam line along one edge as a reference and included the end cuts so I don’t have to cut a gazillion dog-ears from the diamonds after I’ve cut them all.

I stitched two more pairs, this time on both sides of the strips, cut them into diamonds and added them to the array.

Now you can start to see how I might be able to work on colour flow since the remaining 14 pairs are an array of light/medium/dark hues.

Jellyroll Collection

It’ll be interesting to see how much colour flow I can actually manage from this collection of fabrics – I won’t know until I’ve stitched all the remaining pairs, cut out the diamonds and start laying them on the floor (I don’t have a design wall – I don’t have a spare wall in my apartment studio to accommodate one).

Let you know how it goes once I’ve got a layout.

Comet Quilt – Completed

Finally finished. Yesterday I attached the hidden binding (mitring the corners) and hand stitched it to the back.

Comet Quilt - Top

Comet Quilt – Top

I’m happy with the colour flow from top left to bottom right. The bronze “sparkle” in the background fabric shows nicely, as well – I didn’t see that as a possibility when I ordered the fabric. There’s also a blue speckle which is brought out by the medium blue shades in the brighter blocks.

The back turned out nicely, as well.  I was able to incorporate the single pink triangle there. In the photo, the blocks look darker than they are – that’s because in a brighter light (it’s a dark cloudy day today – a large snowstorm is forecast to start around noon) the bronze sparkle in the blocks from the background fabric do show.

Just about every scrap of fabric I had leftover from the front got used in that strip. I was lucky to be able to complete the 125 blocks I needed for the stripe.

When I was making the quilt back  made sure I’d have enough fabric from the offcuts to be able to make the hidden binding. I like how the elements of the back come to the edge of the quilt that way rather than being interrupted by a conventional binding.

Comet Quilt – Back

This morning I pulled out two complementary jellyroll packages from the stash. Now I have to figure out some way to use them in a quilt. That’s my next project.

Comet Quilt VI – The Back

All those bright blue triangles I had leftover when I remade so many of those HST blocks? I used them to make more HST blocks for the insert on the back of the quilt!

25 of 125 blocks

The quilt top is 54″ x 68″. I need to make the back 4″ larger in both length and width: 58″ x 72″ or thereabouts (I’ll be using the off-cuts to do a hidden binding after the quilt is quilted). My HST blocks finish at 3″ so I needed 25 of them for the length (one extra row just in case), and 5 blocks for the width (15″ to make the back panel wide enough: 42″ + 16 1/2″) will do it.

I needed 125 blocks to construct the insert strip. The strip will be bordered with two dark strips – a finished 1″ strip using the last small scraps I had of the Sparkle fabric (not a single bit left), and one other (finished width 1/2″) yet to be determined!

Back strip under construction

I have assembled two of the 25 blocks elements – 3 to go. I should get those done today. Tomorrow I’ll put the quilt back together, set up the sandwich and then think about what kind of quilting design would complement the Comet Quilt top – no idea about that yet.

Comet Quilt – V

Here is the quilt top – finished – borders in place. Final size ~ 50″ x 70″ (I’ll measure it when it’s finished).

Quilt Top – Completed

It has taken a lot of fiddling, and looking at the photograph I can see spots where I could make more block swaps – but this is it. No more replacing blocks – I’ve done enough. I’m prepared to live with this outcome. Besides, the quilting will integrate the blocks; I will use some kind of variegated thread that both blends but contrasts with the fabrics.

Leftovers from remade blocks

I realized quite early on the bright blue blocks were going to be too bright so I remade almost all of them, substituting darker fabrics, particularly in the upper right quadrant. I haven’t counted them – I don’t want to know how much extra work I actually did. I’m happy with the reconstructed blocks, I was able to make enough to distribute throughout the panels surrounding the central panel.

I was keeping one eye on the Moda quilt pattern as I worked and that was a mistake – I thought it would make the process simpler (give me an idea about how many blocks to make, what pairings to set up) – it made it more difficult. Because I wasn’t using the suggested fabrics I had to reconsider and rework selections/pairings I’d made even after large sections were stitched. The quilt pattern uses large blocks in the outer regions – those elements turned out to be difficult to incorporate and keep the whole flat – I would have been better off to have constructed the quilt from 3 1/2″ blocks throughout. Next time I attempt something freeform like this, I will put the stimulus photo away and work from scratch basing decisions on the fabrics and the colour movement I want to achieve.

Now onto the back – I have absolutely no idea what to do with that. I think I’ll take the top to the fabric shop to see what I can find. I know, without looking, I have nothing in my stash that will suit the quilt top.

Comet Quilt – IV

Comet Quilt – More sections added

It’s a dull day today, hard to get a good photo without more daylight, but this image does give a sense of how this quilt is building out.

I added a row at the top and along the left side, a panel across the bottom and another (built from two smaller panels) to the right. Along the way, I found myself taking bits apart and changing out blocks to better the colour movement down and to the right.

The next section is a panel, constructed from segments of the background with just a few HST dotted here and there. This panel will extend the length of the whole by about a foot giving a good throw quilt size.

The final borders are constructed from background fabric – and I’m pretty sure I don’t have enough. With a bit of luck the yard I bought online the other day will arrive soon.

Comet Quilt – III

Central Panel – Done!

There it is. I’ve just finished assembling the central panel.

It took a careful, precise pairing of blocks in rows, making sure I pressed the seams in an appropriate direction so I could juxtapose the blocks when stitching the rows. Not a task for the disorganized. Fortunately I’d taken lots of photos of the arrangement on the floor so I could refer to them as I was painstakingly sewing these blocks together.

I’m happy with this layout – I got rid of a lot of the “squareness” in the pattern and what’s left will be dulled when I add the darker bordering elements which are all much darker.

I also managed to align the points pretty well (not perfectly – I can see a few small irregularities) – even another quilter would have to have an eagle eye to spot them.

So, tomorrow – since there is no aquafit (the pool is closed for the next 10 days – probably longer – COVID-19 precautions, right? We’re all working hard here in NS to keep the lid on the virus – we’re getting spread but so far it’s not escalating exponentially…). I have NOTHING else on my calendar. I’ll be able to get up and get to work on the next set of bordering panels.

[BTW: The pink bit in the lower right corner is a post-it note saying “Bottom Right” so I had a reference point to keep me oriented as I was assembling the panel (I built up the panel starting at the bottom rows simply because I could reach them more easily without having to worry about inadvertently shifting blocks).]

[BTW 2: Yesterday I bought some of the striped fabrics specified in the original quilt pattern – I’m thinking it might be interesting to try this quilt again as a “postage stamp” quilt ending up with 1 1/2″ blocks. That’ll be a challenge because the HST will be very small – same number of blocks, however. I think those striped fabrics were an interesting aspect of the original design and I want to see if I can make them work without following the pattern!]

Comet Quilt – II

I’m progressing – I haven’t begun sewing yet – I’ve spent the past three days walking around the panel arrayed on my floor, moving a block here, changing a block there.

This morning I removed 8 HST with the bright blue with dots and remade them using some Stonehenge fabric (in dark blue and teal tones) which I bought yesterday. Then I placed them into the array. They register as medium in colour supporting the “bright” centre of the panel.

Comet panel – Laid out

The “squareness” of it is now more or less gone. I have the light moving toward the bottom left corner. The adjacent panels will continue that colour movement. I’m now ready to assemble these rows.

In the meantime I’ve begun laying out segments to fit around this piece which bring elements of the medium and darker blue shades into mostly background strips and blocks. I have sewn a portion of one of the side panels and lain out two others. These pieces become constructed, more and more, from the background Sparkle fabric, until finally the borders just use background (fingers crossed I actually have enough – I ordered another yard yesterday just in case because I have a suspicion I will need more than I have).

Side Panels Under Construction

I finally have a handle on the ratio I’m working with. My quilt will turn out 78% of the original (that’s because I changed 4 1/2″ blocks to 3 1/2″). Knowing that ratio now lets me construct the panels elements and borders which I intend doing after I sew the main centre panel together.

That’s for tomorrow.

Comet Quilt

I’d seen a photo of the Comet Quilt some time ago and thought it would be fun to try creating something like that – a light centre against a dark background. I went through my fabric stash and pulled out a pile of light batiks, a bunch of medium, and a few dark.

I was wondering what to actually use as the dark background fabric when I happened upon the Moda (Ruby Star Society) Comet Quilt pattern.

The Comet Quilt (Moda)

I discovered the actual background fabric used in the quilt and was able to find some online so I ordered 2 yards.

And then the fabric pile sat there while I worked on the three Skyline quilts. I was intending to work on a wall art piece next but the fabric pile started calling to me – I looked at the Moda pattern to get an idea of how I wanted to work on this. I wanted a throw size (~50″ x 70″) – quite a bit smaller than the pattern was describing. So I had a couple of choices – fewer blocks, or smaller ones. I decided to duplicate the 18 x 23 blocks using 3 1/2″ half-square triangles (finished size 3″).

This is where the whole process becomes quite complicated. I’m using a set of my own fabrics (not those in the pattern) so as I read through the pattern to guesstimate of how many HST I would need I realized I was not going to be able to manage any kind of match-up to the blocks in the pattern. I cut the same number of light blocks, medium blocks, dark blocks. I matched up some light/light light/medium, light dark, medium/dark, dark/dark combinations, marked the stitching lines, sewed the blocks, cut them apart into HST, pressed them, and trimmed them carefully to 3 1/2″.

Then I cleared a space on my studio floor and began laying them out:

The Comet Quilt (Moda)

I put the Moda instructions with photos aside and just played with the blocks trying to create the “startburst” for the quilt centre.

I’ve been taking photos, moving blocks around, taking more photos, moving more blocks. this is where I am at the moment – the central 11 x 11 block centre panel. I’m sure when I see this tomorrow morning in the daylight I’ll move blocks again.

In some ways this improvisation is easier than trying to follow the pattern layout! I can just make decisions based on the blocks I have and see how the panel turns out.

What’s obvious is that my “medium” colour tones are brighter than the fabrics used for the original. So my quilt, overall, will be brighter than the Moda original.

Once I’m satisfied with a layout for this panel, I will sew the blocks together, first into rows, then stitch the rows. I have to do that, because I will need to plan the outer panels based on the size this panel works out to be. The Moda pattern will give me an idea about how I will want to use my dark/background HST squares but I can’t cut my background fabric yet because I don’t know the size required for the remaining elements!

That’s just what it’s like when you improvise.

Skyline #3 – Completed

Finished the third quilt a few days ago. It didn’t take as long to quilt as I’d anticipated in large part because instead of quilting single blocks I was able to quilt two at a time using the 360 x 260 hoop. I probably could have quilted 4 at once using the large “Garden Dream” reversible hoop (360 x 350) but it was just as fast to re-hoop blocks as it would have been to fight to take the hoop from the arm and turn it around and hope the positioning was close. The problem with that large hoop is getting the second side to align with the first. So I rarely use it for quilting.

Skyline #3 – Top

I am happy with how the layers on layers of circles turned out. There are actually five complete circles but they’re not obvious in part because the four quadrants are all different. But that’s also what helps with the layered effect.

To quilt it, I used a floral design I’d created for another quilt doing my best to overlap the stop/start positions where the design ended and began in adjacent blocks. Overall, the effect is to appear to have been done using a long-arm quilting machine.

Skyline #3 – Quilting Detail

Again, I used a strip from the original Hoffman “Skyline” fabric as a strip in the back – making sure I had it right side up in relation to the front of the quilt.

Skyline #3 – Back

The three quilts together as a set I’m calling “The Sisters”!

Skyline #1
Quilt Top Skyline #2 – Quilt Top
Skyline #3 – Top

Three very different quilts all from the same fabric.

Now on to something else.