Jeans Makeover

Too bad I didn’t remember to take a before picture – you’d have seen jeans that were very baggy in the bum with upper legs that were WAAAAY too wide!

So here’s how this goes: I go to a local thrift store and buy a pair of jeans that fit nicely in the waist and high hip. That’s my starting point. The jeans cost me $5! There’s no point in buying new expensive jeans retail because they fit no better than those from the thrift store.

Get the jeans home and wash them a couple of times to get rid of the smell (and to shrink them if they haven’t been worn a lot).

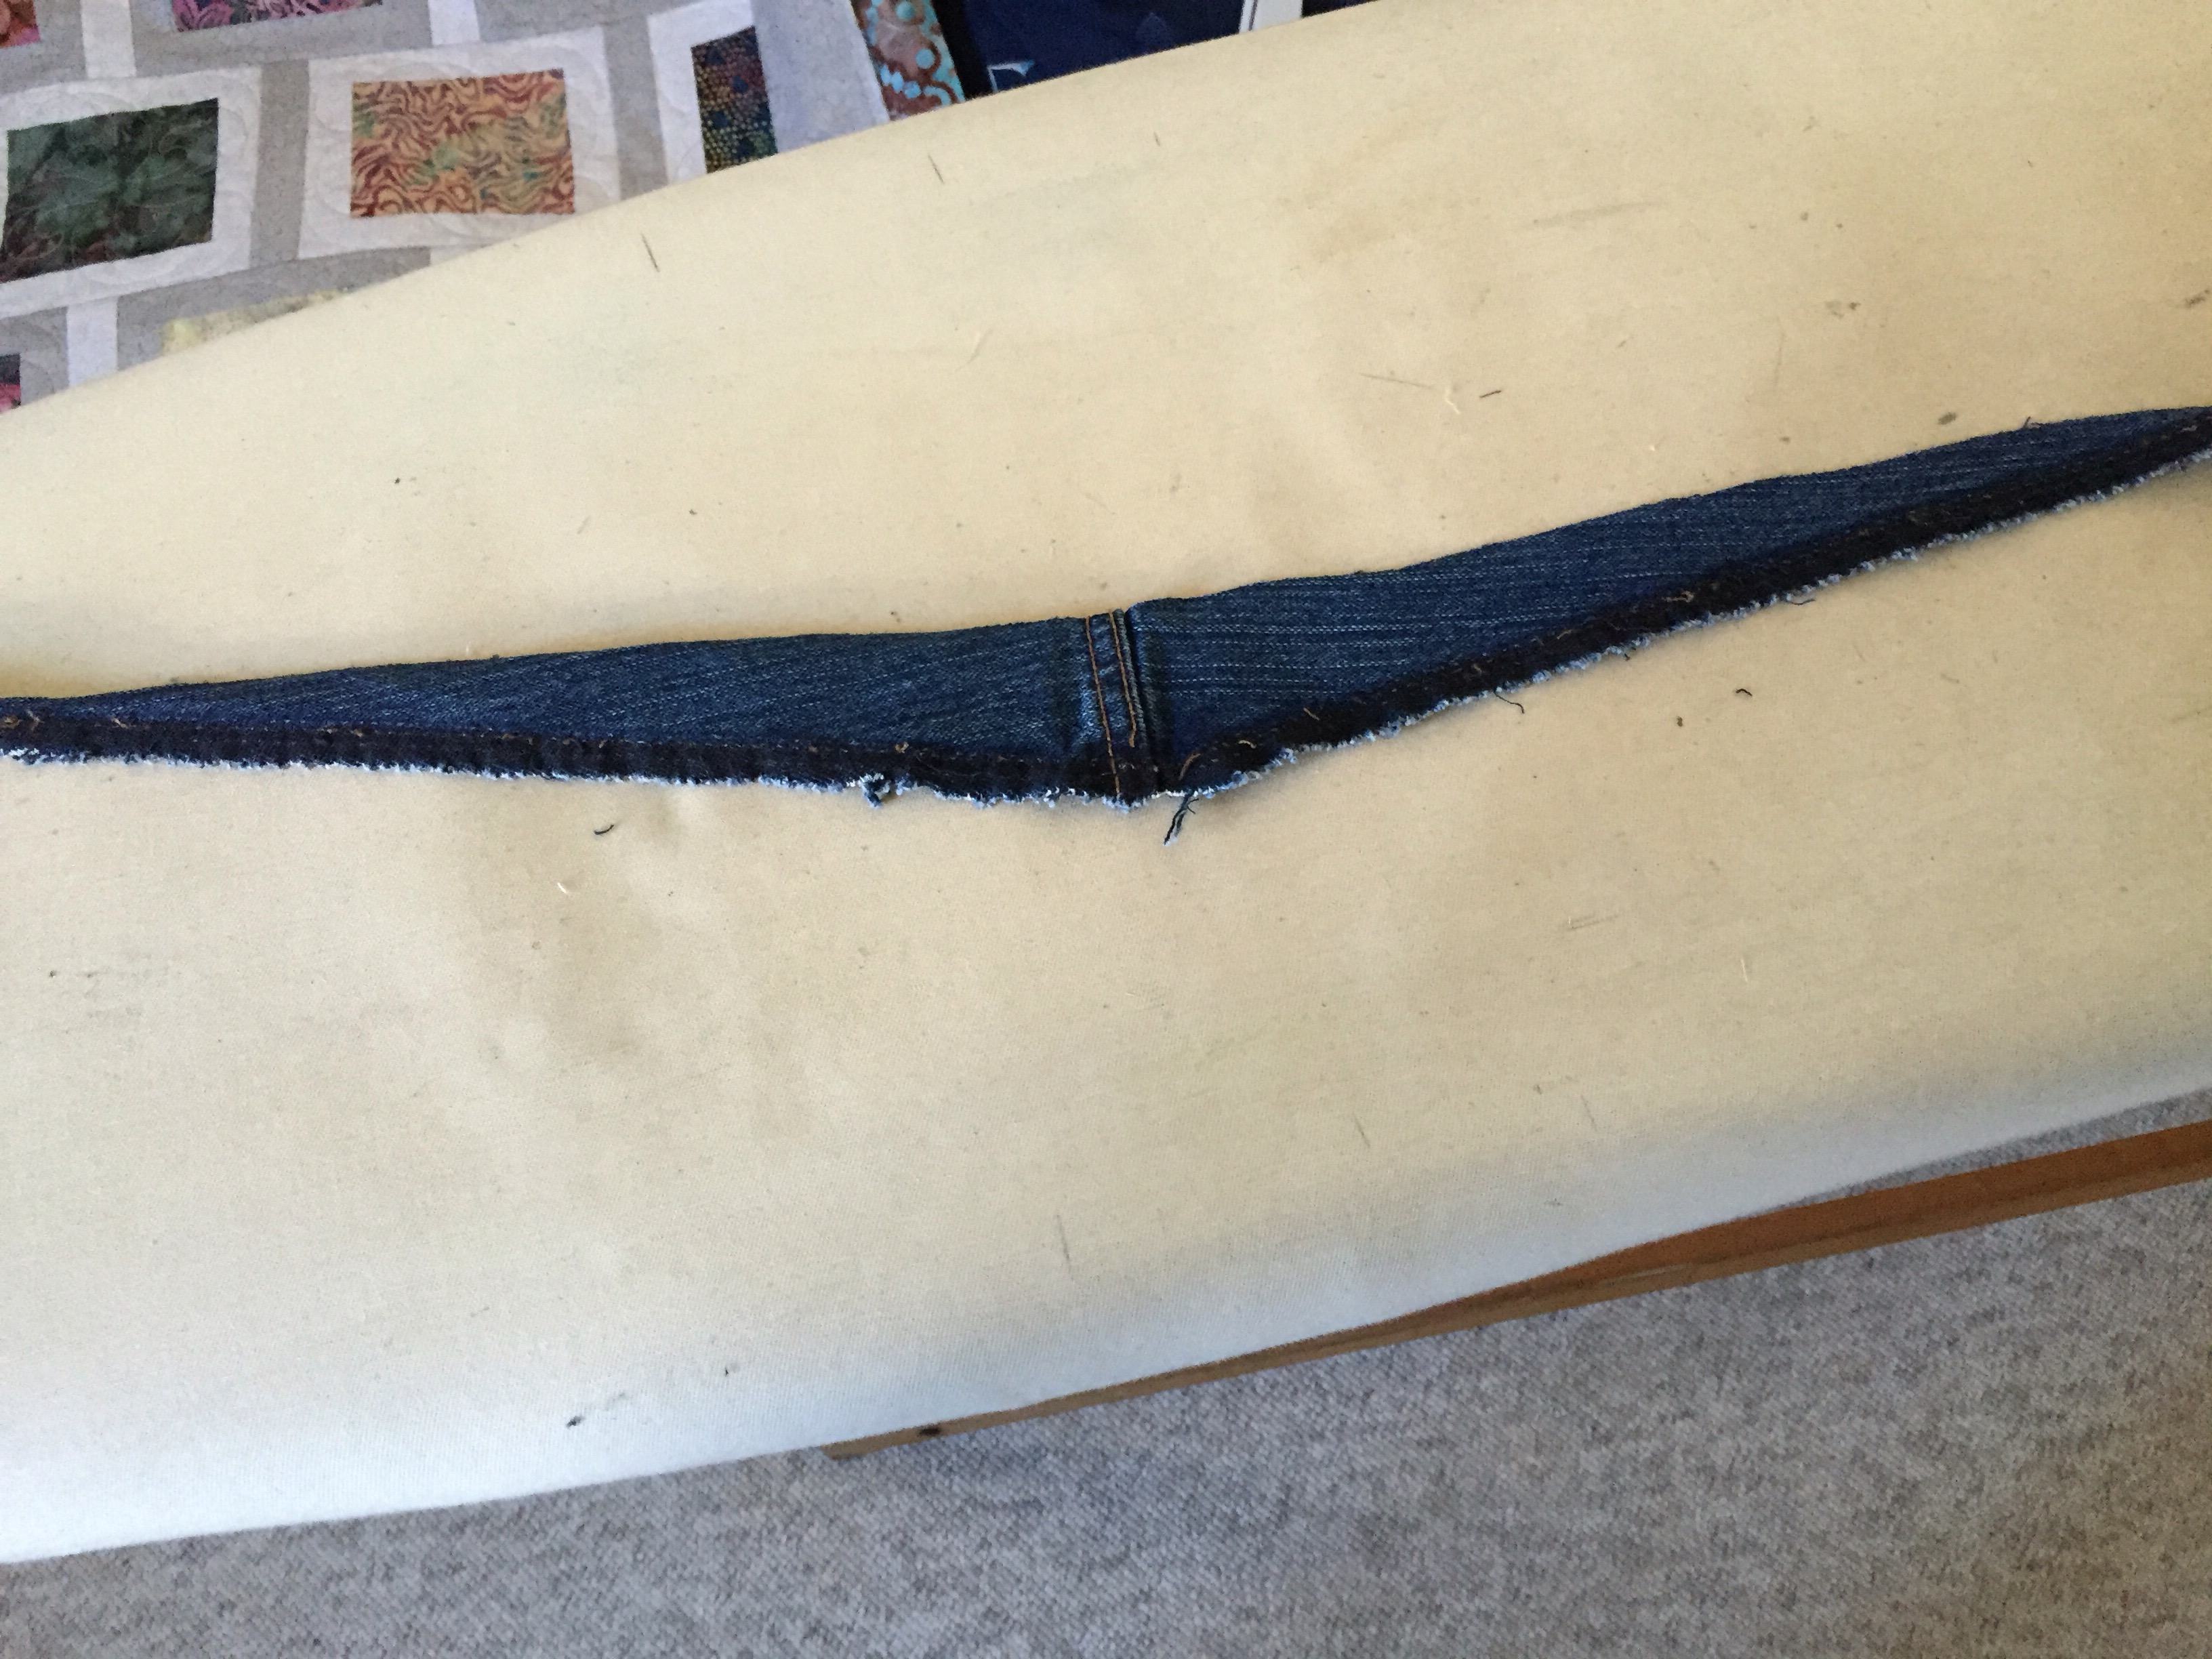
I open the inner leg seam from knee, through crotch, to knee. I pin, then straight stitch, front to back through the crotch making sure I am cutting out about 2 1/2″ at the back crotch seam area tapering the alignment along the inner leg till the front and back match at the knee – I don’t cut anything at this point because I want to check fit before cutting. The fabric eventually removed from the back crotch and back inner legs looks like this – sort of triangular.

Once I’m sure of the fit (I may want to remove a bit more from the back crotch and back inner leg – a smigeon from the front as well) I stitch, cut, and serge the inner legs through the crotch, then edge stitch the seam flat.

IMG_7251

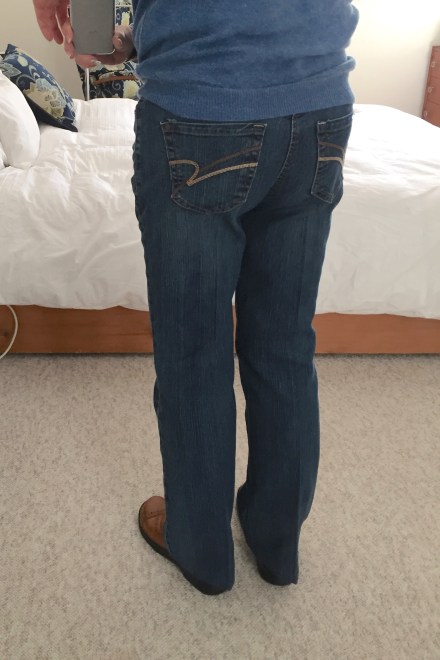
The back fits reasonably snugly with enough give for sitting. I shorten the legs – cut the length of the leg at the inner seam 28″ (enough to serge the edge and turn up a 5/8″ hem – my inseam is 27 1/4″).

The front fits smoothly, not baggy.IMG_7252

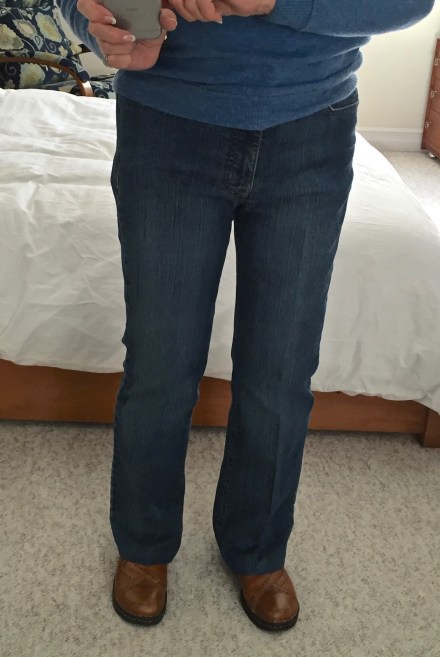
I make two other alterations – I carefully cut out the front grommet – they cut holes in my sweaters – patch, and reinforce the hole, sew on a button; the second alteration is to extend the depth of the right front pocket to hold my iPhone securely.

This is an earlier pair adjusted to fit the same way. I’ve worn this pair a lot – they’re very comfortable.IMG_7255

Sunny (Although Cold) Afternoon


indour Garden Mid-winter

 
I’ve been out doing errands and have just come home. Since I’ve added a quilt to my living room sofa I’m much more inclined to stop and read for a bit here (why I didn’t that years ago is beyond me!).

So I sat down to read, have taken a moment to enjoy the sun streaming in the large window and the plants lined up in front. I’d pruned away dead leaves and flowers on the weekend now they’re all looking happy.  They’ll start responding to a longer day in a couple of weeks.

It’s peaceful sitting here.

“Charm” Quilts

One of the things I wanted the ladies in the quilting class to learn was how to look at pictures of quilts and deconstruct them. So I hunted for quilts I thought would be relatively easy to analyze. Among the photos I sent them was a charm quilt. “Charms” if you don’t know are precut pieces of fabric 5″ square. I had several charm packs (a charm pack is 40 of these 5″ pieces) in my stash and thought I should give the quilt a try. The original photo sashed and bordered the charms in alternating darker and lighter grey. I took my charms to the fabric store to see what would work with the charms I’d selected. Dark and light grey for the sashing was going to make those small coloured blocks pop. So I cut the strips I needed and quickly assembled the quilt top. What I particularly like are the vertical strips from one row to the next linking the rows.

IMG_7208

I made a few more bordered blocks, cut half of them in half to assemble a strip for the backing.

IMG_7209
The quilt sandwich is pinned and ready to be quilted.

However I still had a large number of charms not used in this quilt so I thought I’d have a go at another quilt idea based on two blocks: half-square triangles and strips. The quilt I had in mind would need 140 4 1/2″ blocks. So I made 70 half-square triangles and 70 blocks with 1/2″ strips down the middle.

IMG_7242

Here are the blocks laid out on my office floor. I’m still auditioning them – trying to find what for me is the most pleasing arrangement. That’ll take a day or two of coming back to look at the layout and tweeking it a bit more. Once sewn together, I intend to border the quilt with the darker grey fabric I used in the first quilt, backing and binding – I don’t know yet.

Quilting Class – Jelly Roll Quilt

So here they are – the jelly roll quilts the gals have been making – stitched in the ditch – next to be quilted in the hoop. We got started on that today.


Great quilts, all! I’m looking forward to seeing the finished quilts.

Here are the backs – equally interesting:


Great work.

Another Useful Idea

Even though my sewing machines have cutting blades on the left hand side I don’t use them because as a right handed person I want to reach for my scissors, instead. 

I’ve found this simple way to keep a small pair of scissors nearby on each sewing machine (I have 4, but three are on my sewing tables). 

Plastic hooks with removable tape on a clear spot on the side of the machine does the trick – once I got used to not having to hunt for scissors when I’m sewing I no longer have to think about it – they’re always right at hand!

A “Good Thing”

Living is about improvisation. One of life’s small frustrations is finding the end of a roll of tape. I think I came across this idea on Pinterest – using the little plastic tabs on the end of the plastic bread bags (among other places) to mark the tape end. It’s a “Good Thing” as Martha Steward would say.

I use many different kinds of tape in my sewing room – double sided tape for positioning the machine embroidery hoops, masking tape to mark alignment positions on my sewing machines and to mark front/back of fabric, to identify rows of blocks for quilting, to convert cutting rulers to templates, duct tape when something needs a more secure temporary join.

Life got a whole lot easier when I started using those little pieces of plastic instead of throwing them out!

My Sock Drawer

I’ve been knitting socks for myself and others since 2003. So far I’ve probably knit about 350 pairs of socks – of which I have 42 pairs in my sock drawer, including the latest pair I finished last night.

Socks drying after being washed

I started knitting socks for myself because I have always found the seam across the toes of ready made socks uncomfortable. I’d read about “self-patterning” yarn and when I came across some I thought I’d give sock knitting a try. 

The great thing about knitting with variegated yarn is that a pattern emerges and I keep knitting to see how the sock will unfold (the first sock is always an adventure, the second sock is boring, but hey, it doesn’t take a huge time investment before a new sock adventure begins!).

Within a couple of months I had half a dozen pairs of socks; within a year I’d got rid of all my store-bought socks and I just kept knitting.

I produce about 26 pairs a year on average, some years a few more. I always have socks on the go. I find the act of knitting very relaxing. I’ve never knit the same pattern twice so each new pair of socks is a new exploration. Making something interesting from leftover yarn is the most enjoyable – I really never know how they’re going to turn out!

IMG_2651
So as long as my hands will allow I’ll have socks on the go.

Quintessential Toronto

My nephew and his gang and I attended the TSO (Toronto Symphony Orchestra) Saturday afternoon a week ago. We took the subway from the northern-most end to Dundas Street and back – the best part of our adventure as far as Charlie (age 4) was concerned. The concert (The Science Of The Symphony – a one-hour program for kids) was well put together and the two older boys enjoyed the music.

As we were leaving Roy Thompson Hall I turned back and captured the CN tower framed by two tall buildings with RTH in the foreground.

How more Toronto than that can you get?

Hand-me-down Socks


“These socks are very needed in this Arctic cold weather!!! Thanks again !! ”

 
Poonam stopped by for a visit during the Christmas holidays. The weather was cold so I pulled two pair of socks from my sock drawer and gave them to her. Her feet are a bit smaller than mine so I selected two of the smaller pair.

This was the first pair of socks I knit – in 2003! Because I have so many pairs of socks they don’t get worn heavily so these were still good as new. 

Glad they’re appreciated and doing their job.