Socks Using Lang JaWoll Aktion Yarn

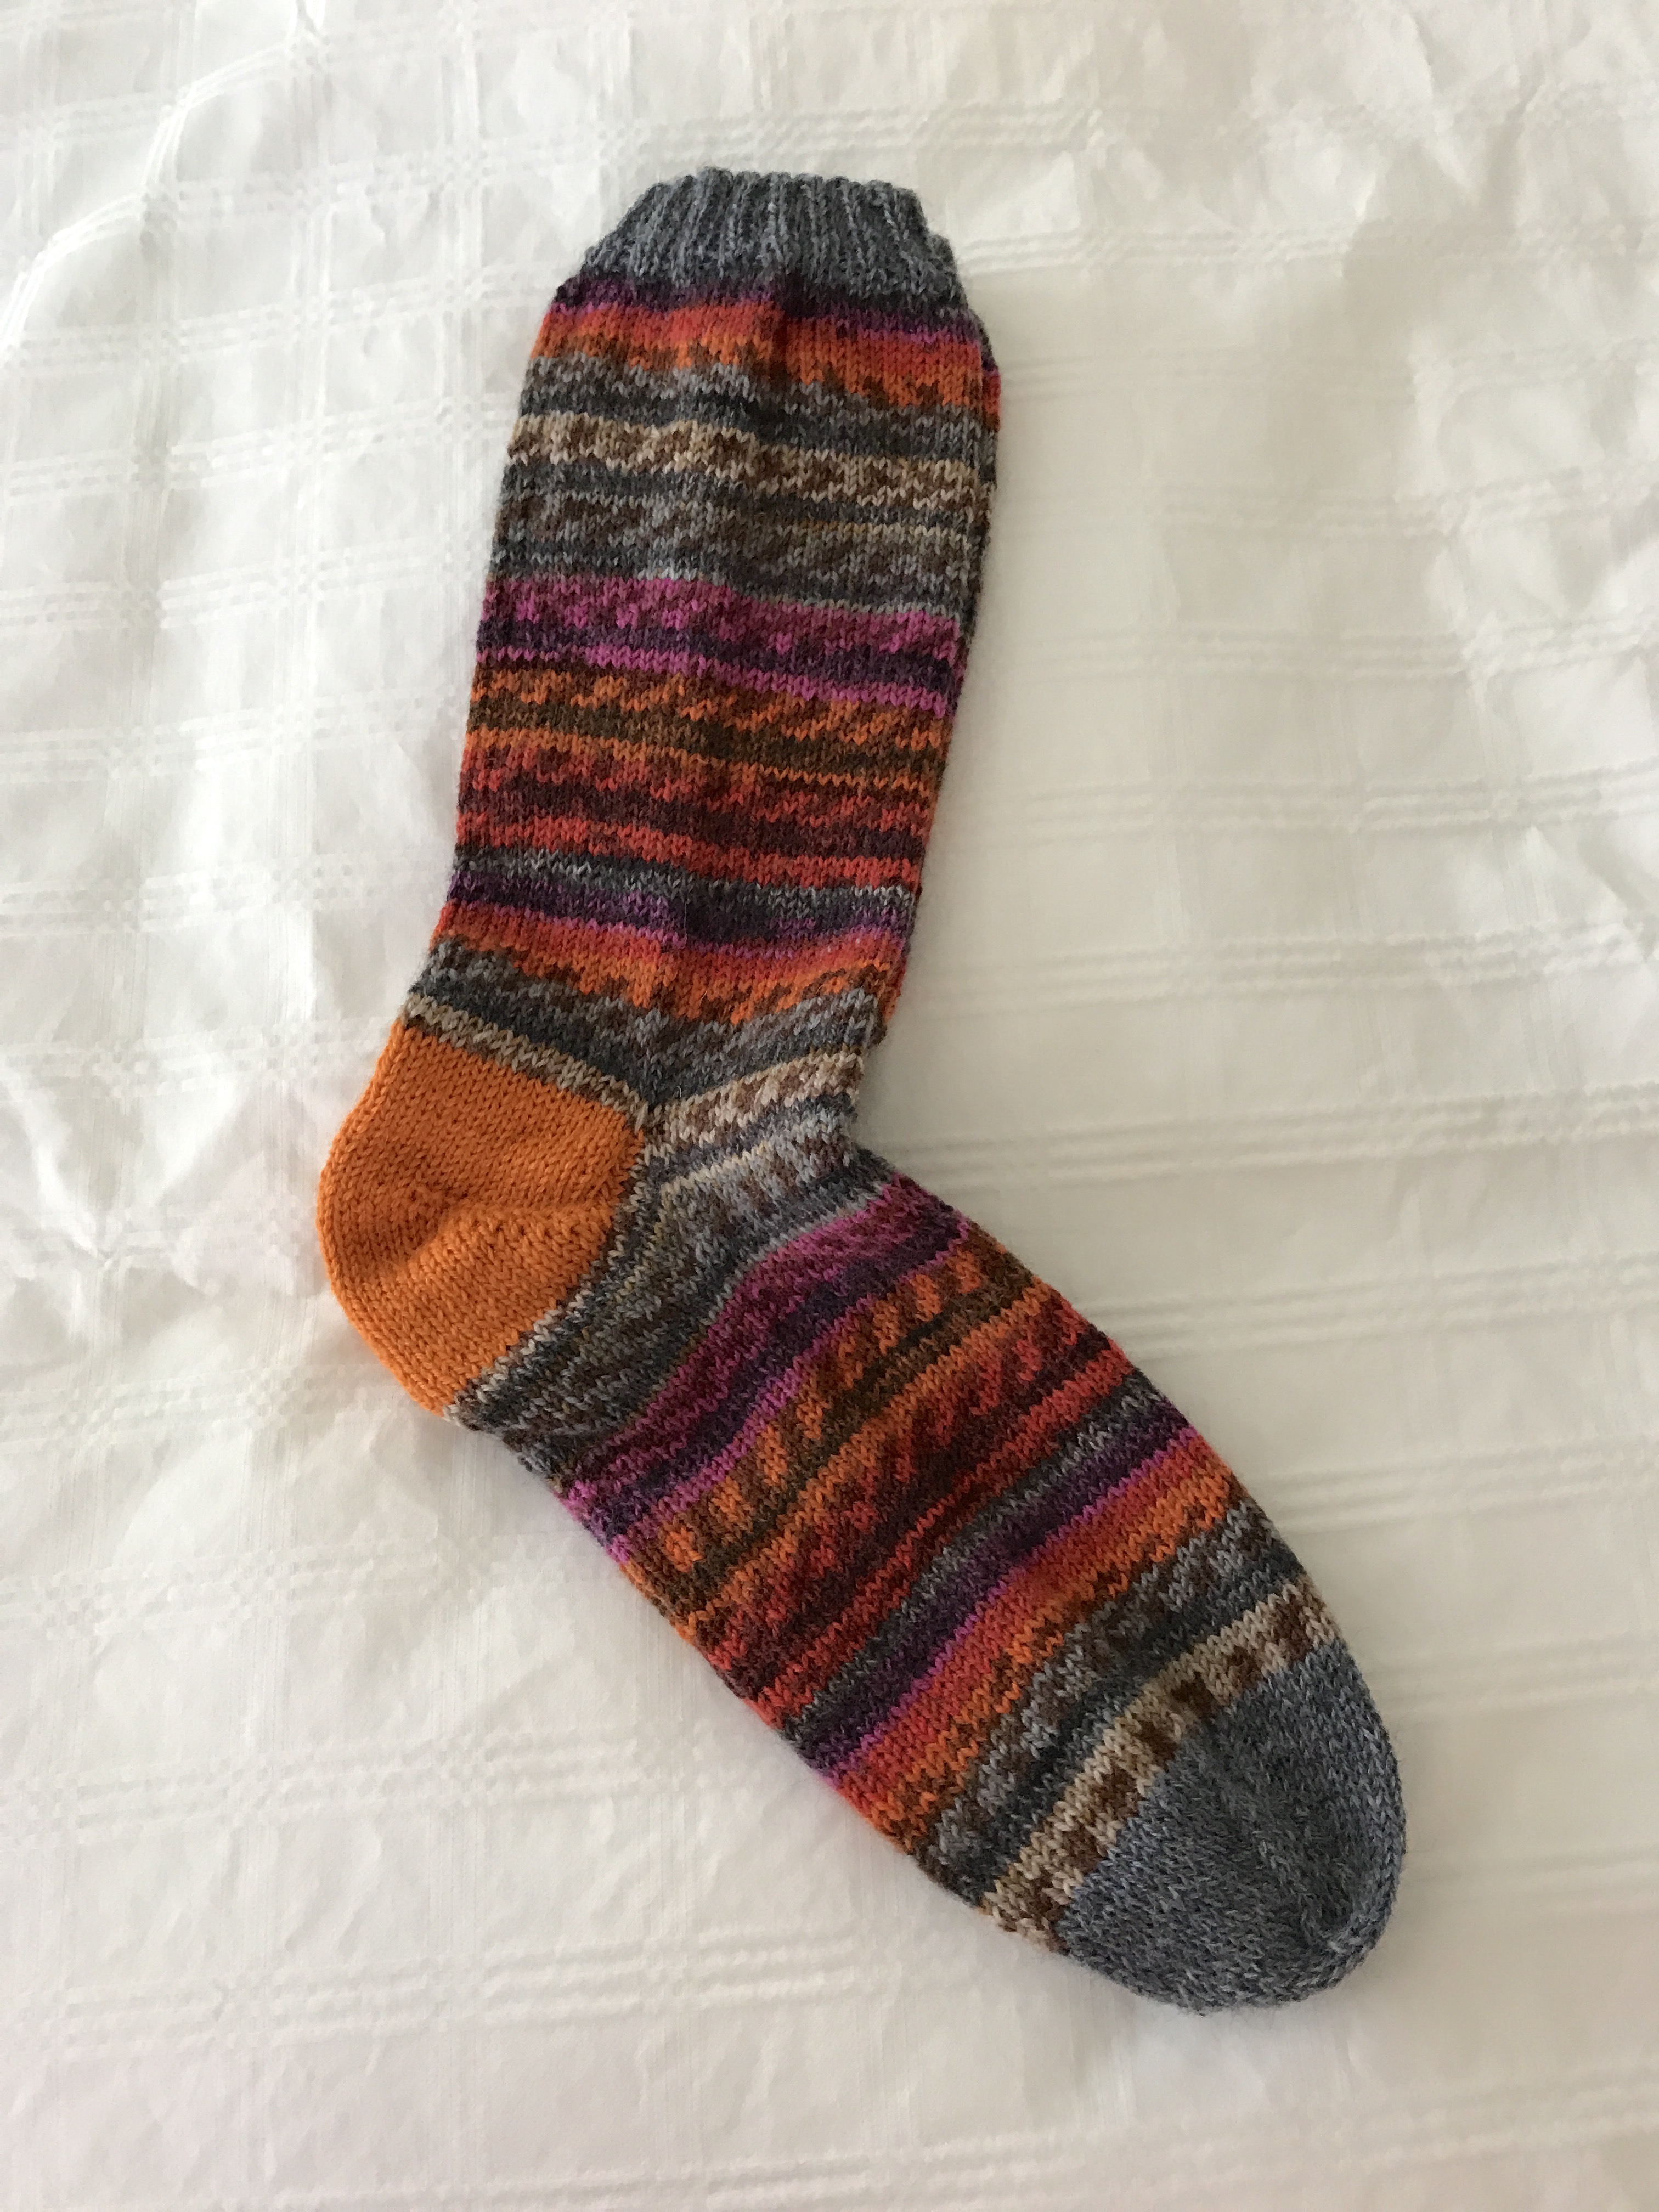
Orange ‘n Grey Socks

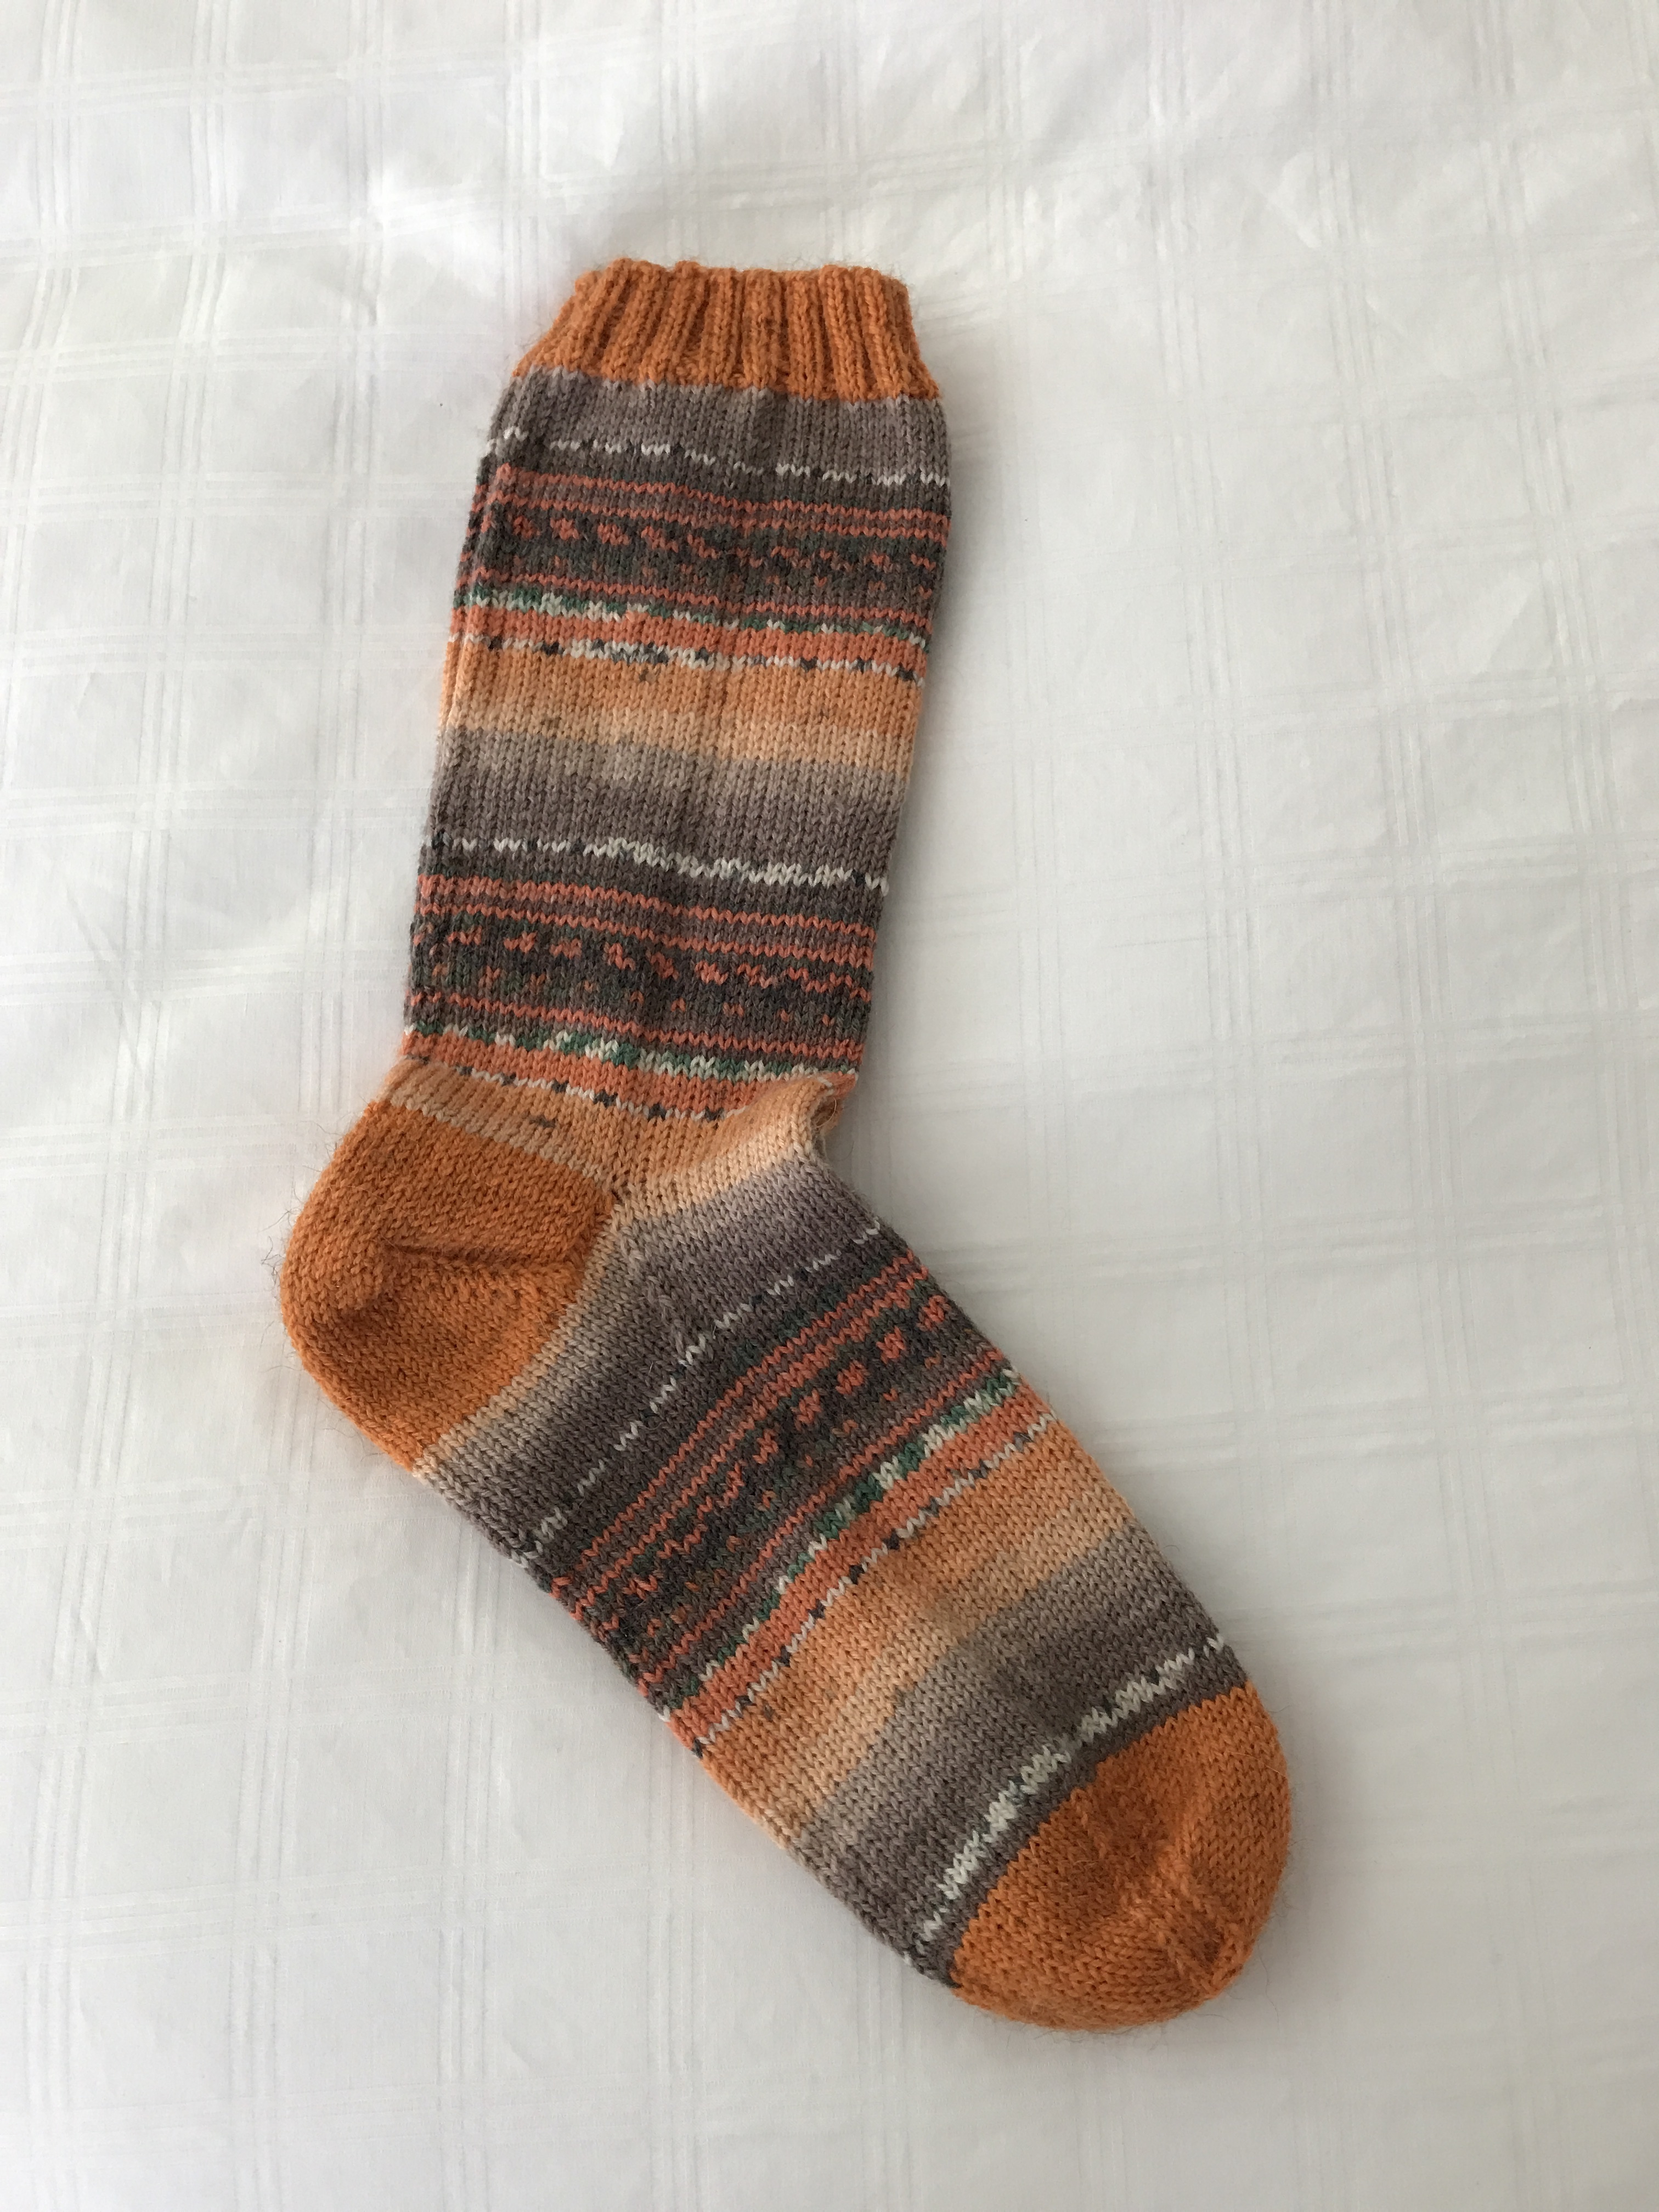
A very nice sock yarn – good weight to knit using 2.5mm dp needles. When I got to the heel I decided to strengthen the colour using the orange, rather than tone down the socks with the grey I used for the cuff and toe. It worked – it makes the colours more vibrant. This pair of socks has a name on them. They’re for one of the gals in my building.

Preparing for Parrsboro 2017

Quilts and Wall Art for Parrsboro

I’ve been spending today getting ready for the showing of eight new quilts and eight new wall hangings in the Parrsboro Art Labs during the first two weeks of September. First I had to write some kind of biographical blurb for the blast email they send out, then I had to write descriptions of each piece with photos of the front and back of each quilt. Yesterday I was at the lumber yard picking up nine 6′ lengths of 3/8″ dowels to hang the quilts (I still have to baste a temporary hanging sleeve on each), I bought some bulldog clips to hold the dowels at the Dollarstore. I still need a package of push pins to mount the clips to the walls. The showing isn’t until September 3 so I still have three weeks to get everything done in time.

I love seeing my art hanging in one spot. I don’t have room to display quilts in my apartment—they live folded over hangers in a closet. To have eight of them fully displayed at once is such a delight. I’m not expecting any of the quilts or wall art pieces will sell (the prices reflect the actual cost of the materials, as well as my labour and creativity, which sets the price well above what people locally expect to pay for a quilt; however, I consider my work to be art and so I’ve priced it accordingly). Nevertheless, these pieces of functional and decorative art will be seen by a reasonable number of people and that makes this extra work worth while.

I’ll post photos of the showing after it’s been hung in the gallery space. And if you’re interested, here’s last year’s show and the show the year before.

Foggy Morning – Completed

Done!

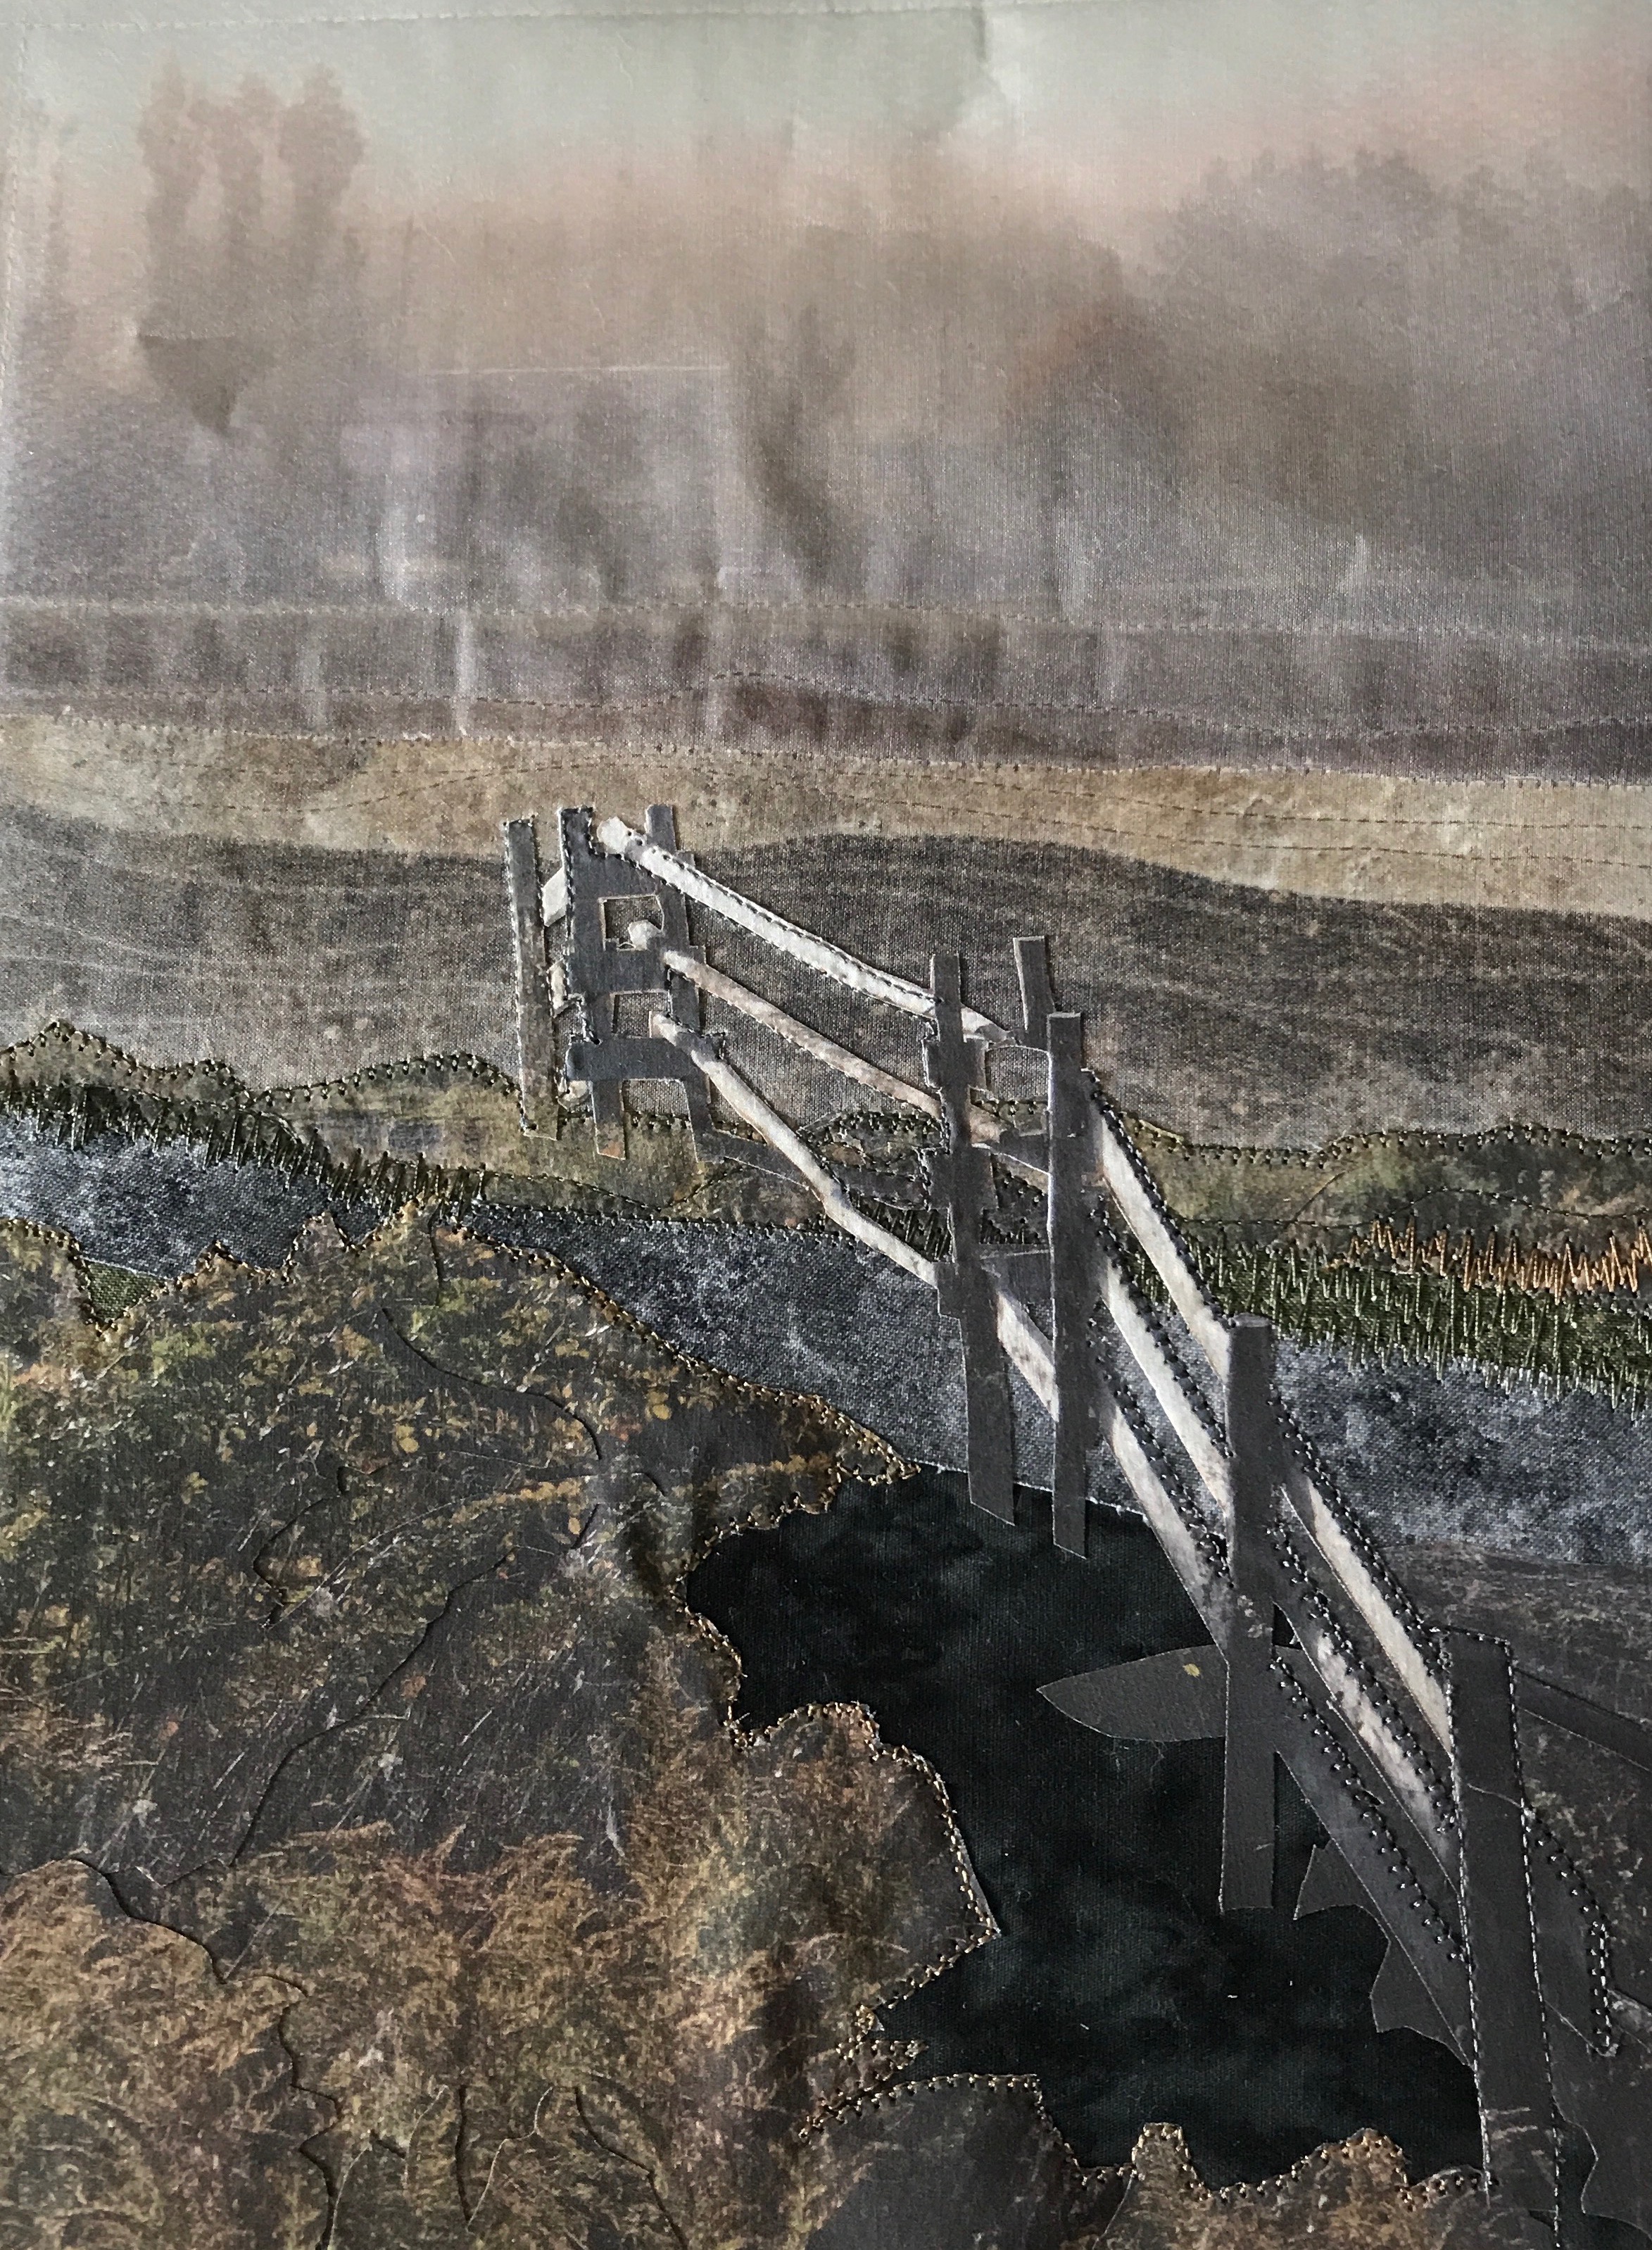
Just finished the hidden binding (with a sleeve for a rod to hang the art piece. I darkened the uprights on the fence a bit with permanent marker after I’d put on the dark piping – now the two are more balanced. The border fabric has the texture of old barnboard which brings out the colours in the scene in a way I’m happy with. That fabric was a lucky find yesterday – a fabric by Moda: grunge! And the distant fog obscures the trees and buildings in the distance but when you look more closely you can just make them out (as you would with fog).

Foggy Morning – Completed

That’s it for now. That gives me eight wall art pieces to take to Parrsboro beginning of September.

Socks

Finished this pair last evening.
I can’t sit in front of a TV without something in my hands to work on. Knitting socks is mindless (except when doing the gusset or rounding off a toe where I have to keep track of the decreases).

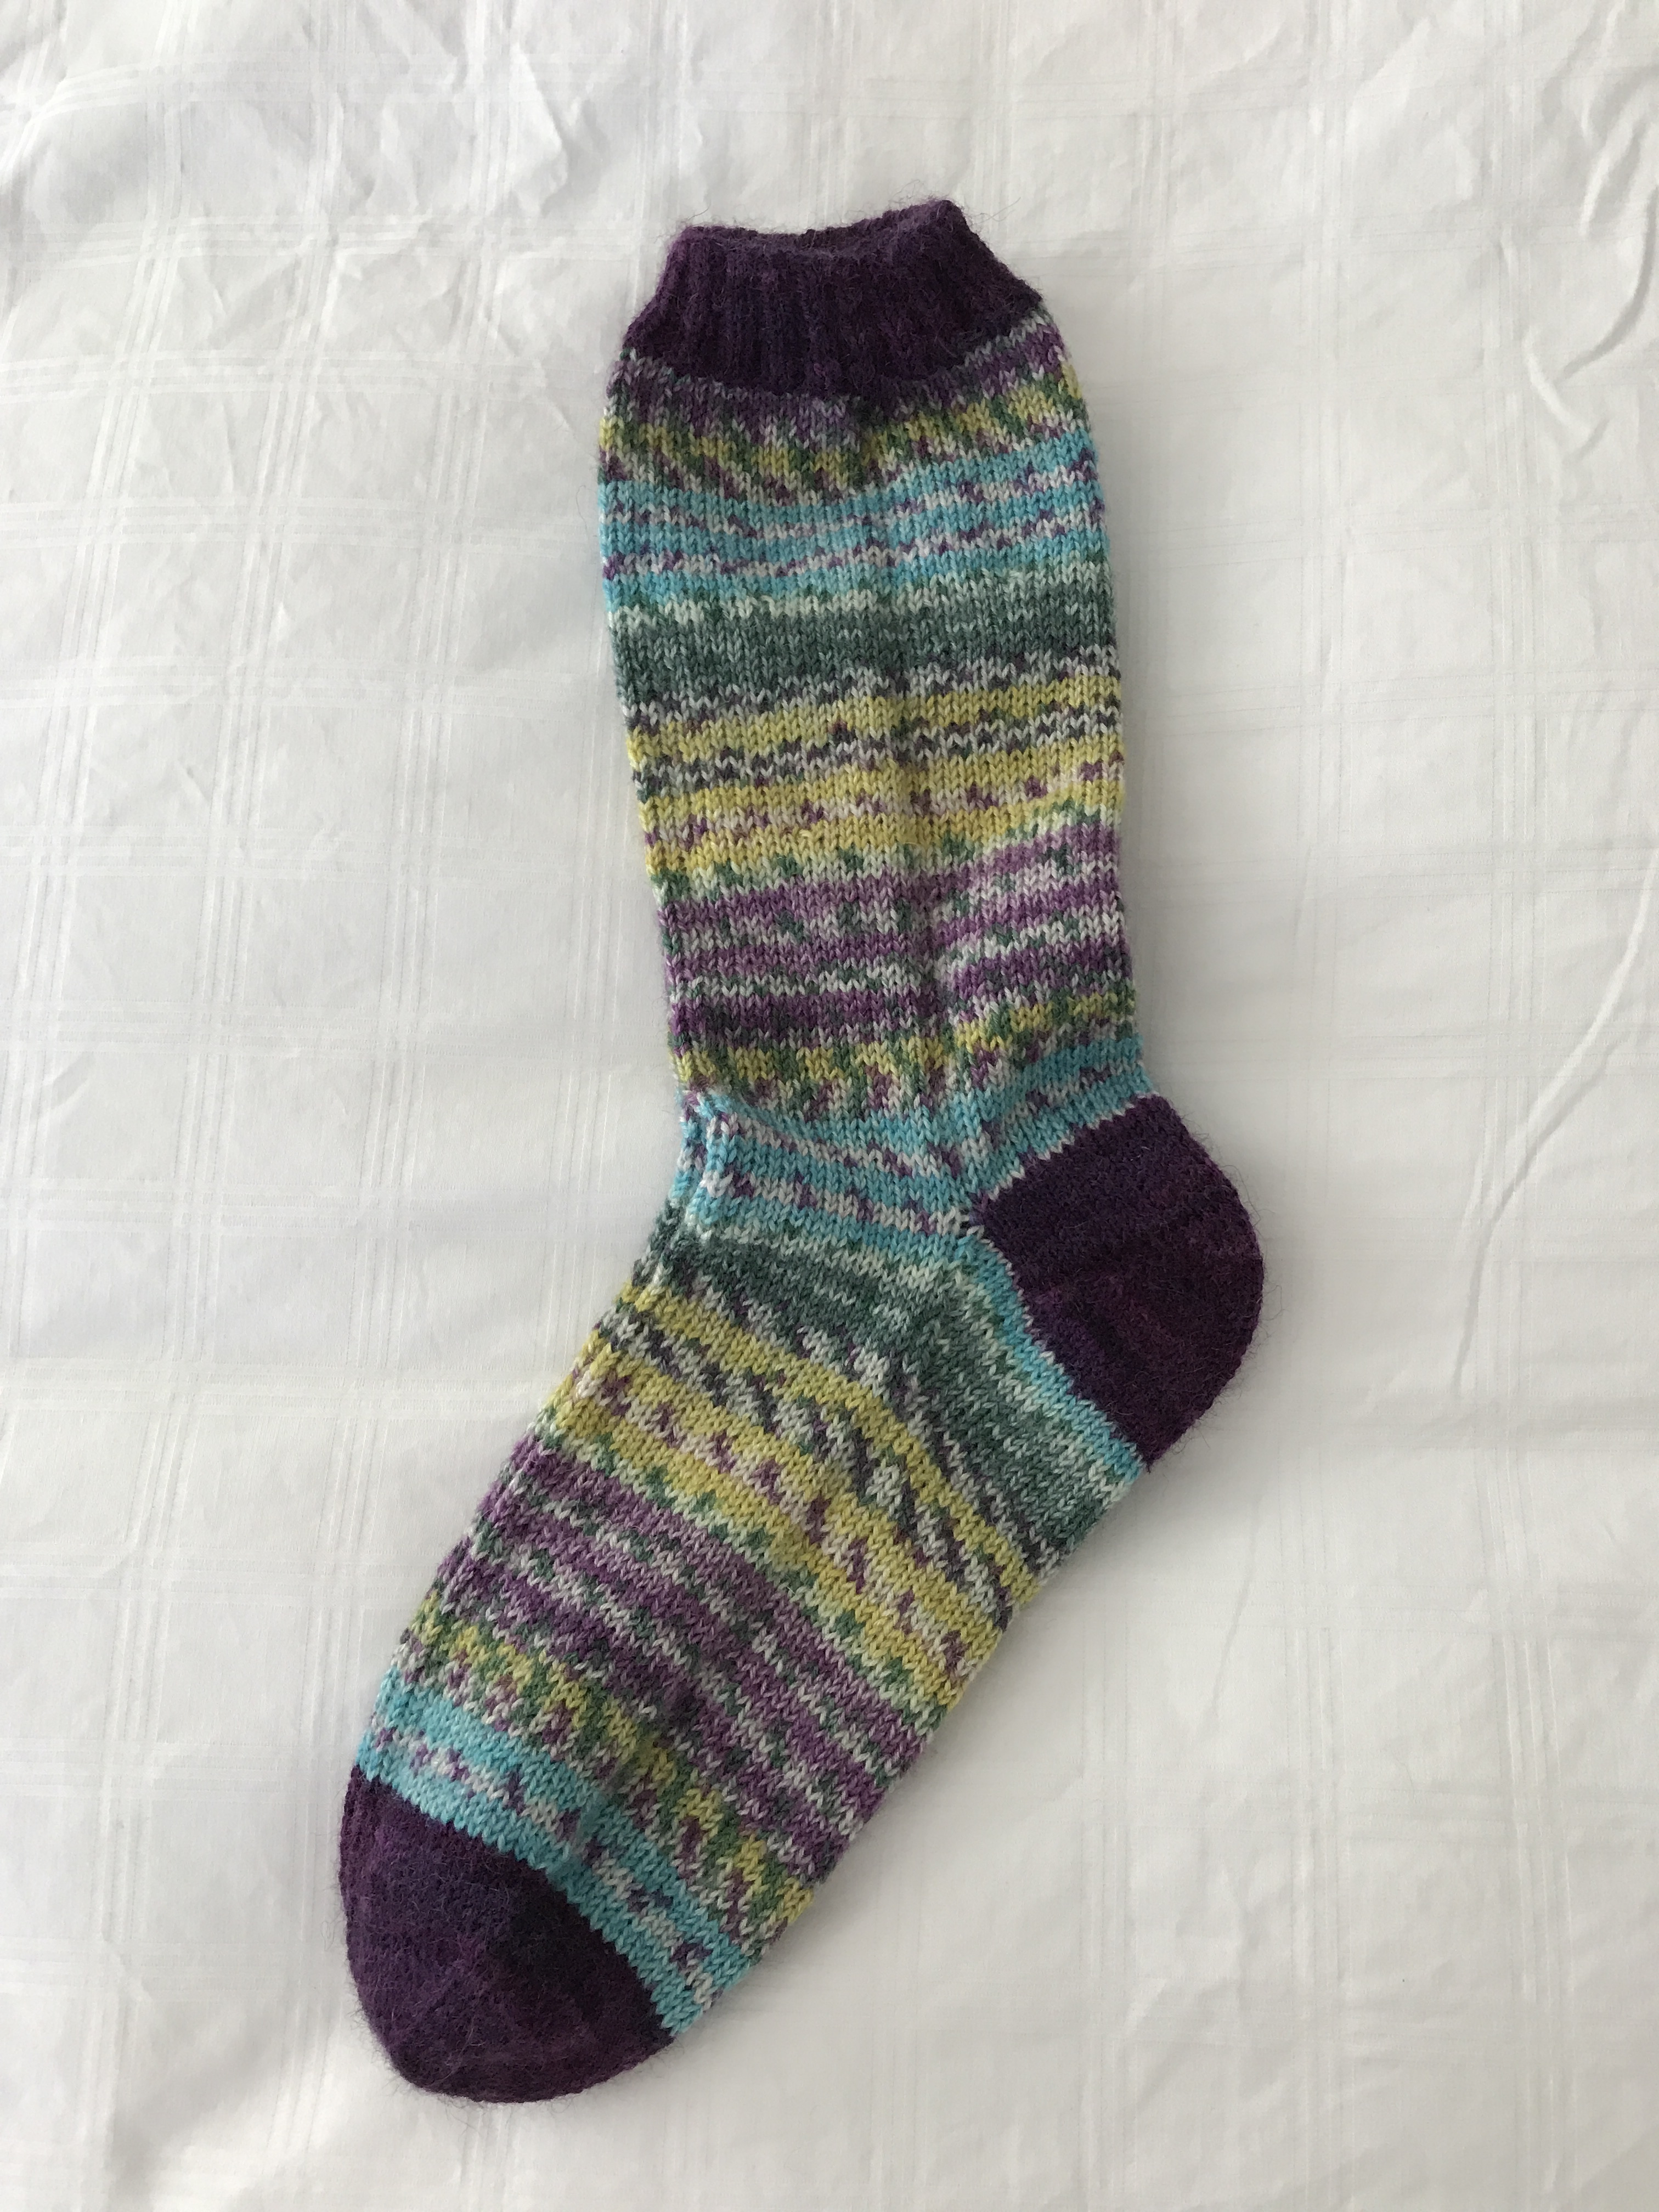
Purple/Turquoise Socks

They didn’t look at all like I thought they would based on the variegation in the yarn. I hadn’t anticipated the striping – thought the colour changes would be more solid.

Foggy Morning – II

Here is the piece after working on it for a large part of the day.

First, I placed the fabrics for the distant background and middle ground, covered them with silk organza (which I fused to the fabrics below – I didn’t want to stitch over the organza (which would have destroyed the “fog” effect I was trying to achieve), instead, I did quite a bit of stitching to suggest the texture of the fields in the distance before fusing the organza in place.

Next, I laid in the foreground, including the fence (which I had very carefully cut out using very sharp scissors from the photograph printed on fabric – did that weeks ago). Then, I began edge stitching all those elements. I have maybe about 1/3 of the edge stitching done – some on the brush in the foreground and on the fence to hold them in place. I was beginning to feel the strain in my back so I stopped working to discover I’d just put in close to 5 hours on the project! Time slips away when I’m working on something like this – “I’ll just to this one more bit…” and before I know it, the day has disappeared.

Foggy Morning – In Progress I

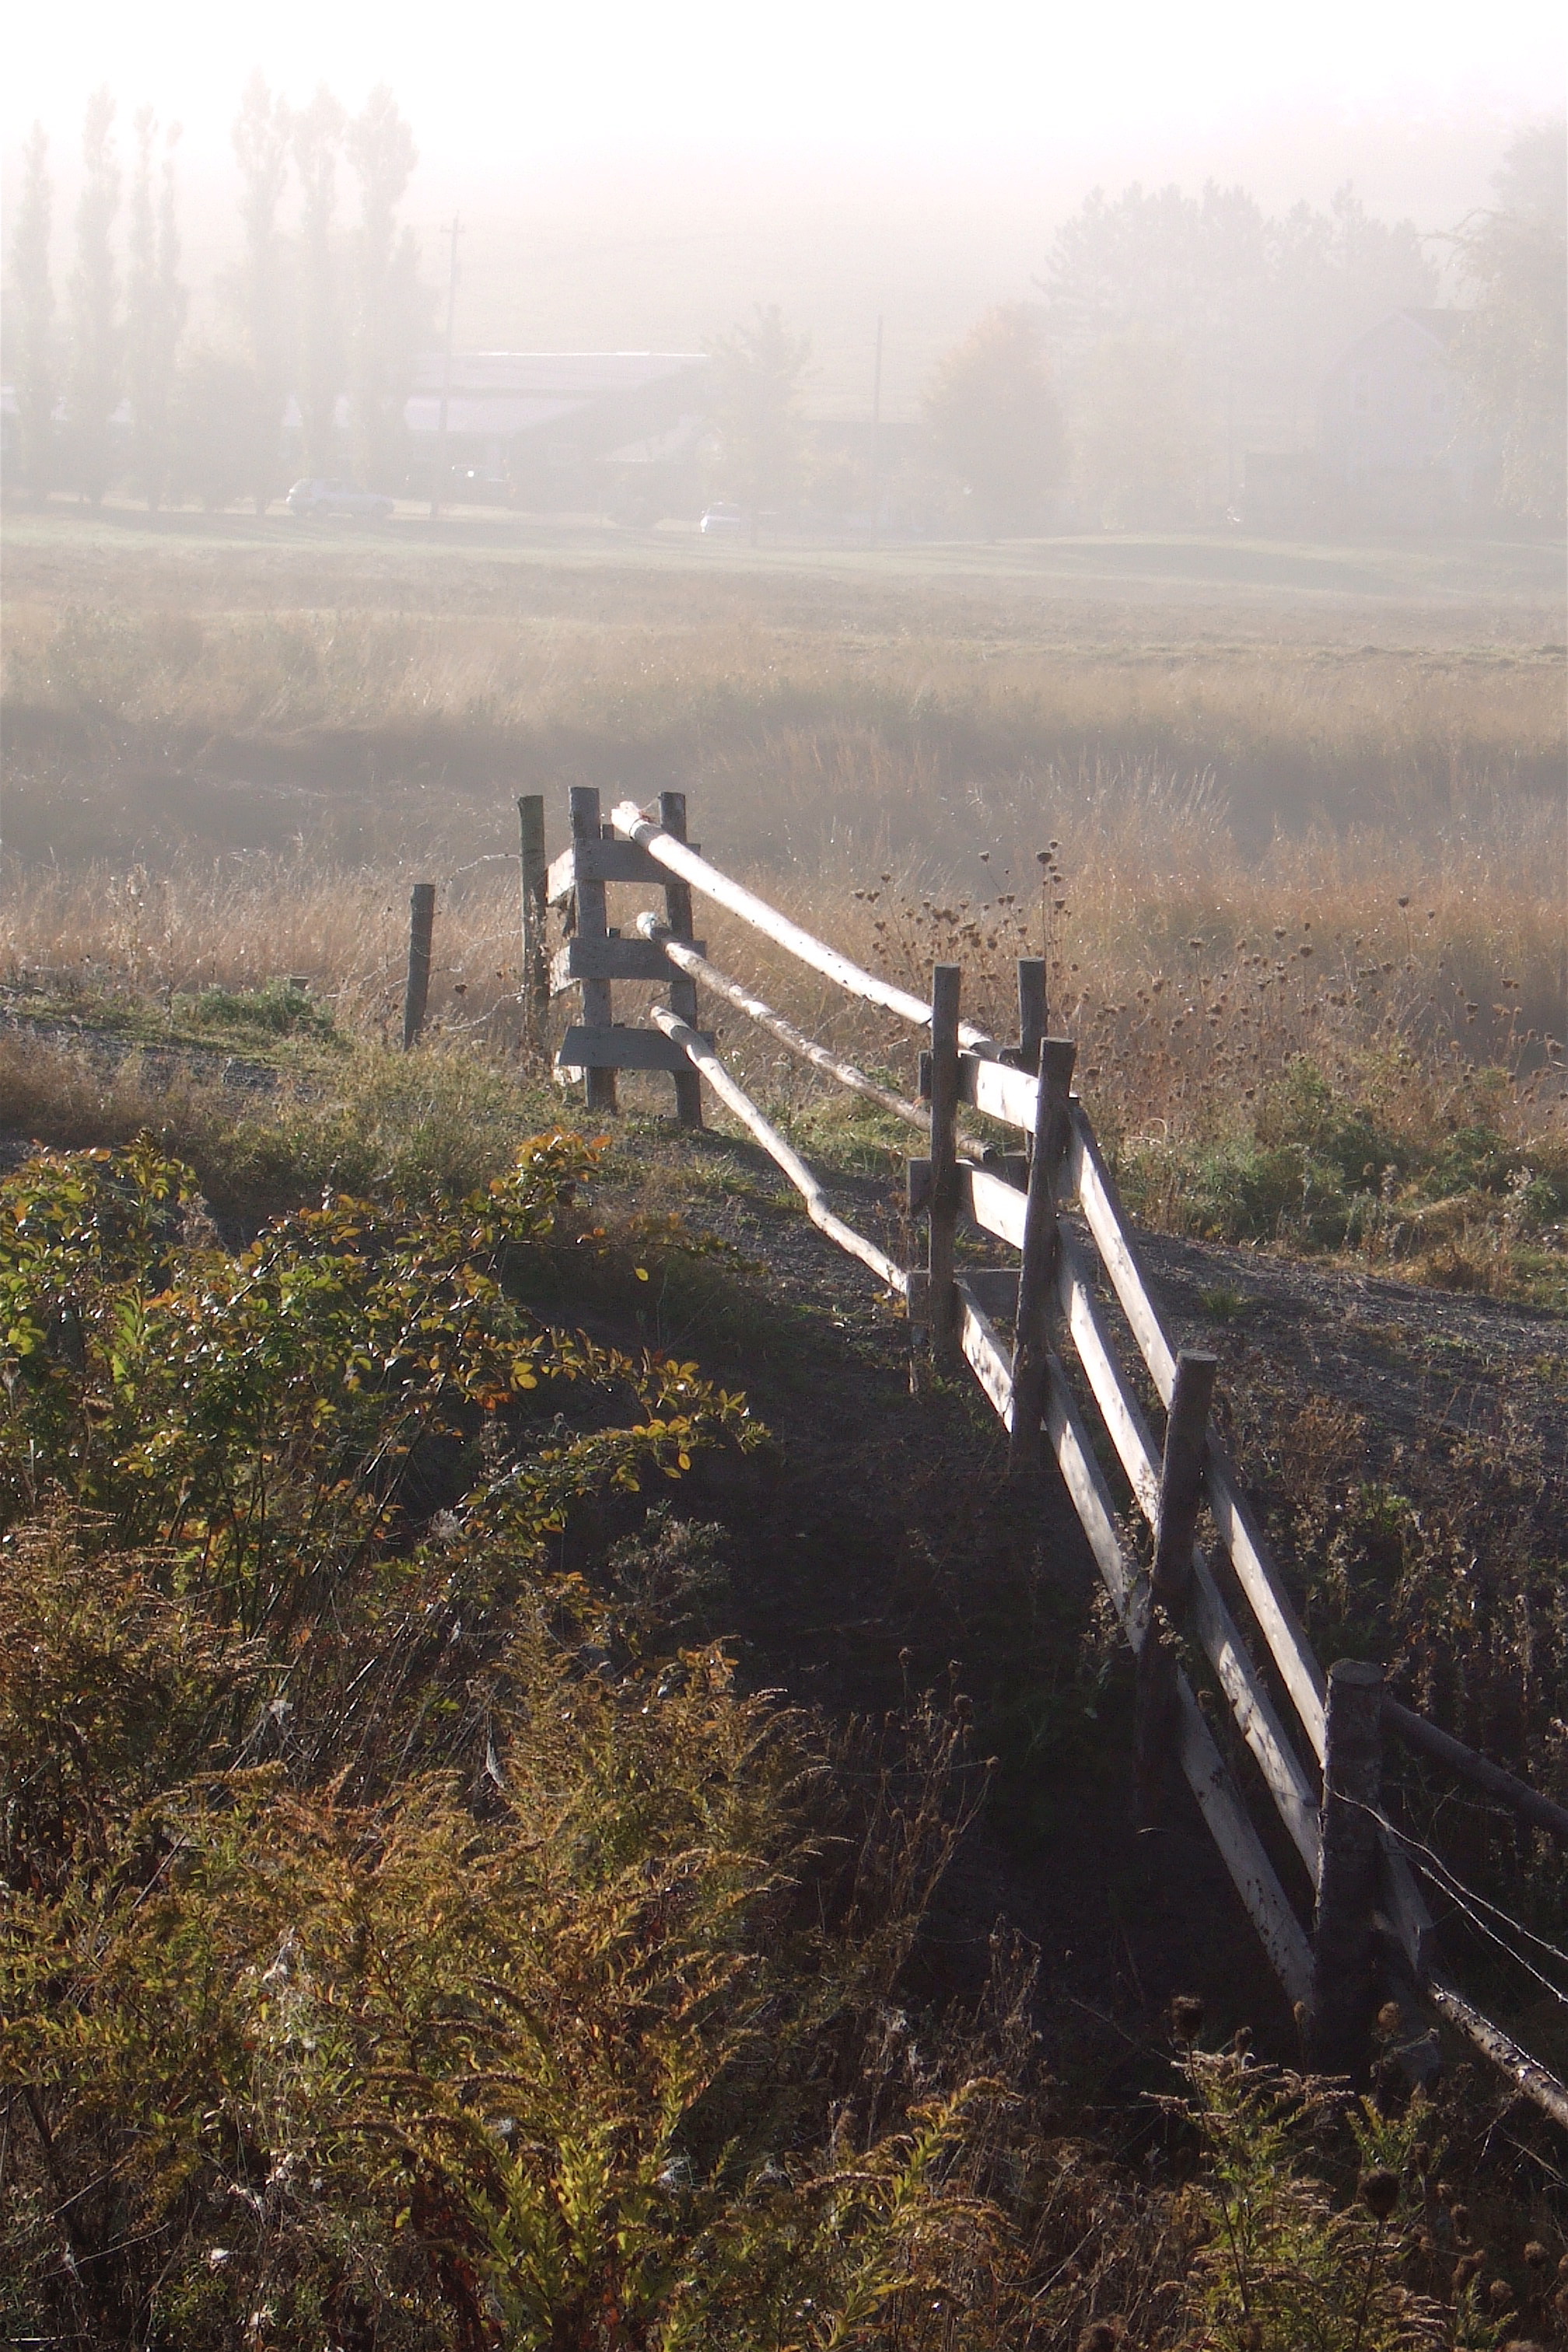
Here is the original photo for comparison – it’s getting there. The colours are somewhat different, but when the thread work is done it should be closer to the photo – that’s what I’m aiming for, anyway!

Foggy Morning – Photo

Foggy Morning – I

I was on a photo-taking adventure near Canning NS, on a foggy October morning in 2006, with David Lacey, a NS landscape artist. Near the beginning of our backroad trip we spotted an old fence at the edge of a field. The sun was still low and the ground fog hadn’t yet completely burned off. Standing where I was, the sunlight on the fence created a sharp contrast to the morning fog hovering over the farm buildings in the distance.

Foggy Morning – Photo

This was one of the photos I’d set aside as a possible subject for a textile art piece. The challenge is creating the “fog” – it seemed to me I could capture the faded texture of the foggy distance with a layer of silk organza over an underlying image  of the farm buildings and trees printed on fabric.

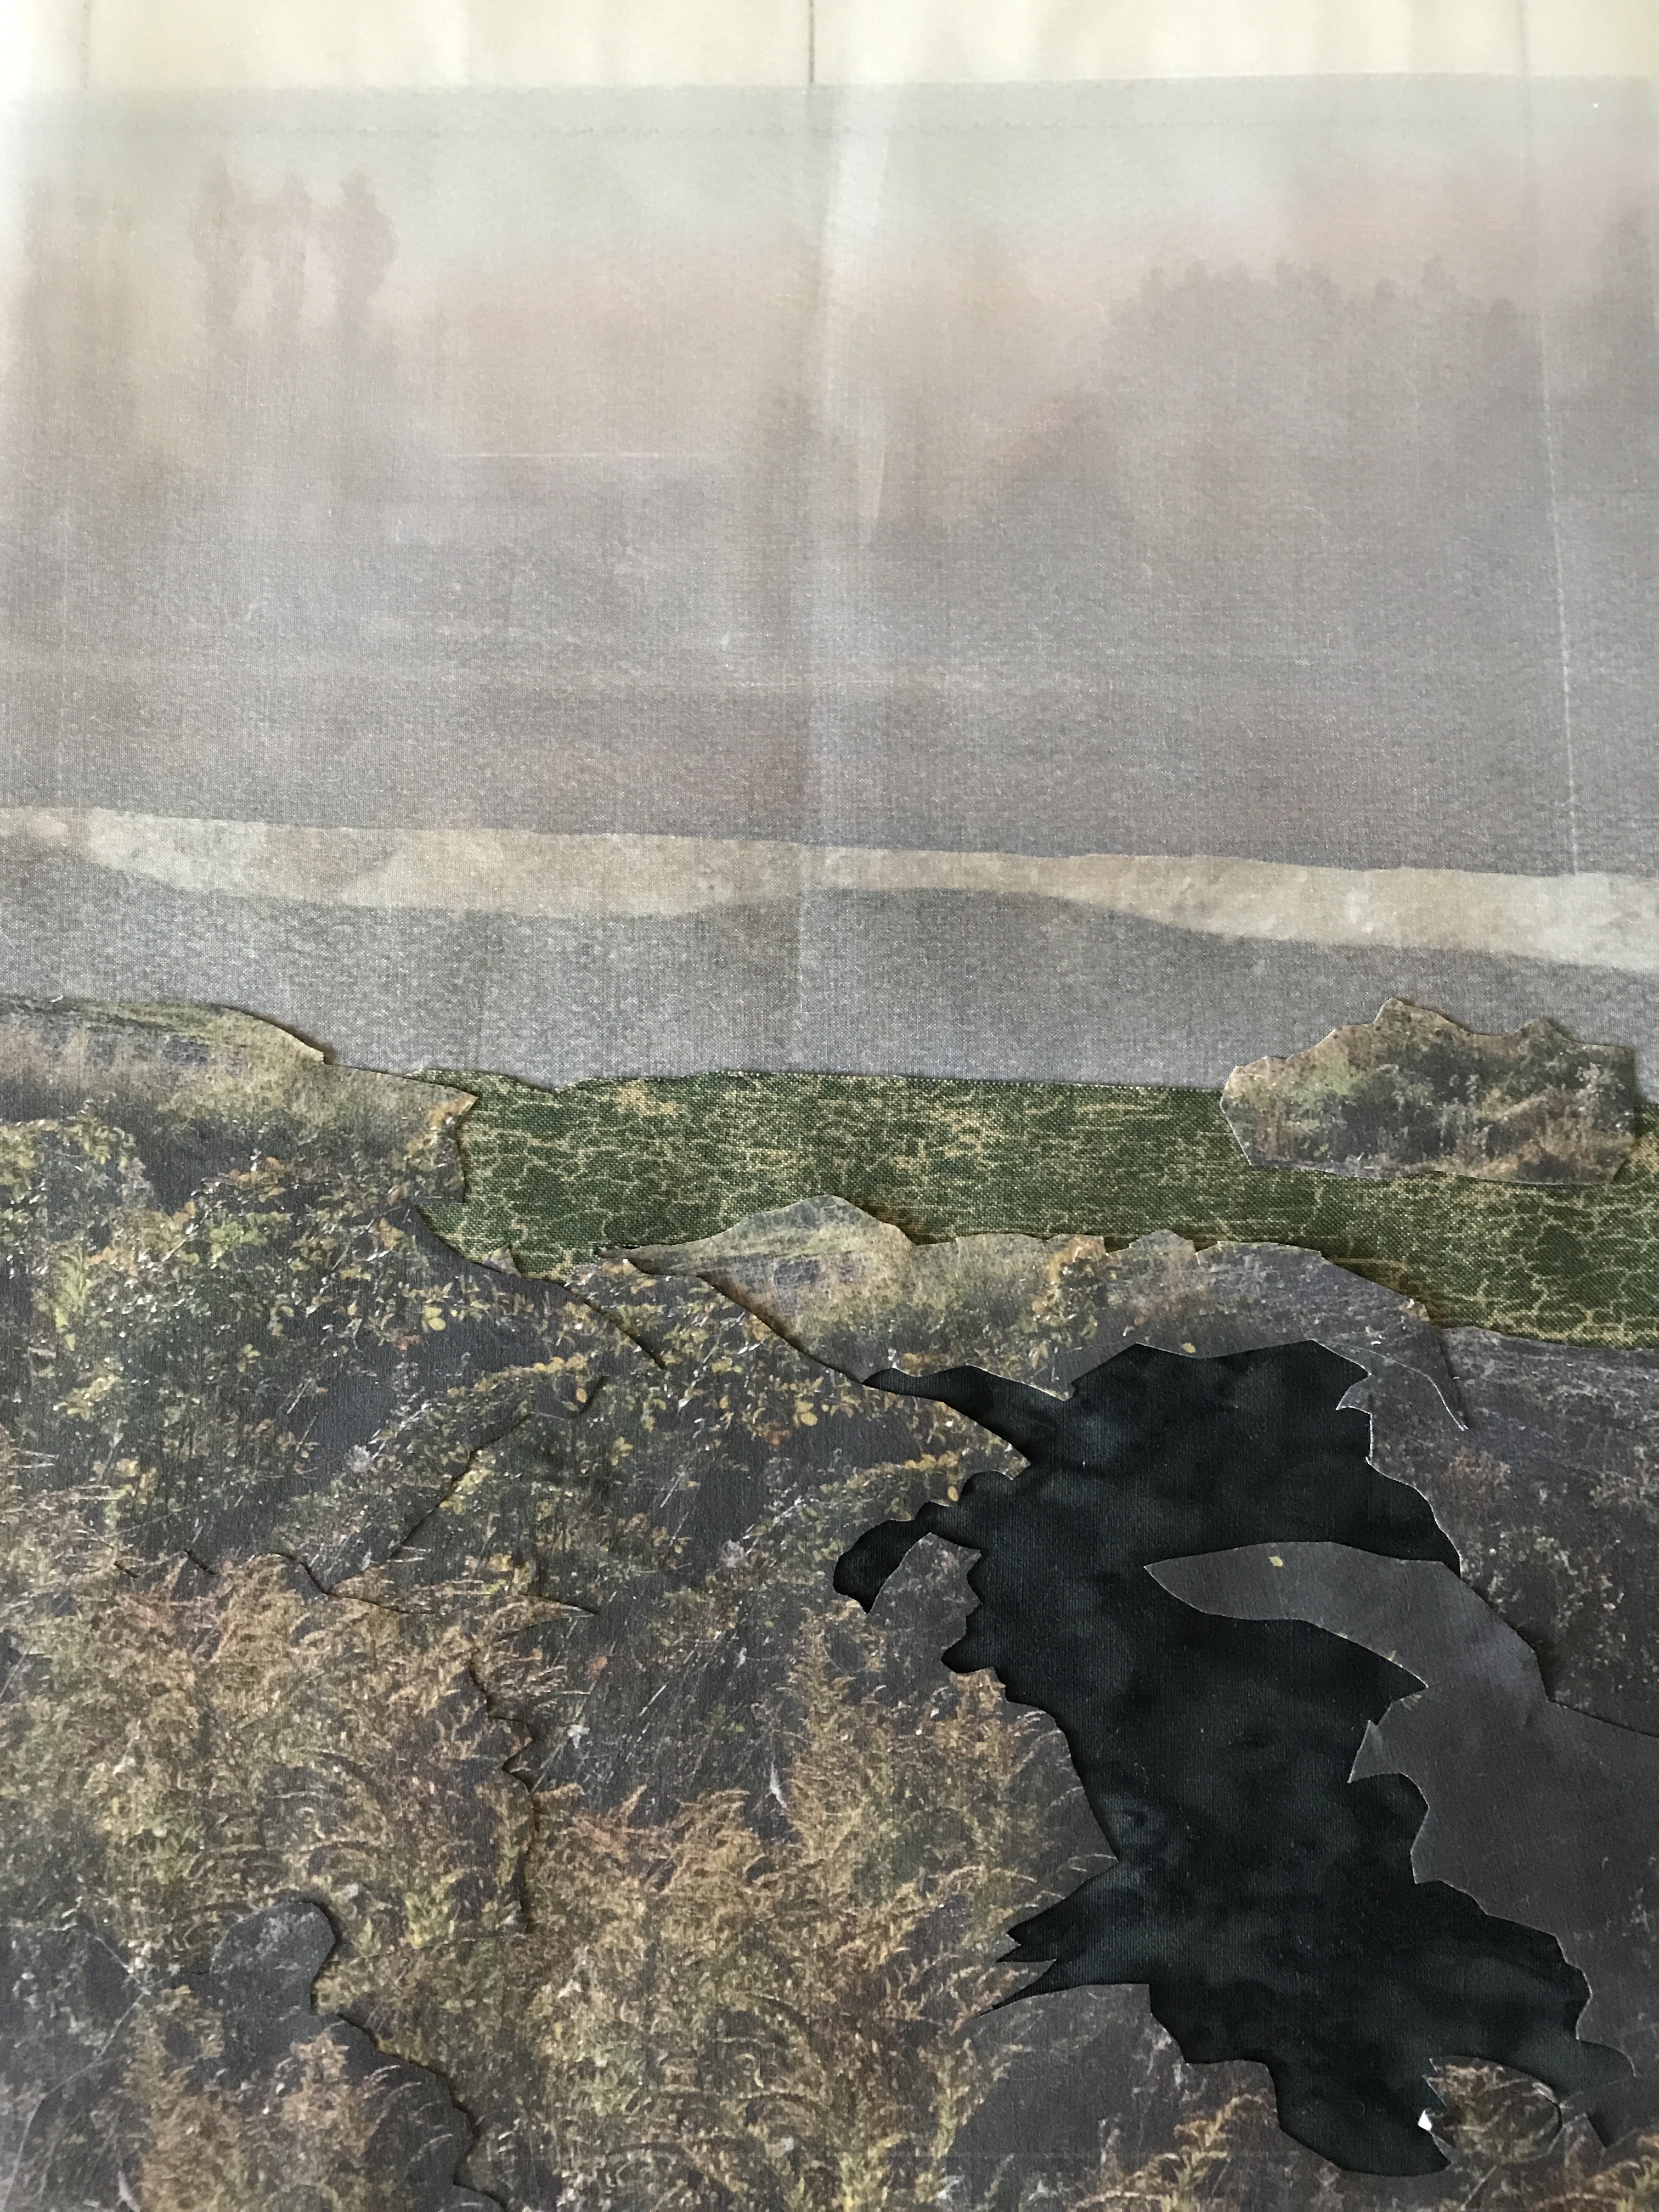
First, I enlarged and printed the top half of the photo on fabric and added a fusible backing. Next I’ve added layers of printed fabric to the middle ground which is still somewhat obscured by the fog. I will do quite a bit of thread painting in this middle ground to increase the detail although it will be covered with organza.

The foreground, consists of pieces cut from the photo printed on fabric which will be thread painted to bring out the detail. The shadow of the ditch is created using an underlay of black batik. Now that I compare the photo and my pieces of fabric (not yet fused in place, thank goodness) I can see I’ve missed the cow path which is integral to the image. So I will have to go back to my fabric stash to find a dark grey something to set that up….

Foggy Morning – In Progress I

Here is the fence, the focal point of the piece, tentatively in place –  I can see I will need to do a lot of thread work where the fabric meets the organza in order to marry the foreground and the middle ground better.

Foggy Morning – In Progress II

However, I’m happy with the start – I’m beginning to see how to construct this piece.
Boys From Minerve 2010

Boys From Minerve 2010

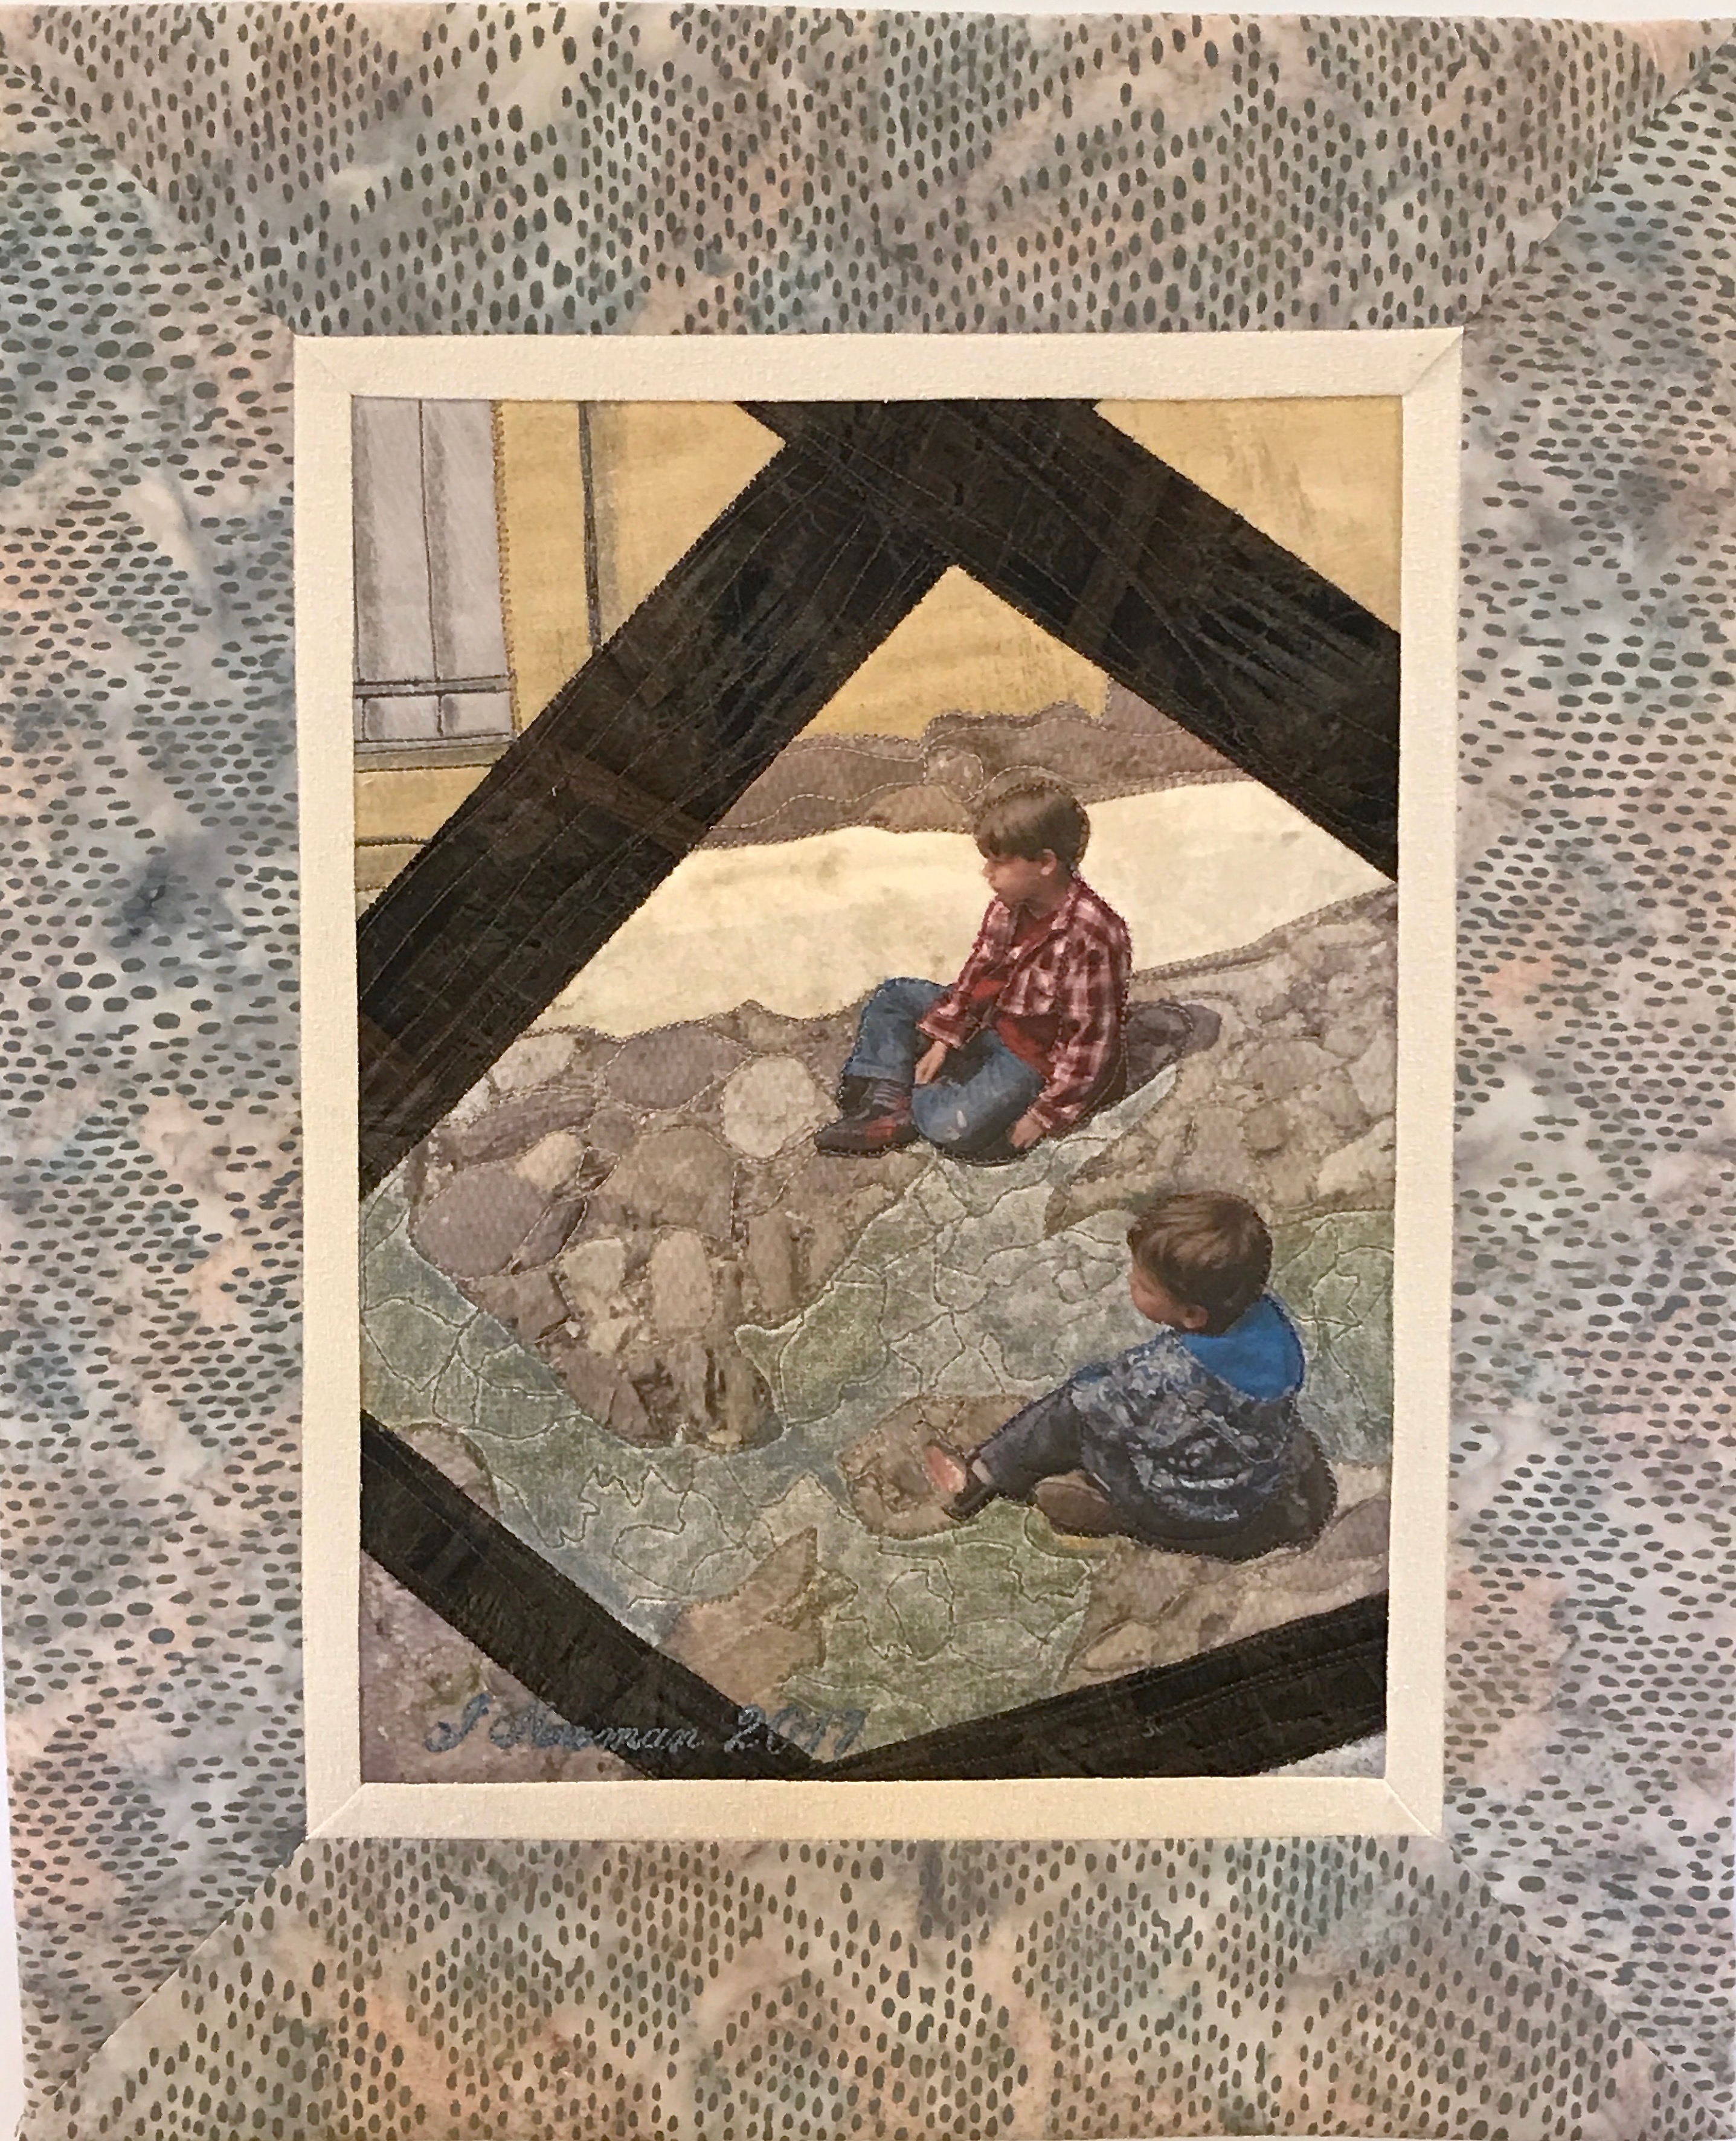
Just finished – well I have to hand stitch down the hidden binding (I’ll do that this evening) – but otherwise it’s done. This is based on a photo of two boys watching some men working that I took in Minerve (in the south of France in the vicinity of Limoux) in 2010. I enlarged the photo a bit, enlarged the boys a bit more, printed the resultant image on fabric, cut out the boys carefully and some of the rocks of the roadway, then used fused appliqué to build up the rest of the image. Carefully edged stitched all the bits of fabric, then thread painted the rest. I also darkened the grey fabric of the roadway using some fabric pastels to blend the colour better with the paving rocks.

I wasn’t sure the piece was going to turn out but I’m happy with the outcome. Trying to find a fabric to “frame” it took a bit of looking around. In the end I found this half yard in my stash of batik fabrics – I chose it because the green/grey blended with the roadway, and the hint of pink makes the boy’s shirt stand out. The blue embroidered signature does the same for the smaller boy’s jacket.

I captured the image through a lattice on the porch of a nearby house – the heavy brown bars – I thought about leaving them out but they frame the boys and draw your attention to them.

So another piece finished for the exhibition in Parrsboro at the end of August.

Silk Quilt – Just About Done

I had to take a break from hand stitching the hidden binding on the back. I’ve got it half done, I’ll finish the task later this evening. (My hand stitching isn’t fully back to where it was before my thumb decided to stop working, but I can control the needle much better than I could before the carpel tunnel surgery!).
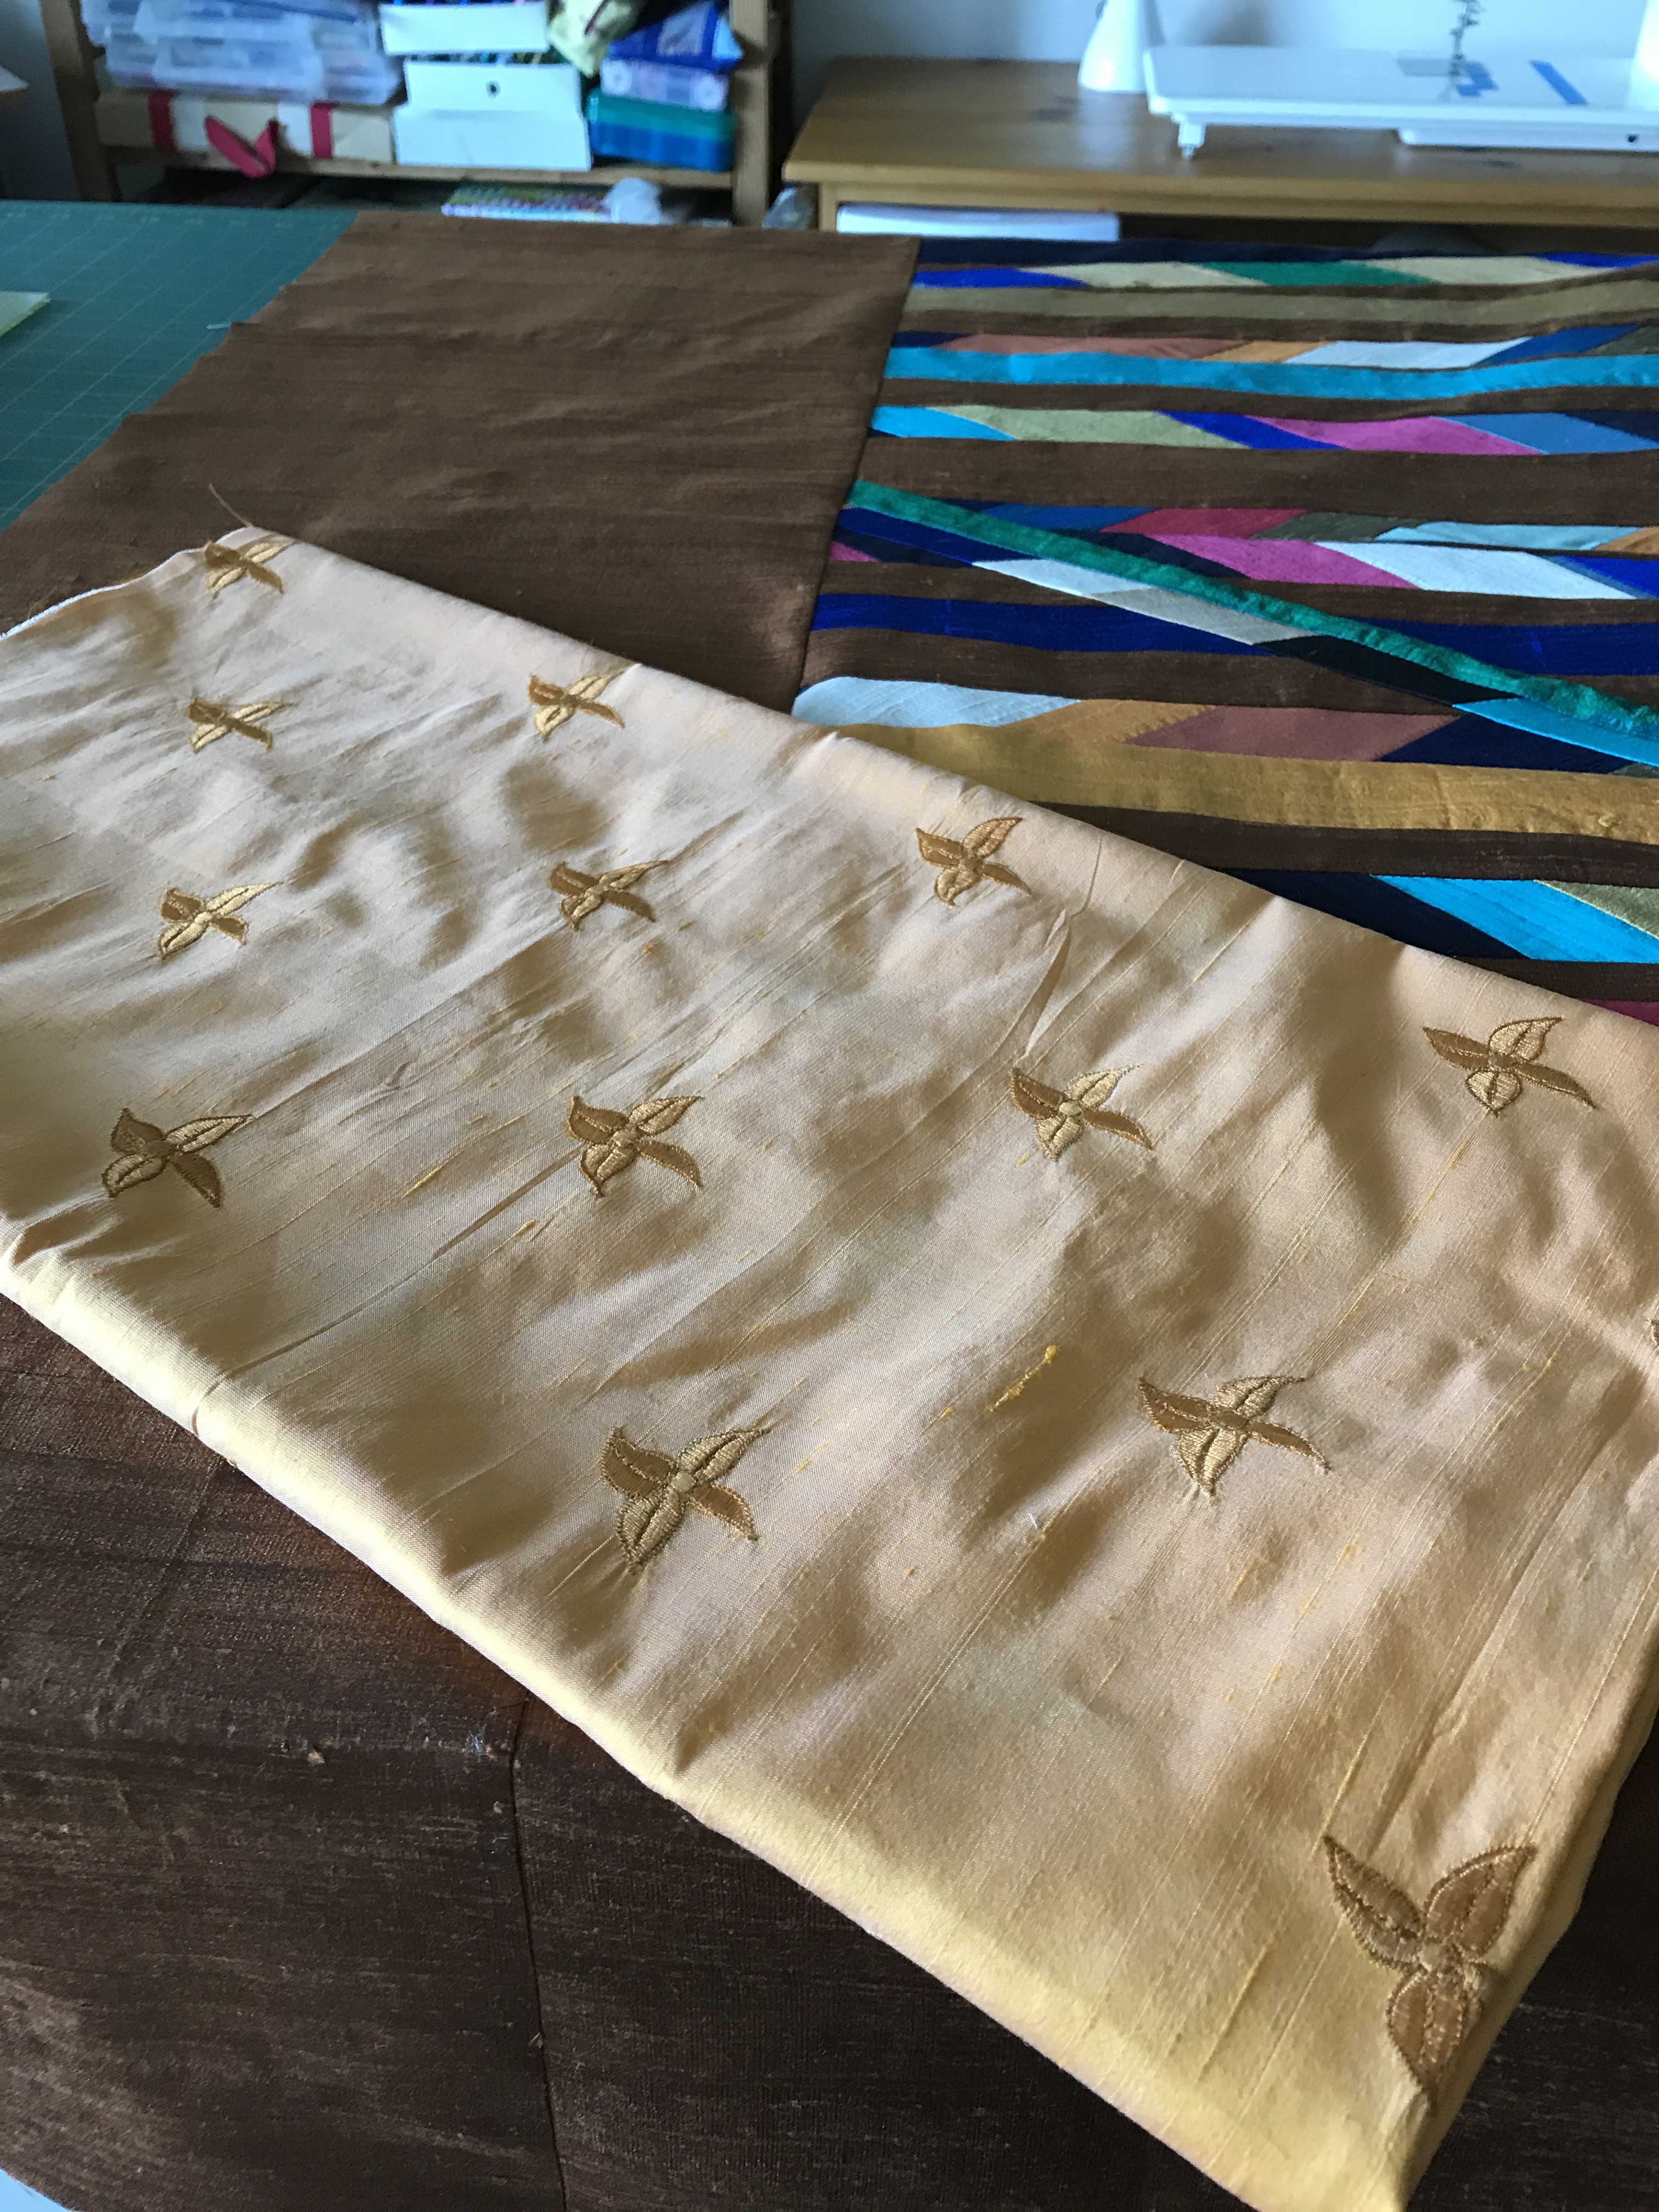
I had intended doing a pillowcase backing but the backing silk fabric just would not stay flat and in place, so in the end I began the quilting starting in the centre and worked outward toward the sides, doing my best to keep the silk backing from sliding around. I tried pinning the quilt sandwich but couldn’t get the backing layer to lay flat so in the end I removed all the safety pins, just pinned the top and one side edge and then did my best to keep smoothing the backing as I stitched each quilting seam. A much more difficult task than I had expected. To get the unbound look I was after on the finished quilt, I did a hidden binding using some bronze embroidered silk fabric that came with the other two pieces, so it matched. I considered machine stitching the binding in place, but I like this unbound look with the quilting stitching coming to the very edges.

Silk Quilt – Top

When the quilting was finished the back wasn’t too bad, Still a bit of fullness in spots, but when steam pressed again it will be reasonably flat. And I like the embroidery in the fabric – it provides a bit of visual interest.

Silk Quilt – Back With Hidden Binding

Just two sides left to hand stitch – the label is already sewn in place.
The finished quilt is smallish when compared to most of my other quilts – similar width but shorter (my lap quilts are usually about 5 1/2′ long – this quilt is 55″). It’s still long enough to cover a person (maybe a shortish one), but it would make a nice hanging for a hallway, or bedroom.

Peach Coloured Socks

These, too, are just finished. They were a delight to work on – the pattern as it emerged was interesting and kept my interest, even on the second sock which I usually find boring to knit. Also it was easy to find the repeat to start the second sock.

Peach Socks

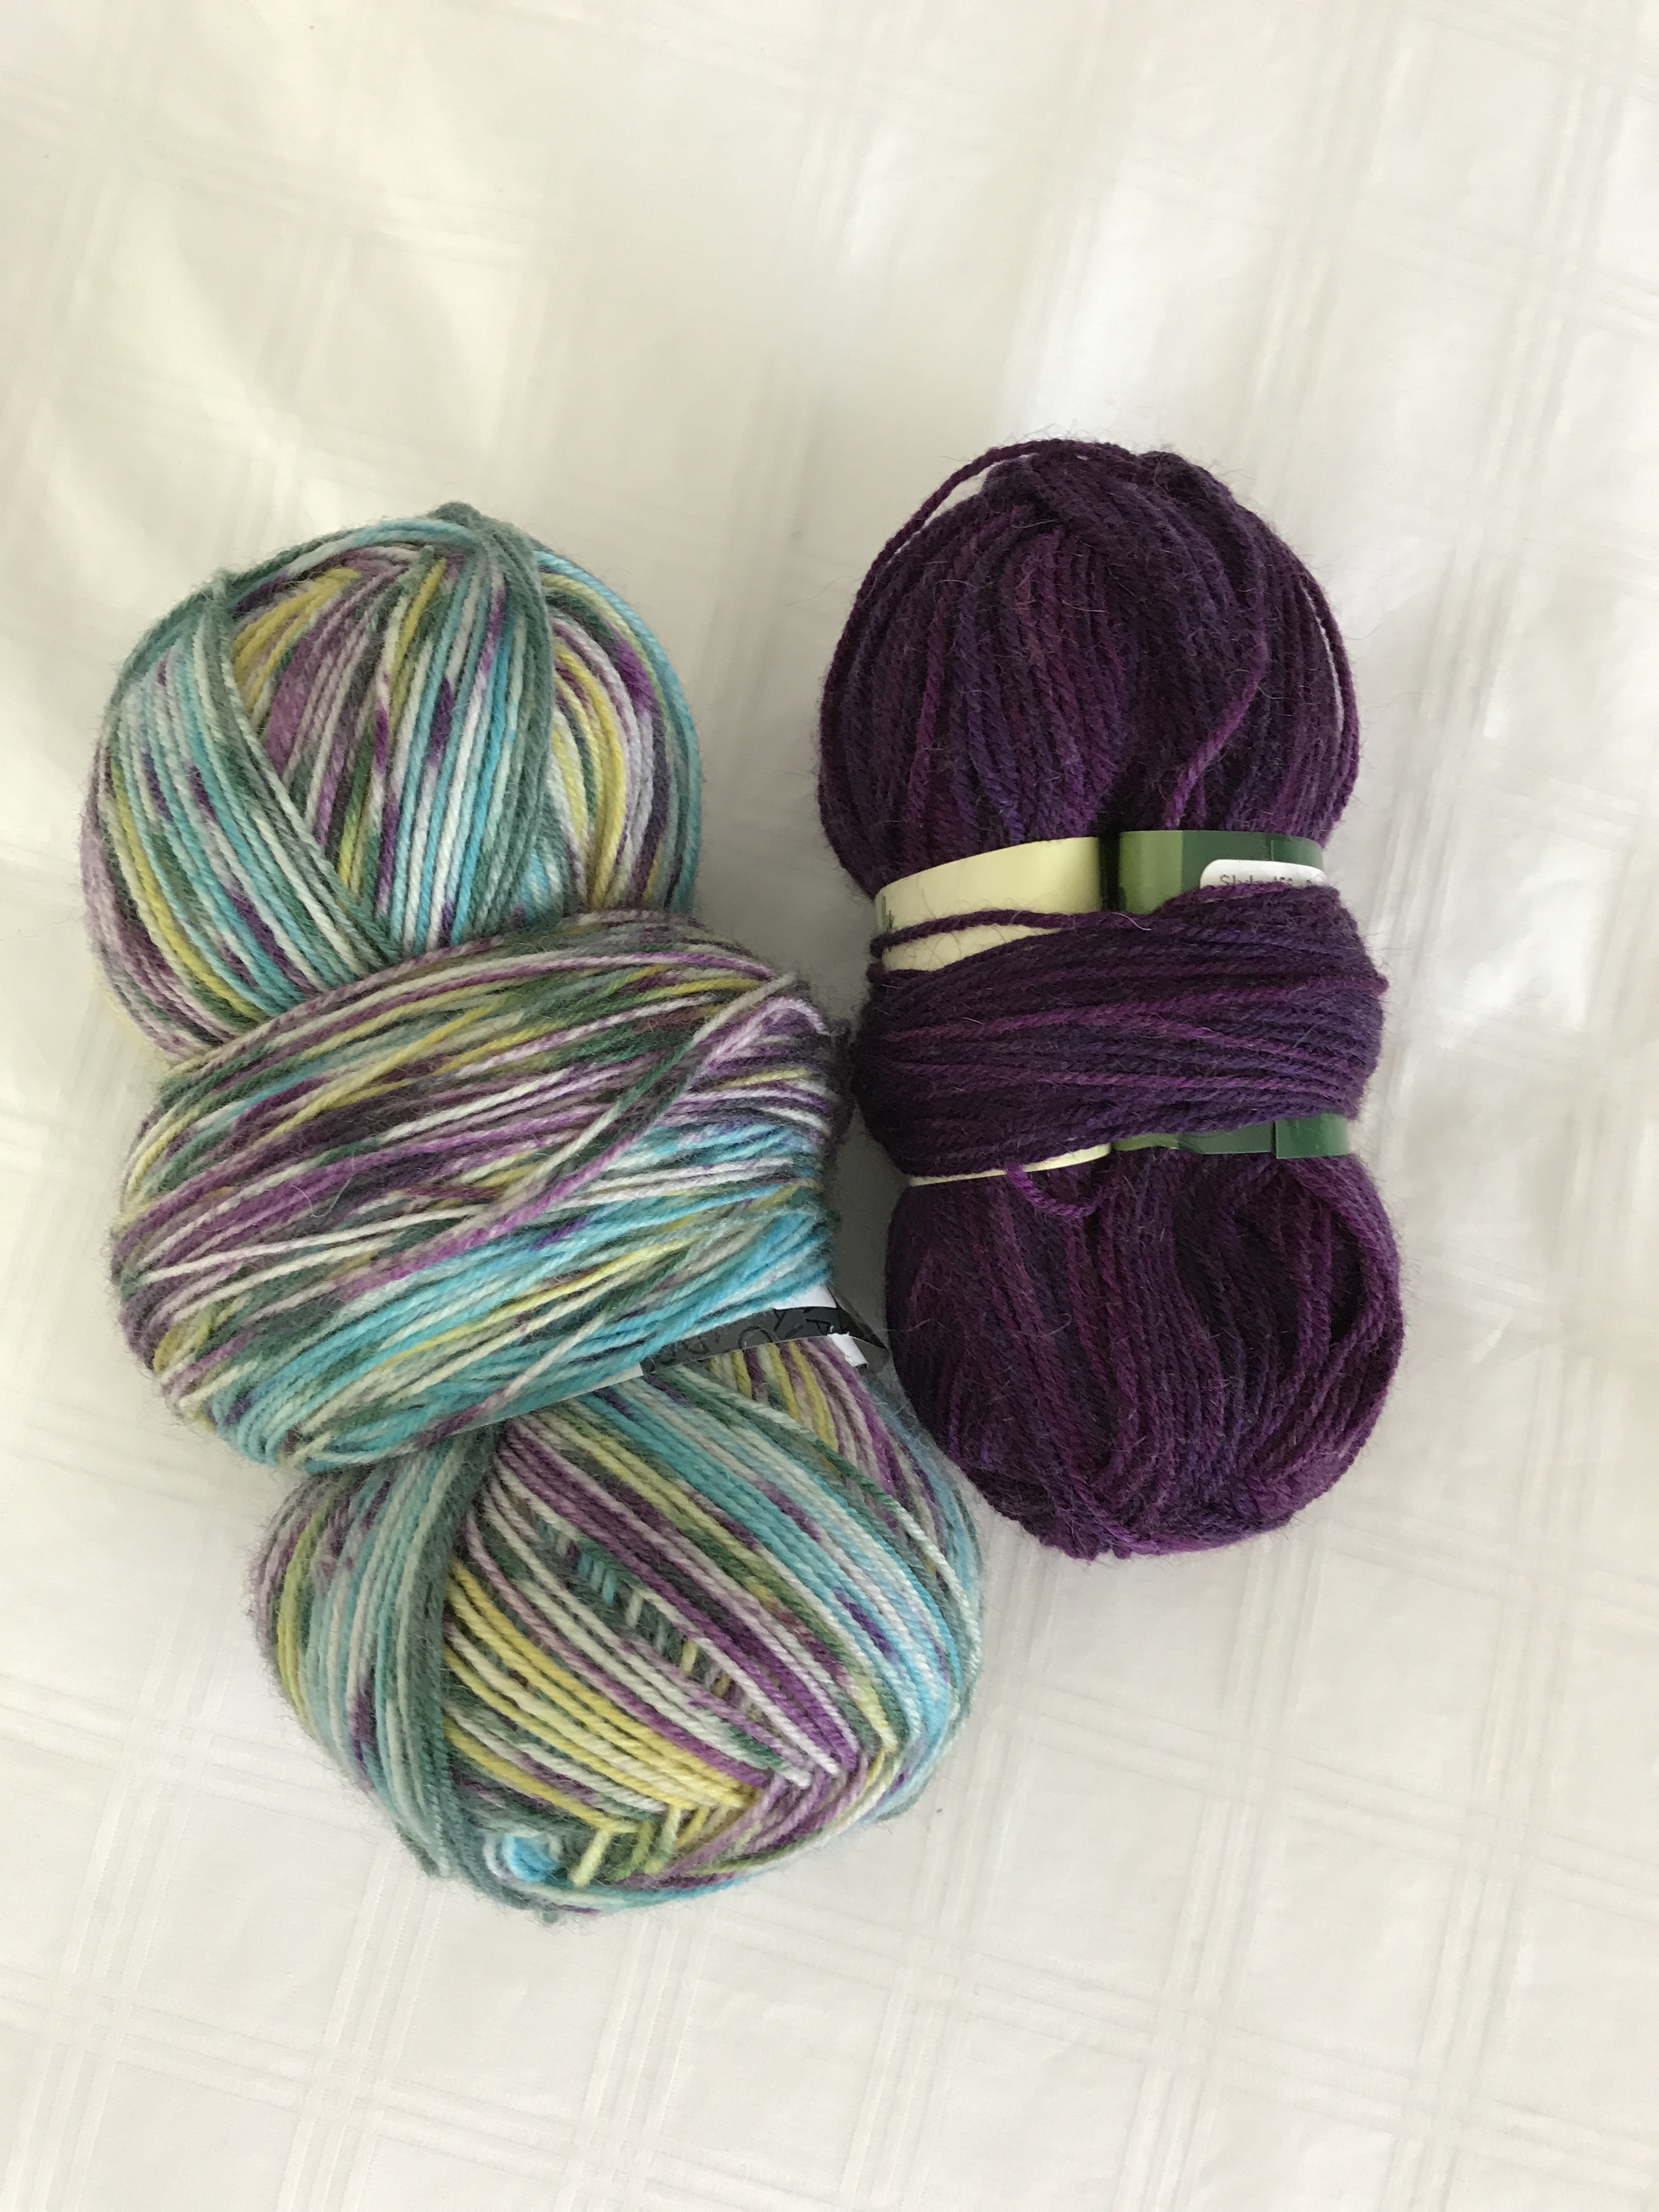
Once finished on to another pair. Here’s the yarn I’ve started using. The purple for cuff, heel, toe and I’ll be interested to see what pattern appears from the variegated yarn.

Yarn For Next Pair

Silk Quilt – Top Finished

Many years ago, I was looking after the UNICEF booth at one of our local Christmas Craft Fairs. Across from me was a quilter with a gorgeous silk quilt for sale. She’d collected silk ties and had cut bowtie shapes from the silk she salvaged. I loved it and wished I could have afforded it – but it was too large to be wall hanging and too delicate to use regularly on a bed. I admired it every day I sat there selling greeting cards.

I never forgot it and when a friend gave me a bundle of silk fabric she’d purchased in Singapore and which she had decided she’d never use, I thought, a silk quilt. I decided the bronze silk dupioni would make a lovely quilt background. I ordered a dozen silk fat quarters from Etsy a couple of years ago in colours to complement the bronze.

I wanted to do something modern and decided to mix some small piecing of the coloured silks to form strips on the diagonal and solid strips.

Silk Quilt

Finally finished piecing the top this afternoon. The central panel is offset to the top and left. The finished quilt size: 51″ x 56″. I had wanted to make it more rectangular but I just didn’t have enough bronze silk. I have a few small scraps but in order to keep the grain of the silk running top to bottom I had to piece the top and bottom strips so my size was limited by the amount of silk I could cobble together.

Tomorrow I’ll set up the quilt sandwich. I’m using a second of the pieces of silk fabric. I have enough for the backing, but I will have to piece it horizontally because it isn’t wide enough to do a single running length and I haven’t enough silk left to create a pieced strip. Besides the embroidery in the golden silk is enough detail and I will be careful to cut it between the embroidery designs so the seam, when pressed open, will be relatively unseen.

Embroidered Silk Backing Fabric

I really see this as a largish wall hanging rather than a lap quilt. If I’d had enough bronze silk, I’d have finished the quilt with a narrow binding, but because I don’t I’m going to finish the quilt using a “pillowcase” turn. I plan on quilting it stitching in the ditch from top to bottom and adding some more vertical lines where necessary in the border areas.