I’ve spent the morning, fussy cutting the flowers, laying them out, fusing them to the raw silk background, redrawing the finished block size, positioning where I want the signature to go on each. The remaining nine are now ready to thread paint.
I’ve tidied up the top of my cutting table, putting fabric scraps back where they live. Stacked the rules in the ruler holder. Put my rotary cutters where they’re normally stashed. Now I have to start selecting thread for the stitching.
It’s a lovely sunny day out – no clouds at the moment. So once I’ve got myself organized it’s time to get out of the apartment! I’ll start sewing on these tomorrow morning.
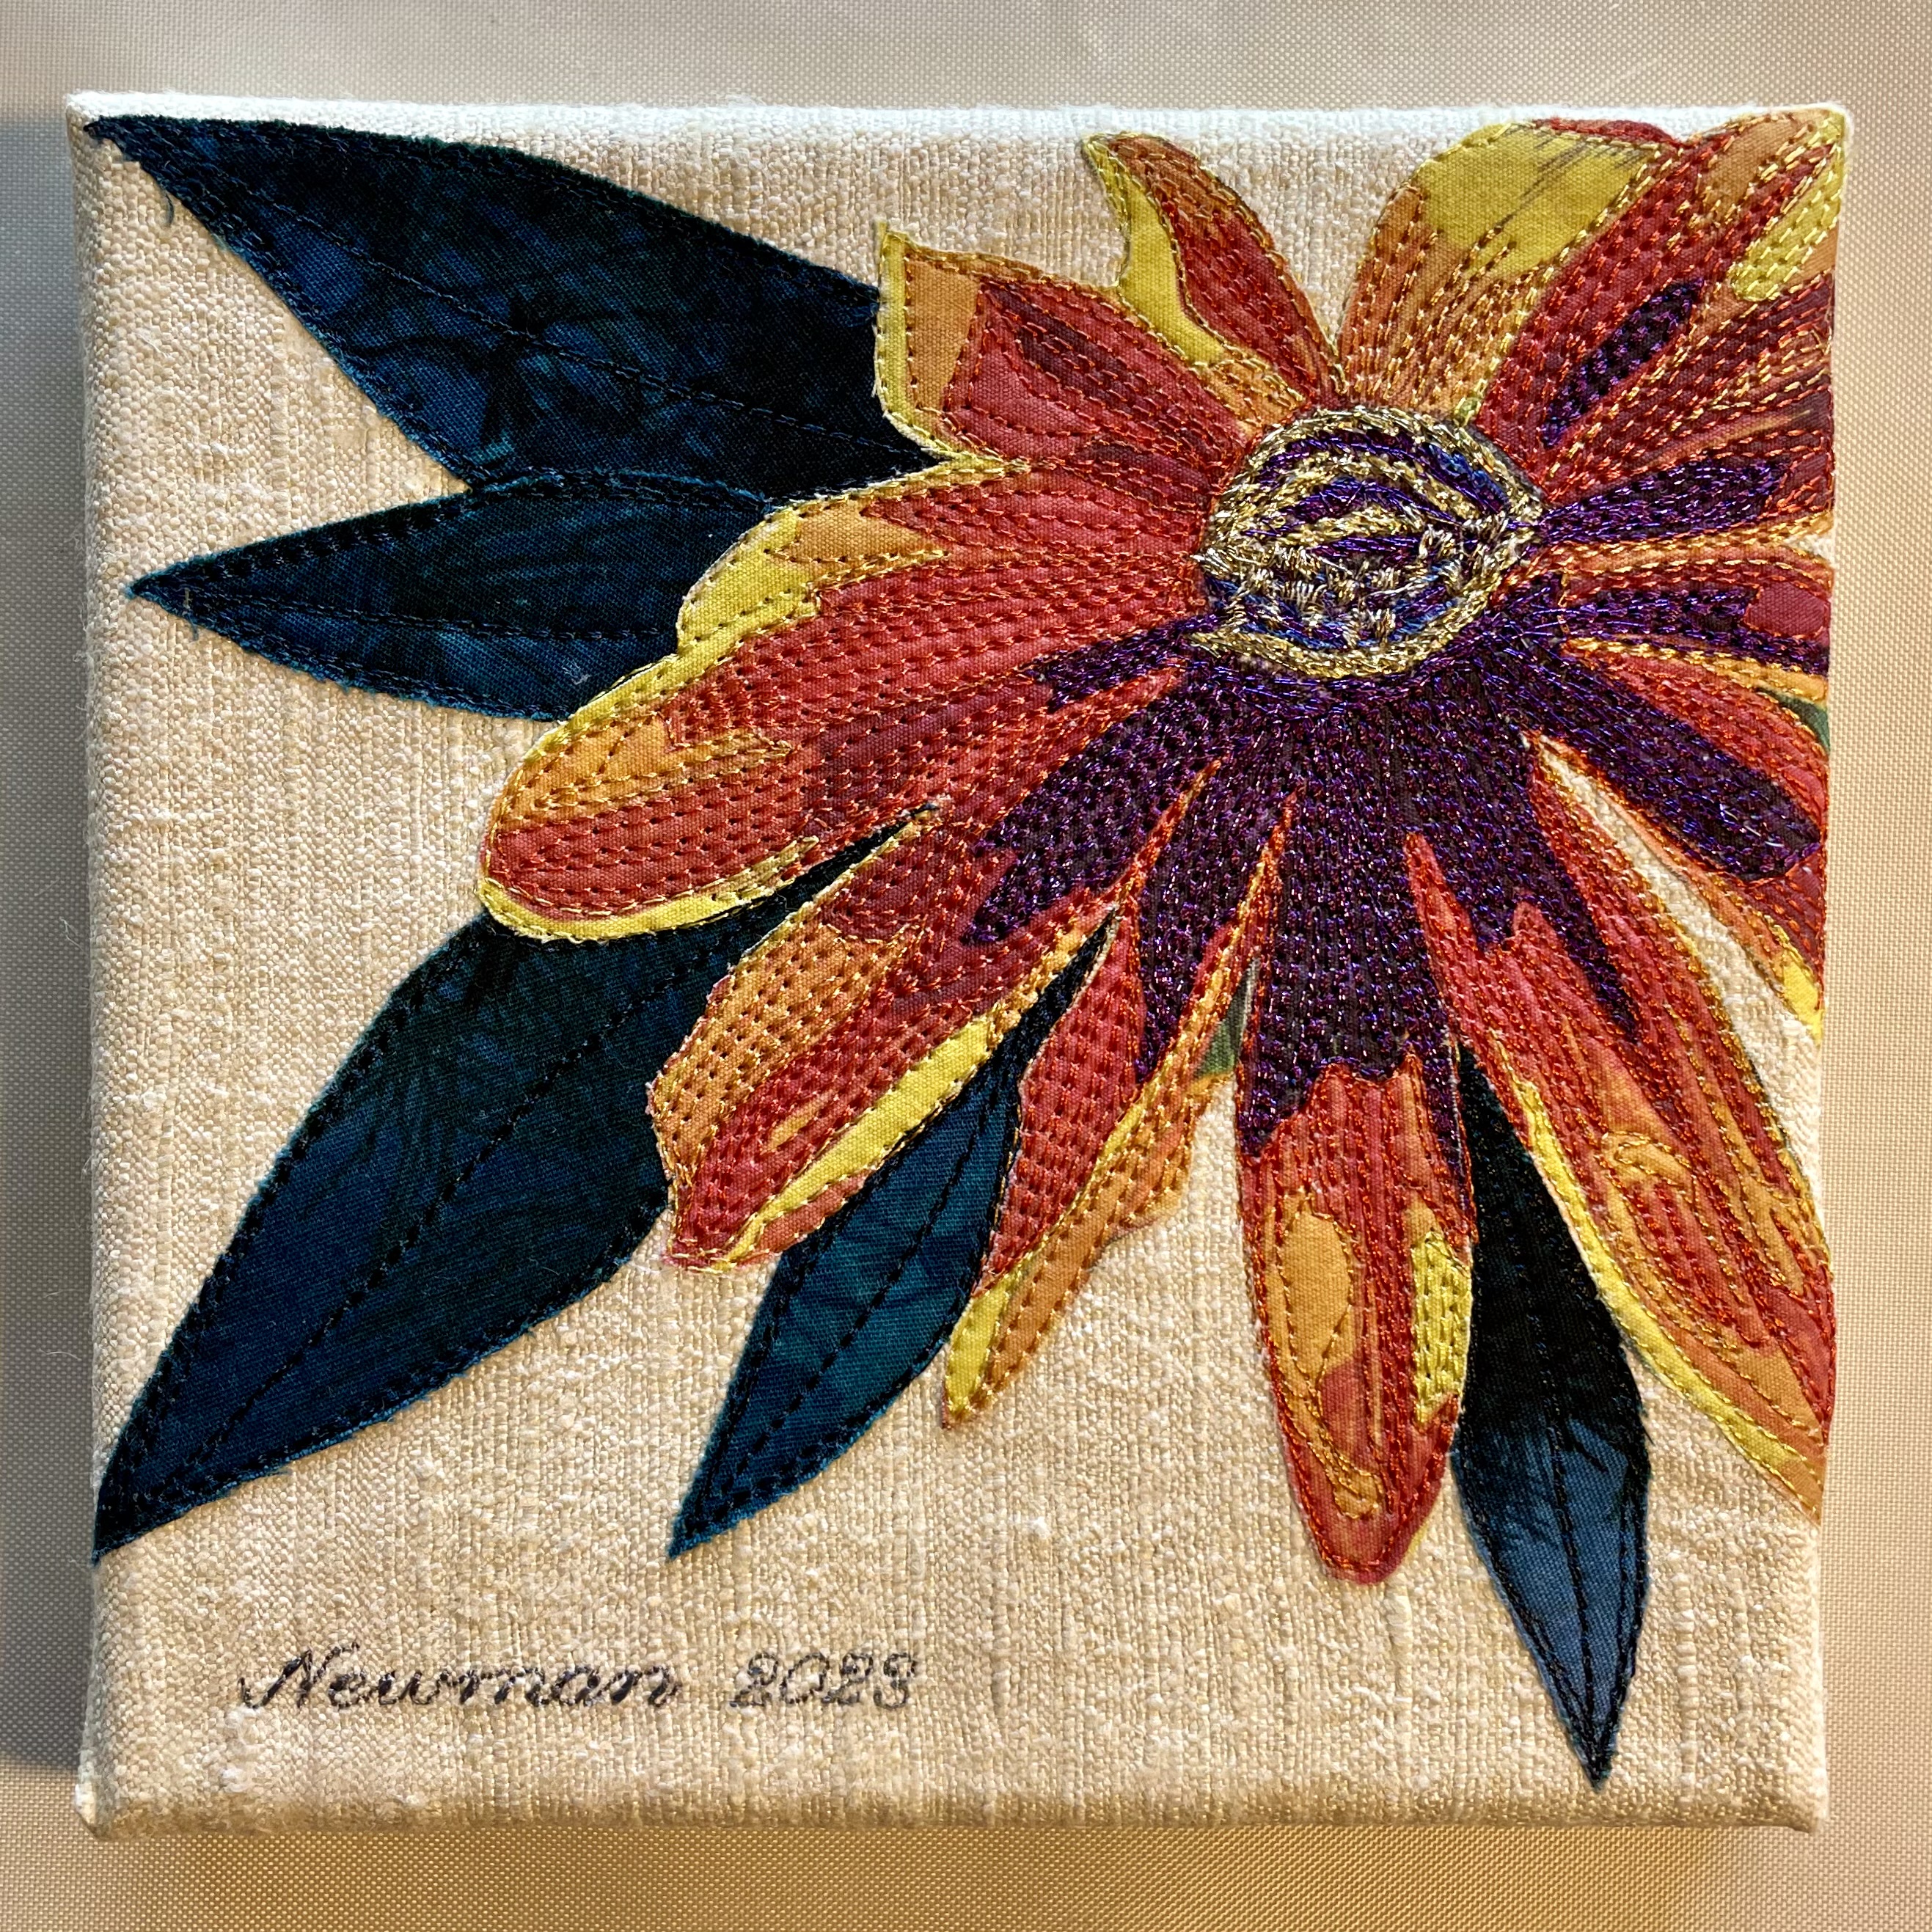
This one is #3. I finished it yesterday. A surprising number of thread changes involved in this one. I’m pleased with how the flower centre turned out – I didn’t feel it needed a metallic thread; the dark brown/black set up enough contrast with the golden yellow to make the flower lively. The challenge is deciding how much stitching and where. The flowers look better when there is some unstitched space but there still needs to be enough thread painting to give the flower texture.
More To Come
This is what’s on my cutting table (anti-clockwise starting at the bottom left) – a purple poppy (needing to be fussy cut), a Blue Flag iris, Bradford Pear, a clematis, a peony, a day lily, and a hibiscus I cut from some Hawaiian bark cloth which I’m not going to use. Instead, I added a few more printed photos to the collection – a yellow/pink phalaenopsis, a more vibrant purple iris, and a golden/red hibiscus. That gives me the ten flowers I’m hoping to complete for this set.
I’m waiting now for my latest order of 6×6 mounted canvases to arrive so I can mount these pieces when I’ve finished thread painting. This project will take me another ten days or so to complete.
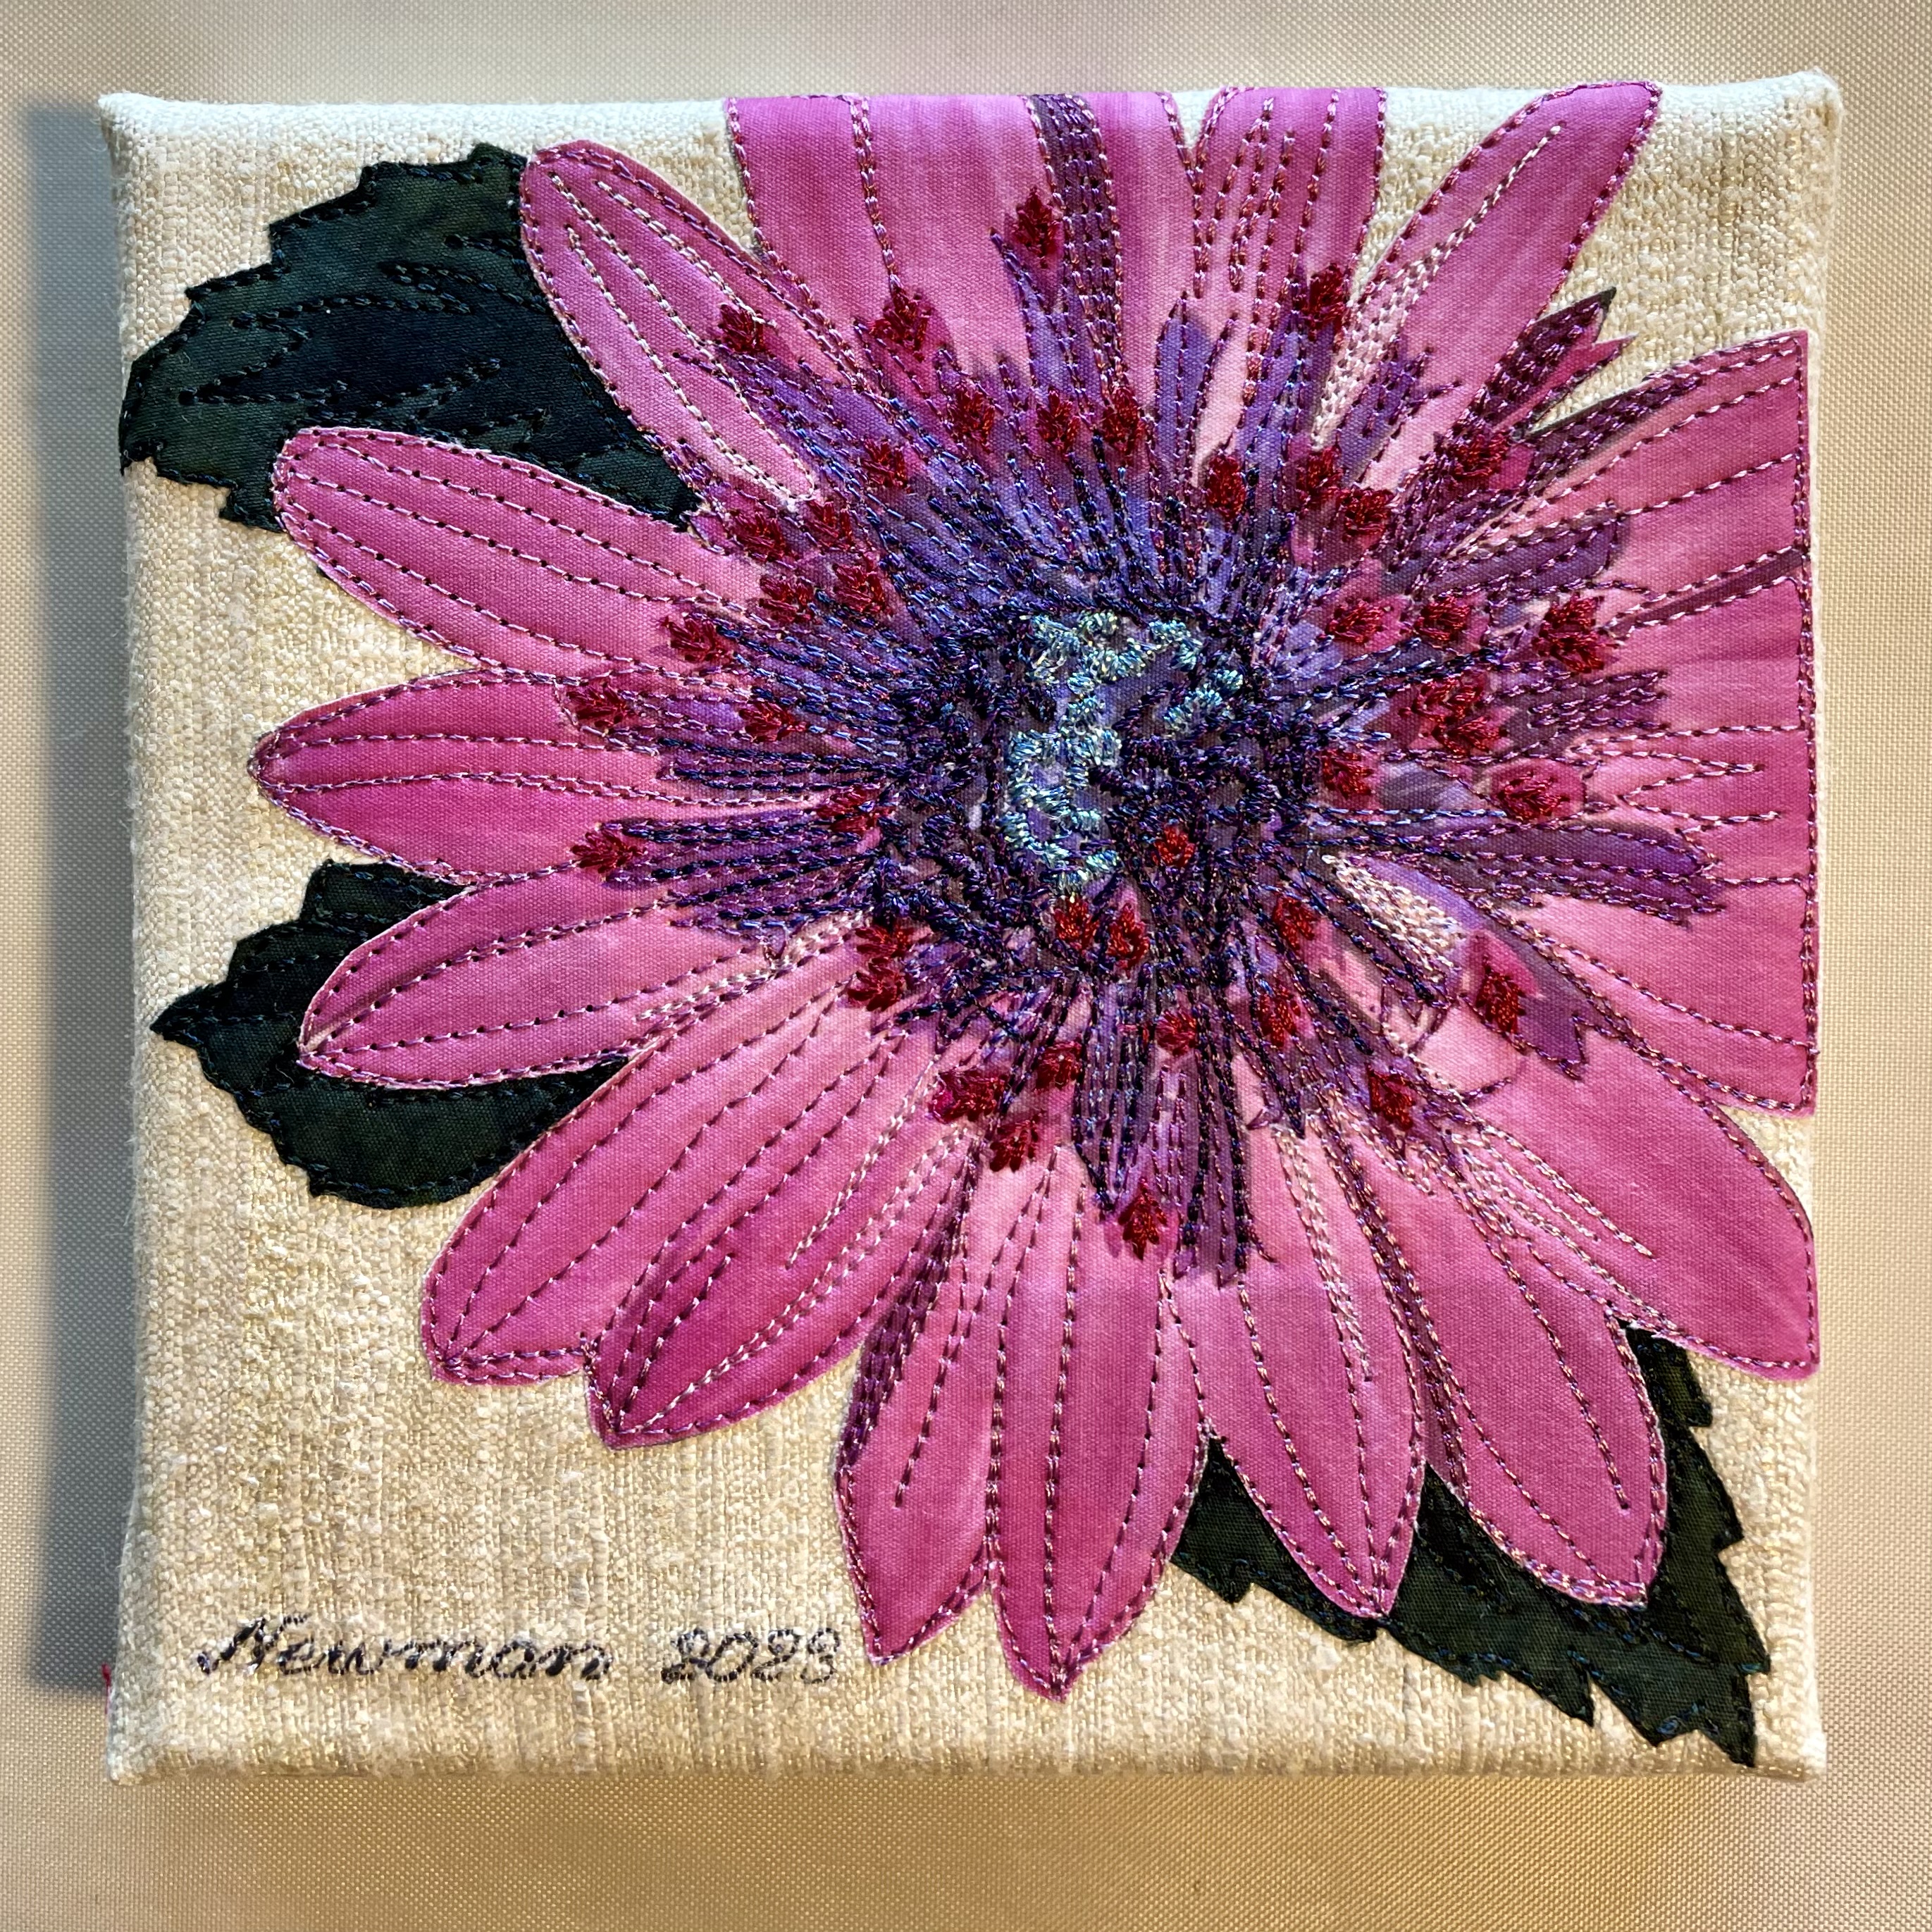
Osterspermum are African daisies. I first noticed them at garden centres maybe 20+ years ago. They come in a range of colours from off white to a lovely purple, red, orange. I started planting them in the container gardens on my back deck. Over the years I took lots of photos of them.
Osteospermum
I decided to include an Osteospermum in the set of ten pieces I’m working on.
Again, on a raw silk background, I fused the fussy cut flower printed on cotton. I selected a variety of rayon and polyester embroidery thread to use for the thread painting. Then I started stitching – first the flower edges with a dusty pink thread, then I spent about an hour designing a stitch to use for the small central florets – I stitched each one separately. Then I worked my way into the centre. wanted to catch the viewer’s eye at the centre – I used a metallic thread paired with a rayon to stitch the unopened florets at the very centre. Last came the leaves.
A second 6×6 piece finished.
Then I went back to Rudbeckia II – I wasn’t happy with the flower centre. I removed the piece from the canvas backing, pressed it lightly and reworked the centre and dark purple areas thread painting with metallic thread.
Rudbeckia II – Reworked
You can just see the glint of the metallic thread at the centre and in the deep purple areas. The thread painting with metallic thread gives more depth and texture at the flower centre. The slight glint of purple metallic thread livens the whole flower.
This is my second go at the Rudbeckia. This time I printed the flower on fabric, pulled off the plastic backing, added fusible web, then fussy cut out the flower. I dug through dark green scraps, added fusible web, then cut leaf shapes. I fused leaves and flowers to a 9″ x 9″ raw silk square of fabric which I’d backed with Sewer’s Dream interfacing to stabilize it.
Then I began stitching! It took several hours to thread paint the flower – constantly changing thread and bobbin colour – using the “hover” function on my machine to simulate free motion sewing.
This time, I left myself enough space on the background to apply a signature. Having used fusible web, my raw edges are relatively smooth, not fraying as was the case with the first Rudbeckia.
I think I’m rather happier with this version than I was with the first prototype.
One leaf done – a second underway and weeks of work left to do.
One Leaf Done; Weeks Of Work To Do
The question is why bother? Why didn’t I just fussy cut the flowers, fuse and edge-stitch them in place and leave it at that? Good question. The thread painting, in spite of the large amount of work involved, adds interesting texture and dimension to the fabric turning it into a piece of wall art. I probably should have thought more about the size of the piece before I began, choosing fewer elements, but this panel does make an interesting art object. So I committed myself to the work. In addition, the fabric raw edges are inclined to fray because the bark cloth is loosely woven – thread painting lets me densely edge stitch creating a sharper outline for the flowers and leaves.
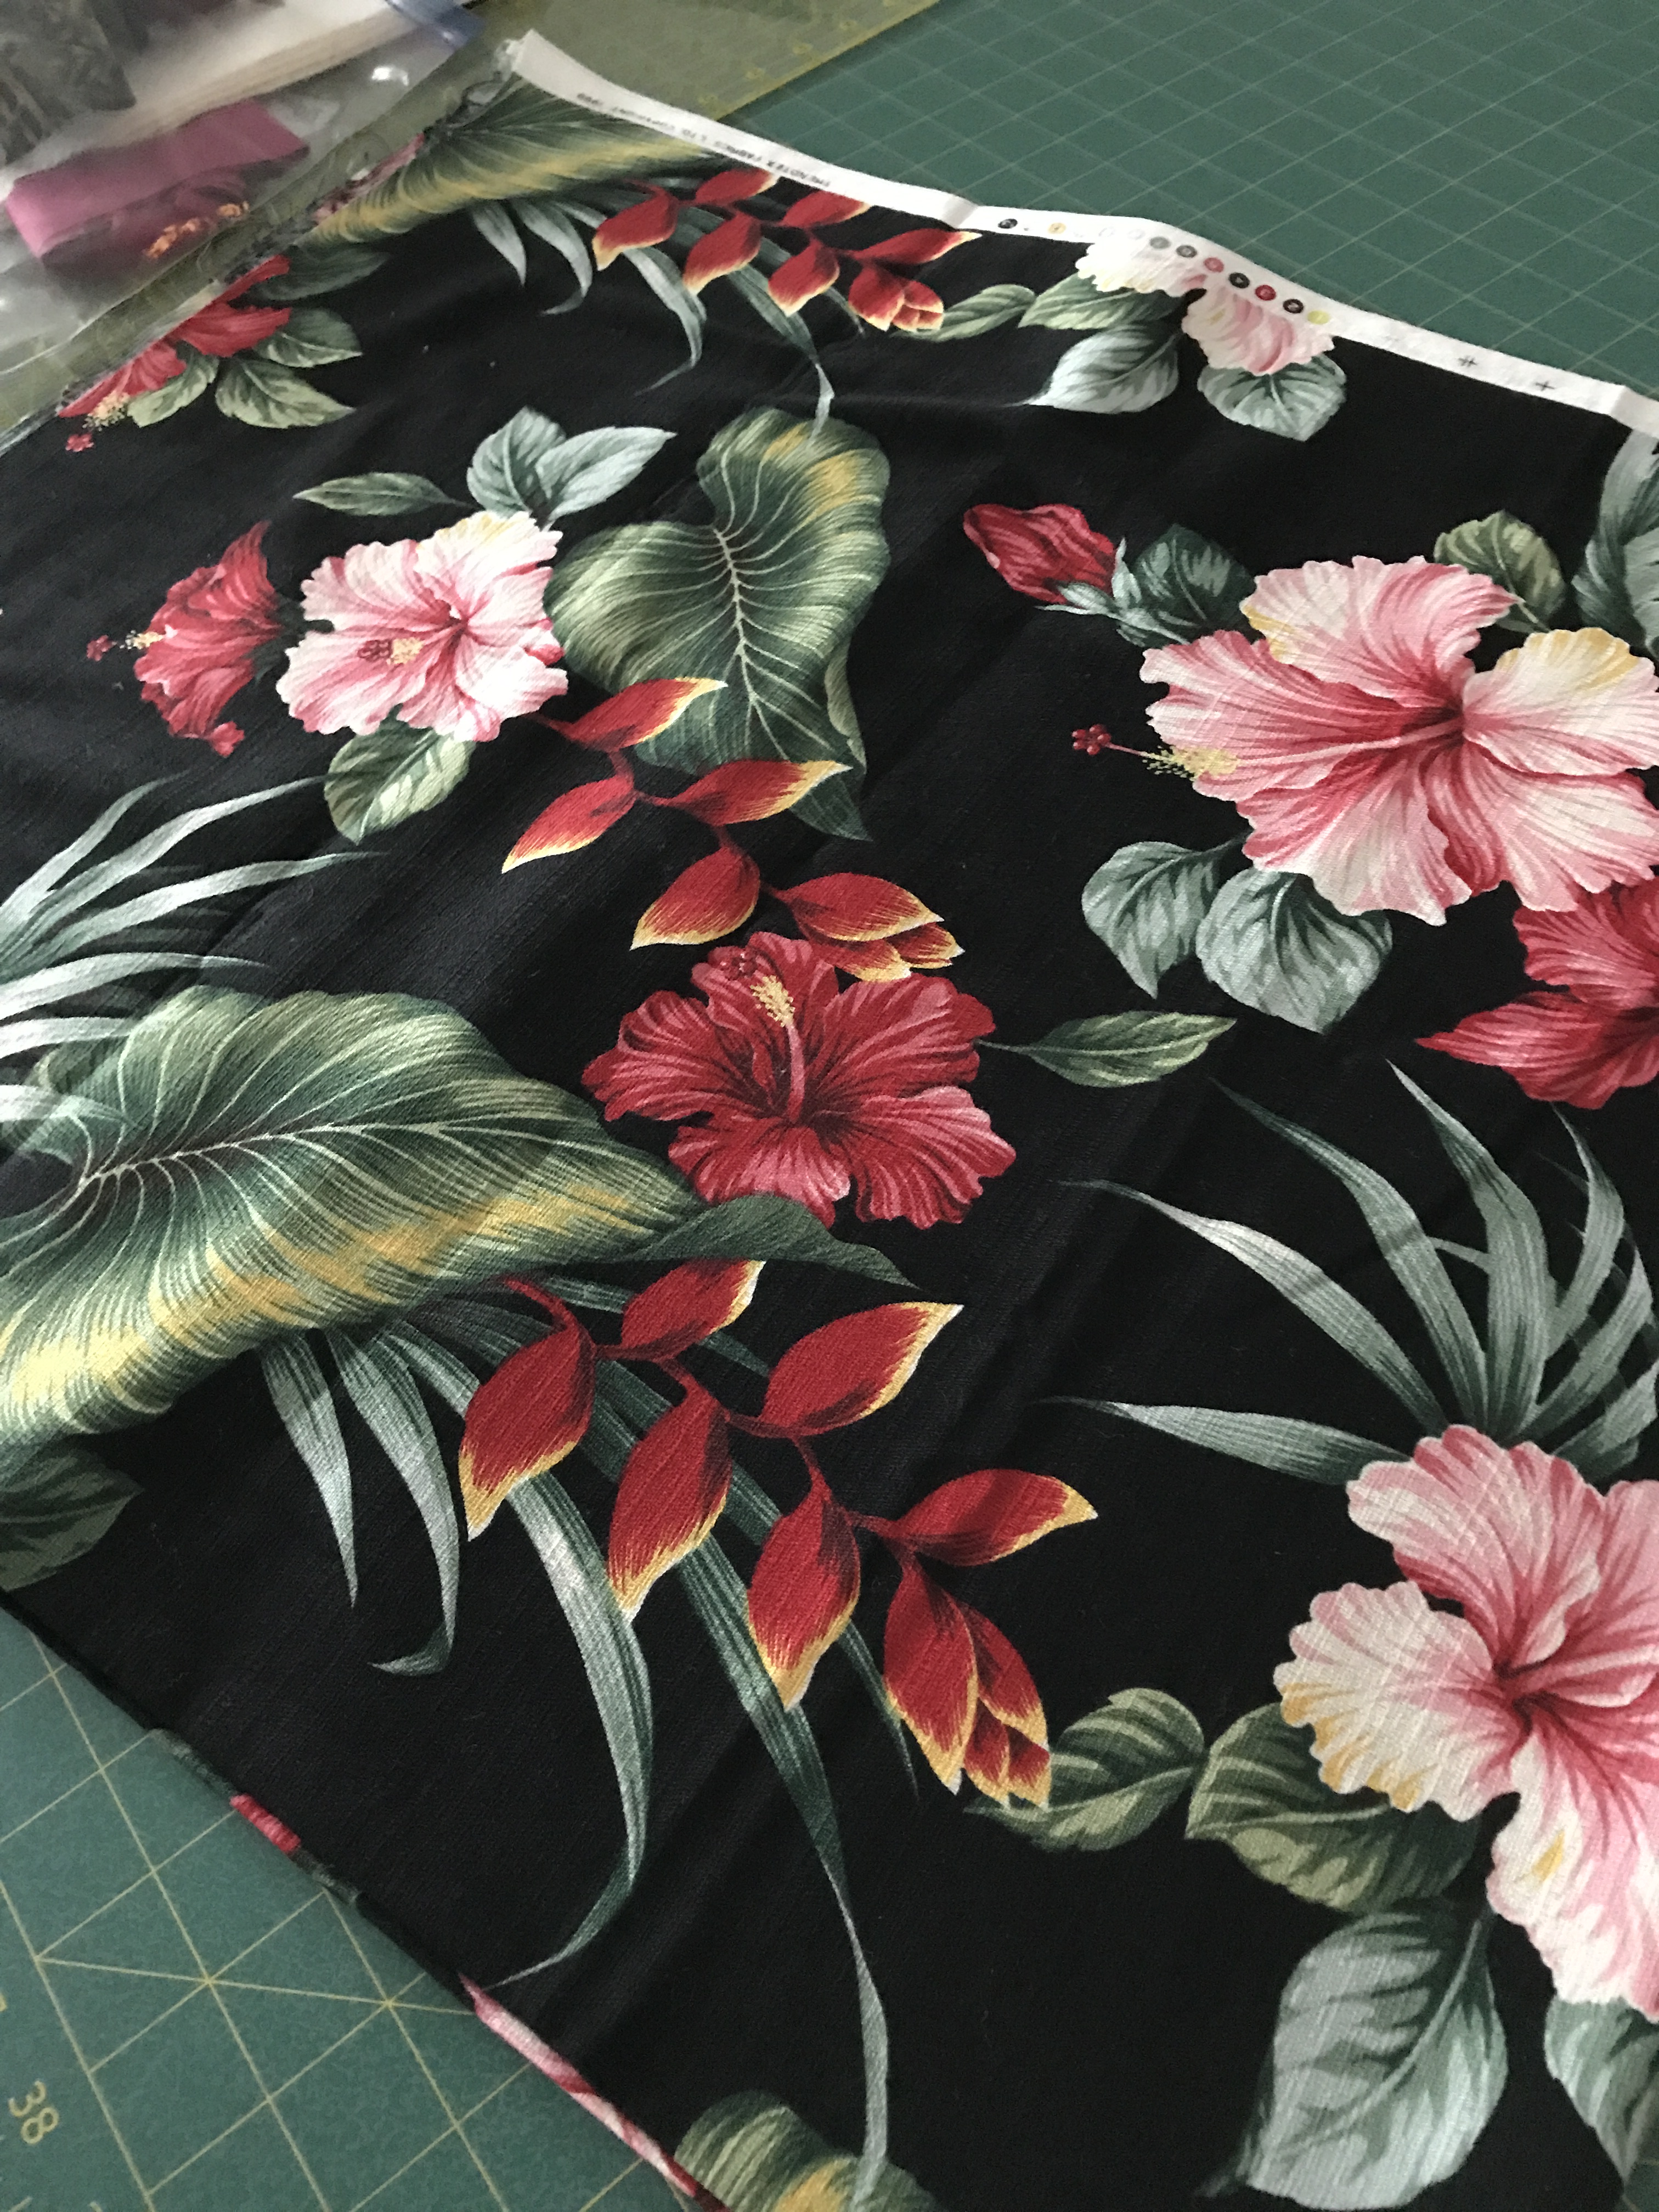
Tropical Flowers – Bark Cloth
I started with printed bark cloth given me by a friend – 4 one metre pieces with different coloured backgrounds. I chose the blue to work with here but you can see from the black piece just how clearly printed the flowers are. The fabric provides a lovely foundation for doing thread painting.
Tropical Flowers – A Selection
The first step is to choose a few flowers/leaves and cut them out. Next I apply a fusible web to the back of the fabric, pressing the whole thing flat, then fussy cutting before removing the paper backing from the fused web – the paper makes cutting out much sharper. Once the flowers are fused to a background fabric, thread painting can begin.
So that’s where I am in the process. It will take many hours to fill in the colour gradation of the leaves and flowers – I’m working to eliminate the grey using light values of the adjacent colours so “grey” won’t mean grey when I’ve done thread painting – there will be pale green, or pale teal, or pale pink where grey currently is found.
The flowers/leaves on the black backed fabric don’t have grey, instead the fabric has appropriate light shades for each element, making the decision-making process somewhat easier. But now, back to the teal leaf which I began yesterday….
Finally finished this convergence quilt yesterday. Got the binding done and label sewn on. Two sets of mistakes that went together – totally unexpected and unplanned. It definitely worked out quite well.
Finished Quilt Top
I’m happy I took out the narrow vertical turquoise stripe – it disrupted the left-right movement of the convergence flow. Replacing it with the narrow turquoise border was a good decision. I didn’t have enough grey crackle fabric to complete the binding so I incorporated a turquoise piece I trimmed from the backing after I’d finished quilting. I ran out of binding as I was coming to the join and inserted another small piece of turquoise to complete it. I like where that insert landed.
Fiished Quilt Back
To create the quilt back I set up a “jellyroll race” using leftover bits of fabric from the top, with a narrow strip inserted and two unequal sashing strips. Using the turquoise for the backing sets up an interesting flow from top of quilt to the back. There’s enough turquoise in the top that when you flip the quilt over you retain the connection between top and bottom.
The ombre fabric I ordered online arrived Friday so I will now work on completing the double conversion quilt featuring the ombre fabric.
But before I can get to that, I’m have to work on the thread painting wall hanging.
Detail – Thread Painting Floral Wall Art
I started the thread painting last Tuesday as part of a class I’m teaching (I stitched the dark green parts of this and another leaf although you can’t really see what I’ve done in the photo). We meet again coming Tuesday and I have made no progress on the stitching work. Nevertheless I need to move on to framing the piece so I’ve trimmed it, I’m in the process of adding a bit more batting to the edges to allow enough background to balance the floral arrangement and provide support for the borders. Then I have to set up the marking (using Friction heat erasable pens) so I can apply the borders – have to get that process well underway before Tuesday – not completed, but started so I can demonstrate how I add borders. The framing of the piece won’t hinder the massive amount of thread painting I will still have to do.