Modern Flowers

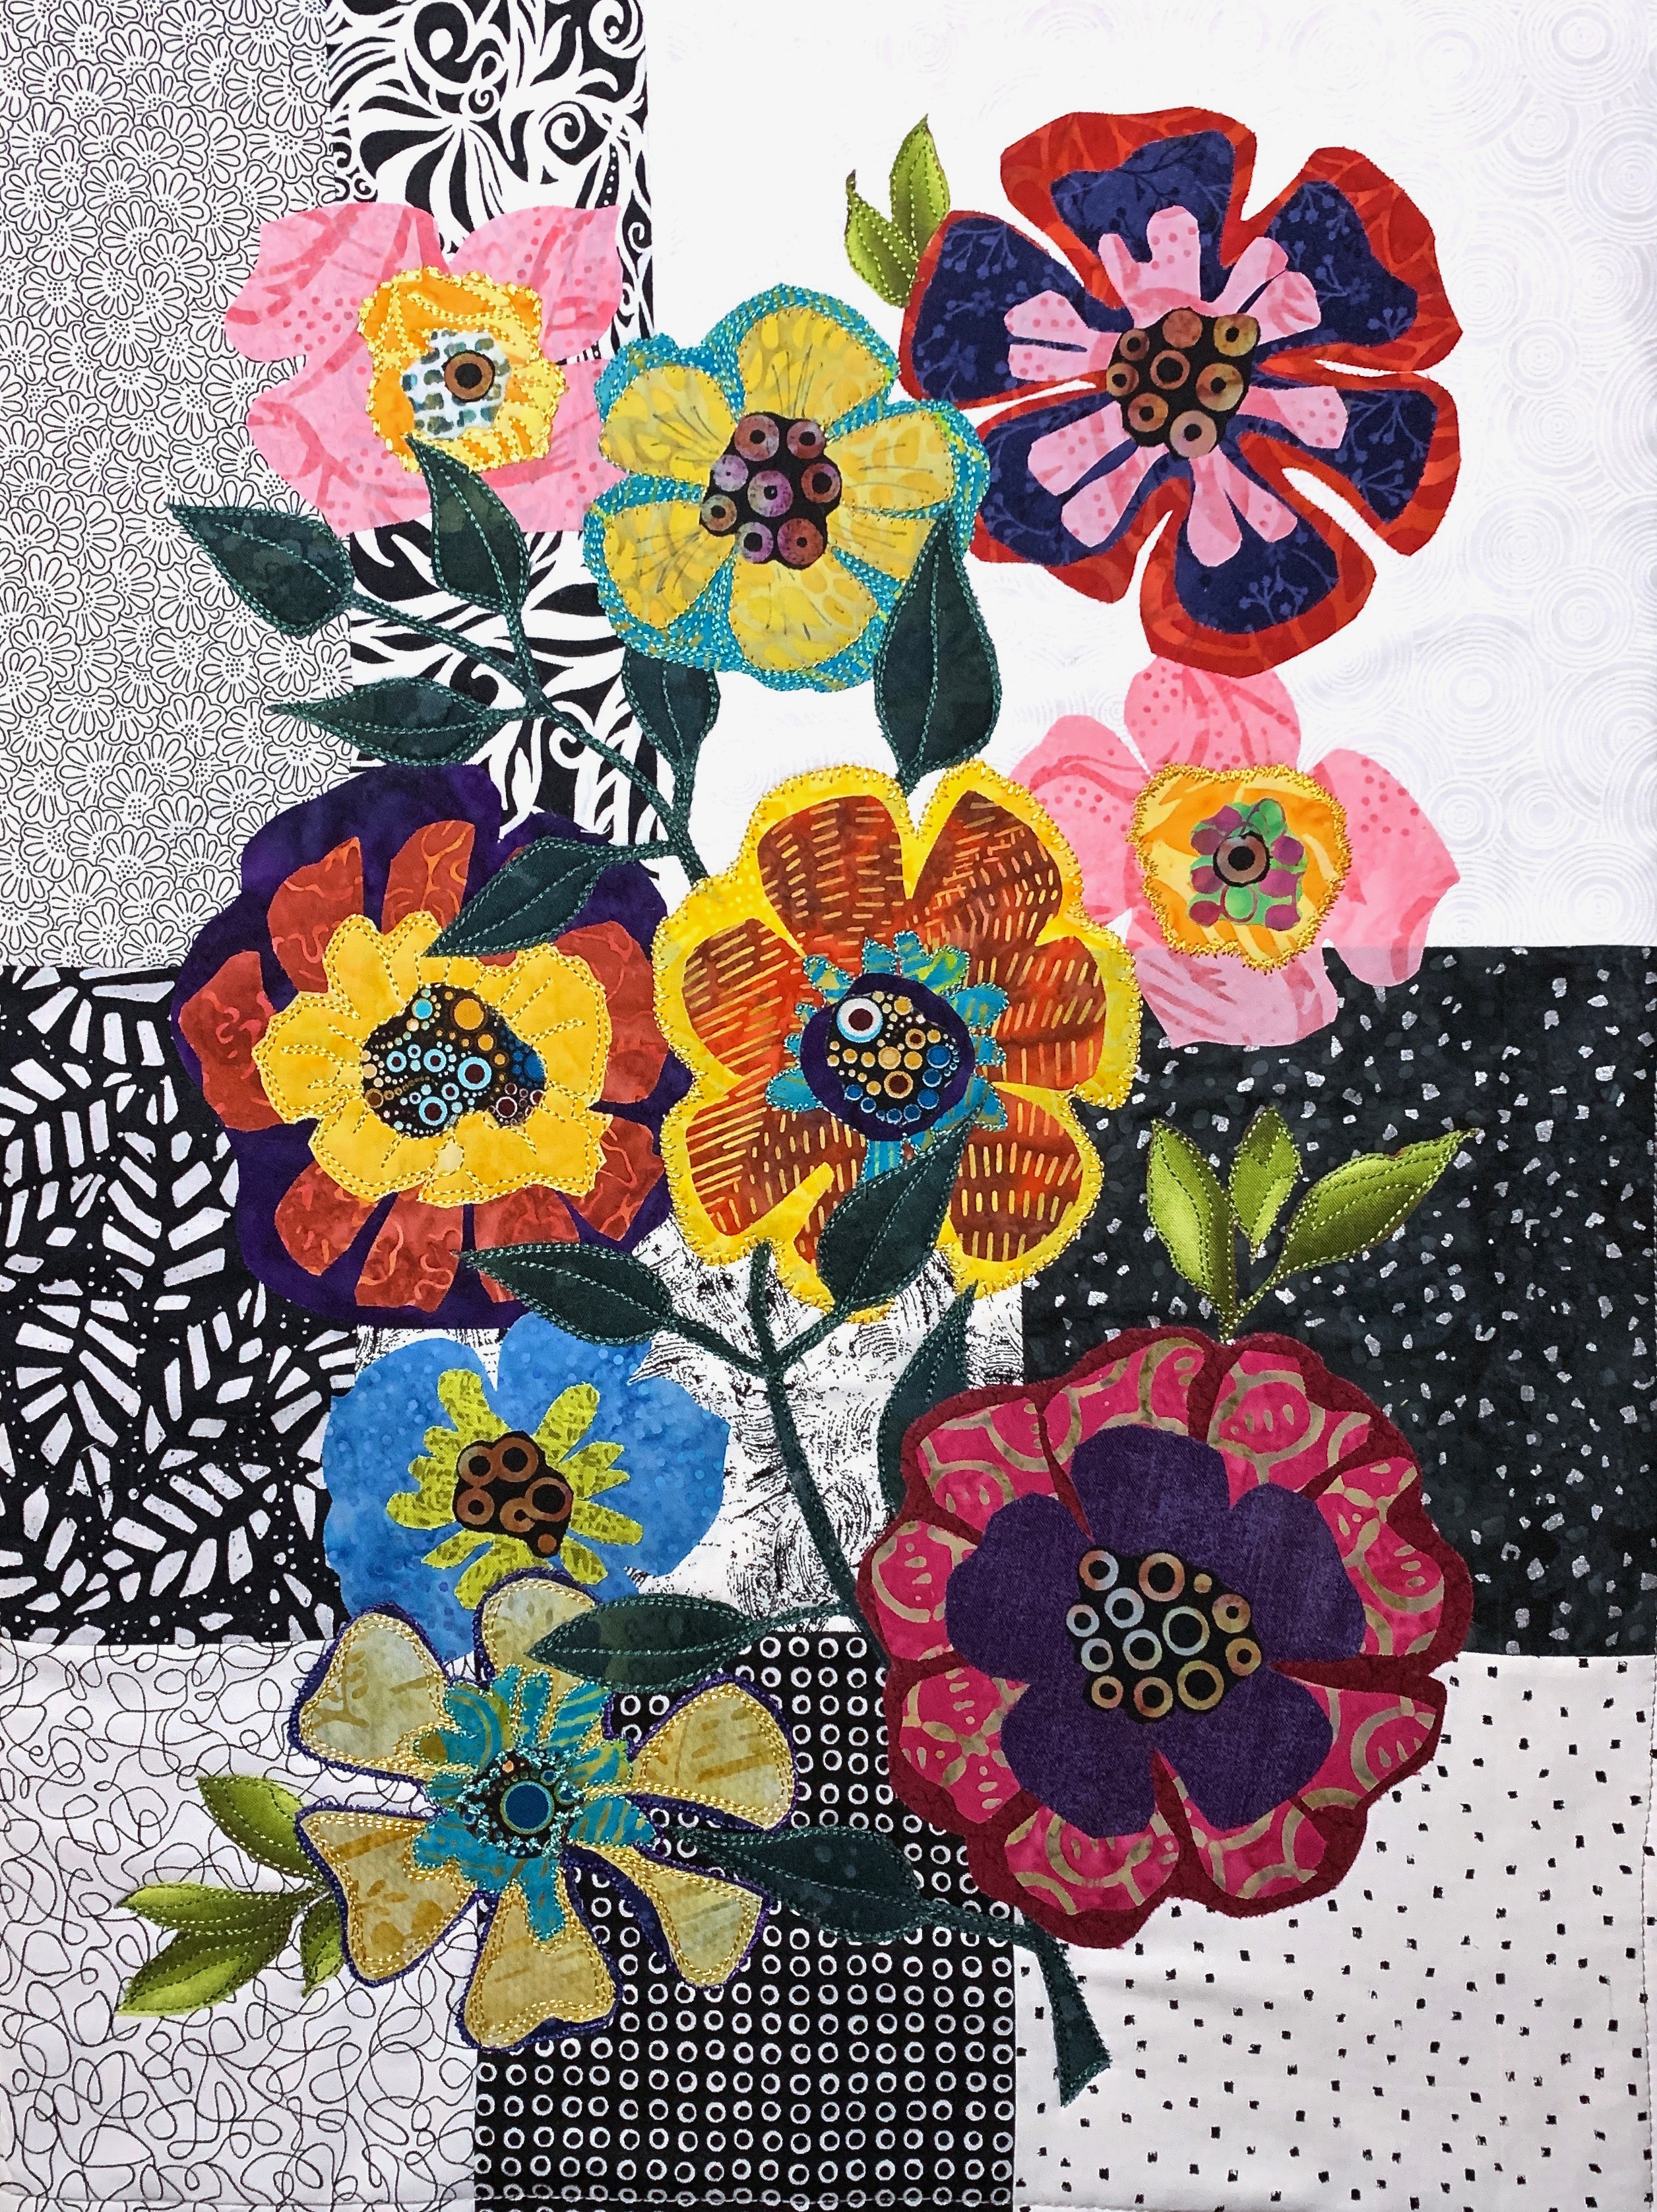
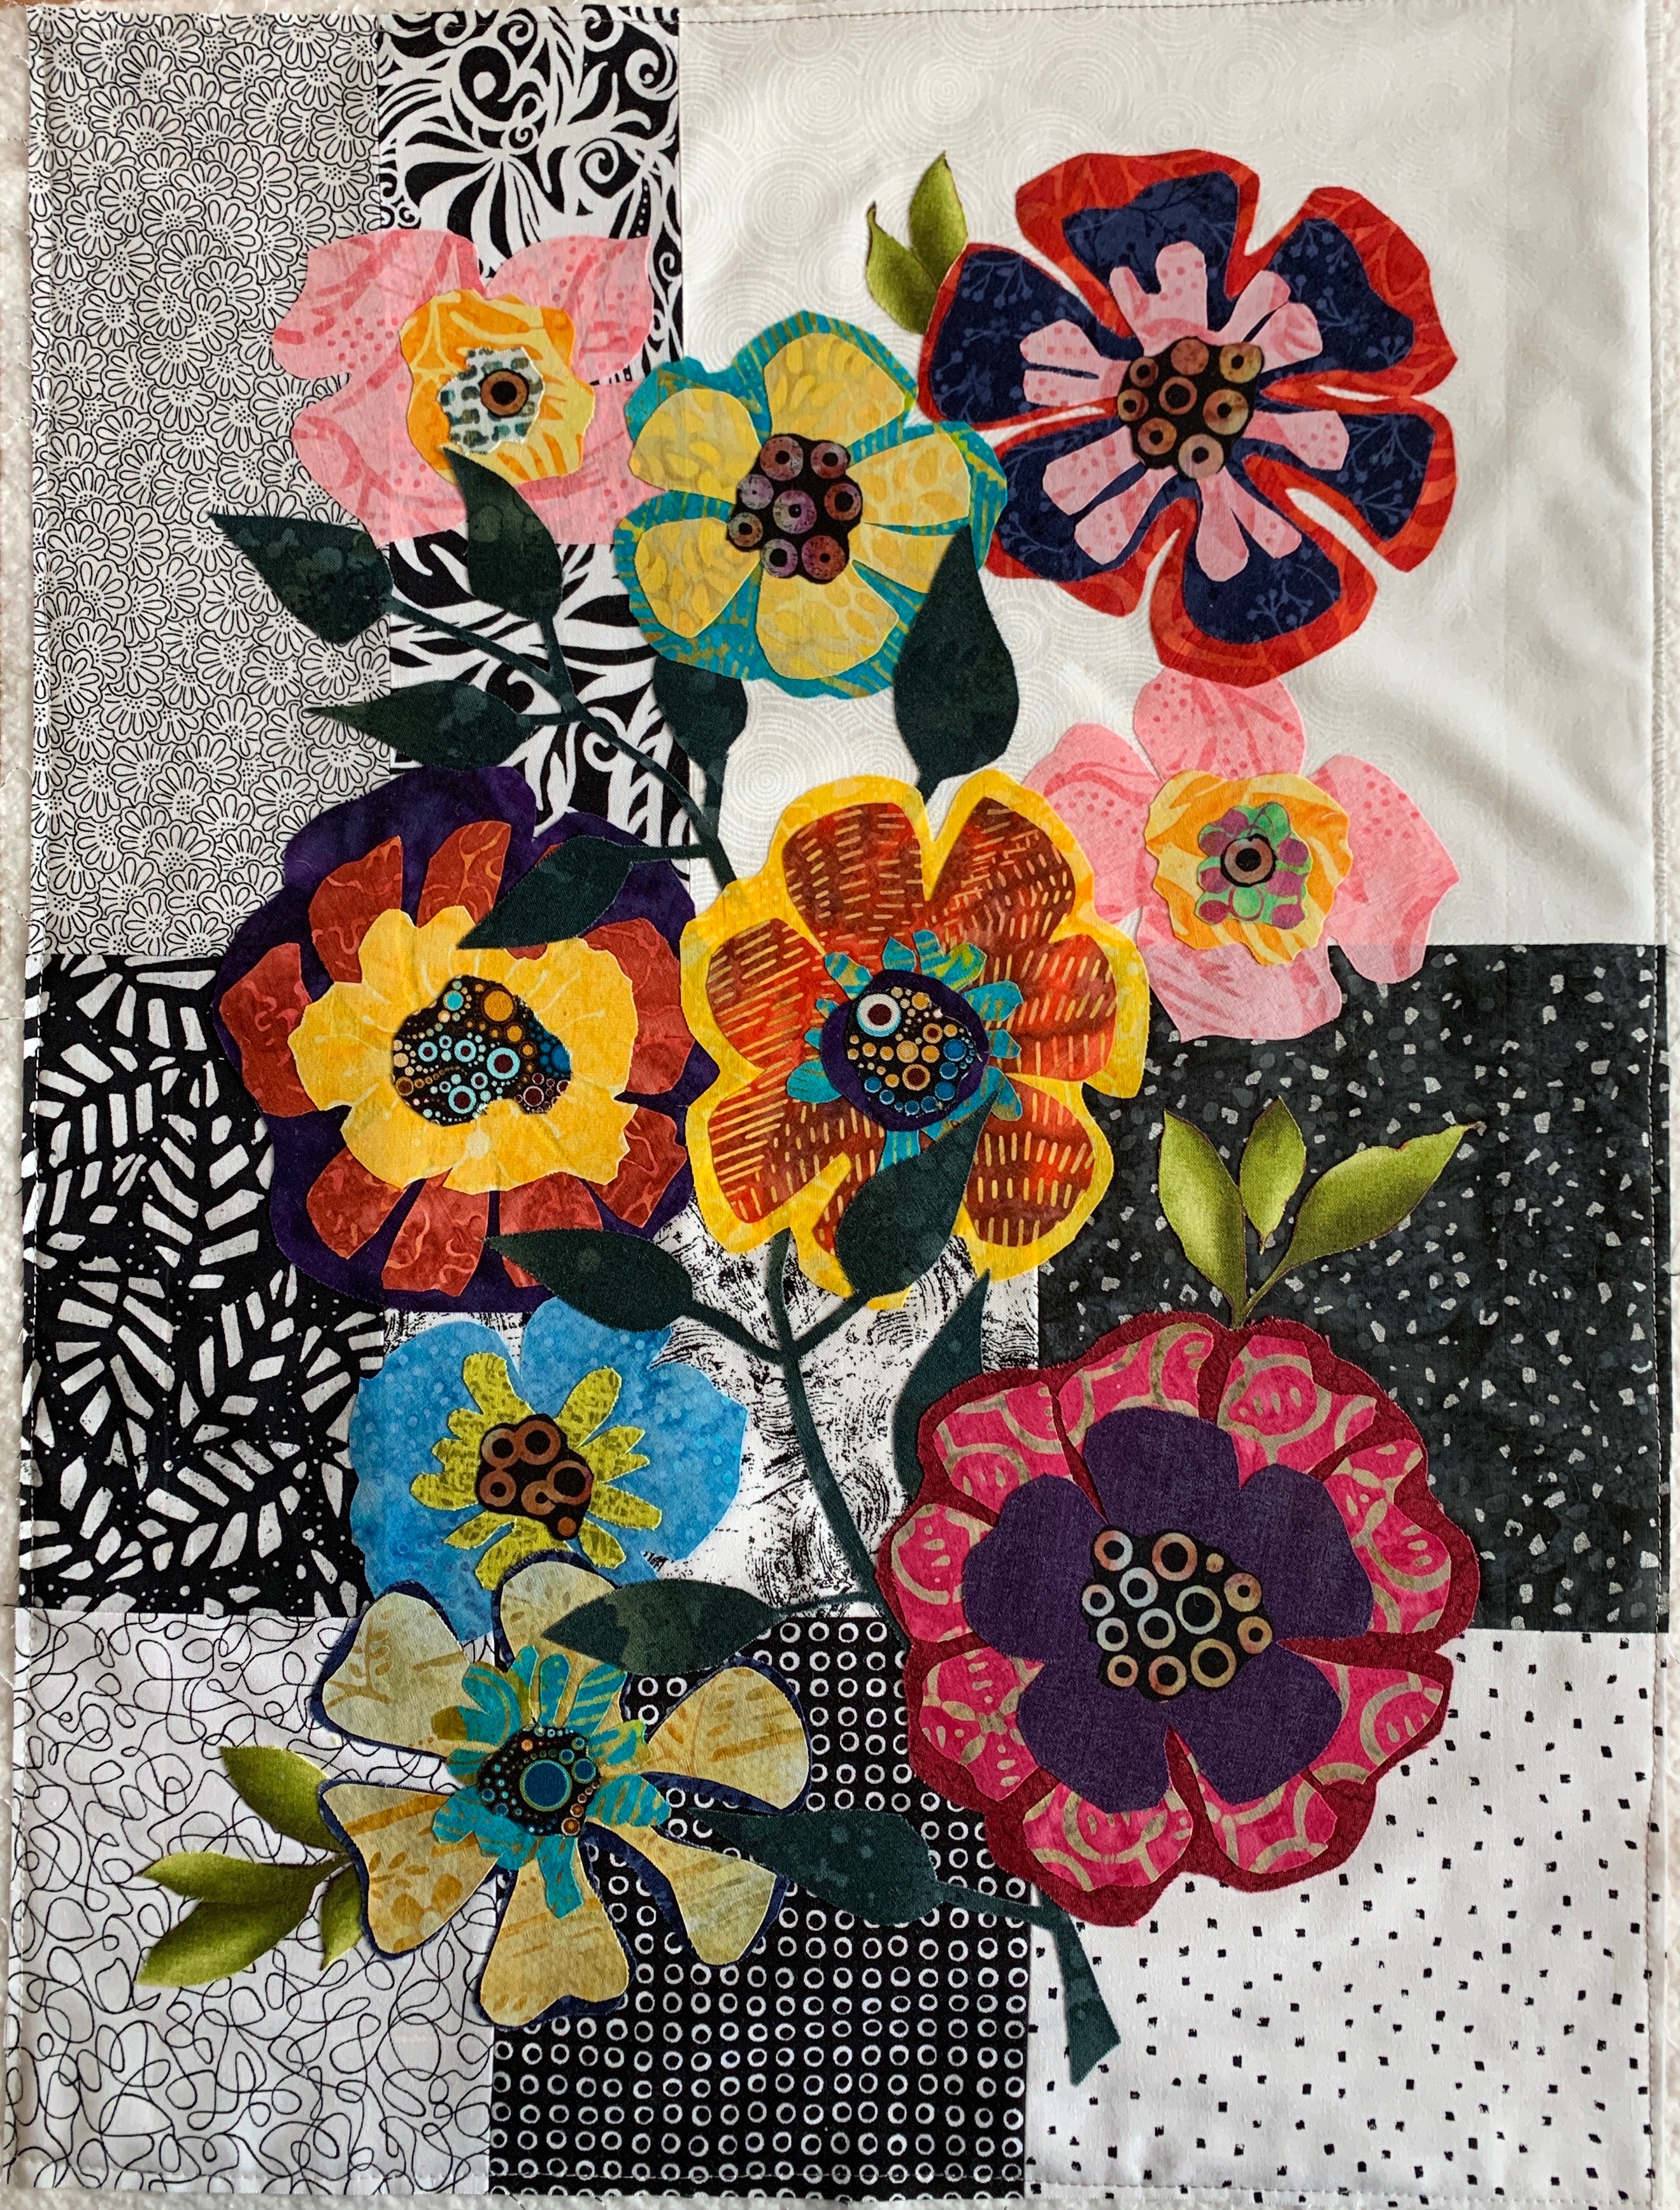
When I finished the first modern flower appliqué wall piece a couple of weeks ago I decided I wanted to try a second hanging – this one laid out on the horizontal with a border but having some the flowers spill off the piece entirely. Also I didn’t just want to repeat the flowers in the first piece – this time I decided to use layers of offset circles, again with leaves flowing through the space.

Modern Flowers – II

Early in the week I took the black/white leftover pieces from the first hanging, created a centre panel, then added a white-on-white mitred border; next I backed the pieced fabric using medium weight woven fused interfacing to stabilize the panel so it will remain relatively flat through the thread painting process. That worked well on the previous piece – Floral Collage – I decided to try it again on this larger piece.

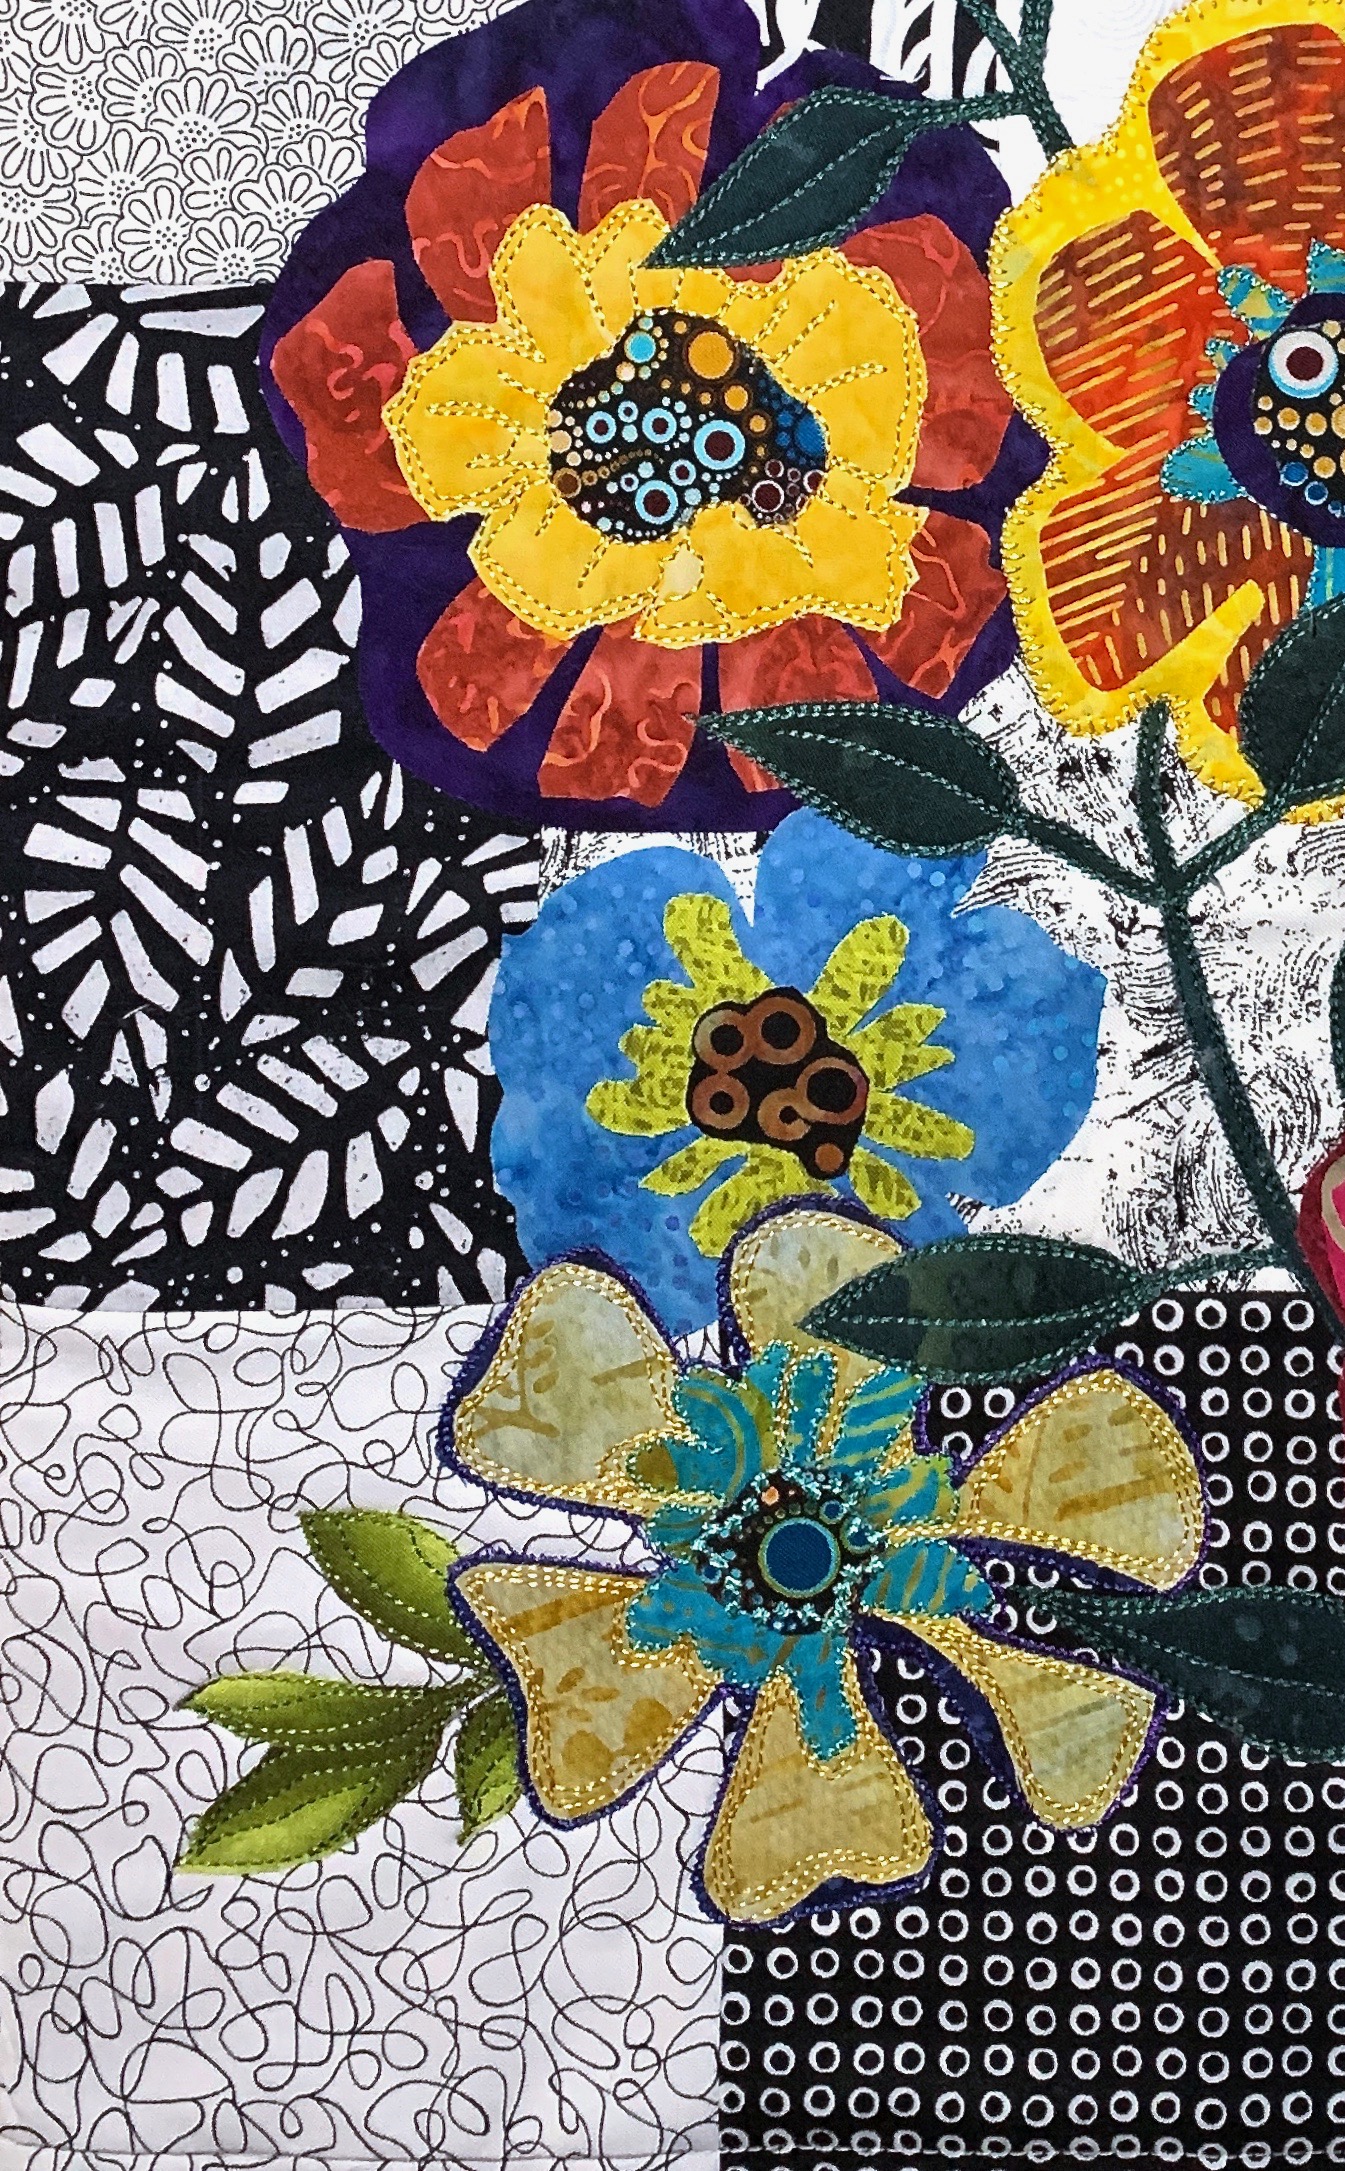
I had kept the pile of small fabric scraps I used on the first flower appliqué on my cutting table – I didn’t have to go looking for more. This morning I cut various size squares from the scraps, added fusible web to each square, then cut out circles from 1″-6″ in diameter. What I have at the moment is a tentative layout. I think I want to add stems and more leaves in a somewhat lighter green to complement the dark leaves I have already cut out.

That’s it for today. Tomorrow I’ll fuse the individual flower elements, cut out stems and more leaves, play with arrangement, next fuse the whole to the background. Then I’ll start thread painting. The temptation is to simple outline each circle using a narrow blanket stitch but I’m not sure I’ll do that – I may decide to use doubled embroidery thread and straight stitch several rows close to the edge – I’m sleeping on that.

Flowers III

It’s done – completed this afternoon. Binding the piece was more difficult than I expected. First I bound it as I would a quilt – but do you think I could get the corners to look alike? There’s often a bit of variation when I do a quilt, but because the project is rather large nobody notices the corners aren’t “perfect”. But on a small piece like this – a rounded corner, or a too pointy one is like a poke in the eye!

Flowers – Finished

So I removed my first binding (fortunately I didn’t have to trim the edges of the piece to any extent), then did a second one by binding the sides, then the top and bottom edges, turning in the ends to form the mitres. Definitely much better, if not completely “perfect”!

The challenging bit on this piece was creating embroideries of small circles which would fill the flower centres mimicking the fabrics I’d used which had small circles. I’m reasonably happy with how that stitching work turned out.

I do want to attempt a second piece like this – but I’ve got two others ready to work on before I get there.

Finished size: 16″ x 21 1/4″

Flowers II

I started today by stitching the leaves first, not straight sailing because there are breaks – a few of them come from beneath a flower. With all the leaves done, I moved onto stitching with turquoise – first the blue yellow flower at the top, next the turquoise centres.

Thread Painting Underway

Then on to working the bottom left flower. I’ve done most of the yellow stitching, although I intend embellishing that further tomorrow.

Thread Painting – Detail

I spent quite a bit of time creating embroideries of small circles for the flower centres  – I’ll use my metal hoop so I can do the embroidery work easily. I want to position embroidered circles on top of the fabric circles at the centres. I suspect that isn’t going to be easy to execute. In any case, I won’t get to that until I have all the other thread painting done. Then I have to decide if I want to do any kind of stitching on the background! I may leave it alone…. I’ve discovered I can’t plan any of this out in advance – it’s all about one step at a time. It’s about improvisation.

Flowers

I’ve been looking at pictures of quilts by Freddy Moran – large bold background with appliqué collage in strong bright colours. I decided to try something like that.

I set up a black/white fabric background, then began cutting out flower-like shapes in layers and bright colours. Nine large flowers later I thought I needed to connect them in some way so I included a long flowing branch of leaves. Then added a few lighter green leaves (from a floral print fabric) to just finish off the appliqué.

Flowers

Now to start thread painting – here’s where I can use contrasting colours, particularly on the leaves and stem to make them brighter. No time to even start that today – tomorrow, for sure.