
The idea for this quilt came from a pinterest photo a friend sent me a while back. I liked the idea of just creating blocks from strips of variable length with a background fabric. I had a jellyroll of blue batiks and lots of scraps in blues/greens. I’m guessing the pinterest original likely used 2 1/2″ strips but that would yield blocks too large for me to embroider in the hoop, so I reduced the strip width to 2″ (which meant cutting 1/2″ from the jellyroll strips) and created 9 1/2″ blocks of six strips each.
It took a while to assemble the blocks then I laid them out. I knew from the outset I’d place the strips horizontally in blocks assembled as columns (7 blocks x 5 columns = 35 blocks). I auditioned the blocks on my office carpeted floor and decided to reverse direction of two blocks which meant a narrow (1/2″) background strip to set them off from those in the adjacent column. And narrow borders so the binding would be separated from the batiks.
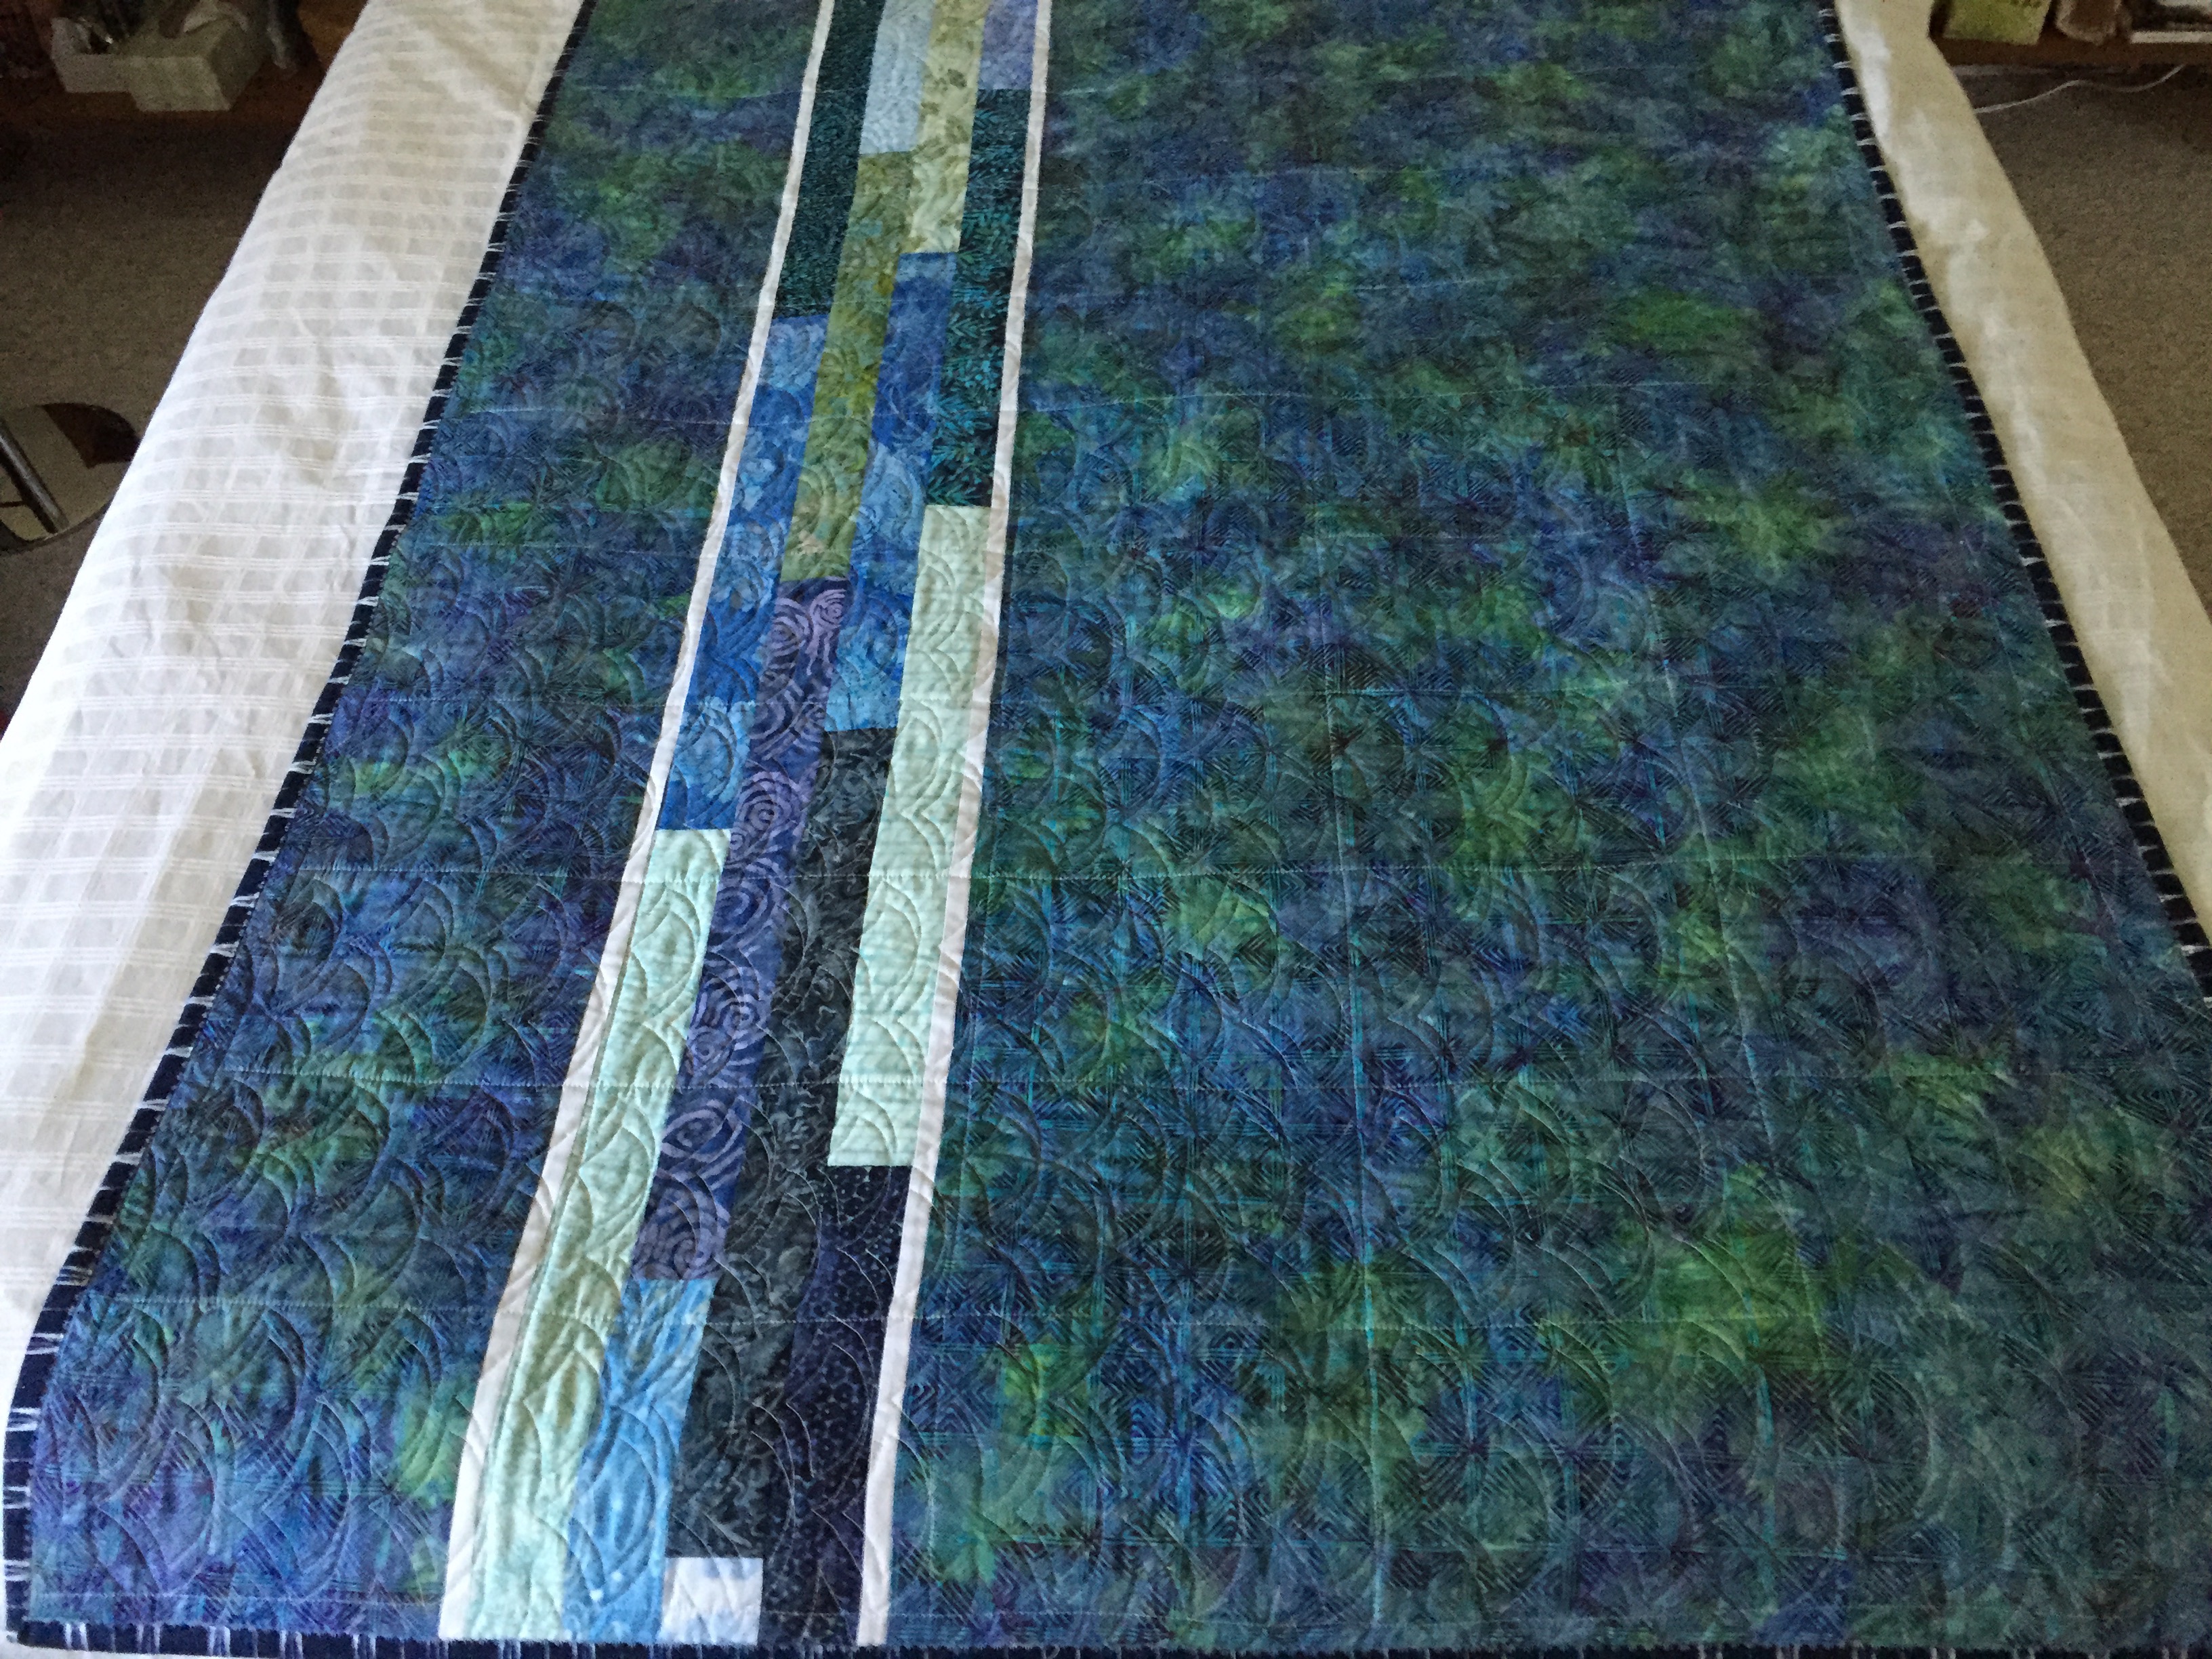
Once the top was done, I used leftover strips to set up an 8 1/2″ wide strip the length of the quilt, inserted it into the backing fabric (so I’d have enough width for the quilt). I pinned the quilt together, stitched in the ditch (blocks that were 4 strips wide so I’d be able to quilt them in the hoop).
To quilt the whole thing, I adapted a long-arm quilting design and embroidered it in each section. Once done I added the binding (a 1/2 yd of Michael Miller fabric I bought at Britex in San Francisco for this purpose).
The embroidery design in this instance had tie-ons and tie-offs which I left (usually I remove them and draw the threads into the quilt when each block is finished). That left me on the reverse of the quilt with obvious small white clumps of thread at each tie-on/tie-off! So I did what I’ve done before – took a permanent marker in a colour that blended with the backing fabric and coloured the knots. Worked like a charm – the knots became invisible – until I turned the quilt over and discovered small grey-blue dots all over the front of the quilt!
PERMANENT marker, remember! I tried a bunch of different solvents on scraps of white fabric – bleach, soap, bleach & soap, nail polish remover, rubbing alcohol. The only solvent I didn’t try was hair spray only because I had none in the house. It was obvious that ink was there to stay.
So how was I going to salvage the quilt? I woke up this morning with an idea – smallish circles in yellow/orange hues appliquéd over each ink mark. I had some Heat ‘n Bond Easy Print Transfer Sheets so I opened Photoshop, set up a page of circles (in 3 sizes), printed two sheets, rough cut the circles, fused the transfer to the back of scraps of fabric, fussy cut the circles, then positioned them over the ink marks. I added quite a few more circles in random locations to balance the arrangement of the necessary yellow & orange dots.
 I’ve renamed the quilt “Galaxy” – because it kind of looks like a constellation of suns. I’ve already fused the circles to the quilt front. All that remains is to stitch around the edge of each circle with some kind of decorative stitch. I’ll probably use rayon embroidery thread on the top and the same variegated Sulky I used for quilting the back in the bobbin.
So one quilt salvaged!
Jun 22/15 Update
I had to create a second set of circles using Heat ‘n Bond Lite because the first set didn’t fuse well to the quilt top – another couple of hours precision work. I carefully removed the first set of circles, fused the second set. It took the better part of two days to stitch around all 42 circles!
I used a variegated yellow Aurifil 50 on top and an olive green bobbin embroidery thread on the bottom (which disappears in the batik on the back). I had to stitch VERY slowly to outline each circle precisely.

From a distance the appliqué stitching disappears!

Now I could have loaned you my yoyo maker!
You could have!
Gorgeous once again. Look up Gravity quilt. A friend down here just finished it. She’s a crazy, accomplishing, obsessive sewer like yourself.
I did look up “Gravity Quilt” – too tedious for me! I prefer to improvise as I go.