The Latest Iteration

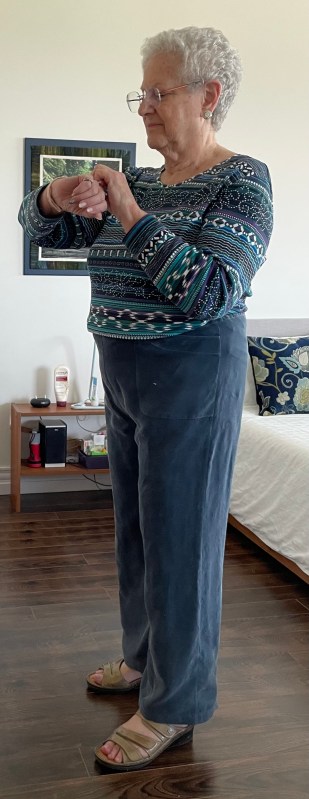
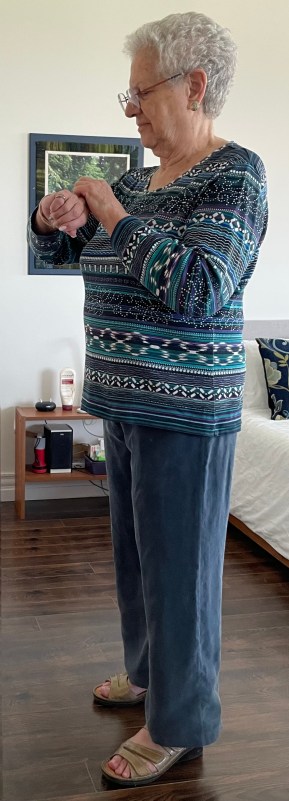
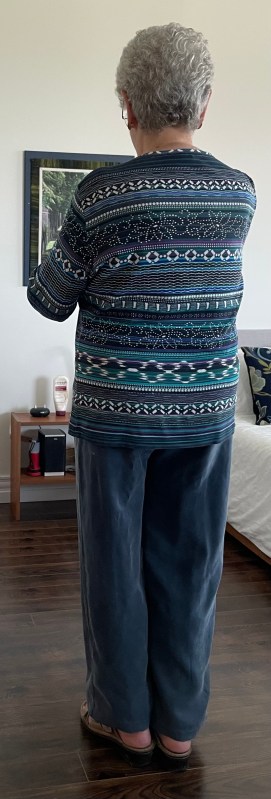
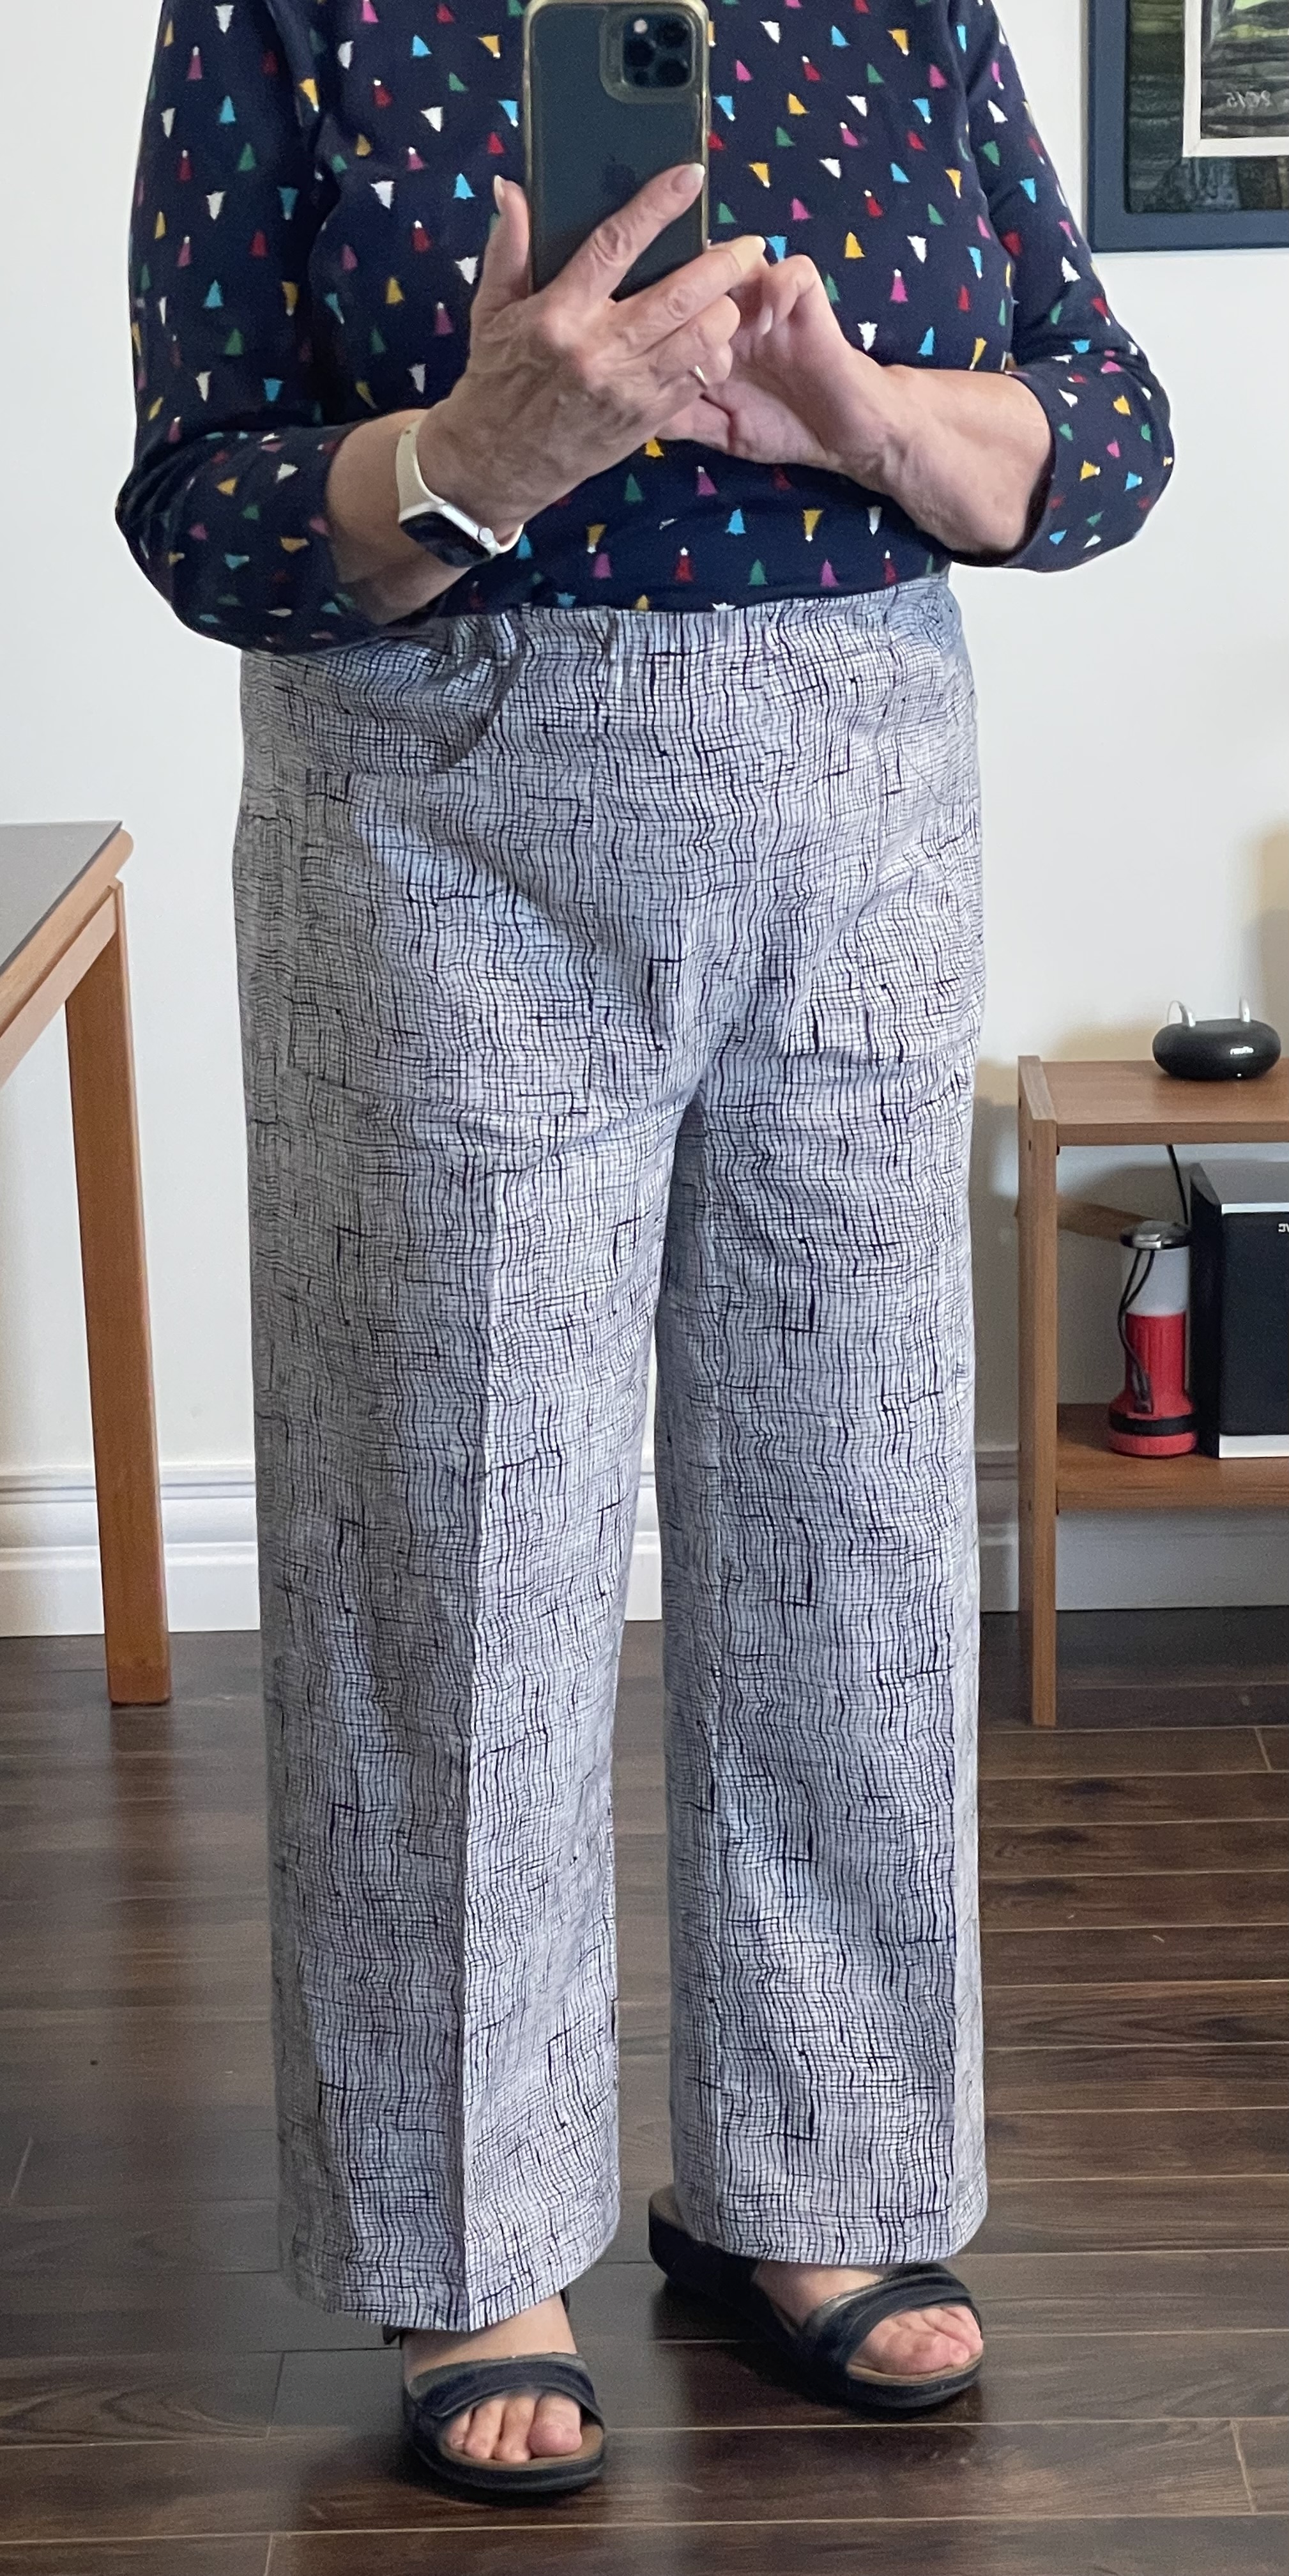
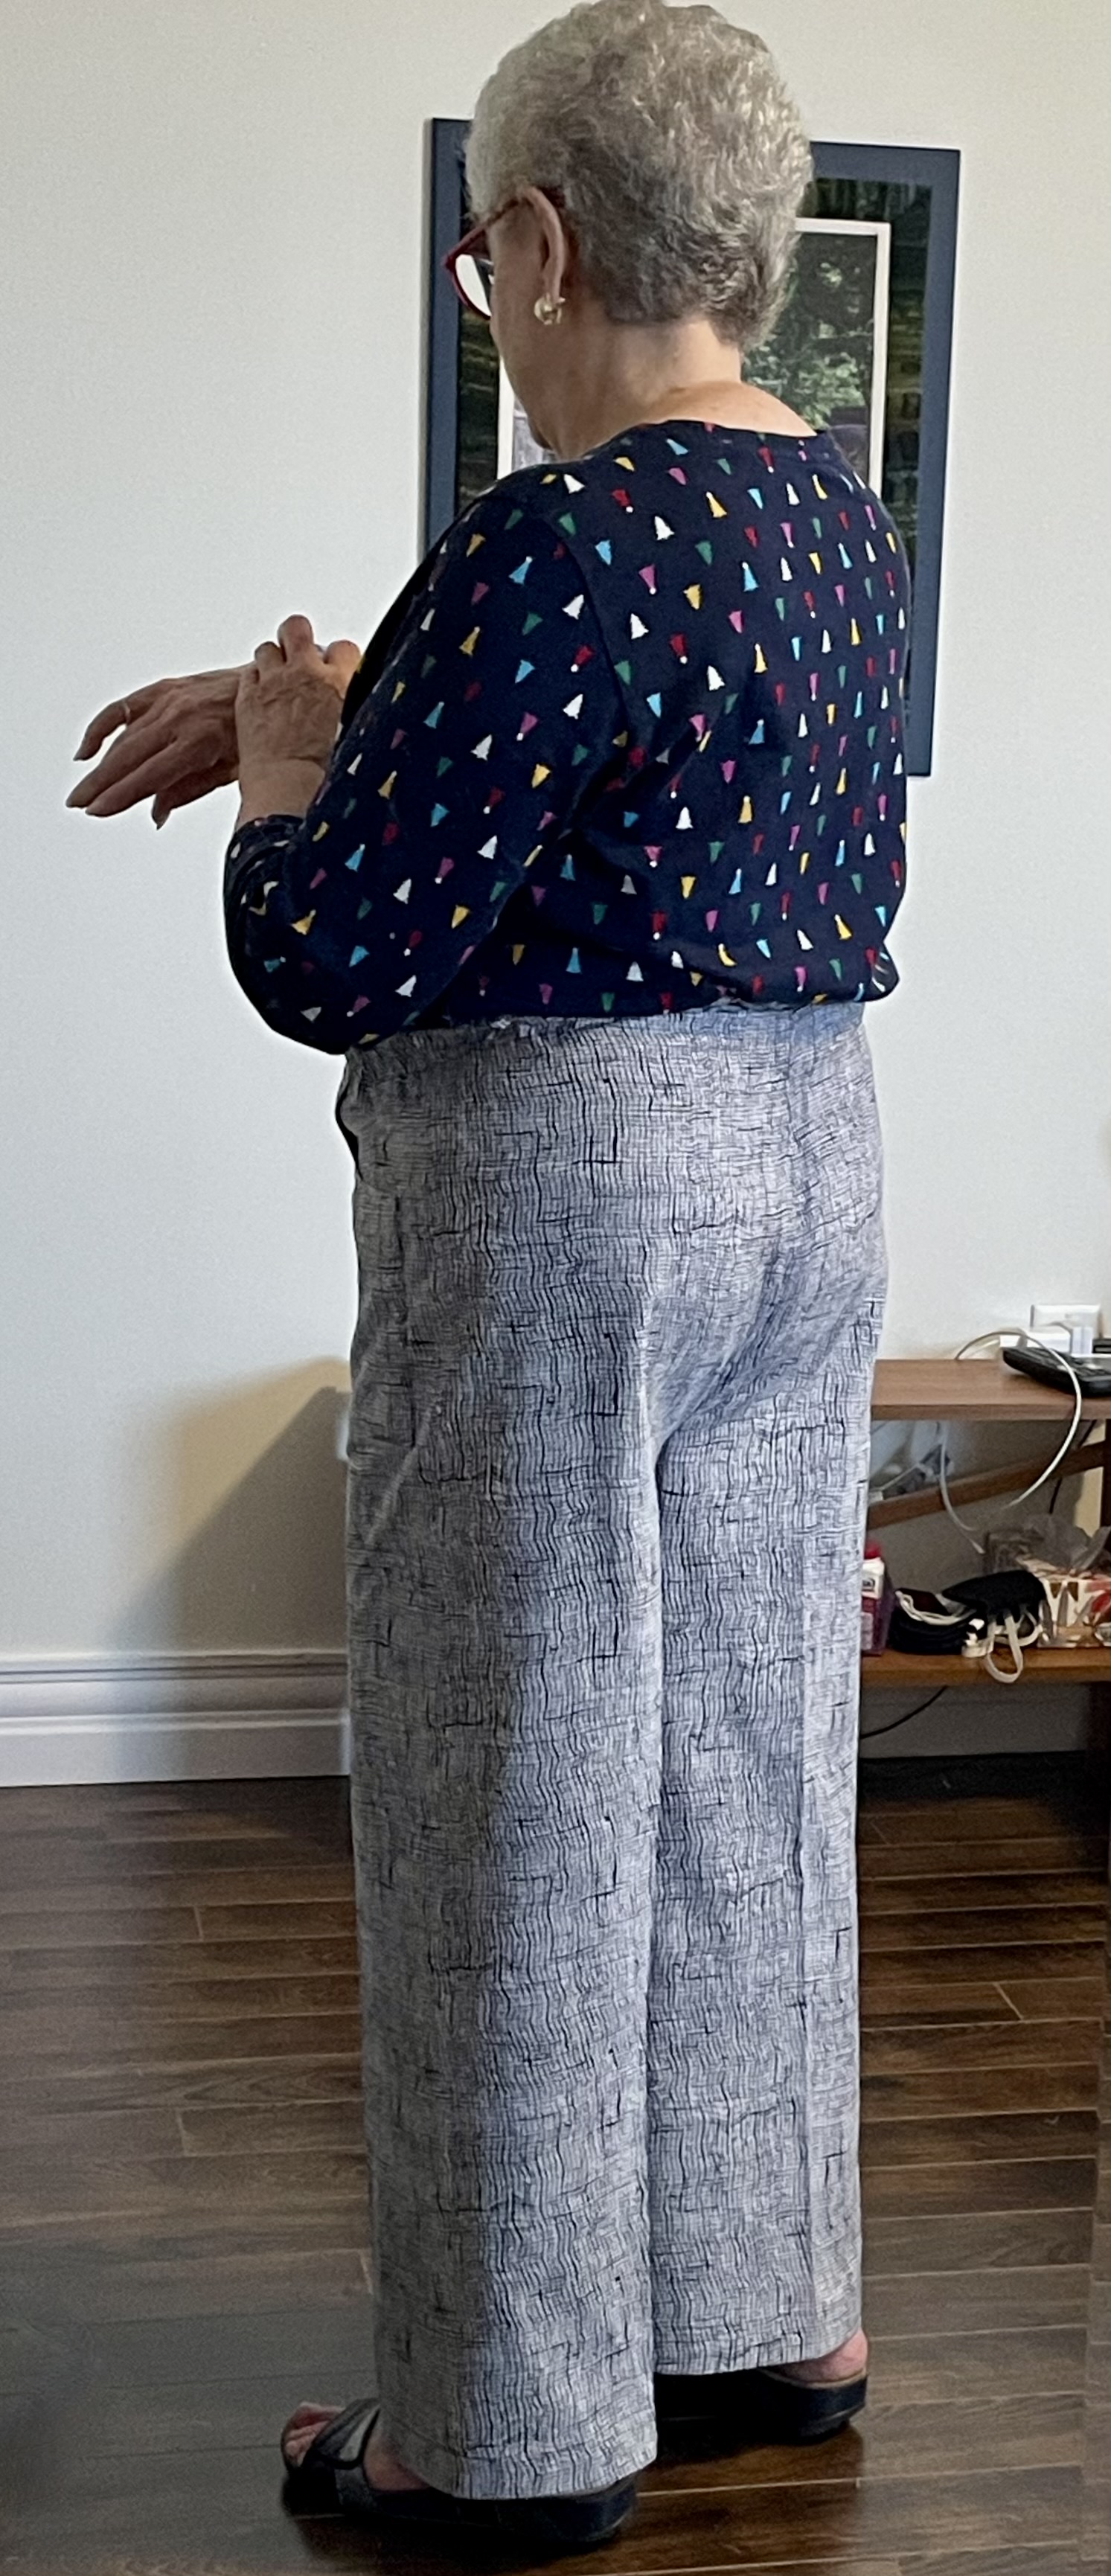
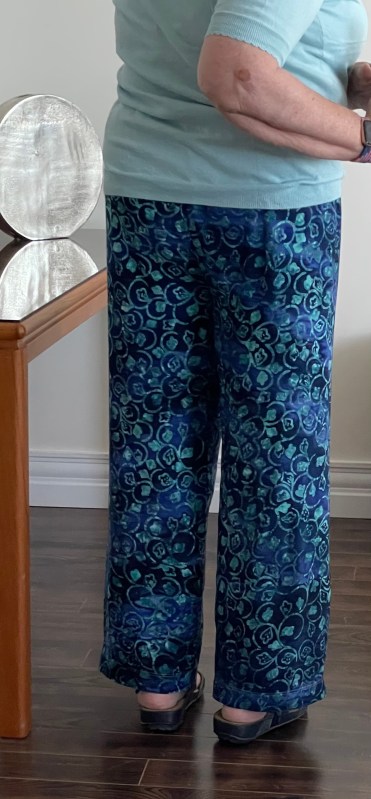
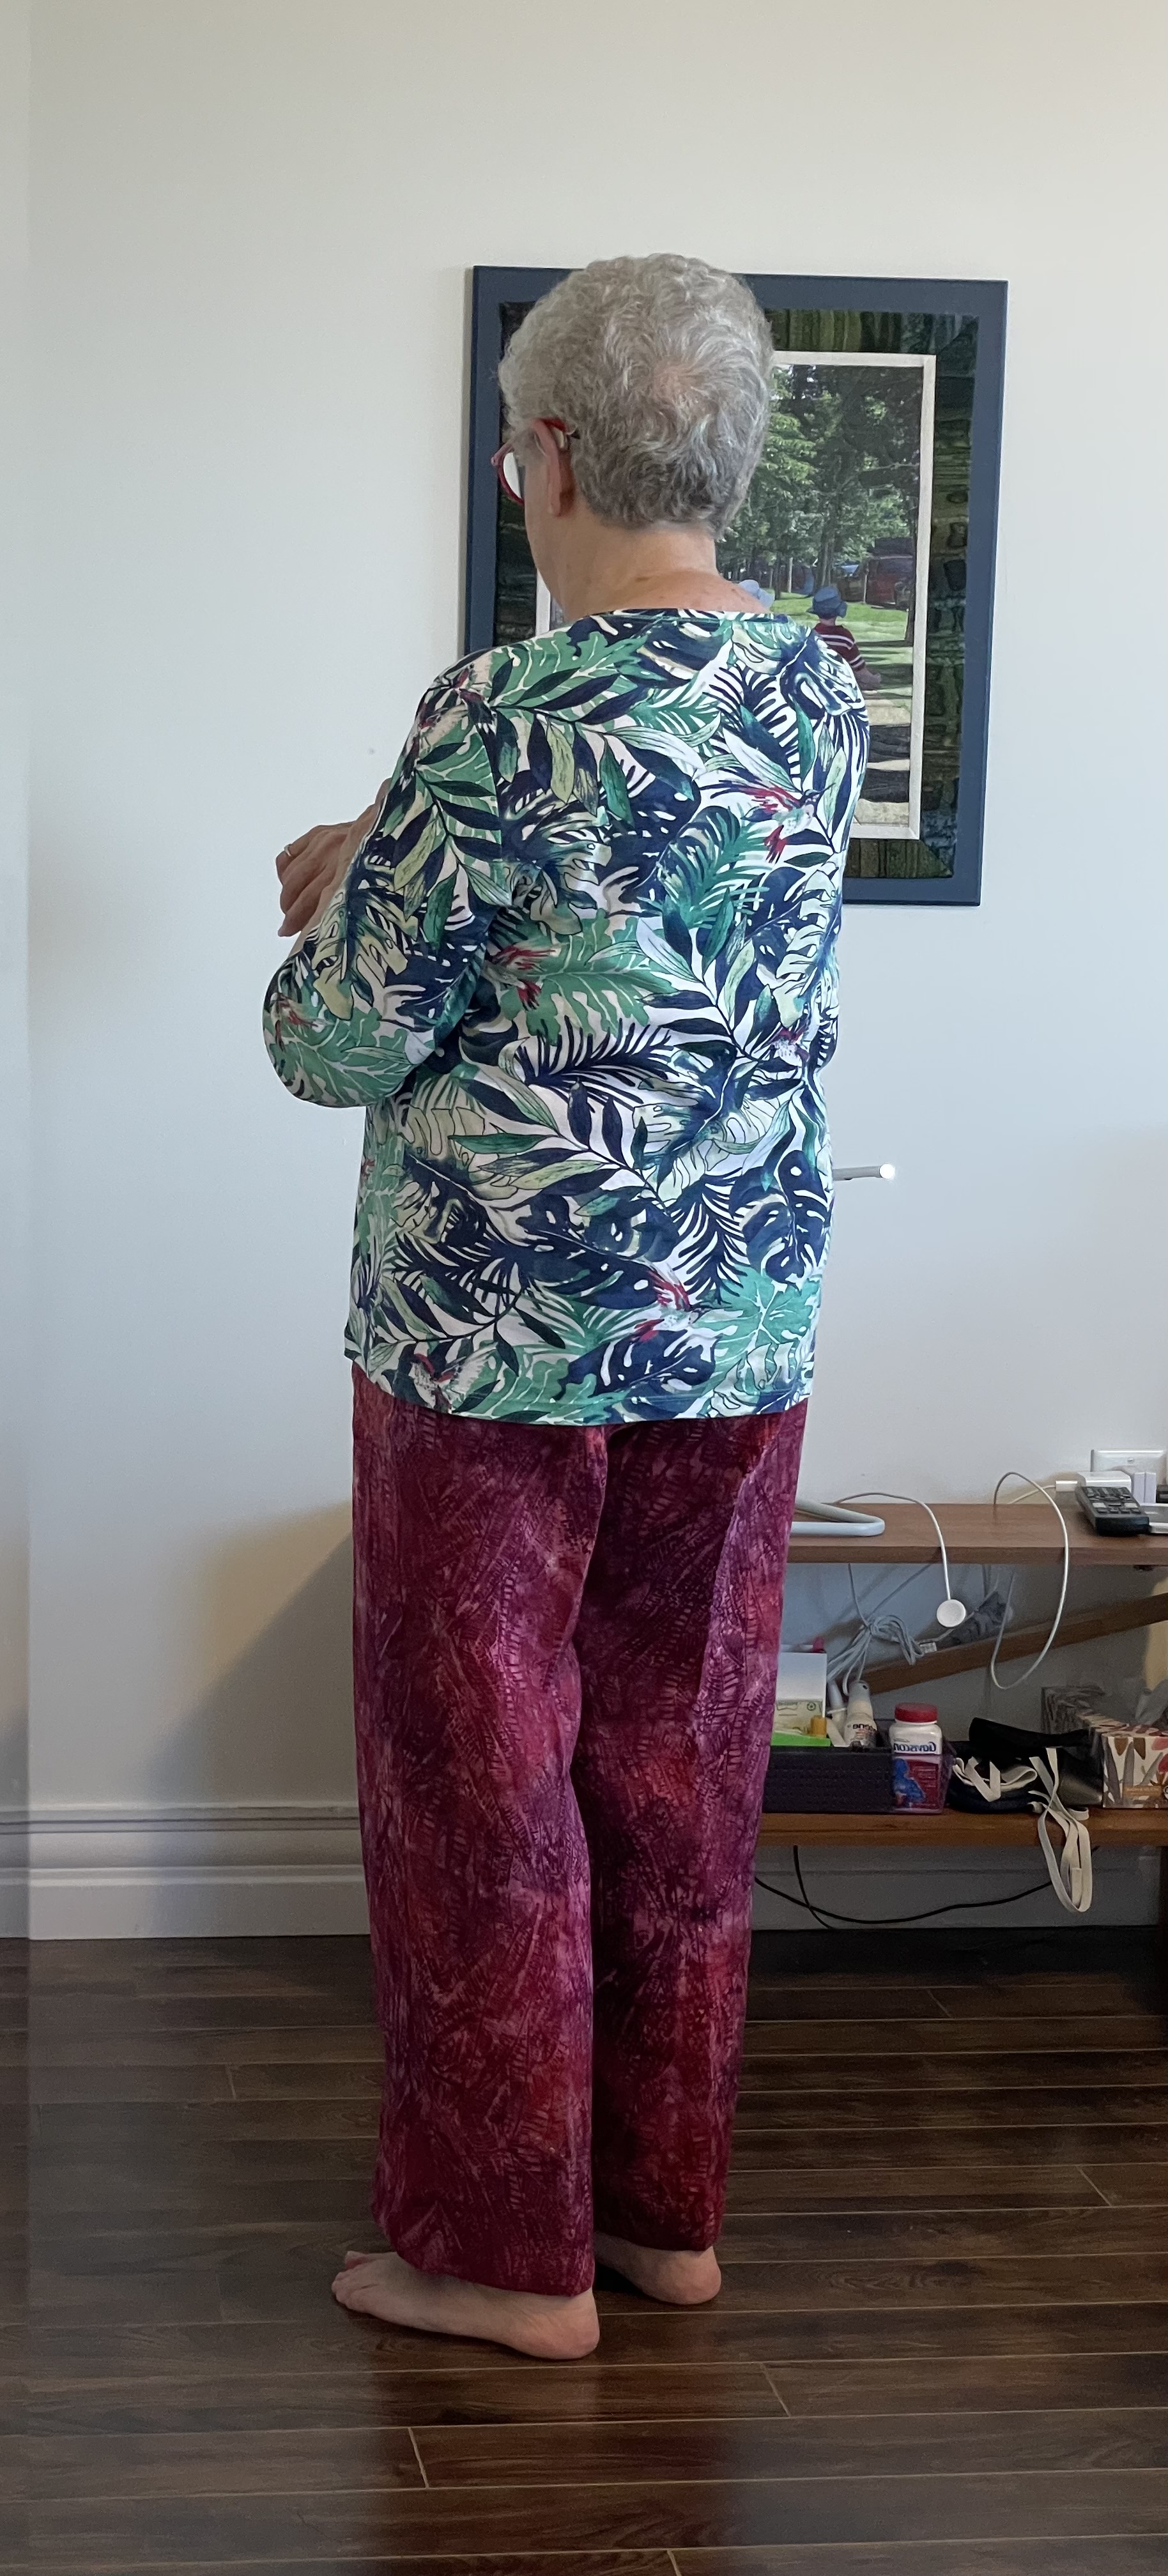
Here is the latest pants iteration – pull-on pants in a rayon batik I bought in Bali in 2014!

I redrafted the pattern again – adding 1/2″ to each side seam (front and back) which has given me a bit more room to sit down in. The crotch is also a bit wider in the back and extends closer to the knee which gives me slightly more fullness on the inner thigh which is helping the fabric fall straight from my bum and the inseam hang correctly.

I had intended to create a fly front on these pants but this fabric is soft and drapey so I folded the fly addition back and cut along the centre seam to make a straight front seam. I did want to shape the sides a bit but the waist on pull-on pants has to be as wide as the hips, so an elastic waist it is.

I made more work for myself with these pants – I basted the four panels together so I could try them on and assess the fit. I set up the waistband, then fit the pants to the waistband and it seemed I was probably close to the fit I wanted. Then I took apart the side seams so I could properly add the front and back pockets to the flat panels, basted them back together, and finally serged everything – in the order I would normally use for constructing pants. Just took longer.

Next time I’m not going to need to do the basting – this pattern is pretty close. For winter pants I am going to want the back to be shaped under the bum somewhat so the back dart will return, as will a fly front opening (which will allow me to taper the sides at the top).

I have to say, after all these years chasing a pattern and strategies for making pants that fit – I think starting with the straight monpei rectangles, building in the crotch triangles, adding a waistband, has got me closer than anything I’ve done before. I no longer have a “shapely” body – I’m straight, and flat, and dumpy! The peasant pants, based on two rectangles, gives me pant shapes on the grain of the fabric, with enough fabric where I need it and that hang straight from the fullness of my bum (given what little of it that I have).

I’ve actually learned more about making pants, particularly pants for myself, from this series of experiments, than I have for the past 30 years. I’ve drafted a pant sloper in the past, but the part that was missing, that I didn’t see, was pants are based on two rectangles based on a hip measurement and garment length from waist to hem (with seam allowances and hem added)! By adding a crotch based on the crotch depth measurement to one side of the rectangle, you get the curved shape around the hips, bum, and between the legs you need. You can add further shaping, if necessary, by removing fabric from beneath the bum with a dart down the back of the leg. You can remove fabric from the centre back and the top of the side seams if you have to to accommodate a curvy body shape. But you start with your hip measurement and crotch depth, which sets you up to draft the rectangular shapes that are the basis of the garment! Didn’t know that before.

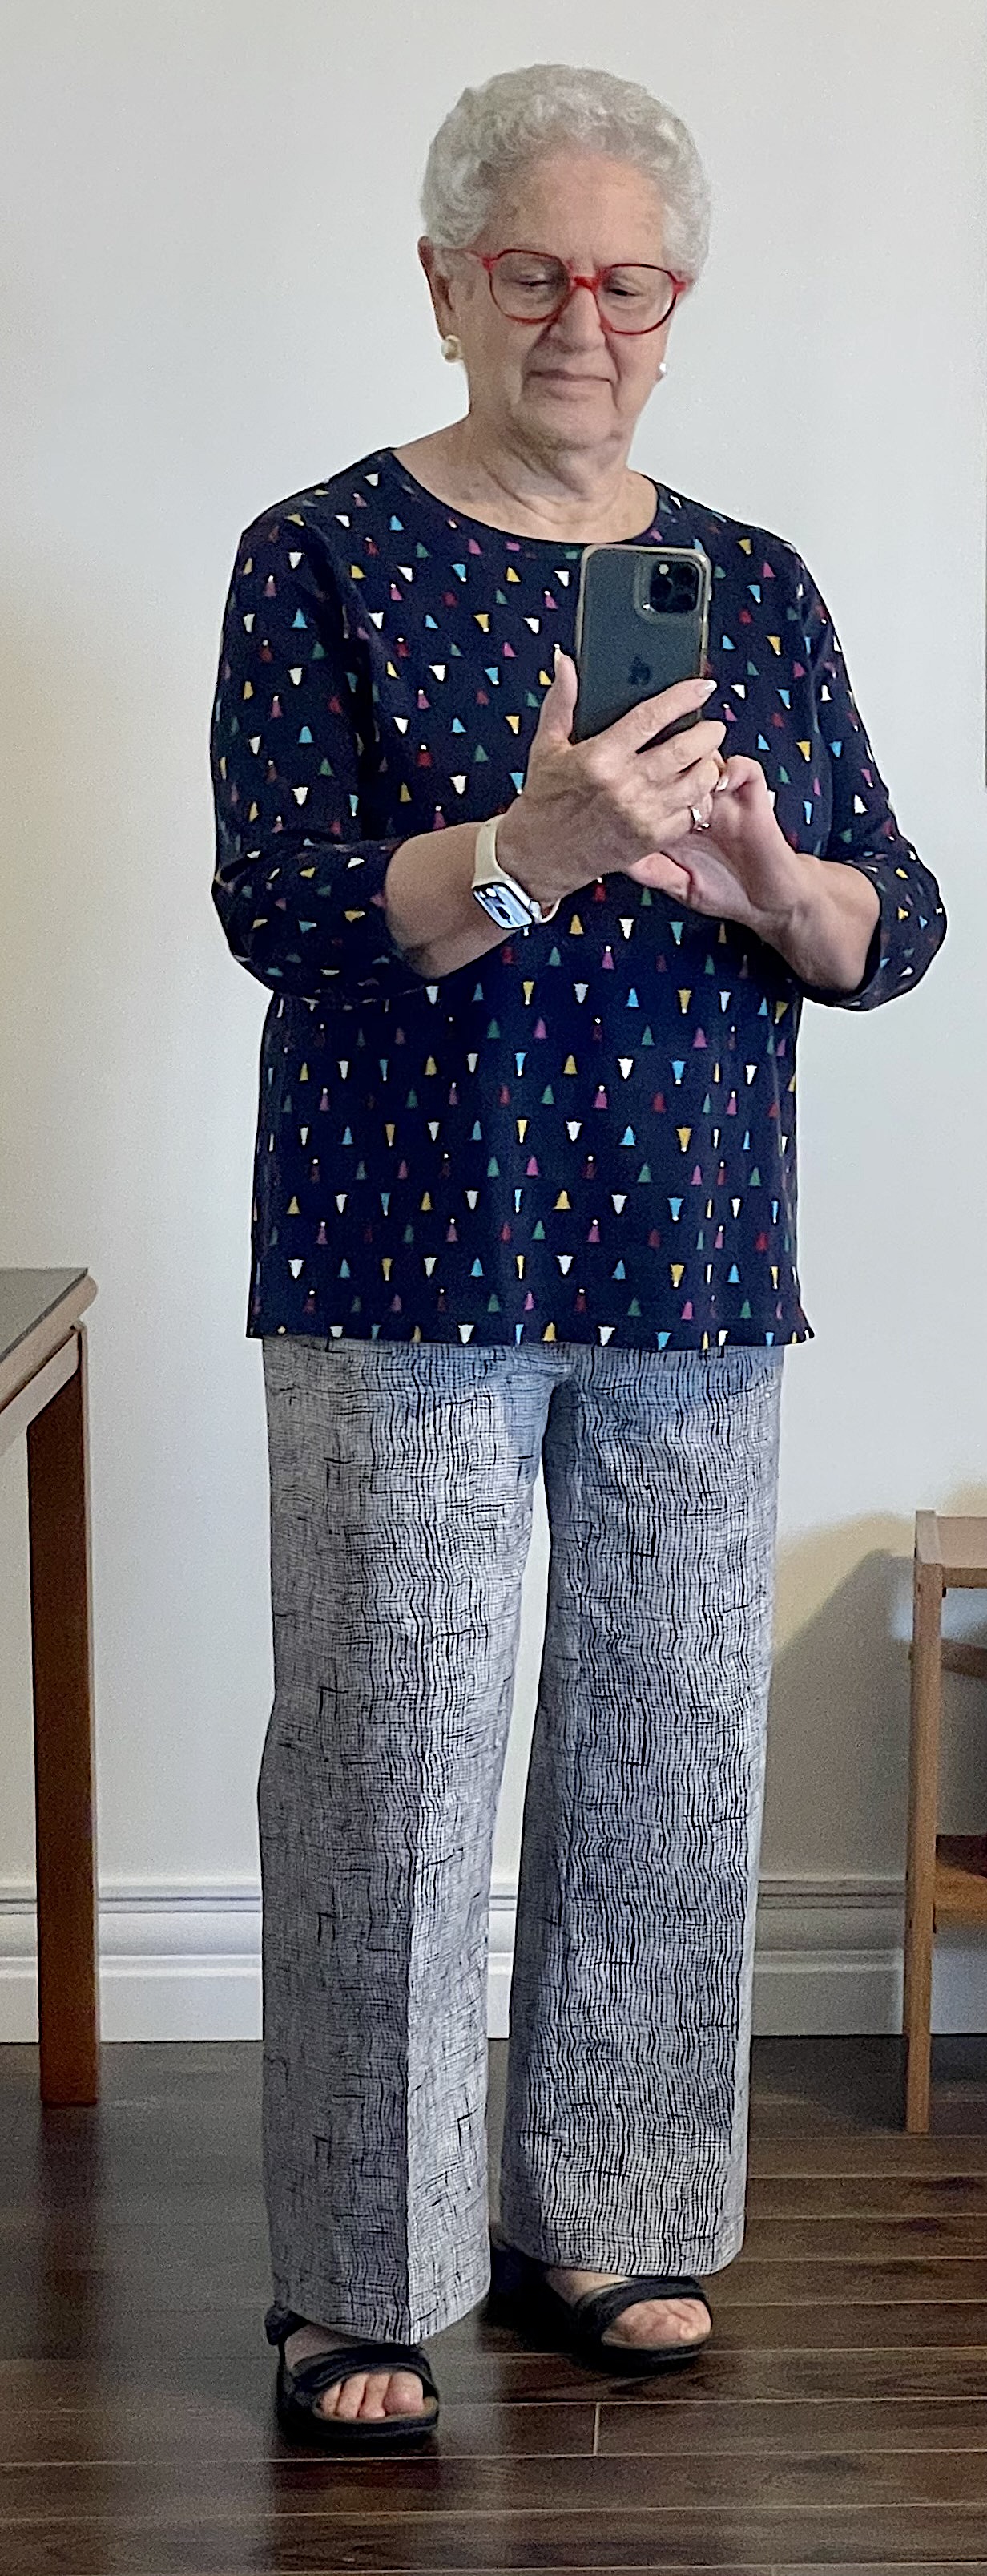
My next attempt will be in corduroy (which has a small amount of stretch) – for fall.

A Close Match

Remember, I described the challenge of working with this yarn? How the sections of colour were too long so the transitions were not going to allow me to finish with a blue toe. That I had to cut out segments of the various greens to finally reach the blue.

The difficulty was trying to judge the transition segments so the colour demarkations were more blended. I didn’t succeed entirely, I was better with the sock on top – the first one, I think, than with the second. However, the recipient of these socks won’t notice any difference – I’m just being an obsessive perfectionist! The important part of the sock is the leg, anyway. Nobody sees the foot inside the shoe.

The next pair I’ve got underway is definitely BORING – an alternating pattern of magenta, brown, beige, pink stripes.

I haven’t reached the end of the first repeat which seems to involve at least 10 stripes – I’m trying to decide what I can do to liven up the colour palette. This is one of the Hobbii “Silly Socks” balls of yarn I ordered a couple of months ago – I’m not sure what I have in the “leftovers” collection that might intersperse with this to make it more interesting – but I want to do something!

An Afghan Feast!

Our Wonderful Meal

Last evening I was invited to dinner at the apartment of one of the two new Afghan immigrant families I am helping learn English. The occasion was a thank you to the group who sponsored them to Canada, including me for the time I spend with them each week.

The apartment is small, but in traditional Afghan fashion they had laid out the feast for 11 people on a tablecloth on the floor with plates etc. arranged around the perimeter. Two rice dishes, one with delicious lamb hidden beneath, the other with saffron and pistachios, kofta (tasty meatballs in a tomato sauce flavoured with spices I couldn’t name).

I just looked up a recipe:

For Meatballs (Kofta)
– 1 lbs ground beef
– 1 large onion, chopped in big pieces
– 2 green chilies, chopped
– 1 cup cilantro, chopped
– 1 tsp garlic paste
– 1 tsp salt, or to taste
– ½ tsp black pepper
– ½  tsp coriander powder
– ½  tsp cinnamon powder
– ½ tsp cumin, ground

For the Sauce (curry)

– 1 medium onion, chopped
– 2 medium tomatoes, pureed
– 2 Tbsp tomato paste
– 1 tsp garlic paste
– 1 tsp salt, or to taste
– ½ tsp black pepper
– ½ tsp turmeric powder 
– ½ coriander powder
– ½ cup Yellow split peas/chana daal, cooked 90%
– ½ cup oil

https://www.heratkitchen.com/post/kofta

There didn’t seem to be the yellow spit peas in this version (although I’ve had Kofta that did). The tastes I didn’t recognize: turmeric/coriander in the sauce, the coriander/cinnamon/cumin in the meatballs. Delicious on the saffron rice.

There was also:
A minty bowl of finely diced salad
A spinach dish – Sabzi – I could see finely chopped spinach and onion, I assume garlic
Some potato fries – which seems to be a common companion dish
And a custard dessert with cherry jello on top

A lot of work for these young people to undertake.

The challenge, of course, was getting down to sit on the floor – none of us guests are young. At 80 I can get down and up again – I do it a lot when I’m laying out quilt pieces on the floor – but I’m past sitting on the floor, let me tell you! I could not find a comfortable position other than with my legs stretched out in front of me with my back supported by the sofa behind me – taking up too much space for this group and my feet in everybody’s way! I tried sitting on my feet, on my bum with my feet tucked in on my right, on my left, lotus position – I could sustain no position for very long.

I loved the meal and the conversation and friendship. I paid for sitting on the floor – this morning when I got out of bed, I could hardly move. Once my morning dose of Tylenol and Lyrica kicked in and after an hour of Aquafit in the pool I could finally move.

In spite of the sitting challenge, I will certainly do it again!

Closing Down Of Summer

August 20 2023
There comes a day each year in August, in Nova Scotia, where you sense the impending arrival of fall. The smell in the air, the slight change in temperature, the shift in colour of the day, all signal the closing down of summer.

That was yesterday – Sunday morning, just past the middle of August. There is still a third of the month before September. There will be many more summer days – sunny, hot and humid, or overast and muggy, or brilliant sunshine with a more bearable temperature, but interspersed with them will be those slightly crisper days which will become more frequent as September turns to October.

The loveliest time of the year, here in NS, is mid-August ’til end of October. Who knows what awaits us this year – it’s been an unusual year of weather from the get-go. Our winter had less snow than we’ve come to expect, spring was the wettest we’ve ever seen with continuous rain. Summer seemed to start late and with unusual heat came torrential rain that extinguished the uncommon forrest fire conflagrations raging in a number of locations but also resulted in destructive flooding.

Will we experience a more “normal” transition to fall? We all hope so. In gardens, flowers are past their prime, grass (in spite of the rain) is showing brown spots, soon trees will hint of changing colour. That natural progression will occur, but the weather? It’s anybody’s guess, this year!

Earlier today it was cloudy with a bit of sun shining through, but as I walked from my car to the pool, I was aware of the slight chill in the air. This afternoon, it’s warm and very muggy – the air is heavy with moisture and the forecast calls for rain this evening.

Today, it begins to look and feel like fall.

Closing Down of Summer 2022
Closing Down of Summer 2020
Closing Down of Summer 2015

Monpei – Revisited

The Start Of A Drafted Pattern

I decided to take the Monpei idea further and create a “pants” pattern from it – two rectangles – one each for the leg front and leg back. Instead of the triangular gusset I grafted the crotch triangles onto the rectangles (10 1/2″ x 40″), curved the crotch additions using a French curve, raised the centre back by 1″, took the centre back in by 1 1/4″. I also added “jeans” pockets. The waist I finished with a facing and elastic at the top.

At some point in the past I had bought this Sandwashed Cupro Blend fabric online from Blackbird Fabrics.

Cupro is a ‘regenerated cellulose’ fabric made from cotton waste. It is made using the teeny tiny silky cotton fibres, known as linter, that stick out of the cottonseed and are too small to spin. The linter is dissolved into a cuprammonium solution, which is a mixture of copper and ammonium, dropped into caustic soda, then spun into fibre. Much like Tencel and Modal, cupro is a plant-based material that is chemically processed to produce the resulting fabric.

Cupro is said to have all the positive qualities of silk: it’s silky-smooth and drapes just like the luxurious material. 

https://goodonyou.eco/what-is-cupro-fabric/
Top Tucked In

Not the most flattering photo but I wanted to show more of the top of the pants and how they fit – I tucked in the t-Shirt. The pants fit rather well both front and back.

The finished pants hang/drape quite well – no pulling at the front crotch, the side seam is straight, the back hangs nicely from the bum. I purposely hadn’t pressed the centre front/centre back to allow the drapey fabric to fall where it wanted. However, it turns out there is absolutely no give to the cupro fabric so when I sat in the pants they pulled tightly across my lap and wrinkled a lot.

This is, after all, just another experiment – I’ve ended up with a wearable muslin (although I can only wear the pants one day then they have to be washed – pressing alone doesn’t eliminate the wrinkles).

So how do I change the pattern to reduce that amount of wrinkling? Obviously by adding a bit of fabric across the front. That’s what I plan on doing next – I will add 3/4″ to the body portion of each side seam, along with a fly front as well as shaping the side seams so the top fits without elastic (although I may still want/need elastic in the back).

I’ve already pulled from my stash a piece of rayon I bought in Bali in 2014. It’s another drapey fabric which should result in a comfortable loose-ish garment. What I’m aiming to accomplish is a reasonable fit so I can make corduroy and wool (yes I have several gorgeous lengths of flannel I bought at Britex in San Francisco in 2015!) pants for winter.

On to the next experiment.

Half A Pair Of Socks

This has probably been the most labour-intensive sock I’ve ever knit!

The lovely dark blue and canary yellow ball of yarn caught my eye when I saw it at LK Yarns a couple of weeks ago. What I couldn’t know was the rest of the colour pallet was dull. I knit the yellow cuff then I pulled out the yarn from the centre of the ball (which I always do), found a medium blue yarn and started knitting. I expected the colour to change within a reasonable number of rows – didn’t happen – 25 rows into the sock I was still knitting medium blue – no yellow or dark blue in sight! When I peered into the centre of the ball, I could see a range of pale greens, but it was clear the last colours I’d get to would be the yellow and dark blue.

This particular ball of yarn turned out to be exactly two pattern repeats – each pattern intended to be a single sock – there was a white segment in the centre of the ball to mark the end of the first repeat. So I was going to end up with a very dull sock!

I unravelled the medium blue back to 9 rows, then picked up the dark blue from the outside of the ball and started knitting. The leg turned out mostly bright blue/yellow – just turning into the soft green as I began turning the heel. But then I ran into more green and more green. A sock for a size 7 1/2-8 shoe was going to finish on a pale green and never get to the medium blue. So I started splicing the yarn. I knit small amounts of the various greens until I got close to the toe, the I picked up the blend into a pale blue, then spliced it again to get to the medium blue to finish.

One sock done. Now I have to watch closely while knitting the second sock – carefully counting rows, so I can work up a colour match for the second sock.

Not gonna buy that yarn again!

Monpei Finished

Just finished the pants. Simple to make, and I can tell these are going to be VERY comfortable!

I was careful to make the crotch gusset long enough that the inseam is straight. The pants are cut from two rectangles; two triangles (which become the crotch gusset) are cut from the top/sides – I couldn’t do that because my waist is the same as my hips. So I cut the two rectangles (leaving them as is) – I merged the front and back leg into a single panel – so no side seam – but making sure the centre of the panel was on the straight of the grain. I also merged the two crotch triangles into a single long triangle with the vertical of the triangle on the straight of grain so I end up attaching a single gusset, rather than two triangles (a narrow one on the front inseam and a wider one on the back). The widest part of the gusset triangle is positioned at the crotch depth position in my case 12″ at the back/11″ at the front. [Click here for full instructions on how to make a montpei. (Click here for the original instructions.)]

When I tried on the basted panels (with crotch gusset sewn in) I could tell the centre back was going to be too short (I could have adjusted it by dropping the crotch gusset but instead I added a back yoke (2″ at the centre back grading out to the sides); I left the front crotch depth as it was. (I also took in the waist 2″ at the centre back – I didn’t need the extra fabric to pull the pants on.)

Because I wanted to add front pockets to the top of the panels I added them at this point; however they should have been sewn on while the panels were flat – to stitch them I measured 3 1/2″ from the centre crotch line marked it with a Frixion pen, turned the pants inside out so I could stitch the pockets with the panel “relatively” flat. Because the monpei have no side seam, I stitched down the side that would have been included in a side seam.

I created a facing for the waistband, attached it, strung elastic through the sleeve that created. I finished by top stitching the doubled over hem.

Done.

Here are the pants with my shirt tucked in so you can see how the top fits and the pocket detail which is hidden when the top is on the outside.

Although these pants have an unfitted straight leg, they fall nicely from my bum. The wider leg is easier to sit in, and the hip, while snug, is plenty wide enough to permit bending over.

BTW, I finally figured out how to get a reasonable photo of myself – I have a tripod which I set up so I didn’t have to focus the camera on my phone, I just had to press the shutter button on my watch – letting the camera remain focused and steady! (Duh… Don’t know why I didn’t occur to me to use the tripod before. Makes getting side and back pictures much easier!)

Because these montpei fit so well, I’m going to take the time to draft a sloper with the two crotch gusset triangles integrated into the inseam thereby eliminating the gusset (as they are on a regular pants pattern). I will adjust the centre back taking it in at the waist and extending the back crotch depth. My inseam seems to be about 26″ in these pants. I will set leg length at 26″ + 1″ for the hem. I’m curious to see how these would turn out in something like a light weight corduroy.

The finished fit is definitely the best I’ve encountered so far! This may be the starting point for any pants I want to make for fall!

On Fitting Pants

Donna DeCourcy wrote me today

“I look forward to your progress on pant fitting. Currently, I make all my own clothes and am frustrated by pants. I enjoy your blog immensely and finally changed my password and made the roundabout route to get back to finally making and leaving a comment!”

I answered her:

  • jmn Donna, pants fitting and making is difficult and frustrating because you’re working from a flat piece of paper and you’re trying to create a garment that is curvy in a number of different locations that are different on every body, and your body changes constantly!
  • You can’t count on a pattern you got to work once to work with a different fabric that has a different weight or a different amount of give (stretch). You can’t know for sure a pattern you made six months ago will fit you today! Unlike a top or a dress or a skirt which fits more loosely, pants (particularly today’s styles) fit closely, so there’s not much forgiveness in fitting – they fit and are comfortable, or they’re not and you start over again. 
  • I’ve been chasing patterns and ideas for fitting pants for at least 30 years! At the moment, the closest I’ve come to getting a pattern to work is “Top Down, Centre Out” which fits the waistband first, then drapes the pants pieces from that, making the adjustments in the toile/musin as you’re making the pants.
  • That’s why I just make “wearable muslins” (prepared to discard the project) because as far as I’m concerned each new pair of pants (from the same pattern) is still a work in progress, never a sure thing.

I added another comment later:

Monpei #2

This pair of pants is a Monpei: Here’s how I made them: https://jmncreativeendeavours.ca/2021/07/25/the-japanese-monpei/

You might want to give this idea a try. It’s surprising how well they hang on me! I’m about to make another pair from some Japanese katagami fabric I’ve had for a couple of years.

Barbie “Pink” (& other stuff)

Pink Outfit

It was sunny earlier today. Warmish. I pulled this pair of pants and this t-Shirt from my closet to wear. I stopped at a friend’s house for iced tea during the afternoon and her comment,

“Oh you’re wearing your “Barbie Pink” outfit!” stopped me in my tracks.

Barbie Pink! Really!

I’m never going to be able to wear either of these garments again. I’m not a “Barbie” fan. I didn’t grow up with Barbie. I was 16 when Barbie was released – well past the playing with Barbie age. Barbie is simply not part of my cultural heritage.

I have no interest in seeing the film – although I’ve read reviews describing the feminist underpinnings of the movie. I just don’t see myself showing up in public again in what others obviously identify as a “Barbie Pink” outfit!

Another Face

I pulled up behind this convertible yesterday afternoon – the “face” was unmistakeable. I grabbed my phone and took a photo – not a perfect image but the face is definitely visible.

More Shoes

What do you suppose went on here – both socks were stuffed into the right sneaker. Both covered in mud, left on the grass.

The Gals

Two of these gals are 89, one is 92! We were taking a leisurely Sunday afternoon drive along the Noel Shore yesterday. Visited Burntcoat, sat at the lookoff for a bit.

Noel Shore

Stopped for ice cream in Kennetcook (good ice cream, BTW). One of those just moseyin’, taking side roads, not worrying about “getting lost” day trips. We had a nice time. Lots of laughter (I’m the “baby” in this group.)

Yard Sale

We encountered this old fashioned yard sale. Someone had emptied the house, and EVERYTHING was sitting out for the taking – there was a small locked cash box (a slit in the top) and hand-written sign above saying “Pay Here!”. All on the honour system (nobody about). We weren’t the only curious visitors.

I found a box of power line insulators – I have owned one for years – I use it as a weight to hold patterns in place when I’m cutting fabric – been looking for more. I picked out three small size ones, left a toonie (a Canadian $2 coin) in the box. They’re in my dishwasher waiting to be cleaned. (Bernice picked up a small toothpick mug for her collection.)

Ahead Of The Curve

I’ve been making clothes for myself for decades. I stopped being able to buy pants that fit without alteration since my early 40s; hence my long-term quest for pants patterns and techniques for fitting pants that would yield me something that fit me. My top measurements are closer to a single size although for the past decade I’ve avoided fitted shirts, t-Shirts, etc. because my waist has slowly, but surely, increased and that affects how any top I might make will fit.

I was laughing a couple of weeks ago with MaryAnn (a sewing pal) about a FBA (Full Bust Adjustment), saying what I need more is a FTA (Full Tummy Adjustment). She got up, went into her sewing room and returned with a book:

Book Cover

Everything you want to know about fitting patterns is here and if your question isn’t answered in the book, it will be found in Jenny’s blog: Cashmerette Sewalongs + Tutorials. Her foray into garment making for largish women is very informative. Her learning to make garments for herself led her into pattern making for curvy women. She’s recently introduced pattern sizes from 0-16 (the original sizing was 12-32). These simple, generally unadorned garments are suitable as a place to start for anybody. She wants women to look good in their clothes and to feel somewhat stylish.

While the book explains the complete range of adjustments in great depth, Jenny starts by describing “grading” – how you use today’s multi-size patterns to fit the different parts of your body. My challenge is I’m right between her smaller sizes and the larger sizes. With a size 12 bust, a size 20 waist, a size 8 bum, I can’t actually work within a single size range. I’m about to write Jenny to ask her advice concerning which size range I should be working in. I’m guessing because I’m a smallish person she’ll recommend working in the 0-16 range and grading my waist beyond the pattern rather than working in the 12-32 range and grading beyond the pattern to fit my bum. I’m going to take the basic pants pattern from the back of the book and size it to fit me (it’s a 12-32 pattern) to see where I get with it. If I’m able to get a fitting muslin using a graded sloper based on this pattern, I’ll be able easily to design whatever features on want on my pants from there.

Let you know how I get on!