Lego Flowers

Lego Flowers

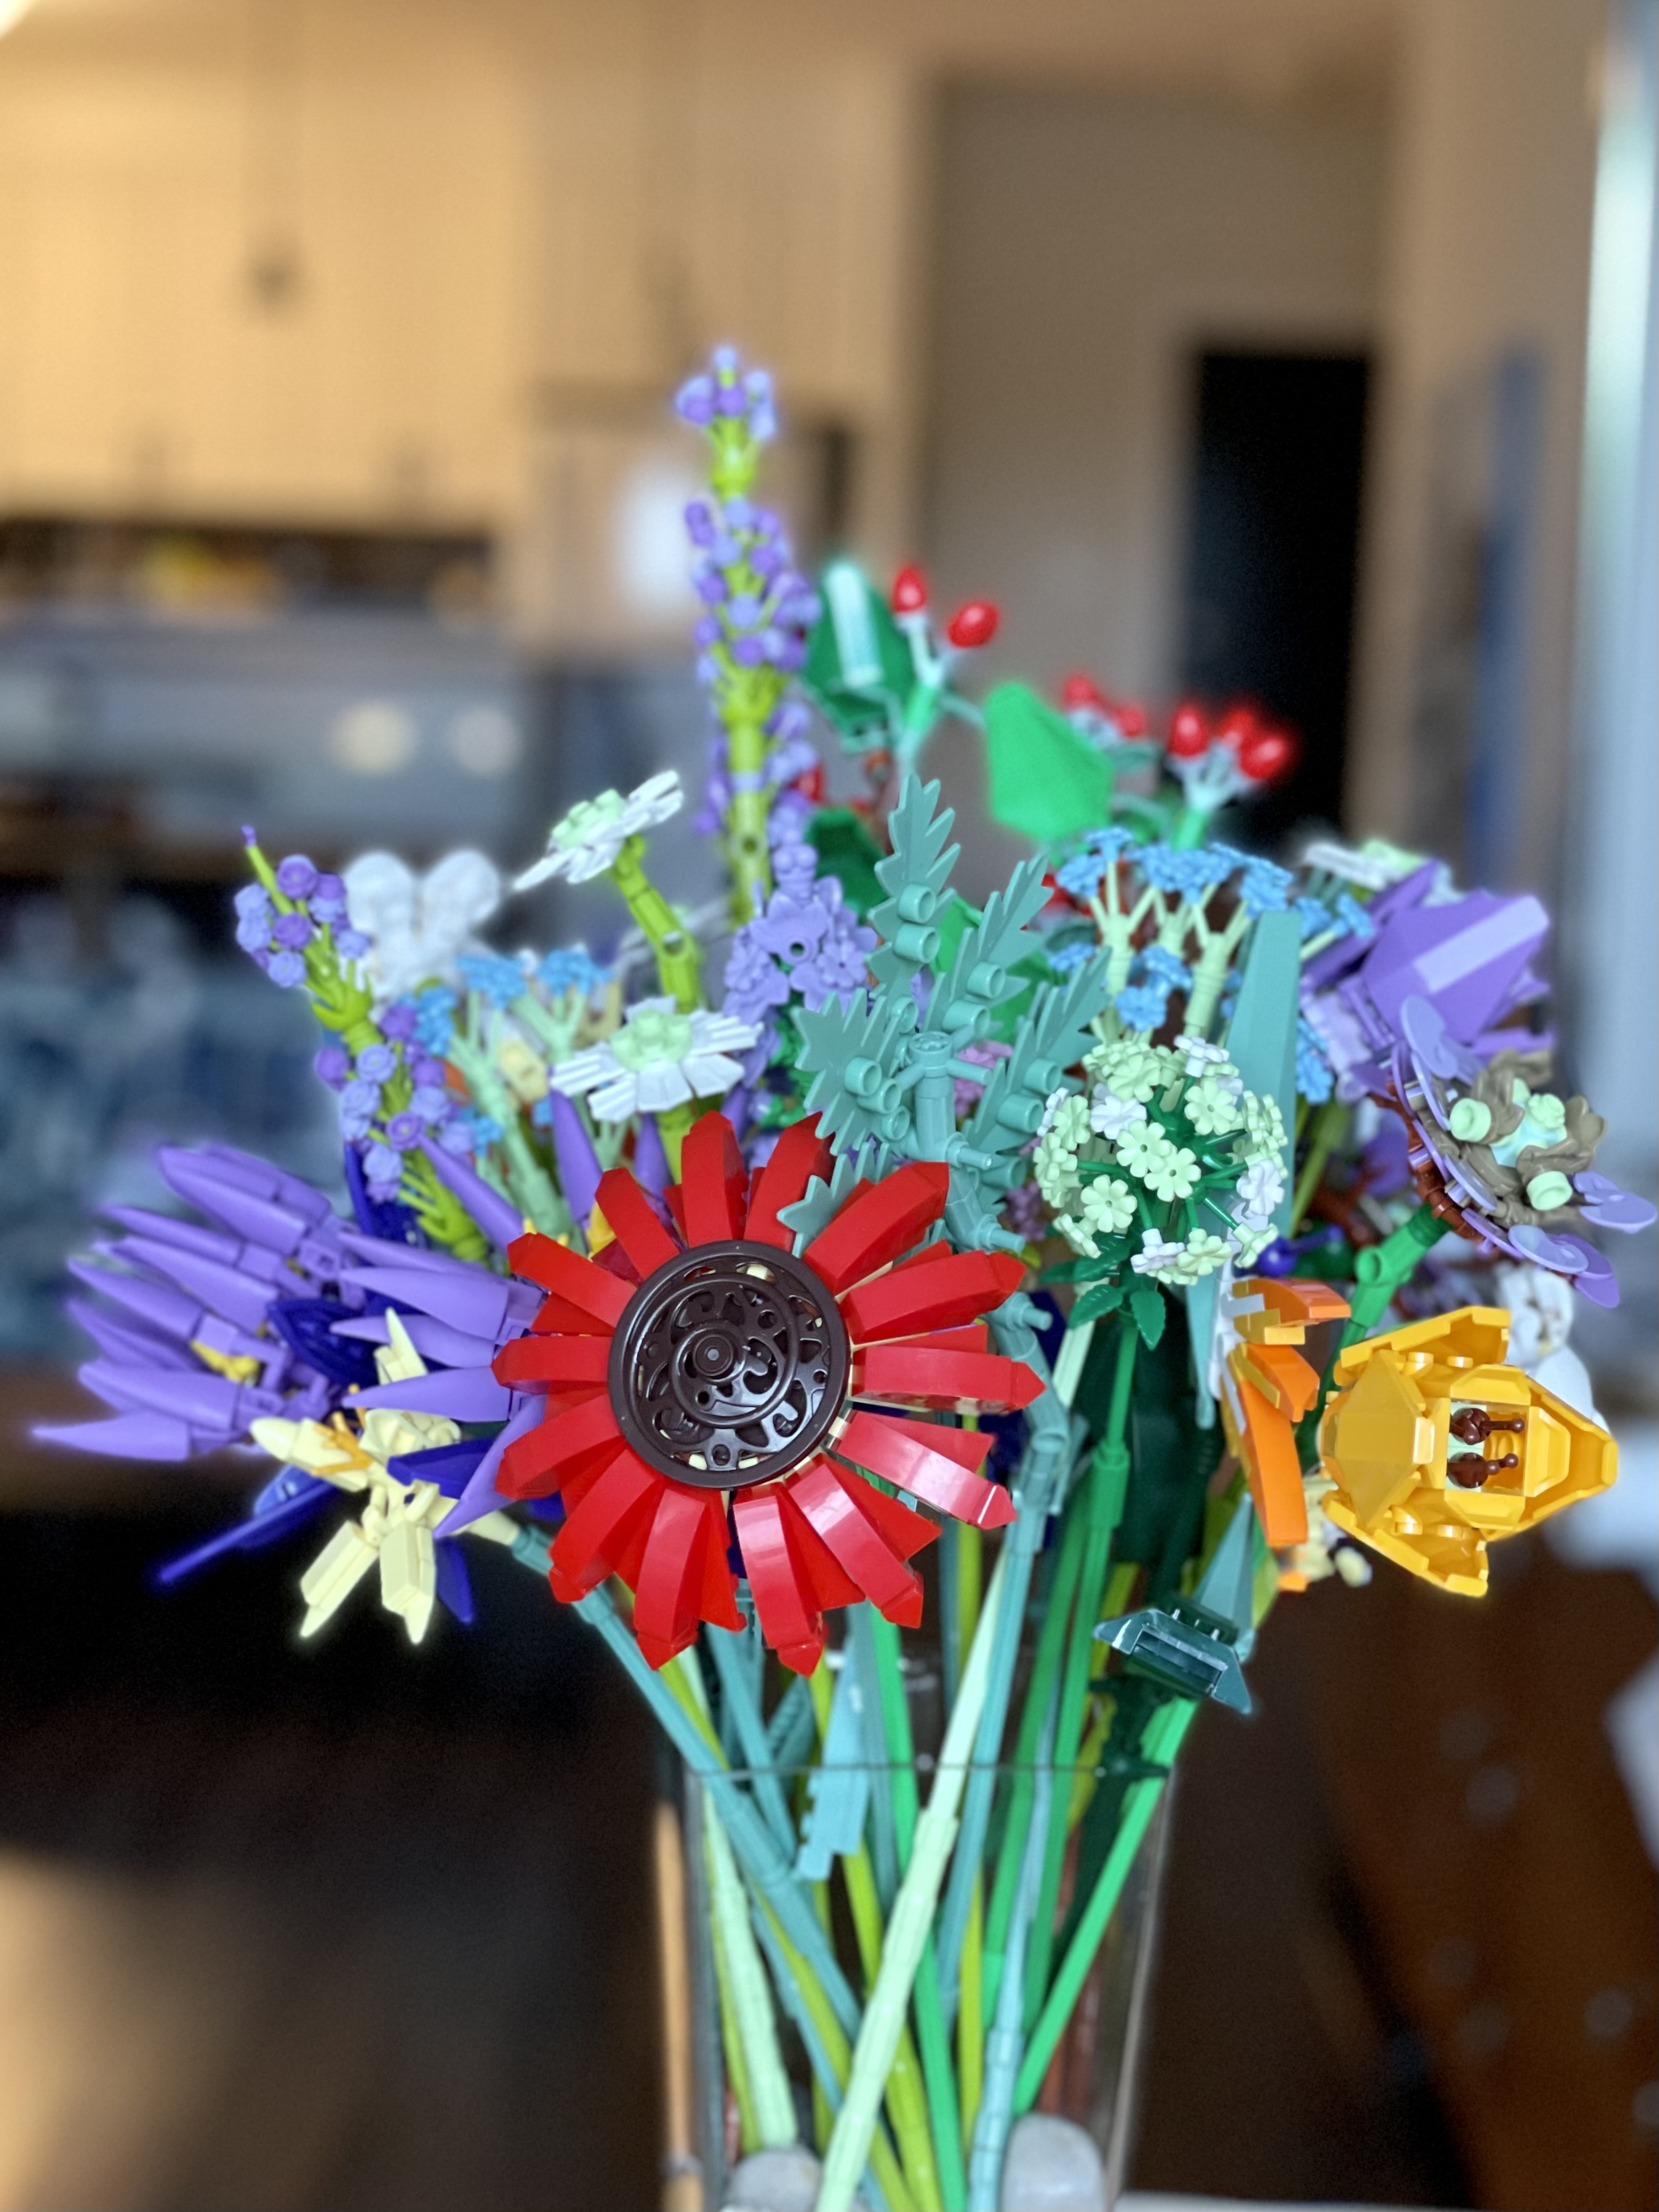
While I was in Toronto, I saw my niece’s lego flowers. She had three bouquets on her buffet, two were real flowers, the third was constructed from lego. From a distance it was hard to tell them apart.

An inveterate puzzle doer, I was taken by the challenge of putting the flowers together so I ordered myself two kits. As soon as they arrived, I couldn’t refrain from opening each box and start assembling the flowers.

The boxes come with two books of instructions – that should tell you something.

Making up the flowers is not easy. I started at the first flower in the book – the lavender. The pieces are tiny and clicking them together (no tools but fingers) proved somewhat difficult, particularly since as I tried building the flower stalk it wouldn’t stay together (after working on a number of flowers, I hauled out my tube of gorilla glue and stuck the intransigent joins together). However, I finally managed to assemble the two lavender stalks.

I moved on to the two alliums – those were easier because the tiny flowers fit the pedicles firmly.

It took me four days to construct all the flowers. I’d been immersed in the puzzle to the exclusion of just about everything else – an enjoyable challenge.

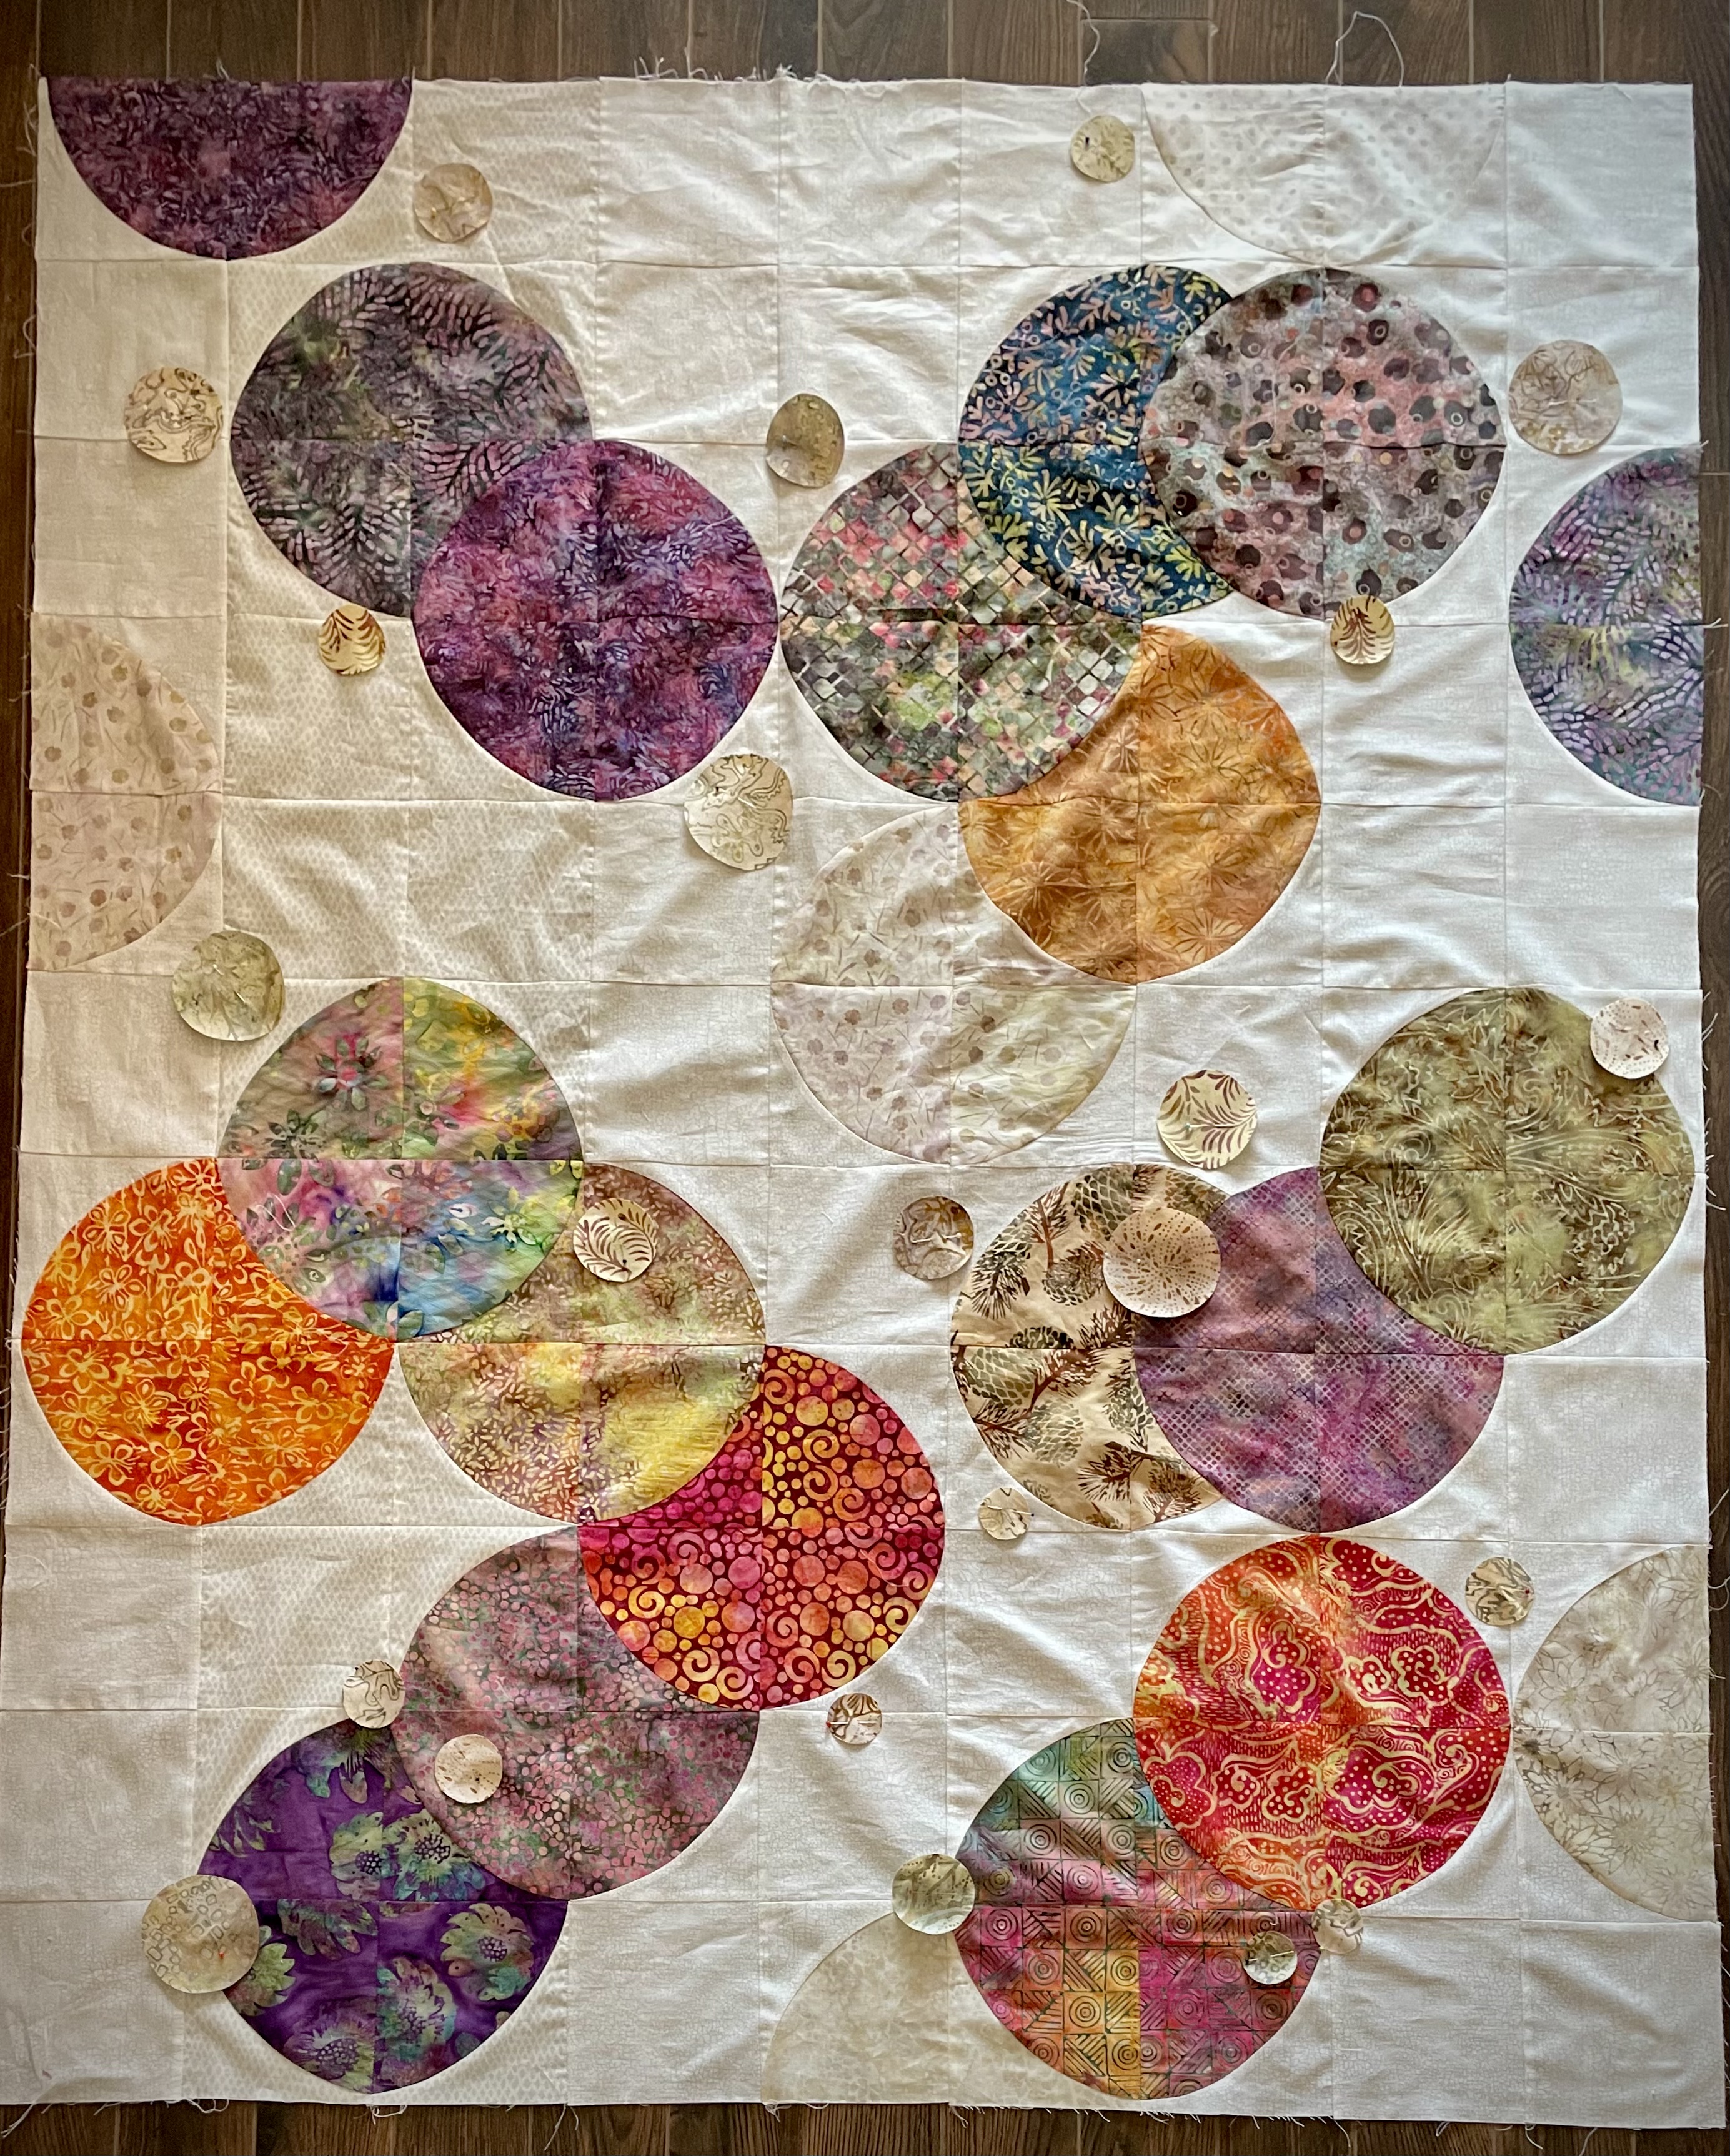
Once done, I was able to come back to the quilt.

I have nowhere to put the vase of flowers. At the moment it’s sitting on my kitchen island raised counter. I’ll probably just give them away in the end.

Quilt Top Finished (almost)

This is the cause of my problem! I finally figured it out yesterday.

My circles aren’t quite circular! I thought it was because I’d cut my quarter circles out a bit large then trimmed them smaller. I wondered whether my sewing was accurate enough. Neither of those.

My problem stemmed from the template I was using to cut the quarter circles! You can see the radius at the edge is 6 1/2″ from the corner to the circumference. But look at the centre radius – from corner to circumference is something like 3/16″ too short! So every quarter circle I cut, was flattened at the mid-point from the seams, and making the “pointy” bits happen at the seams.

I partially solved the problem by trimming the end points 1/1 6″ which helped round out the shape, but if you look closely at the finished quilt top you can still see the irregularity.

To compensate for my not-quite-round circles, I decided to appliqué smaller circles at strategic points – some are placed to eliminate the “pointy” bit at the seams, others to pull your eye from the flattened circumference.

I collected batik bits from a couple of scrap boxes, a range of light beige with a bit of contrast. These smaller circles are obvious but not blatant. I think this will rescue the quilt top. These small circles are pinned in place for now while I think about placement for the next couple of days. I will fuse them in place when I’m satisfied with the placement. I will also edge stitch them with decorative stitches and rayon thread.

If I didn’t mention the lack of circularity, you might not have noticed it, but I think you’d still feel a niggling something about those circles. This way, there’s more to look at and the eye isn’t drawn to that abnormality quite so much.

Because I’d cut all the pieces before I began sewing, the only real solution would have been to discard these pieces in a scrap box to reshape for a different quilt, and start from scratch with a more accurate quarter circle template. I had used all I had of some of these fabrics, I’d have had to redevelop the colour scheme; I’d have needed to order more crackle for background, come up with another stripe background fabric.

Not happening.

I am going to reshape the quarter circles on the back. I can get away with that, because I haven’t cut any “L” shaped pieces yet. So whatever template I find in my collection (or one I will make from template plastic) I will use to reshape the “pie” pieces and cut the “L” pieces. The sewing will be much easier than it was making these blocks!