
Inner panel is pieced – the outer dimensions are square – one corner still needs adjusting, however (later this afternoon).
Next comes the outer binding – a piece of cake!
Art Quilts
Medallion Quilt – Three Corners Completed
Three Corners Completed
Just finished the third corner – one to go; however, I’m thinking I may have to redo the first corner (upper left) because when I’ve finished the fourth I think I’m going to be short on the first side and the panel isn’t going to be square – I might be off as much as 3/4″! Here’s hoping I’m not. 3/8″ – 1/2″ I can fudge when adding the outside border, but more than that will want a redo.
Exhibition at Art Lab, Parrsboro 2017

Welcome Sign at Art Labs Parrsboro NS
Yesterday the exhibition of my eight quilts and eight textile wall art pieces opened at the Art Lab Studios and Gallery in Parrsboro NS. I have no wall space at home to hang these art quilts so it’s wonderful being able to see eight of them hanging in one location.
The opening yesterday afternoon was great fun – quite a few people were there and it was very interesting to observe visitors’ reactions, discovering the detail that goes into making one of these functional art works. You’ve seen each of these pieces while I was constructing it; I’ve written about each as I worked on it. Here is my production for the past year since I had a showing late August 2016.
Now to start on a new body of projects for a showing next year!

Wall #1

Asian Fabric Quilts

Grey/Yellow Quilt and Silk Quilt

Sunflower

Three Wall Art Pieces

Framed Wall Art Pieces

Waiting For Wind

Two Blue Quilts
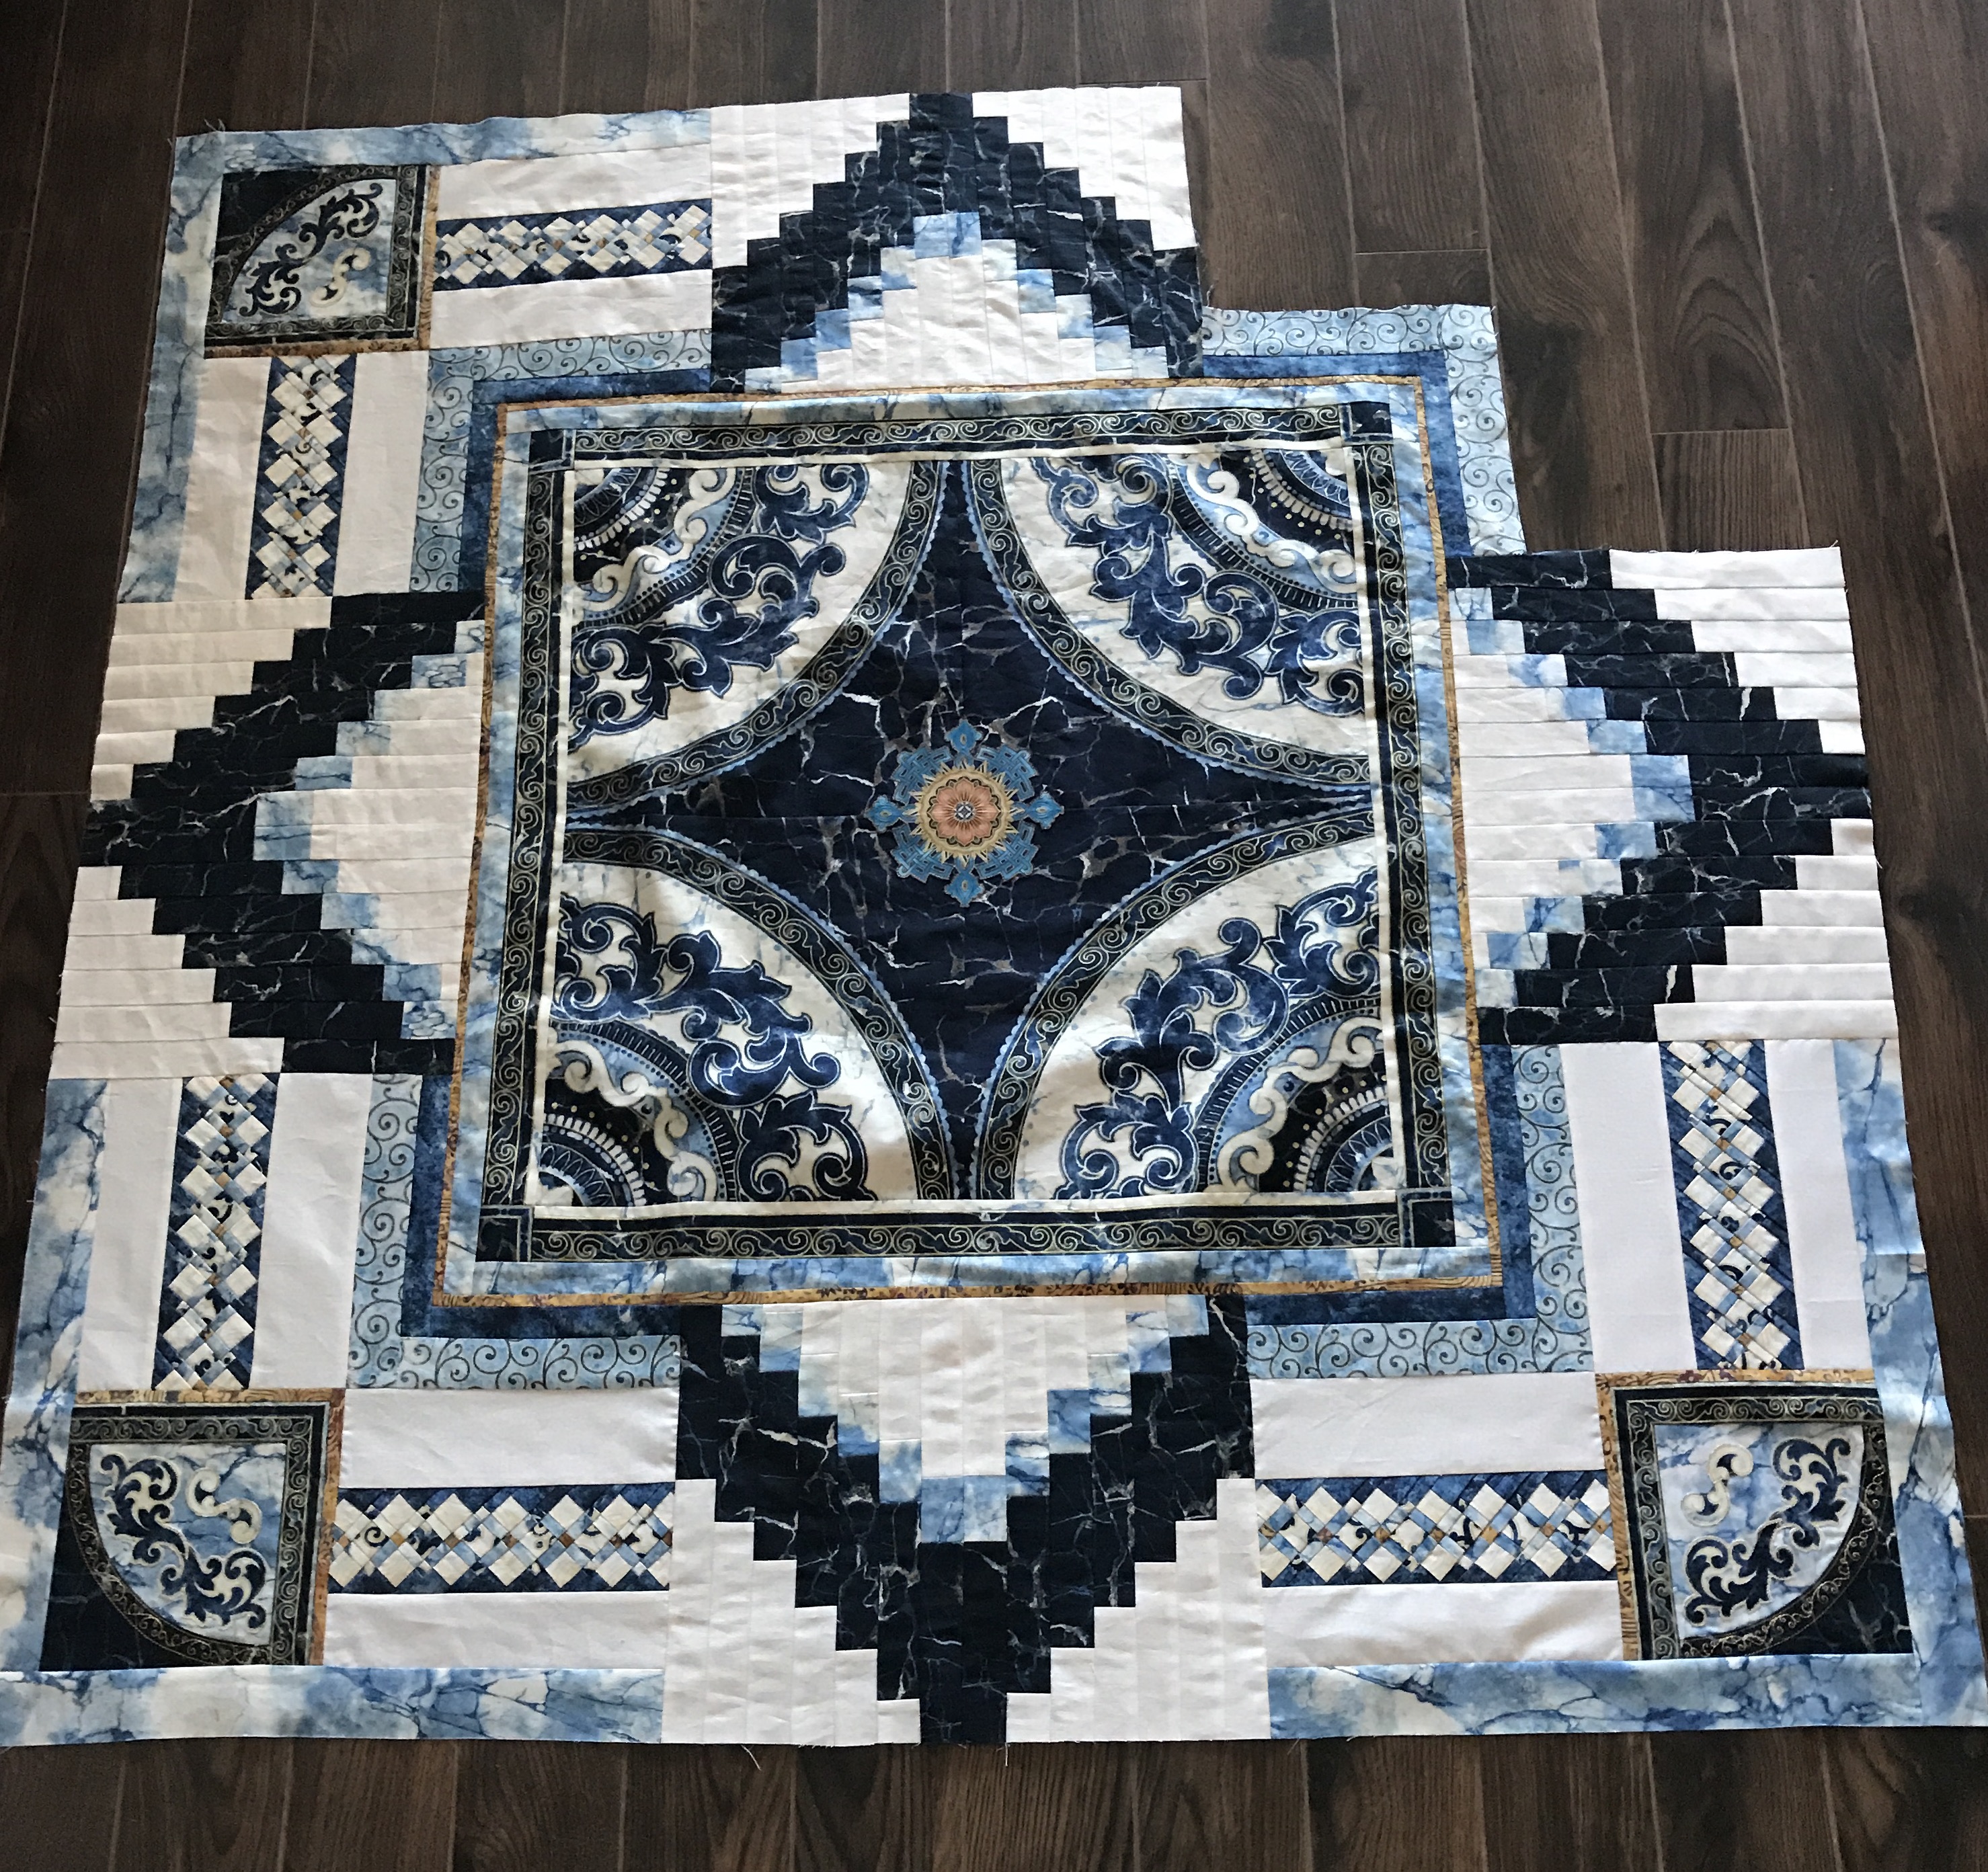
Medallion Quilt VII – Update

First Corner Completed
I have finally got this corner to lay flat – it’s been a challenge getting the sizes of all the elements precise. I’ve sewn, picked out seams, sewn, picked out seams at least three times making small adjustments until I’ve been able to get this corner to work. It’s not perfect but it’s close enough that when the quilt is done and the wide patterned border is added nobody is going to notice the imperfections.
Three more corners to go.
What’s made the piecing so difficult is I wanted the seminole strip to extend past what would have been natural piecing lines so that it remained in one piece. That’s meant fitting overlapping pieces from the upper left to the bottom right. Partial seams everywhere. I’ve discovered I’m getting better results by sewing each seam, then opening the end where I need to make a join, then re-sewing the seam. And scant 1/4″ seams is crucial – by stitching them just a hint under 1/4″ I have been able to align elements where corners need to meet. Very painstaking work. Probably never do another quilt like this again!
Medallion Quilt VII

Corner In Progress
I can go no further until I do the embroidery on the remaining three corners and piece the seminole strips but it’s now possible to see how I can sew all these elements of the quilt together – attach elements, but then open the edges so I can sew the next piece then resew the end of the seam – in other words: partial seams. I now know what the measurements for these corner segments are as well since I’ve been able to fit in the first of the eight which fit between the on-point border and the corner square.
So now, back to embroidery and seminole piecing!
Medallion Quilt VI
Just finished piecing the remaining two parts of the on-point border. Now you can see the effect I’m after. I also added in a narrow (finished width-1/4″) orange/gold border which ties in the center panel with the corners (see lower right corner). I’ve prepped the four corner drunkard’s path blocks – they’re next on the to do list. I’ve added fusible web to the curlicues – I’ll cut them out during the US Open Tennis this afternoon, fuse them to the blocks, then top stitch them and add the embroidery to the curved seam on that block. I’ve also pieced enough fabric to cut and assemble the seminole strips.

On-point Border Pieced
As you can see, there are still gaps between the plain border sections and the corner block…. I want to extend those sections and insert the seminole strip in the middle – the challenge is how to assemble all of that – I’m going to have to work with partial seams! What I don’t know yet are the dimensions I need for that spacer block (with the seminole strip) to have the corner come out correctly. It would be easy to piece it in the conventional way were it possible to put a seam across the seminole strip but I want that strip in a single piece from the wide on-point border to the corner!
I have no idea how to assemble these corner sections. I’m postponing that problem-solving until after I have all the seminole strips stitched and the corner blocks finished.
Medallion Quilt V – Update
Got it!
Once I thought about embroidery I could consider appliqué. So that’s what I did. I fussy cut two dark scrolls and two light pieces. I glued them in place (I will adhere them with fusible web on the real blocks), then edge stitched them. I started using a double thread but that was too heavy – so I finished with a single thread. Then I embroidered a scroll along the curved edge and on the two binding edges (I will actually have enough of the printed scroll to do two sides – just not four). I also tried a 1/4″ inner border in the orange/golden fabric to bring out that bit of colour – but looking at it now, I think it’s too much, probably will leave it out – just the tiny dots in the seminole piecing).
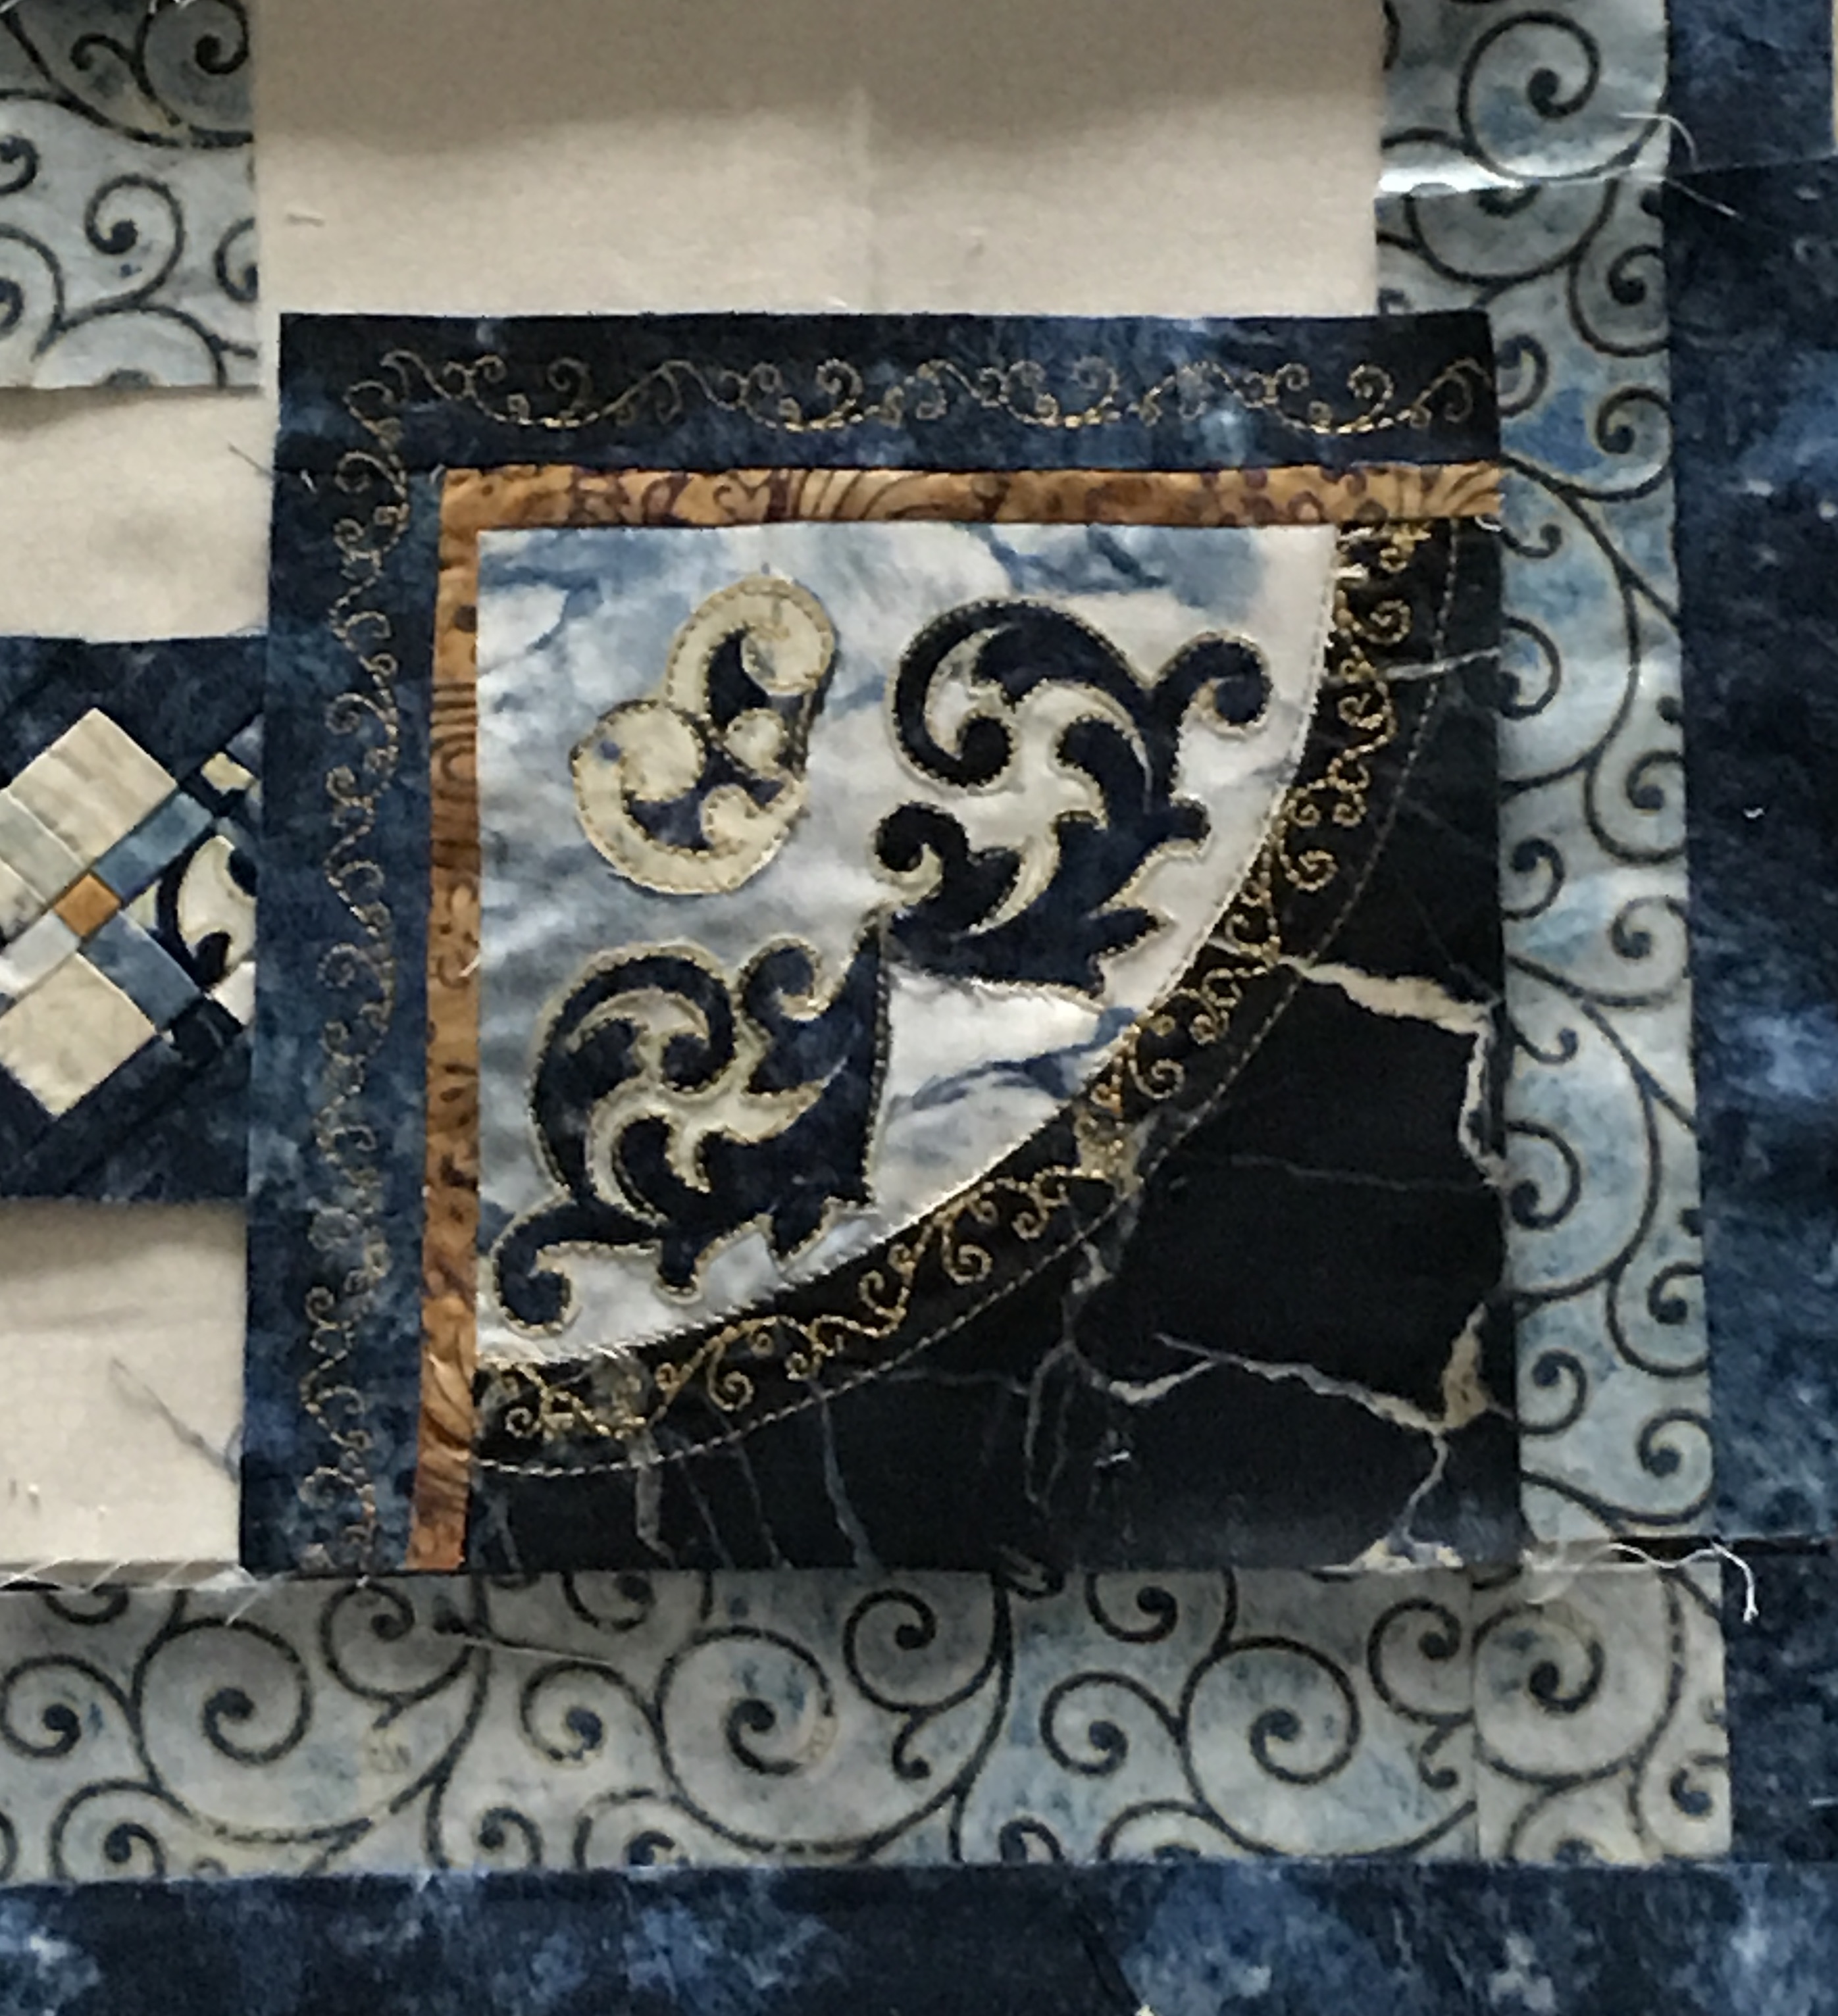
Corner Block – Detail
Here’s the block in context:
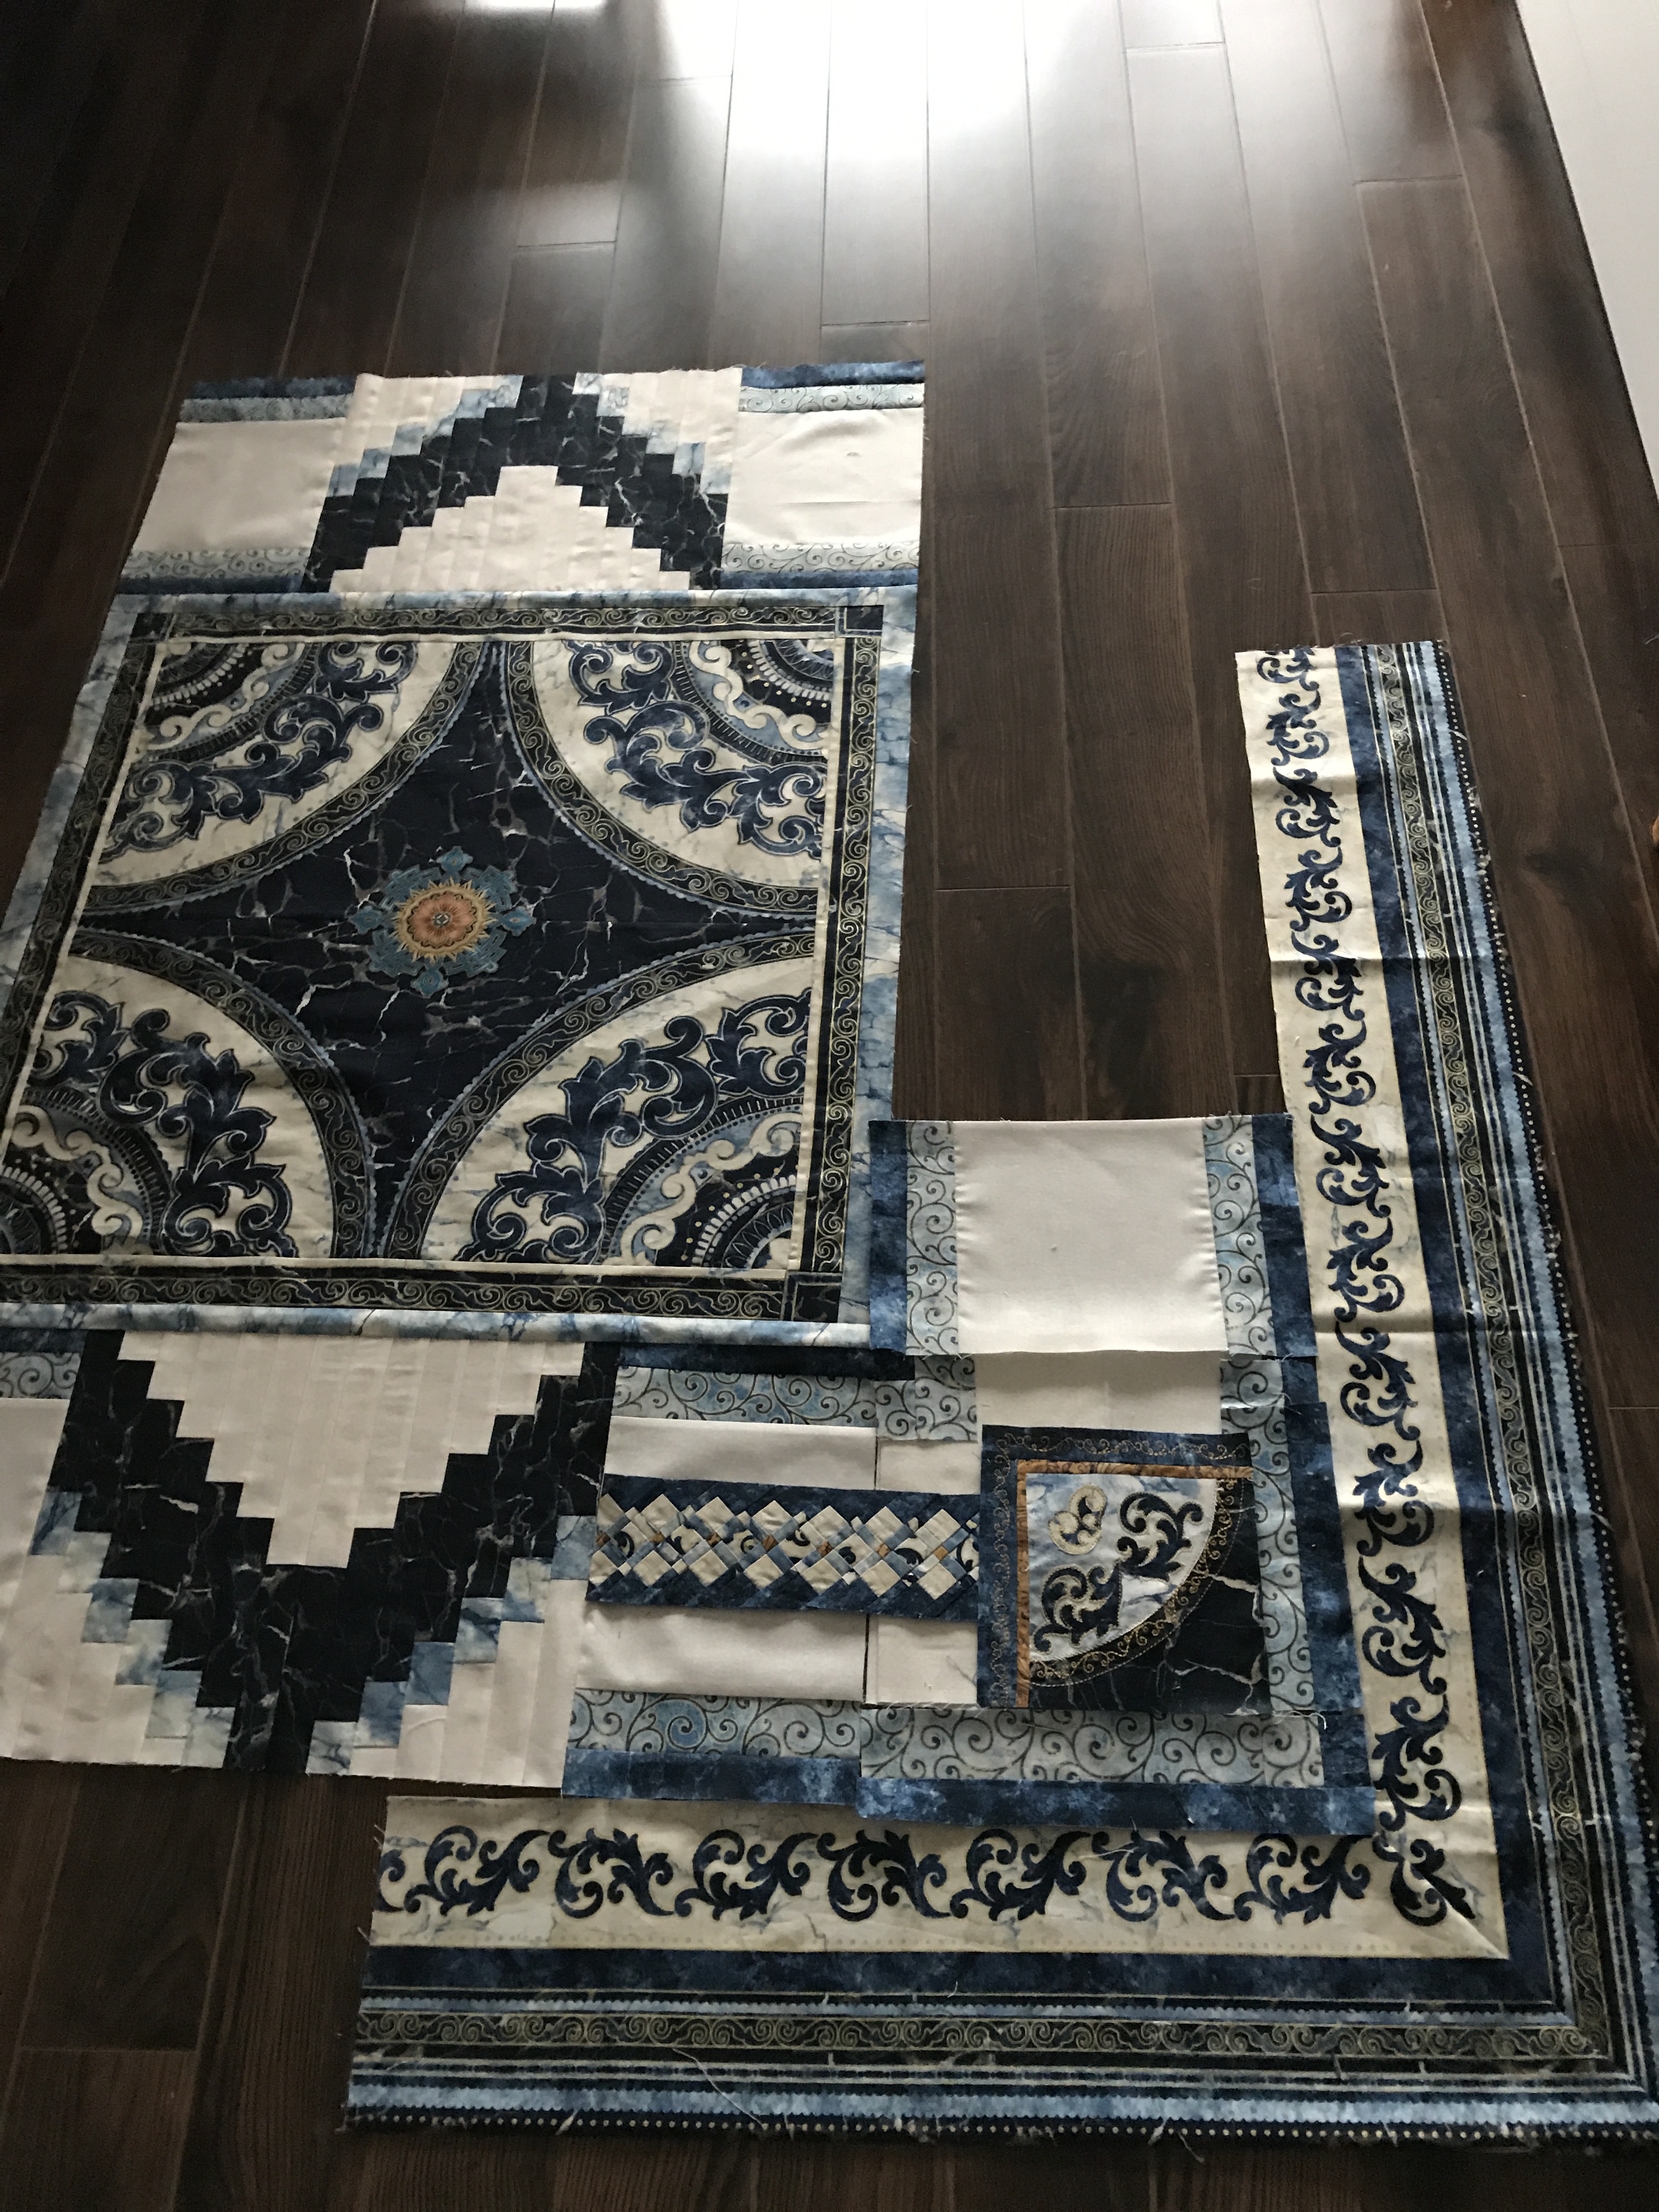
Appliquéd / Embroidered Corner Block
This now has the balance I was looking for. It provides context for the corner block. Next I will have to decide whether to embroider an edge on the seminole piecing – perhaps just a line of straight stitching adjacent to the seam on each side where it’s joined in.
This finally feels right. Now I have to construct four corner blocks.
Preparing for Parrsboro 2017

Quilts and Wall Art for Parrsboro
I’ve been spending today getting ready for the showing of eight new quilts and eight new wall hangings in the Parrsboro Art Labs during the first two weeks of September. First I had to write some kind of biographical blurb for the blast email they send out, then I had to write descriptions of each piece with photos of the front and back of each quilt. Yesterday I was at the lumber yard picking up nine 6′ lengths of 3/8″ dowels to hang the quilts (I still have to baste a temporary hanging sleeve on each), I bought some bulldog clips to hold the dowels at the Dollarstore. I still need a package of push pins to mount the clips to the walls. The showing isn’t until September 3 so I still have three weeks to get everything done in time.
I love seeing my art hanging in one spot. I don’t have room to display quilts in my apartment—they live folded over hangers in a closet. To have eight of them fully displayed at once is such a delight. I’m not expecting any of the quilts or wall art pieces will sell (the prices reflect the actual cost of the materials, as well as my labour and creativity, which sets the price well above what people locally expect to pay for a quilt; however, I consider my work to be art and so I’ve priced it accordingly). Nevertheless, these pieces of functional and decorative art will be seen by a reasonable number of people and that makes this extra work worth while.
I’ll post photos of the showing after it’s been hung in the gallery space. And if you’re interested, here’s last year’s show and the show the year before.
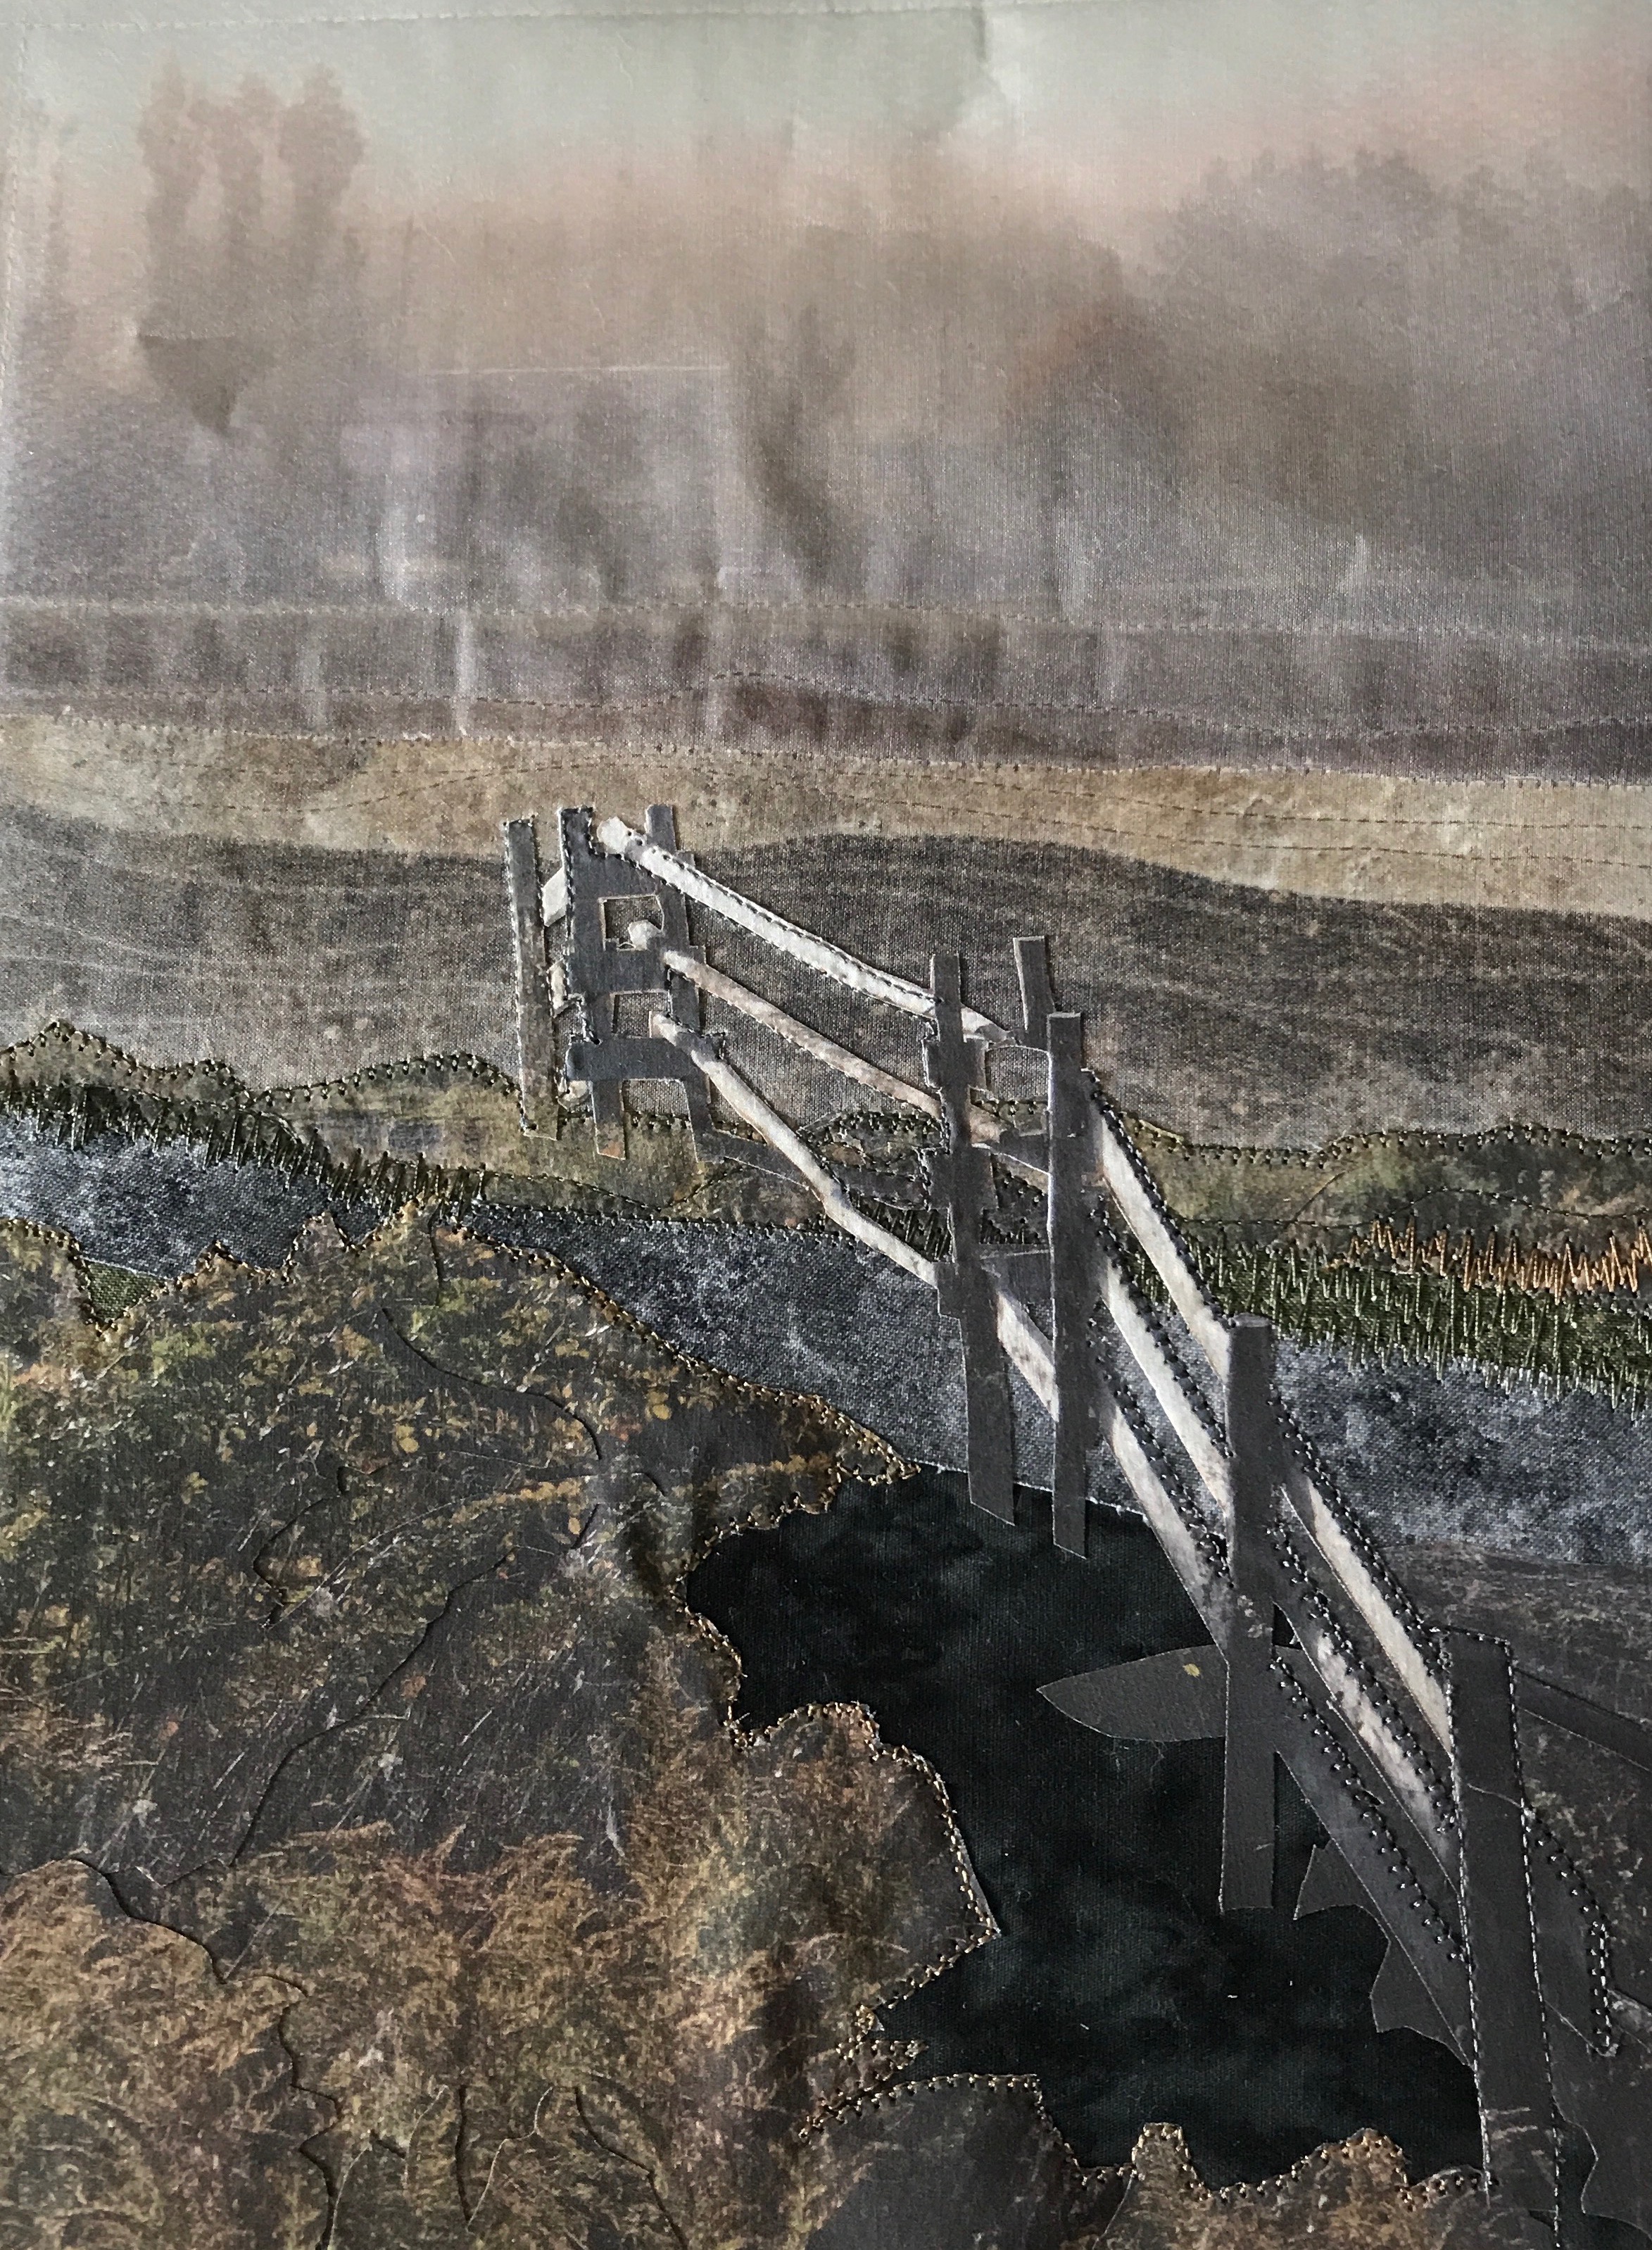
Foggy Morning – Completed
Done!
Just finished the hidden binding (with a sleeve for a rod to hang the art piece. I darkened the uprights on the fence a bit with permanent marker after I’d put on the dark piping – now the two are more balanced. The border fabric has the texture of old barnboard which brings out the colours in the scene in a way I’m happy with. That fabric was a lucky find yesterday – a fabric by Moda: grunge! And the distant fog obscures the trees and buildings in the distance but when you look more closely you can just make them out (as you would with fog).

Foggy Morning – Completed
That’s it for now. That gives me eight wall art pieces to take to Parrsboro beginning of September.
Foggy Morning – II
Here is the piece after working on it for a large part of the day.
First, I placed the fabrics for the distant background and middle ground, covered them with silk organza (which I fused to the fabrics below – I didn’t want to stitch over the organza (which would have destroyed the “fog” effect I was trying to achieve), instead, I did quite a bit of stitching to suggest the texture of the fields in the distance before fusing the organza in place.
Next, I laid in the foreground, including the fence (which I had very carefully cut out using very sharp scissors from the photograph printed on fabric – did that weeks ago). Then, I began edge stitching all those elements. I have maybe about 1/3 of the edge stitching done – some on the brush in the foreground and on the fence to hold them in place. I was beginning to feel the strain in my back so I stopped working to discover I’d just put in close to 5 hours on the project! Time slips away when I’m working on something like this – “I’ll just to this one more bit…” and before I know it, the day has disappeared.
Foggy Morning – In Progress I
Here is the original photo for comparison – it’s getting there. The colours are somewhat different, but when the thread work is done it should be closer to the photo – that’s what I’m aiming for, anyway!
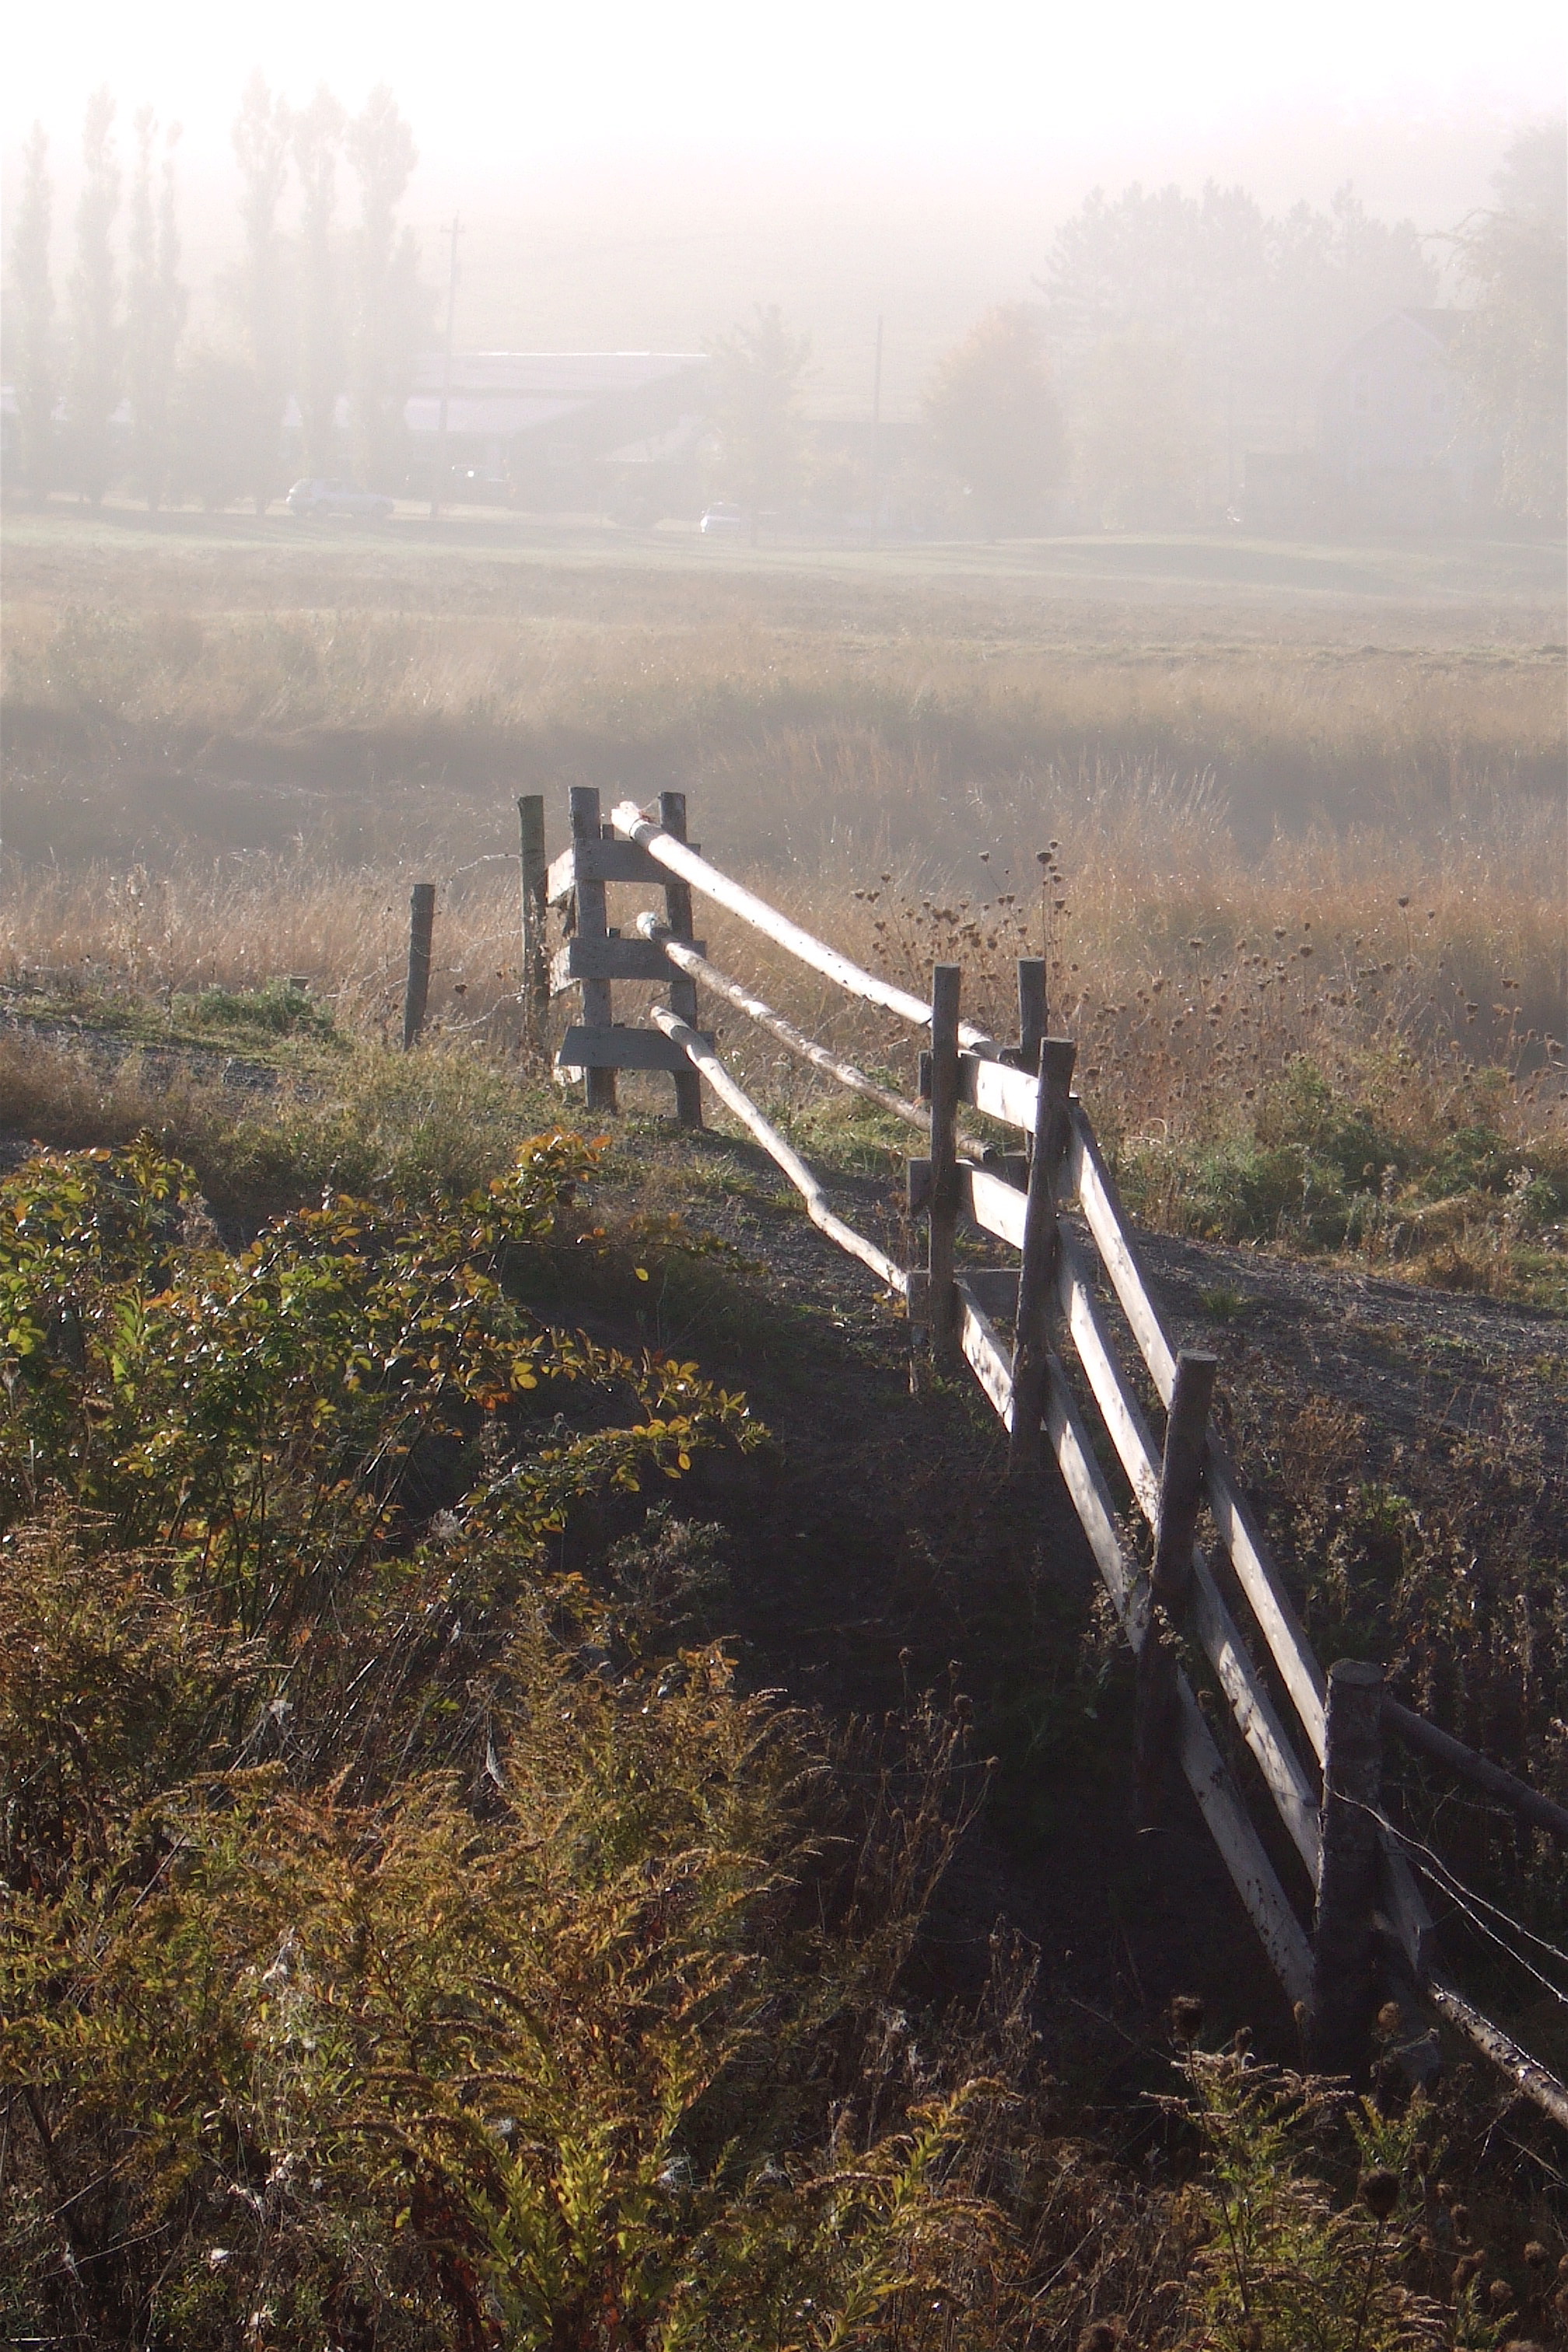
Foggy Morning – Photo
