A bit late for “Merry Christmas” but still in time to extend best wishes for 2024!
May the coming year find you contented, well, and carrying on!
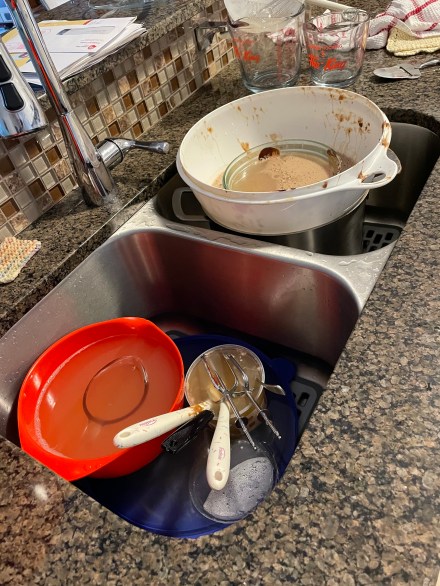
Take life day by day! (That’s all any of us has.) Enjoy each day. Take pleasure from the small things that happen. An unexpected conversation, something nice to eat, finishing a particularly challenging puzzle, being able to do something for someone else, a pleasantry in the elevator, a good workout at the pool, a leisurely walk, the sunshine!
Yesterday, for me, it was finishing the quilt I’ve been working on for weeks, a good Christmas dinner with friends down the hall, and a bit of texting with a distant friend I haven’t been in touch with for a while.
May you feel like “Maggie Muggans” – “don’t know what will happen tomorrow!”
You’ve made it through 2023. All the best in the coming year.
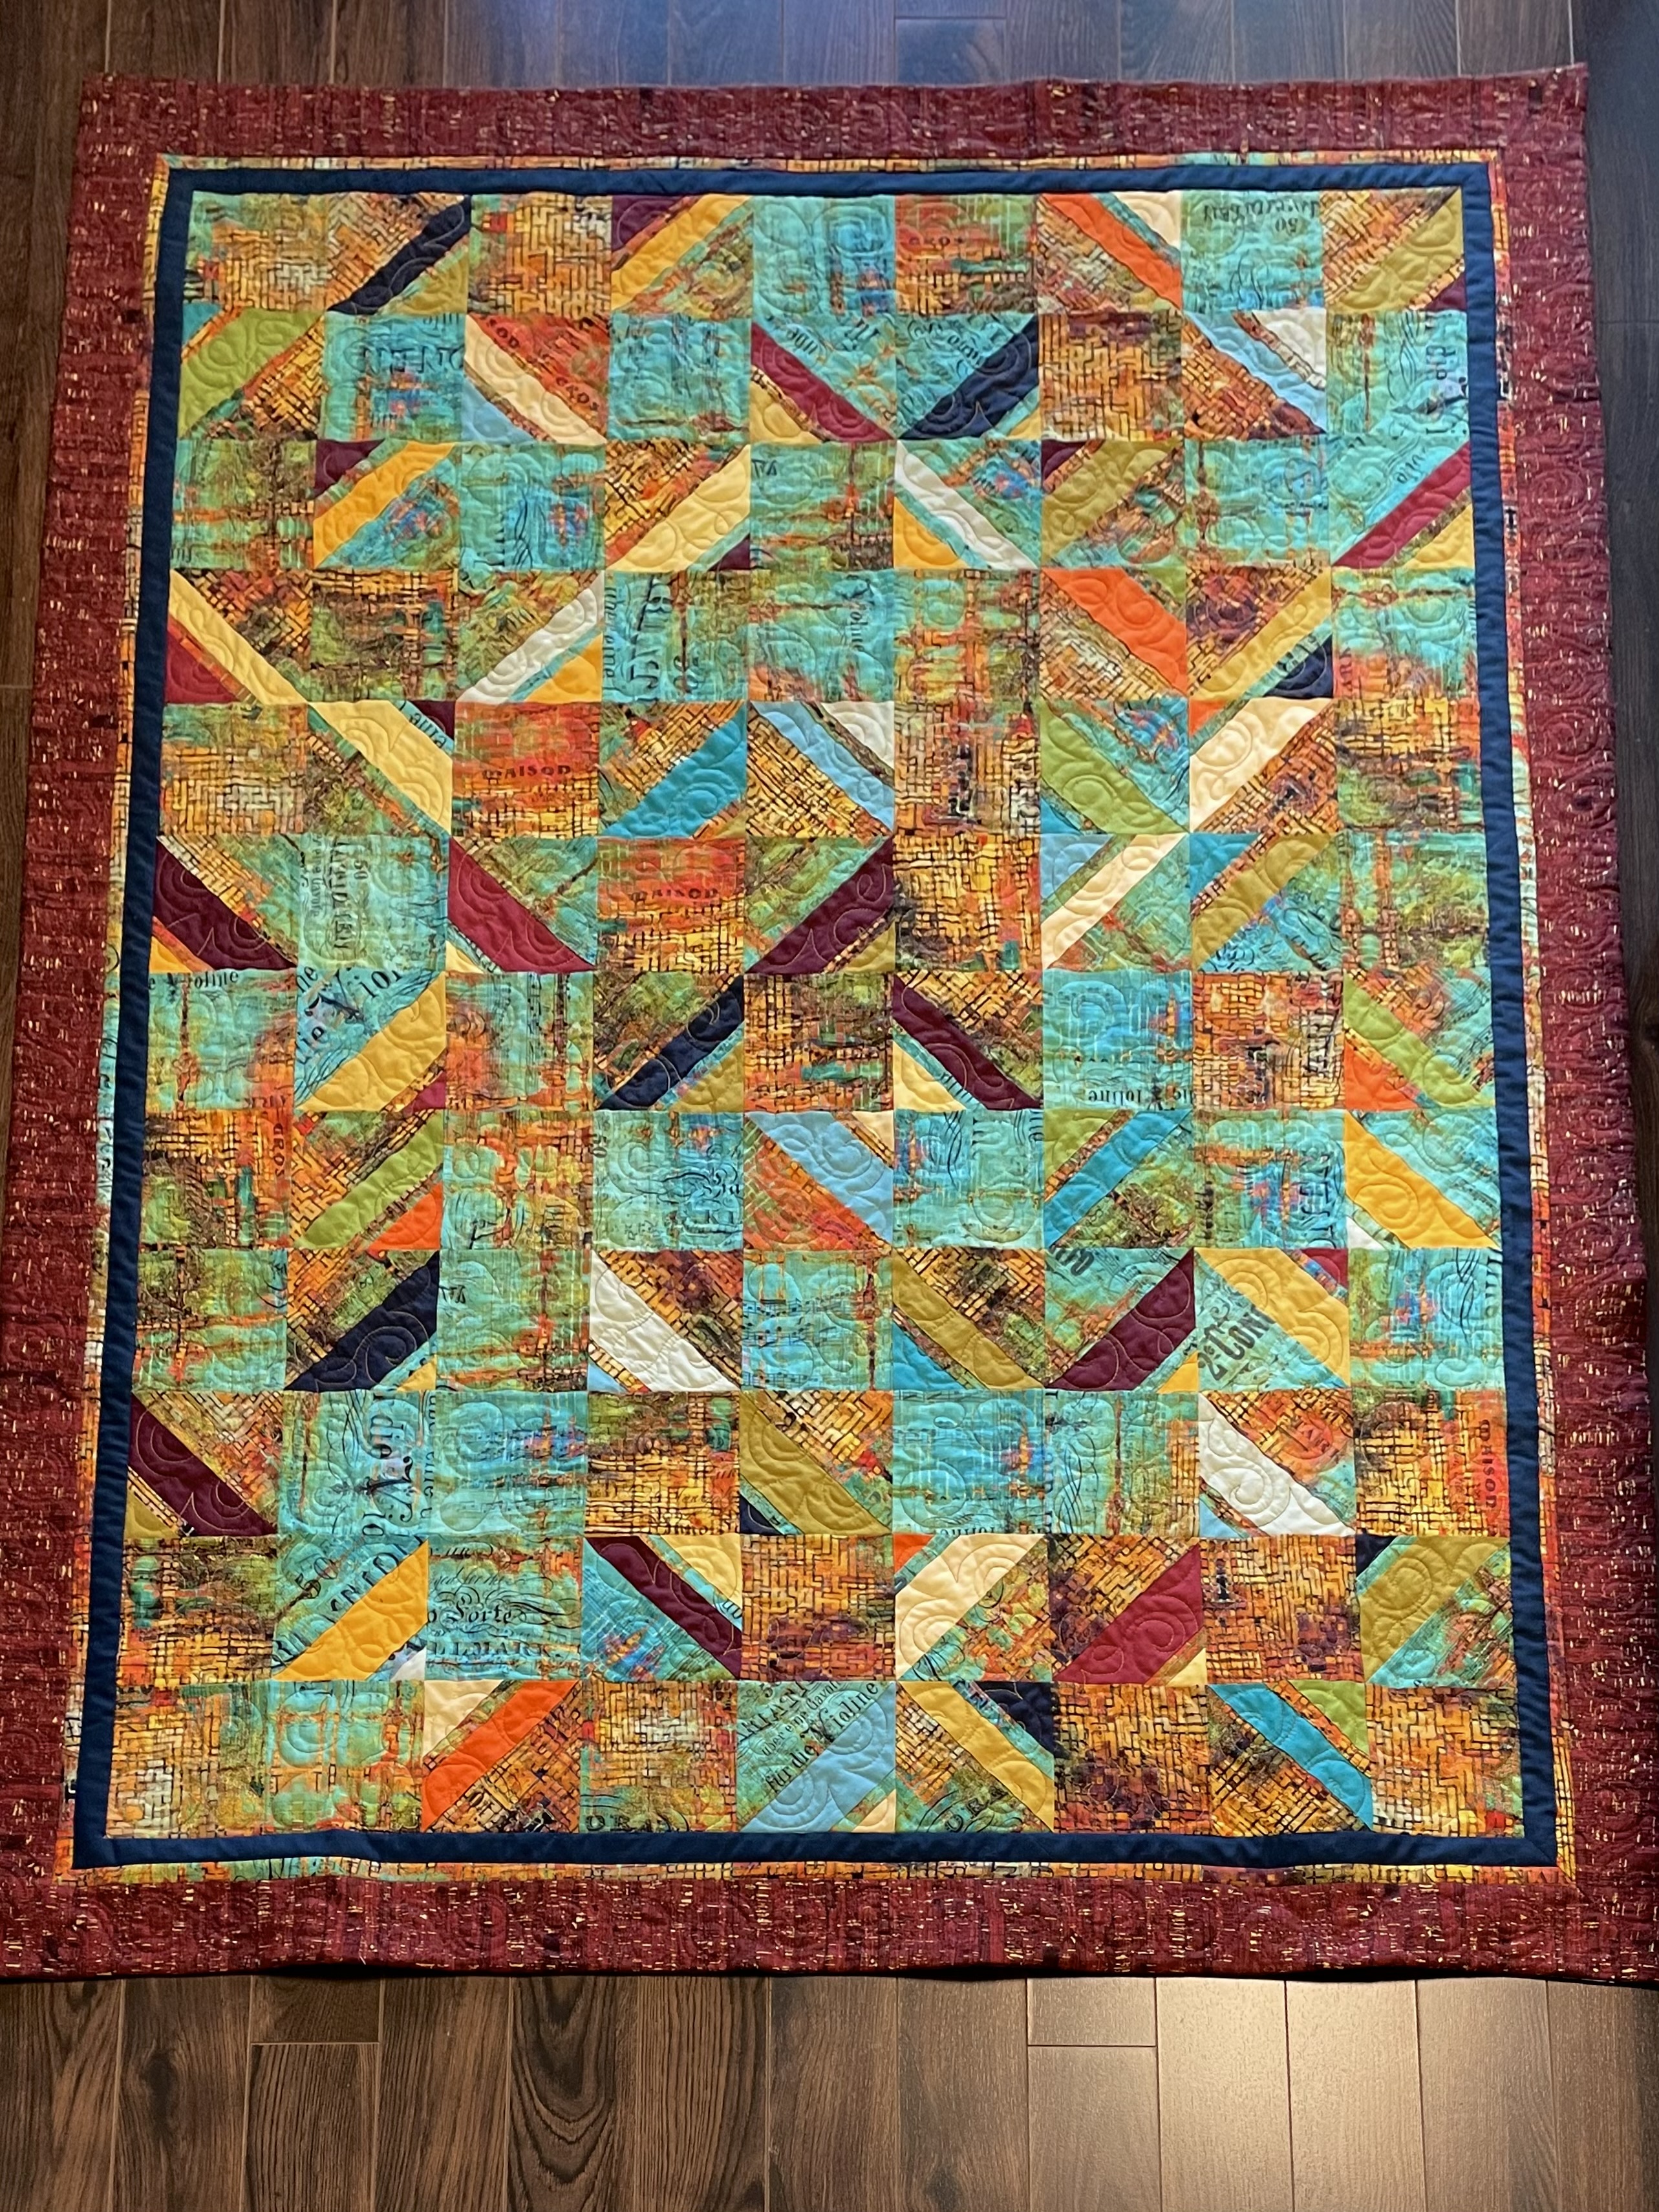
I started playing with this quilt on Oct 12. Ten/eleven weeks ago. I just finished hand stitching the hidden binding on the back! Finally – my Christmas day project – to get this quilt done.
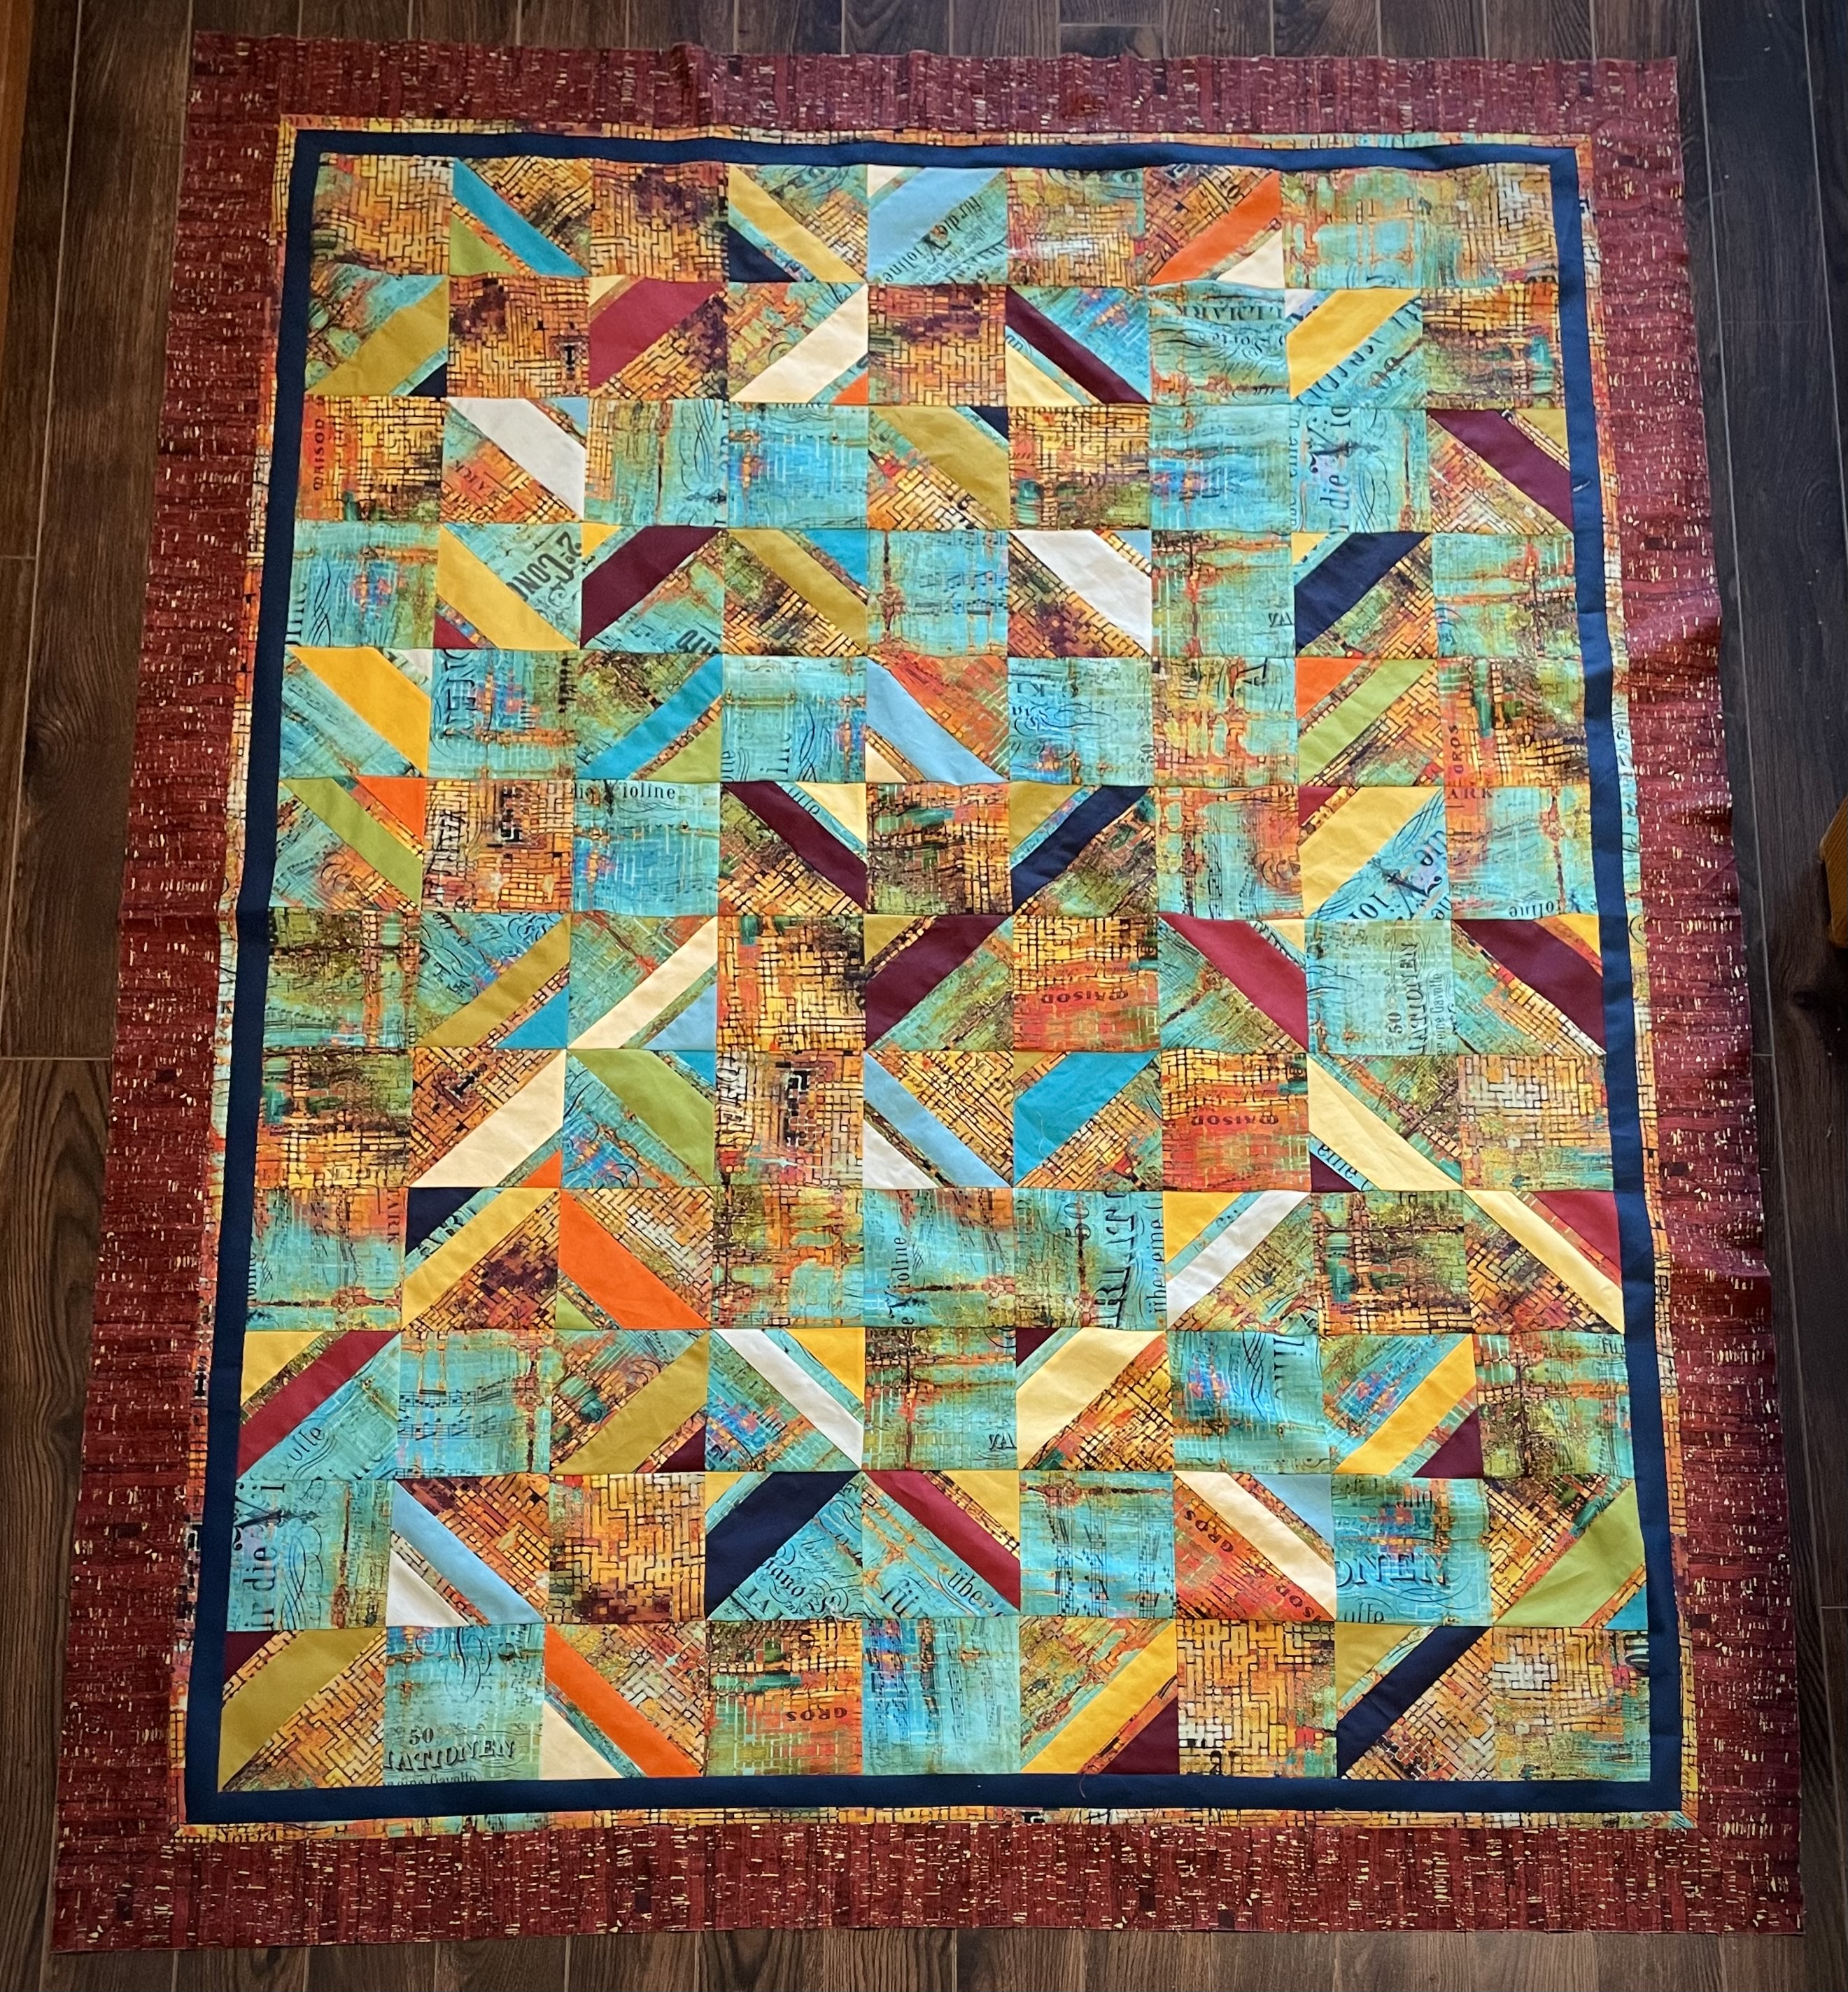
Quilt TopQuilt Back
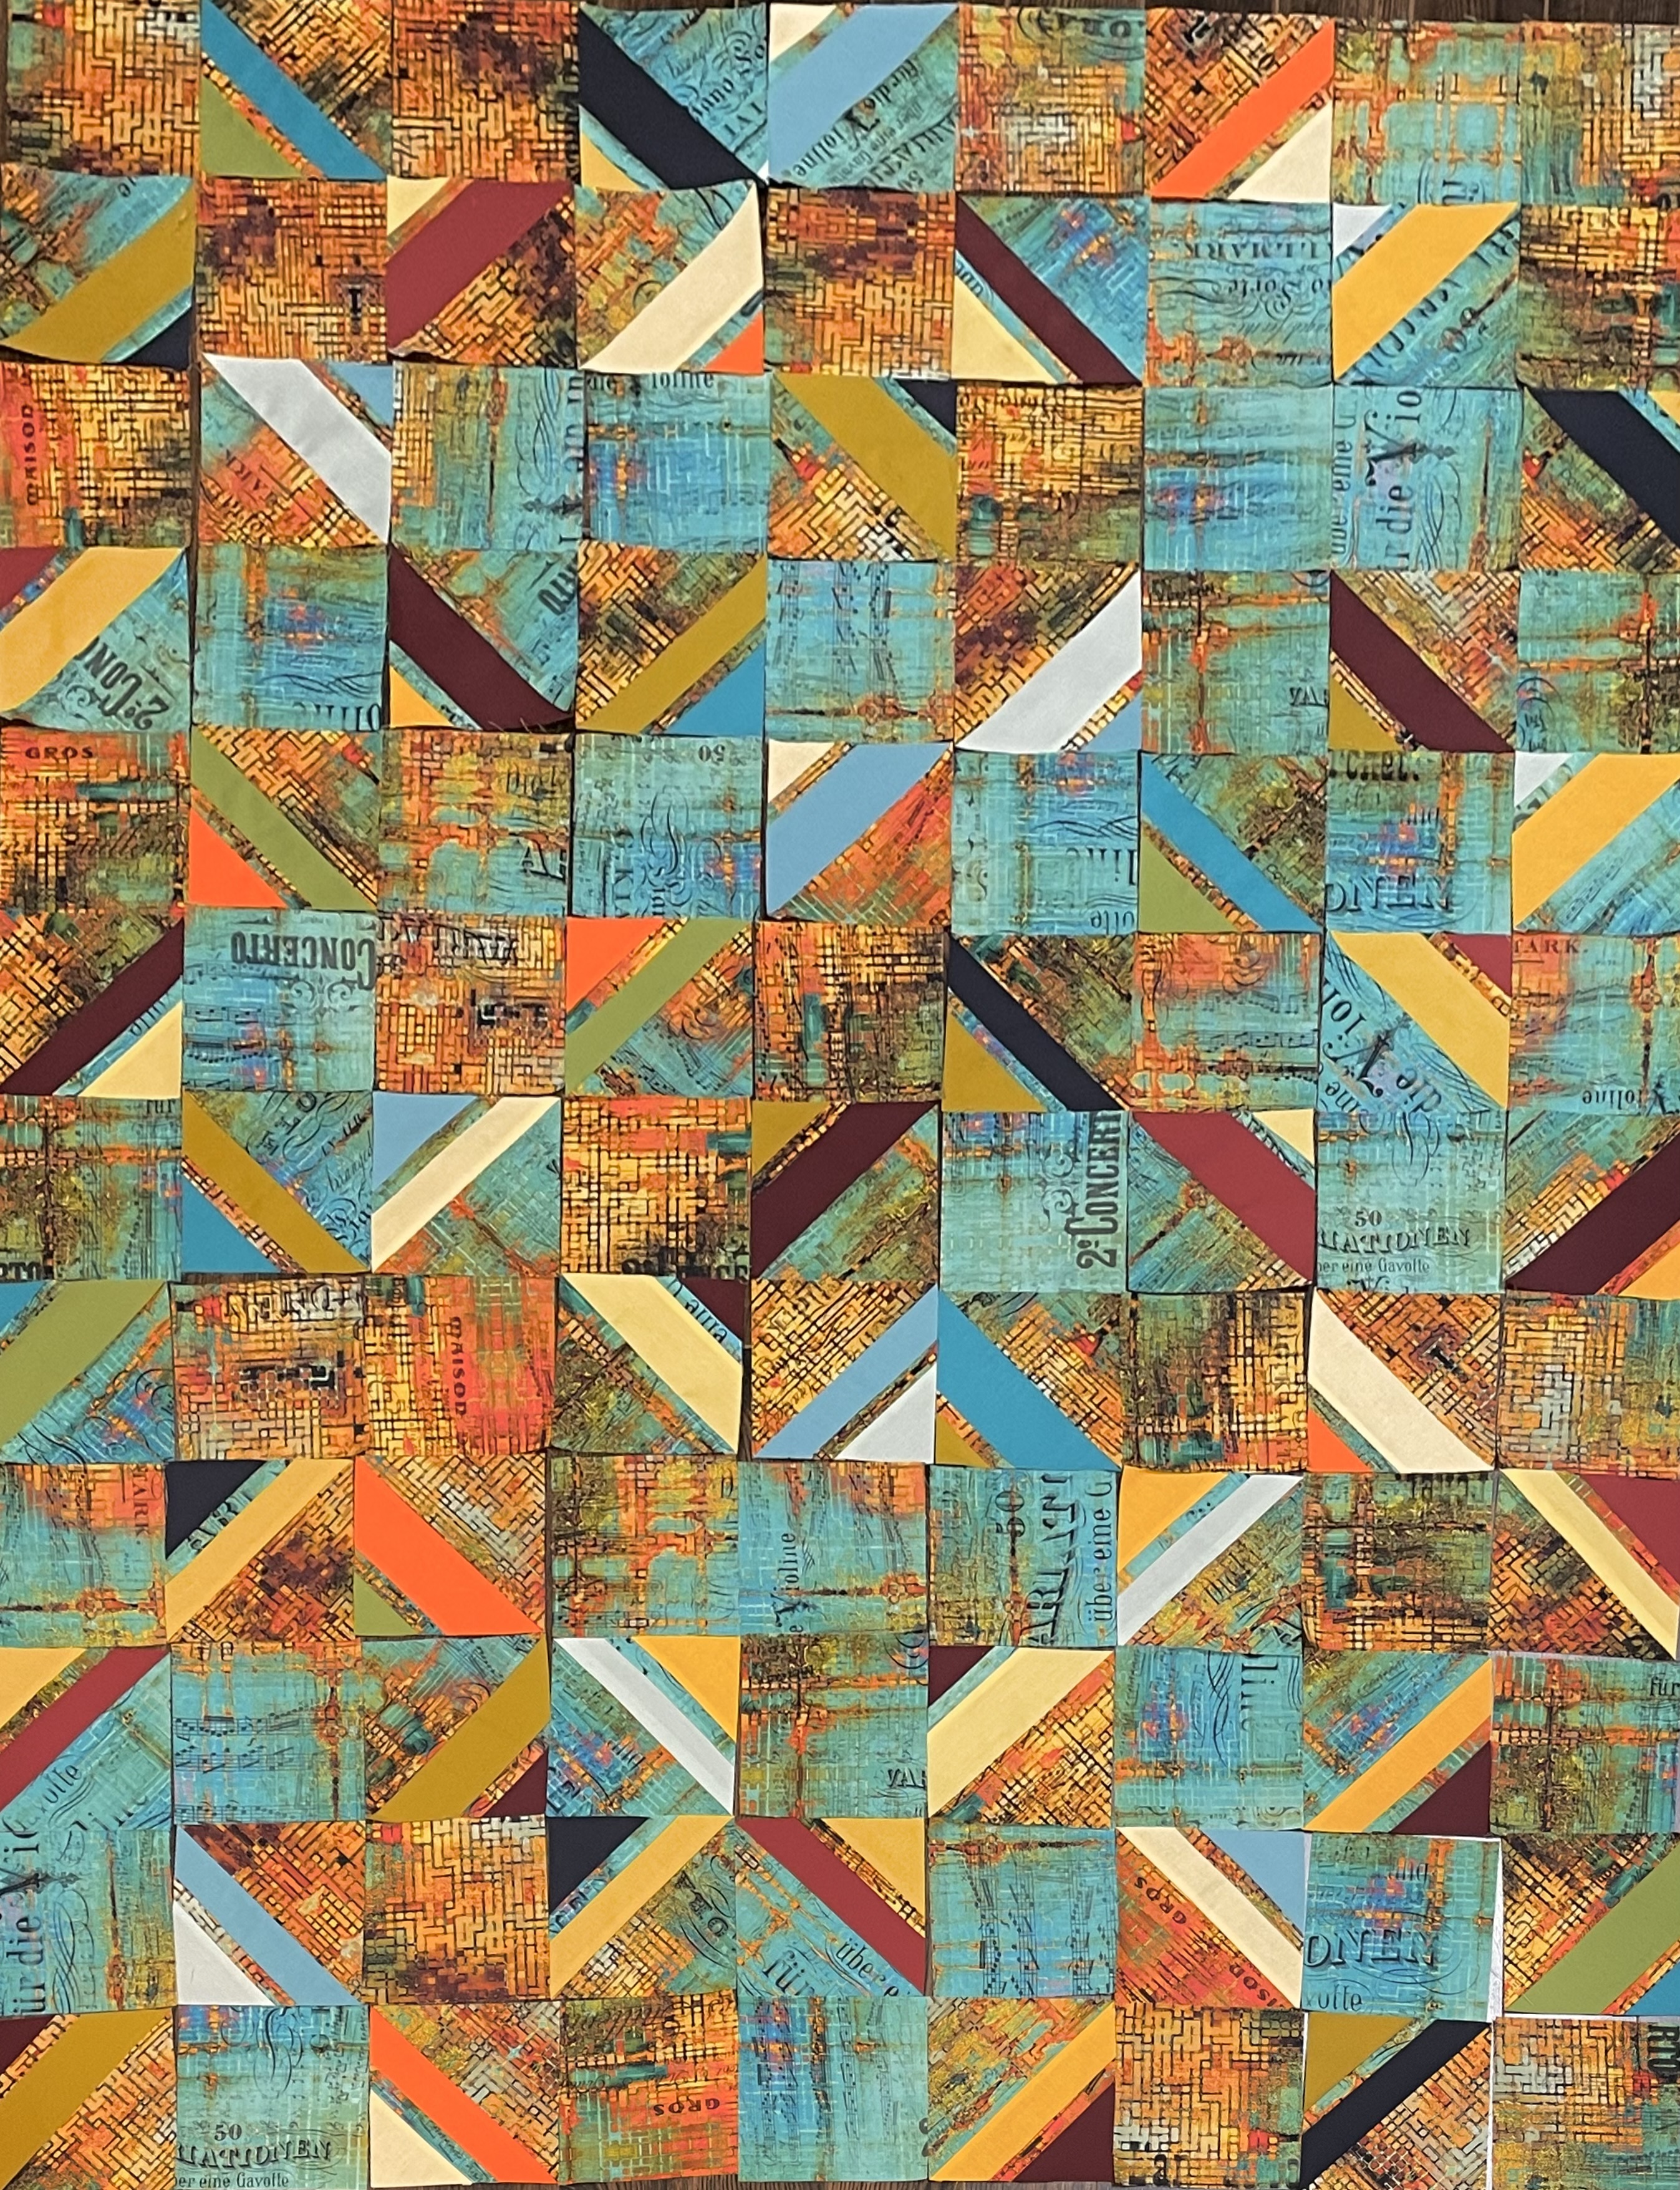
Once I had the quilt top assembled I found I could move along again. I made the decision to use the Holtz fabric intact on the back rather than cut it up. I had to incorporate the two pieces I had in order to have enough to complete the back – that’s even after inserting a 14″ strip I assembled from bits and pieces leftover from the quilt top – a much better use of that very busy fabric!
I would have completed the quilt with a conventional binding, except I didn’t have enough of the bronze cork fabric to do that. So in the end I used the leftover strips from the backing to make a hidden binding.
I’m glad the quilt is finally completed. I kept avoiding it because I knew I wasn’t going to be happy with the finished project – nothing there that pops out to say “notice me!”. In fact, I may decided to showcase the quilt back, which I think is much more interesting, in upcoming exhibitions.
So on to the next project – a couple of wall art pieces which I’ve been thinking about for over a year! Time to start working on the first of them.
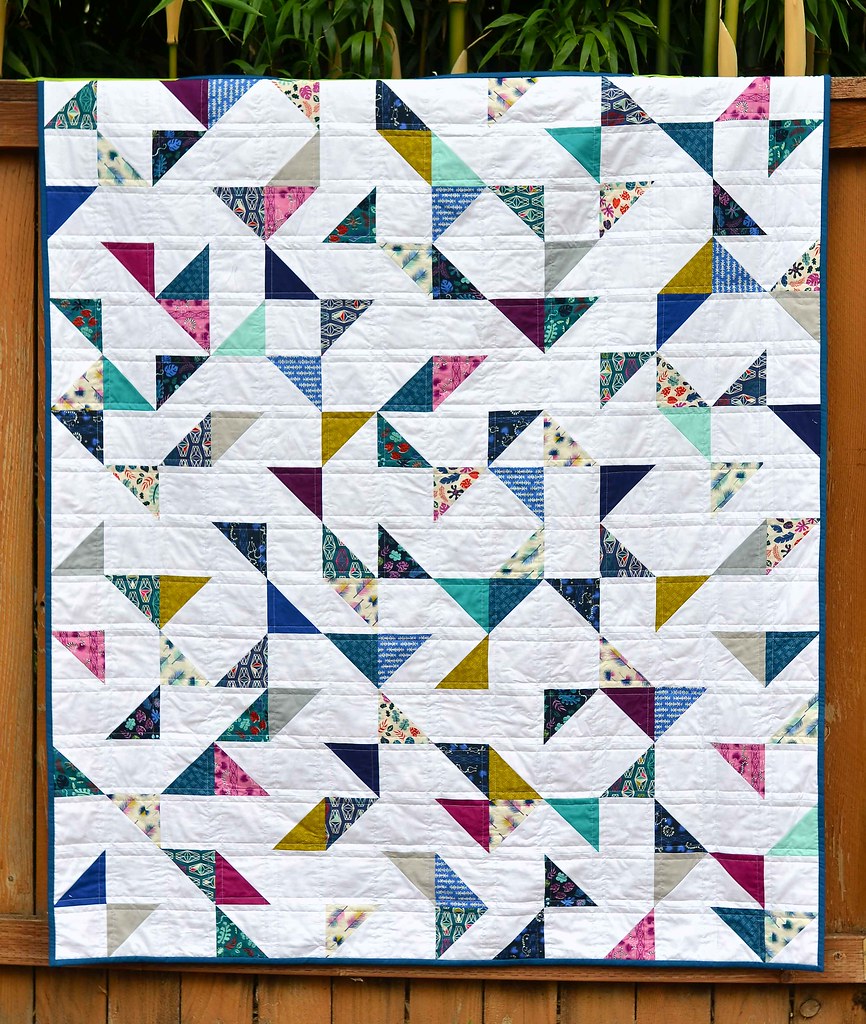
Here it is – the finished quilt top. It’s not the idea I had in my head when I started! It’s what I’ve ended up with, however; I can live with it.
It’s just another half-square triangle quilt; nothing special. The border pulls it together. I’d never have guessed I was going to use the “cork” fabric to finish the project but the brick colour brings out the various reds/oranges/yellows in the print fabric and the solids. One of the benefits of having a relatively large fabric stash.
Did I tell you about the discussion I had with a friend about “the stash”? I’ve decided I can call my fabric collection a “stash” as long as I’m using it to create new work. The moment I stop, it becomes a “hoard” and I turn into a hoarder!
Gotta keep working – I’ve more fabric and supplies in my apartment than I can use up in a lifetime. In the end I will die a hoarder!
Sally mentioned the other day, when I dropped into Sew With Vision about something, she’d like to hang it. I’m all for that. It’ll be interesting to see what people think of it.
Now onto the back. I’m going to use what I have left of the Free Spirit: Tim Holtz, Eclectic Elements, Abandoned, Rusted Patina fabric along with some border remnants, and the unused blocks I set aside. I want to see how large swaths of the fabric works, against a small amount of detail.
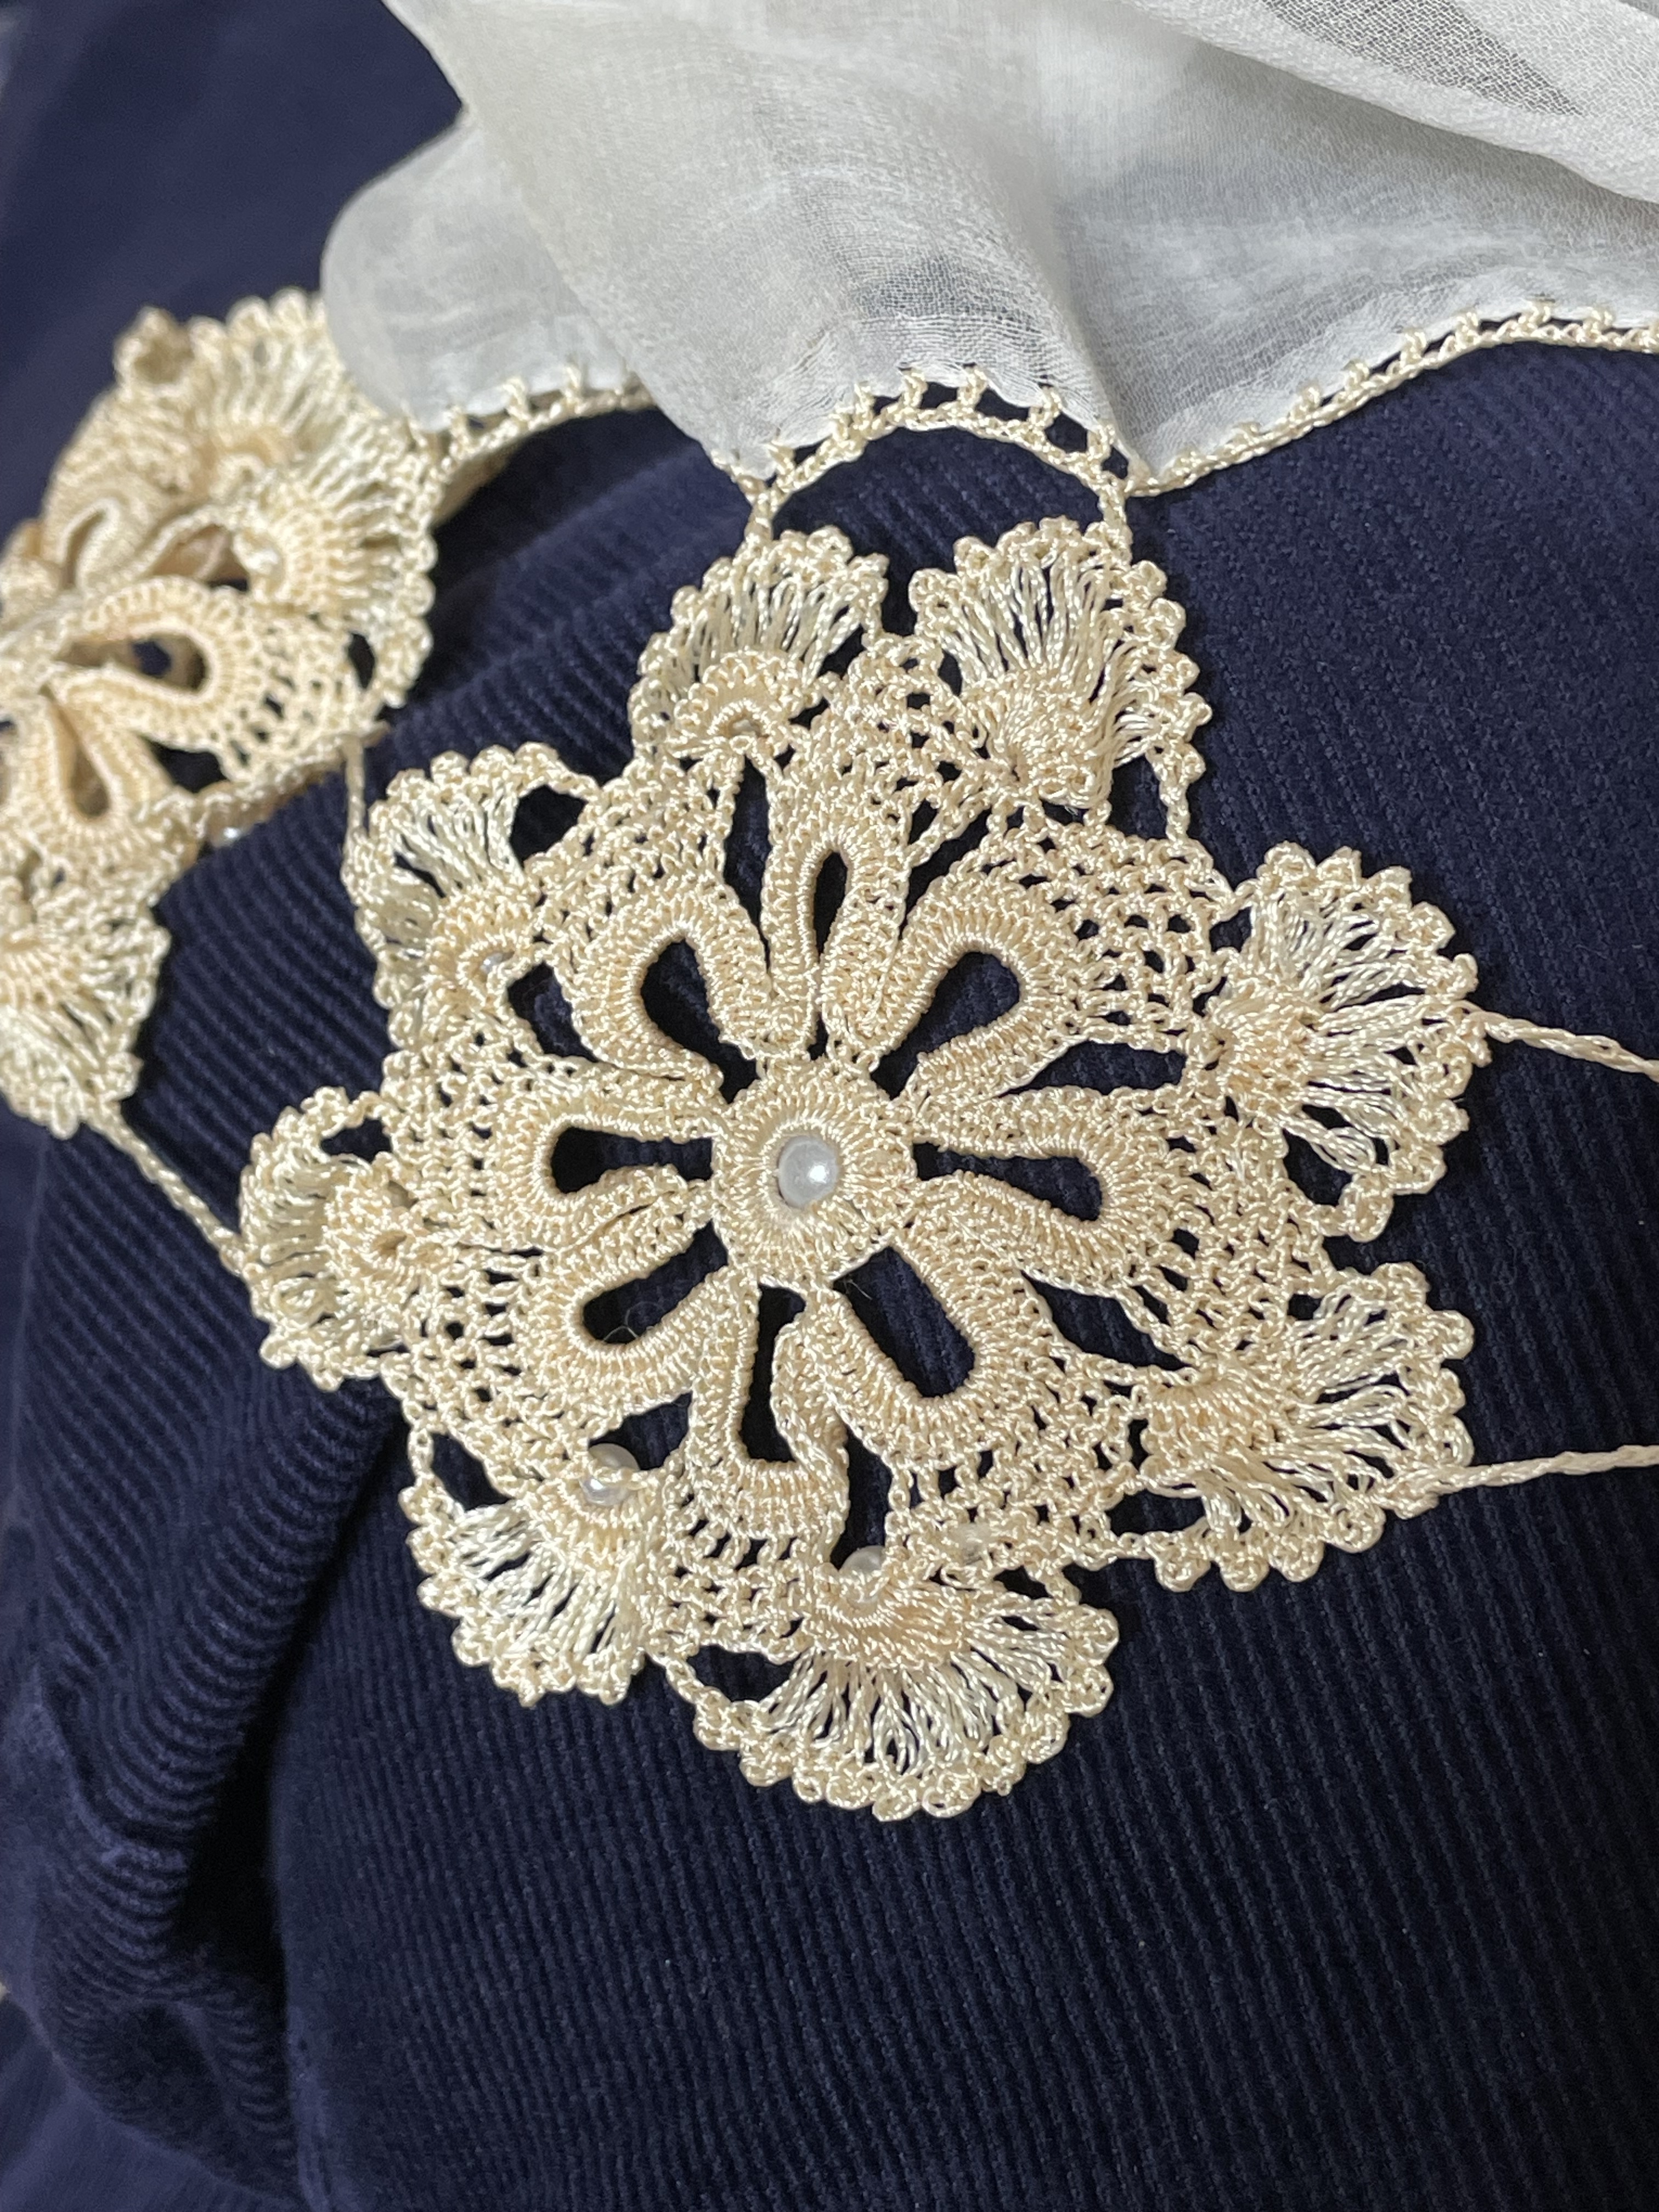
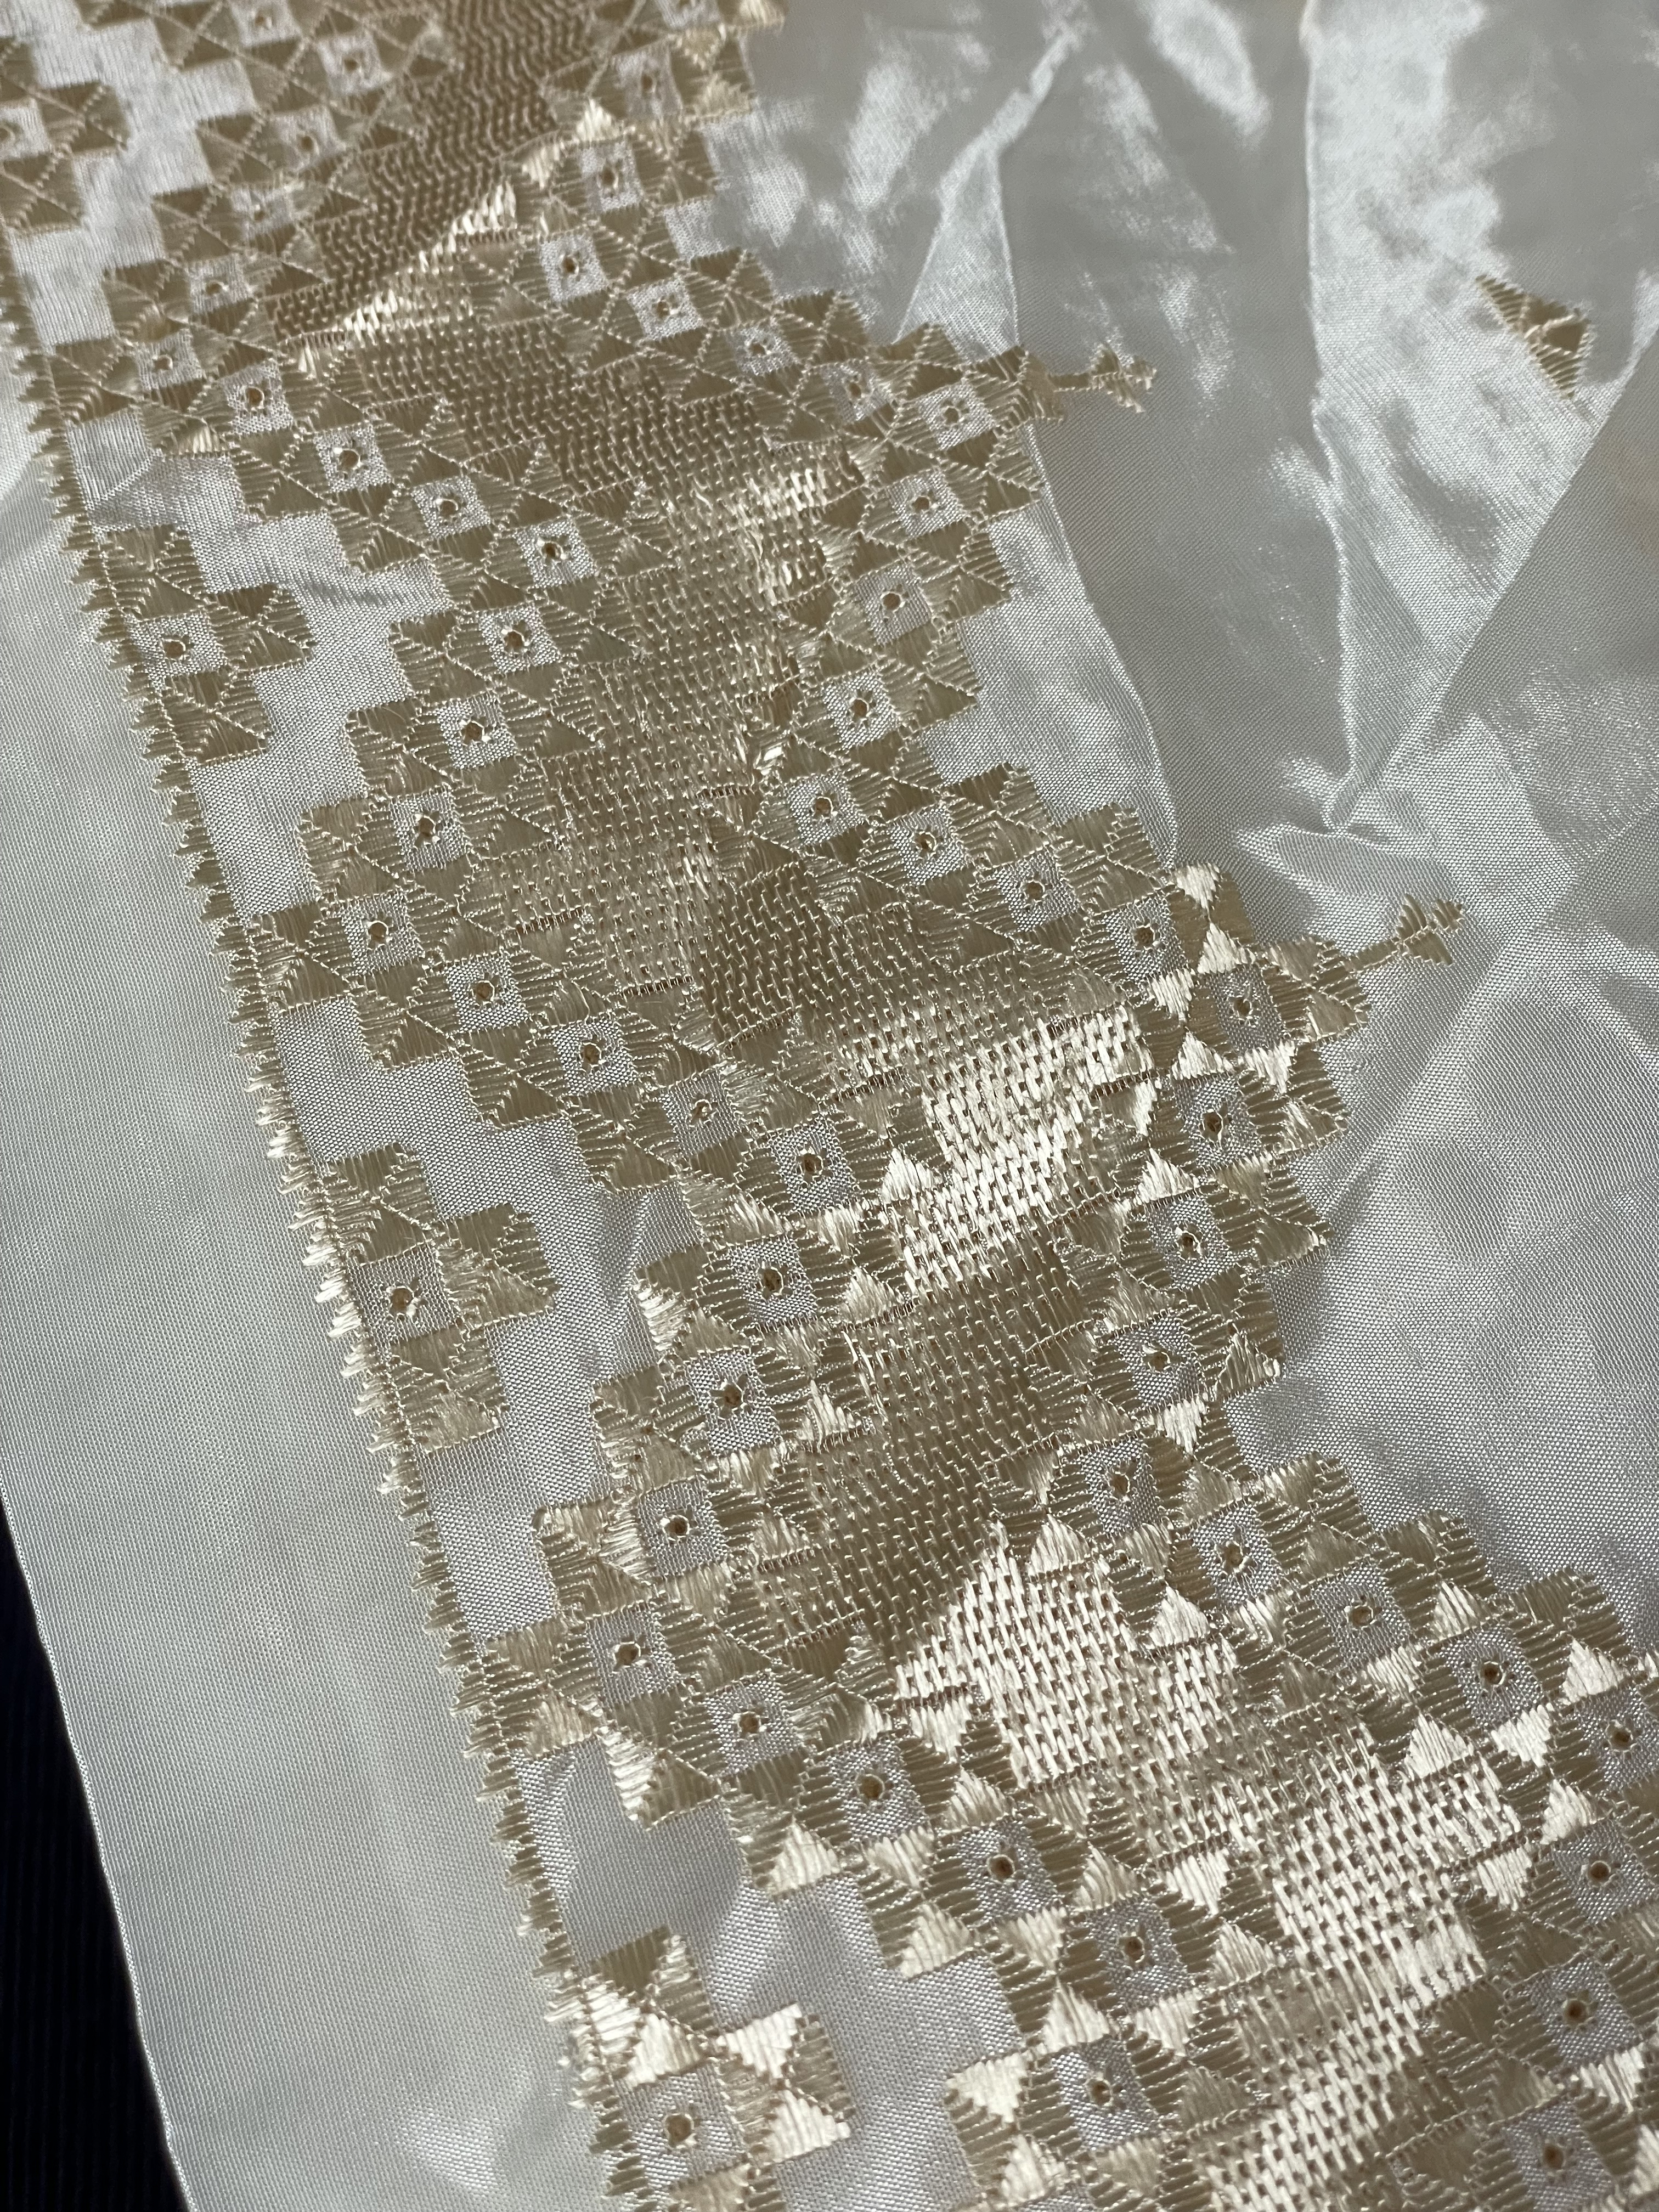
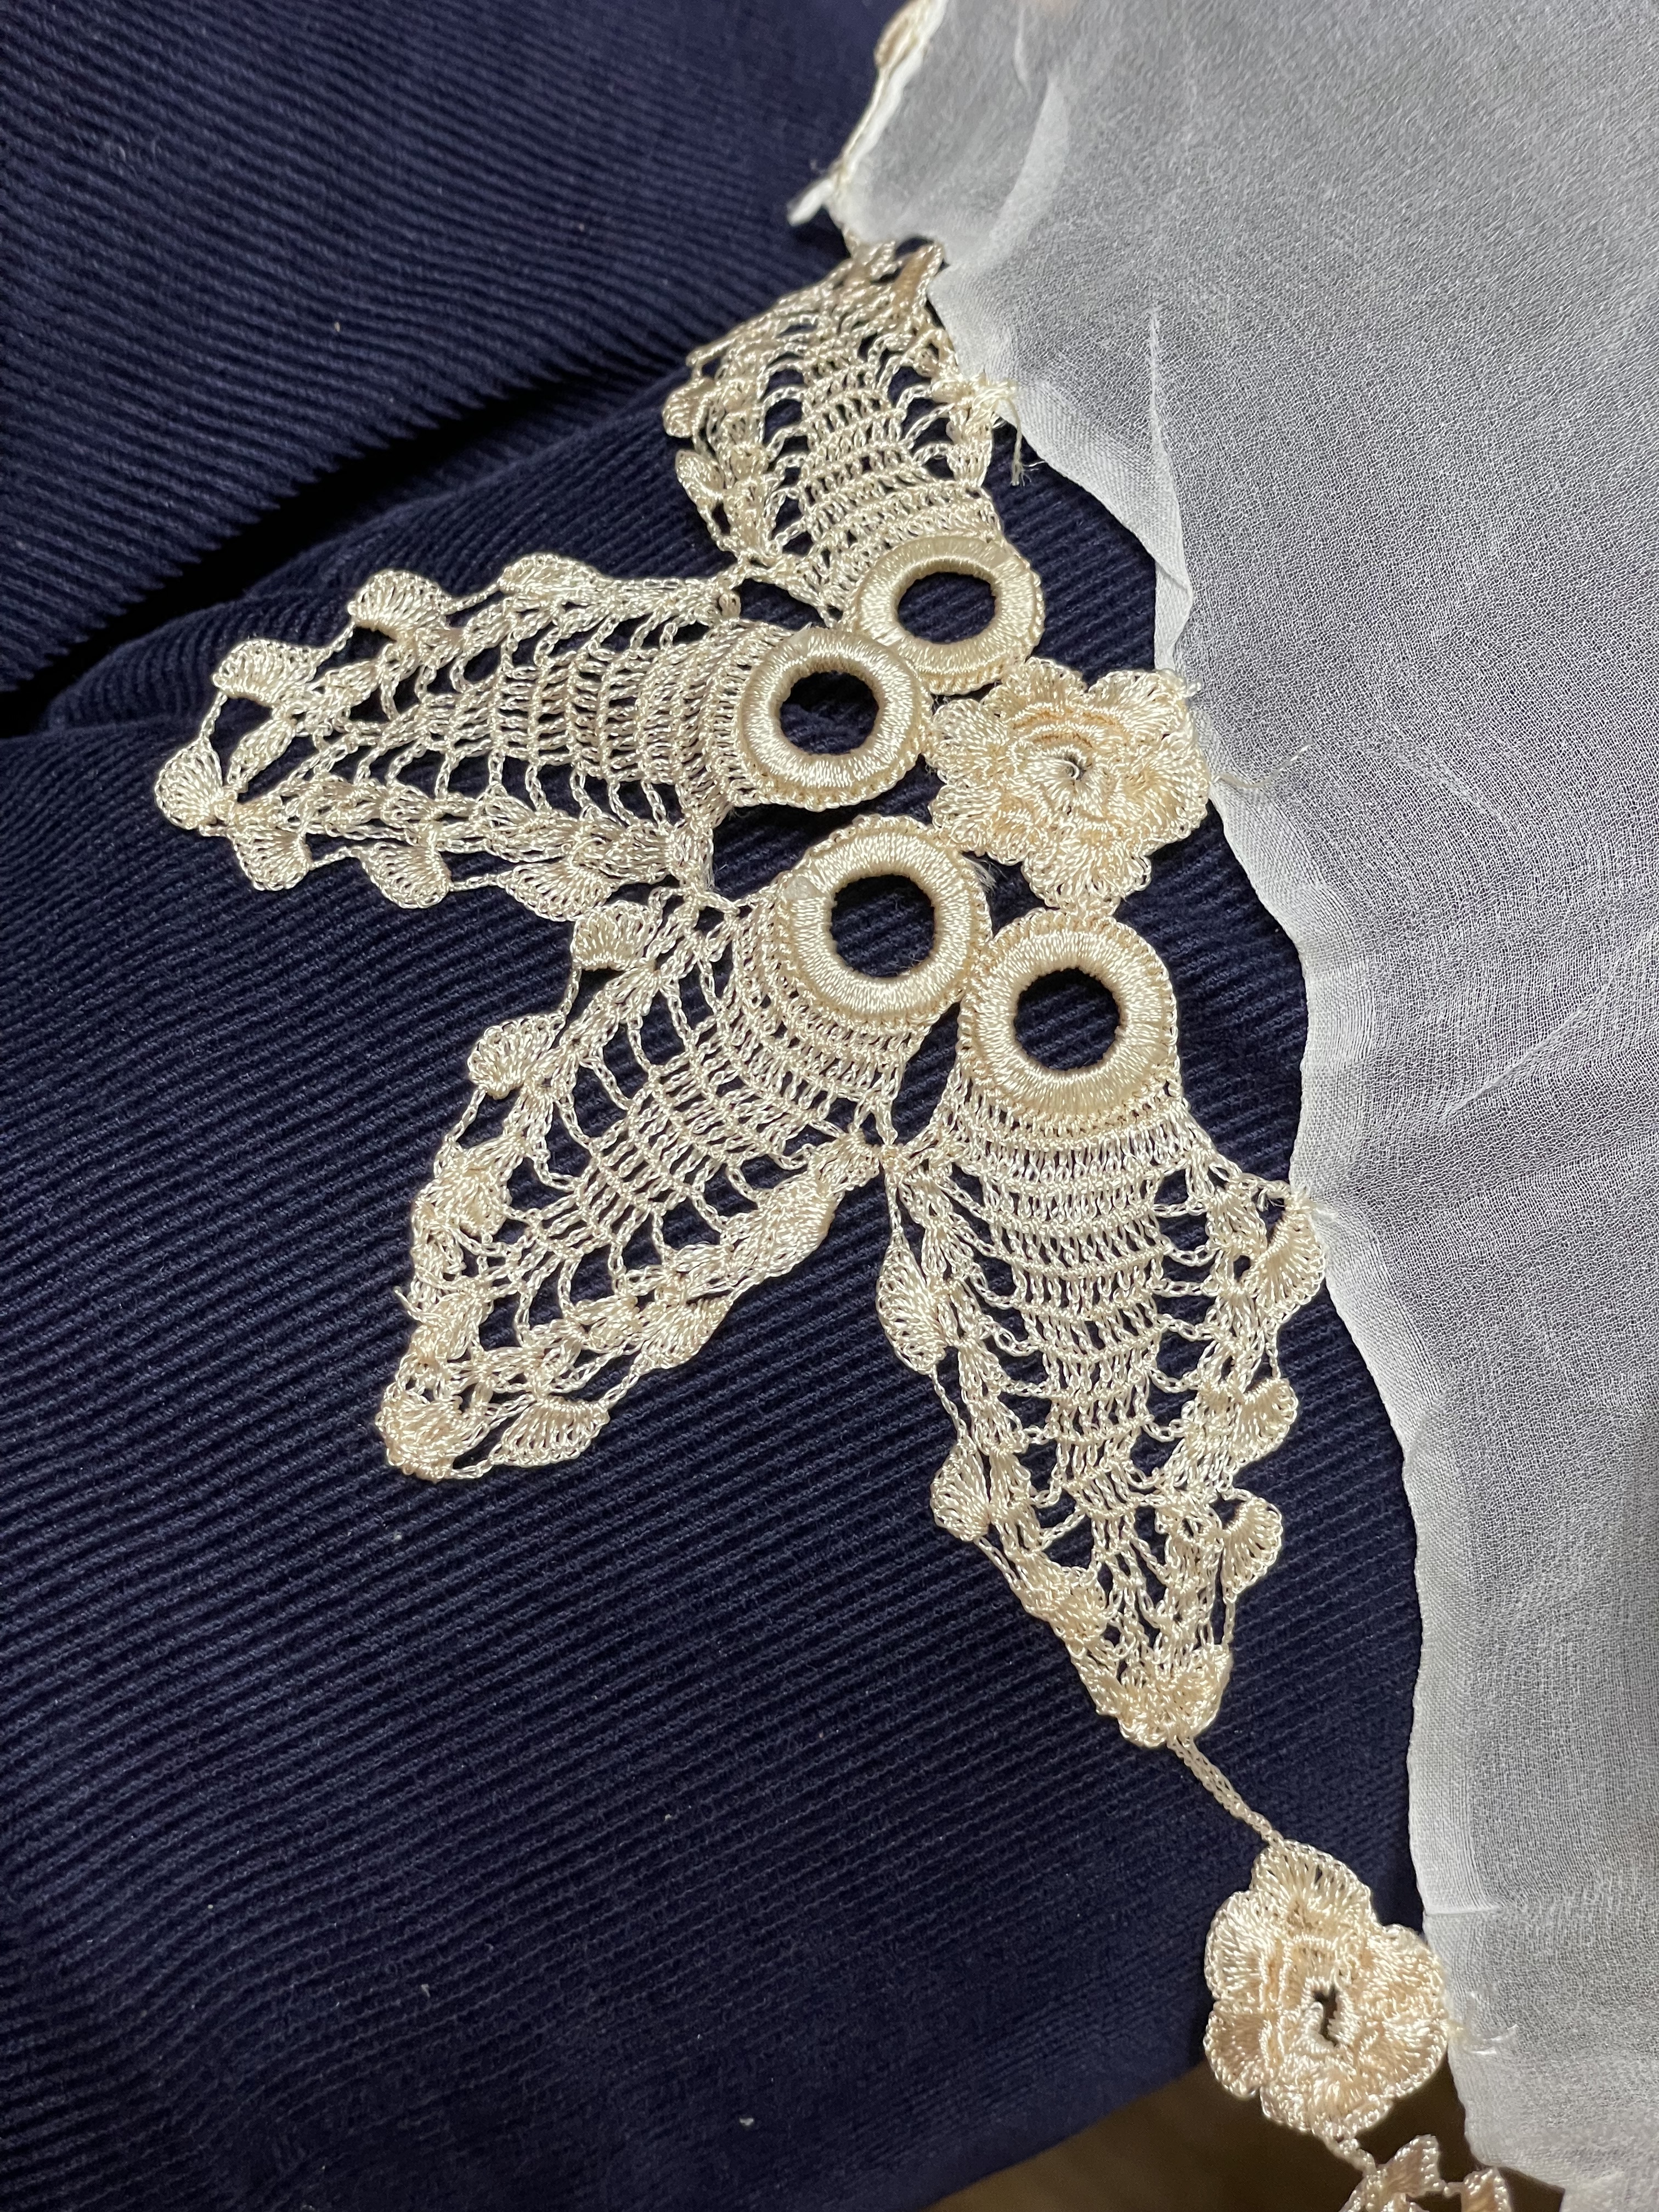
I was visiting Jawad and Shukria a couple of weeks ago. Shukria had just received a parcel from her sisters with hand embroidered and crocheted garments. The crochet embellished the edges of some head scarves; the embroidery enhanced the hem of some pants. Jawad had a tunic done by someone in his family who had taken three months to embroidery the front of it for him – obviously something to wear at a special occasion!
Last night I asked if I could photograph the hand work. What I forgot to do was place a coin on it to show the scale of the work – it’s extremely fine, both the crochet and the embroidery. Incredible precision! Not a hope in hell I’d be able to work with such fine thread (crochet or embroidery) and control it as magnificently as this work. The fabric is also a very fine, closely woven, either a lightweight cotton or a silk. It’s breathtaking!
It’s days since I posted anything but I’ve been chugging along as always.
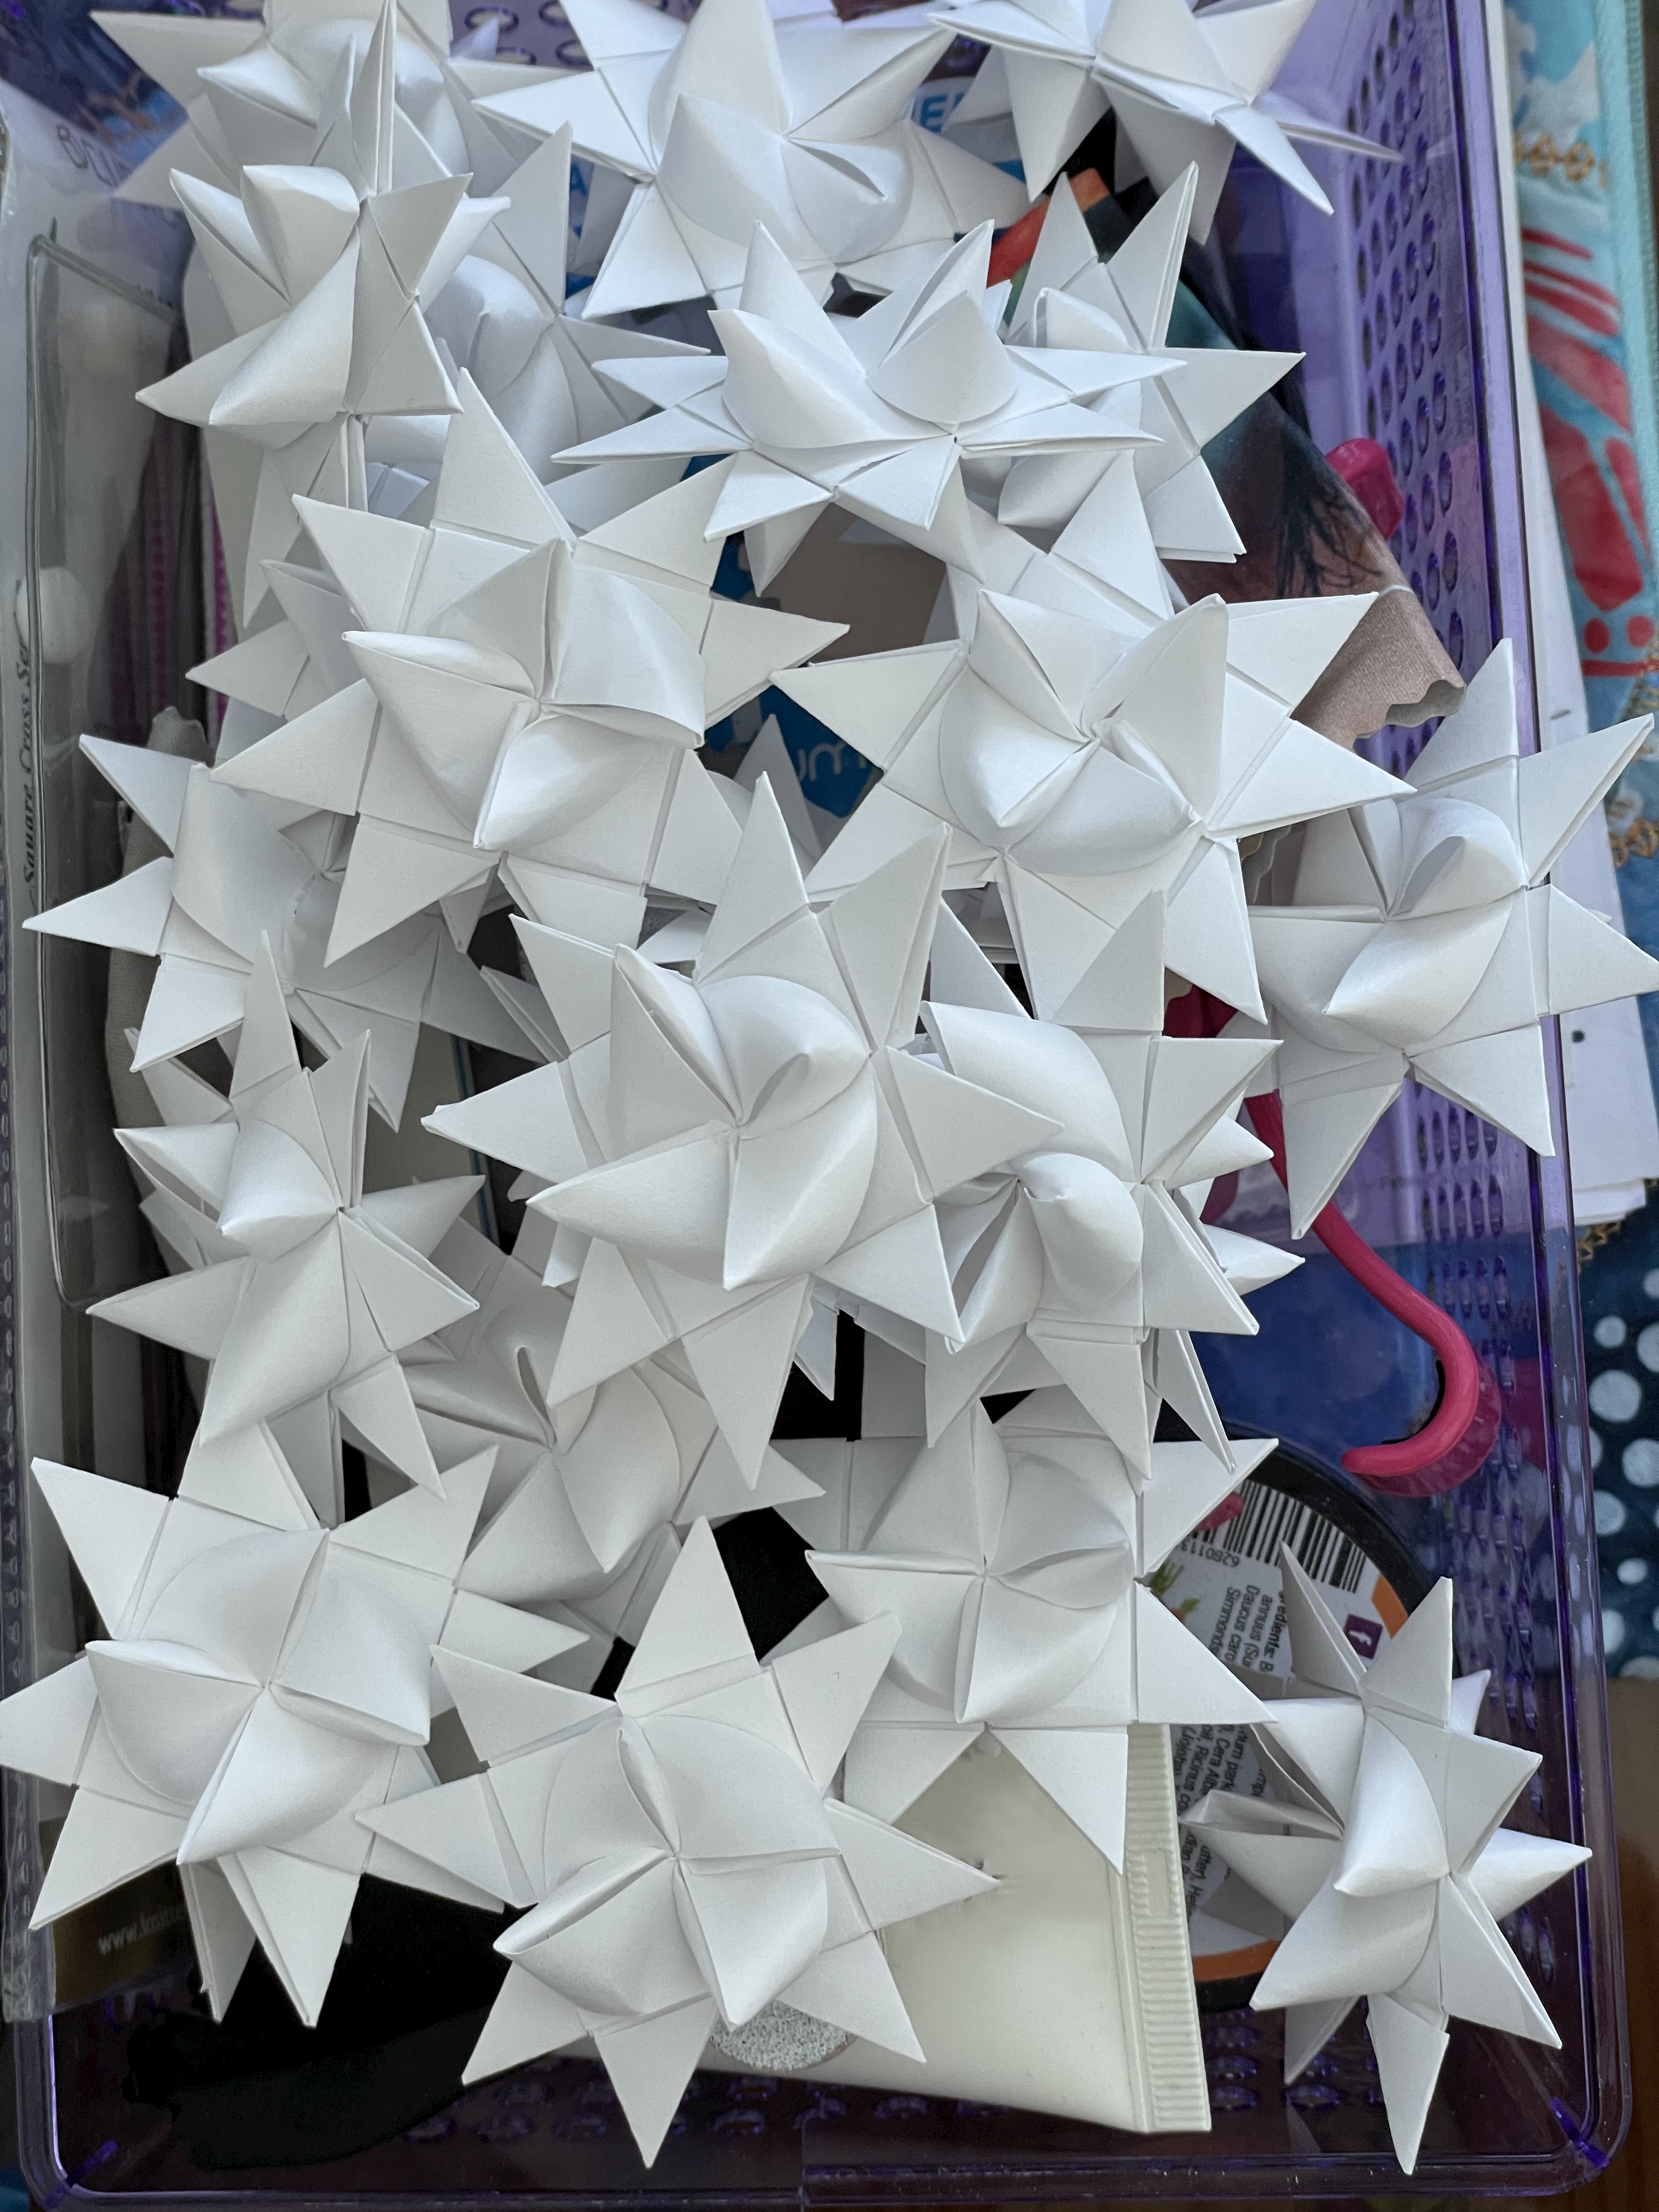
Danish Paper Stars
Danish Paper Stars – it’s become a seasonal tradition to make stars to share with neighbours and friends. I’ve made a total of close to 60 this year. I started with about 45 – which I distributed the other evening (one star per apartment). When I got home I realized I didn’t have enough left for friends so last evening I made another 15! That’s it for stars this year. It takes me about 8 minutes to make a star. [The website I found a couple of years ago describing how to make the stars is still functioning so click here if you want to try your hand at making a few!] [If that link doesn’t work try here.]
The Quilt Top – it’s been a chore but I finally managed to piece the panel together. I rummaged through my stash looking for fabrics to border it with. I came up with something.
Quilt PanelWith Border Fabrics
The challenge with the burgundy “cork” fabric is that it’s directional so I’ll have to consider how to use it on all four sides – it will require some piecing, I think. Deciding to include a thin strip of the backing fabric ties the whole thing together. It don’t see any appliqué that will enhance this panel which is already way too busy!
Can’t say I’m ecstatic about this creative effort – the background fabric [Free Spirit: Tim Holtz, Eclectic Elements, Abandoned, Rusted Patina PWTH126] turned out to be much busier than I anticipated. I loved the colour combinations, but cutting it up just accentuated the “busy-ness” and adding the solids as I did made the whole panel out of control. That’s the challenge of improvising – it doesn’t always work out as you’ve imagined it.
The Rusted Patina fabric should have been used as very large pieces which is what I’m going to do on the back. I managed to purchase enough from a number of online sources to do that. I want to see what making a small strip through the dominant backing fabric will do. In any case I want to use up what I have. I don’t intend doing anything more with it. Lesson learned!
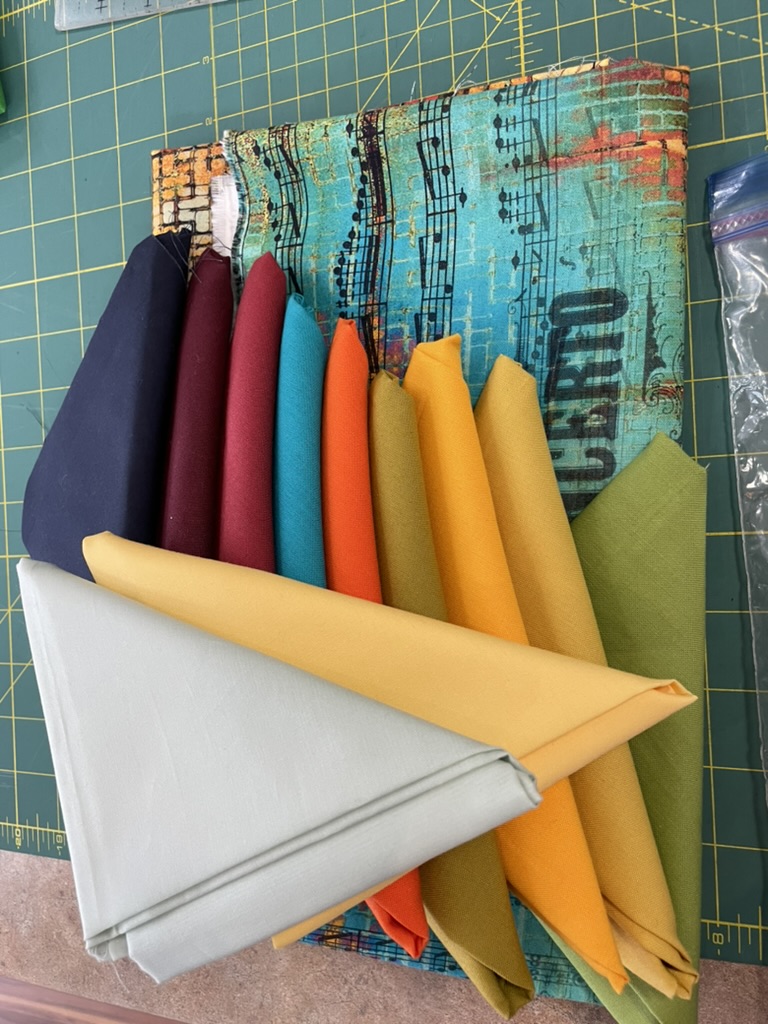
Remember when I started this quilt I had a wonderful bright fabric with yellows/oranges/ turqoises/blues. Because the solids weren’t quite light/bright enough, I added a couple more to liven the array.
The Original FabricsWith Some Lights Added
I had an idea in my head based on a quilt I’d seen on Pinterest
Another HST Idea
to use the print as my background, the solids as accents, with the solid triangles formed from three strips.
This afternoon I finally got back to sewing on this quilt (I’ve been avoiding it for over a month). It didn’t take long to sew the strips for the “solid” triangles, pair each strip with a strip of background print fabric, cut the HST.
56 HST with Solids
Each strip pair gave me four blocks – I just needed to lay them out interspersing them with background blocks.
Tentative Layout 9×12 Layout
I find it very interesting that when I look at the pieces on my floor the yellows/oranges stand out, but the photo brings out the turquoises/blues! The pale yellow solid elements brighten the ensemble. The pale blues are lost among the music elements of the background. The orange solids, the burgundy stripes connect with the background print (on the floor – not so much in the photo), and the navy doesn’t do much of anything. I’m not sure I see much point in playing around with the layout – I don’t think it will make much difference to this rather drab quilt top.
My challenge now is to come up with some way to make this layout interesting. Would a solid sashing in one of the lighter yellows accomplish that? Use the background fabric for a border? What about circle appliqués (of different sizes) cut from the solids placed in some kind of cascade?
Whatever I do, it will have to involve the solids because that background fabric, which I thought would be striking is so busy when cut up, that it overpowers everything else!
Got any suggestions? I sure don’t know where to go from here.
Since I began working on the project, I’ve had a hunch I wasn’t going to be happy with the outcome. My fallback position was to assemble the array, make it into a quilt (with batting and a backing), then use it to make a jacket! Looking at the potential panel, however, I don’t think the jacket would be outstanding, either.
I hate it when the work goes sideways as it has here.
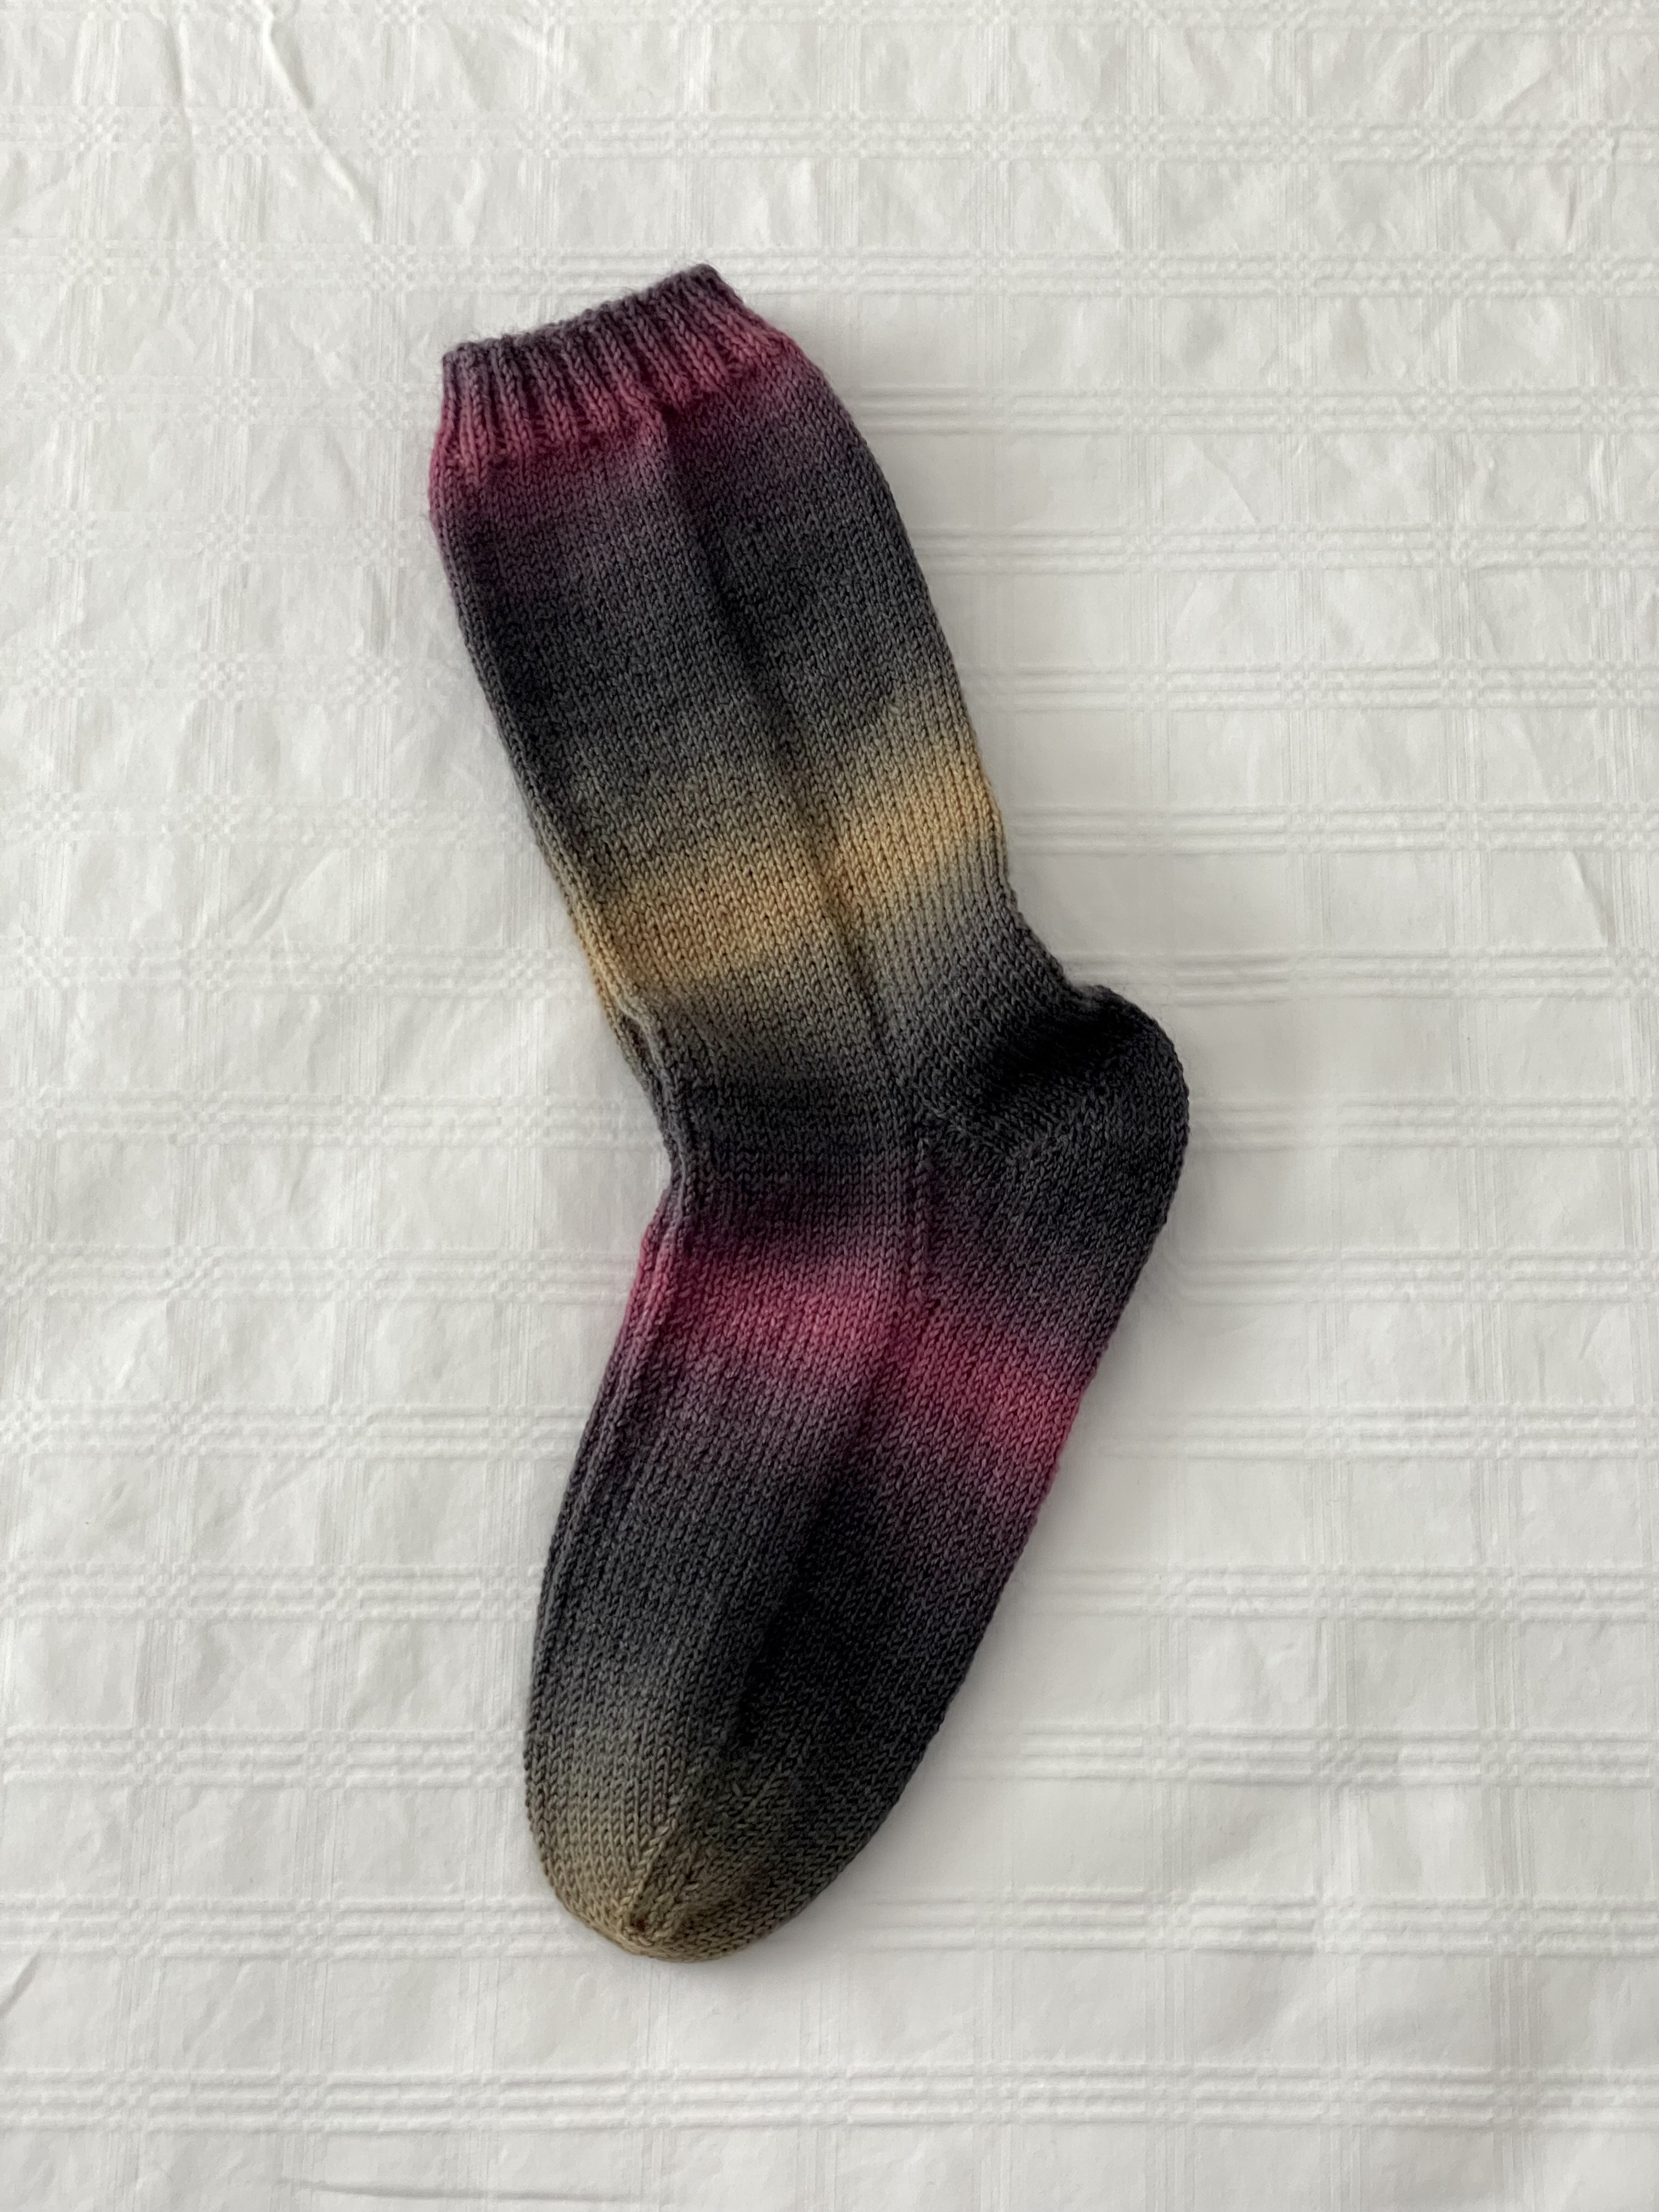
I finished these socks last evening. A nice yarn to work with.
The pink was on the outside of the ball which meant I’d never get to the second pink stripe for a size 7-8 sock! So I rewound the ball in order to have both pink stripes come through.
I enjoyed knitting with this yarn even though the transitions were so subtle. It was difficult finding the matching location – the ball label said the yarn would make two matching socks – the manufacturer just forgot to mark the begin/end in the centre of the ball. It took a bit of careful study to find a similar location for starting the second sock. I didn’t do too badly – the match is almost perfect.
These socks are in the gift pile at the moment – they may make it to my sock drawer….
I’m getting nowhere on the quilt project – I know I’m not going to be happy with the finished outcome and that what I’ll end up doing is making a quilt, then cutting it up to construct a jacket of some sort. So I keep walking away from the strips of fabric sitting at one of my machines.
My avoidance project today, after having put strings of lights on my driftwood sculpture and along my balcony railing, was to make a new iPhone case!
The Old iPhone CaseThe New iPhone Case
As you an see, my old iPhone case which I made over a year ago has become very shabby. The lambskin (which I bought locally) was very soft and didn’t wear well. I’ve been meaning to make a new iPhone case but haven’t made time to do it. It’s not a big project, I can make one in under two hours. It’s just getting to it. Today was the day.
I used some leather I had bought in New York City in the spring of 2012 at the Leather Skins warehouse. (Check out the lambskins! Yummy! Irresistable! Not outrageously expensive!)
Leather Skins Warehouse
The place was small, on the 11th floor, Suite 1101, 261 W 35th St. The walls were filled with skins from ceiling to floor, sorted by kind, not so much by colour! I was taken with the lamb skins – I bought one in a purple-ish blue. There were actually six matching skins enough to make a jacket and pants – I only took a single skin. I also bought a printed leather skin (rather inexpensive – because a piece had been cut from one end – didn’t matter to me because I was intending to use it used for trim and there was a lot of leather in what remained of the skin). I’ve used small bits and pieces of that printed leather from time to time but most of the skin was still intact. Today I decided to cut a 5 1/4″ strip to make the iPhone case!
Didn’t take long to put the iPhone case together. I grabbed some zipper tape and slides. I dug through my zippered bag fabrics and found one to use for the linings, cut the three pieces I needed for the small pockets, the side pocket and the phone pocket. I looked through my parachute cord stash and picked out one. Finally I cut a small amount of velcro, and chose a button to decorate the closure tab.
I made this bag just a bit wider than the old one – to make room for the credit cards and the cash and the few items I carry in the side pocket. In under two hours I was finished. It’ll be interesting to see how long this one will last. I’m expecting the painted surface will rub off, but the skin is a bit sturdier than the blue leather was so the case may hold up somewhat longer.
In case you’re interested, you can find my instructions for this version of the iPhone case here.
I’ve finished garment making for now. I just completed (maybe – more about that in a moment) a black and white Ebony T-Shirt top. I took out some of the flare (I could take out more – might do that if I make another one) and widened the sleeves, dropped the arm hole a small amount to relax the sleeves – it worked. Although I lengthened the 3/4 sleeves, I didn’t lengthen them enough! I’m not doing anything about that right now (I have enough fabric to add cuffs, for example) – I’ll wear it a couple of times before deciding whether to change the sleeve length or not.
Black/White Flared Top
I like the weight of the fabric, a knit, but with more heft than a t-shirt fabric. I have no idea how well it will wear – I have a hunch I will be dealing with pilling. It wasn’t a cheap fabric (even though it’s a synthetic without any natural fibre in it) so I won’t be surprised if I have to shave it after wearing it; whereas the fabric in the burgundy top has a slightly polished surface and it shouldn’t pill at all.
No doubt about it, the quality of fabric, even “good” fabric, is not the same as say 25 years ago. The integrity of the weave, the stability of the fibres, have deteriorated. When I make or buy something I want it to last a good while. I hate garments that make it through one season and then look shabby and need to be thrown out.
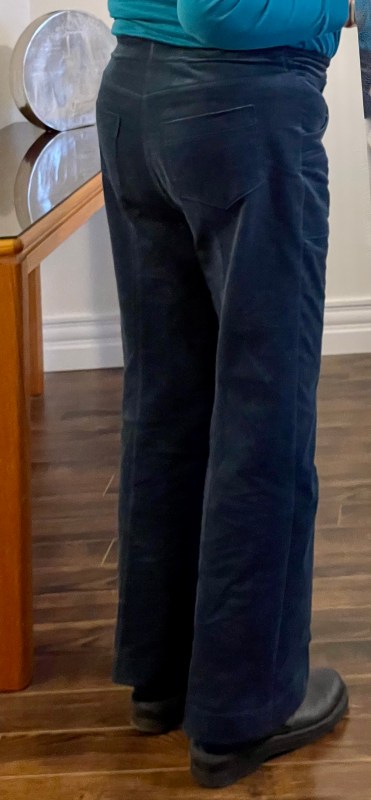
I finished the burgundy corduroy pants last week. I adjusted the crotch depth (I removed 3/4″ from the back panel which seems to have eliminated the fold that occured on the teal pants).
Burgundy PantsTeal Pants
The reality is, even if I’ve made the pattern before (sometimes many times), each new garment is still a muslin! There are always adjustments to be made. The fabrics hang a wee bit differently. There’s more or less stretch in one fabric which changes the fit. Good thing what draws me to making clothes for myself is the challenge each new garment offers!
In the pants I just finished I incorporated a FTA in the traced pattern. It has resulted in a good fit at the waist, nicely draping coverage across my tummy, with no pulling when I do up the front fly zipper.
I followed the instructions in Jenny Rushmore’s “Ahead Of The Curve”. I started by putting on an unadjusted pair of pants/jeans, buttoning the waistband but leaving the zipper gaping so I could measure how much I needed to add to make the tummy fit work. Then I drafted the changes she laid out – a horizontal cut connected to a diagonal cut, with a cut from top to horizontal cut to open the waistband.
Full Tummy Adjustment – FTA
I made those adjustments on my pattern (outlined in red – sort of). You can see I needed to open the top close to 3/4″ at the centre front, 1/4″ at the waistband, giving another 1/4″ (a shade under) at the centre front to make the fly flap straight.
My Adjustments
That gave me a nicely fitting front for the pants:
I wore them all day yesterday; I have them on again today. They stay snugly at my waist, they don’t pull down when I sit, and there’s no strain across the tummy. Comfortable. I’m making these same adjustments on the burgundy pair of pants I’m just about to cut out!