Kantha Jacket

Last spring in San Francisco, Sheila and I visited Gumps. At the front of the store was a rack of lovely casual bright print jackets by Meiko Mintz constructed out of Indian Kantha cloth. I didn’t bother trying them on – the price deterred me. The jackets were something I could easily make for myself (if I could ever find the quilted Kantha cloth).

A couple of weeks ago, I came across an inexpensive king-size Kantha bedspread on Amazon which I ordered. It arrived amazingly fast – within 10 days. More than enough fabric to make a jacket.

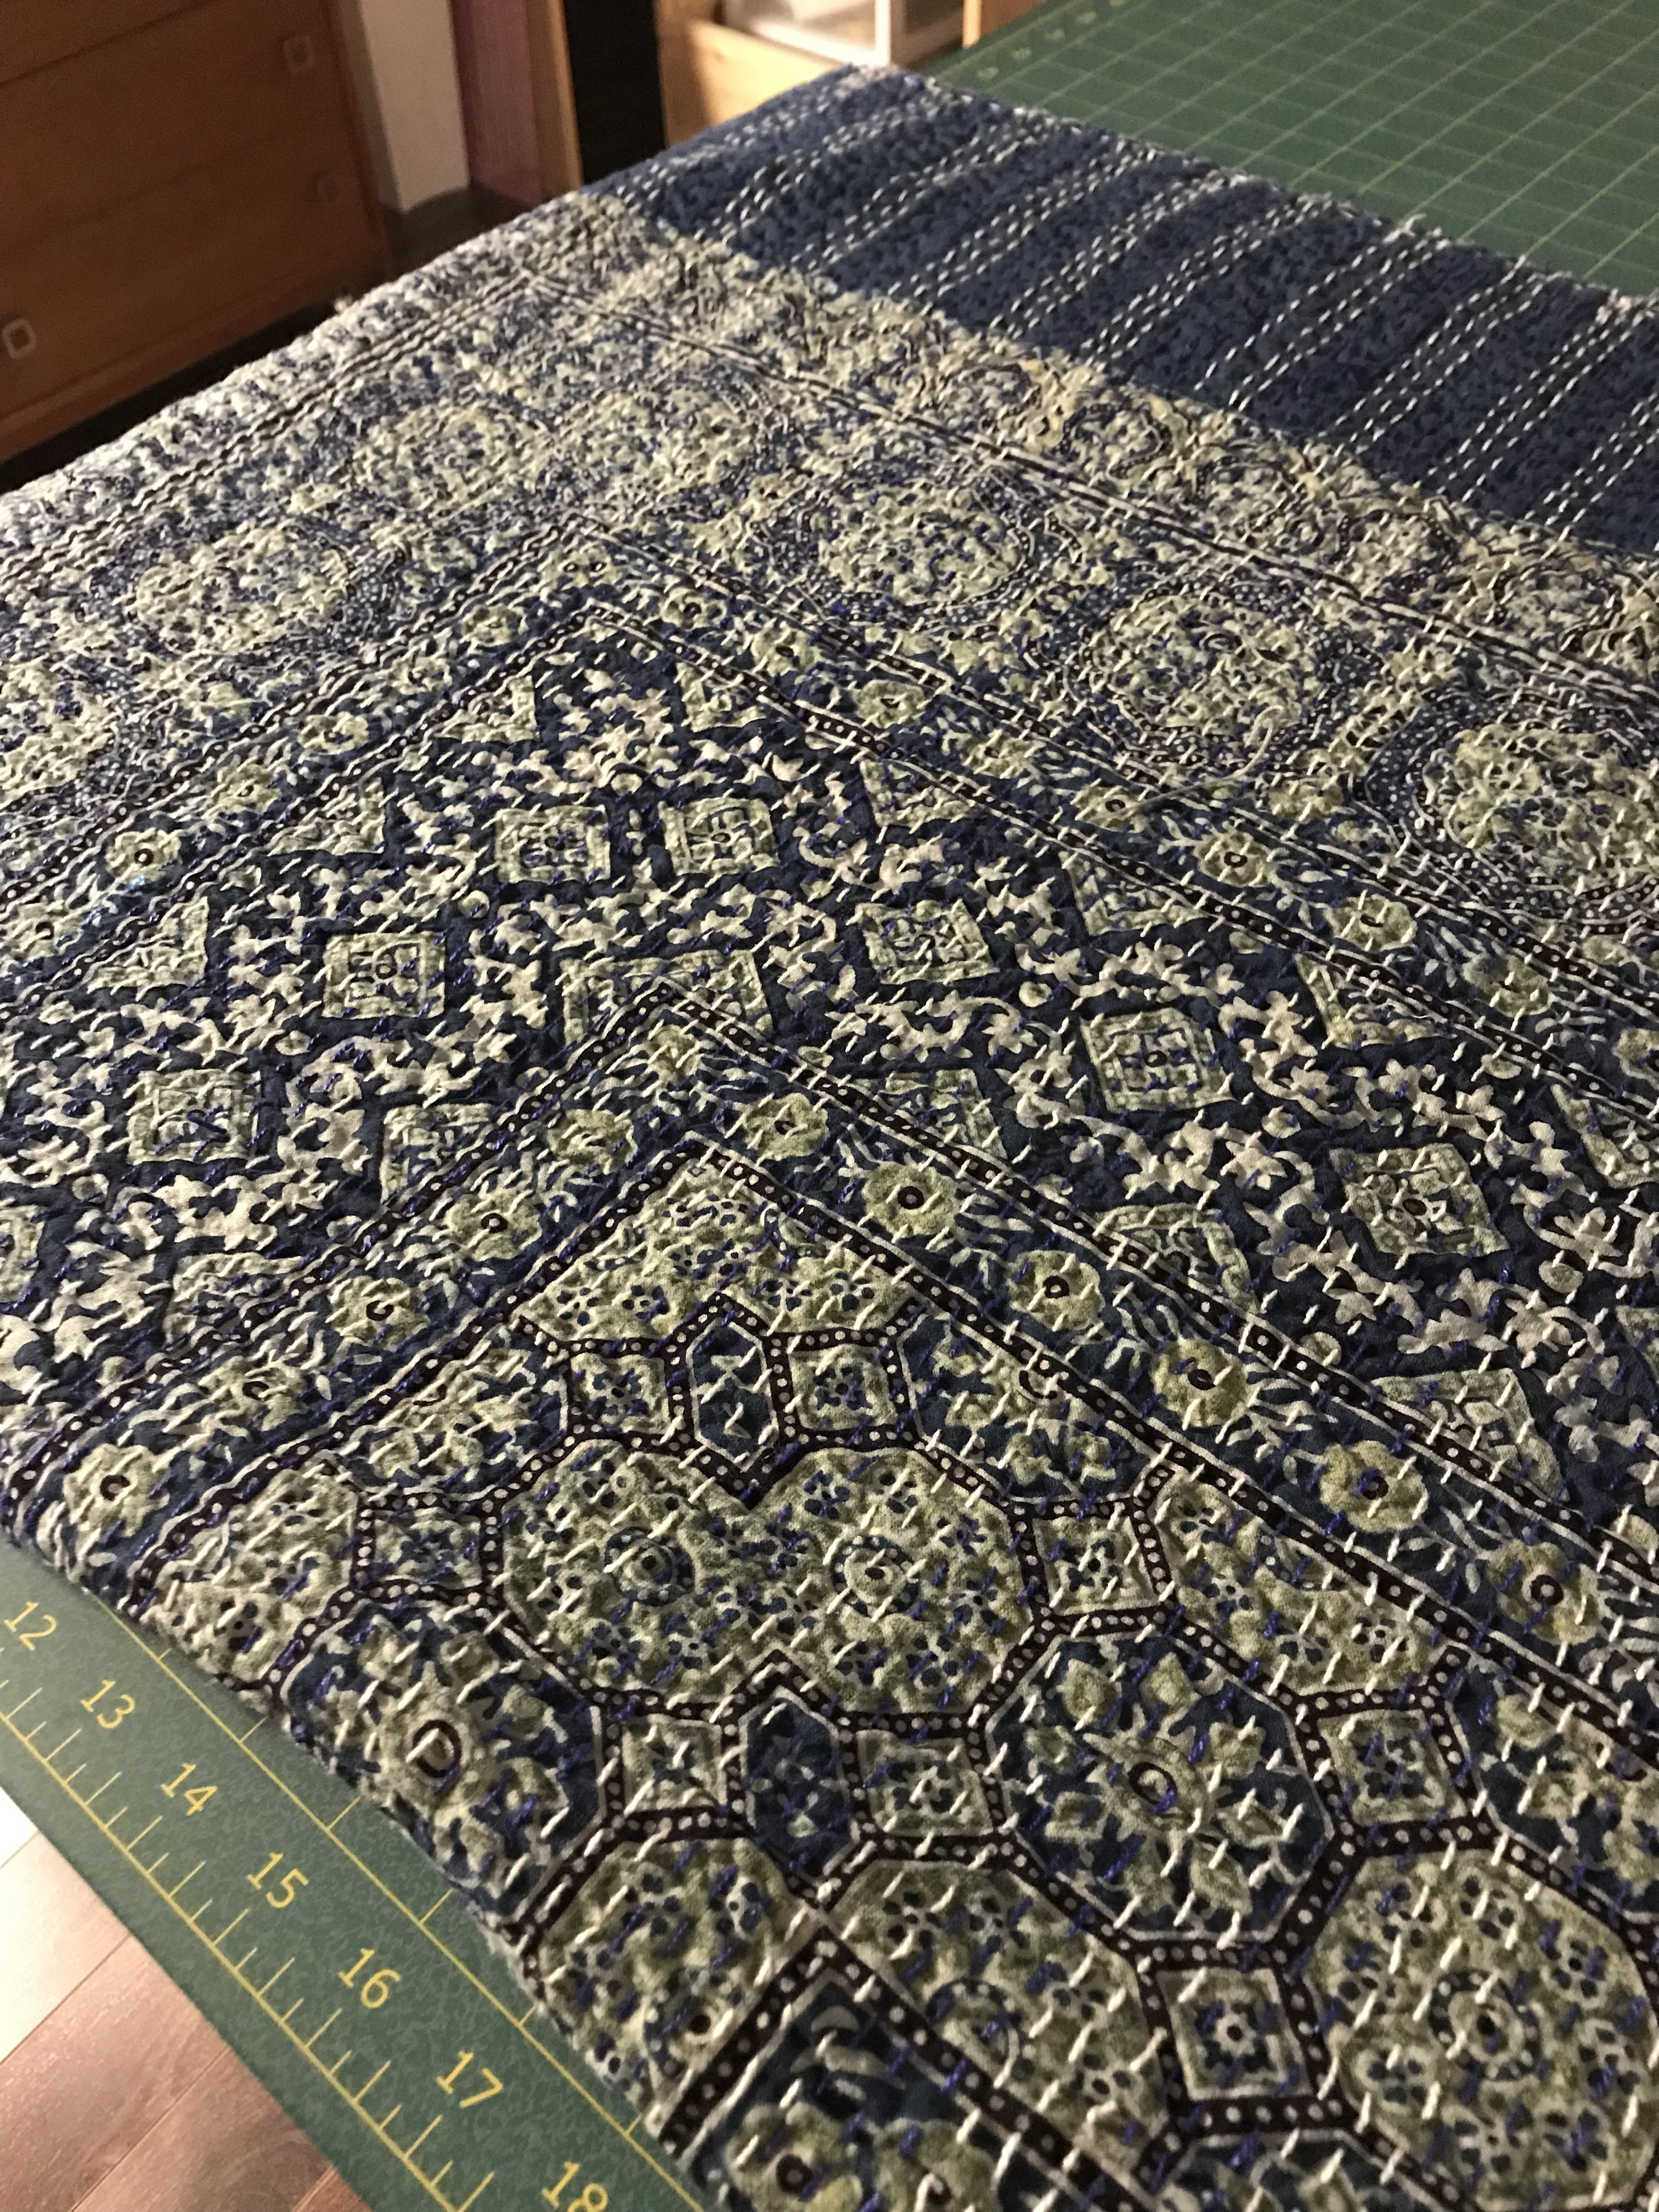
Kantha King-Size Bedspread (folded in half)

First it had to be washed… I thought about the process for more than a week – I knew the indigo (or whatever dark blue dye had been used) would run and likely kill the white stitching which I didn’t want to happen.

I was able to fit the large bedspread in my home washing machine. I added colour collector sheets to the wash.

Colour Collector Sheets

I used four just to make sure I would catch as much loose colour as possible. I added some Oxyclean (to get rid of whatever dirt was in the fabric), and an unscented detergent to cool water. (I probably should have added a cup of vinegar but I wasn’t sure how it would react with the Oxyclean – I will hand wash the jacket with added vinegar once it’s done to stabilize the colour before wearing it).

I caught a LOT of dye:

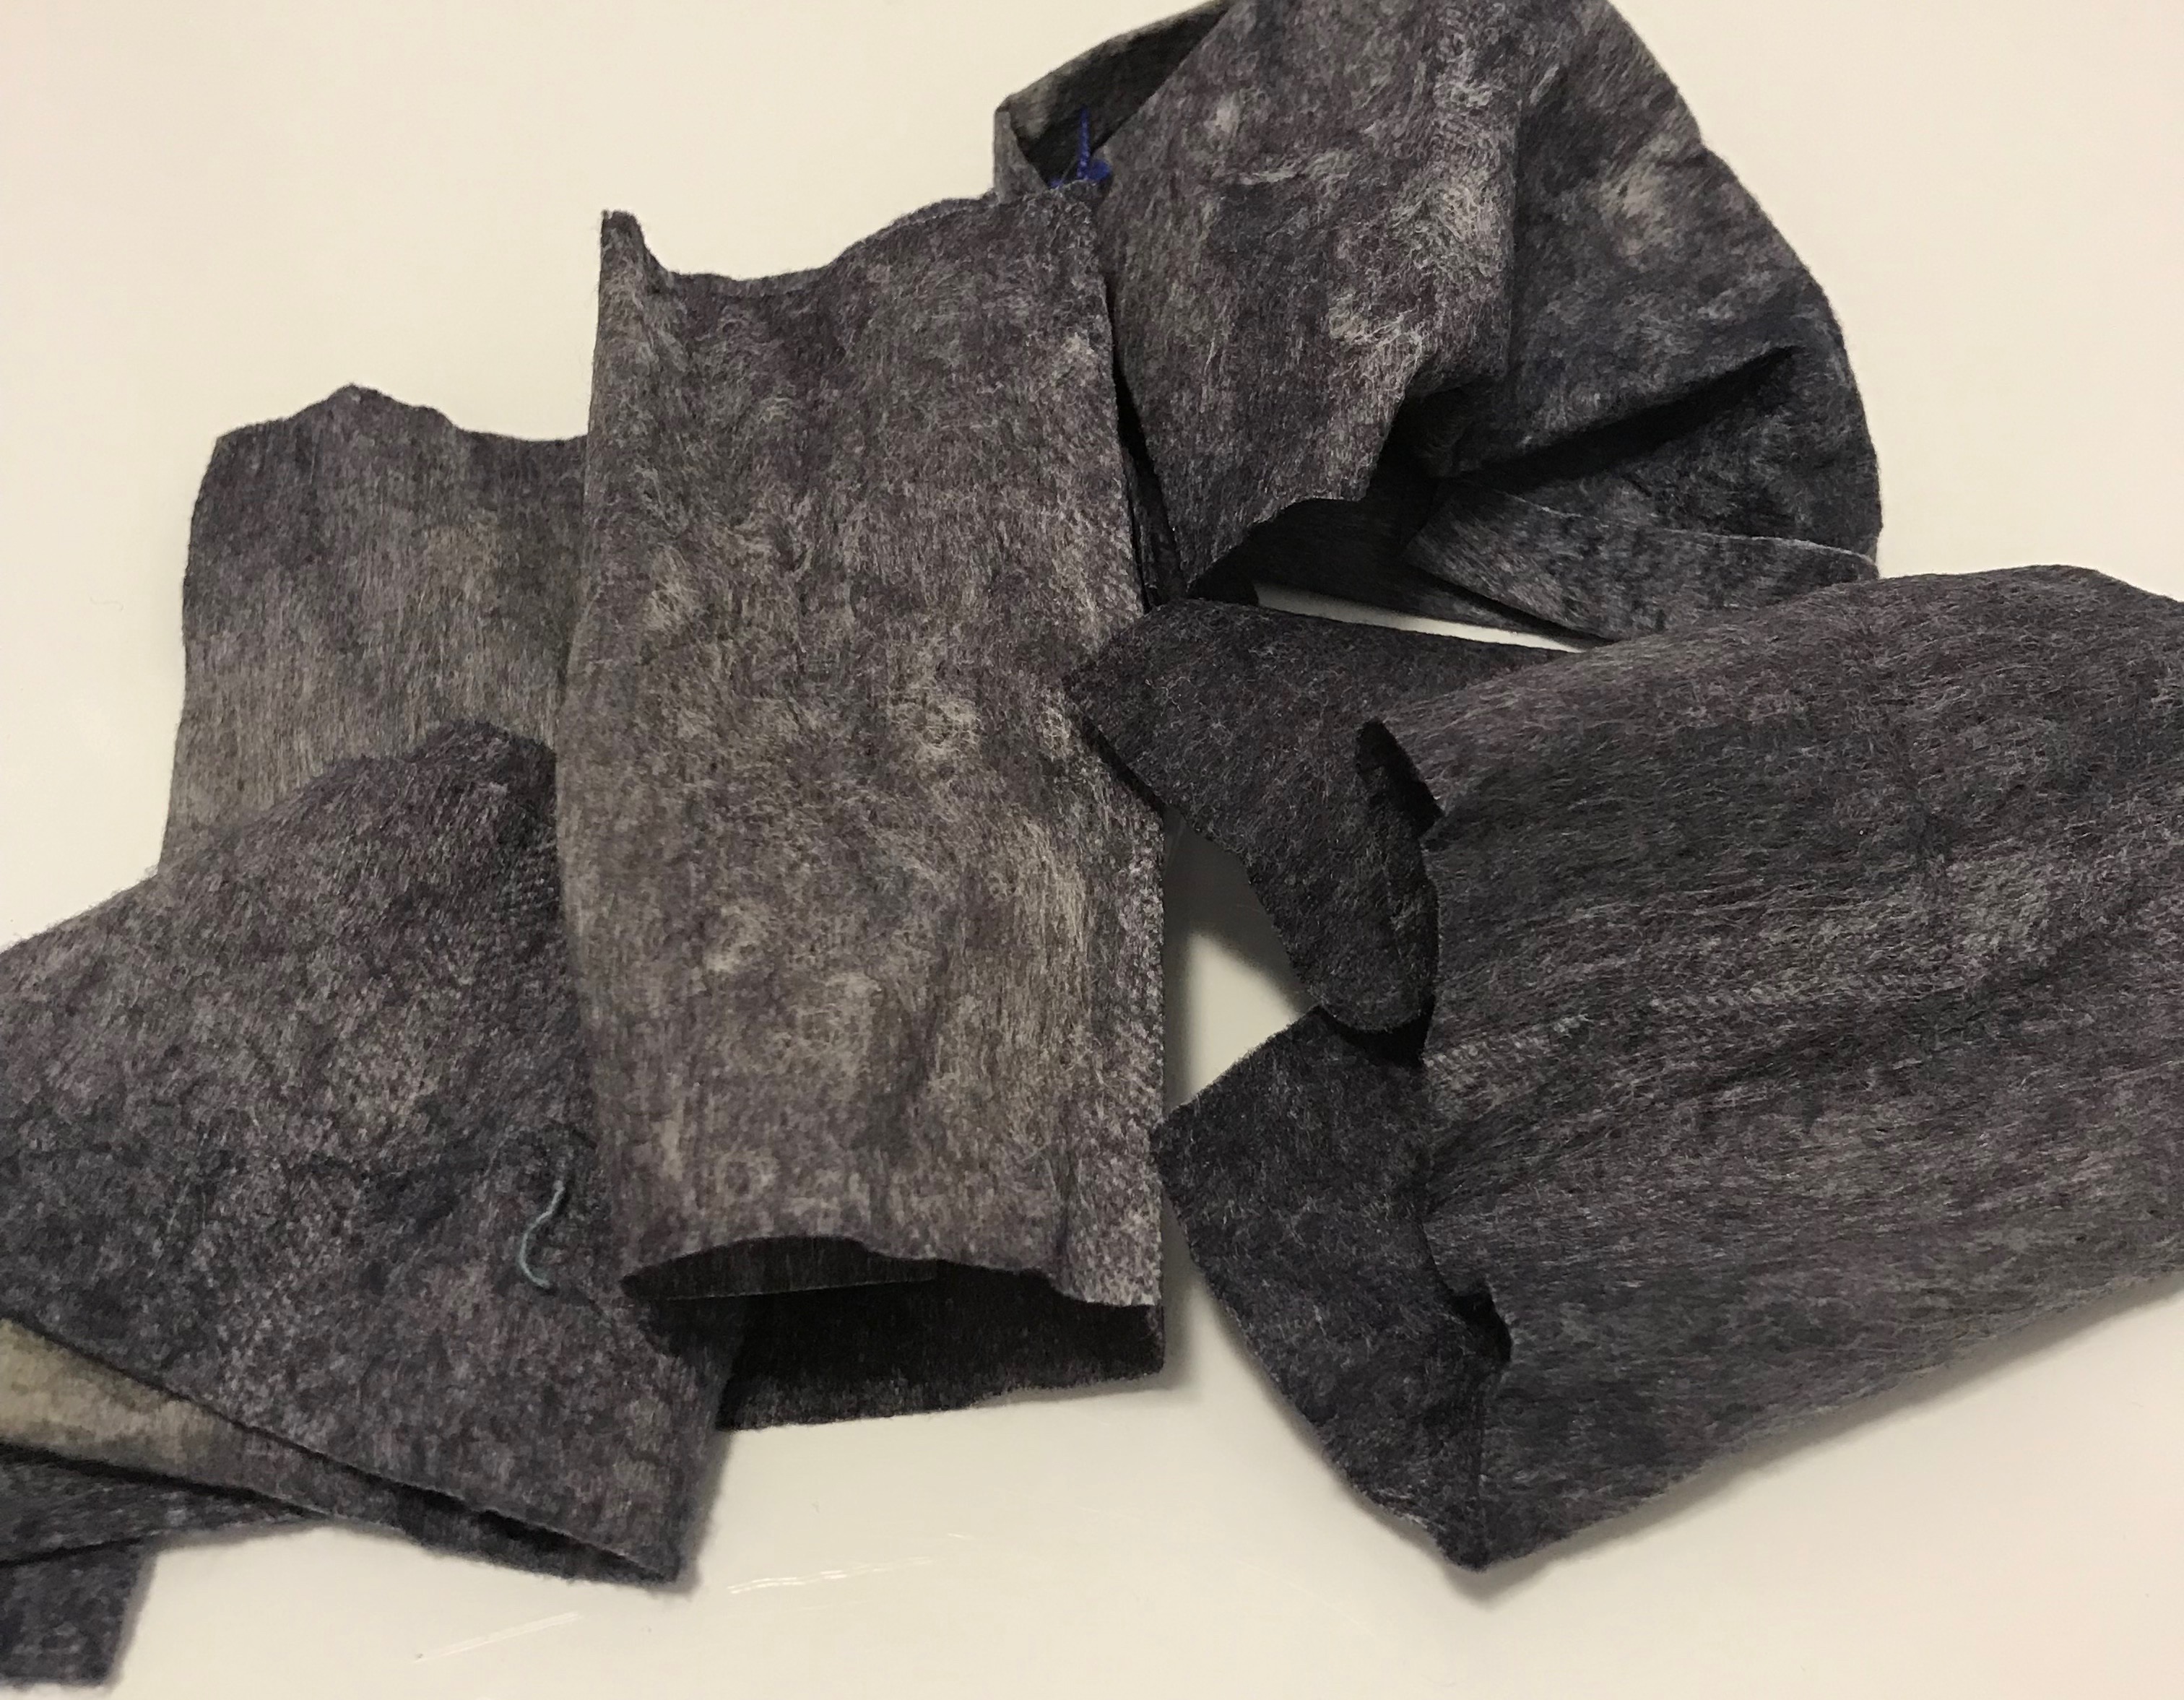
Colour Collector Sheets – After Washing

I started the garment by making a pattern from an existing jacket (which I happen to have bought at Gumps three years ago). A simple style with a Mandarin collar, turned up sleeves, pockets (too small to be useful – mine will be quite a bit larger). The thing about the jacket, which is reversible, is it’s finished with a hidden binding. Because my fabric is already quilted I will do a hidden binding finish using a batik that complements the plain fabric on the back of the bedspread fabric.

Here’s the jacket cut out and ready to begin sewing (I’ve already added the turned up cuffs to the sleeves – I constructed them separately and attached them to the sleeves so the print shows when the cuff is rolled back).

Jacket Front – Cut Out

Because of the way I’ve incorporated the the fabric detail, large patch pockets would obscure the design. Instead I’m going to make double welt pockets and use a single layer of printed fabric for the pocket on the inside of the jacket, blind binding the pocket fabric, then stitching it to the front, leaving just the double welt showing on the outside of the jacket. I’m still not sure whether I want to add a solid, darker blue strip to the bottom of the jacket – I have enough fabric to do that, although it would be an add-on and an extra seam – still thinking about that.

The finished jacket will be just a single layer, with machine stitched buttonholes. I’ve so far not looked for buttons – have to check my button collection before I go shopping.

More as the project unfolds over the weekend.

It’s All About The Pink – V

Just finished the pink quilt  – I bound it in the same fabric I used for the wide border. In the end I left the narrow border alone – I began stitching the leaf motif but two repeats of the stitch and I stopped and picked it all out – the stitches weren’t quite even and it just didn’t look good.

It’s All About The Pink – Completed

That’s likely it for sampler quilts – while I enjoyed creating the 63 different blocks, most of which I’d never constructed before, the task is time consuming because each block had to be cut out and pieced individually – couldn’t streamline the process.

The back – because the quilt top is so busy I decided to simplify the back insert – I used large pieces broken up with strips of accent fabric. The quilting shows on the back – you can barely discern it on the quilt top.

It’s All About The Pink – Back

Another winter scene: Friday, after the storm – with ice pellets and freezing rain the night before – a beautiful sunny day, if cold, and the trees, shrubs, plants, grass – all sheathed in ice – a beautiful sight. This small tree made me stop and capture its image as I was leaving the pool after my morning exercise class. I tried capturing other photos but there was so much vegetation covered in ice that the images weren’t worth keeping.

Sheathed In Ice

In The Midst Of Winter

In The Midst Of Winter is actually the title of a recent book by Isabel Allende, but it’s apropos for today – snowing quite heavily right now, has been snowing all day. Expected to turn to rain during the night – the roads tomorrow will be horrendous, I’m sure. And I just checked – I have nothing on my calendar for the day so I can stay home and work on the quilt.

“In The Midst Of Winter”

18 blocks embroidered/quilted yesterday, 25 completed this afternoon. That leaves 20 for tomorrow. Then I will need to stitch the narrow border and embroider the wide border – who knows, I might get all of that done by afternoon.

I tested a number of decorative stitches for the narrow border – I’ve decided to use # 8.4.29 on my Pfaff Creative Icon – modified to 20mm width, 55mm length – that should complement the overall embroidery design – because the narrow border is pale I think I will use a variegated light grey thread (Aurifil 4060) which won’t show much. The pink variegated thread I’m using for the quilting would stand out too obviously.

Stitch for Narrow Border

Yesterday, I dropped into one of my local sewing/quilting shops. At the counter there was a clay magnetic tool holder in the shape of a flower – I thought about buying one, but I knew I had a number of rare earth magnets on my fridge at home so I decided to see what I could create.

Wearable Magnetic Tool Holder

Wearable Magnetic Tool Holder – II

When I’m quilting I use three tools – small scissors, fine tweezers, and a self-threading needle (for burying thread ends at the start and finish of each embroidery). While I’ve always kept them close at hand on the sewing table – actually having them on my person means not having to look/feel for them at beside the machine. I’ve been wearing my improvised tool holder today while I worked – definitely useful. The holder isn’t large, but an adequate size and strong enough to hold my tweezers and small scissors. The padding allows me to store the needle while I’m working so I don’t have to hunt for it among the other stuff beside the machine!

Construction: I started by cutting out a 6″ square of fabric and batting, a circle from the lid of a plastic kitchen container. I taped one rare-earth magnet to one side of the plastic disc, then cut the fabric out in a circle (3/4″ larger than the plastic disc), stitched a running thread around the edge, pulled it taught and finished off with another smaller covering circle tacked over the back of the padded one. Then I embedded the second magnet between two pieces of clear plastic, taped it in place, cut out a circle of fabric and stitched the edge together. The second magnet is slipped under whatever I’m wearing to connect with the magnet on the larger, padded disc which gets worn on the outside.

So back to work on the quilt tomorrow.

It’s All About Pink – IV

I haven’t worked on this quilt since Dec. 31. I’ve read 5 mystery novels, watched some interesting series on TV, added elastic to the bottom of two sweaters, continued repairing socks in the “repair socks” basket (five pairs completed, six left to do), knit a new pair of socks and close to finishing the first sock for another pair. But no sewing on this quilt.

However, yesterday, I pieced the quilt back. Today, I pinned the quilt sandwich.

It’s All About Pink – IV

Yesterday, I also set up an embroidery to fit a 150mm x 150 mm block; I still need something for the borders – I’ll probably use one of the decorative stitches for the narrow border and something related to the block design for the out border – have to do that now.

And then the quilting in the hoop will begin.

Blue Socks

Finished last evening. This pair has a longer foot than I usually make – 60 rows from gusset to toe-off rather than 50. My friend wears a women’s size 10 shoe (as compared to my size 8) so I made the foot longer.

Blue Socks

Hope it’s not too long! If it is, I’ll unmake the toe, remove 4-5 rows and reknit the toe.

It’s All About Pink – III

Here’s the quilt top assembled:

Quilt Top With Borders

I like how the pale narrow inner border finishes off the pieced centre. I was just lucky with the outer border – not many fabrics to choose from and at first I passed over this one, but in fact the “golden” shade within this pink brings out all the tones in the top.

Next…. Now I have to piece a 14″ strip for the backing – this top has finished at 54″ wide. For the back fabric panel I need another 14″-16″ to allow enough excess width to assemble the sandwich.

It’s All About Pink – II

I’ve just finished stitching the quilt blocks together into a 7 x 9 array. There was a lot of moving blocks around as they sat on the floor trying to get the colour, shape, fabric distribution worked out. I can live with how the quilt top has turned out. Some of the blocks come from Tula Pink’s 100 Modern Quilt Blocks; most are blocks I just made up from scraps, or from blocks I found on Pinterest. The distribution of light/medium/dark fabrics works out reasonably well – I’m happy with it.

It’s All About Pink – Blocks Stitched in 7 x 9 Array

Now comes the next difficult decision – how to border this array. I’m thinking it wants a narrow light sashing (probably 1″ wide) with a wide medium outer border, but maybe I want to piece the outer border in some way. I need to do a bit of searching to see what I might come up with….

In the meantime this is kinda what I have in mind:

Auditioning border fabric


Amaryllis

Here is the  Amaryllis for this year (2017) – now fully in bloom (with a fifth flower still to come, it looks like). I picked up this bulb mid-November at the Superstore where I do most of my grocery shopping. I decided on a pale one for a change (I have mostly bought red ones). I love watching the flower stalk appear and grow so quickly and then the flowers begin opening – one by one.

Amaryillis (2017)

No second flower stalk from this bulb, it seems. Oh well, this one has lovely, happy blooms. I’ll enjoy them for the next week before they begin fading and then out it will go. I’ve never had any luck getting flowers for a second year.

And then I opened my Christmas bag of stuff from a friend yesterday and guess what – another amaryllis – this one a red/white blend. I can see the stalk already peeping out just the tiniest bit – another thing to look forward to.

It’s All About Pink

Just finished the 63rd block. Laid them out – first pass – to get an idea of what the whole would look like.

63 Blocks

Not bad, there’s a LOT to look at here, although one block has to be revised – I didn’t see the swastika until I looked at this image. I’ll make a replacement. I also need to array all of the blocks on the floor and walk around them for a while to make sure I’m happy with the layout – colour, shapes all reasonably distributed.

And then the big challenge – there’s not a lot of light pink batik available here in town so once I get these blocks assembled into a 7 x 9 array, I will have to go shopping for a couple of fabrics to border, back and bind the quilt. There’s nothing in my backing stash that goes with pink.

Overall, I am please with how the impact of the layout is “pink” – that was what I was aiming for. A lot of improvising has gone into this block collection – I didn’t have measurements for most of these blocks, while I worked a bit with graph paper, most of the time I started with an element and built around it. In effect each block represents a “sample” – the sort of thing I’d do to work out the dimensions of a block before using it in a quilt. Here, the sample is my end product.

Blocks 30-43

I’m up to block 43! Just 20 to go (at least for the quilt top – I’ll probably work on more for the back – a dozen or so…)

Blocks 30-43

What’s going on here is a lot of improvisation – some “standard” blocks accompanied by a lot of using up scraps to end up with 6 1/2″ x 6 1/2″ blocks.

The challenge is having enough light pink batik – I’ve got lots of mid-range fabrics and enough dark. I’m running short of the lighter values and without the light the blocks aren’t going to work. I may have to resort to a few printed fabrics – I’ve used just two so far and am trying not to use more but I may be forced to.

The Scrap Collection

This is what my cutting table is looking like at the moment. I’ll clear it up (actually throwing out pieces that are too small or narrow to be useful) when I get back from some errands.