Hibiscus

Hibiscus

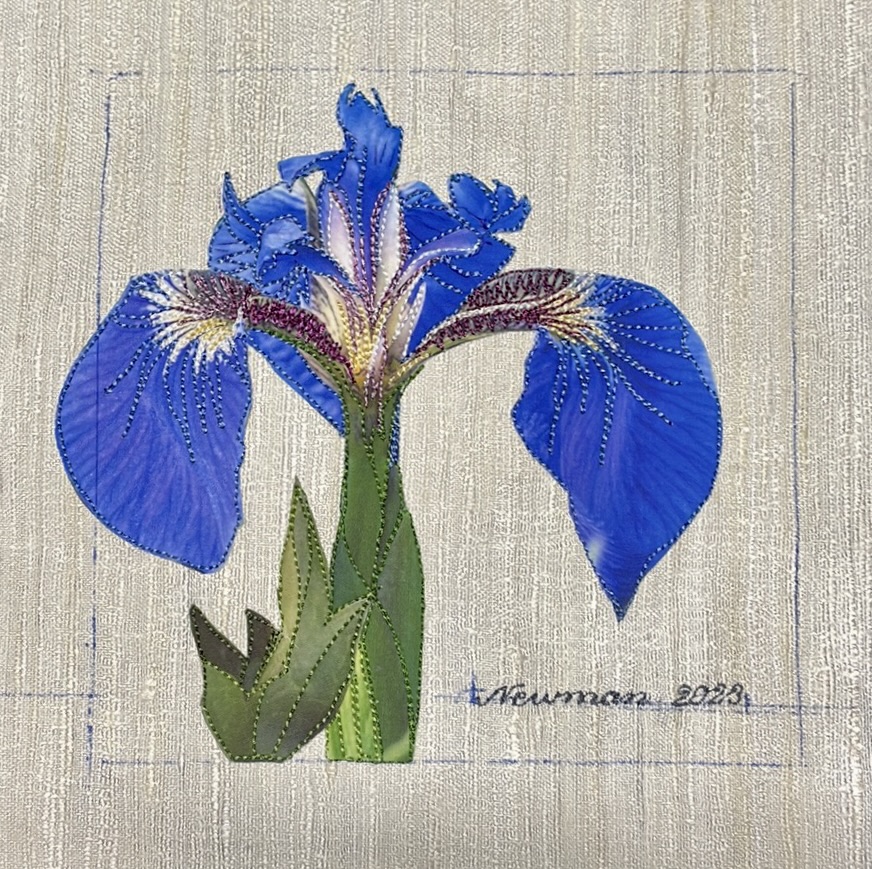
I thought this piece would be easy and straightforward – not so. The first thing I had to do was tone down the reflection both in the flower and on the leaves – I used Derwent Intense watercolour pencils to shade away the white. That gave me better overall colour to work with.

I started thread painting by outlining the leaves and leaf veins. Then onto the flower. Using a strong yellow I stitched the highlights on the petals. Next came the dark red at the throat, then the brighter red of the centre. I wasn’t intending to fill the entire centre area but an edge stitching at the red/pink boundary was jarring and left the red centre very dull so I took it out and reworked the area – filling it in. After that, I added the pink, and stitched the pistil. I needed to create a stitch for the stigma (of the pistil), and another for the stamens, I filled in the style of the pistil in a darker red.

Up close there is more stitching than I’d prefer, but when the piece sits next to the other 7 completed pieces, the flower shading stands out and the piece fits in with the others.

Peony

Peony

I finished this piece a few days ago, just forgot to post the image. I decided to represent a simple peony rather than a many-petaled double flower. With this one I had relatively few petals to deal with and the centre of the flower is better exposed.

The question is always, how much stitching, how little? Whether to create a new stitch or can I adapt something already on the machine. In this case, I took one of the “flower” machine stitches, and edited it so that all I had were six small overstitched dots. I used and reused the stitch, filling in the stamens. I then created a second stitch for the multitude of stamen filaments, stitching that in dark rose thread. Finally I used a machine stitch for the stigma, which stands out from the stamens.

The finished, mounted piece has the illusion of depth I was after.

Then I went on to the Iris.

Iris

I haven’t mounted this piece yet – I think the flower has enough thread painting, but I’m not sure about the leaves on the left. I have to do one of two things there – either more stitching, or I have to create more texture with permanent markers or coloured pencils. I’m still thinking about it – I don’t want to do too much to those leaves – I don’t want to draw attention to them but they need something more. So Iris isn’t quite done.

Today I intend to work on Hibiscus.

Hibiscus

I’m going to soften the “white” highlights to make them less prominent, I will embellish the stamens along the side of the pistil, I will emphasize the pistil head – just not sure what I’m going to do with the leaves. The white highlights there also have to be toned down – I likely will do that with markers.

First, lunch, then some sewing!

Hibiscus

Last year I was lucky if I got one new bloom a day – this hibiscus has been prolific! I’m getting 3-5 flowers every day. This plant could use a good home for the winter – I can’t bring it in because I don’t want to introduce outdoor insects to my indoor plants!

My Blooming Hibiscus

hibiscus

My hibiscus was slow to start blooming — I got a couple of flowers when I bought it earlier in the summer but then nothing for about a month. When the plant got moved back to the newly finished deck it decided it liked its new home, I guess, and started blooming – a couple of flowers a day. Most of them have had a yellow edge to the petals with predominantly red centers  – this one turned out to be predominantly golden yellow. I think I’ve caught it at its peak. The flower didn’t survive the storm we had yesterday – good thing I to the picture when I did.