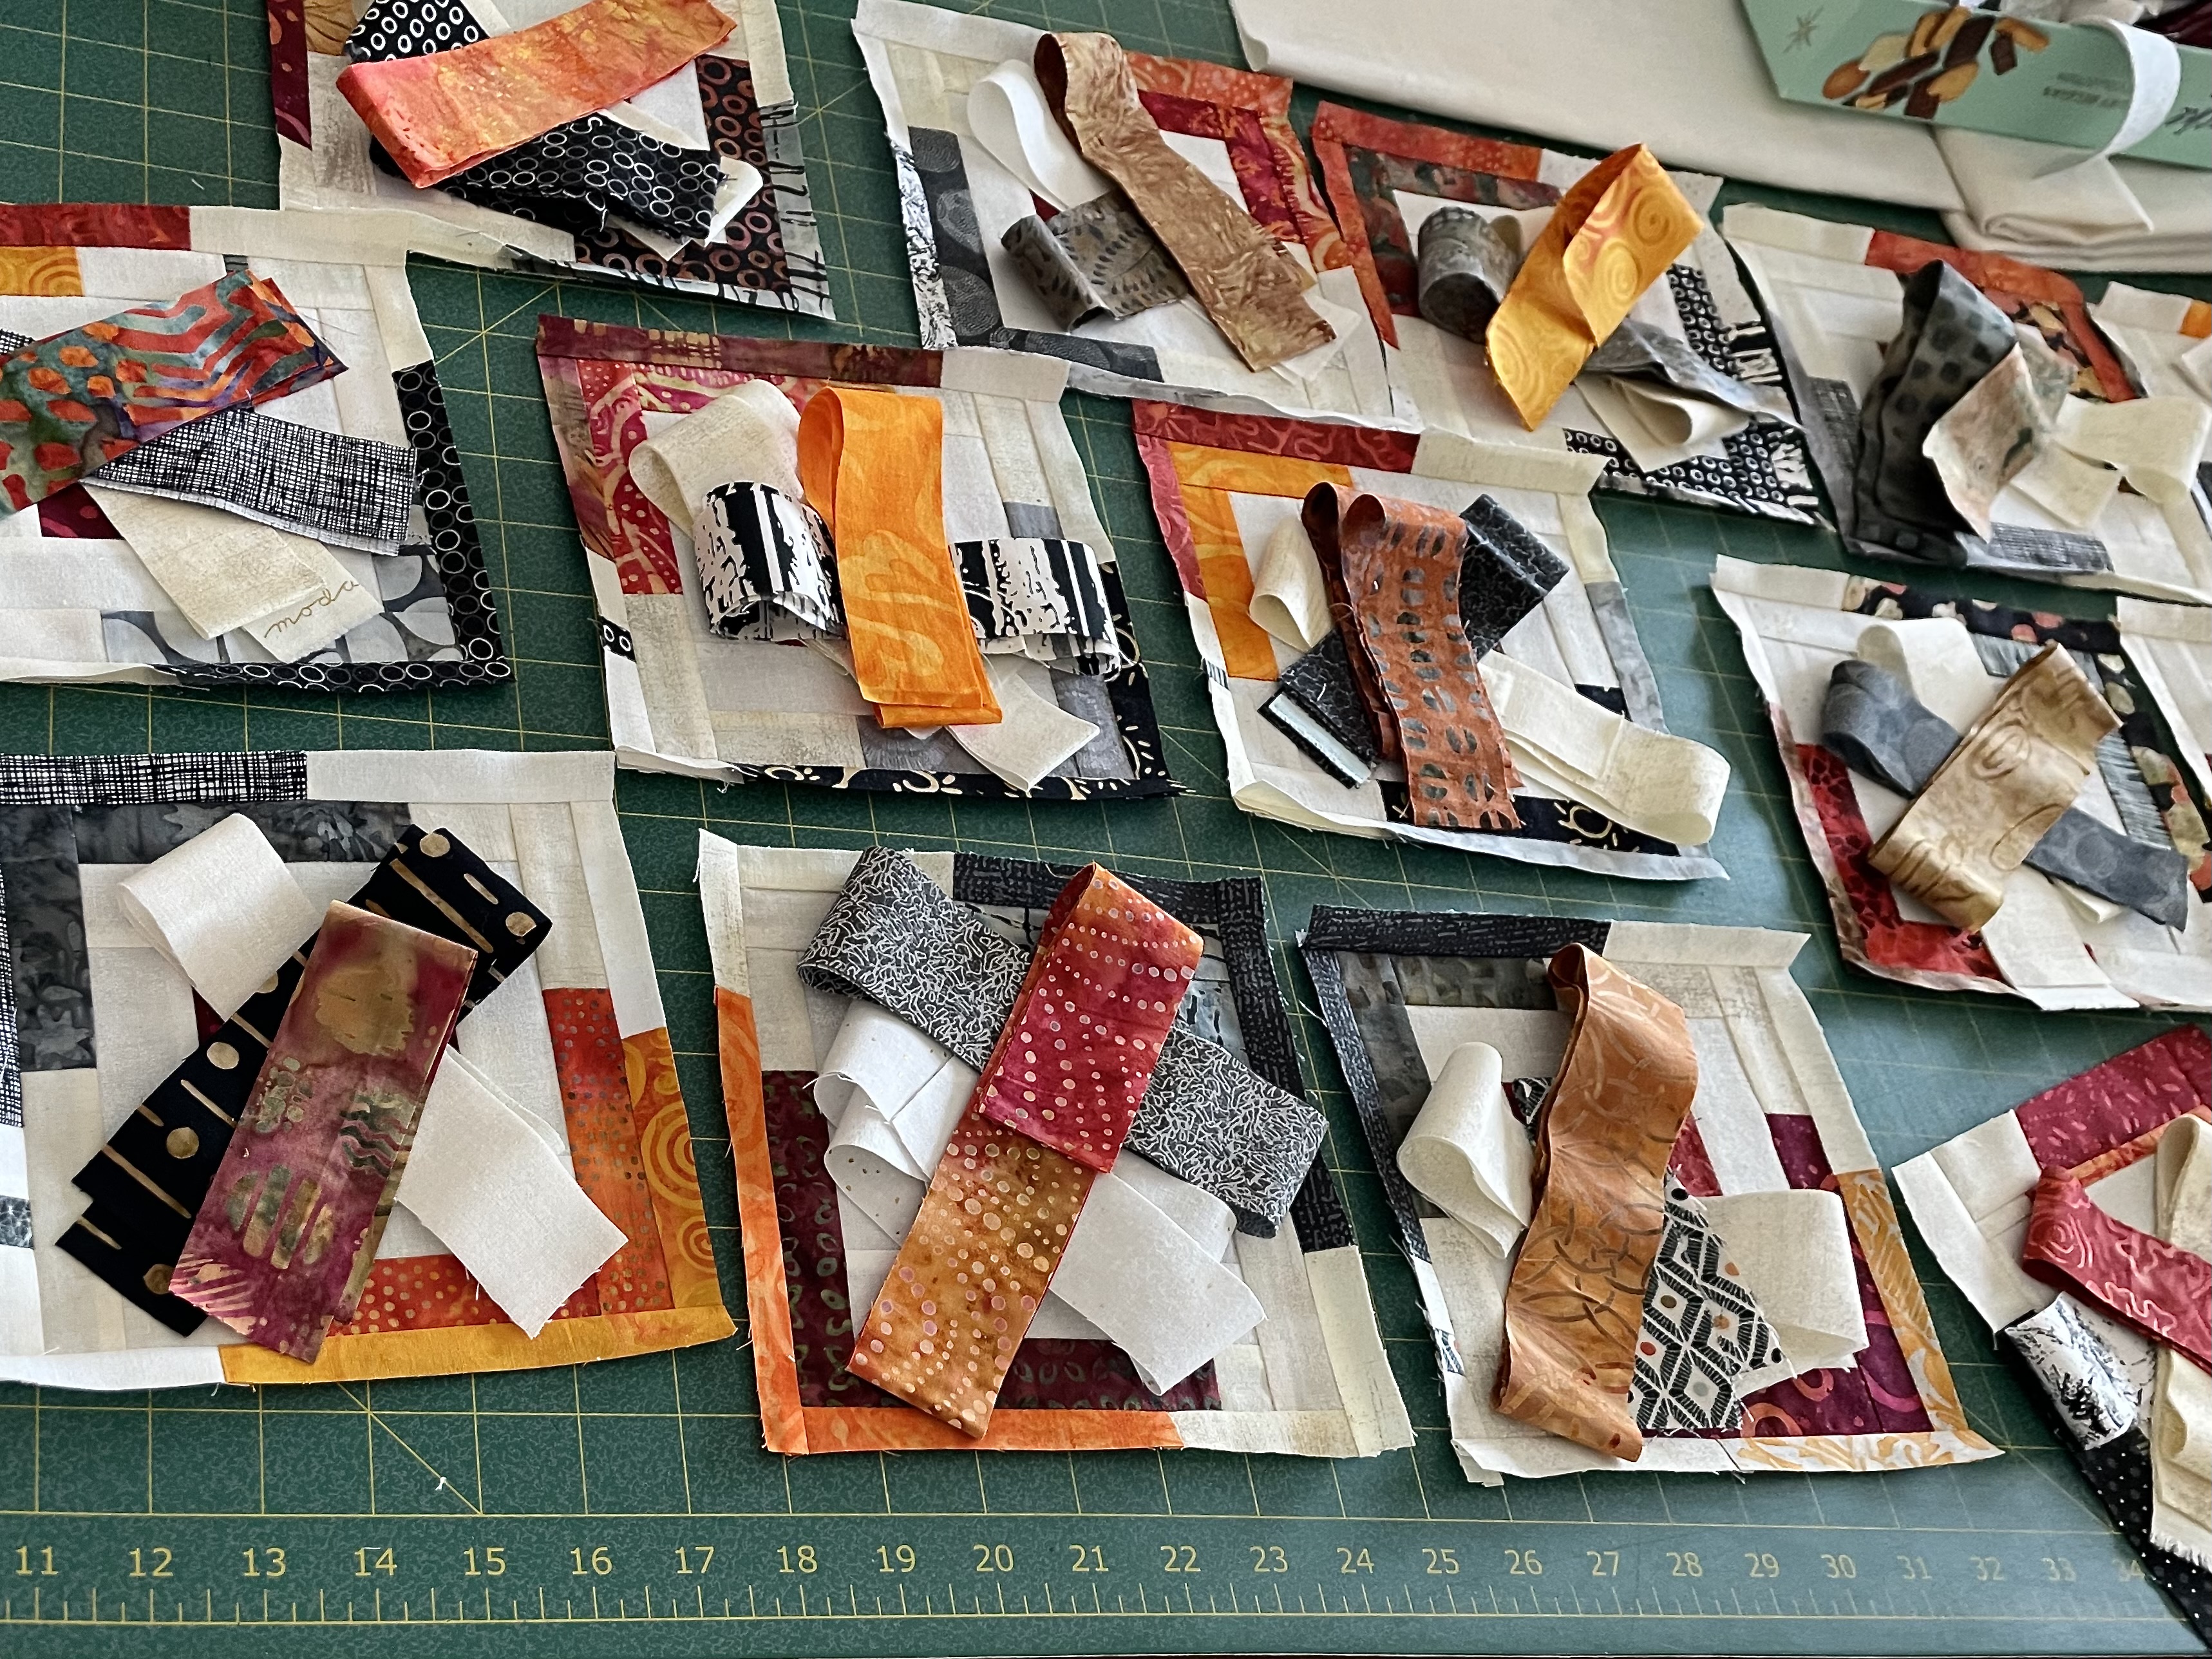
I have completed five blocks. I don’t have a design wall so I’ve laid them on the floor in my sewing studio area. Although it’s difficult, I can still manage to get down, and then up again, as I move blocks around on the floor.
This is a first go at laying out blocks – I will actually complete all 19 blocks I’m working on before making any decisions about placement. I don’t intend to use all of them in the quilt top – I’m building as many as I am so I have some for the back (or a second quilt – I have a ton of strips of all three sizes – another quilt is taking shape in my head). I will also need a bunch of predominantly “white” blocks to fill in many of the spaces. I will also need many half blocks to fill in around the edges – how many will depend on how many I put in the rows and columns.
What I have on the floor at the moment is a placeholder – it will get changed as each new block is auditioned in the array.
I spent the morning adding the round of narrow strips to each block. That sewing didn’t go quickly because I can’t chain piece anything – each strip had to be constructed as I worked my way around a block; no two strips are the same. I’ve made an effort to not use any fabric more than once in each round to avoid duplicates when I start joining blocks.
Once I was finished adding the narrow border to each block, I laid them all out and placed the strips for the next round on each, doing my best to avoid repeating, in this final round, any fabric I used in previous rounds. I will check that each block has no repeated fabrics when I go to sew this outer round of strips. I have enough different fabric strips to be able to do that. That’s the case for both the “reds” as well as the “greys”.
So how do I organize the fabrics, the cutting, and the collecting so I can make ~20 different blocks? I figured out I needed to cut and sort three different sizes from each of the fabrics – 3/4″, 1 1/4″, and 1 1/2″. I sorted the sizes into different boxes (I had neither enough room nor boxes to sort colours, greys, and background light fabrics into separate boxes, so I sorted just by size.
3/4″ Sorted
I did the cutting and sorting yesterday. I also bordered and trimmed all 20 center squares (3″ blocks”). The bordering went quickly because I was able to chain piece the strips one side at a time. This morning I laid out all 20 of the bordered squares
Top: Bordered Centre Square / Middle: 1 1/4″ Strips To Add; Bottom: Level 3 Stitched
I’ve decided to add 1 1/4″ strips to 15 of the blocks, but to use the narrow 3/4″ strips with 5 of the blocks – so they’re not all the same construction.
Blocks with Level 2 Narrow Strips – Ready To Sew
The remaining blocks will have 1 1/4″ strips at Level 2, with narrow 3/4″ strips at Level 3. All blocks will have the same strip width (1 1/2″) for the outer round.
Now, I’m ready to sew. I’m starting with the 5 blocks with narrow strips. First I’m going to set up all the strips by joining background to the colour and grey strips, then add the joined strips to the centre bordered squares. Next, I’ll continue with these blocks adding the next two sets of strips to complete these blocks. Last I will work on the remaining 15 blocks, working on each level for all 15 blocks.
Although I can’t actually chain piece, this will be more efficient than completing one block at a time. This way I can audition the coloured and grey strips with all of the blocks at the same time and get a sense of the coordination I’ll be looking for when I go to assemble the blocks into the top.
Once I have these blocks completed, I still need to create at least a dozen blocks from just the light background fabrics to intersperse among these coloured blocks. I’m after a minimalist feel to the quilt so I need to reduce the amount of colour in the overall layout. I’ll tackle that problem when I’ve finished these bright log cabin blocks.
I haven’t been travelling, just getting on with life with small projects I haven’t bothered to report on.
Boomerang Quilt Completed
I finished the Boomerang Quilt ten days ago (seems longer than that somehow). I took it to Sew With Vision to show the gals how I used the fabrics I bought there. Sally wanted me to display it to advertise a class we’re scheduling – you never know whether there will be any interest or not.
I’ve been working on darning some socks – one pair for me, two pairs for friends. I’ve another sweater needing restoration sitting with my knitting waiting for me to make time to work it.
A while back I came across another minimalist quilt which I’ve begun working on. It’s based on the Log Cabin block which I haven’t made in a gazillion years. Made from scraps, I thought it worth trying. I have no idea what size the quilt in the image turned out to be; I want a lap quilt – so something that’s approximately 50″x 65″.
Improvised Block – 9 1/2″
My first try gave me an idea for proportions – some wider strips, some thin, ending with a wider outer strip which includes the seam allowance. I want a trimmed block that is 9″ square finishing at 8 1/2″ square. My test block works, but it’s too large at 9 1/2″; I started with a square that is a bit too large and it’s bound by strips that are a bit too wide. By shrinking the square by 1/2″, and the first strips by 1/4″ I should end up with a wider outer strip and be able to trim to 9″.
Now for a second block with some revised measurements to see what I end up with. I have a bunch of “Grunge” fabrics shading from off-white to cream. The “background” of the quilt will be a blend of the light with orange/gold/deep red and various grey/dark grey elements inserted in the strips.
It’s taken the entire day to piece this quilt back using the extra blocks, small scraps and other leftover fabric all because I didn’t have a backing fabric on hand. Looking at the panel I almost see it as another quilt – not quite, though, because the left side has a rather boring patch right in the middle. That was where I started piecing, trying to use the larger leftover pieces and wasn’t being concerned about placement or size. In fact, I was simply trying to create a 26″ x 72″ panel to use on the back and didn’t think I could actually be making a second separate quilt!
This is just the backing for the “boomerang” quilt (I don’t have a name for it, yet). Now to cut some batting, layer the three parts, and pin them together. I haven’t yet set up an embroidery for quilting the quilt – that’ll be tomorrow’s part of the project.
A blizzard outside today, so I’ve been sewing all morning. I just completed the quilt top with the pieced inner sashing and the border. I like how the border print brings the whole project together. There’s now enough colour movement and border fabric elements within the panel to invite the eye to look around.
I added the narrow sashing to the border before applying the border to the panel so I could do a single mitre including the narrow sashing – easier than mitring the two elements separately and trying to get them lined up.
Now I have to come up with an idea for the back. I have quite a few leftover blocks (with boomerang) and some rectangles I assembled from leftover triangles along with scraps from the blues. I don’t have any “backing” fabric, per se; my plan is to use the scraps to make as large a panel as I can, then fill in with something that goes with the blues in the top.
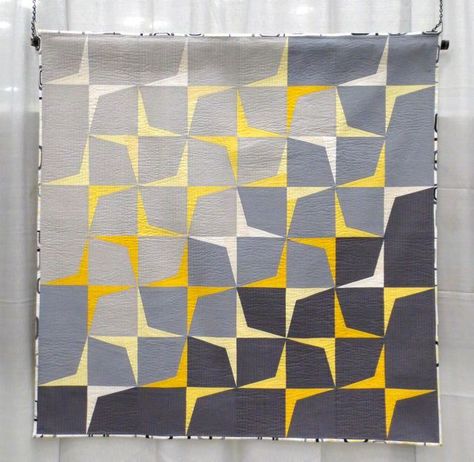
I liked the simplicity of the design, although I thought I’d try using print fabrics to create the blocks. I also didn’t want a square, a good lap quilt has to be a rectangle so it covers the body as well as the feet when you use it, even if it’s created as an art piece intended for hanging!
So from the beginning I was using this “trajectory” quilt for inspiration not to duplicate it. Also it’s a paper pieced work – I hate paper piecing so I constructed a set of templates (based on a 6 1/2″ block) to cut my block elements.
Then I went through the fabrics in my stash – came up with several shades of blue but nothing to contrast with it so I went shopping.
The FabricsIn Black/White
In the end I came up with more blue and some yellow/chartreuse pieces.
I cut the block pieces, matched the lighter yellows to the softer blues, the darker chartreuse with the stronger prints and navy pieces.
The Block Pieces Ready to Assemble
With the blocks sewn I laid them out – the challenge was establishing a gradient within a rectangle – not as easy as you’d think.
First Layout
Deadly!
My pale blues read beige and I probably should have reversed the pairings using the brightest yellows with the navy elements; the darker chartreuse with the pale elements – in any case an acceptable quilt but nothing outstanding about it. Here’s where I realized it’s much easier to make quilts that “pop” with strong, large print or batik fabrics!
I had bought a yard of a much larger print fabric which tied the blues/yellows, intending to use it for the border, but I decided I needed to incorporate some into the panel.
I made several new blocks using that fabric in the corner.
Second Layout
Not much better. You barely notice the large print. Nothing is moving your eye around the panel and the upper left corner just sits there.
I thought about my problem for four days while I sick with the norovirus and decided I needed both less and more of the larger print fabric. I made some new blocks this morning.
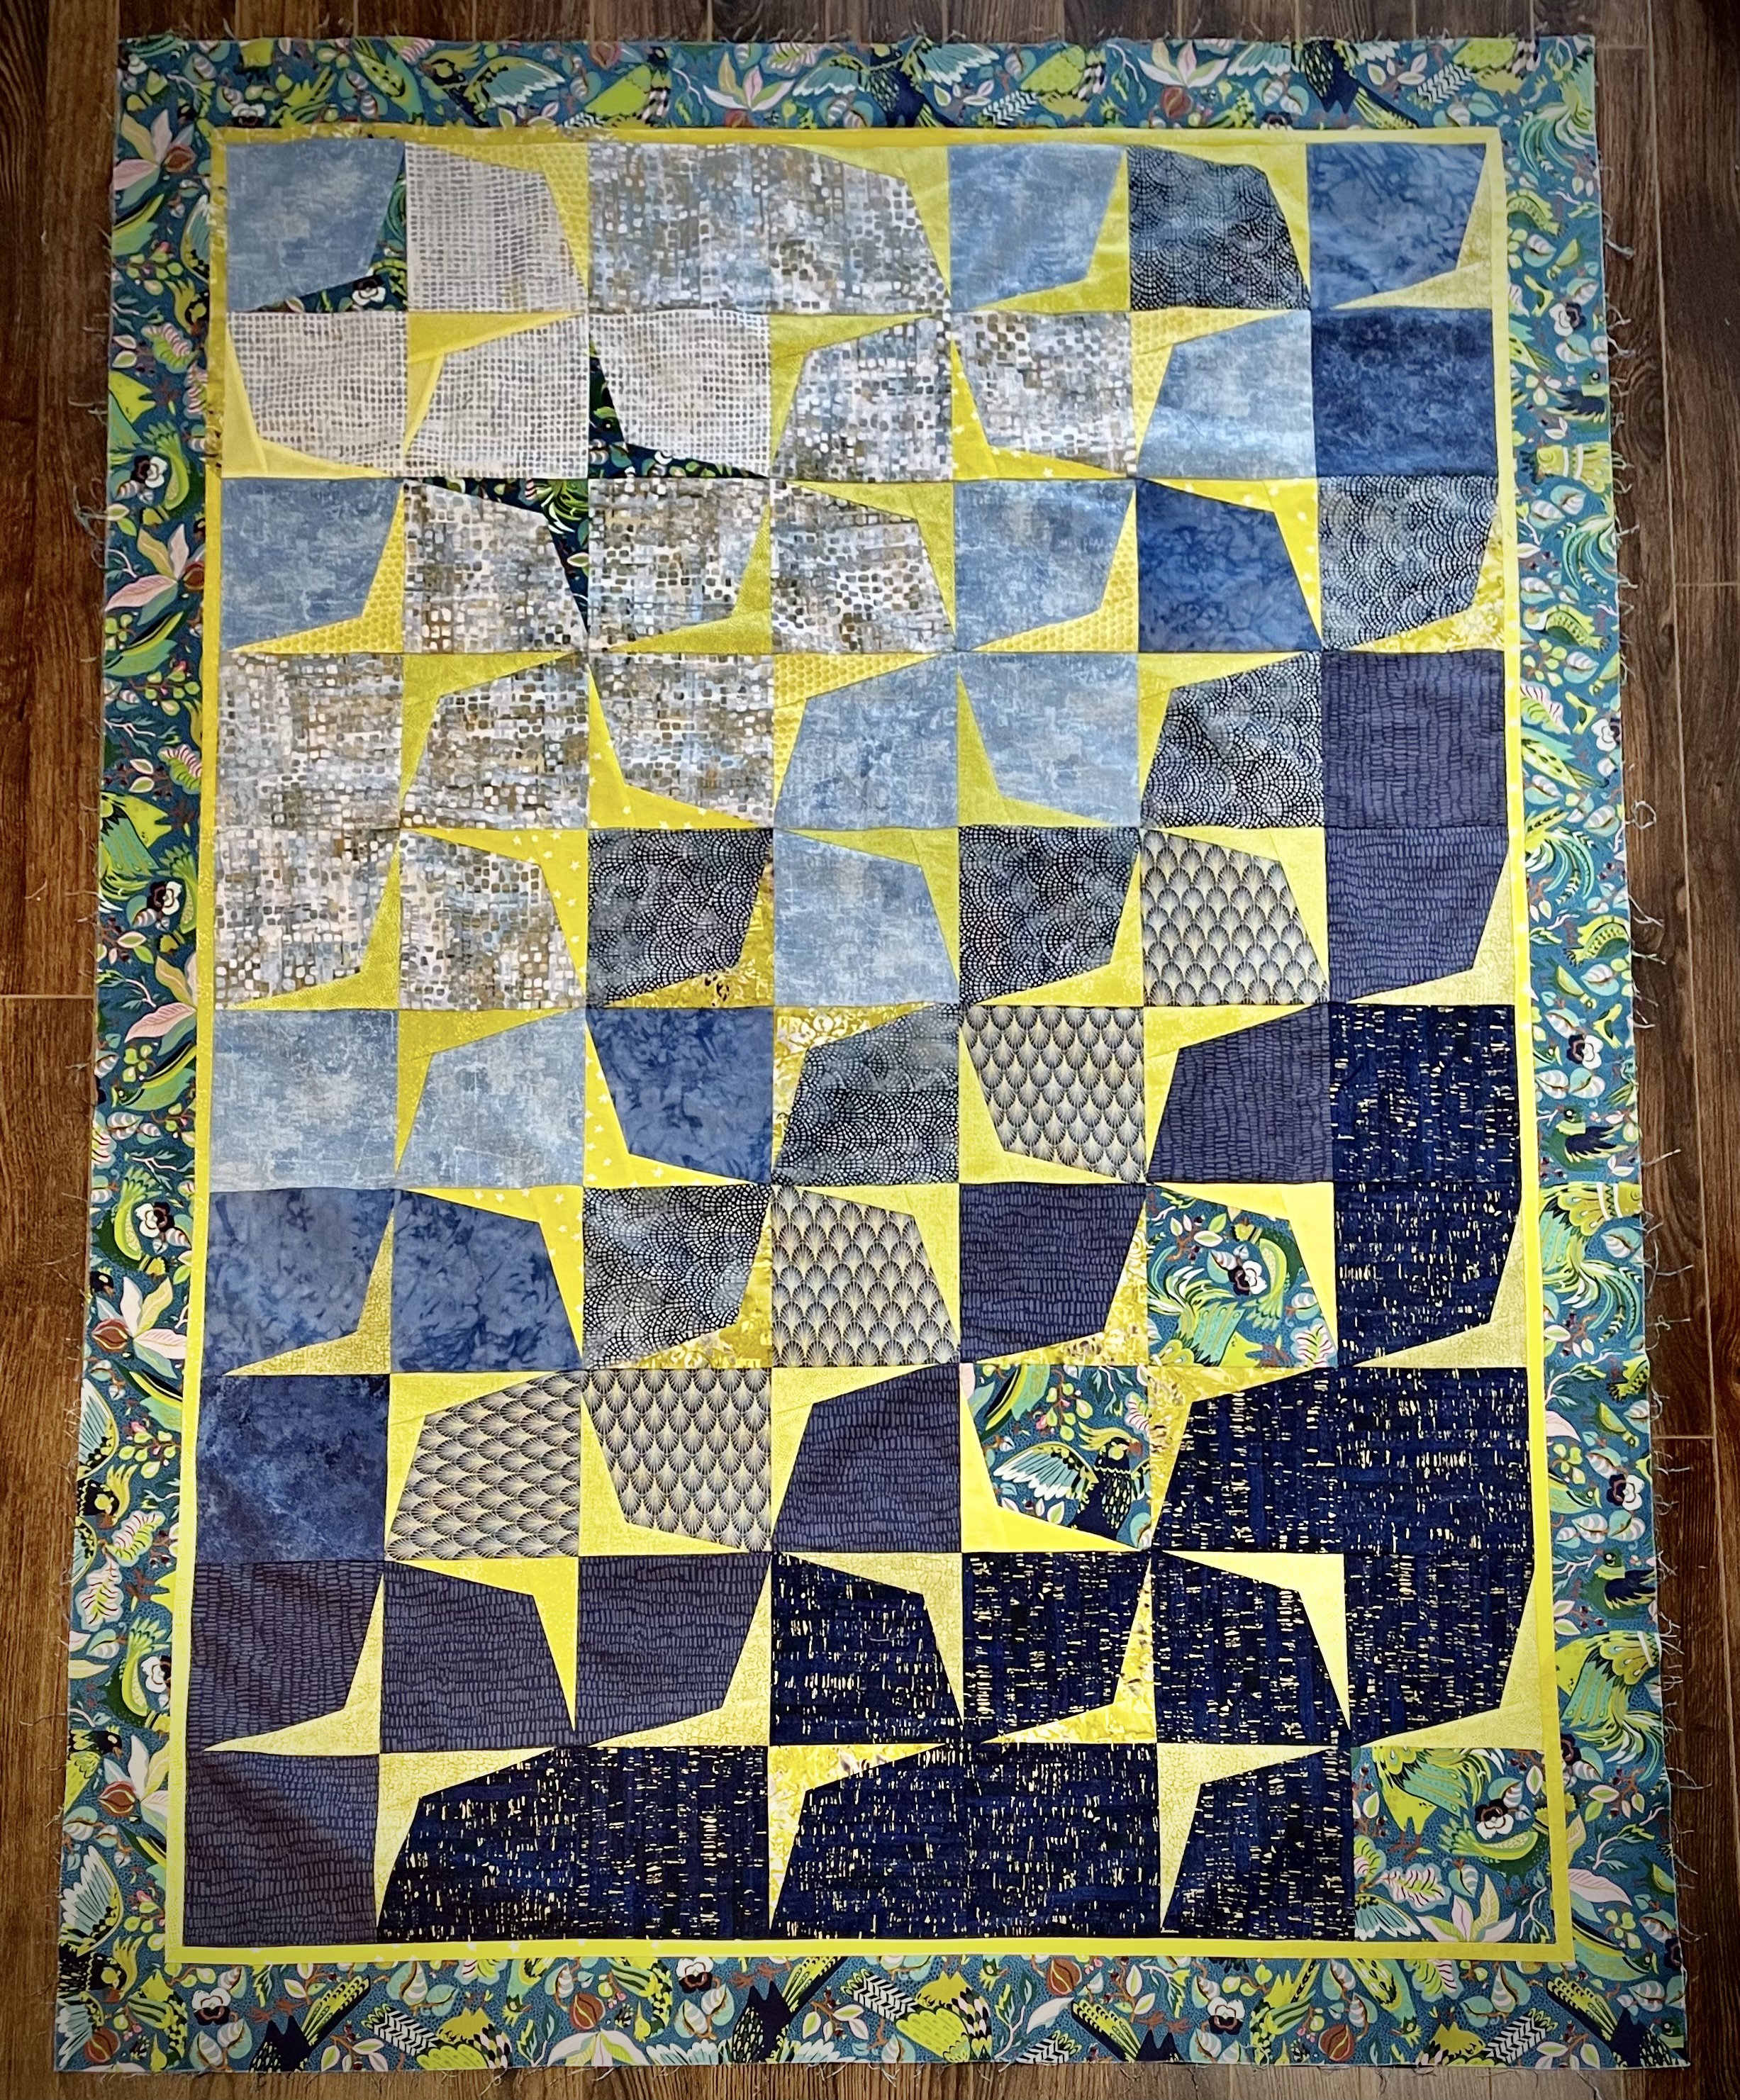
Third Layout
In addition to the few hints of large print, I took away several of the very pale blocks, replacing them with darker elements, I also moved other blocks around mixing up the array quite a bit more. After looking at this arrangement for a while I decided I could finally start sewing rows.
Final Layout / Partially Assembled
Still not one of my better quilts but at least I can live with this. When the panel is assembled, my intention is to insert a narrow gradient sashing (maybe 3/8″) using the yellow/chartreuse fabrics, ending with a 3 1/2″ border using the large print. Who knows, I may even decide to add some appliqué, although I have no idea what that would be – I can certainly break up those deadly light fabrics with small large print circles….
The original inspiration piece worked for a number of reasons: first the quilter used solids (four yellows, three greys), easier to match up than prints; she worked in an 8×8 square array which allowed her to establish a symmetry not possible with 7×10. (My reason for choosing 7×10 instead of 8×11 had to do with the finished size of the panel and with a wide border ending up too large for a lap quilt.)
While the centre panel is settled, the sashing/border is not (and I’ve not yet given any thought to the quilt back). There’s still a lot of sorting out to be done here.
I started playing with this quilt on Oct 12. Ten/eleven weeks ago. I just finished hand stitching the hidden binding on the back! Finally – my Christmas day project – to get this quilt done.
Quilt TopQuilt Back
Once I had the quilt top assembled I found I could move along again. I made the decision to use the Holtz fabric intact on the back rather than cut it up. I had to incorporate the two pieces I had in order to have enough to complete the back – that’s even after inserting a 14″ strip I assembled from bits and pieces leftover from the quilt top – a much better use of that very busy fabric!
I would have completed the quilt with a conventional binding, except I didn’t have enough of the bronze cork fabric to do that. So in the end I used the leftover strips from the backing to make a hidden binding.
I’m glad the quilt is finally completed. I kept avoiding it because I knew I wasn’t going to be happy with the finished project – nothing there that pops out to say “notice me!”. In fact, I may decided to showcase the quilt back, which I think is much more interesting, in upcoming exhibitions.
So on to the next project – a couple of wall art pieces which I’ve been thinking about for over a year! Time to start working on the first of them.
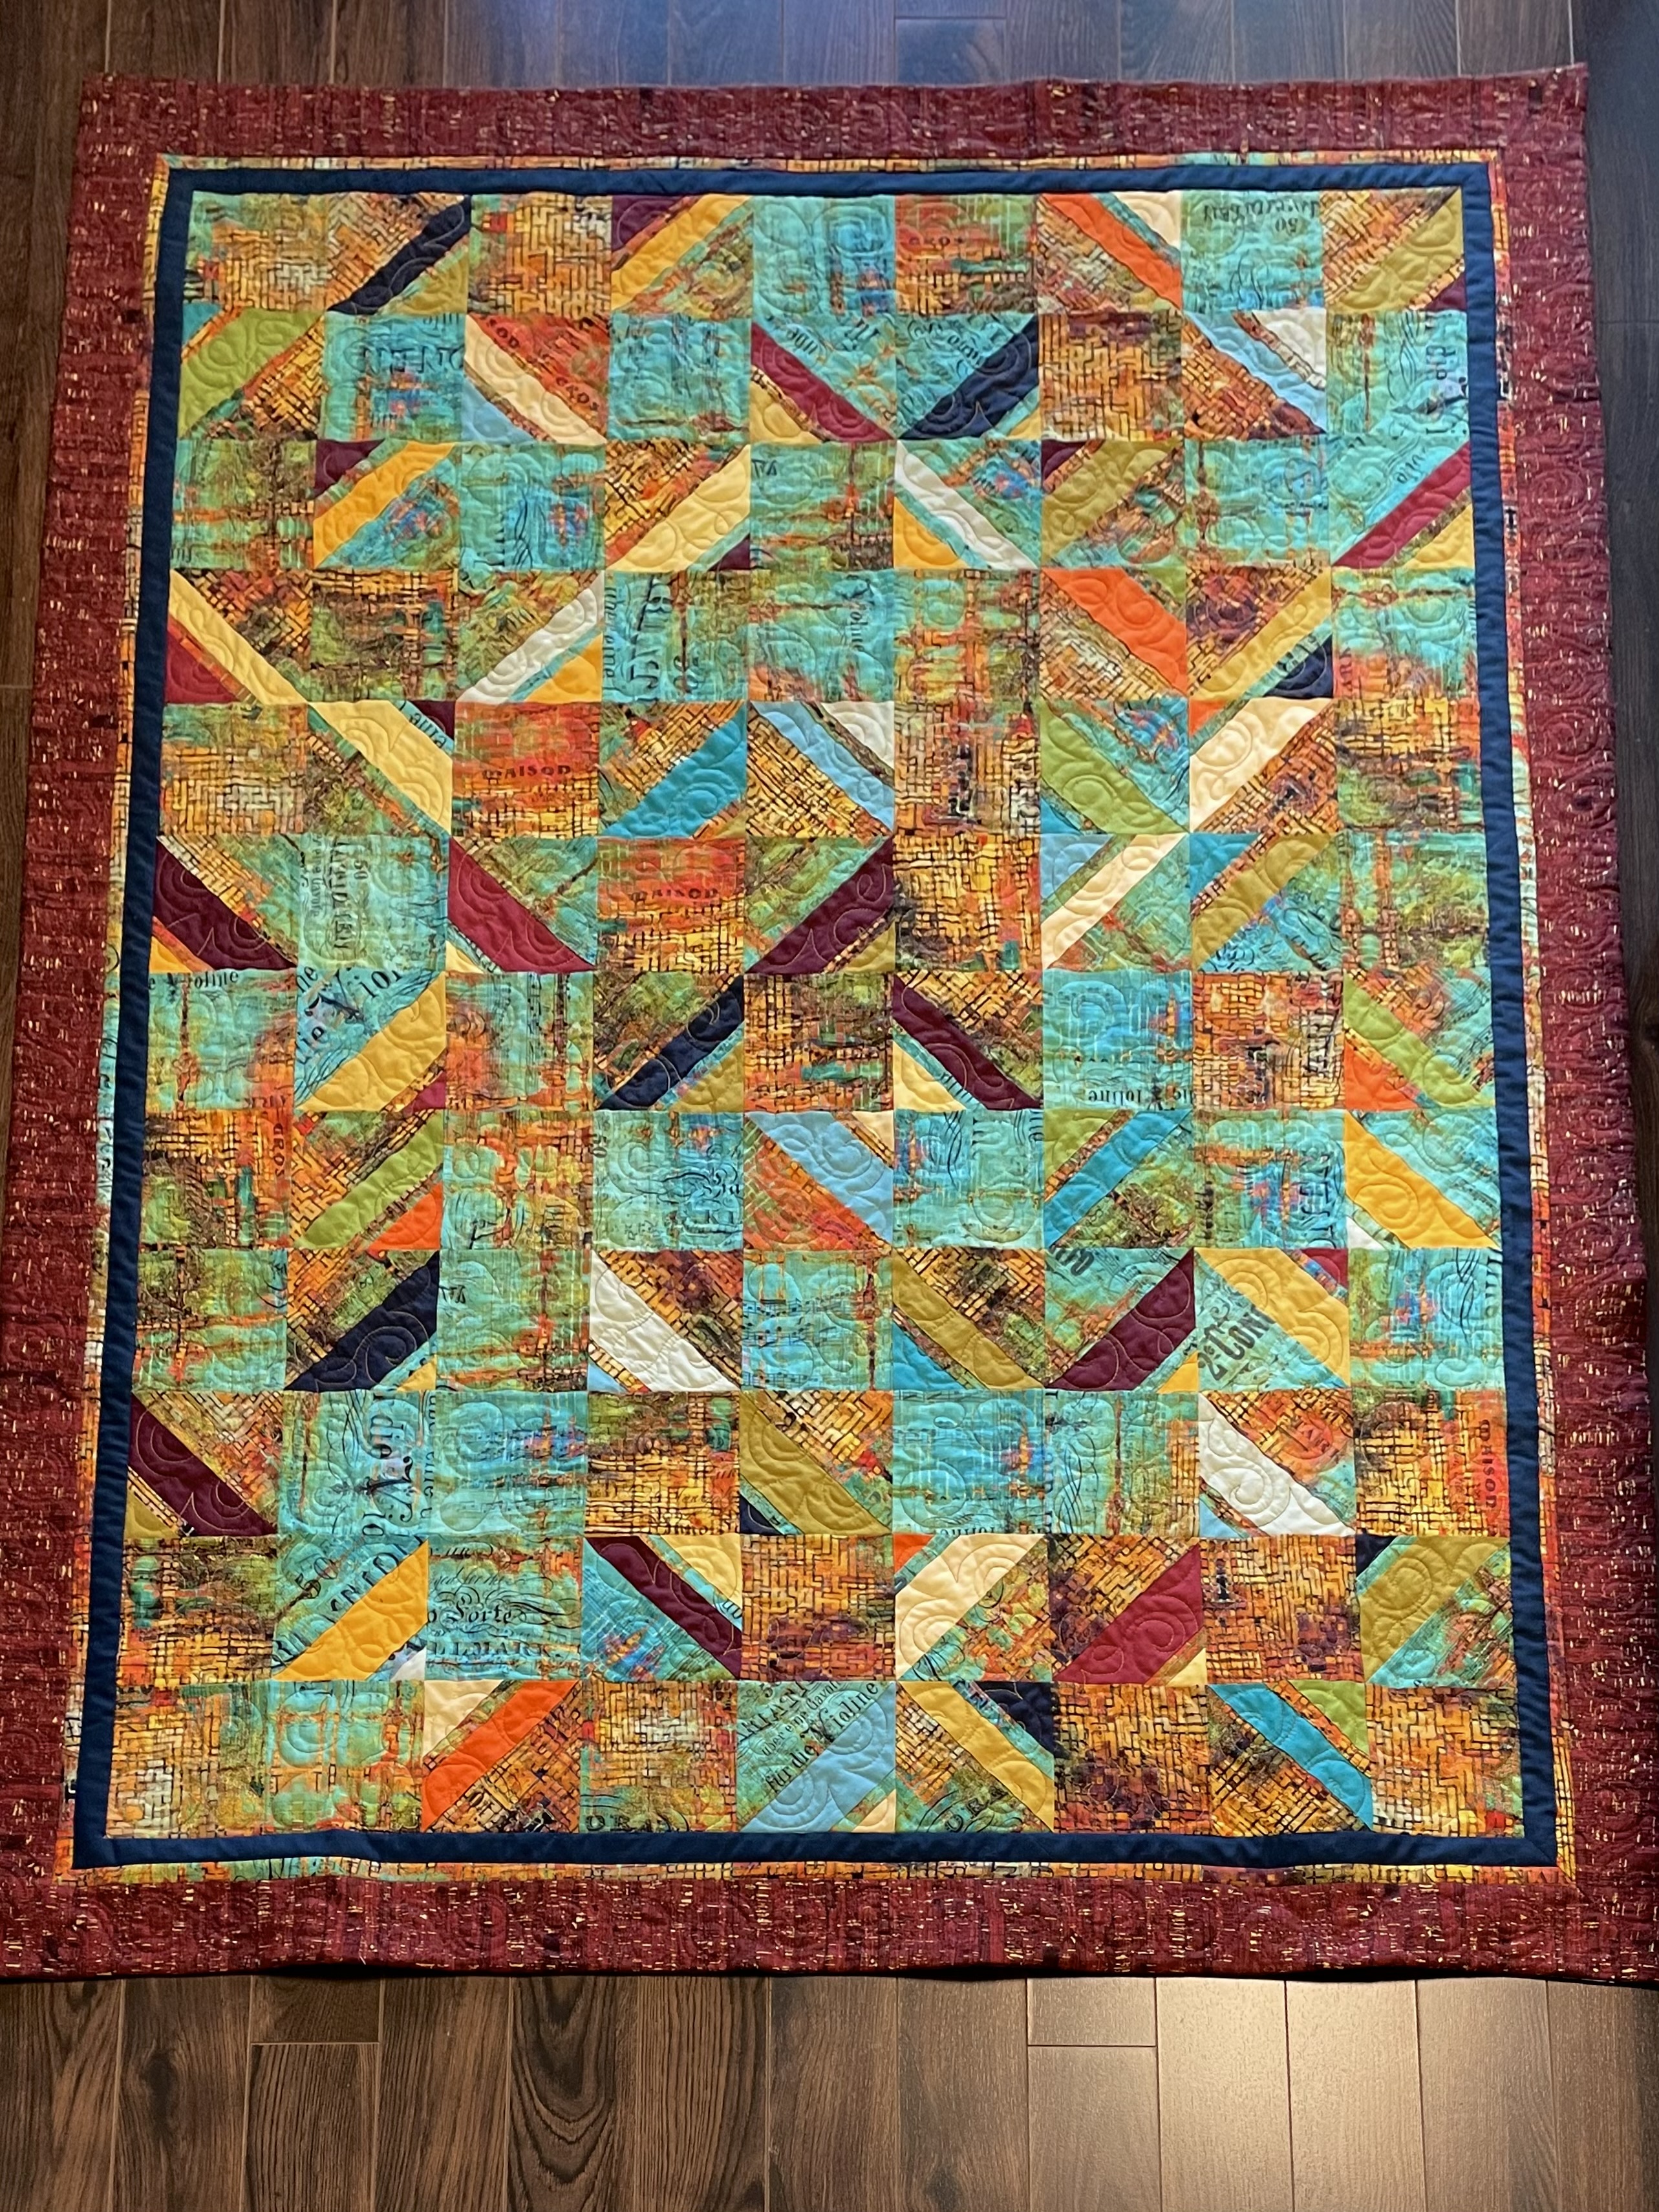
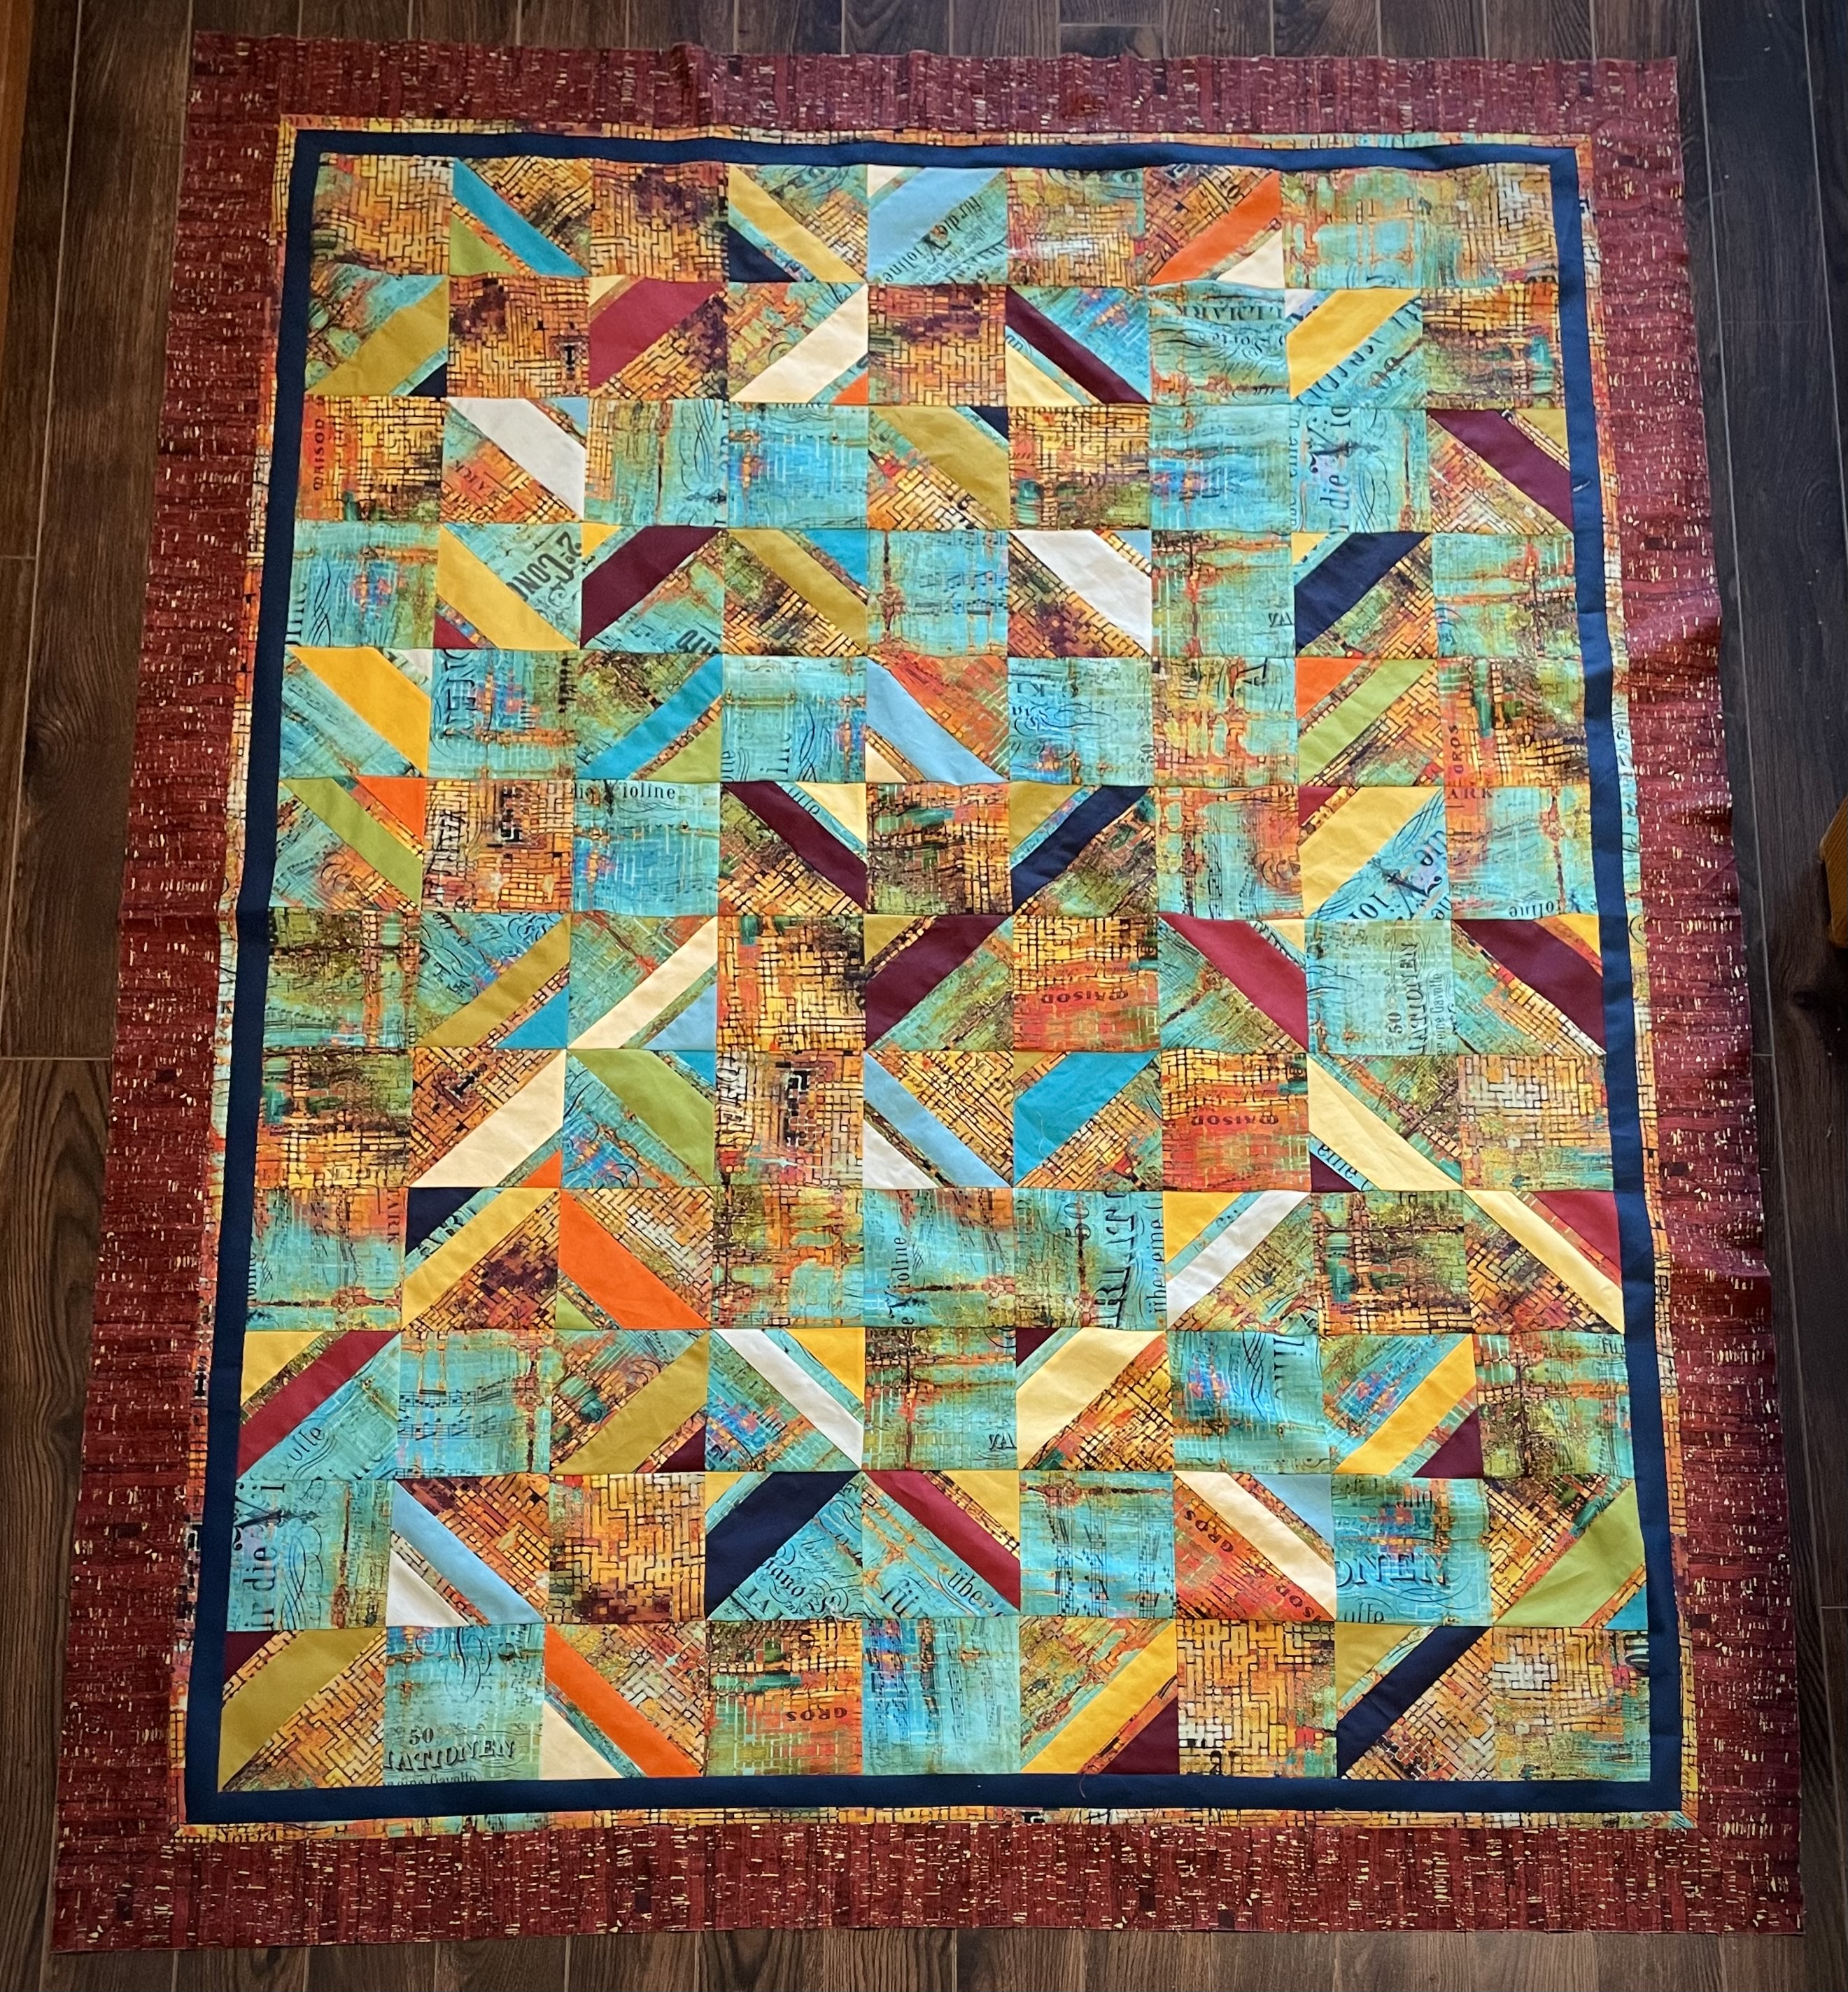
Here it is – the finished quilt top. It’s not the idea I had in my head when I started! It’s what I’ve ended up with, however; I can live with it.
It’s just another half-square triangle quilt; nothing special. The border pulls it together. I’d never have guessed I was going to use the “cork” fabric to finish the project but the brick colour brings out the various reds/oranges/yellows in the print fabric and the solids. One of the benefits of having a relatively large fabric stash.
Did I tell you about the discussion I had with a friend about “the stash”? I’ve decided I can call my fabric collection a “stash” as long as I’m using it to create new work. The moment I stop, it becomes a “hoard” and I turn into a hoarder!
Gotta keep working – I’ve more fabric and supplies in my apartment than I can use up in a lifetime. In the end I will die a hoarder!
Sally mentioned the other day, when I dropped into Sew With Vision about something, she’d like to hang it. I’m all for that. It’ll be interesting to see what people think of it.
Now onto the back. I’m going to use what I have left of the Free Spirit: Tim Holtz, Eclectic Elements, Abandoned, Rusted Patina fabric along with some border remnants, and the unused blocks I set aside. I want to see how large swaths of the fabric works, against a small amount of detail.
It’s days since I posted anything but I’ve been chugging along as always.
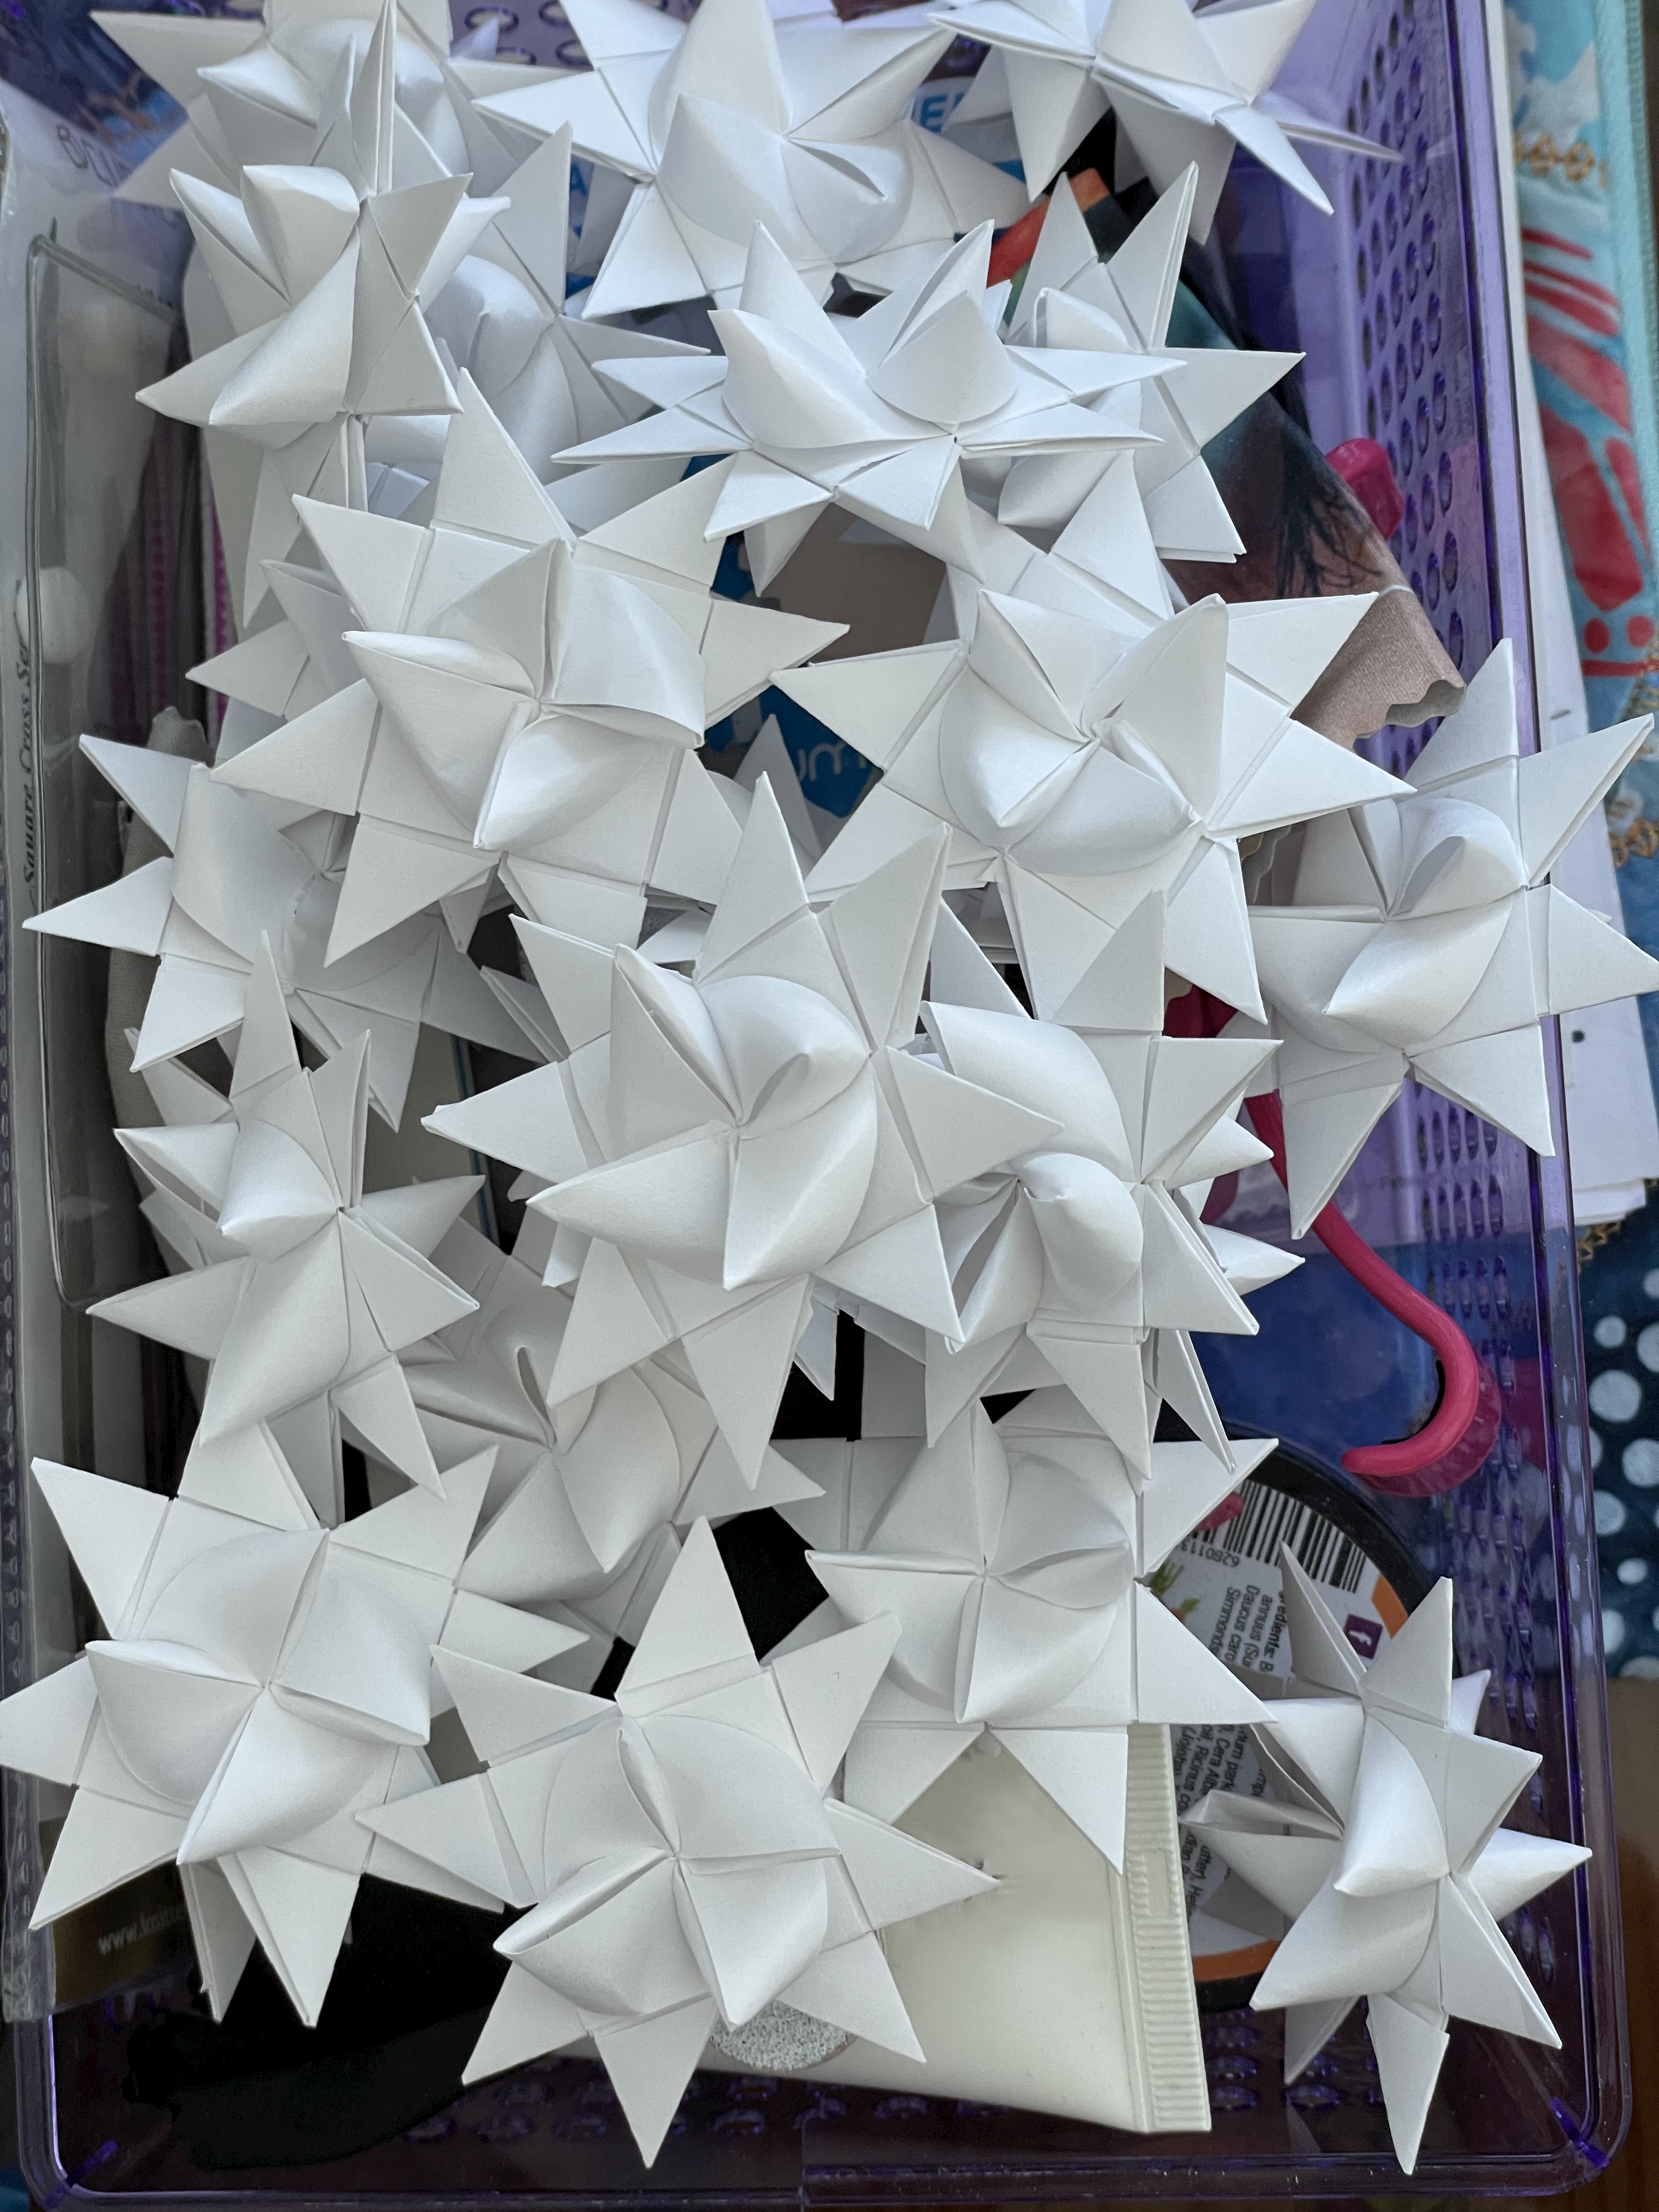
Danish Paper Stars
Danish Paper Stars – it’s become a seasonal tradition to make stars to share with neighbours and friends. I’ve made a total of close to 60 this year. I started with about 45 – which I distributed the other evening (one star per apartment). When I got home I realized I didn’t have enough left for friends so last evening I made another 15! That’s it for stars this year. It takes me about 8 minutes to make a star. [The website I found a couple of years ago describing how to make the stars is still functioning so click here if you want to try your hand at making a few!] [If that link doesn’t work try here.]
The Quilt Top – it’s been a chore but I finally managed to piece the panel together. I rummaged through my stash looking for fabrics to border it with. I came up with something.
Quilt PanelWith Border Fabrics
The challenge with the burgundy “cork” fabric is that it’s directional so I’ll have to consider how to use it on all four sides – it will require some piecing, I think. Deciding to include a thin strip of the backing fabric ties the whole thing together. It don’t see any appliqué that will enhance this panel which is already way too busy!
Can’t say I’m ecstatic about this creative effort – the background fabric [Free Spirit: Tim Holtz, Eclectic Elements, Abandoned, Rusted Patina PWTH126] turned out to be much busier than I anticipated. I loved the colour combinations, but cutting it up just accentuated the “busy-ness” and adding the solids as I did made the whole panel out of control. That’s the challenge of improvising – it doesn’t always work out as you’ve imagined it.
The Rusted Patina fabric should have been used as very large pieces which is what I’m going to do on the back. I managed to purchase enough from a number of online sources to do that. I want to see what making a small strip through the dominant backing fabric will do. In any case I want to use up what I have. I don’t intend doing anything more with it. Lesson learned!