“Bubbles/Balloons ?” Finished

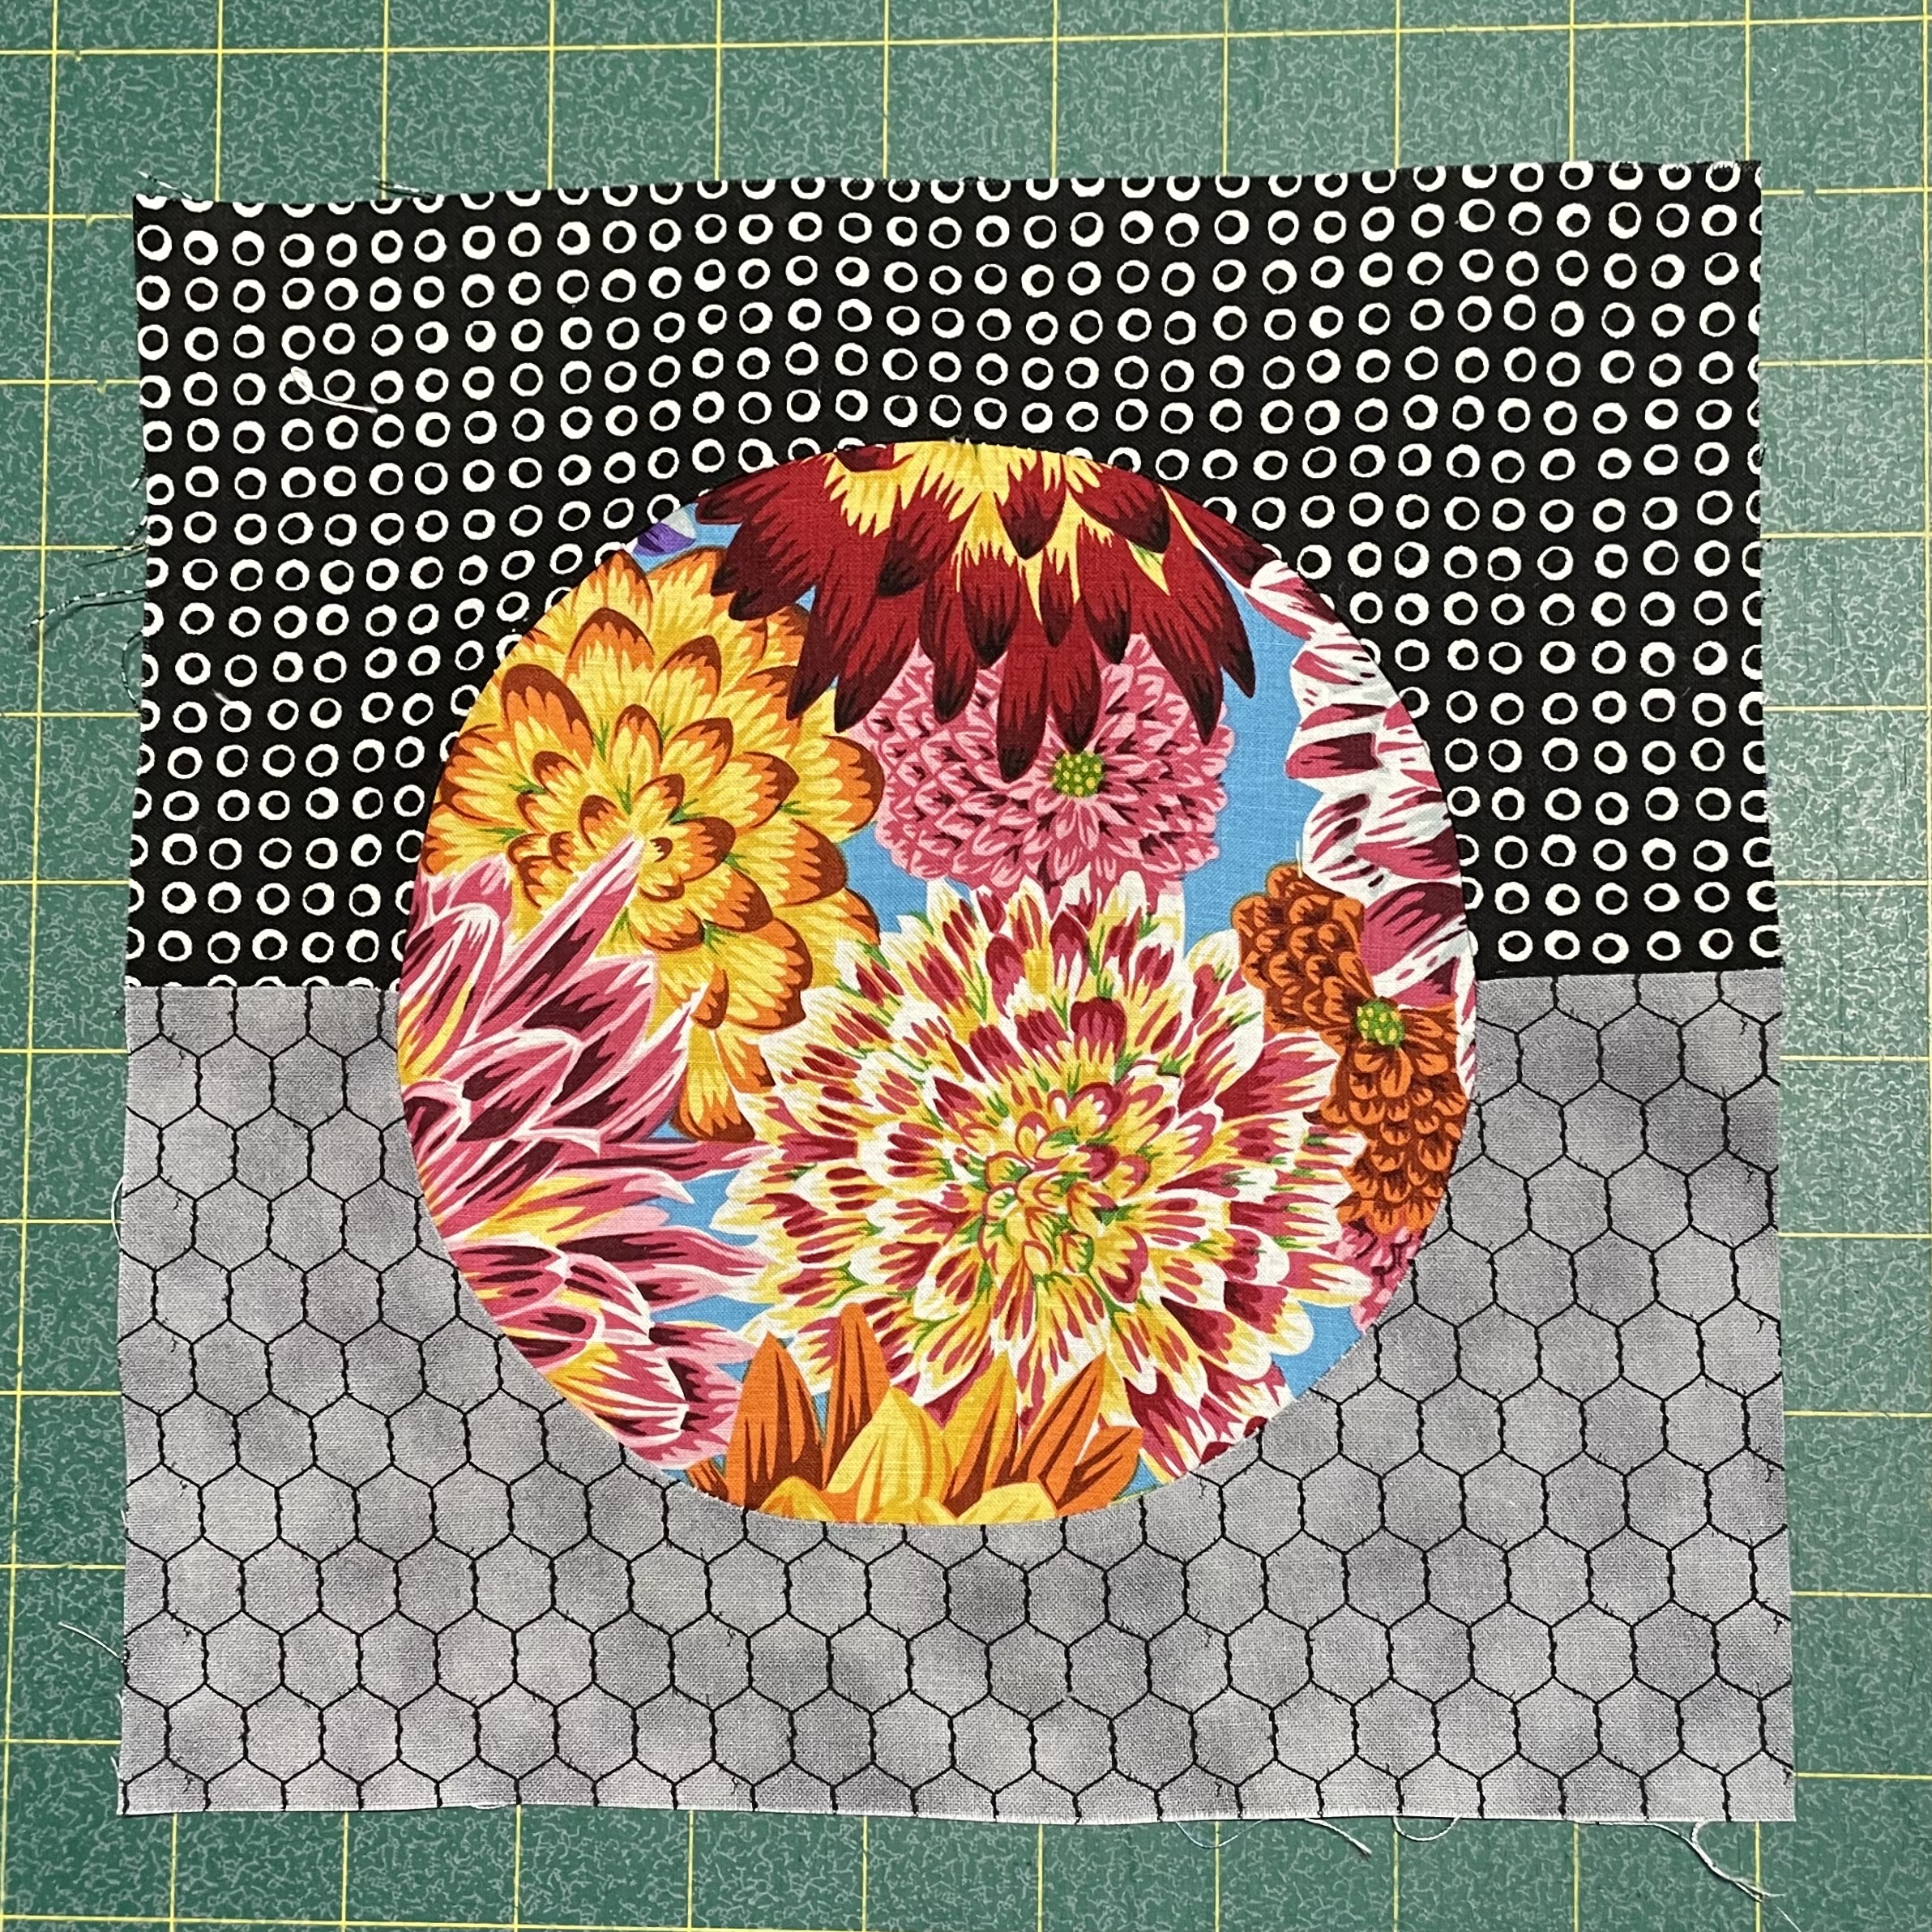
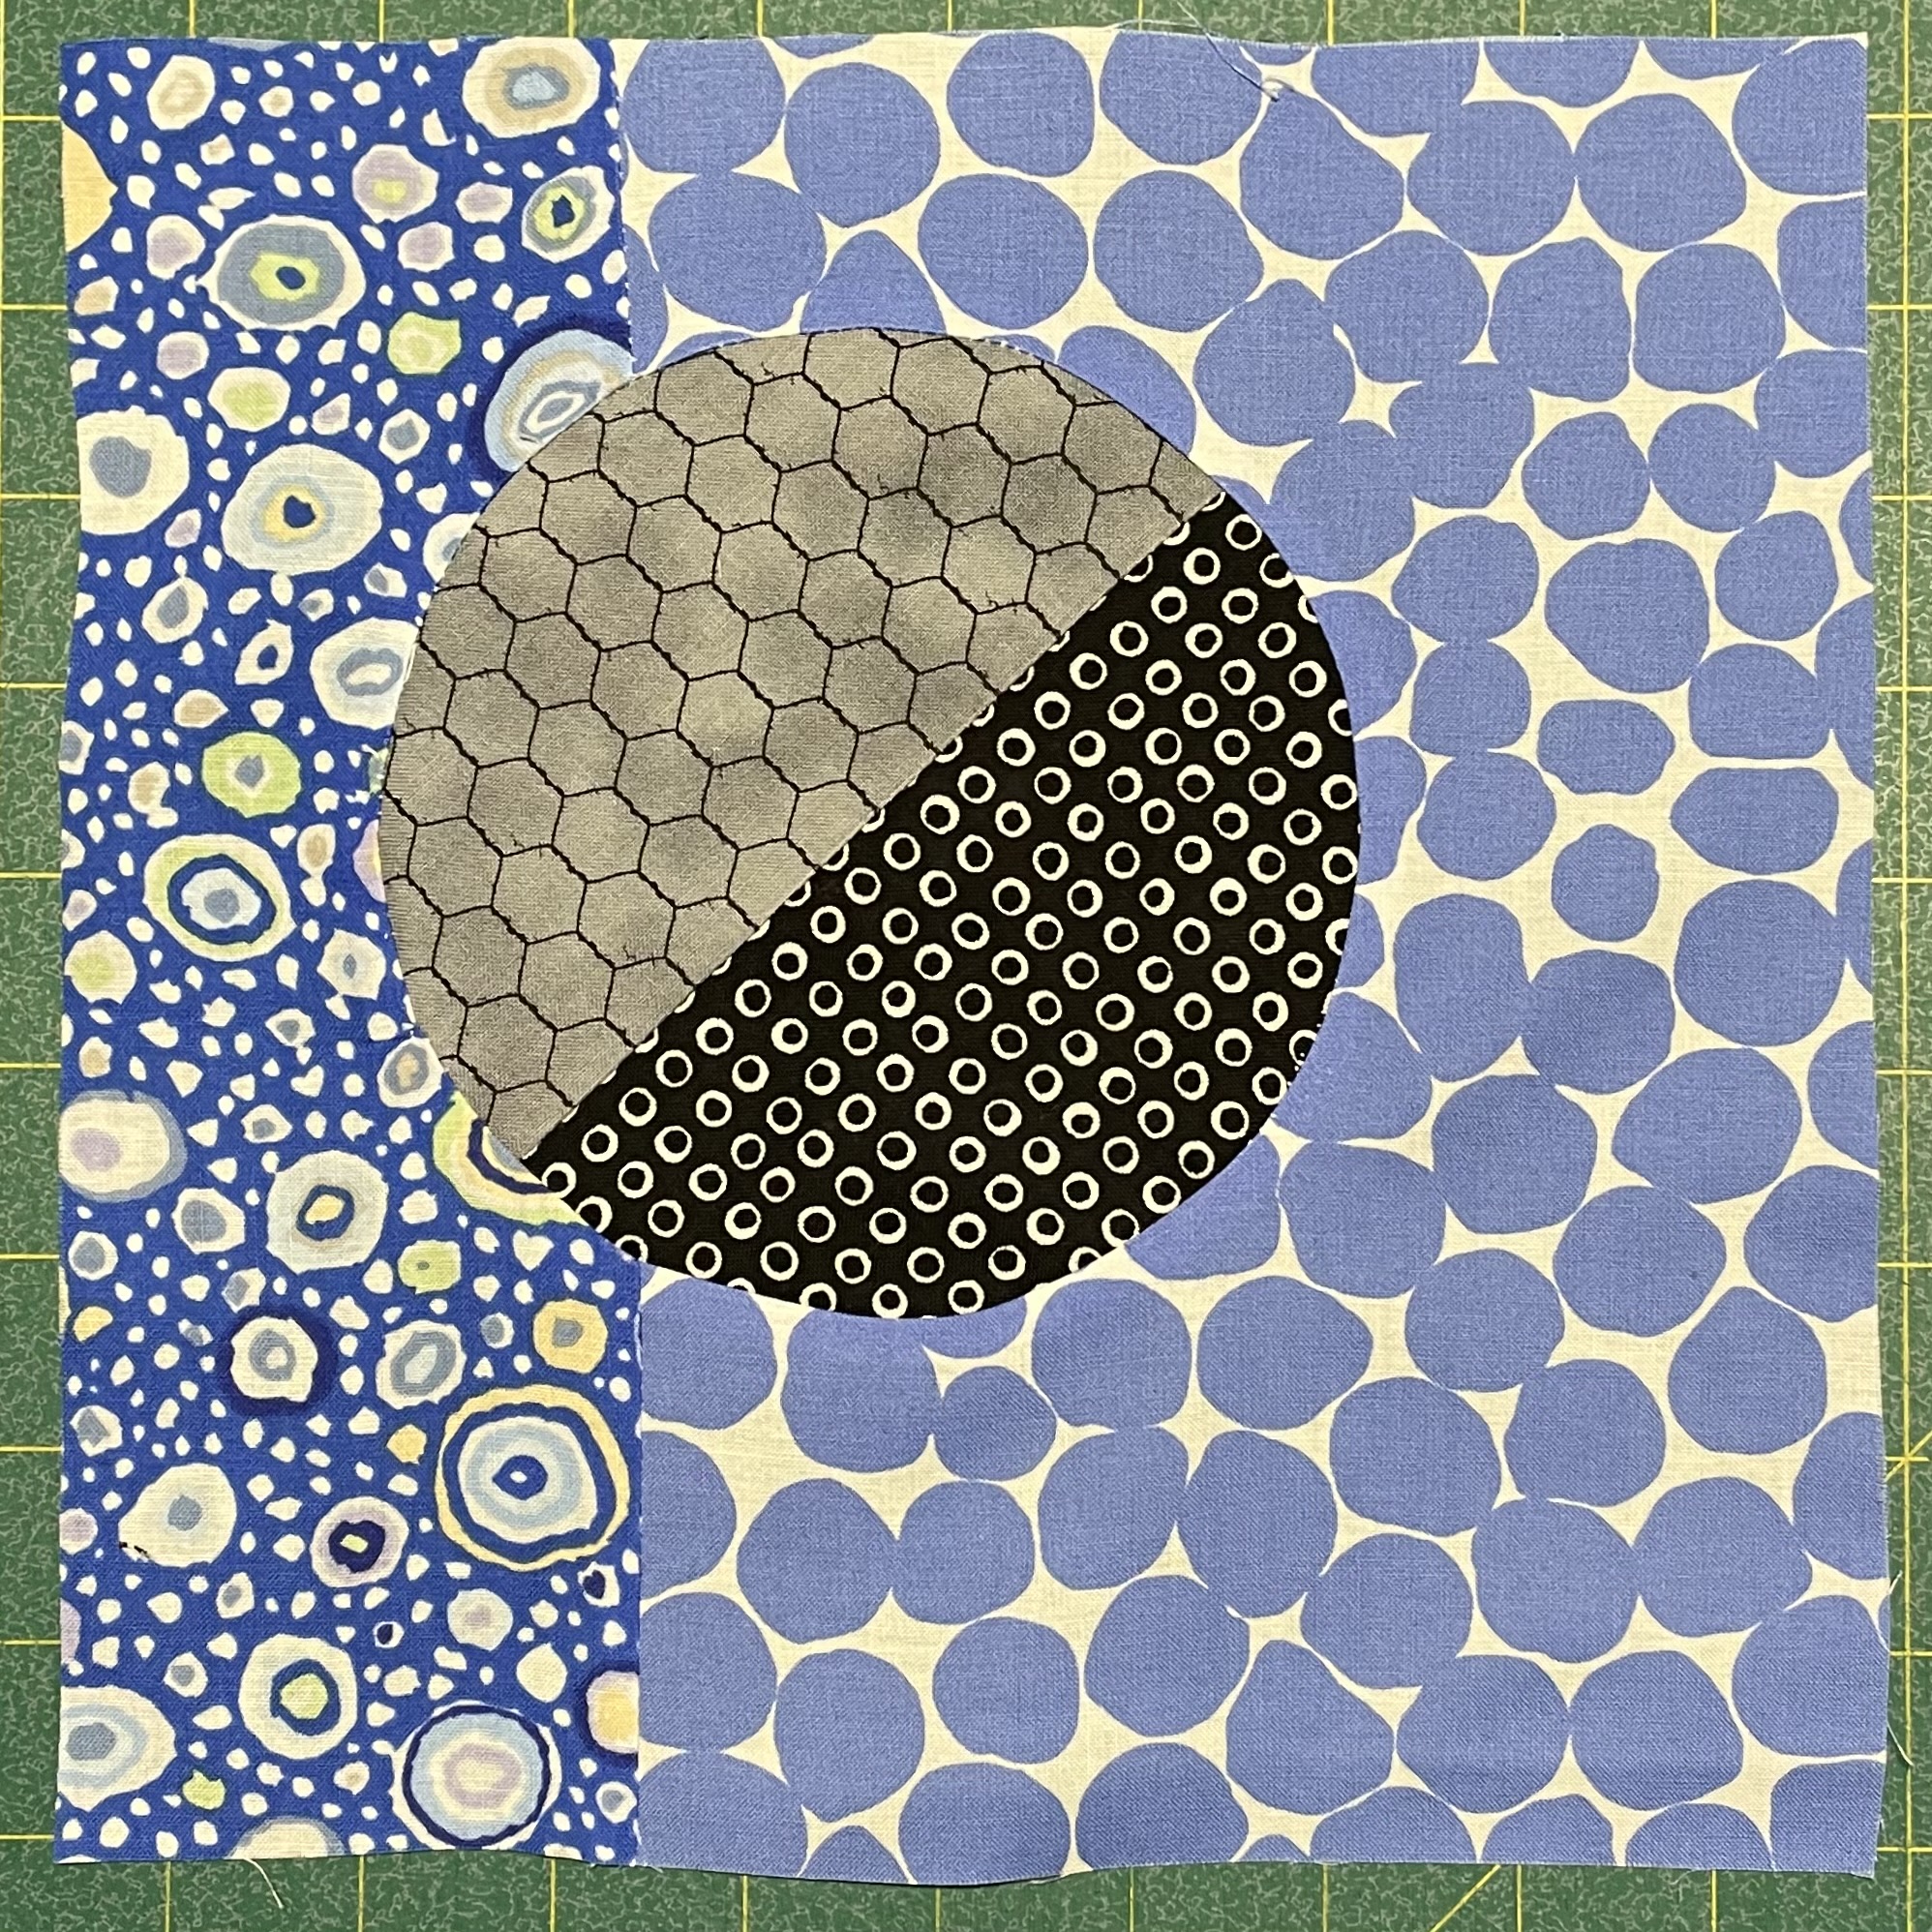
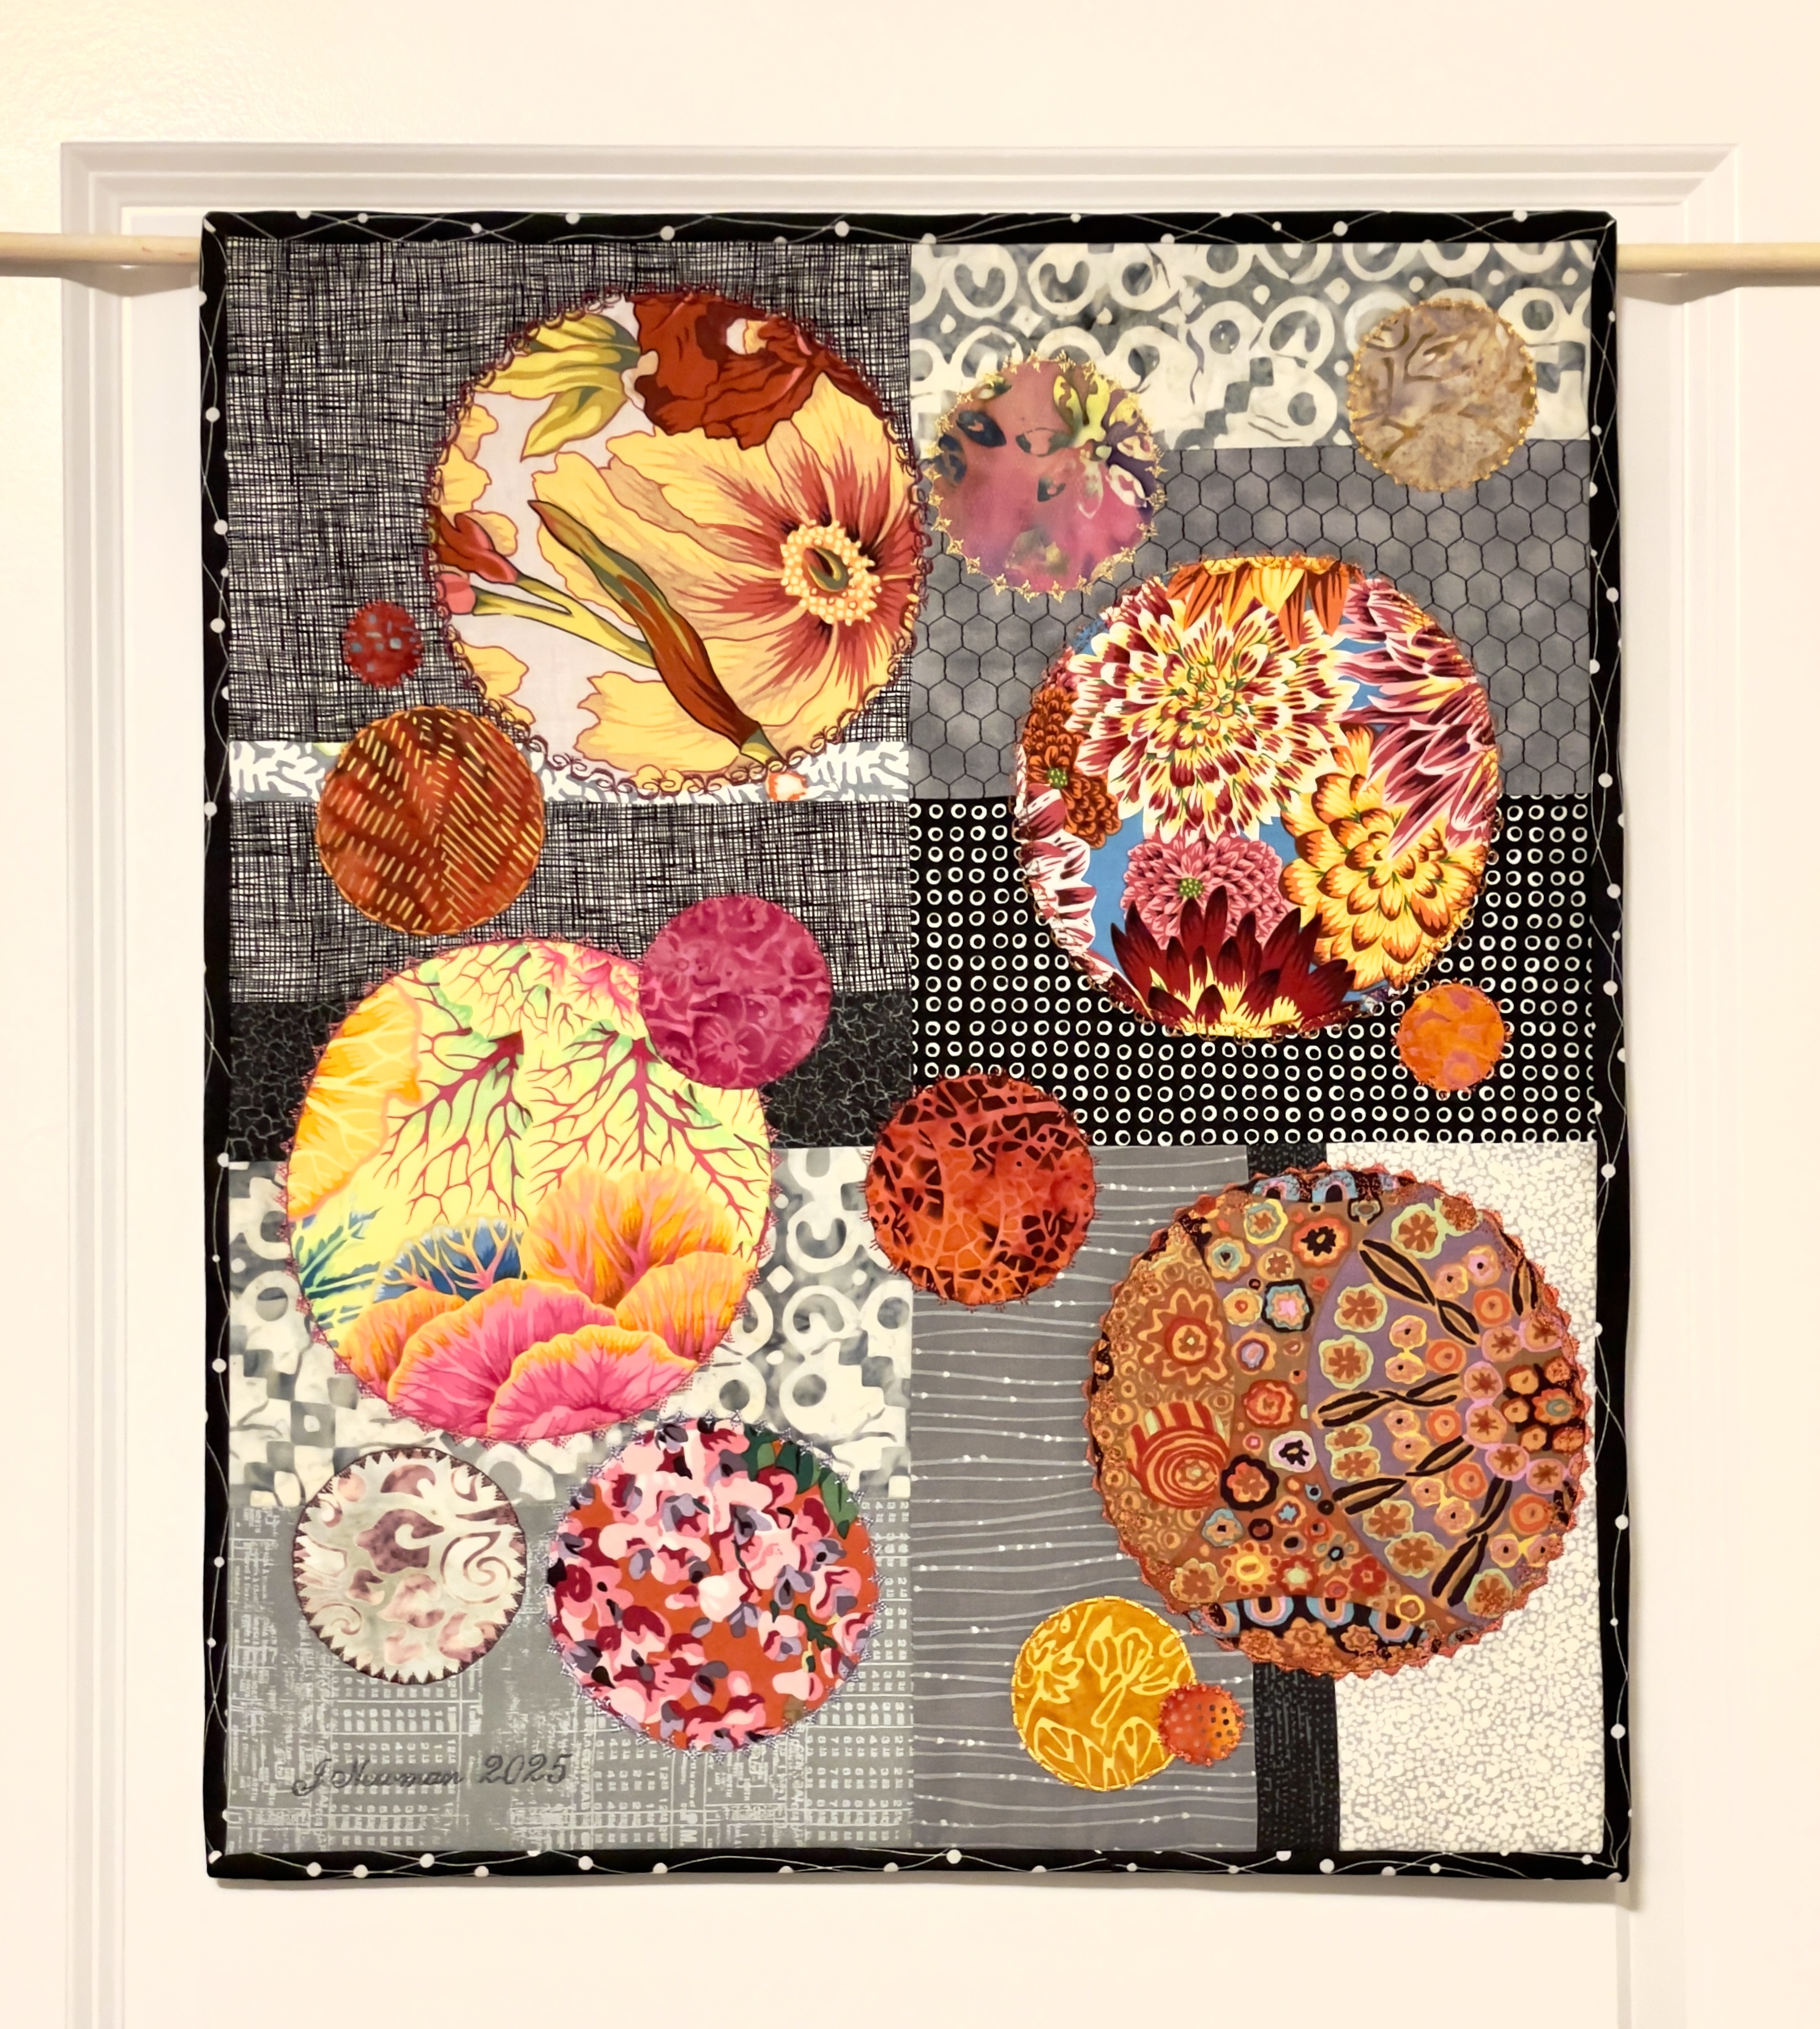
I didn’t think I’d ever manage to finish this piece! It seems like I started it forever ago – I began on Jan 16 with a couple of inset circle blocks. Three days later I had the layout pretty much established and I couldn’t go any further (trump was sworn into office the day after that, and all hell broke loose…).

I picked it up two weeks ago and edge stitched the appliqué circles and then was stuck again – should I also use decorative stitching around the large inset circles or leave them unembellished?

Three days ago I decided to try some embellishment – sat at the machine and immediately broke the needle (!), then didn’t like the particular stitching I started. It took close to an hour to remove what I’d done.

The next day I tried again and managed to embroider the large, lower-left circle, both inside and outside; stuck again. Yesterday, I was determined to get the rest done! I actually did.

Today, I added the binding. I’d chosen the black fabric with the small circles to tie the whole together and hoping a dark binding would lighten the piece (not as much as I’d hoped it would).

Now I’m looking for a name for it – something that highlights the bright circular shapes. Any ideas?

Bubbles

Bubbles!

This is where I am at the moment – 21 1/2″ x 18″. There are four insert circles, the smaller circles are fused raw edge appliqué. Although I’ve ended up with an even number, the distribution and colour feel comfortable.

I’ve been auditioning fabric for a thin inner border and a wide outer border – no luck. Everything I’ve tried – light fabrics, medium fabrics, dark fabrics – all look wrong. I think the piece is telling me to end here and finish with a facing, not a binding!

The next question is whether to quilt or not. I need to do decorative stitching around the appliqué (and possibly outside the inset circles, as well) – I have to wait until I’ve finished the stitching the appliqué to decide.

The point of this effort was to expand my technical know-how – to see how difficult it was to do an insert circle. Definitely not a beginner skill. After five circles, I’ve decided the sewing works best for me with the background on top, just four pins to hold the 3/6/9/12 positions, sewing slowly, one small section at a time, so I can align the opposing curves as closely as possible and still maintain a 1/4″ seam.

I’m not giving up on this idea – I still want to make a table runner and a quilt using it – it’s a matter of deciding whether to use pieced backgrounds, as I’ve done here, or a subtle print/batik throughout. I have to audition some fabric to see what might work.

Inset and Appliqué?

Bubbles?

Four inset circles with appliqué? This is all an experiment. First, the blue background doesn’t add anything – it shows I want to stay with greys, lights and blacks. That block also shows I don’t want pieced circles – I want to use the large prints from my Kaffe Fasset collection – I like the statement each circle makes.

Second, three of those inset circles are not too bad, one is kind of wonky – an appliqué over the wobble would hide the imperfection. Also the piece is stark without the smaller circles – I can’t see trying to inset them, much too difficult – the bigger the circle the easier to inset, I’m finding. I’ve also been moving the circle around in the square, rather than place it at the centre. Will continue doing that.

I also wanted to sew four blocks together and inset a circle at the intersection – there aren’t enough blocks here to try that. I may have to add another couple, making the piece longer, to see whether I can add an inset circle at the intersection. This has become an experiment going in directions I wasn’t expecting.

I have enough here for a fibre wall piece. I want to replace the blue and see what I have . I haven’t nailed down precisely what I want this to be – stopping at this point and finishing the small piece will let me start over.

I’ve been scouring Pinterest for “circle” and seen a lot of very interesting ideas for quilts made with both insert and appliqué circles. I need to review the images I’ve collected and rethink where I’m trying to go with this project.

Inset Circles

I decided to try inset circles – an extension of Drunkard’s Path (a square with a contrasting pie-shaped piece in one corner. With an inset circle you cut a background square then remove a circle; cut a contrasting circle 1/2″ larger in diameter, then carefully line up a few markings and inset by sewing a 1/4″ seam. When pressed you get a pretty good inset circle. (These two blocks are 9 1/2″.)

I’m playing around with this idea in a number of ways. In the first block (left) I created a background from two pieces of fabric, cut the circle from the centre of the block, then inset a strong contrasting circle. In the second block (right) I offset the piecing seam for the background as well as the centre of the circle (which in this case was the offcut from the first block!).

I’m playing around with scraps – just to see what happens. I had a better idea of how to manage the fabric when sewing the second block. I need more practice. I want to cut my circle insets from pieced fabric assembled using curved seams. In block #2 the circle was pieced across the diagonal simply because that was how I’d assembled the first block background.

My next experiment will be to piece the background slightly offset, but the make a more intricately pieced fabric for the circle. We’ll see how that goes.

I’m not sure whether I’m working on a quilt or a fibre art piece – I will have a better idea once I’ve made several inset circle blocks!