Finished – At last

Season’s greetings!

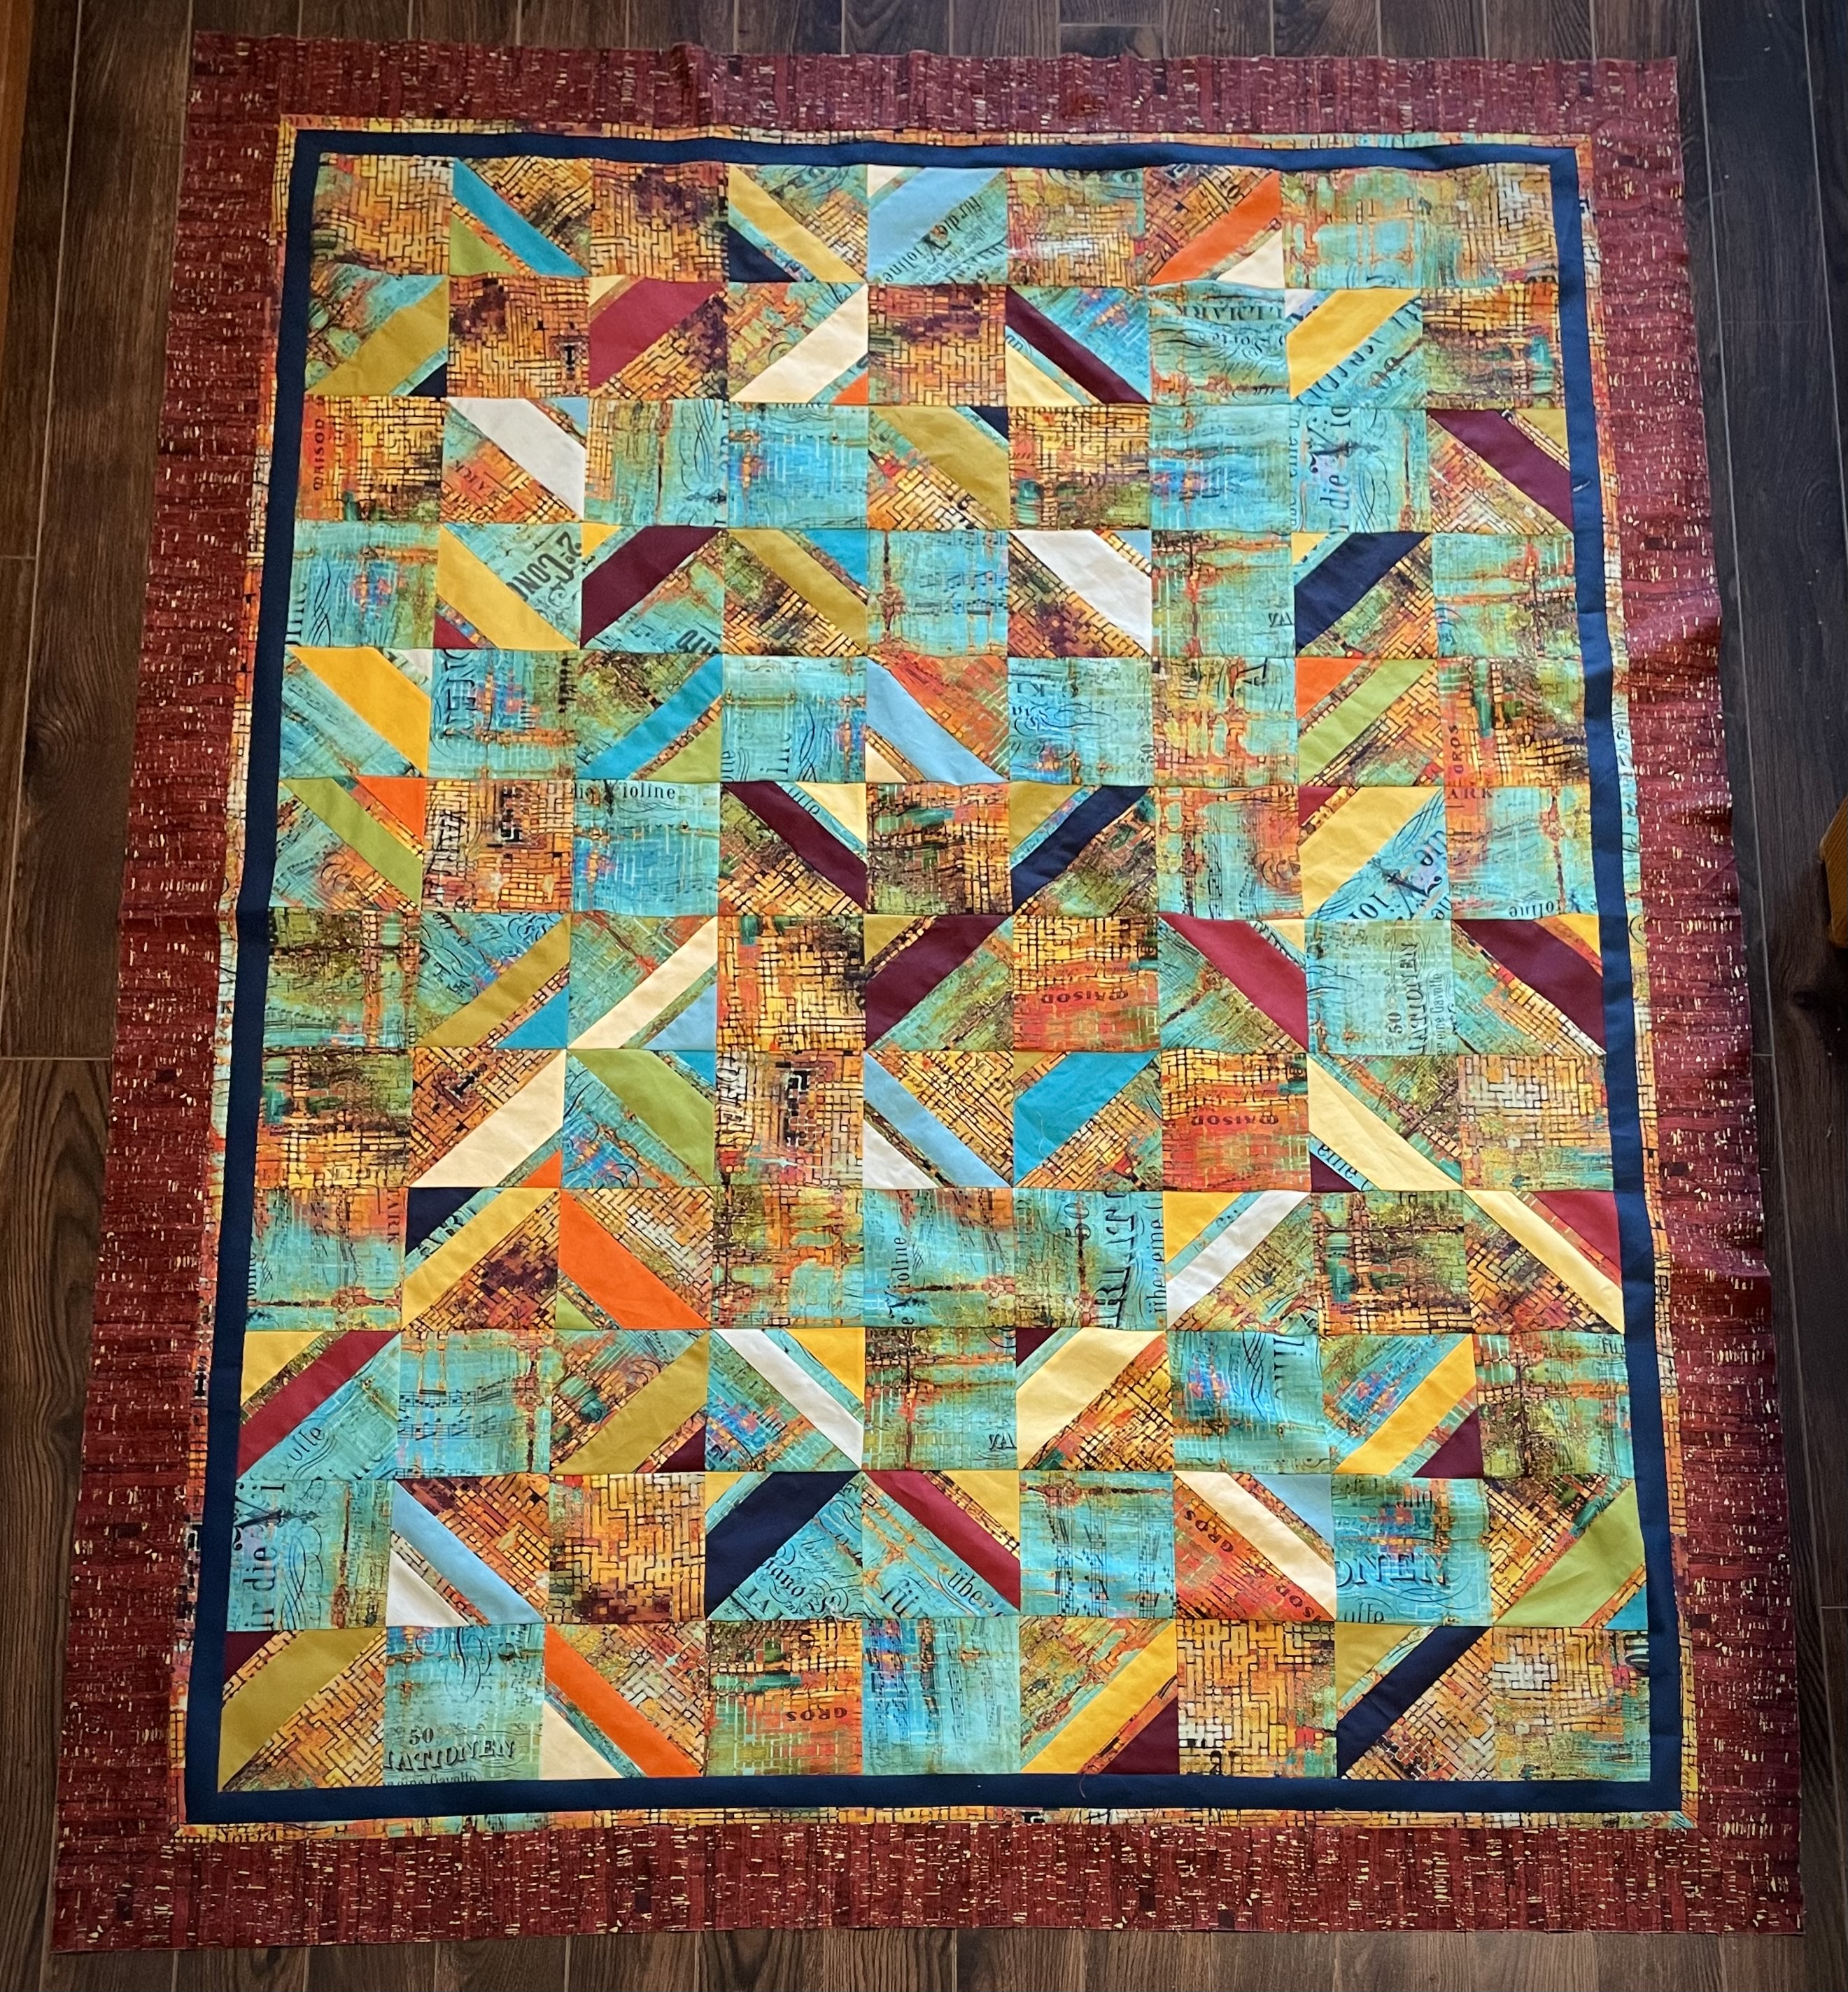
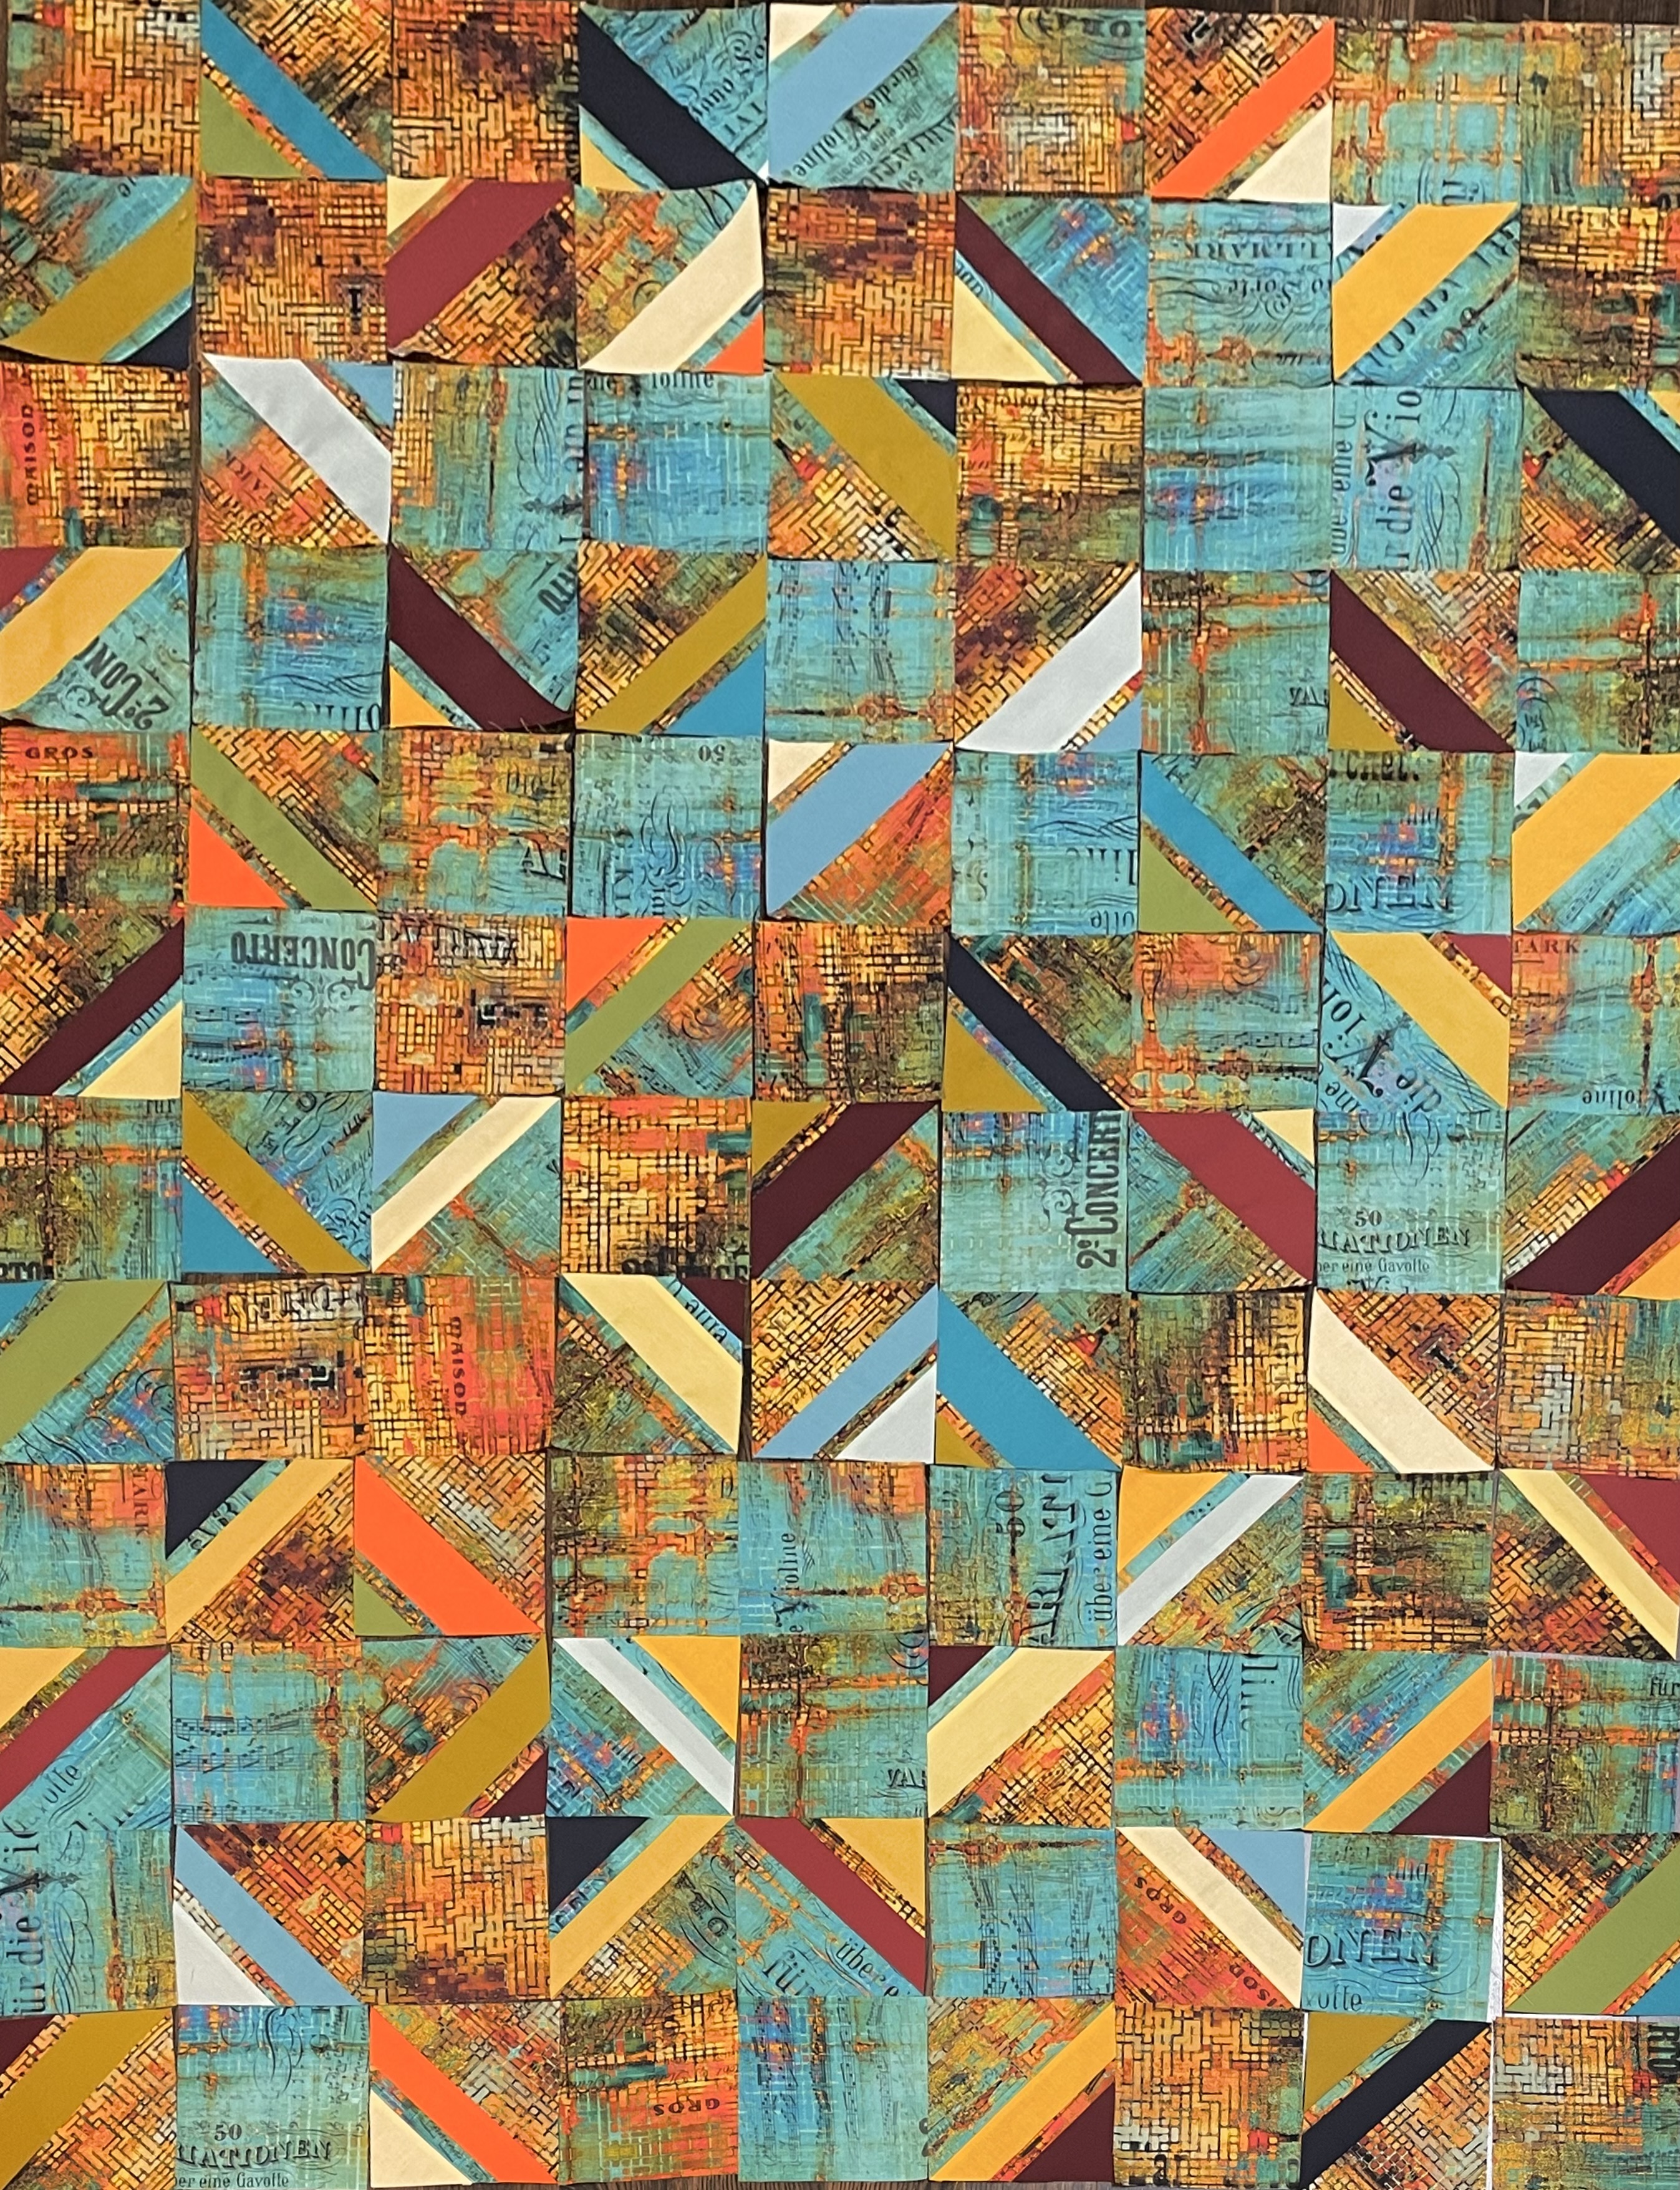
I started playing with this quilt on Oct 12. Ten/eleven weeks ago. I just finished hand stitching the hidden binding on the back! Finally – my Christmas day project – to get this quilt done.

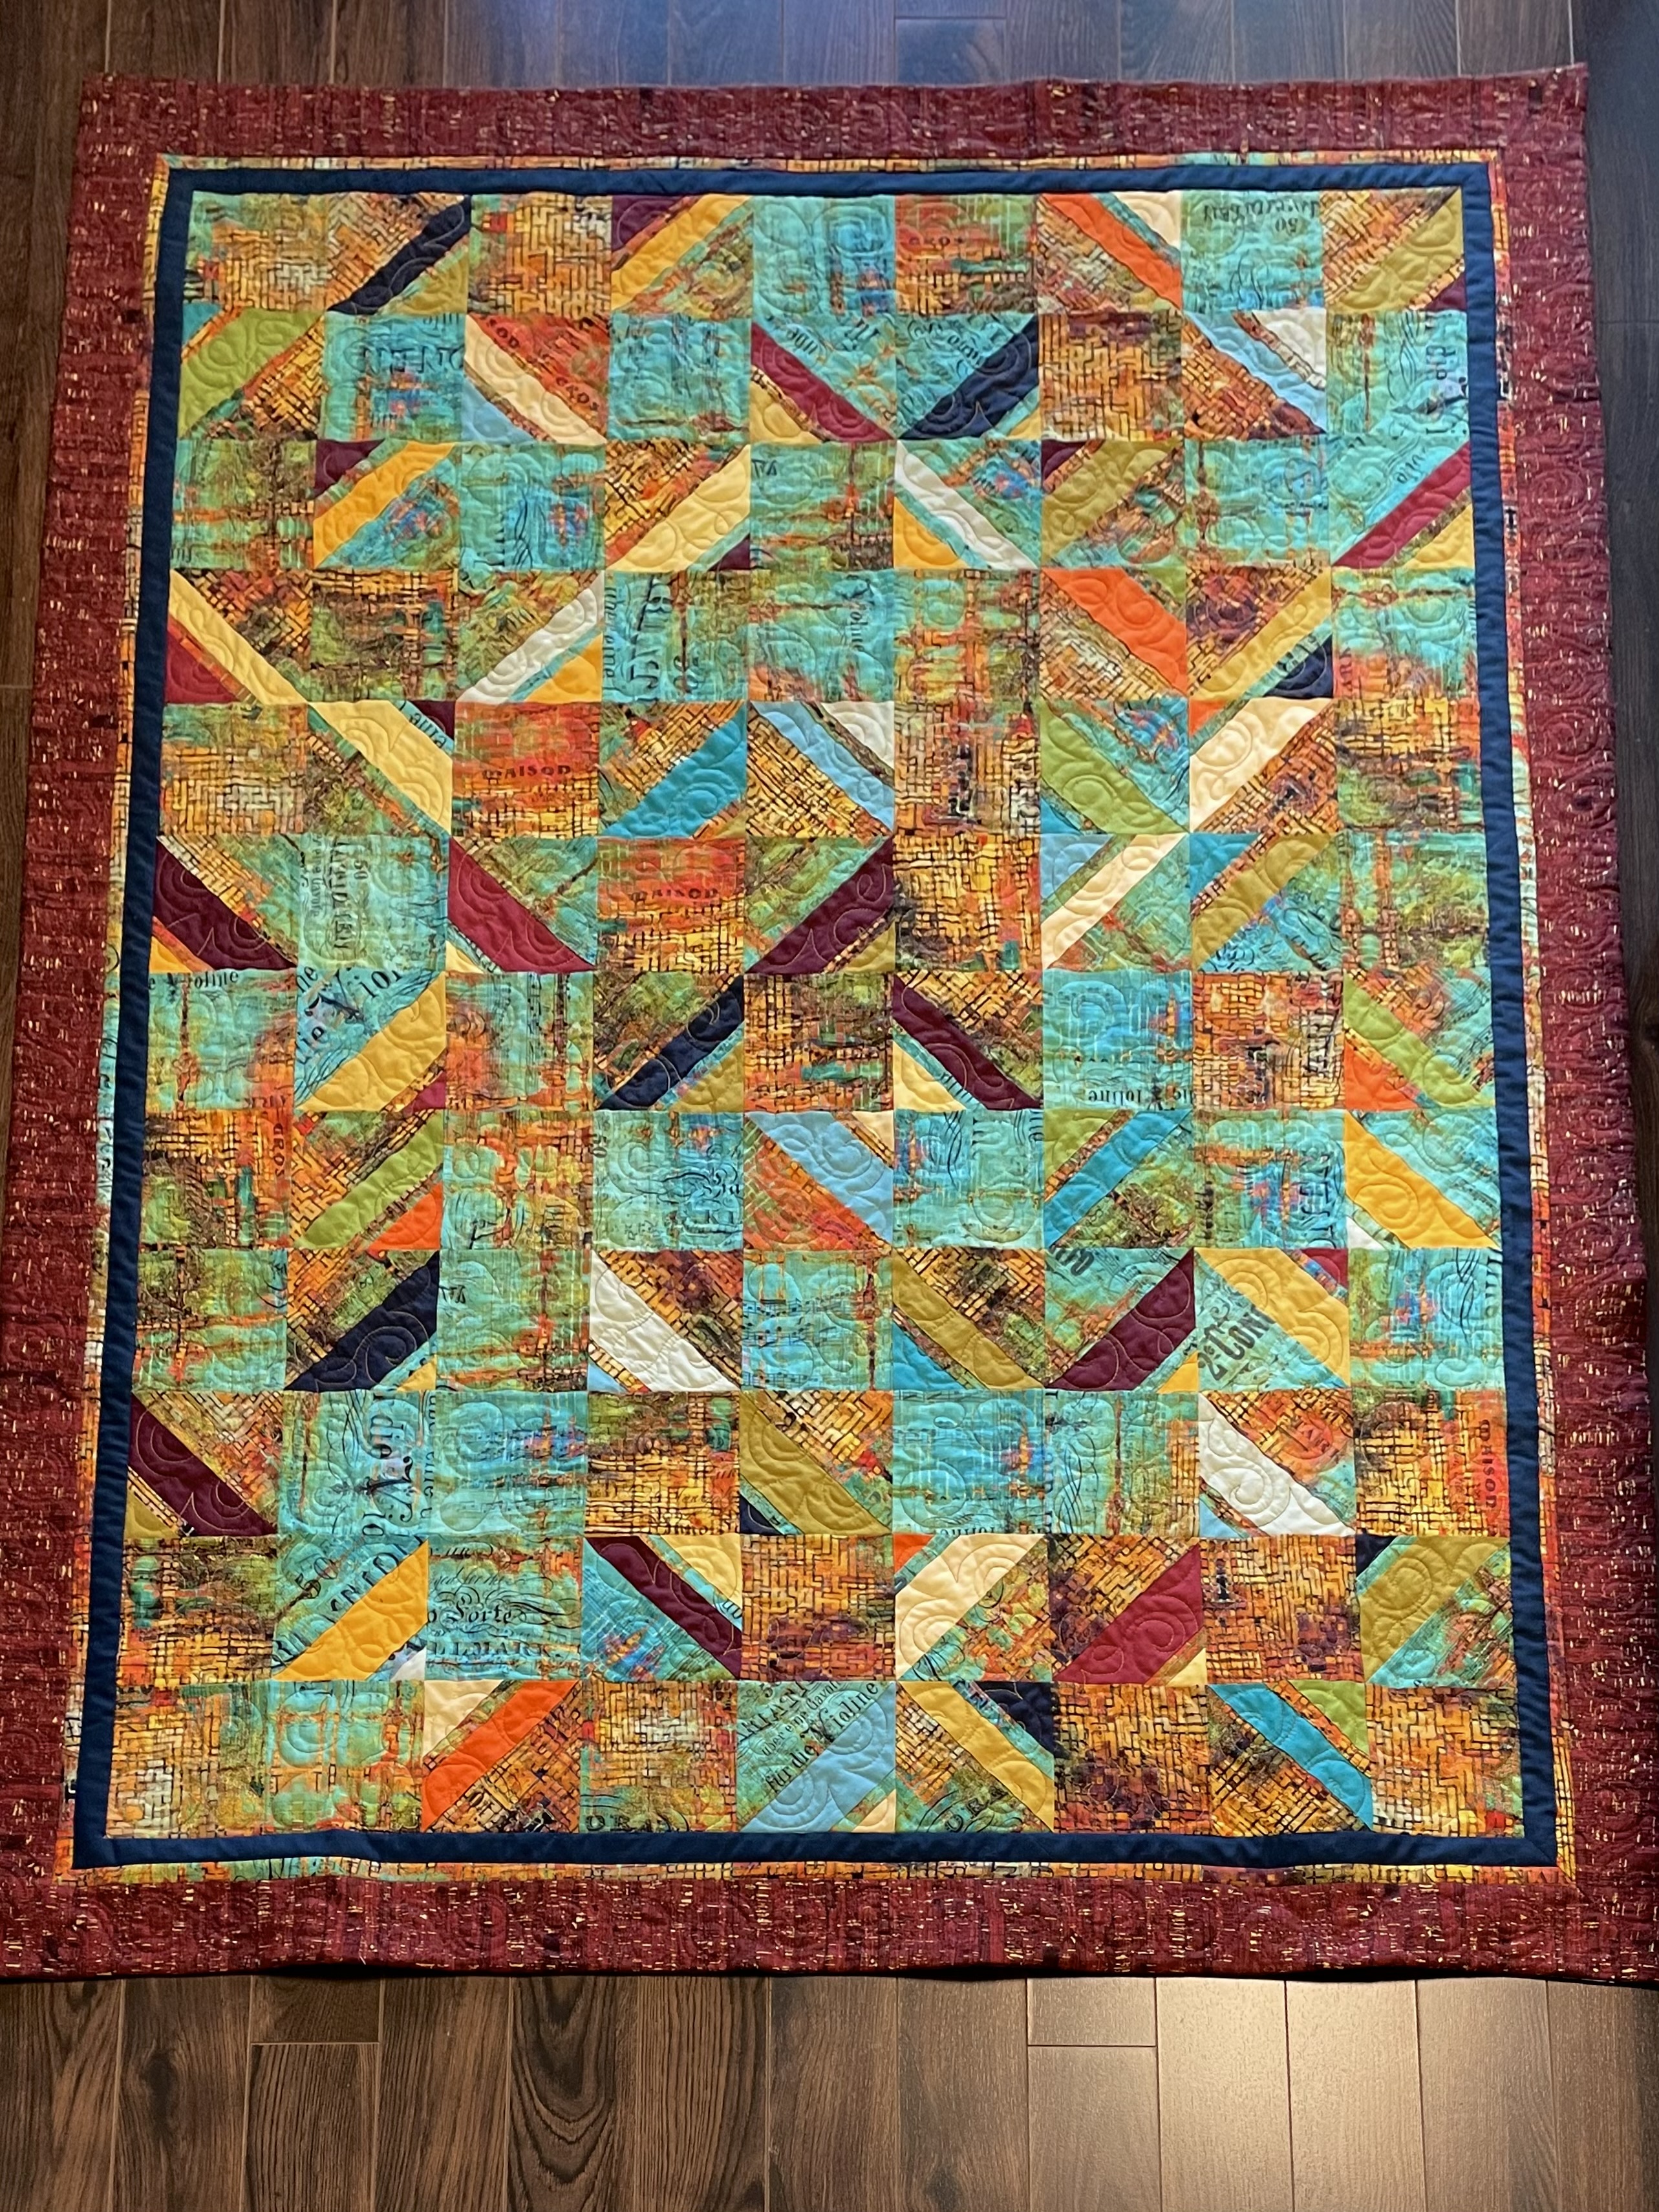
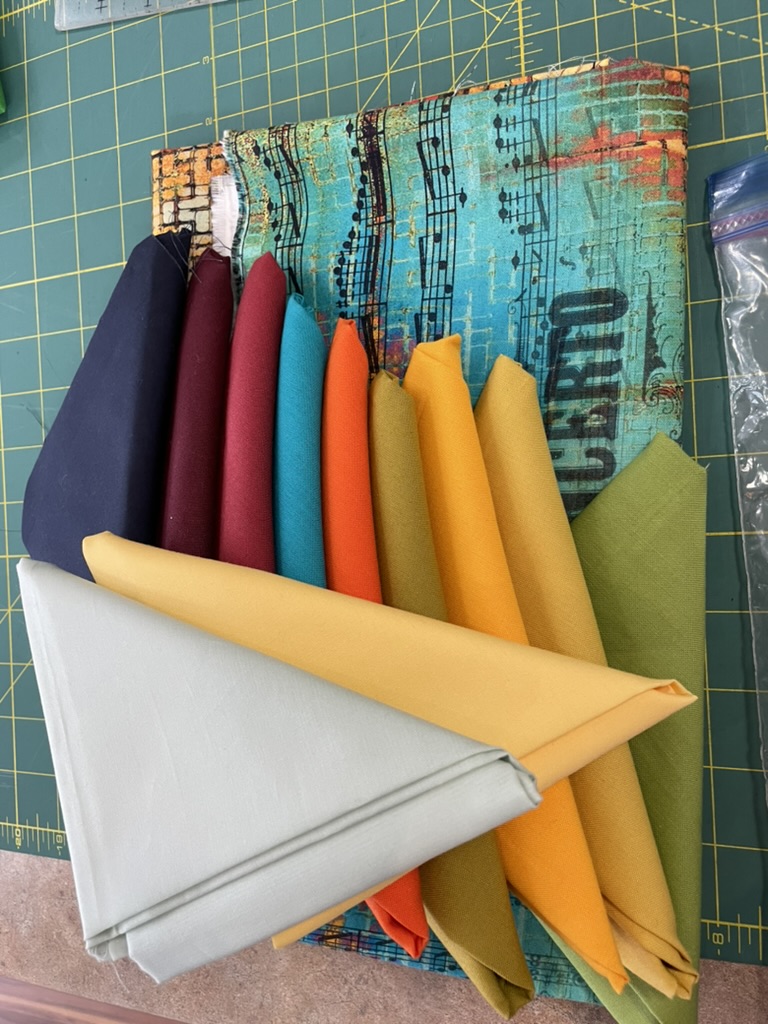
Once I had the quilt top assembled I found I could move along again. I made the decision to use the Holtz fabric intact on the back rather than cut it up. I had to incorporate the two pieces I had in order to have enough to complete the back – that’s even after inserting a 14″ strip I assembled from bits and pieces leftover from the quilt top – a much better use of that very busy fabric!

I would have completed the quilt with a conventional binding, except I didn’t have enough of the bronze cork fabric to do that. So in the end I used the leftover strips from the backing to make a hidden binding.

I’m glad the quilt is finally completed. I kept avoiding it because I knew I wasn’t going to be happy with the finished project – nothing there that pops out to say “notice me!”. In fact, I may decided to showcase the quilt back, which I think is much more interesting, in upcoming exhibitions.

So on to the next project – a couple of wall art pieces which I’ve been thinking about for over a year! Time to start working on the first of them.

OK, The Finished Quilt Top

Here it is – the finished quilt top. It’s not the idea I had in my head when I started! It’s what I’ve ended up with, however; I can live with it.

It’s just another half-square triangle quilt; nothing special. The border pulls it together. I’d never have guessed I was going to use the “cork” fabric to finish the project but the brick colour brings out the various reds/oranges/yellows in the print fabric and the solids. One of the benefits of having a relatively large fabric stash.

Did I tell you about the discussion I had with a friend about “the stash”? I’ve decided I can call my fabric collection a “stash” as long as I’m using it to create new work. The moment I stop, it becomes a “hoard” and I turn into a hoarder!

Gotta keep working – I’ve more fabric and supplies in my apartment than I can use up in a lifetime. In the end I will die a hoarder!

Sally mentioned the other day, when I dropped into Sew With Vision about something, she’d like to hang it. I’m all for that. It’ll be interesting to see what people think of it.

Now onto the back. I’m going to use what I have left of the Free Spirit: Tim Holtz, Eclectic Elements, Abandoned, Rusted Patina fabric along with some border remnants, and the unused blocks I set aside. I want to see how large swaths of the fabric works, against a small amount of detail.

So, This Was My Idea

Remember when I started this quilt I had a wonderful bright fabric with yellows/oranges/ turqoises/blues. Because the solids weren’t quite light/bright enough, I added a couple more to liven the array.

I had an idea in my head based on a quilt I’d seen on Pinterest

Another HST Idea

to use the print as my background, the solids as accents, with the solid triangles formed from three strips.

This afternoon I finally got back to sewing on this quilt (I’ve been avoiding it for over a month). It didn’t take long to sew the strips for the “solid” triangles, pair each strip with a strip of background print fabric, cut the HST.

56 HST with Solids

Each strip pair gave me four blocks – I just needed to lay them out interspersing them with background blocks.

Tentative Layout 9×12 Layout

I find it very interesting that when I look at the pieces on my floor the yellows/oranges stand out, but the photo brings out the turquoises/blues! The pale yellow solid elements brighten the ensemble. The pale blues are lost among the music elements of the background. The orange solids, the burgundy stripes connect with the background print (on the floor – not so much in the photo), and the navy doesn’t do much of anything. I’m not sure I see much point in playing around with the layout – I don’t think it will make much difference to this rather drab quilt top.

My challenge now is to come up with some way to make this layout interesting. Would a solid sashing in one of the lighter yellows accomplish that? Use the background fabric for a border? What about circle appliqués (of different sizes) cut from the solids placed in some kind of cascade?

Whatever I do, it will have to involve the solids because that background fabric, which I thought would be striking is so busy when cut up, that it overpowers everything else!

Got any suggestions? I sure don’t know where to go from here.

Since I began working on the project, I’ve had a hunch I wasn’t going to be happy with the outcome. My fallback position was to assemble the array, make it into a quilt (with batting and a backing), then use it to make a jacket! Looking at the potential panel, however, I don’t think the jacket would be outstanding, either.

I hate it when the work goes sideways as it has here.

An Idea…

I was looking at the print fabric and the solid fat quarters and thinking I didn’t have “light” in my collection. So I eliminated the colour to see what my tonal contrasts looked like – not too bad, but I could use a bit more light in my colour assortment.

Also, I want to showcase the print even though, in a sense, it’s the background. I found an idea on Pinterest I thought might accomplish that for me:

You have to stretch your imagination to visualize the white above as my print fabric, and the print triangles as my solids. Even further, I’m thinking I will break up the triangle with strips from at least two different solids and include a narrow strip of the background fabric as well.

Just playing around with scrap fabric I start to get a sense of what this idea might yield:

Playing Around

Now imagine that bullrush print as my bright yellow/orange/turquoise/green fabric, those triangle elements as the bright solids above and you get a glimmer of where I think I’m heading. I have more bullrush fabric and a couple of different brown/taupe solids to add to the above – tomorrow I’ll do those and include them to the array.

There is actually a pattern for this quilt online: Lagoon Quilt Tutorial but I’m not planning on following it. The block size in the pattern is 4 1/2″ – I want to end up with 5″ or 6″ blocks (not sure which yet). My final quilt size will be more rectangular then the Baby or Lap quilts for which Erika @ KitchenTableQuilting gives dimensions. Her triangles are “solid”, mine will be striped. Lots of differences. What I’m taking from the quilt photo is the inclusion of squares from the background fabric – in my case, the foreground fabric! What I didn’t want was to bury that very interesting print amidst the solids – this way I can showcase it.

One thing stopping me from proceeding at the moment is that I don’t have enough of the print fabric. I’ve ordered some (because my local shop has none left), and I’m waiting for it to arrive! (I’m also in hold mode because my right wrist has decided to be painful – arthritis that will take a bit of time to settle down – cutting with a rotary cutter is almost impossible and I tried but can’t cut with my left hand). As soon as the fabric arrives (and my wrist settles down), I’ll get to work on this quilt.