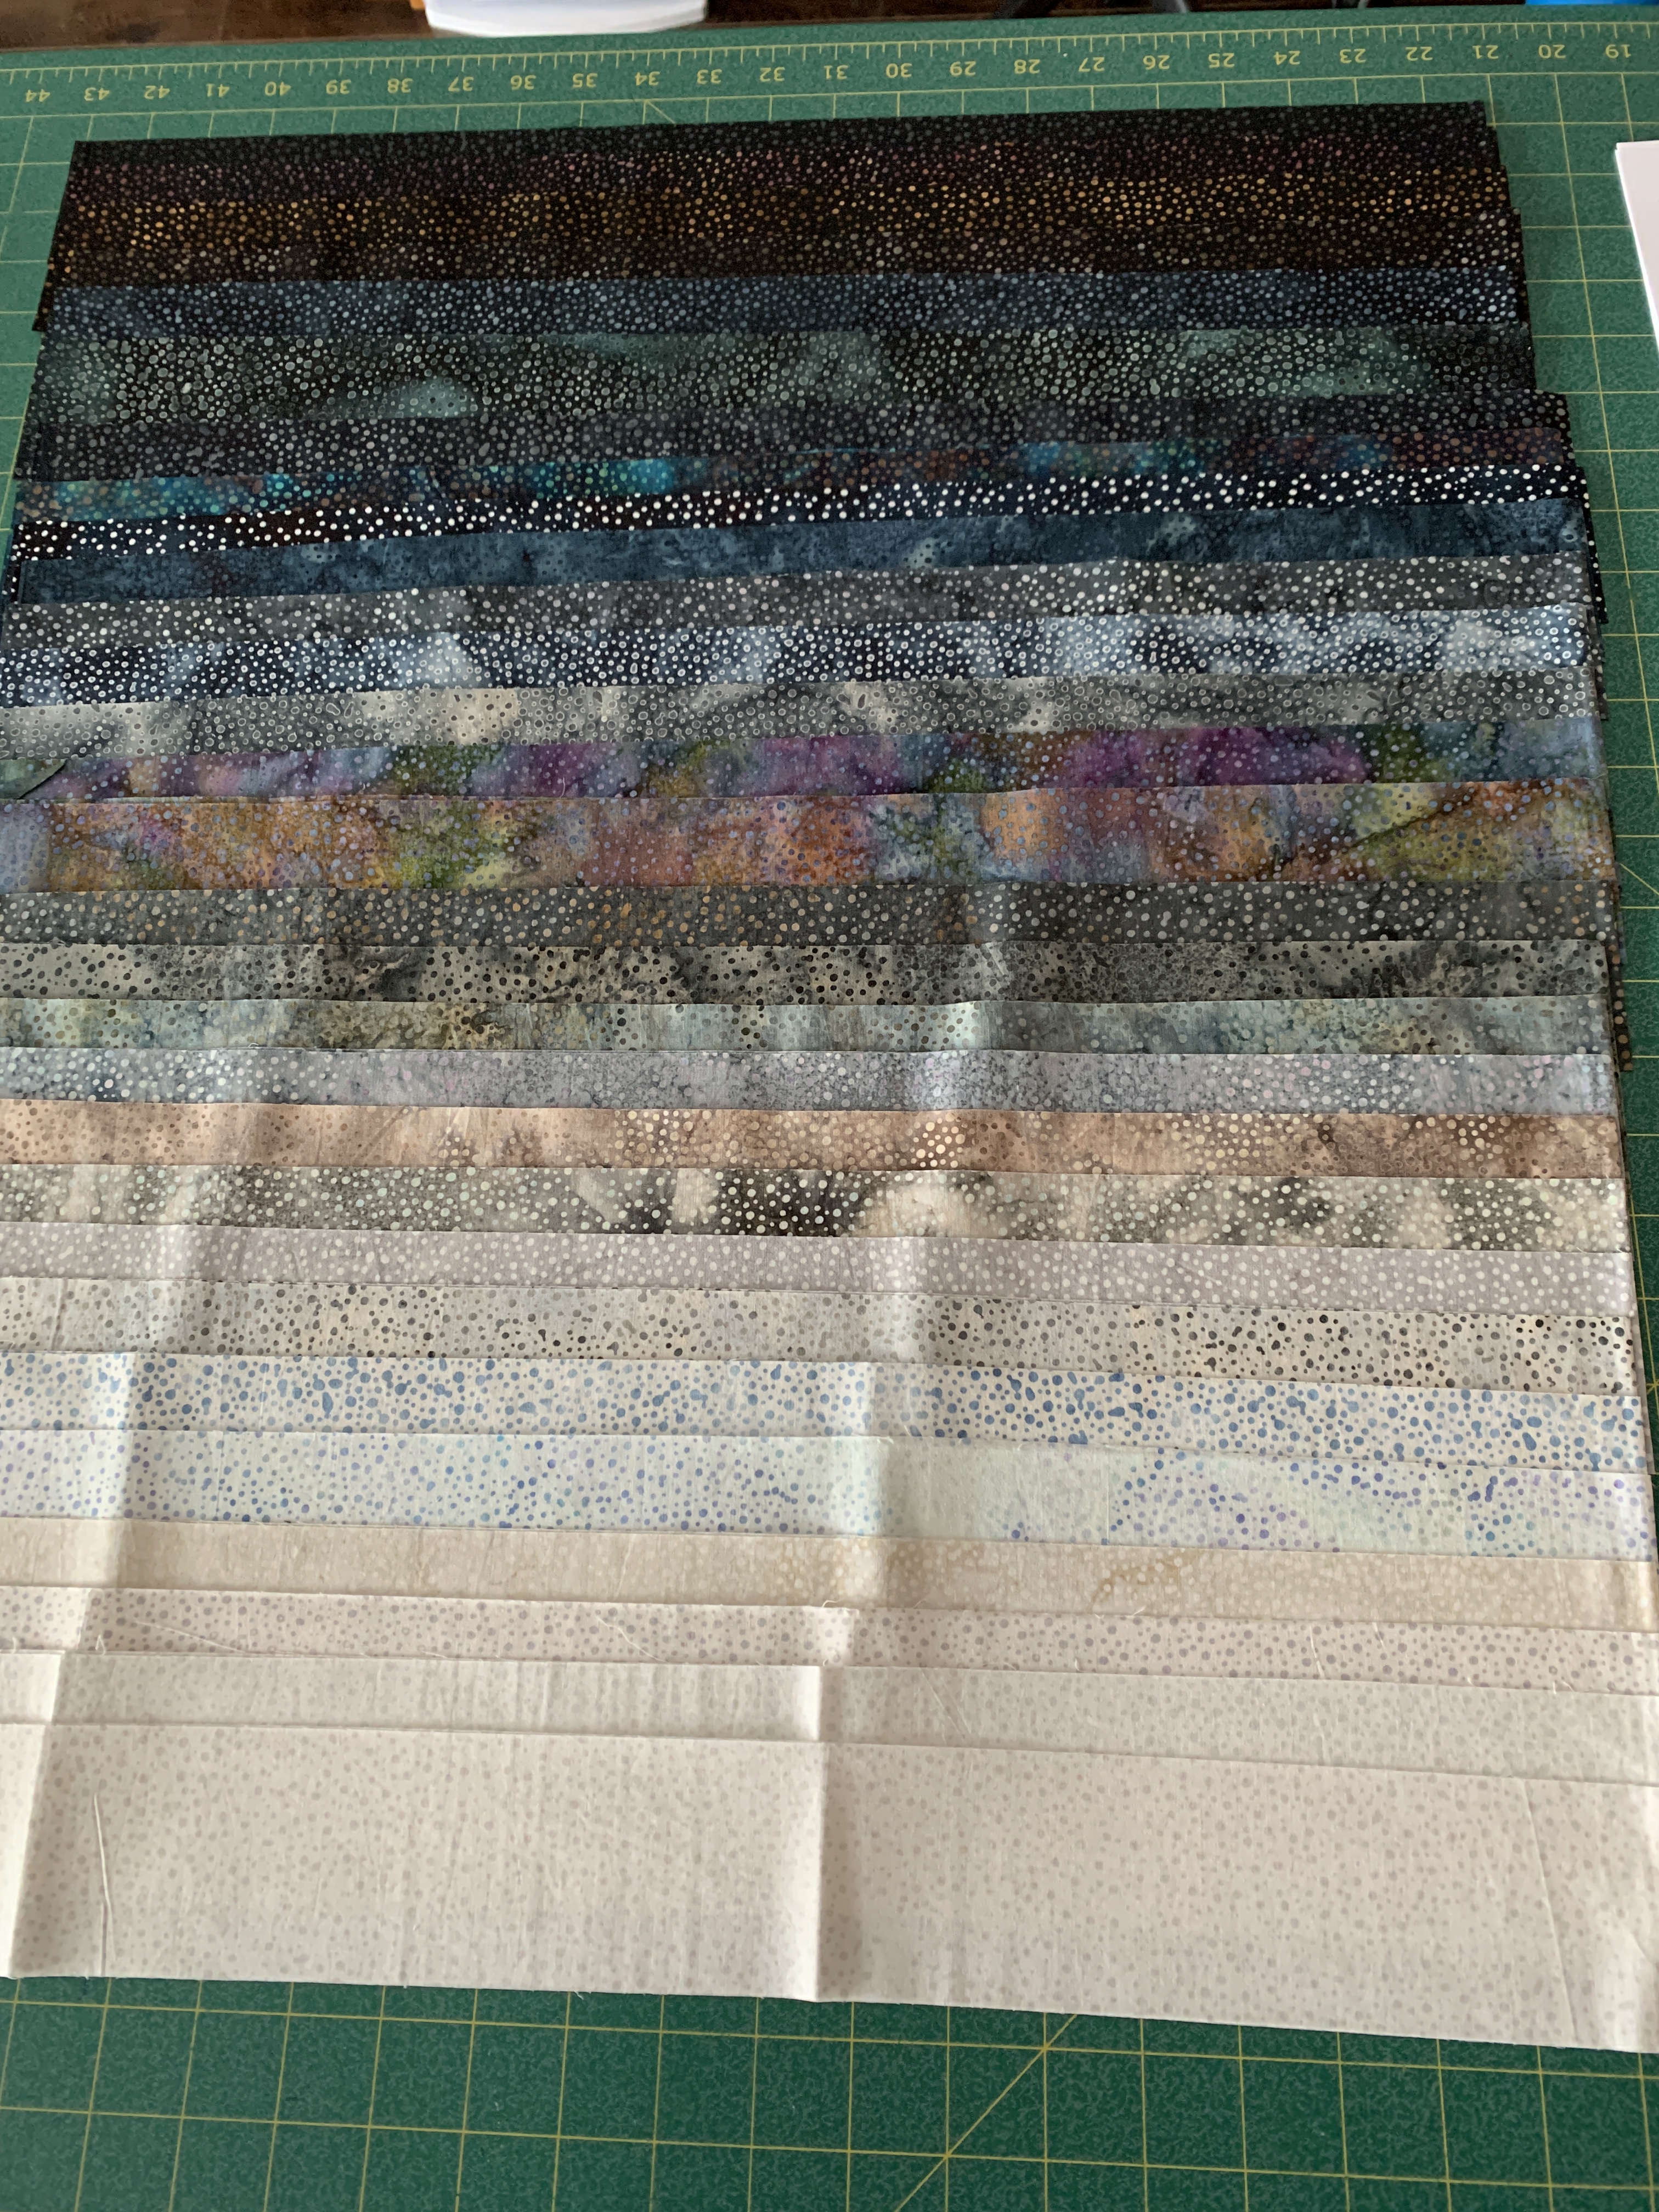
It’s close to two weeks since I posted anything. That’s because I’ve been stuck on the latest quilt – I have this lovely collection of jellyroll strips – I’d like to do something with them using diamonds – and the 2 1/2″ strip width limit has me blocked!

Jellyroll Collection
I’ve tried sorting the strips in pairs (which is one way I could assemble diamonds by cutting each vertical half diamond from the strips and pair them up):

Jellyroll collection with contrast
However, I lose the flow of colour I’m looking for if I pair them this way, and I can’t see a way to bring in the perfectly contrasted turquoise grunge fabric. So I gathered up the strips and set them aside for now.
I returned to my photograph of Ruby and played with it – enlarging her 50% and then extrapolating to a final panel size. I’ve cut out the backing muslin but got no further than that. What’s stopping me with this project is trying to figure out how to make the mud flat look wet – not there yet.
I needed something I could accomplish – I made 10 iPhone cases to give away. I’ve passed on three of the ones I made for myself so I decided I should make some to have in my gift stash.
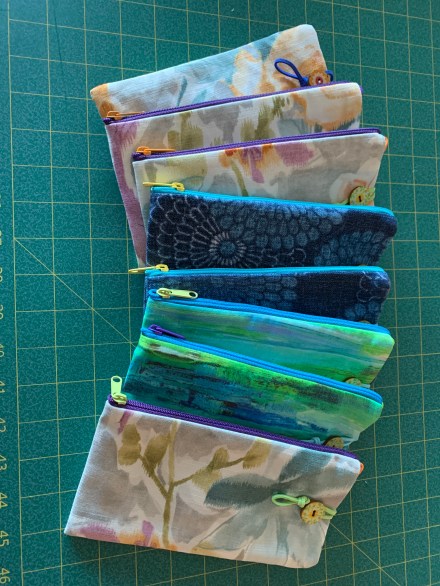
iPhone Cases to give away
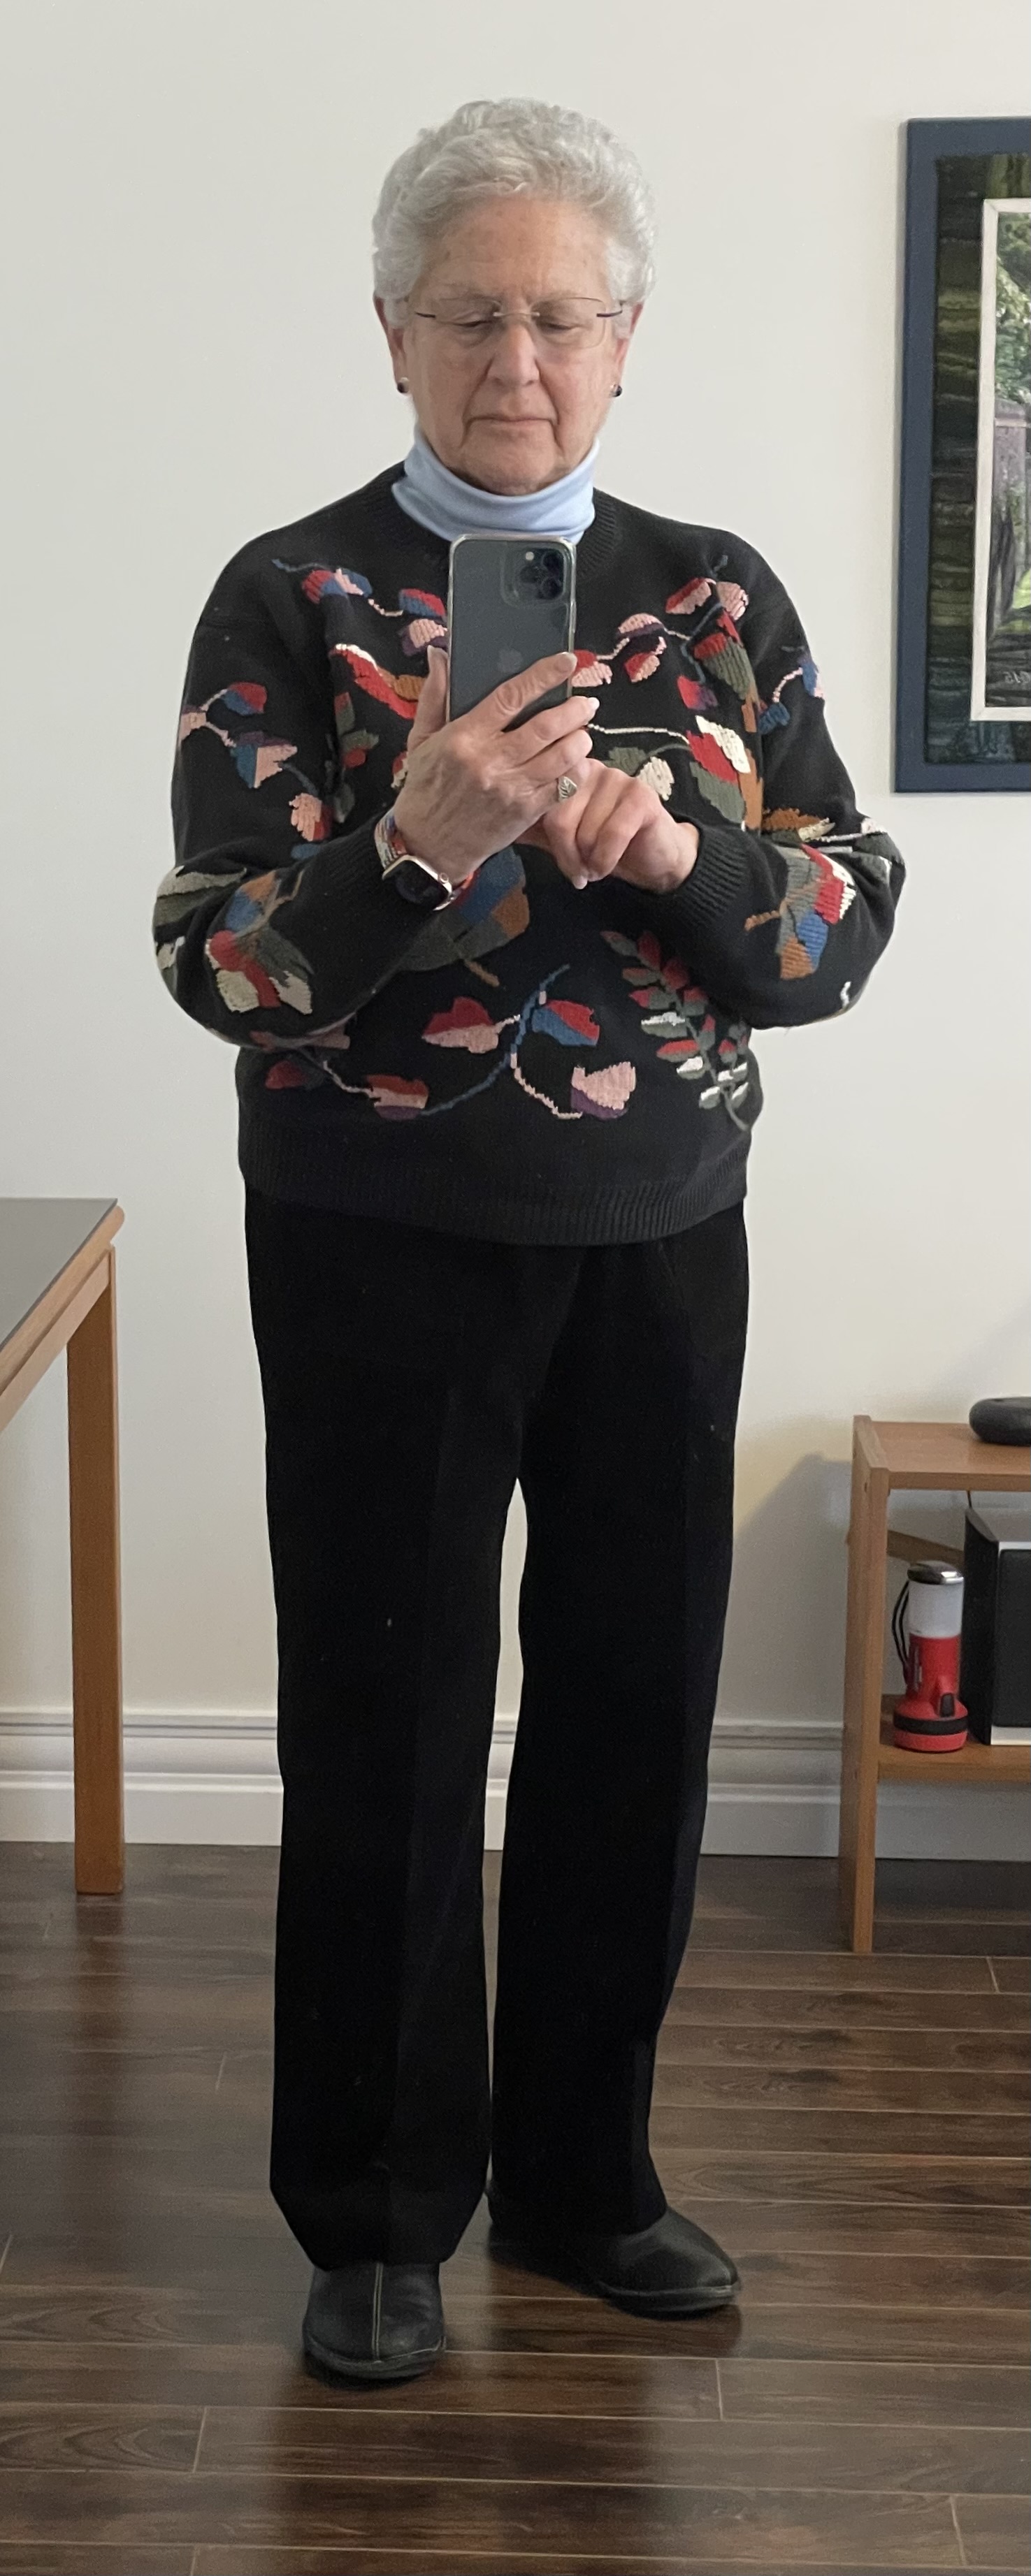
And then I finally got to the corduroy that has been sitting on my serger table for well over a year and decided to make pants.
I’ve capitulated – pull-on pants is what I need to make, not pants with a fly front and fitted waistband. I’m tired of wearing pants that are too tight in the waist (in spite of the elastic gussets I’ve inserted in the sides of many of them). So I went searching for a pattern online.
I started with the Jalie Pattern 3243 for pull-on pants. I bought the PDF version which sends me two files – one I can print on my home printer – that means 25-30 pages that I then have to organize and tape together to create a pattern array before tracing the size I want to make; and one I can take to a print shop and have printed on blueprint size paper.
I did the latter. I went to Staples and after much discussion with the gal (who clearly has never sewn anything in her short life) I decided to print the sheet based on the very limited information I could find on the pattern (all it said was “copy shop 36″). I asked for a 36″ x 48” sheet. When I measured the test block, what I ended up with was a pattern at 88% of full size! At $14 per printed sheet I wasn’t going to try printing it again, so I took it home and started doing some math.
This is one of those pattern with 27 sizes printed as one. I checked the pattern size info and decided my hip measurement was a size V (US size 9), my waist was a size Z (US size 13). To get those measurements on this 88% printout, I needed to upsize those measurements to a Z and a CC.
I marked the pattern accordingly using a bright highlight pen, used my French curve to make the adjustment from hip (size Z) to waist (size CC). I traced the resulting pattern, cut it out, placed it on my corduroy, and looked at it for a day before cutting the fabric, forgetting that corduroy has to be cut all in the same direction! (I didn’t realize I’d done that until I went to press the side seams and could see the colour difference).
Because this is my first attempt at this pattern, it really qualifies as a “muslin”. I’m not expecting it to work out perfectly but the changes I make will inform any adjustments I need to make to the pattern and the project might just turn out to be a wearable garment. So I carry on.
I don’t like the pocket shape and size they provide; I substitute my jeans-shaped pocket instead and make it deep enough to hold my iPhone. I also want back pockets – I have enough fabric to include a pair. I also cut out the waist facings in corduroy, realizing I may want to change that for a batik in the end.
I make one other adjustment. No pants pattern is going to fit my body with scant bum and thin thighs. At one of my visits to Sandra Betzina I learned how to get rid of the excess fabric under my bum and down my thighs by sewing a fisheye dart down the centre back of the pants. What I didn’t anticipate was how that adjustment would affect the centre back crotch length – more about that later.
I make the front pockets; I construct the back pockets. I stitch the centre front and back crotch seams; next the side seams – although when I held up the constructed front and back against my body I was pretty sure the pants were going to end up too small to get on! But I carry on, anyway – this is a “muslin” I tell myself – see what it turns out like.
I add the waistband, put the elastic in, and try the pants on – this is a “muslin”, right?
I can actually get the pants on over my hips, I need to tighten the elastic quite a bit. I hem the pants but I have a problem – the back crotch length is about 1 1/2″ too short. I wear the pants anyway and my turtleneck shirt keeps pulling out when I sit and the pants slip down in back.
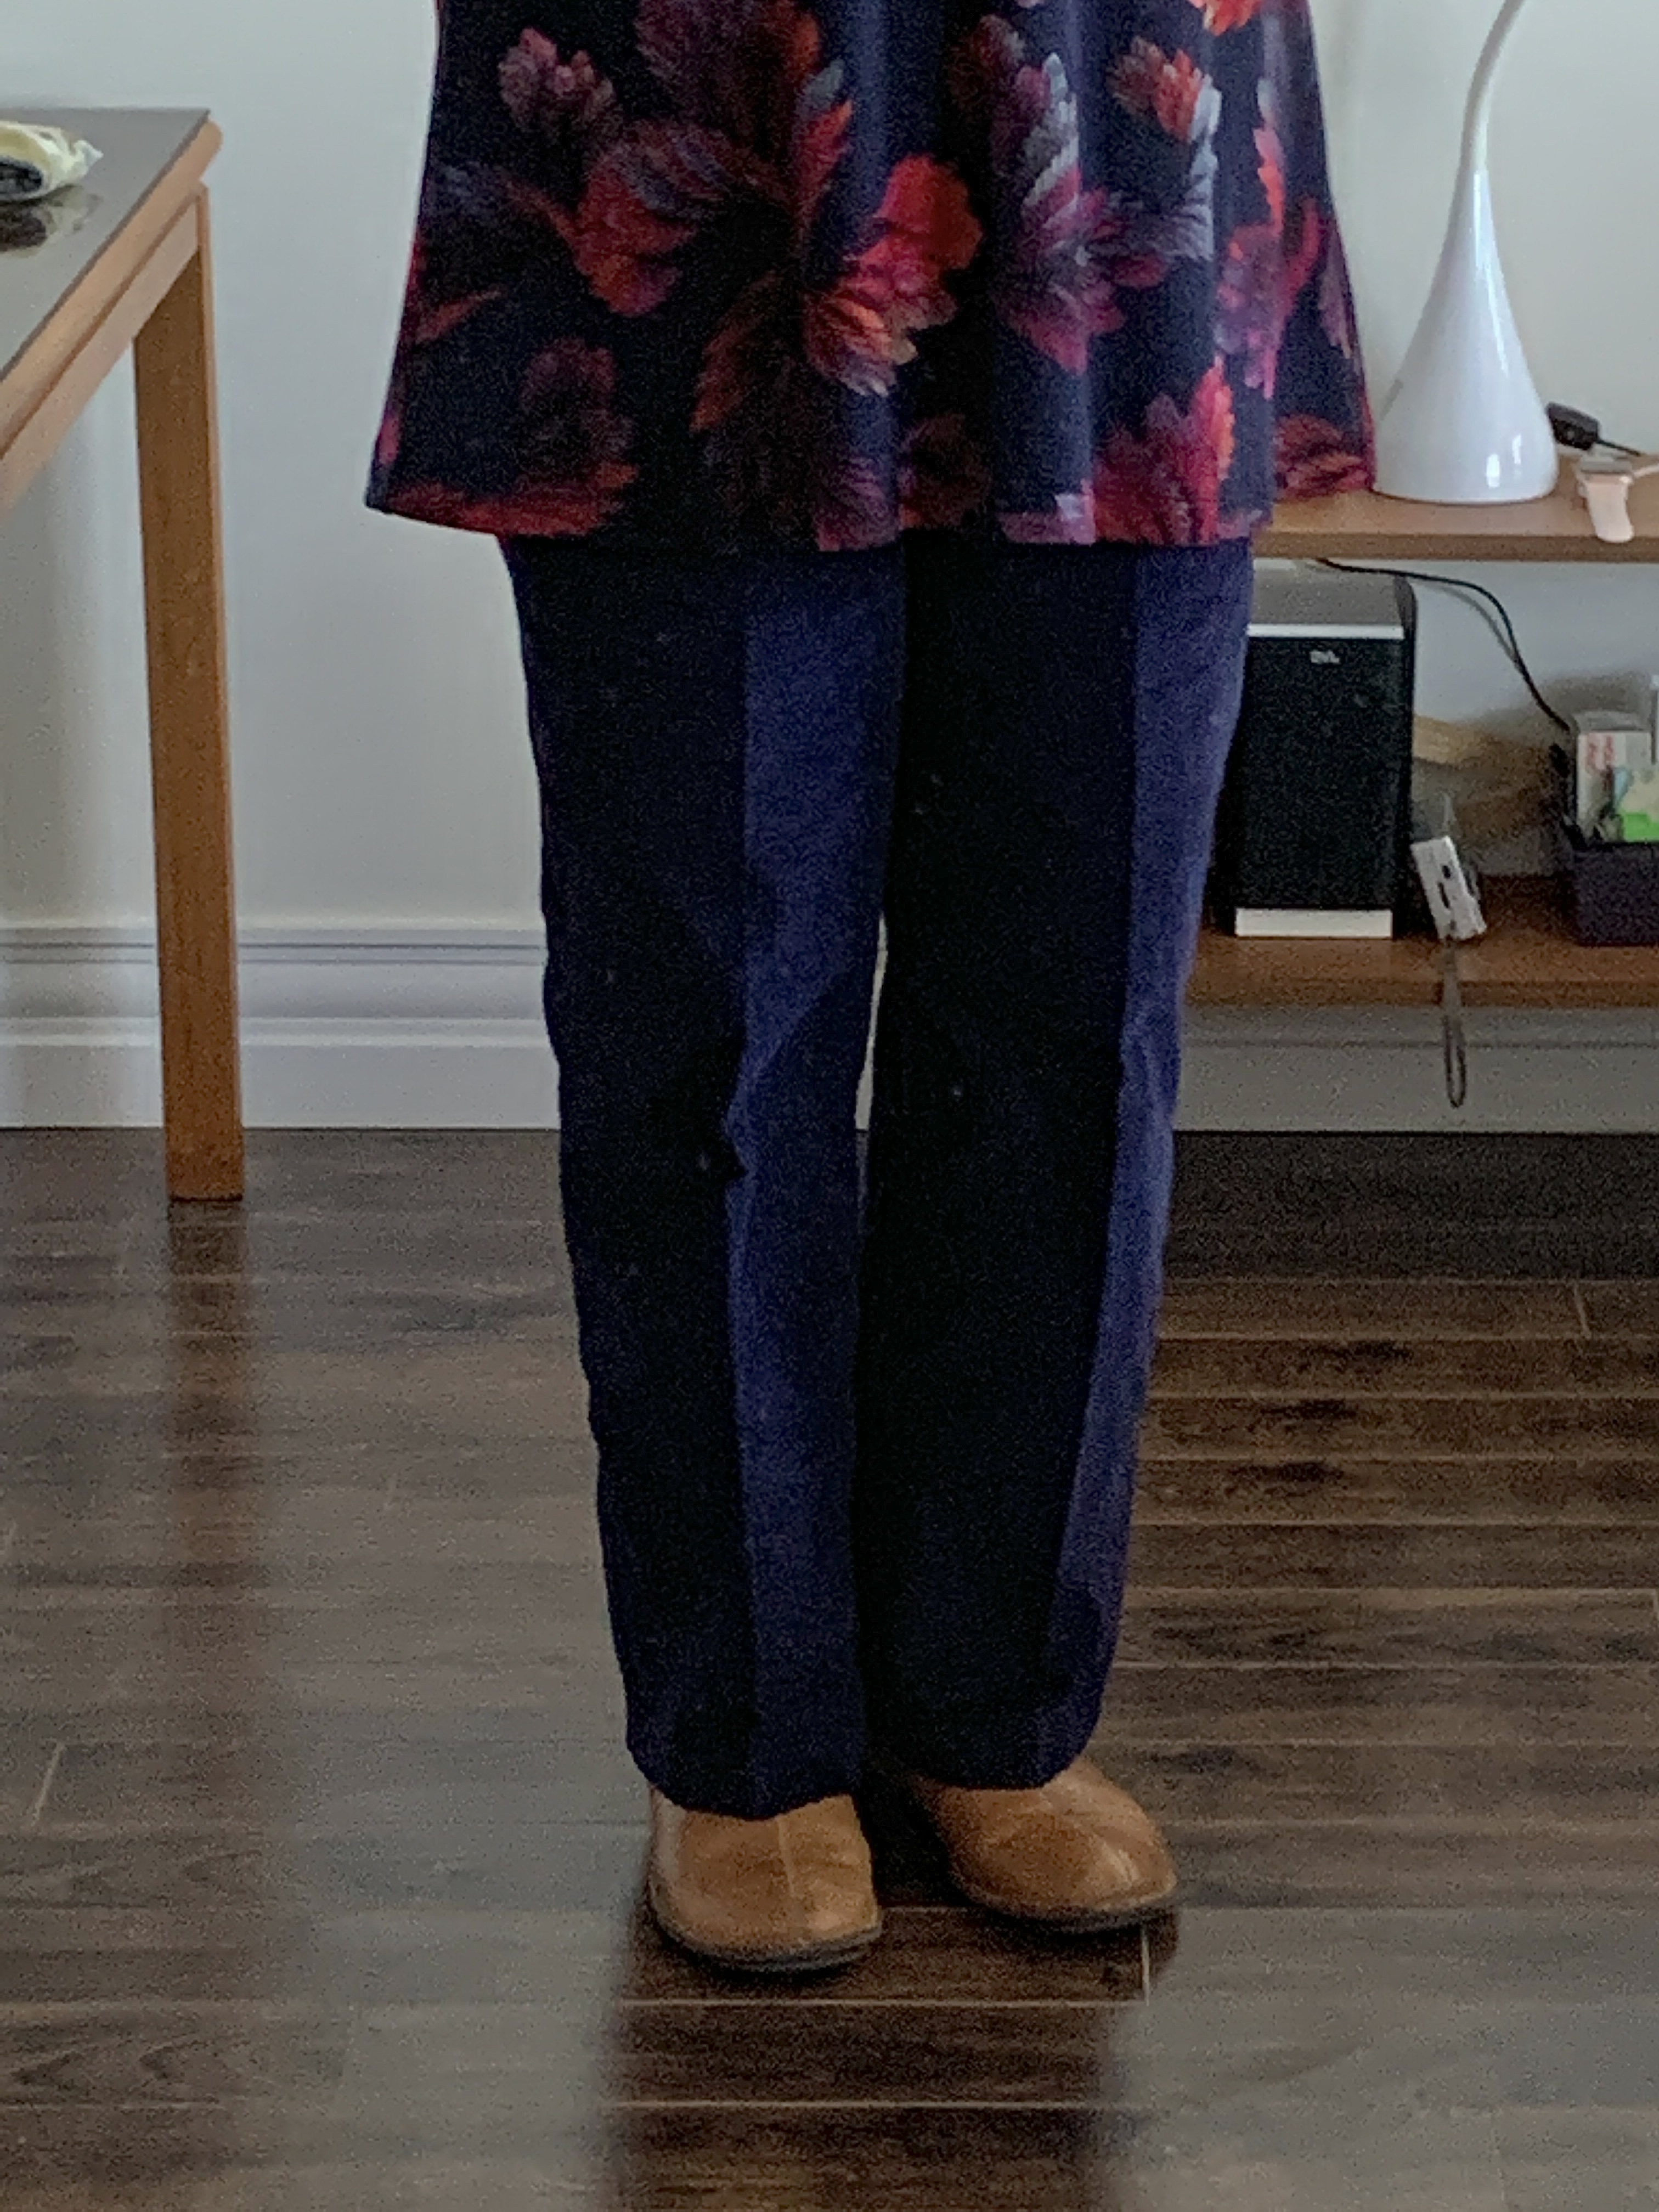
So the next day, I take off the waist facings, add a yoke to the back of the pants increasing the centre back length by 1 1/2″. Here’s where I decide I don’t want to reuse the corduroy waist facings so I cut out and attach a new set in a complementary batik (not as heavy a fabric so the waist should gather more easily). Inserted the elastic and zigzagged a seam down the middle of the elastic to keep it from twisting – but in order to do that I had to stretch the elastic to fit the waist and in the process the elastic is stretched making the waist loose.

I wear the pants again, anyway – just a “muslin”, right? I find myself constantly tucking in my shirt again.
So this morning I painstakingly took out the zigzag stitching, opened the inside side seam to gain access to the elastic, shortened it quite a bit more, then instead of doing a zigzag down the middle, I simply vertically stitched across both side seams, the centre front, the centre back and in the middle of the back on each side – that will keep the elastic in place and avoid stretching it.

The Pull-on Pants after adding a back yoke
The waist of the pants is now definitely tighter. I plan on wearing them again today to test out the fit. Furthermore, I send the PDF file to a friend with access to a blueprint printer. I should have a new 100% printout of the pattern to work from and then I will make up a second pair using the navy corduroy I bought a couple of days ago.
The pants fitting saga continues.