Quilting The Quilt

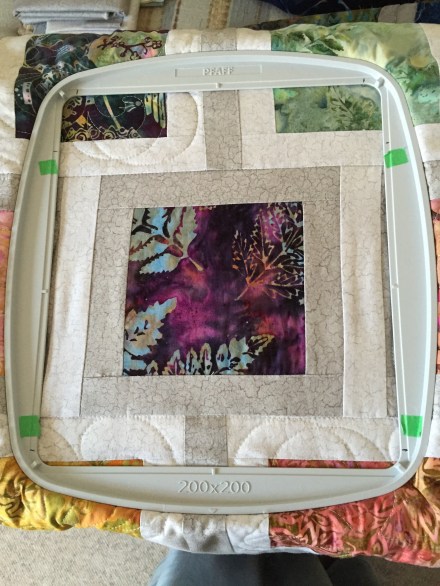
After I finished the backing using the strip I created from the leftover blocks, I assembled the quilt top/batting/backing, pinned it all together.

I set up a couple of embroidery designs to audition for the quilting. The first was a straight line design that more or less followed the log cabin layout of the blocks – the first block stitched reasonably well; the second wouldn’t align with the first! So I carefully unstitched both blocks and returned to the drawing board.

Quilting The Diagonal…

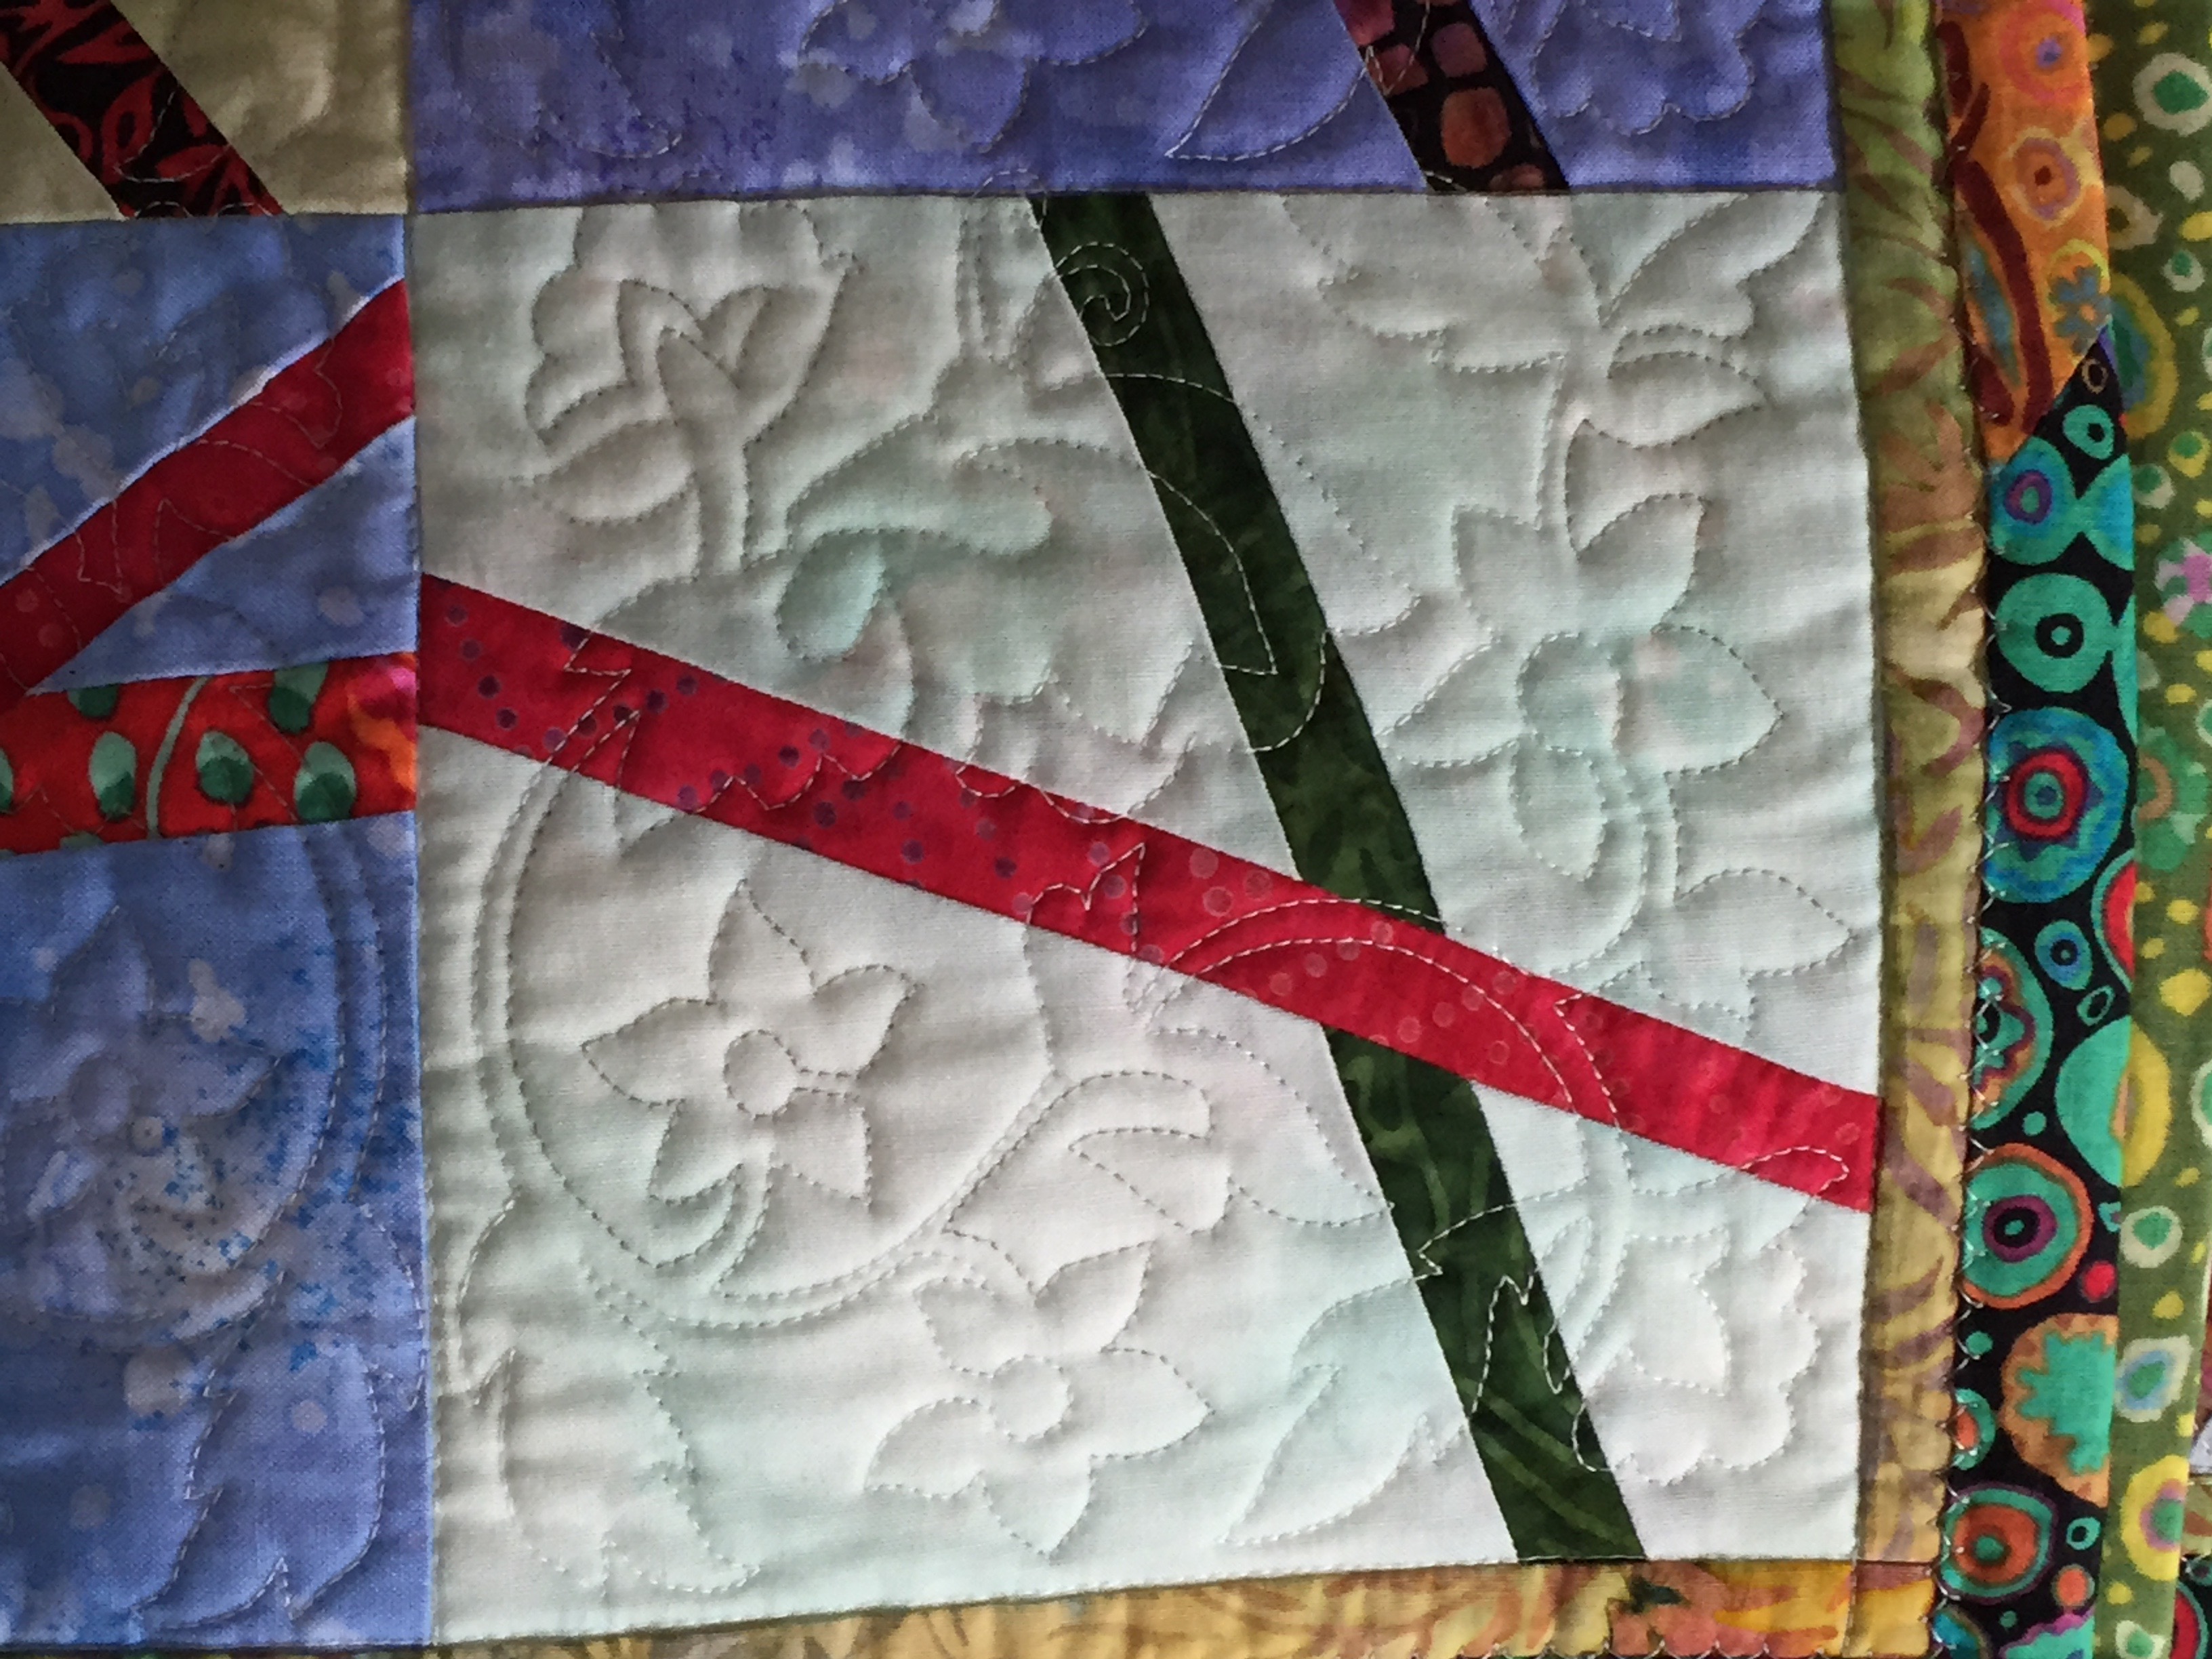
Next I decided to try quilting on the diagonal, more or less following the piecing lines at somewhat unequal intervals… I did quite a bit of stitching before I decided I couldn’t live with it and again carefully picked it all out!

Quilting The Quilt

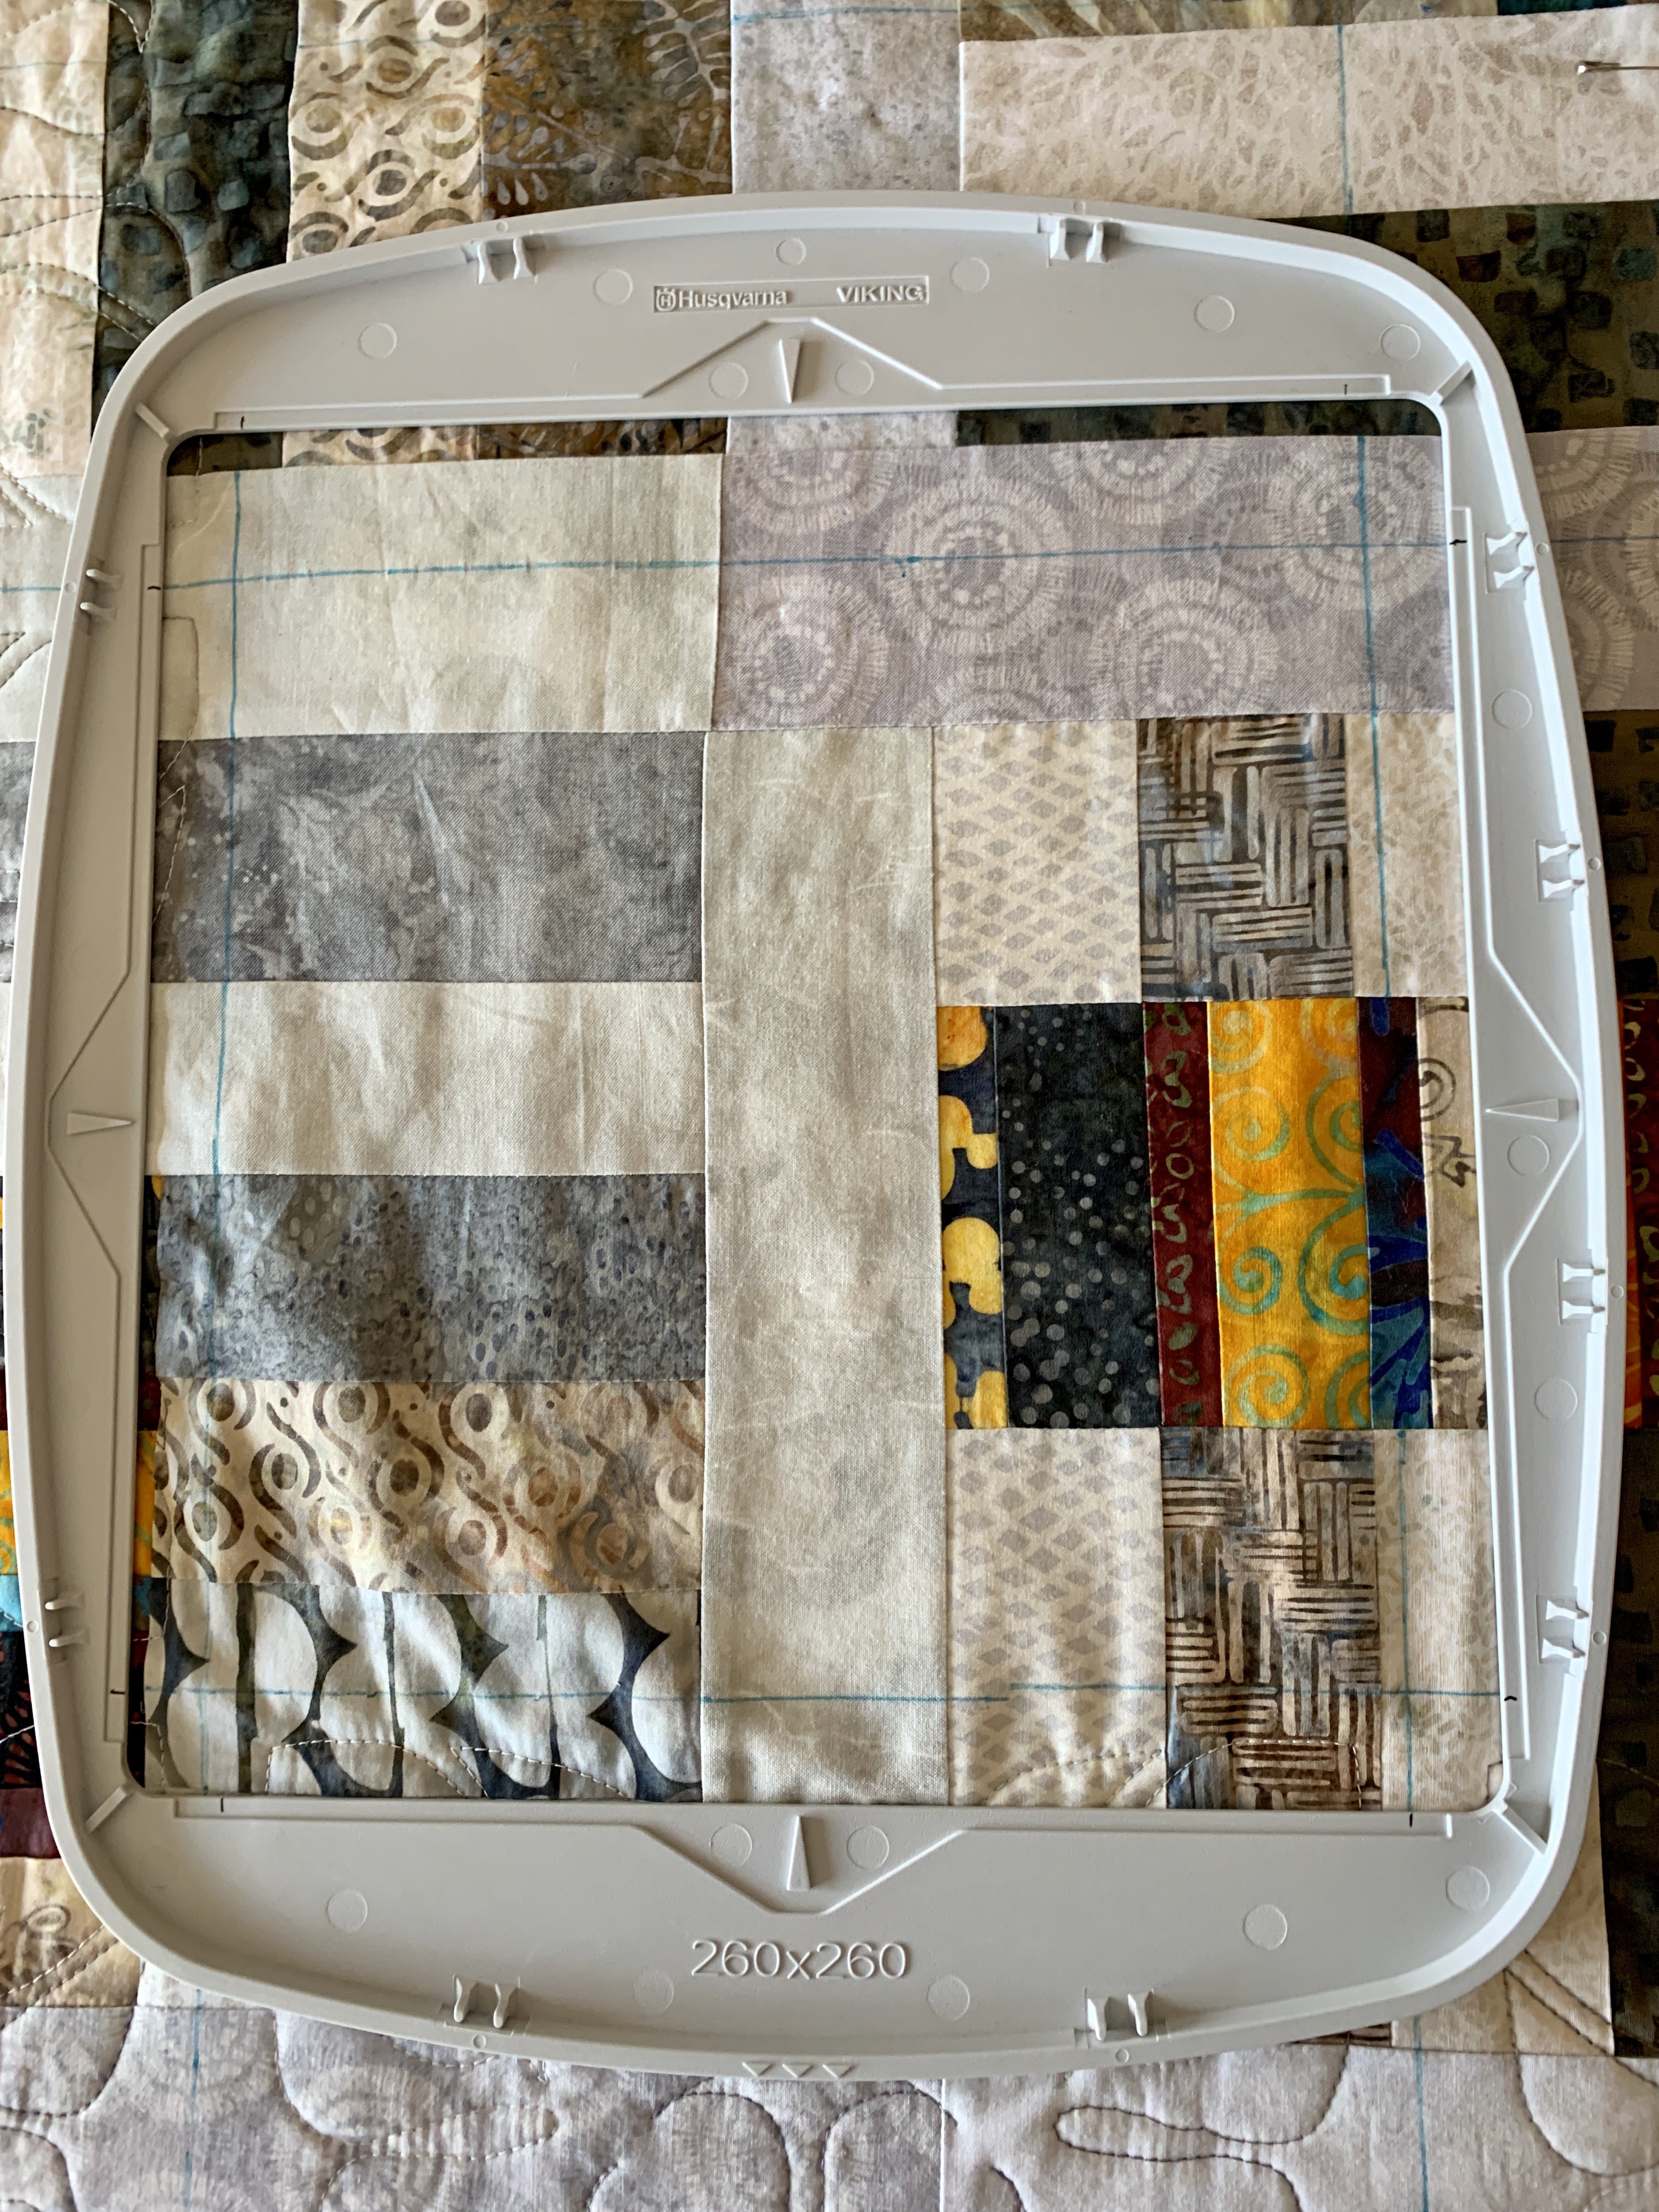
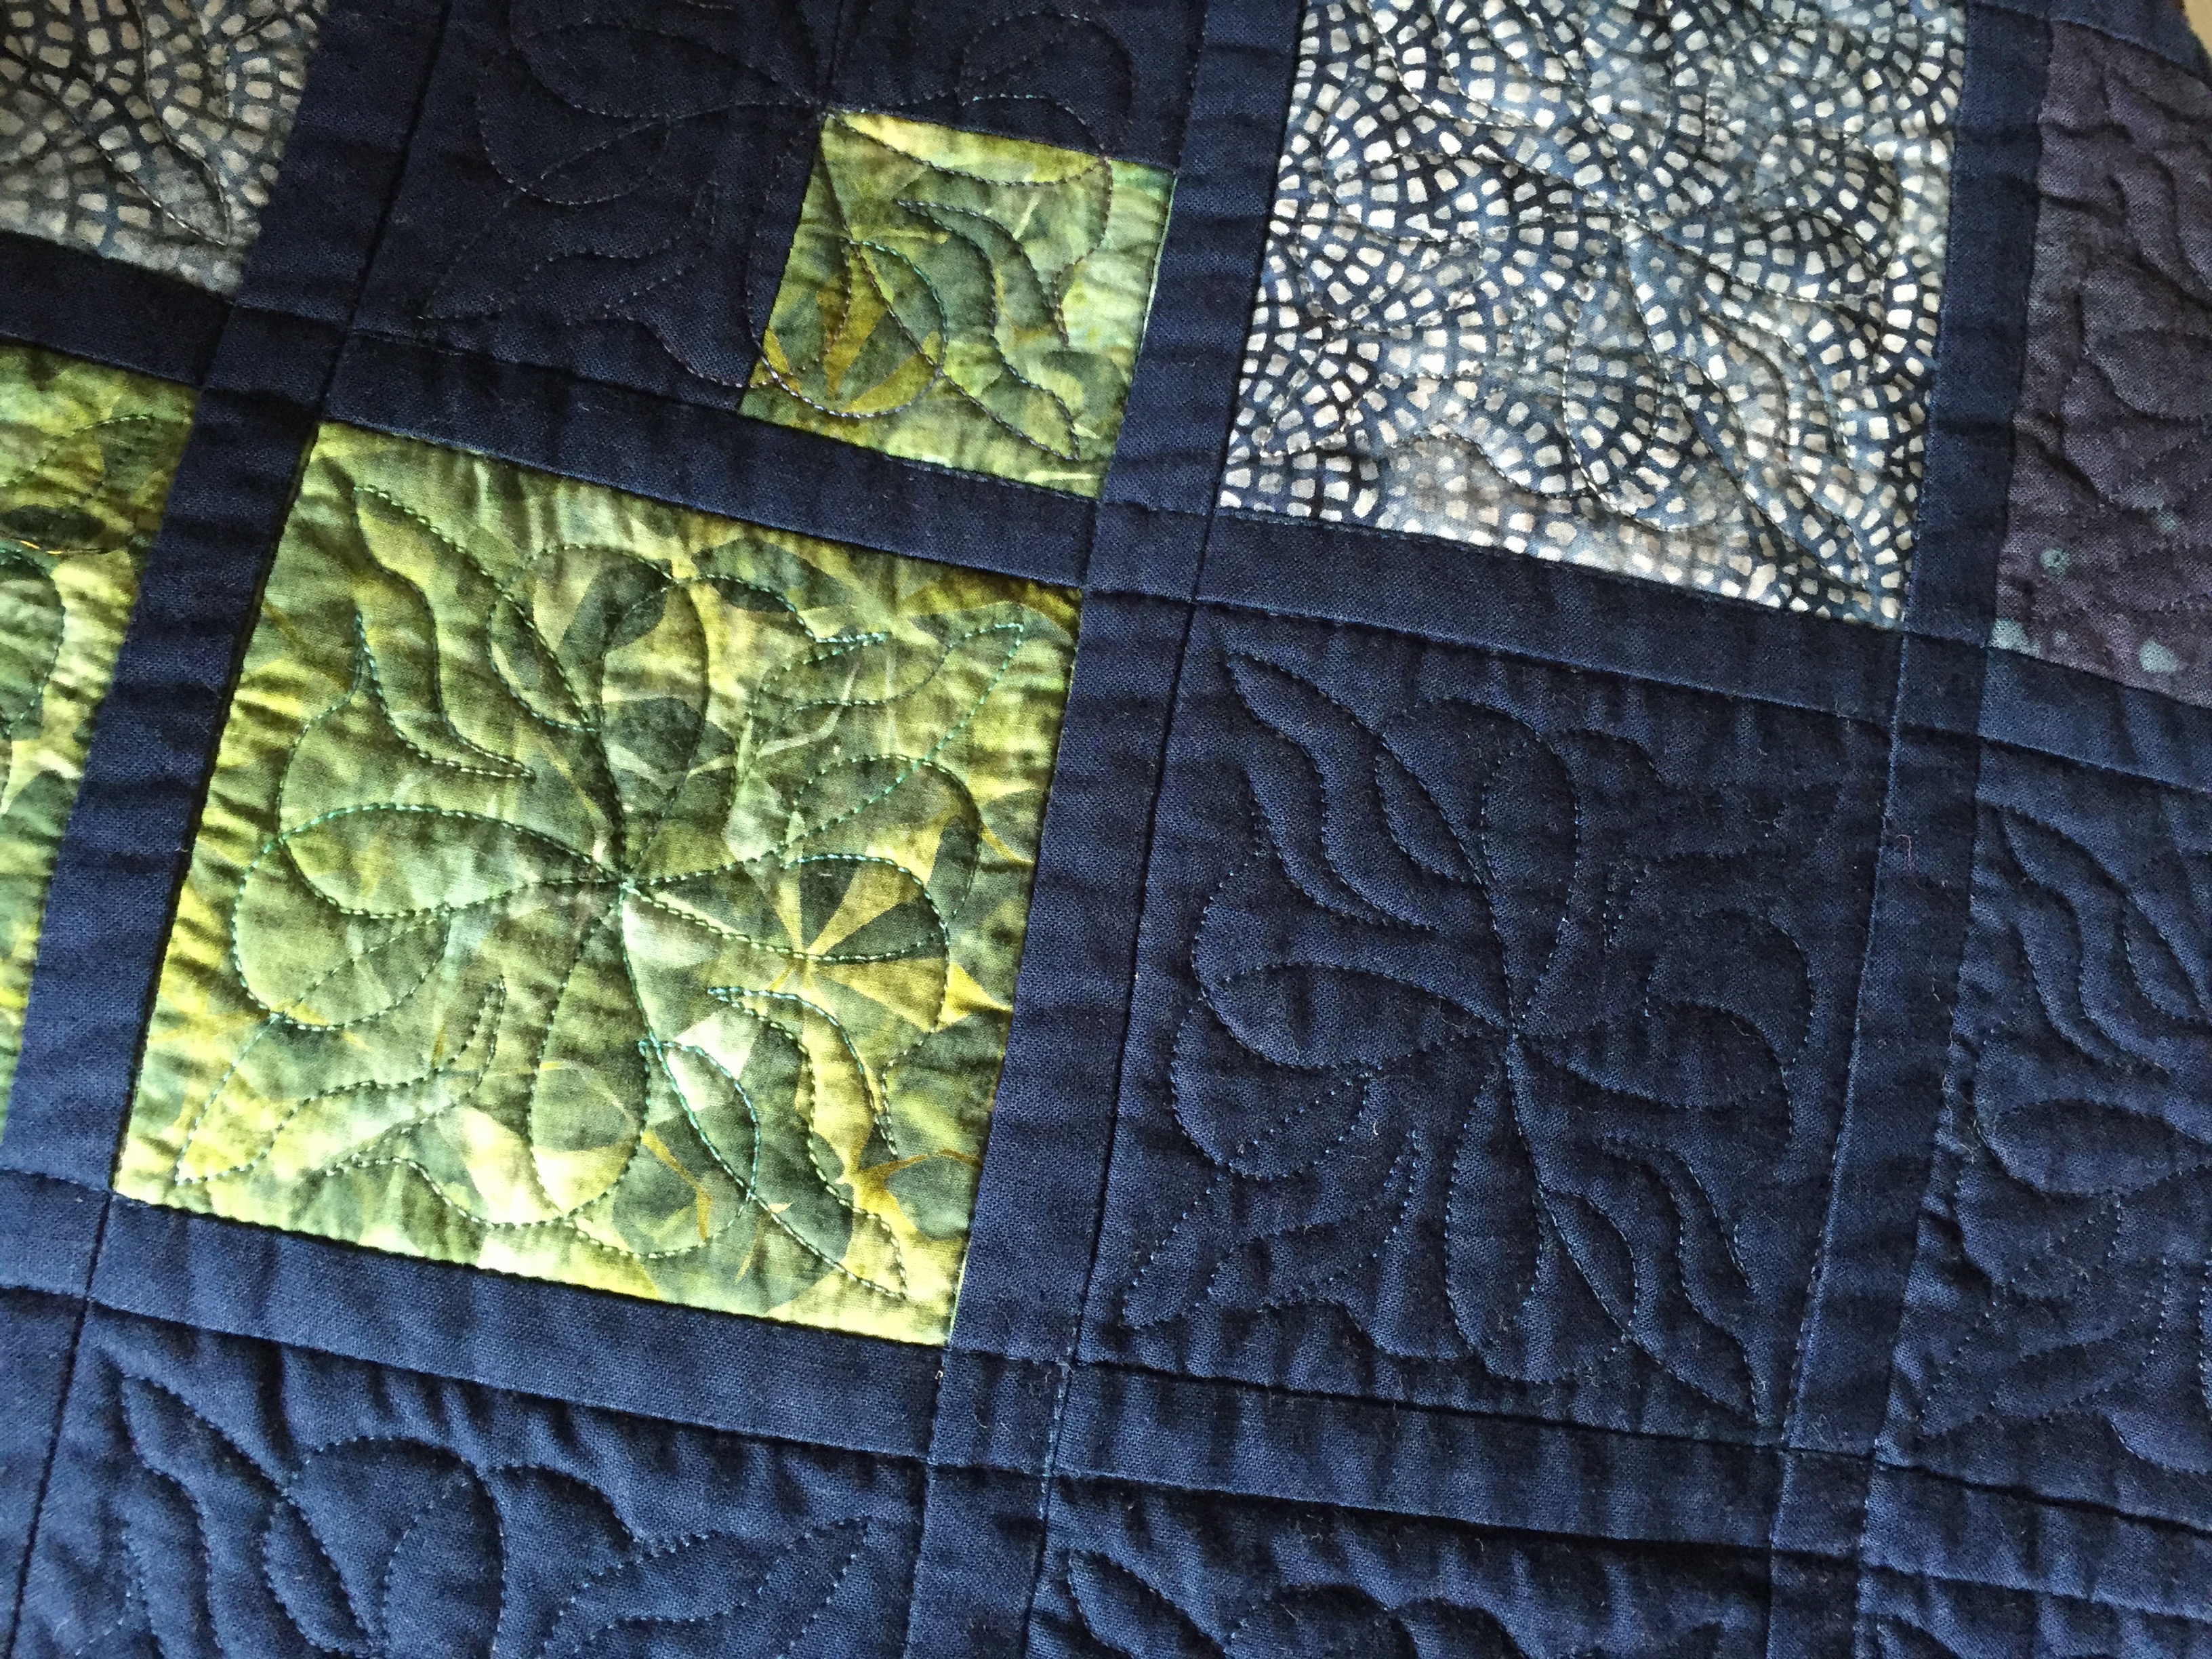
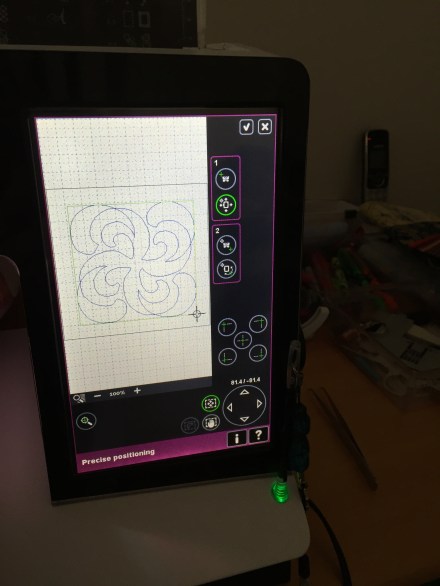
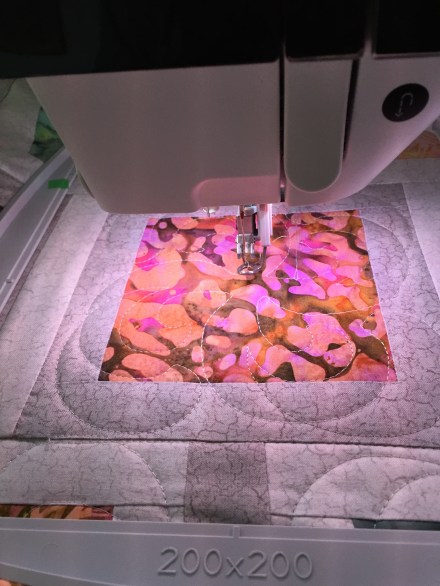
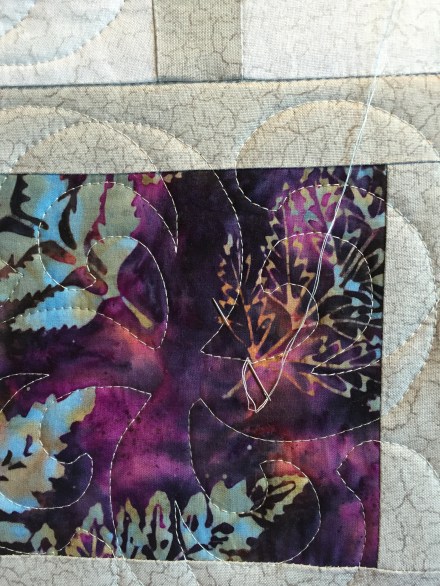
Third I set up an enclosed embroidery design that fit the 8 1/2″ block size. The problem I ran into had to do with my embroidery machine losing calibration each time I tried precise positioning the embroidery within each block! The issue, I thought, was the belt driving the “y” axis element of the embroidery unit was a teeny bit loose, as a result it slipped when I tried locating the corners of each block. The drag created by the quilt itself was too great for the unit to move the hoop consistently without the belt slipping and losing calibration.

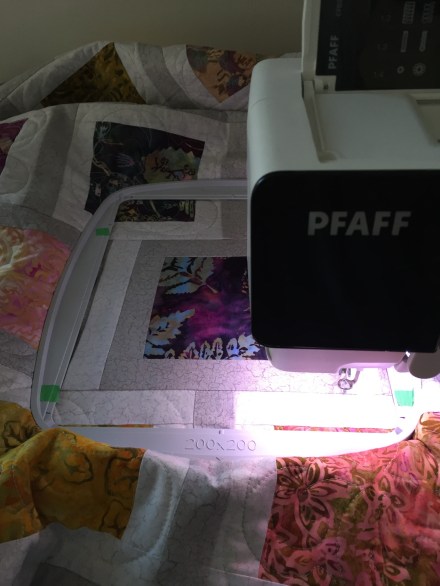
I packed up my machine, embroidery unit, and quilt on Thursday morning; took it into the nearby shop so the repair guy who comes in once a week with the machines he’s fixed that week could see what was happening. I set up the machine on a table in the classroom, started quilting – all went smoothly! When Neil arrived do you think I could make the “slipping” happen? I could not. I rehooped the quilt a couple of times trying to position the bulk of the fabric so it would pull against the embroidery arm when I attempted to locate the corners of a block. I COULD NOT get the embroidery arm to go out of calibration. So I packed the whole thing up and returned home.

Before I set it all back up, I happened to visit my friend Deb who mentioned that the new Husqvarna Epic 3 machine warns new owners to make sure the machine is LEVEL so the embroidery arm works. Maybe I was having a problem with my sewing table having developed a dip and the machine was not sitting level, now. So I pulled out my trusty spirit level and placed it on the bed of the machine in front of the needle. Ever so slightly dipping toward the embroidery unit!

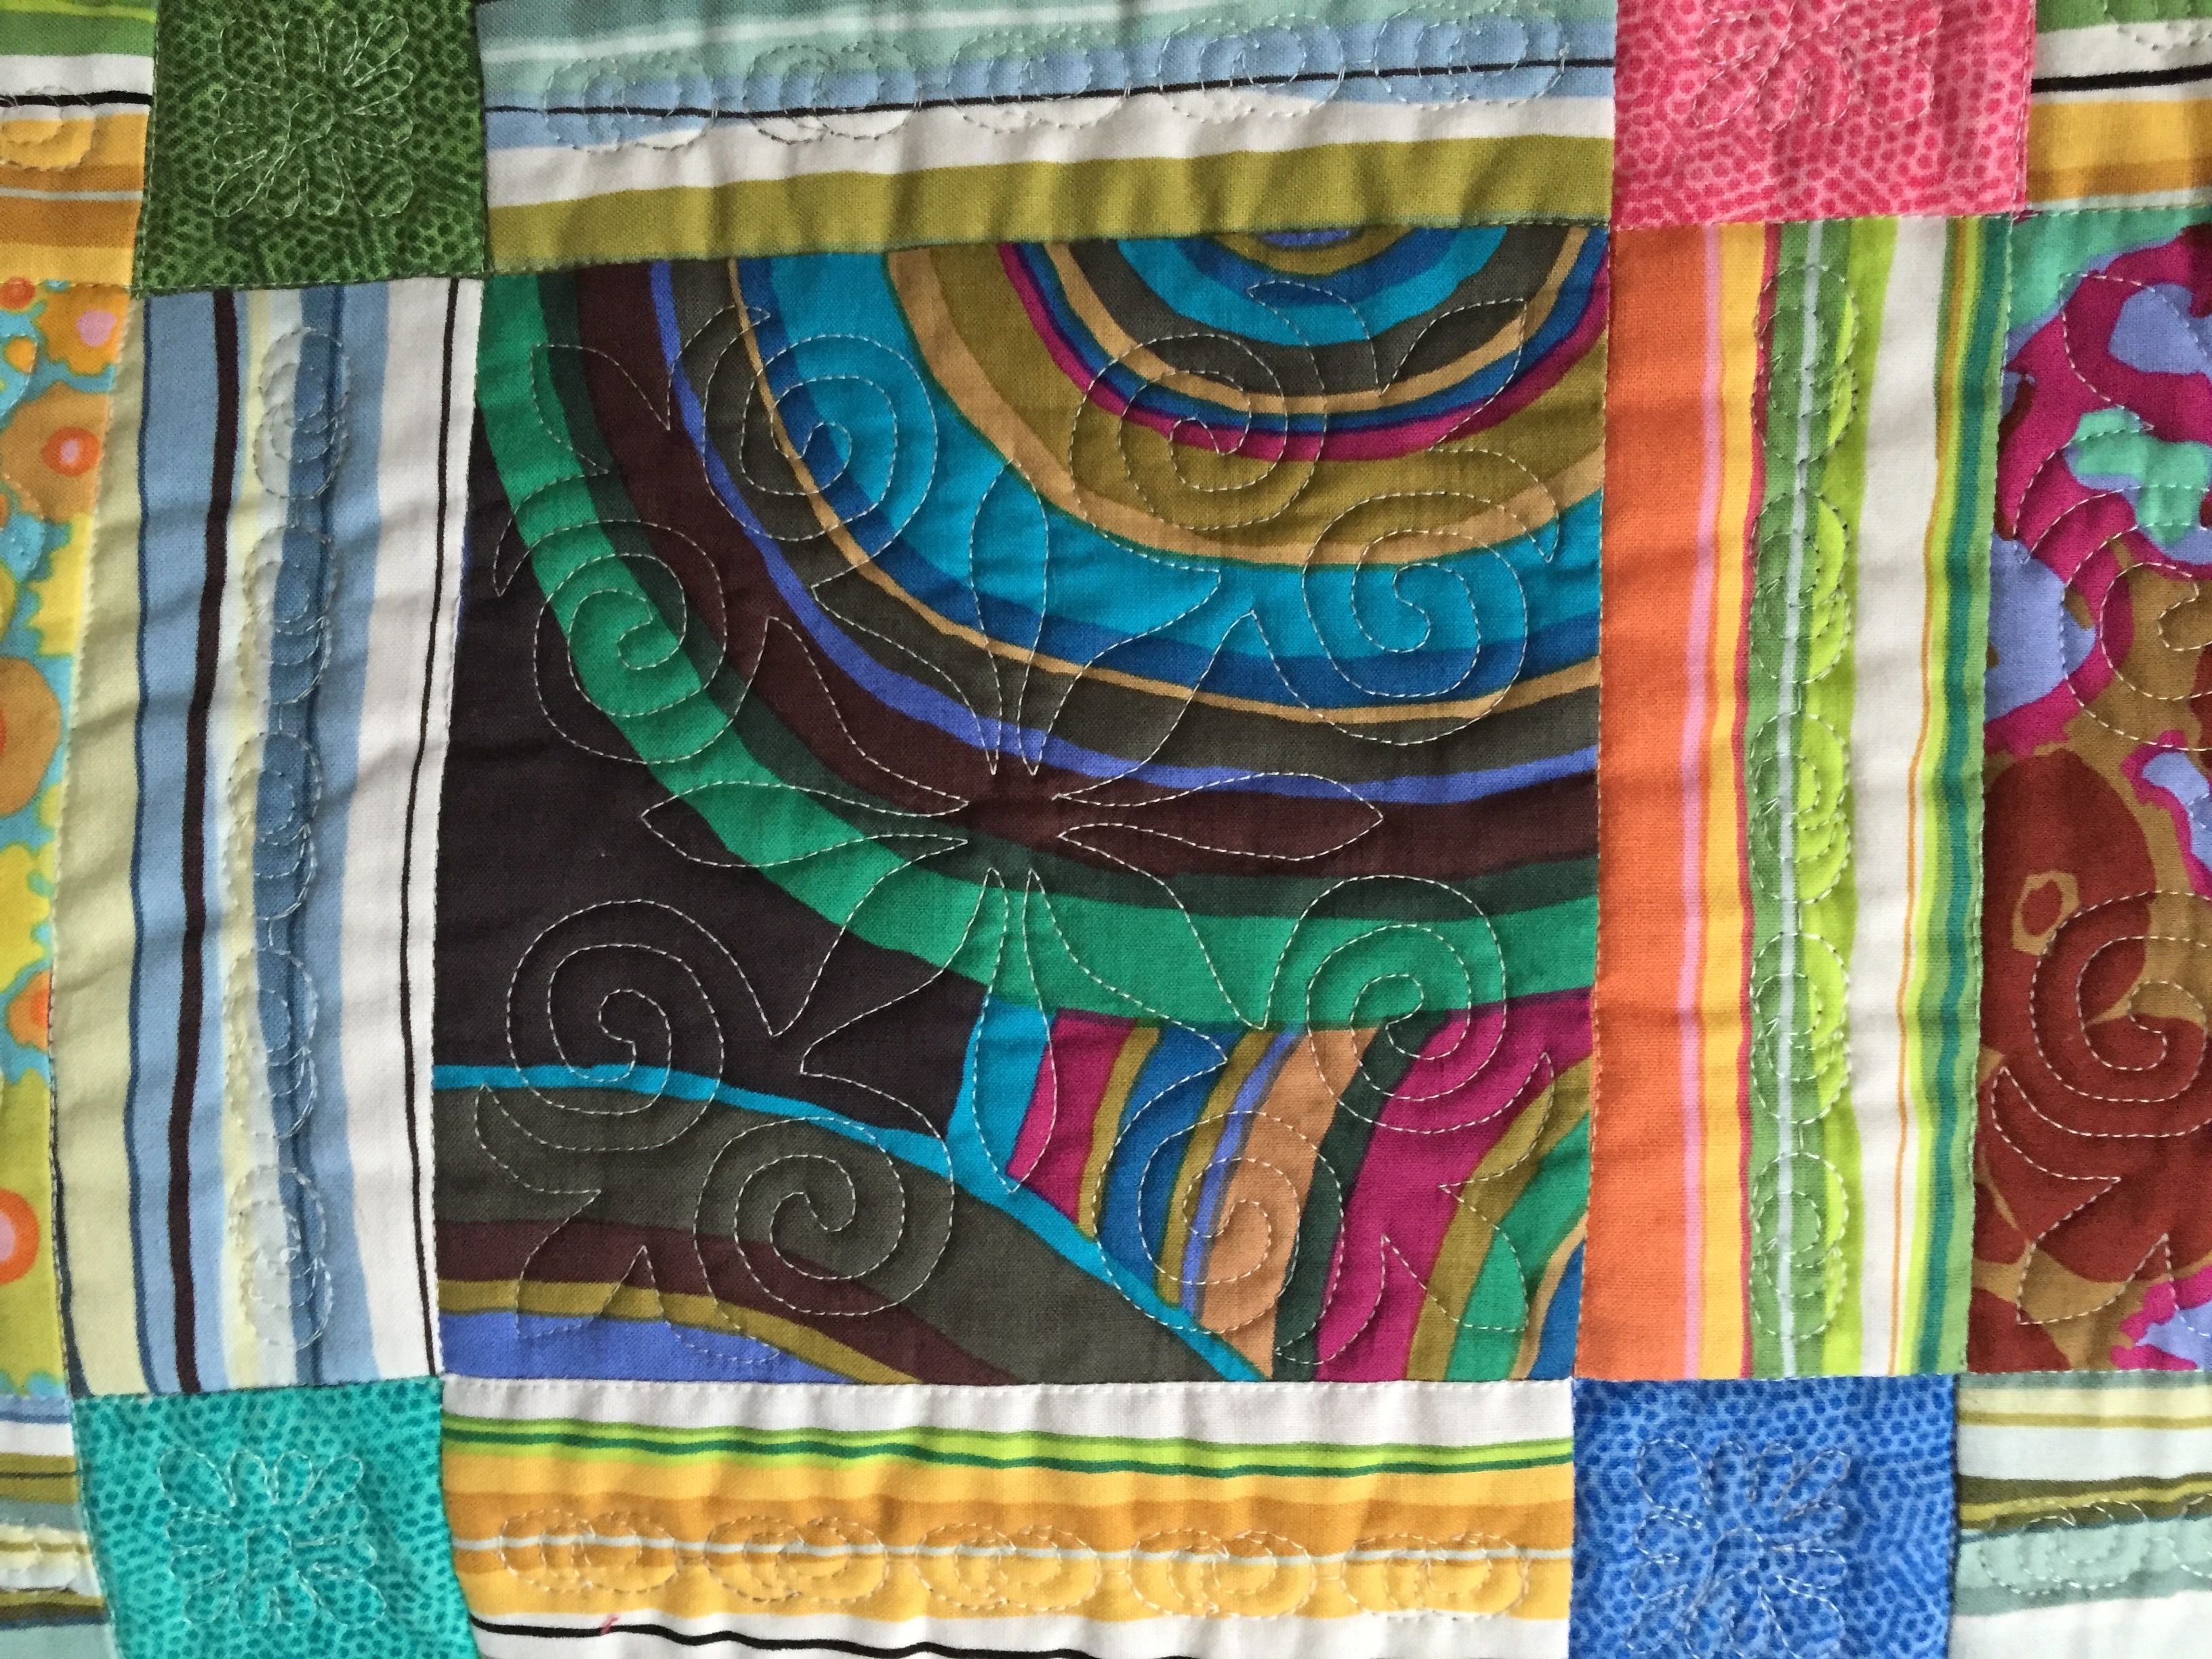
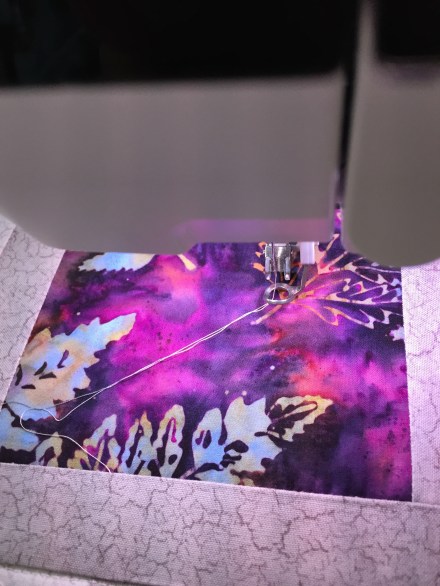
I loosened the feet on the unit to lift it a bit; not quite enough to bring the spirit level to neutral. I placed a small piece of foam core under the feet – that did the job. The machine was now level. Guess what – the embroidery arm hasn’t slipped since (well just once in the 16 embroideries I’ve completed). Whether that was actually my problem, or something else inadvertently fixed itself I’ll never know, but I’m starting to trust the embroidery arm again.

[I won’t bore you with the long story about how I broke the “y” axis drive belt on the embroidery unit; Neil repaired it, and it looks like the arm is now working as it should!]

Crossroads – Quilt Finished

Well, the quilt is almost finished – I still have to hand stitch the hidden binding on the back – at the moment the binding is just pinned in place.

I elected to do a hidden binding because I wanted the contrast strips to reach the edge of the quilt without the interruption of a conventional binding. Using a hidden binding adds a “modern” touch to the  piece.

Crossroads – Quilt Top

The back was pieced from four leftover blocks with large segments from remnants of some of the grey fabrics. None of the three pieces I had were large enough to use without piecing. I added contrast elements to join the grey blocks in an asymmetric layout.

I was fortunate, when I trimmed the quilt, to have enough leftover fabric from each edge to use as binding. That has allowed me to match the binding to the back so the pattern layout is continuous. A nice surprise.

Crossroads – Quilt Back

To quilt the quilt, I had to mark the quilt top into 250mm squares because the actual “blocks plus sashing” were larger than my largest hoops could accommodate. I figured the colour detail of the quilt top was strong enough that the fact the quilting block was smaller wouldn’t be obvious. So a 4 x 5 quilt layout was quilted using a 5 x 6 + 5 x 1/2 blocks. The top row of half blocks blends in – the quilting appears continuous.

Quilting In The Hoop

The quilting blocks can be seen on the reverse but the more open structure of the back panel accommodates that.

I’m actually very pleased with how this quilt turned out.

Now to hand stitch the binding and label – this evening in front of TV.

Quilt On The Go – V

I’m making headway – I’ve got all the circles edge stitched and about 2/3 of the Xs – It’s taken me several hours each of the last three days to get this far. Tomorrow afternoon I hope to be able to finish the remaining Xs.

Circles Appliqué Quilt – Edge Stitching

I’m stitching using embroidery rayon (in many different colours to more or less match the fabric I’m stitching – the stitch is a narrow blanket stitch (l: 2mm, w: 1.5mm) making sure I’m using the needle down position so I can pivot the fabric to keep the stitching along the raw edge.

Once I’ve finished the edge stitching, I will add a narrow chartreuse inner border, and a navy/teale grunge outer border to finish the top. I have fabrics for the second side – I will do some piecing as I assemble it so my narrow width of fabric can be extended to fit the width of the quilt.

What I have no idea about is how to quilt the sandwich! The last time I did a quilt like this I simply stitched the underlying block edges as squares through the circles and Xs. However, this time the arrangement of circles and Xs doesn’t lend itself to that. I’ve discussed ideas with several people and heard many suggestions. Were I doing the quilting on a long-arm quilter I’d just do some open curvilinear design but I will be stitching in the hoop so I need to come up with some kind of “block” idea that will fit within my 360mm x 200mm hoop. (I have a large reversible hoop but I’ve learned the hard way that whatever design I create has to not cross the centre line.) I need to let this percolate for the next week or so when I’ll be ready to do the quilting.


Blushing Peonies – VI

After looking at the finished quilt for a couple of days, I decided, today, to fill in the slightly large unquilted corner where the four embroideries came together. You can see what I did in the photo – I’d set up an embroidery of a single scaled down flower from the original design and stitched in the center of that space.

Quilting, detail

I did all 35 of them although this is really the only one where it actually shows. The other locations were at the junction of 2-4 blocks, or within the large bordered blocks and aren’t as obvious. Nevertheless, I’m happier with the quilting being more uniform throughout the quilt.

It’s All About Pink – IV

I haven’t worked on this quilt since Dec. 31. I’ve read 5 mystery novels, watched some interesting series on TV, added elastic to the bottom of two sweaters, continued repairing socks in the “repair socks” basket (five pairs completed, six left to do), knit a new pair of socks and close to finishing the first sock for another pair. But no sewing on this quilt.

However, yesterday, I pieced the quilt back. Today, I pinned the quilt sandwich.

It’s All About Pink – IV

Yesterday, I also set up an embroidery to fit a 150mm x 150 mm block; I still need something for the borders – I’ll probably use one of the decorative stitches for the narrow border and something related to the block design for the out border – have to do that now.

And then the quilting in the hoop will begin.

Quilting In The Hoop – Examples

The photos below show some examples of the kinds of embroidery designs I use to quilt in the hoop on my embroidery machine. I try to fill as much of the block as I can and where possible I do my best to connect up the embroideries so the quilt looks like it might have been quilted on a long arm quilter!IMG_7331

IMG_7332

IMG_7333

IMG_7334

IMG_7336

IMG_7338

IMG_7339

IMG_7341

IMG_7342


Quilting In The Hoop

If you search online for “quilting in the hoop” you get lots of projects which actually piece appliqué quilt blocks within an embroidery hoop, or you get very dense embroideries which are intended to be quilt blocks in and of themselves. What I haven’t been able to find are directions for actually using an embroidery machine instead of a long arm quilter for doing the final quilting. Lots of information on free motion quilting, quilting with a walking foot on a home machine… I’m sure people use their embroidery machines to do the actual quilting but I’ve not found any descriptions.

I have developed a technique for using my embroidery machine in lieu of a long arm quilter because that’s the machine I have. Long arm quilting machines are very expensive and it makes no sense for me to own one – first, because I have nowhere to set one up (except in my basement which has no natural light) and second because I don’t make enough quilts to justify the expense. And I certainly don’t want to use it for a business – the joy of quilting would be gone.

So here’s how I do it. The technique involves creating an embroidery to fill whatever size block I’ve used to construct the quilt. I don’t like a heavily stitched quilt so I set up a single run (the design is stitched just once), open flowing design with a stitch length of 2.5mm. I make the design about 10mm narrower and shorter than the finished block size (to allow for slightly different finished block sizes). I can adjust the size up or down a small percentage once I have it on the embroidery machine.

I start the process by choosing a hoop that’s a bit larger than the block I’m quilting – I want to allow a some wiggle room so I can adjust the position of the design within the block. Step #1: I put a double sided non-permanent craft tape on the underside of the hoop (peel off the protecting paper). I get from 10 – 15 hoopings before I have to renew the tape. The tape is essential for making hoop placement easier – it keeps the top of the hoop in place while I slide the hoop bottom beneath the quilt block. (Non-permanent scrapbooking tape sticks nicely to the fabric but can be a bit difficult to remove from the hoop back. The best tape for the job I’ve found at my local Dollar store – the last time I saw it there I bought 20 rolls to last me a while! It sticks to the fabric very well and peels off the hoop reasonably easily. Double-sided scotch tape doesn’t work at all.)

IMG_7265

I position the hoop around the block doing my best to center the block vertically and horizontally. Notice the tape markings on the hoop – they show me where the top and bottom seams ought to align horizontally (I found their location by using a Frixion erasable pen to draw both horizontal and vertical lines through the center of a block then positioning the hoop and marking the seam lines – this makes it possible to position the hoop without having to locate the center for each block); in this quilt the vertical center falls in the middle of the vertical joining strip so I didn’t need to mark the vertical alignment. (I put small permanent black marks on the hoop to mark the positioning for an 8″ X 8″ block. All other block sizes I mark with tape.) (I have used my 120 x 120 hoop, my 150 x 150 hoop, my 360 x 350 turnable hoop, my 360 x 200 hoop… any hoop will work; the process is the same for all of them.)

IMG_7260

Next I place the hoop in the embroidery unit, bring up the embroidery design on the screen and use precise positioning to check the location of the corners making sure they fall within the block. Notice the cross hairs in the lower right of the embroidery design.

IMG_7261

I check all four corners to make sure the design fits the block. Because the hooping is at best approximate, I use the precise positioning on my machine to fine tune the location of the design within each block. I adjust the position of the design (up/down, left/right) making sure it’s as centered as possible.

IMG_7262

I set the machine to embroider, but before I start, I bring my bobbin thread to the top of the quilt (later I will embed the two threads using a self threading hand sewing needle – picture later). I hold the two threads out of the way so as the machine executes the embroidery it isn’t stitching over these threads.

IMG_7263

I stitch out the design,

IMG_7258

When the embroidery is done (I include a tie off and automatic thread cutting in the embroidery design), I remove the hoop from the machine, and before removing the hoop I pull the starting threads into the quilt. I also embed the cut tie-off threads on the underside of the quilt. I find it easier to handle the self-threading needle in the quilt when it’s still taut in the hoop.

IMG_7264

This quilt required 50 repeats of the embroidery design, plus eight half block designs (set up as a separate design) four on each side. It took me a couple of hours a day over three days to complete the quilting of this 48″ X 62″ quilt.

IMG_7268

I used my large endless hoop to stitch out the border (another design I created using the elements of the design I used for the blocks). The vertical joining strips were narrow so in the end I left them unquilted. Before beginning this quilt I stabilized the layers (backing, batting, top) by stitching in the ditch along the horizontal lines – I didn’t do vertical lines because I didn’t want vertical seams through the blocks.

I haven’t tackled a larger quilt – I think the boredom factor would do me in; in addition, I don’t have table space to hold that much fabric while the machine is doing the embroidery. My lap quilts are small enough that I can position the quilt fabric beside and above the embroidery hoop while the machine is doing the embroidery. It’s important not to have too much drag on the hoop – if the quilt hangs down the weight interferes with the hoop movement and the design doesn’t stitch out accurately.

So there you have it: Quilting In The Hoop – a technique for quilting a quilt using a home embroidery machine instead of a long arm quilter! Need more information? Ask for help using comments.