Knit Tunic

img_8237

As you can see, I’m  not exactly a “leggings” person. However, everybody seems to be wearing them so I thought I’d give them a try. I bought a funky black and white pair during the summer in Lunenburg. I have yet to find something to wear with them! I’ve tried printed fabrics, and solids, but the prints just don’t work with the stripes. I made both a black and navy pair from some lovely stretch knit I bought from Distinctive Sewing Supplies, they both fit fine but same problem – nothing to wear with them that looks reasonable.

Last week, I bought a couple of pieces of solid colour knit fabric, hoping if I made a couple of tunic tops they’d work with the leggings – forget that, the black and white stripes come above my knee in the front (really, I can’t publish a photo) and so even this sedate solid rust colour tunic does not look great. Here it is with black leggings. The tunic turned out fine, but, really, it doesn’t make me into a leggings person. The dark teal tunic – exactly like this one, same length – doesn’t look any better. Wearable around the house but for going out anywhere – not too sure about that. I just don’t have the shape for leggings. Probably shouldn’t wear them…

Seat Belt Covers

img_8224

Seat Belt Covers

Just finished two sets of seat belt covers. I’ve been meaning to make myself a new set. The impetus was a request from a friend who has a pacemaker and finds the seat belts in his car uncomfortable. I made him a set shortly after he’d had the pacemaker implanted. They’ve worn out. So I’d put a note on my calendar to make him a new set today. I made a set for myself as well.

Materials for one seat belt cover: a piece of fabric 24″ x 7.5″, a double cut of batting 11″ x 6″, 1 piece of hooks velcro 3/8″ x 10.5″, one piece of loops velcro 3/8″ x 10.5″.

Construction: I lay the batting in the middle of the fabric, fold down one long end over the batting, fold up the second long end to overlap the first (I try to use the selvage on one end – that means I don’t have to worry about folding under or fraying – if you don’t have a selvage, fold under the raw edge of the top fabric before stitching). Stitch close to the edge, then a second row of stitching 3/16″ away from the first. Next press the seat belt cover, turn in the side edges (folding in the end corners), press. Finally, careful lay one of the velcro pieces along the folded edge (over the folded-in fabric), stitch as close to the velcro edge as you can, then along the inner edge of the velcro. Add the second strip of velcro to the other side making sure both pieces of velcro are on the same side of the cover. Fold seat belt cover in half using velcro to close it. The cover will just slip over the seat belt – I use them with the folded edge to my neck, open/velcro edge away from me.

img_8225

Inside of Seat Belt Covers

They’re great for short people who find seat belts uncomfortable, particularly in the summer when I’m not wearing a heavy coat. I still use them during the winter as well. Just convenient to have them in the car. I also have one on the passenger side. They’re particularly useful for children using booster seats who also find seat belts cut their necks.

My original pair came as a gift from Hawaii at least 30 years ago. I’ve continued making them as gifts and for myself ever since. The fabric doesn’t have to colourful, a closely woven batik works well – batik has quite a bit of body which makes the seat belt cover a bit stiffer and the fabric doesn’t wear as quickly as a softer cotton.

Bendy Bag…

Bendy Bag

Bendy Bag

I know, I said I was finished making bags but there was just one more I wanted to try – Lazy Girl’s Bendy Bag. I found images of it while looking for something to make for Hillary and played around with paper folding and almost got it figured out on my own – what I missed were the cut corners which you fold and seam straight across at the zipper tab end to get the blunt end at the front of the bag. I gave up, rather than mess around further and bought the instructions. I was right about how to get the diagonal seam and the zipper application. I had to try one this morning so I could put this bag making to rest!

There I’m done (really). The last bag for a while. Now, I can see each triangular piece I cut from my rectangle on each side to get the diagonal seams on this bag are large enough to make a pod… I’ll save them for another time.

More Variations On A Theme

img_8214

I was curious to see if I could apply the half-zipper technique to my standard zippered bag construction – that meant figuring out a way to have the seams concealed between outer layer and lining. Turns out to be quite easy.

Instead of cutting two sides 6″ x 8″ I cut one piece 6″ x 16″ – I sewed the zipper to one long edge, added lining. Here’s the crucial difference – I didn’t top stitch the zipper, instead I steam pressed the zipper making sure both lining and outside were well pressed away from zipper edge. That allowed me to add the slide, fold the bag in half, separate the lining from the outside, sew the remaining side seam (from lining to outside with little tab inserted near the zipper) making sure zipper protruded on the lining side as I sewed. Next I made sure to open the zipper. Finally, I stitched the outside bottom, turned bag right side out pulling lining beyond the zipper, folded lining bottom seam allowance under and top stitched the lining bottom, pushed lining back inside bag, pressed.

I had a zippered bag with a “loop” zipper, and concealed seams.

I made six from four fat quarters which I had just bought so now I know exactly what my materials cost:

The fabric to make six 6″ x 8″ bags cost me $12; batting – I used large pieces leftover from a quilt (batting costs $26/m so say I used 1/16 m ) – $1.65, thread (can’t calculate), zipper (I buy zipper tape and slides from The Zipper Lady @ $36 for six yards (that includes exchange as well as shipping and handling), $10 for 40 slides (25¢/slide) – I get two bags from 1/2 yard so zipper costs me  $10.50/six bags (a bit less than if I’d bought zippers individually at the fabric store). Total for the materials: $25.65 for six bags = $4.27/bag. Labour: It took me 2 hr to make six bags – time per bag, ~20 min (that’s pressing the fabric, cutting fabric and zippers, sewing it all together, pressing again). At $20/h labour works out to $6.65/bag. Total costs: $4.27 + $6.65 = $10.92. Profit – 20% of costs = $2.19. Total cost of one 6″ x 8″ bag: $13.12!

People tell me I should sell them at the craft market – I’d be selling the bags at a loss if I charged $10/bag!

So even a small zippered bag is a gift of love.

That’s it for bag-making for now!

Variations On A Theme

img_8212

Experiments

It’s not a big stretch from a “sweetpea pod” to a “pyramid pod” – the pyramid is based on a similar idea – instead of sewing the two side seams in the same direction as I would for a flat bag, you sew one side seam (closed zipper end) with the zipper in the middle and the second (the open end) with the zipper at one end. I made this pyramid pod (on the left) with a double zipper tape but I still have to experiment to figure out how to construct it with a single zipper tape (the way I did the sweetpea pods).

The two bags on the right were sewn with a single zipper tape. To use this technique (with the zipper top stitched) I had to finished the seams within the bag, rather than concealed by the lining. However, if I don’t top stitch the zipper, it should be possible to make the bag with concealed seams – have to try that next.

Pods

Very early this morning (couldn’t get back to sleep), I was looking online for ideas for a Christmas gift for a fourteen year old girl. Last year I knit her a scarf, year before I made a small shoulder bag. I needed something for Christmas day to take to dinner at her grandmother’s house. I came across this picture of Lazy Girl Designs “Sweetpea Pods.” I tracked it down to a Craftsy pattern:

pod

What caught my attention was the way the zipper was attached – a longish zipper is separated and one half is applied to the zipper edge and the slide is then attached to either end to create a zipper that closes from half of a zipper tape. Clever idea!

Given I didn’t have time to puzzle out how the pods were constructed, I did something I rarely do – I actually bought the pattern at 7:00 am this morning, downloaded it, then proceeded to try making one.

My first attempt was a disaster – in large part because I didn’t fuse the outer fabric to the batting – each time I tried sewing the side seams I kept missing the outer fabric on one side. My pod ended up lop sided and quite a bit smaller than intended.

I persevered. My second pod at least looked somewhat like the pods in the pattern picture, but I still needed to refine my sewing.

Pods 3 & 4, however, turned out just fine!

img_8210

Tomorrow I have to buy some velvet ribbon and hair elastics to put in the pods so I can wrap them as a gift.

This zipper idea is one I need to try on one of my usual zippered bags – it could be a neat way of zipping them up!

Sleeping On It…

img_8207

Partially quilted light areas

Never ceases to amaze me how my brain keeps working while I sleep and when I wake I have a solution to the problem I walked away from (temporarily). I trust my sleeping brain implicitly – it always comes through; there’s always a solution the next day. That was how I worked when I was writing – stop when I got to a place where I wasn’t sure how to proceed – next day, ideas were just there! Always! Same with the quilting – walk away from a decision point, come back next day and there’s a way to work things out.

Last night the problem I needed to solve was how to quilt the light diagonal spaces in the quilt because the fabric expanse was too big (4″ x 20″) to lay flat – I needed to fill the space with something. I thought about just straight line quilting but that seemed too boring. I woke this morning thinking about stippling and knew how to set that up. I traced the light diagonal shape onto paper, sketched in some stippling, scanned the drawing, opened the image in Photoshop and scaled it to the right size, saved the image, imported it as background into my TruEmbroidery Create software and created a design based on my sketch (had to do some adjusting to balance the fill). I did a test run to see  how the stippling worked out – it was perfect! Just the right size for the space.

So far, I’ve quilted in eight of the spaces – I have four large ones, four light triangles and eight smaller diagonal pieces to go – that’s three different embroideries, in all, to fill all the different shaped light areas. I’ll probably work at this some more this afternoon, and it will still take at least another day, if not two, to complete the fill work.

Cost of table topper?

Overhead: $0 – I won’t cost the electricity to run the machines, the iron, the lighting in the studio, rent for the studio space.

Supplies: $100 – the backing fabric alone cost me $40 (cotton fabric these days is ~ $20/m) – then there’s the four half metres of red/green printed fabrics, plus the metre of dotted cream fabric – so $100 is an estimate, my materials may have cost a bit more and I’m not counting in thread or machine needles.

Batting: $30 – batting is $26/m plus tax – the cotton needle punched batting I buy is 90″ wide so I needed a metre.

Labour: $20/hr – I’m a skilled artisan, my time is worth more than minimum wage! My education consulting hourly rate used to be anywhere from $100 – $200/hr, my web design hourly rate is $50/hr. I should be charging the same kind of rate for the sewing/quilting but let’s go with $20.

I will have put in at least 15 hours (probably more over 7-8 days) to make this Christmas table topper so labour = $300.

Total cost for the topper were I selling it: $430.

However, the topper is a gift for a long-time friend; it’s a labour of love.

For the Mah Jongg Player

I heard from my friend Karen this morning:

I have an idea… if the larger bag could hold a Mah Jongg card, and a smaller matching little zippered change purse inside that could hold $3-$5 in change, you’d have a terrific gift for Mahj players no matter what the fabric, but especially if it were in an Asian pattern…

So here we are:

img_8190

Small bags for the Man Jongg player

Didn’t take long to make. A trip to my scrap boxes for some small Asian fabric leftovers. Some batting and lining and zippers. Putting it all together went quickly as well.

Now to get it in the mail – just not today!

img_8191

A Nova Scotia Blizzard

We’re being advised to stay at home, it’s obvious why. I’m not budging from the apartment!

Zippered Gift Bags

Zippered Bags

Zippered Bags

It’s that time of the year when I need to replenish my stash of zippered gift bags. I always try to have a supply on hand to use as gifts. Sometimes the gift is the bag itself, other times it may hold a surprise. Today I sat down to make 15 bags as gifts for the gals in the Friday afternoon knitting/sewing group here in the apartment building. There are 11 women who attend regularly to knit/sew for a couple of hours each week. I made some extras – just in case…

I started with two fabric collections like the one below – samples from fabric suppliers – I had three sets on hand from the day-long quilting workshop I attended a couple of weeks ago. There isn’t enough fabric to make much of anything – maybe a pieced place mat, sometimes a small table runner. But there is enough to make a bunch of bags.

Fabric Samples

Fabric Samples

I laid each fabric collection on my cutting table, used my ruler and rotary cutter to divide each collection into 4-6 triangular / quadrilateral shapes – enough to mix and match using a stitch and flip technique. Next I cut out thirty (15 x 2 for front and back of a bag) pieces of batting (from leftover pieces) 6″ x 8″. I also cut out thirty pieces of lining fabric from my leftover stash (same dimensions) in preparation for the bags. The last bit of set-up was to create 15 zippers from some zipper tape I had on hand, adding slides and cutting the zippers two inches longer than the bag width – in this case 10″ (I also stitched both ends across the tape to prevent the slides coming off while making the bags!).

Tip #1: It’s very helpful to use a zipper 2″-3″ longer than your bag – that way you can position the slide to one end, let it hang beyond the bag edges while attaching the zipper – no worry about hitting the zipper slide with your needle or having to veer around it while you’re sewing!

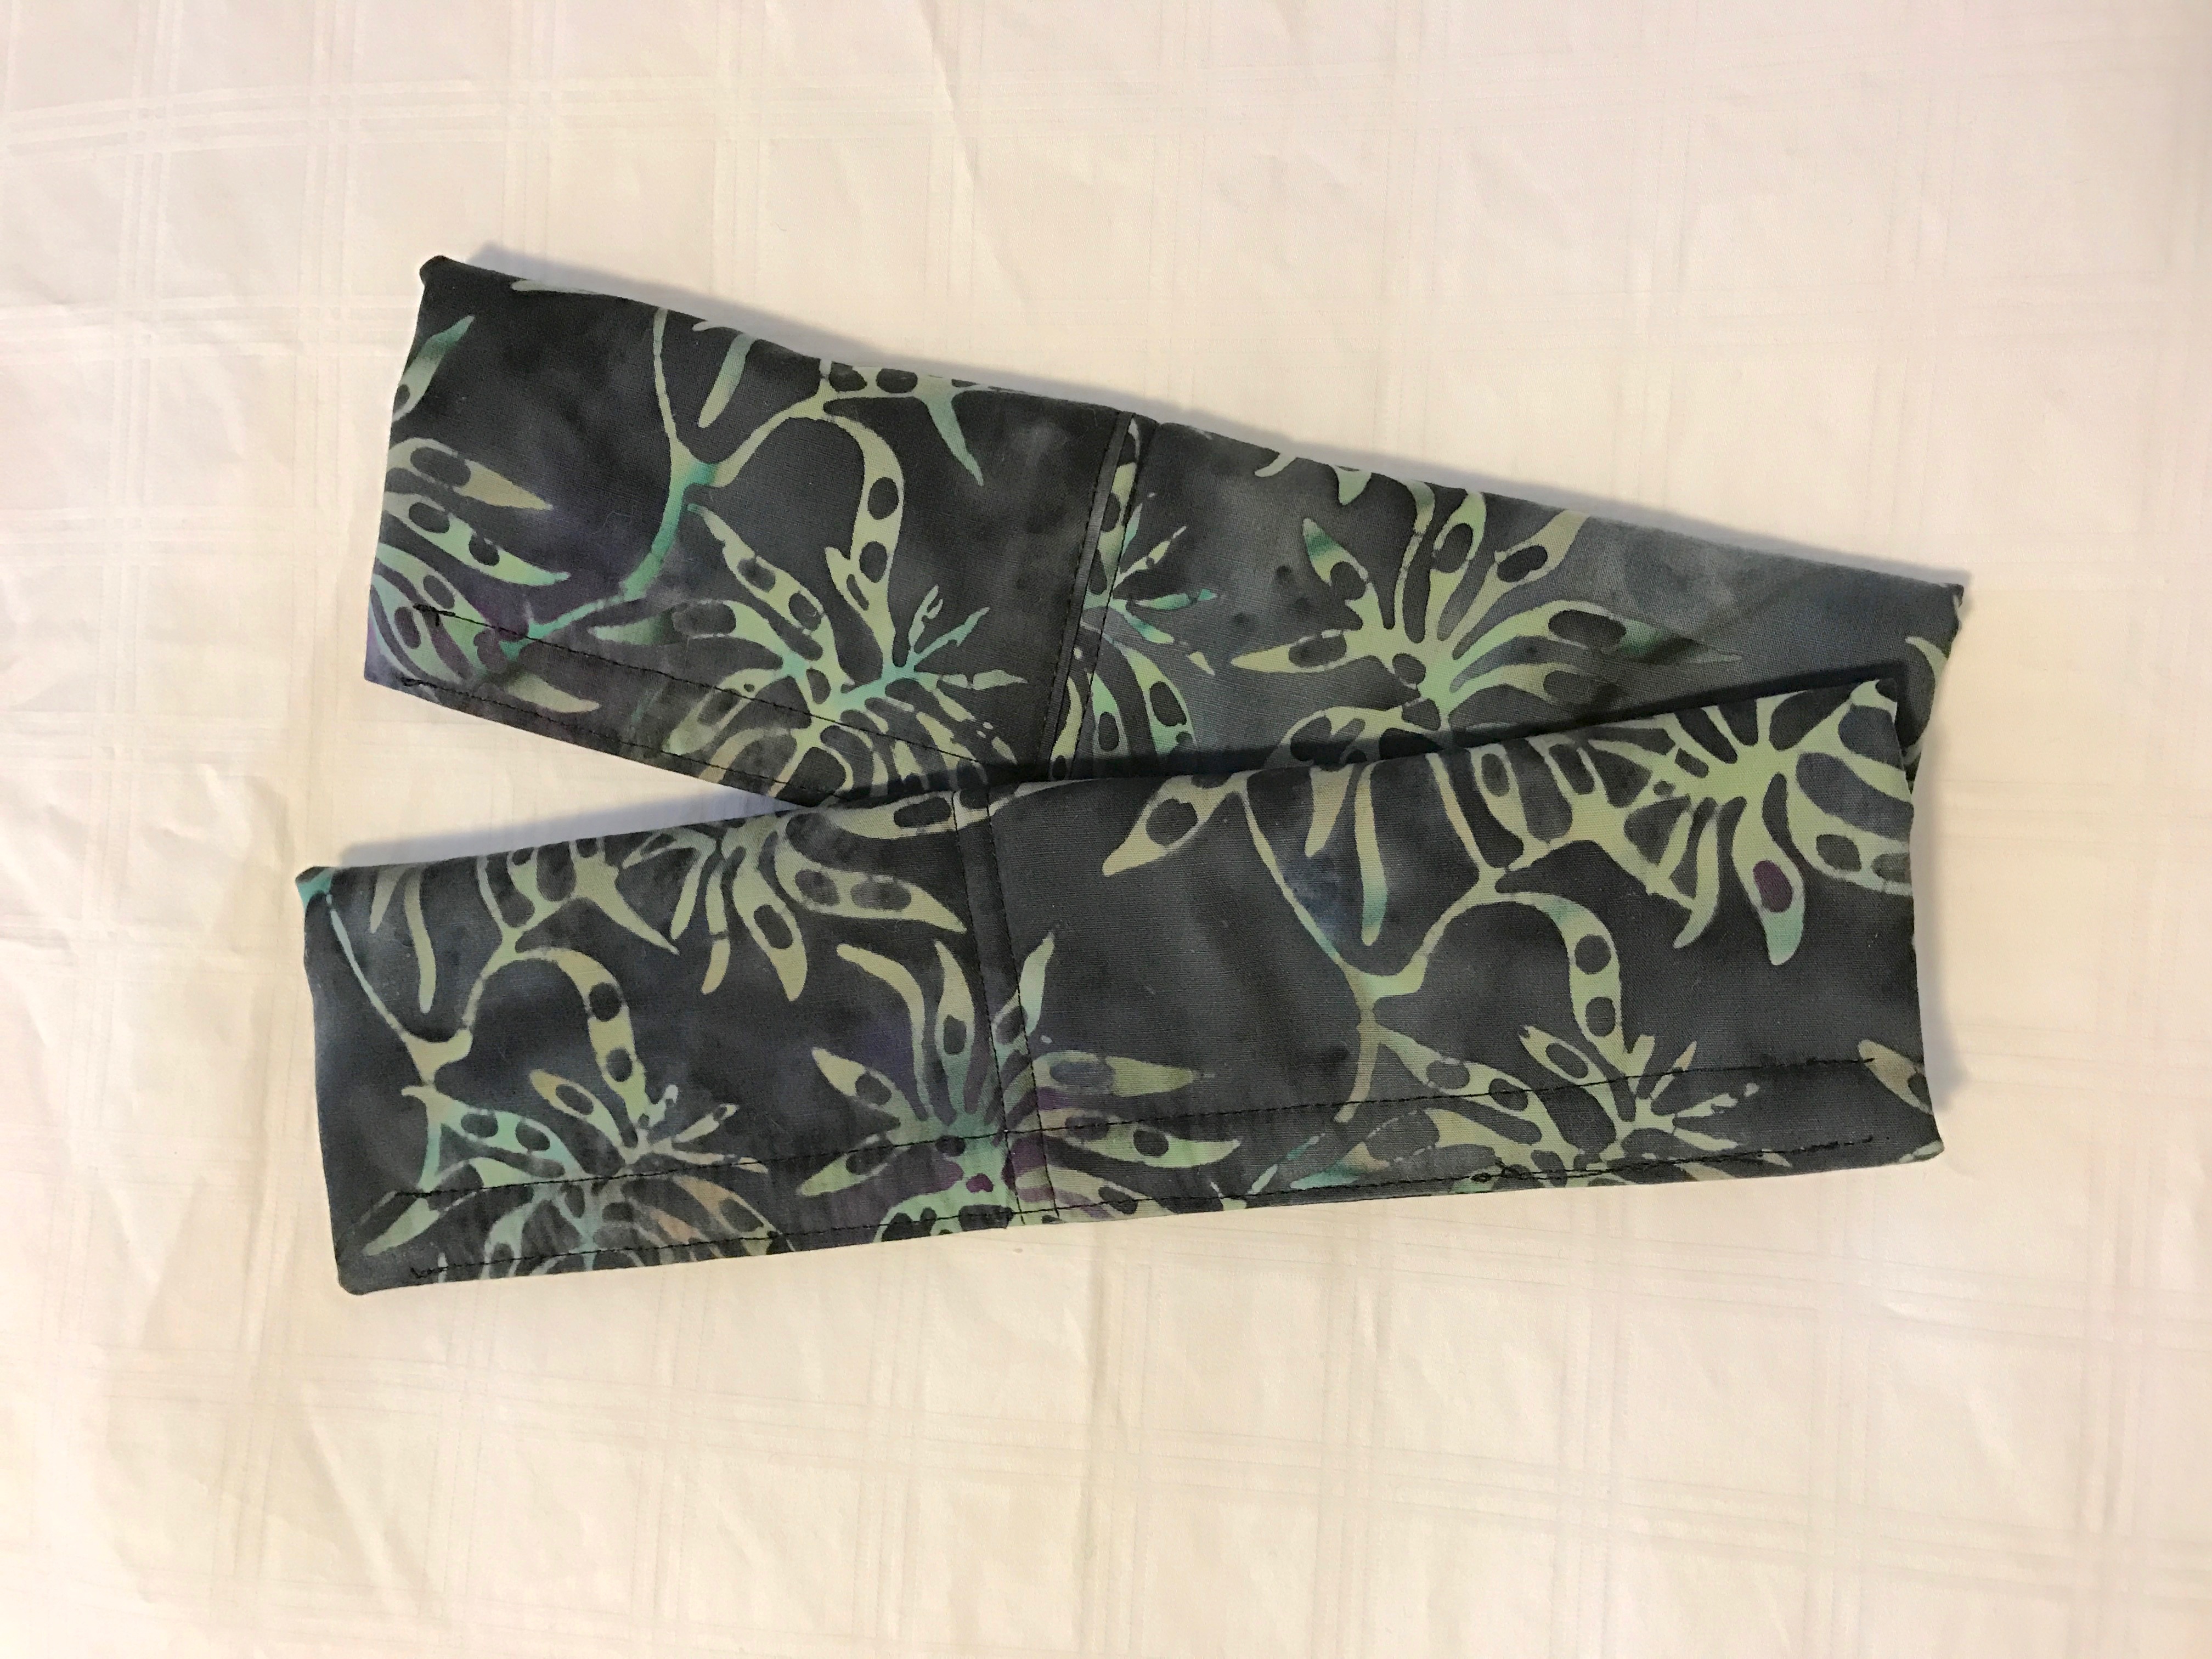
Tip #2: Take a  piece of batting and cover the surface by laying down a piece of cut fabric, place a second piece at one edge right sides together, stitch and flip, and press open. Keep adding pieces of fabric until the batting surface is covered. Press and trim to the size of the precut batting. 

Because my batting pieces were relatively small, to took me about an hour and a half to do all thirty pieces (two sides for each of 15 bags, right?). Working in production mode, I matched up two sides, two lining pieces, and a zipper and stacked all 15 bags beside my machine and began assembling the bags. I’m not going to give detailed instructions about making the bags, there are lots of helpful bag-making tutorials around but let me say one thing – lots of people bind the ends of their zipper, I don’t bother with the extra work. I find my zipper is fine incorporated in the bag side seams, but I will mention a couple of techniques that will make the bag-making go smoothly.

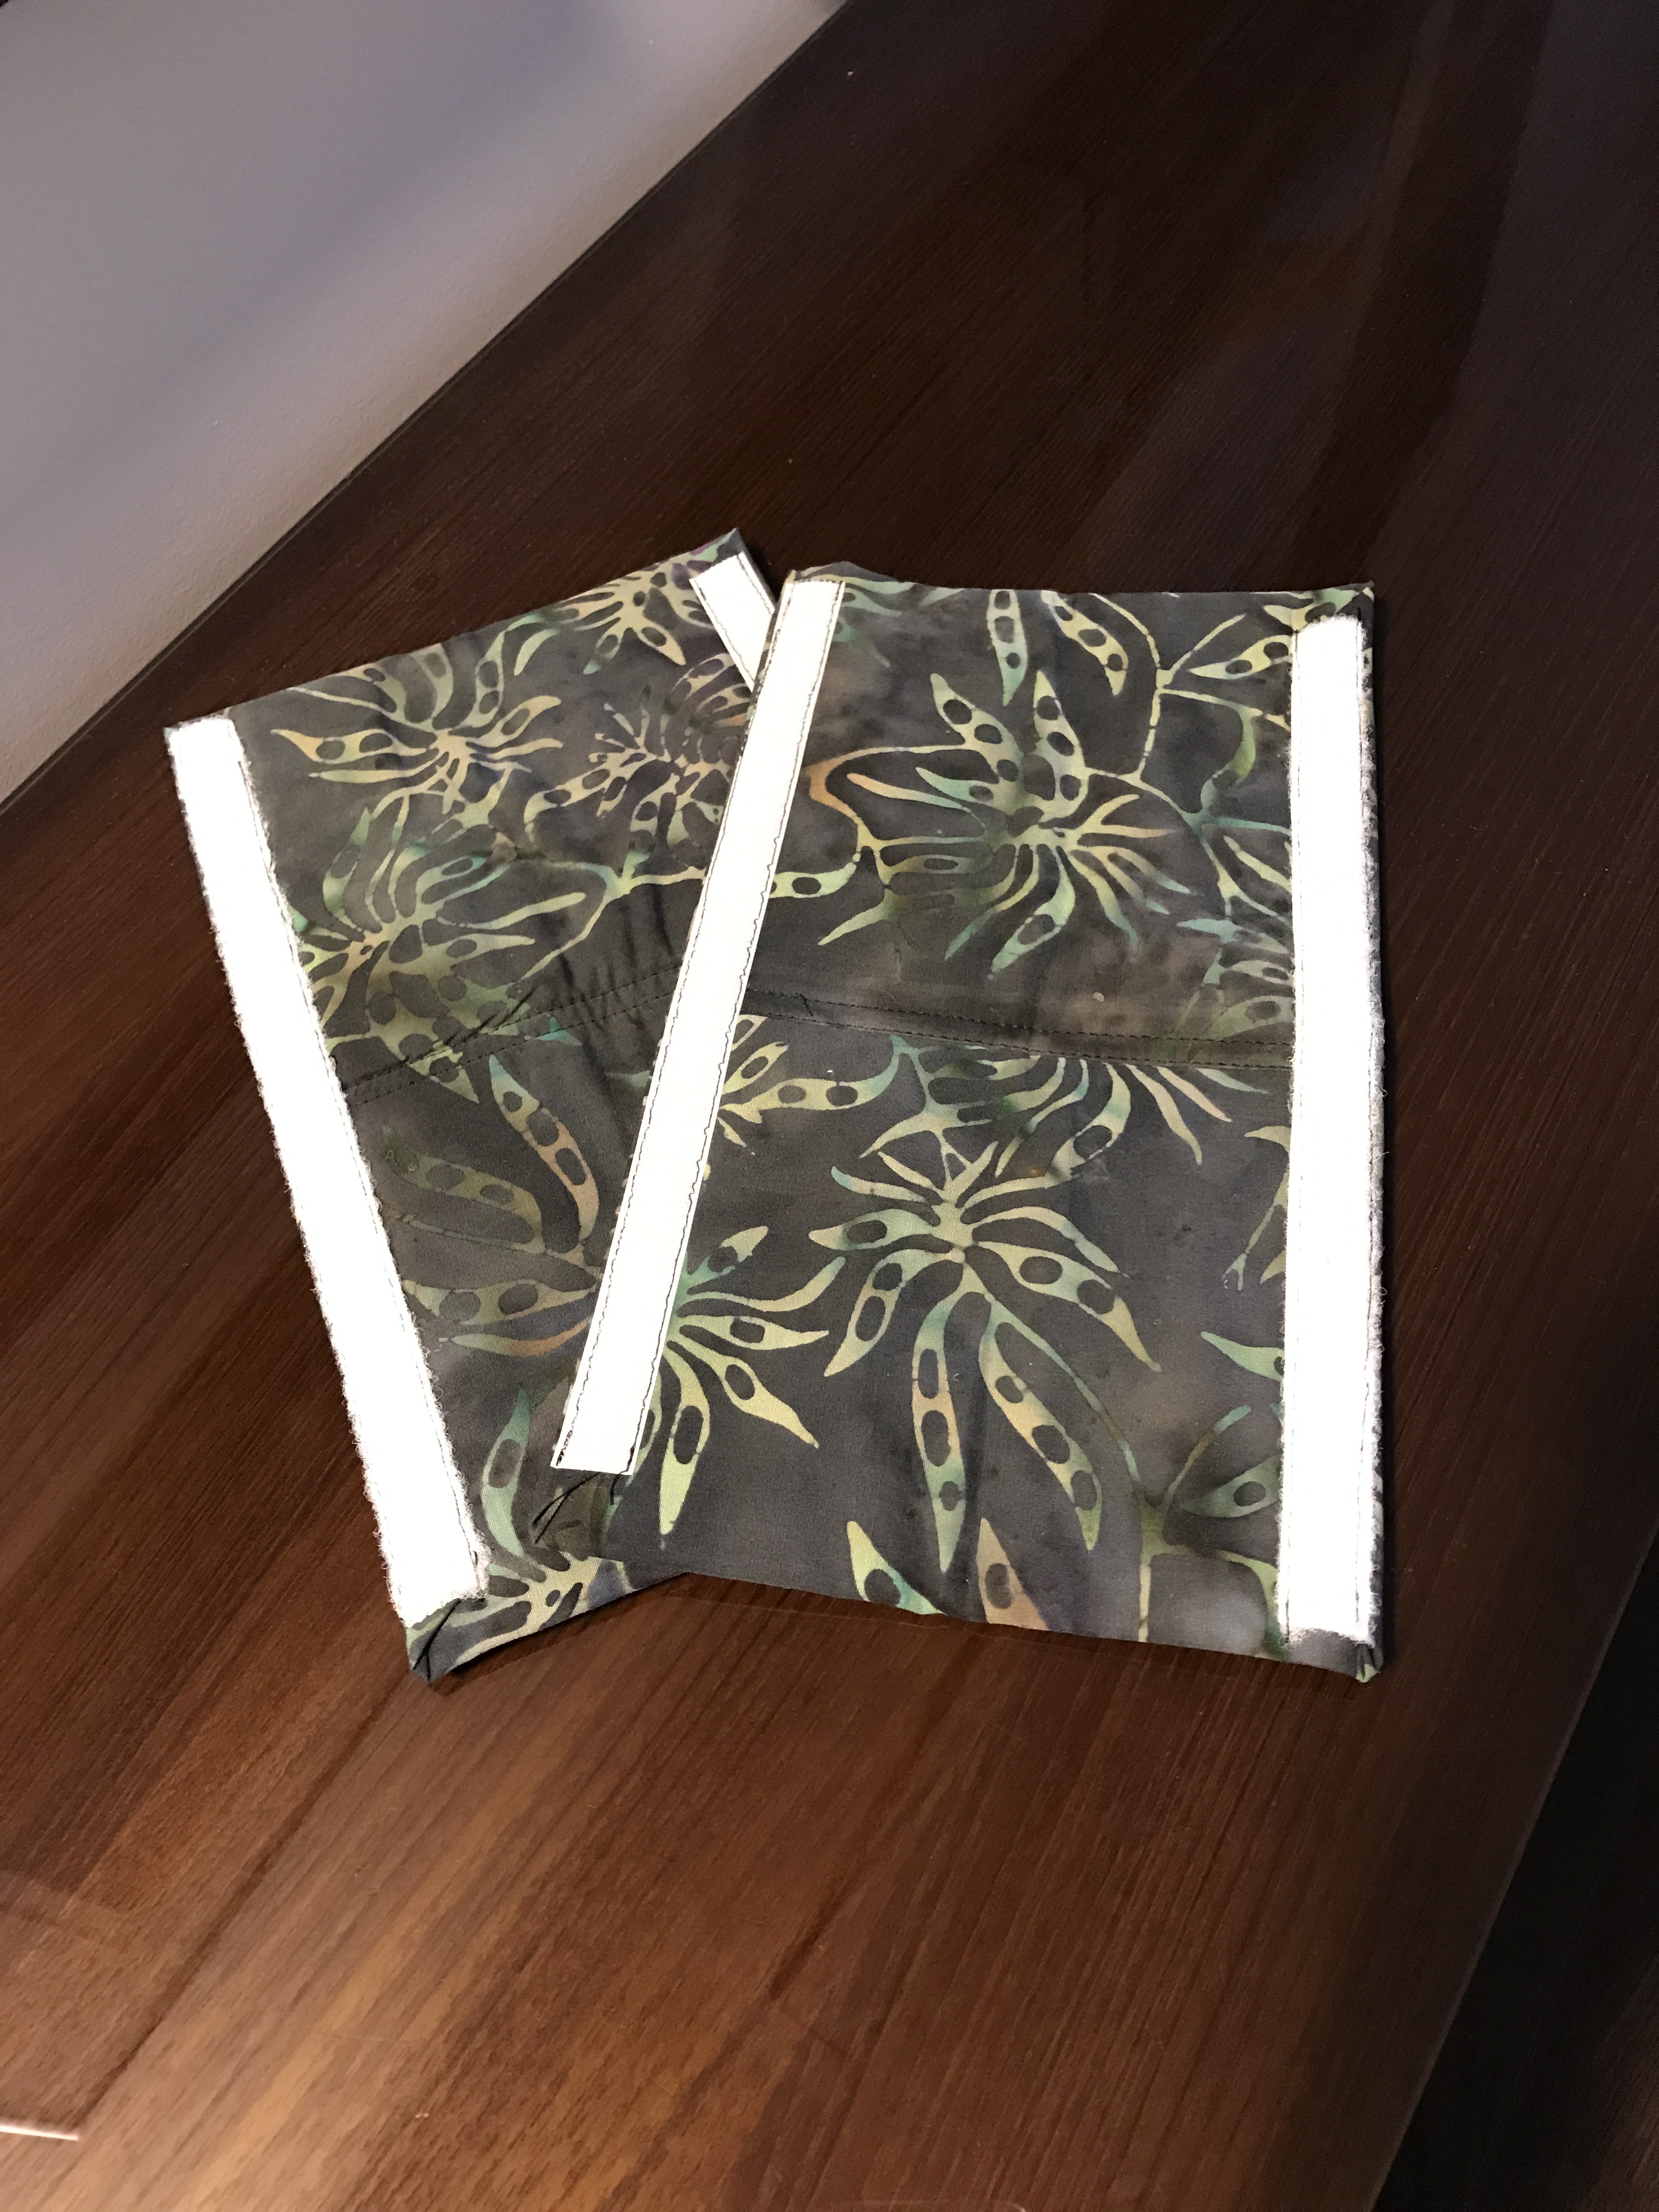
Tip #3: You’ve got one side of your zipper attached to one piece of the outside (fabric/batting) – align your lining piece face down on the zipper tape (not the batting side), making sure the sides are matching up with the sides of the fabric. Now add the second side of the zipper to the second side of the bag – and again place lining face down on zipper tape, sew.

You can see I do two seams to attach each side of the zipper – first sewing it to the main fabric, then stitching a second time to add the lining. A little more work, but it makes it much easier to attach the zipper within the seam. I find something always moves out of position when I try sewing main fabric, zipper, and lining in a single pass.

I now have the zipper attached to both sides of the bag (with the lining also attached). I open the bag flat and press the zipper seams on both the outer side and the lining side. Next I separate the lining from the fabric/batting, lining up rights sides of lining and rights sides of fabric. The next step is critical:

Tip #4: Start by sewing the side with the closed/back end of the zipper, starting at the lining (the slide is at the opposite side), stitch toward the zipper, folding the zipper down toward the fabric/batting pieces, stitch carefully over the zipper, finish seaming the fabric/batting. When everything is finished and you turn the bag right-side out, the zipper will be beyond the fabric/batting, not tucked inside.

Tip #5: Reach between the fabric/batting pieces and open the zipper all the way to the seam you’ve just completed! (If you make this routine, you won’t find yourself in the situation where you go to turn the bag right-side out and the zipper is closed!)

Now I sew the second side seam, again starting with the two pieces of lining right sides together, past the folded zipper which is pushed down toward the fabric/batting (zipper seams are up toward the lining), and on to the fabric/batting pieces. Now you have both sides stitched.

Next seam is along the bottom of the fabric/batting outside of the bag (remember, you’ve already opened the zipper before you sewed the second side so you can get into the bag later). Finally I sew a little distance in from each side along the bottom of the lining to form corners when I turn the whole bag right-side out – this lets me fold in the seam allowance easily so I can top stitch a needle width from the bottom edge of the lining before pushing it into the bag.

Tip #6: I use a 1/4″ seam allowance on the outside (fabric/batting) portions of the bag, but I use a 5/8″ allowance at the bottom of the lining – the bag itself is bulky and this makes the lining just that much smaller to fit inside the bag without a lot of bulk. 

Carefully reach inside the opening in the bottom seam of the lining, pull the fabric/batting through (remember, your zipper was opened after you sewed the first side seam!). Push out the bottom corners of the bag, as well as the end of the zipper where the slide is currently sitting, close the zipper, press the bag.
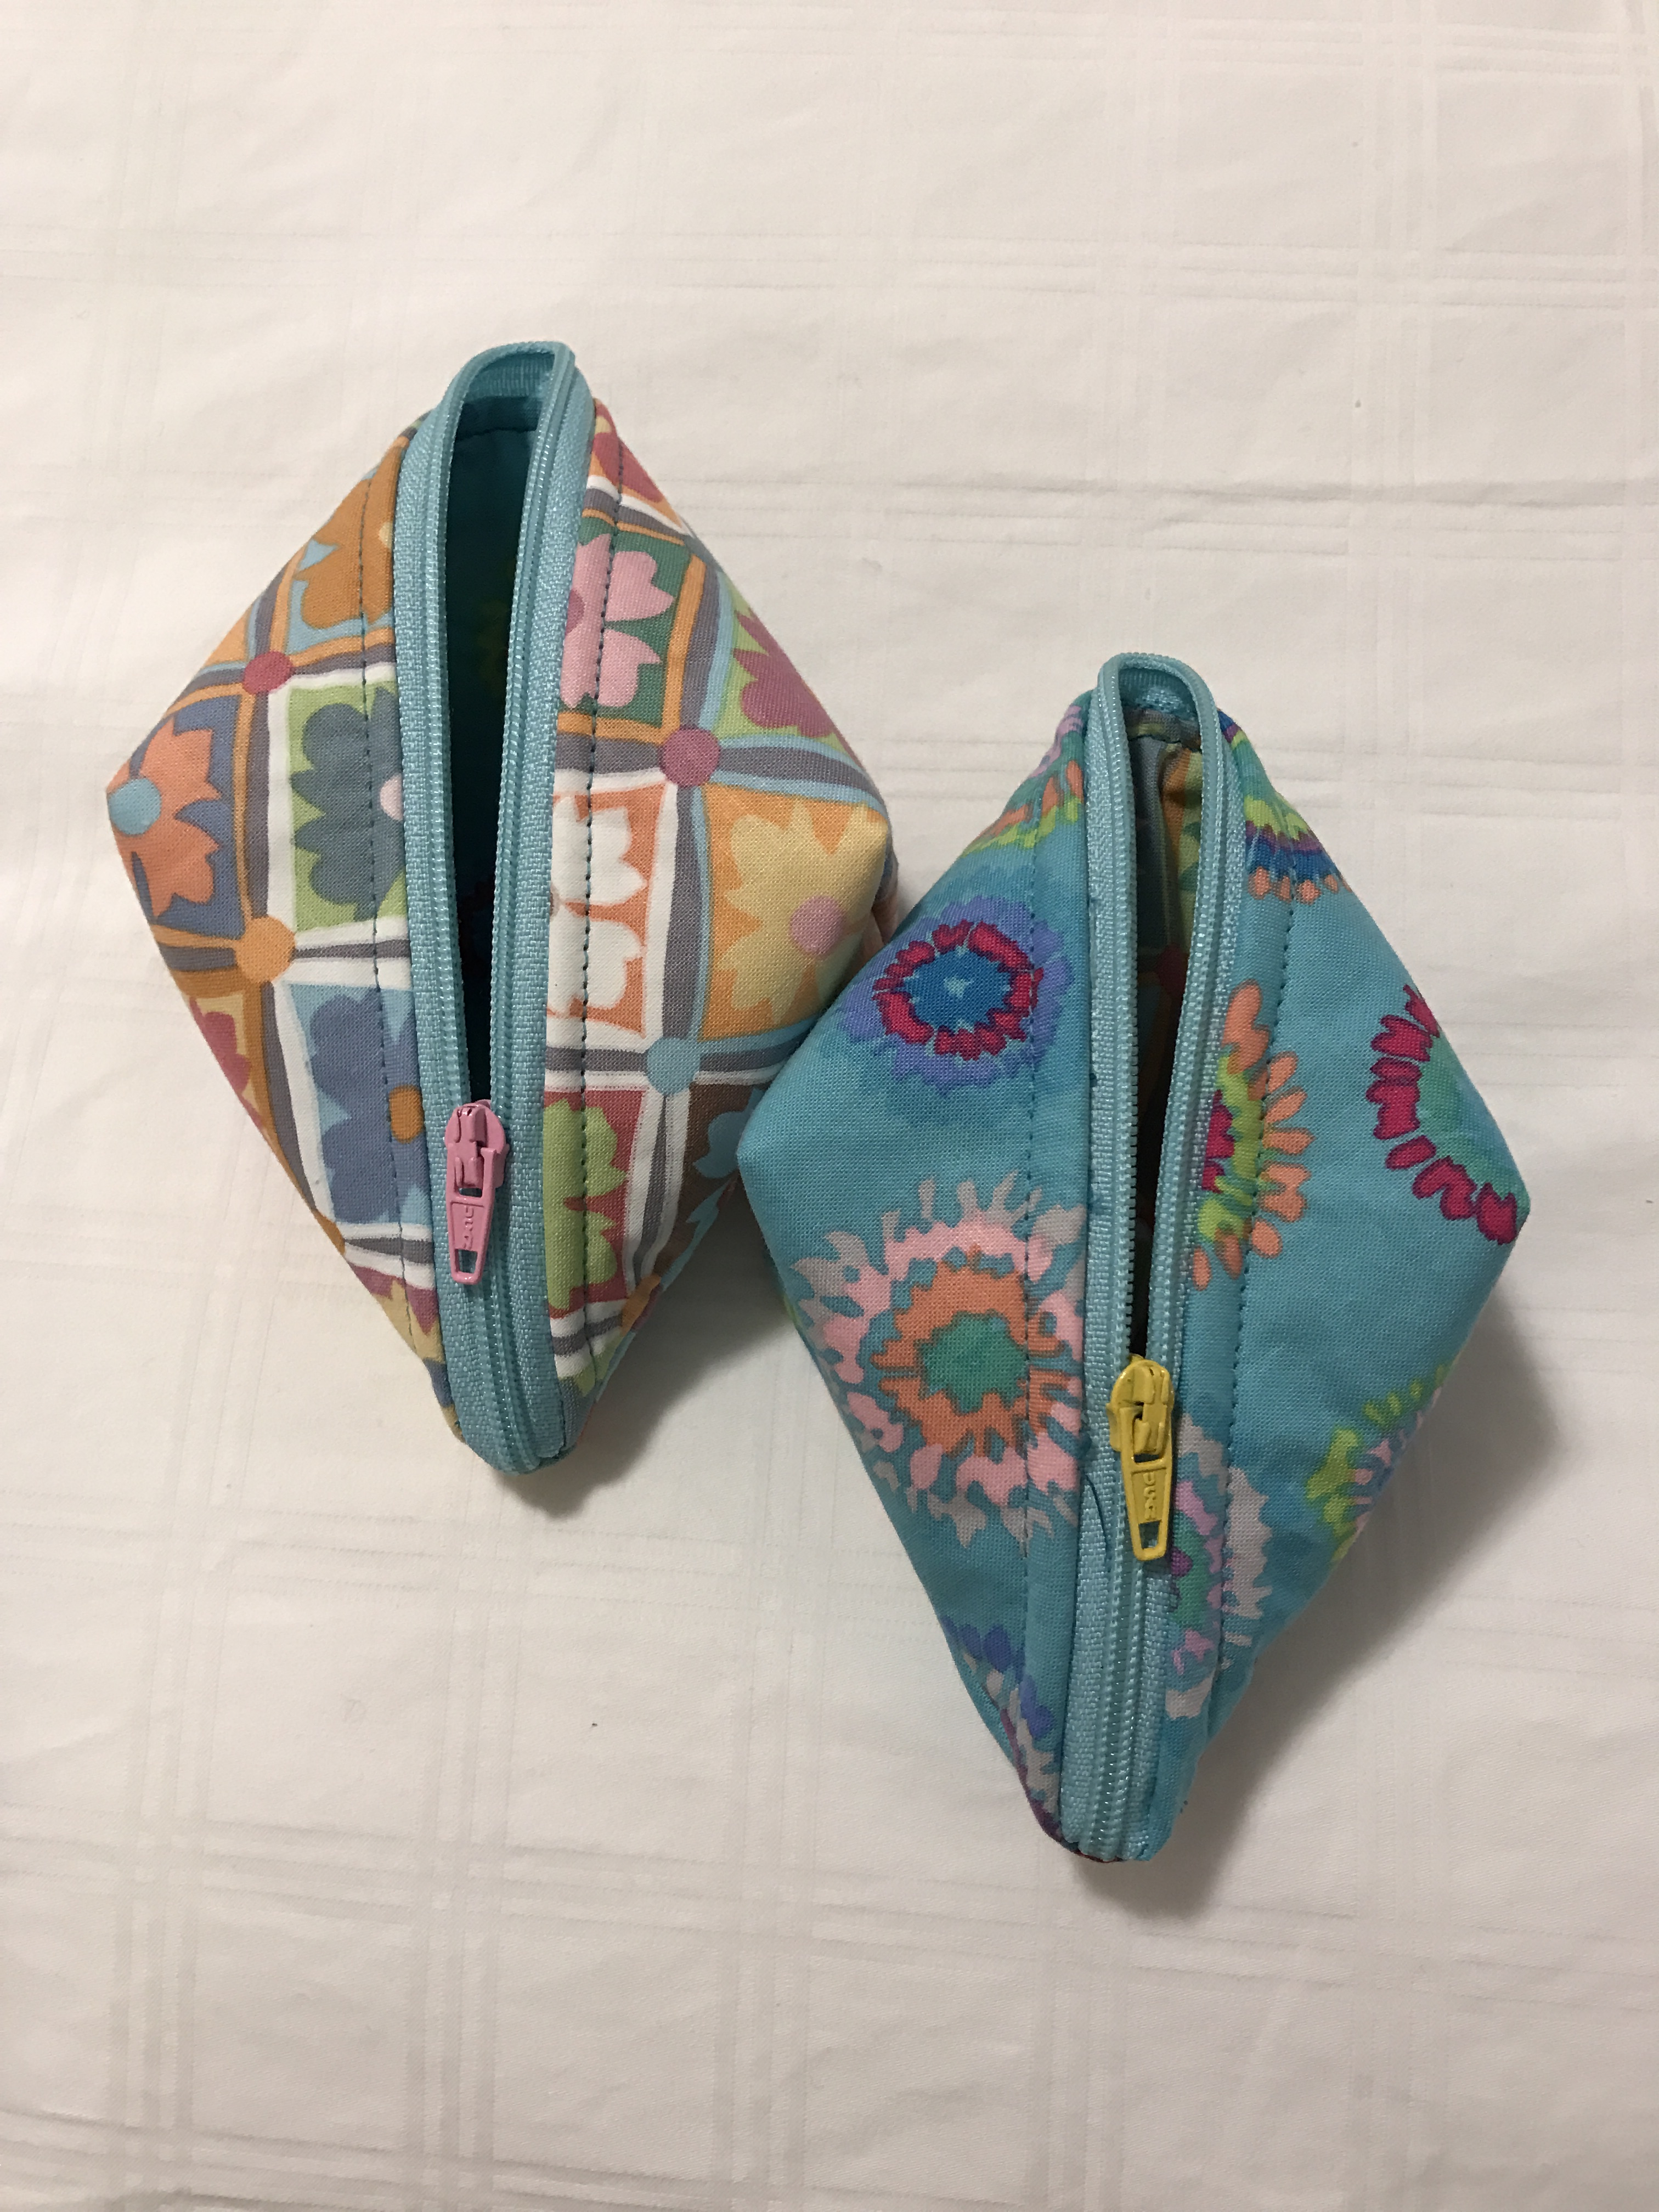
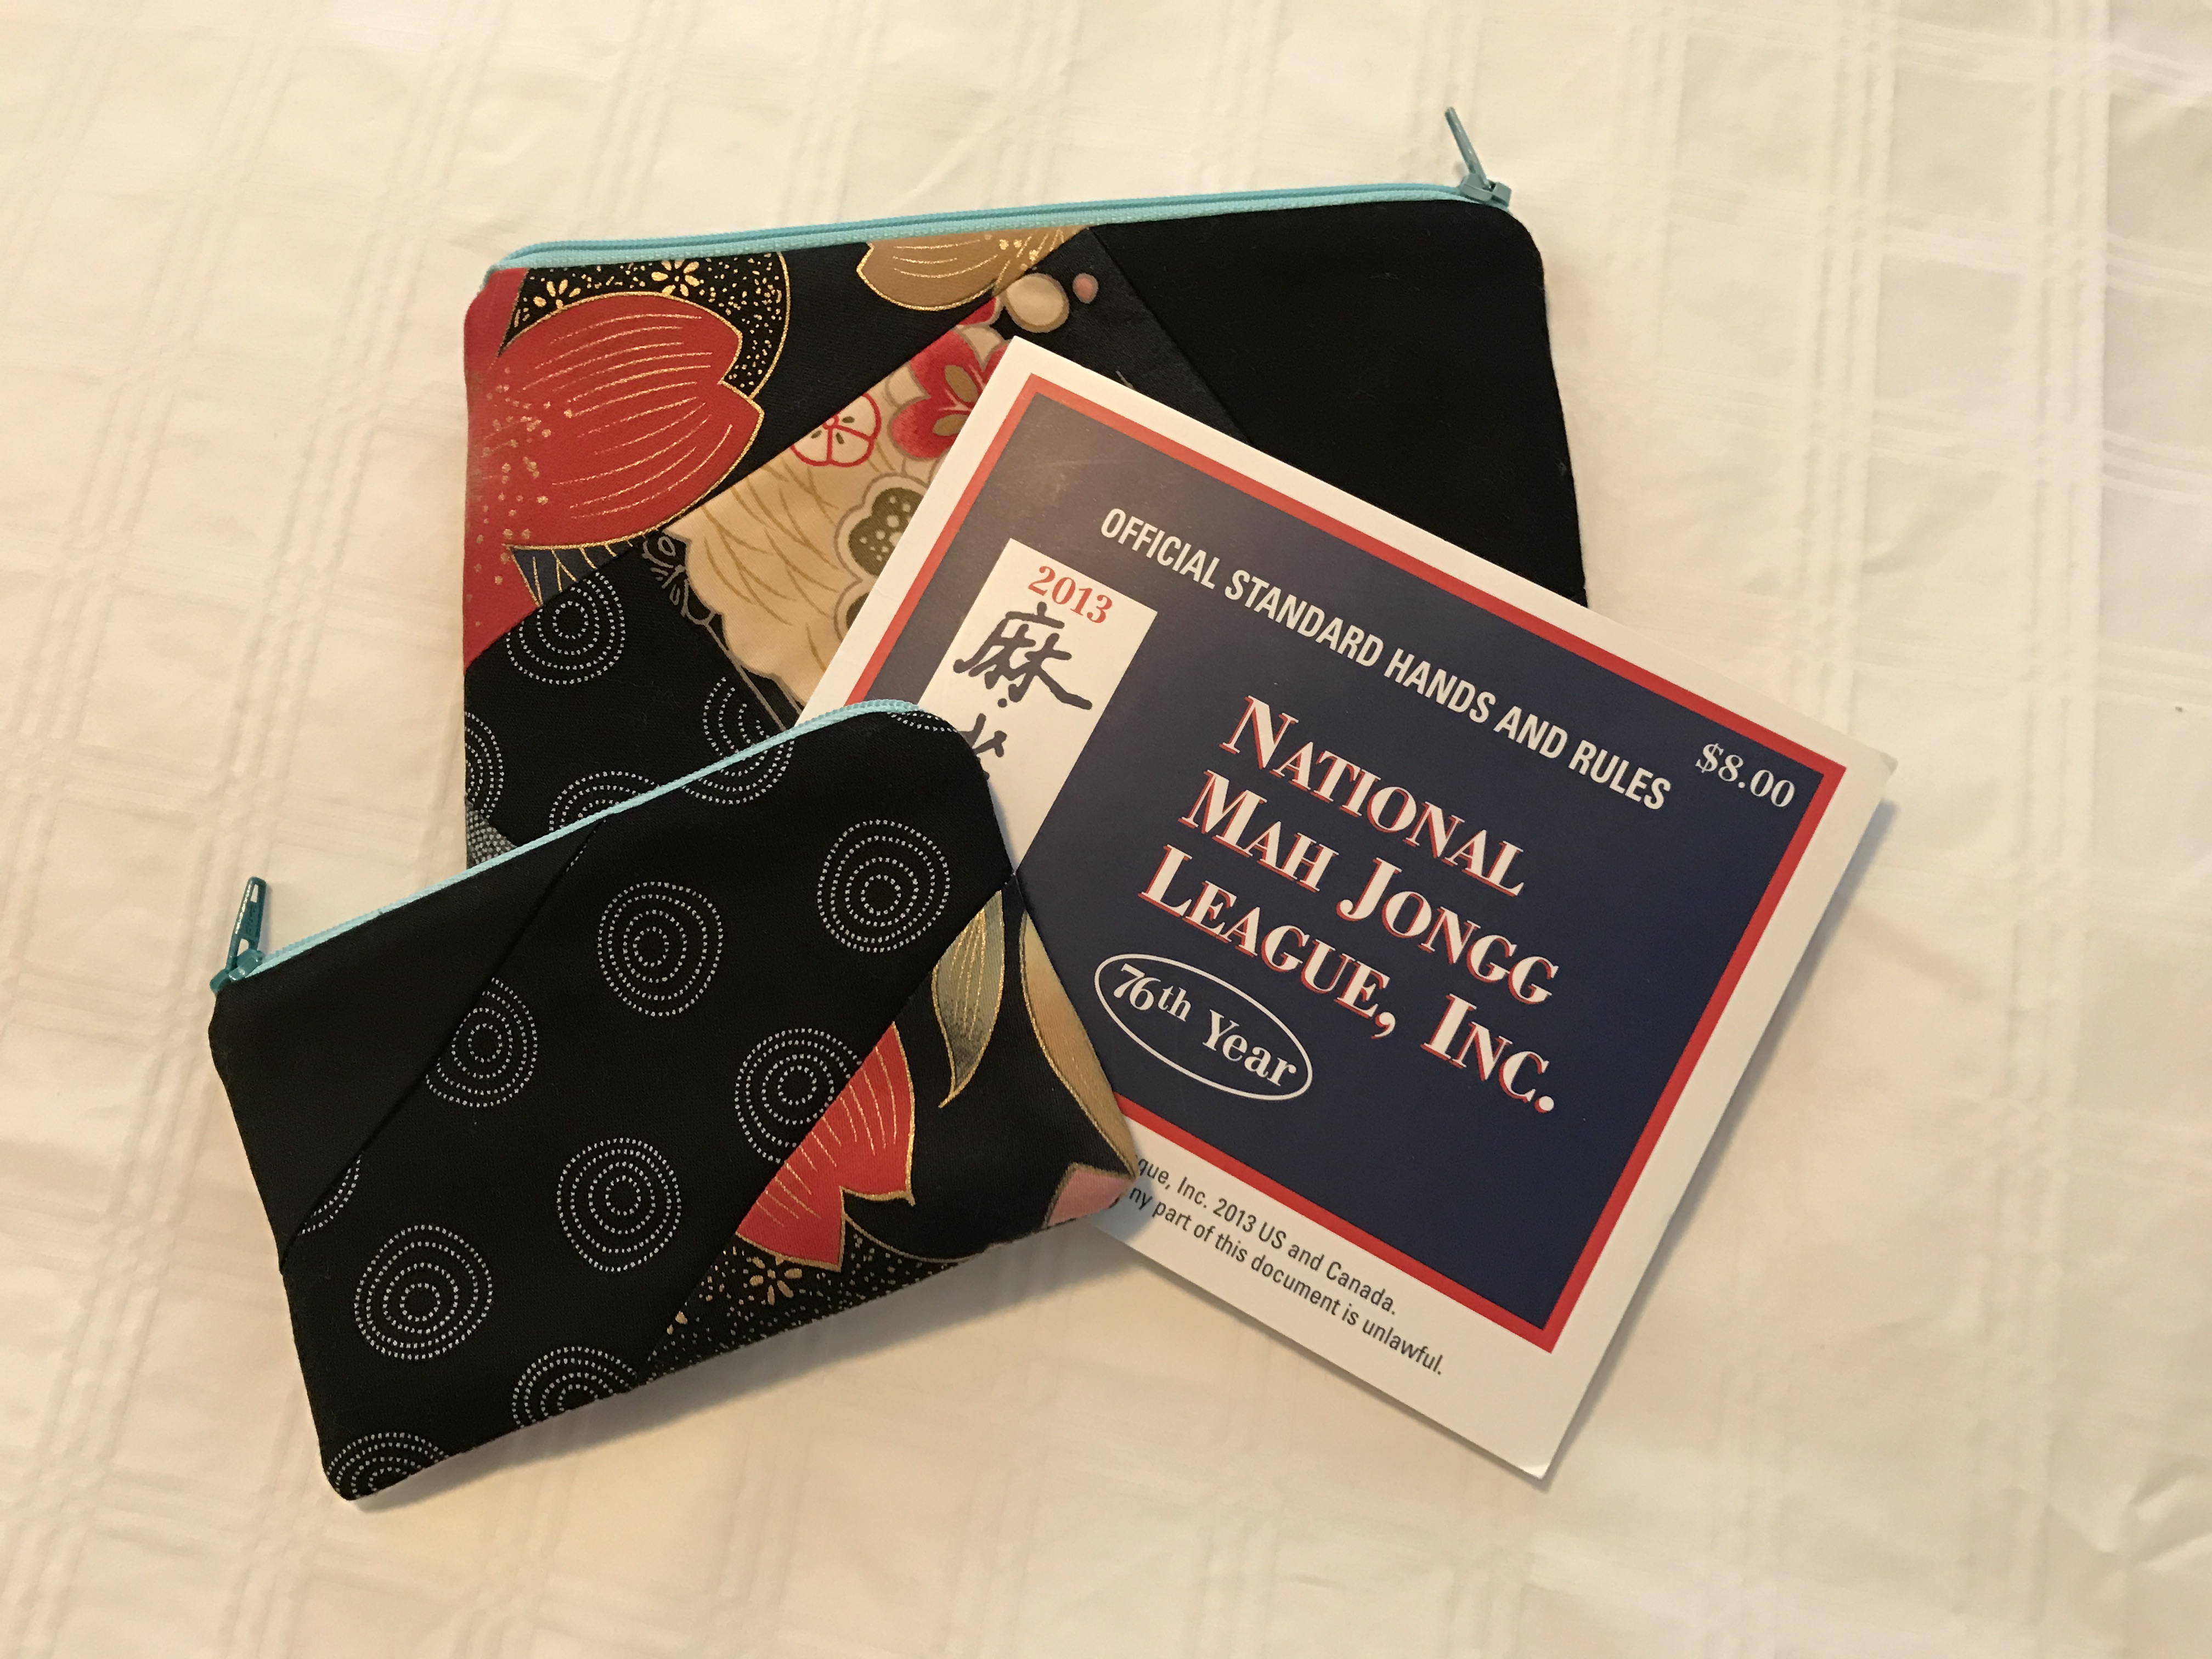
You’re done.

And I’ve got 15 new gift bags in my stash ready to give away!

img_8370

Completed zippered bags

(Actually I used the third fabric collection and some quilted fabric from a coat I’d made last year to make 14 more bags so I finished 30 in all.)

More Bags

It started out wanting to make a new bag for my iPad. I did a couple (the two on the right – one pieced, the second crazy quilt appliqué) before the one I have decided to keep.

I made the two smaller bags from leftovers from the other two bags.

img_5348

More Bags

I seem to be drawn to blues at the moment although the next quilt idea is based on black/white and an array of red/orange/golden.

I still have to finish the “hitoe” I started about a month ago – it’s sitting on my cutting table so I can get back to it tomorrow.

And then I really should make another dozen mid-size bags to have in my bag stash – for gifts….