Nightfall

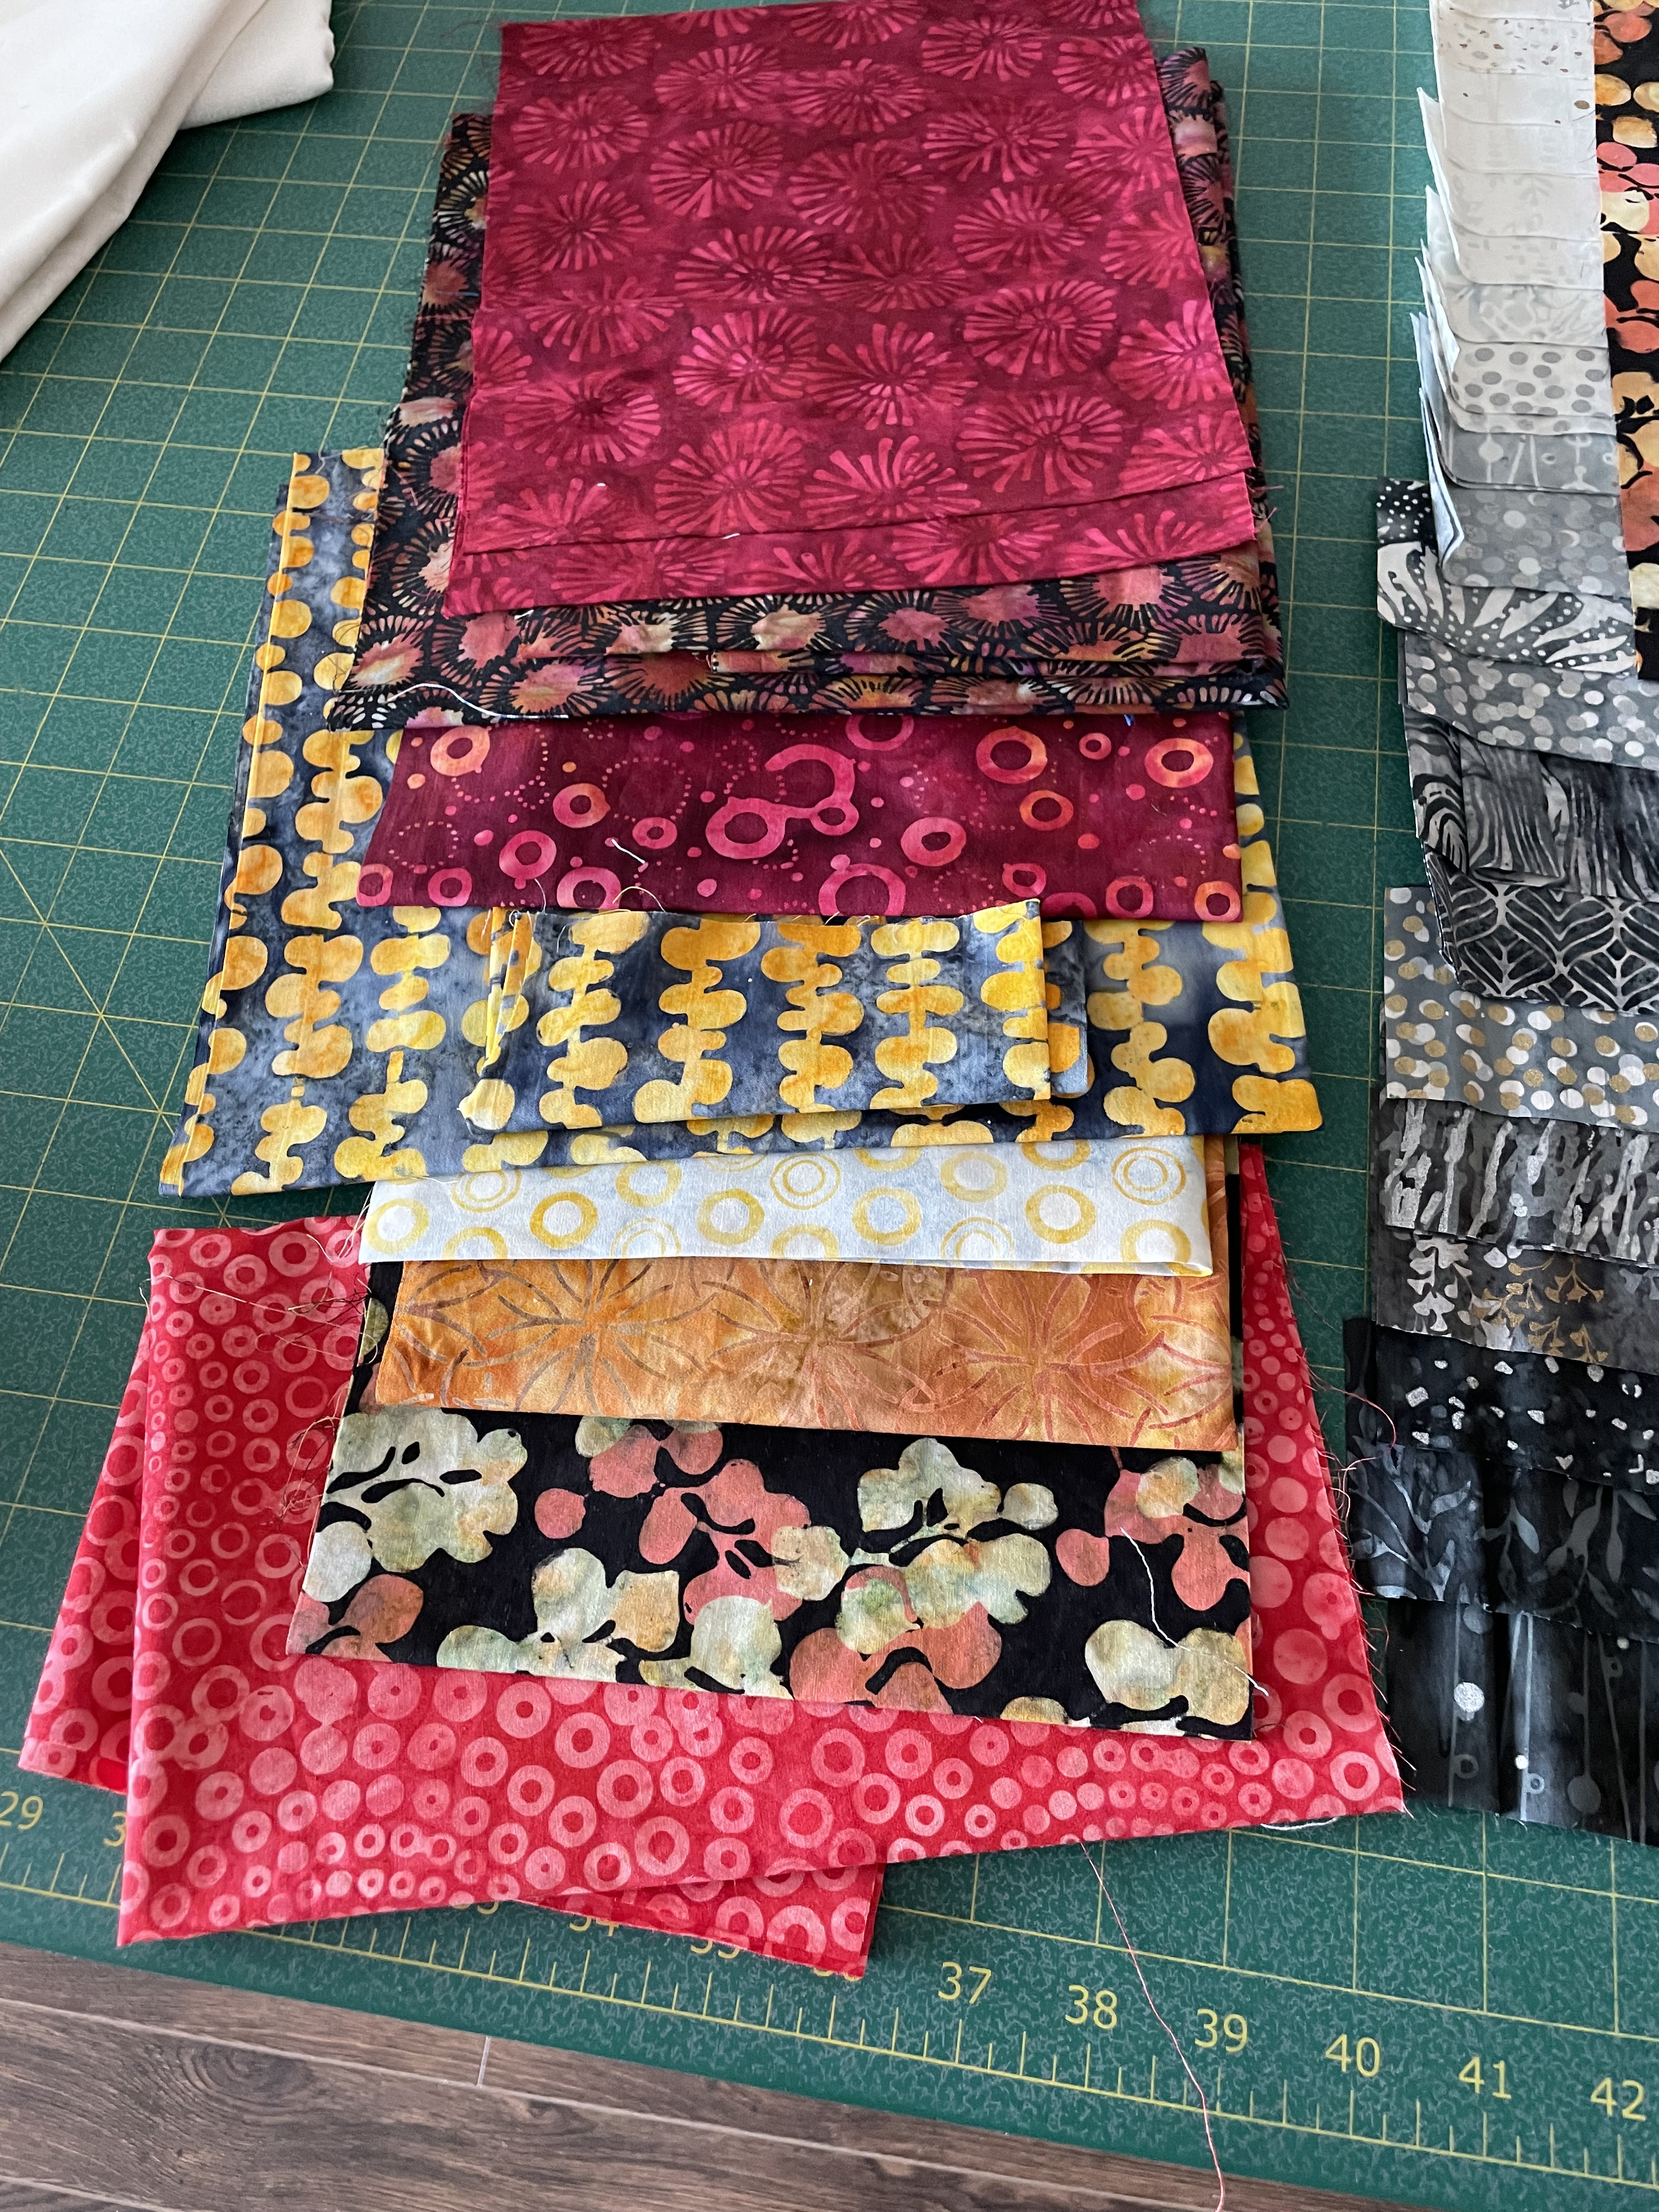
I finally finished this quilt this past week. It turned out to be a lot more work than I anticipated. I thought I was making a simple quilt block – square-in-square but that didn’t work out because of the colour flow I was after. In the end I had to construct each triangle element from scratch! Which took a lot longer.

The back took a lot of “walking around” time – I just couldn’t settle on an idea. One Tuesday evening when my friend Neha was here sewing with me (that’s another story) I made up five square in square blocks from leftover bits – that broke the log-jam and I was able to sort out a 15″ strip to insert in the backing fabric.

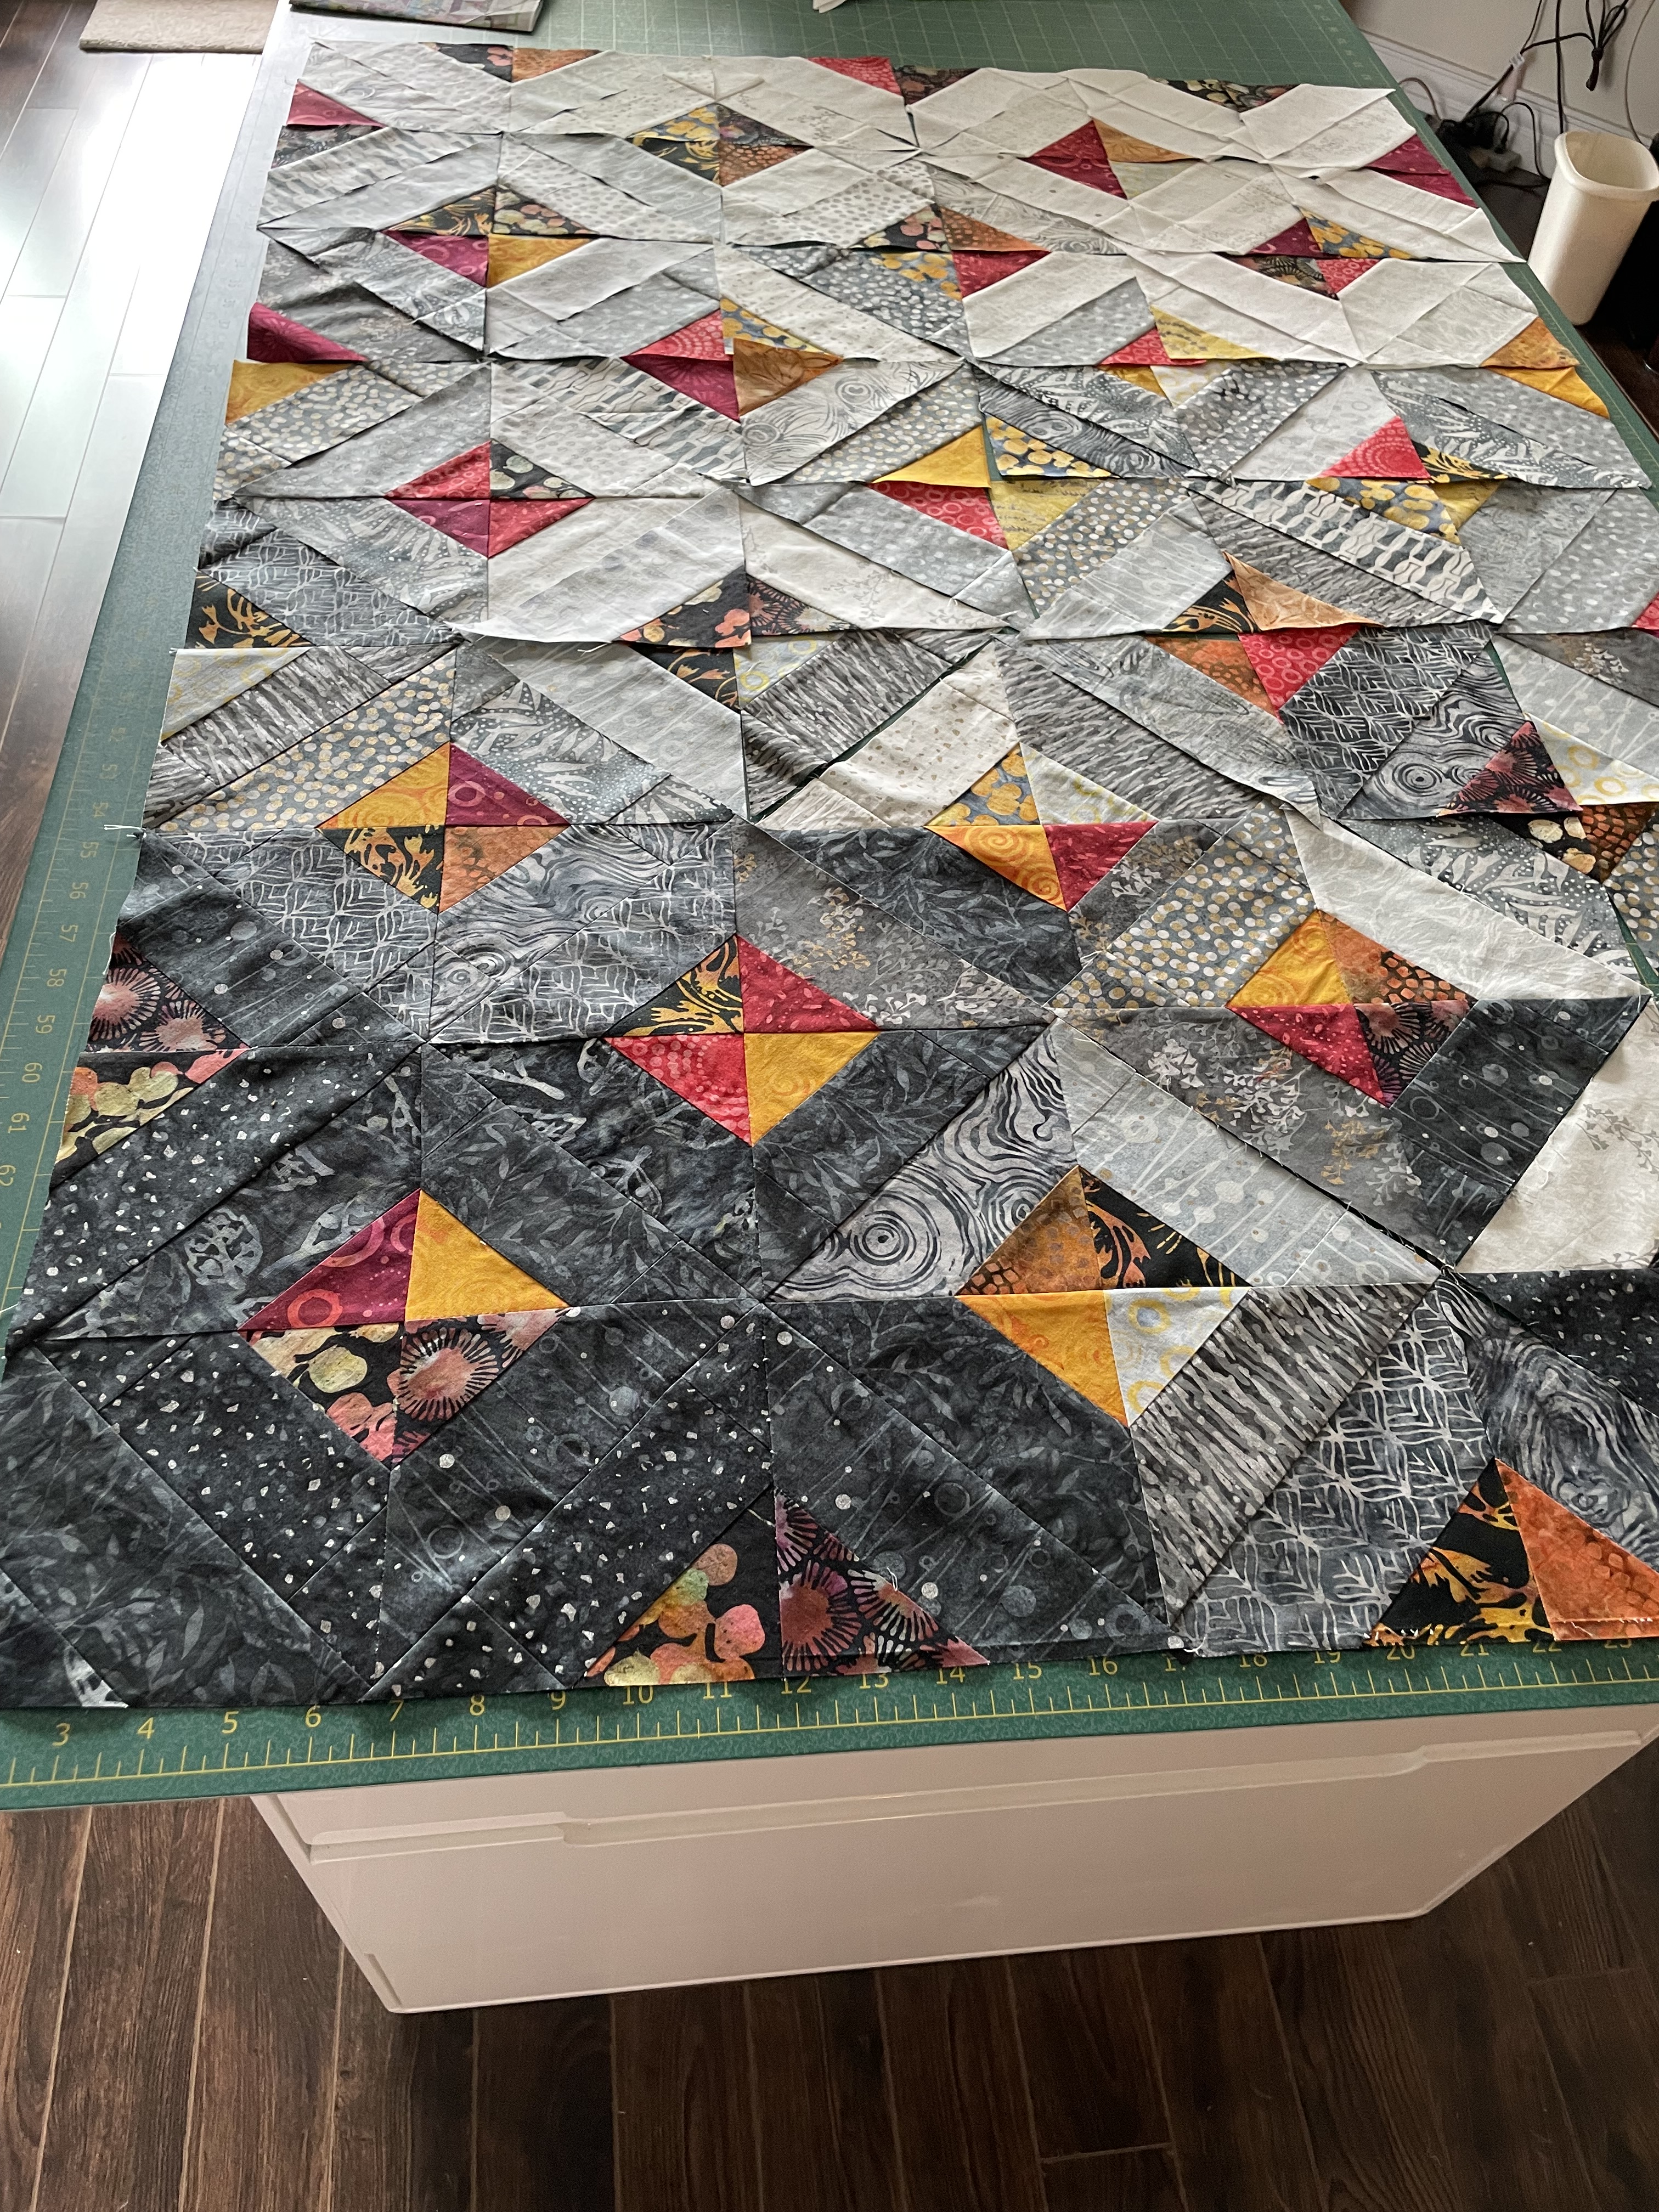
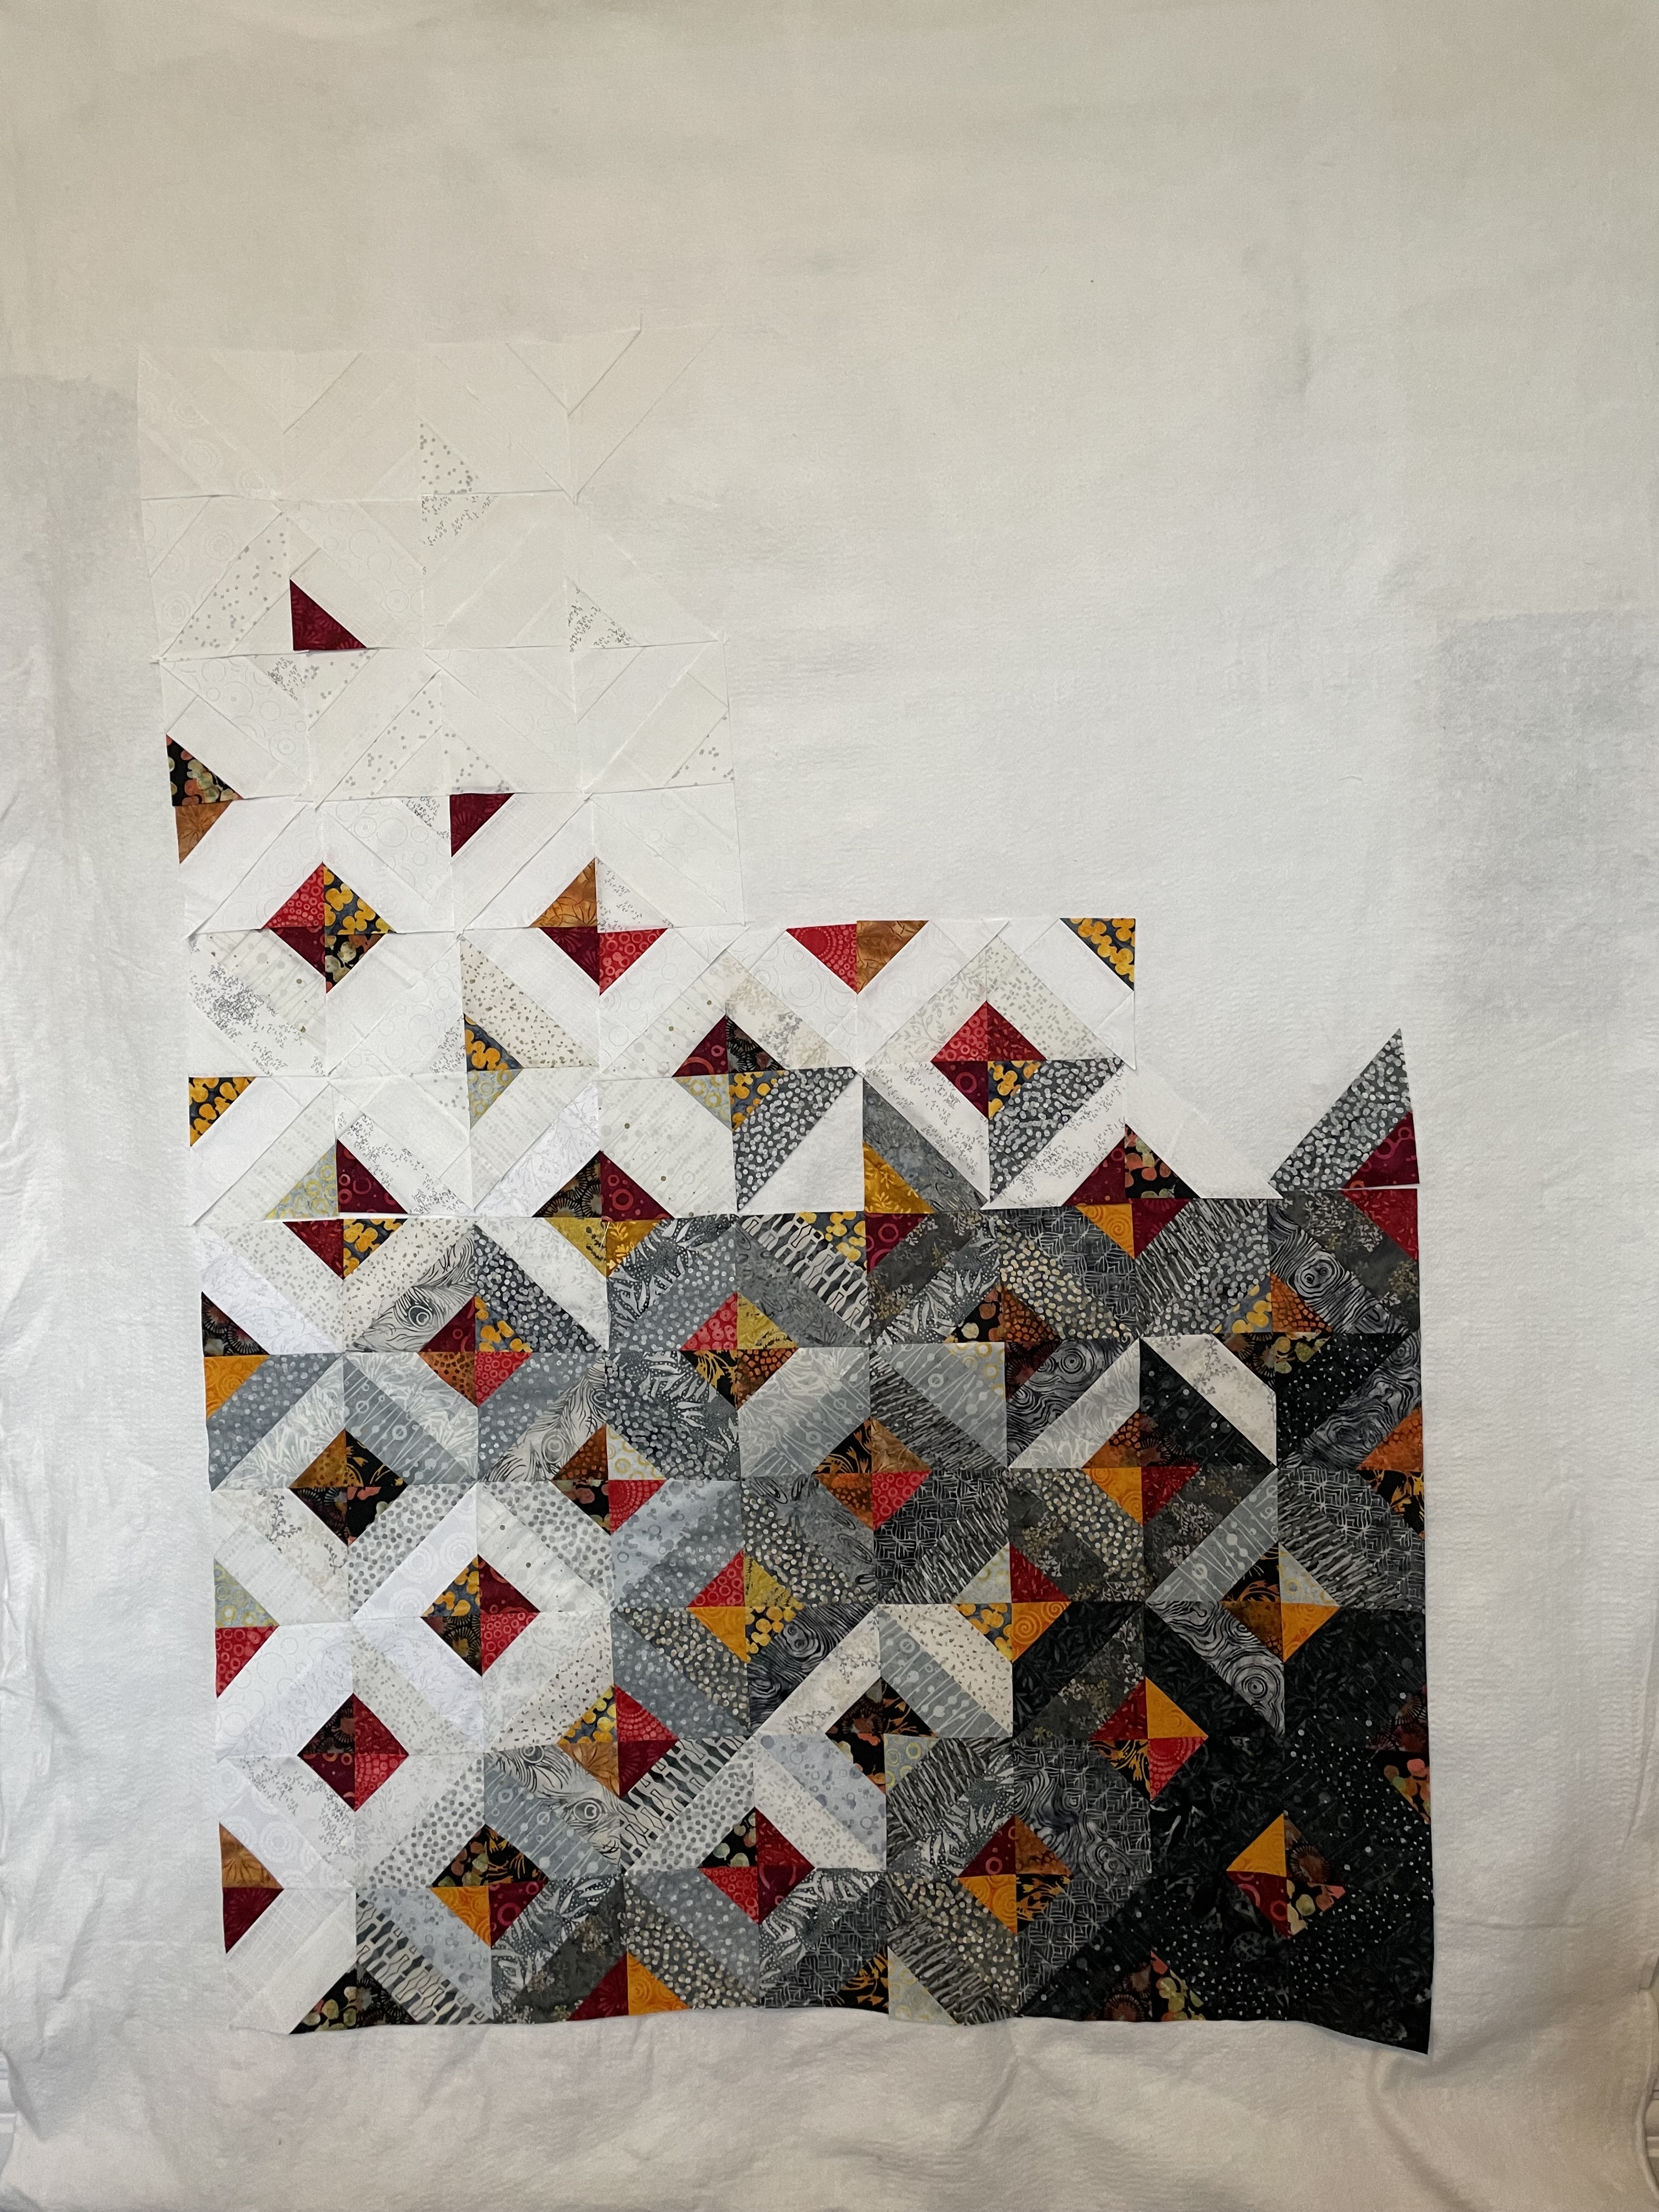
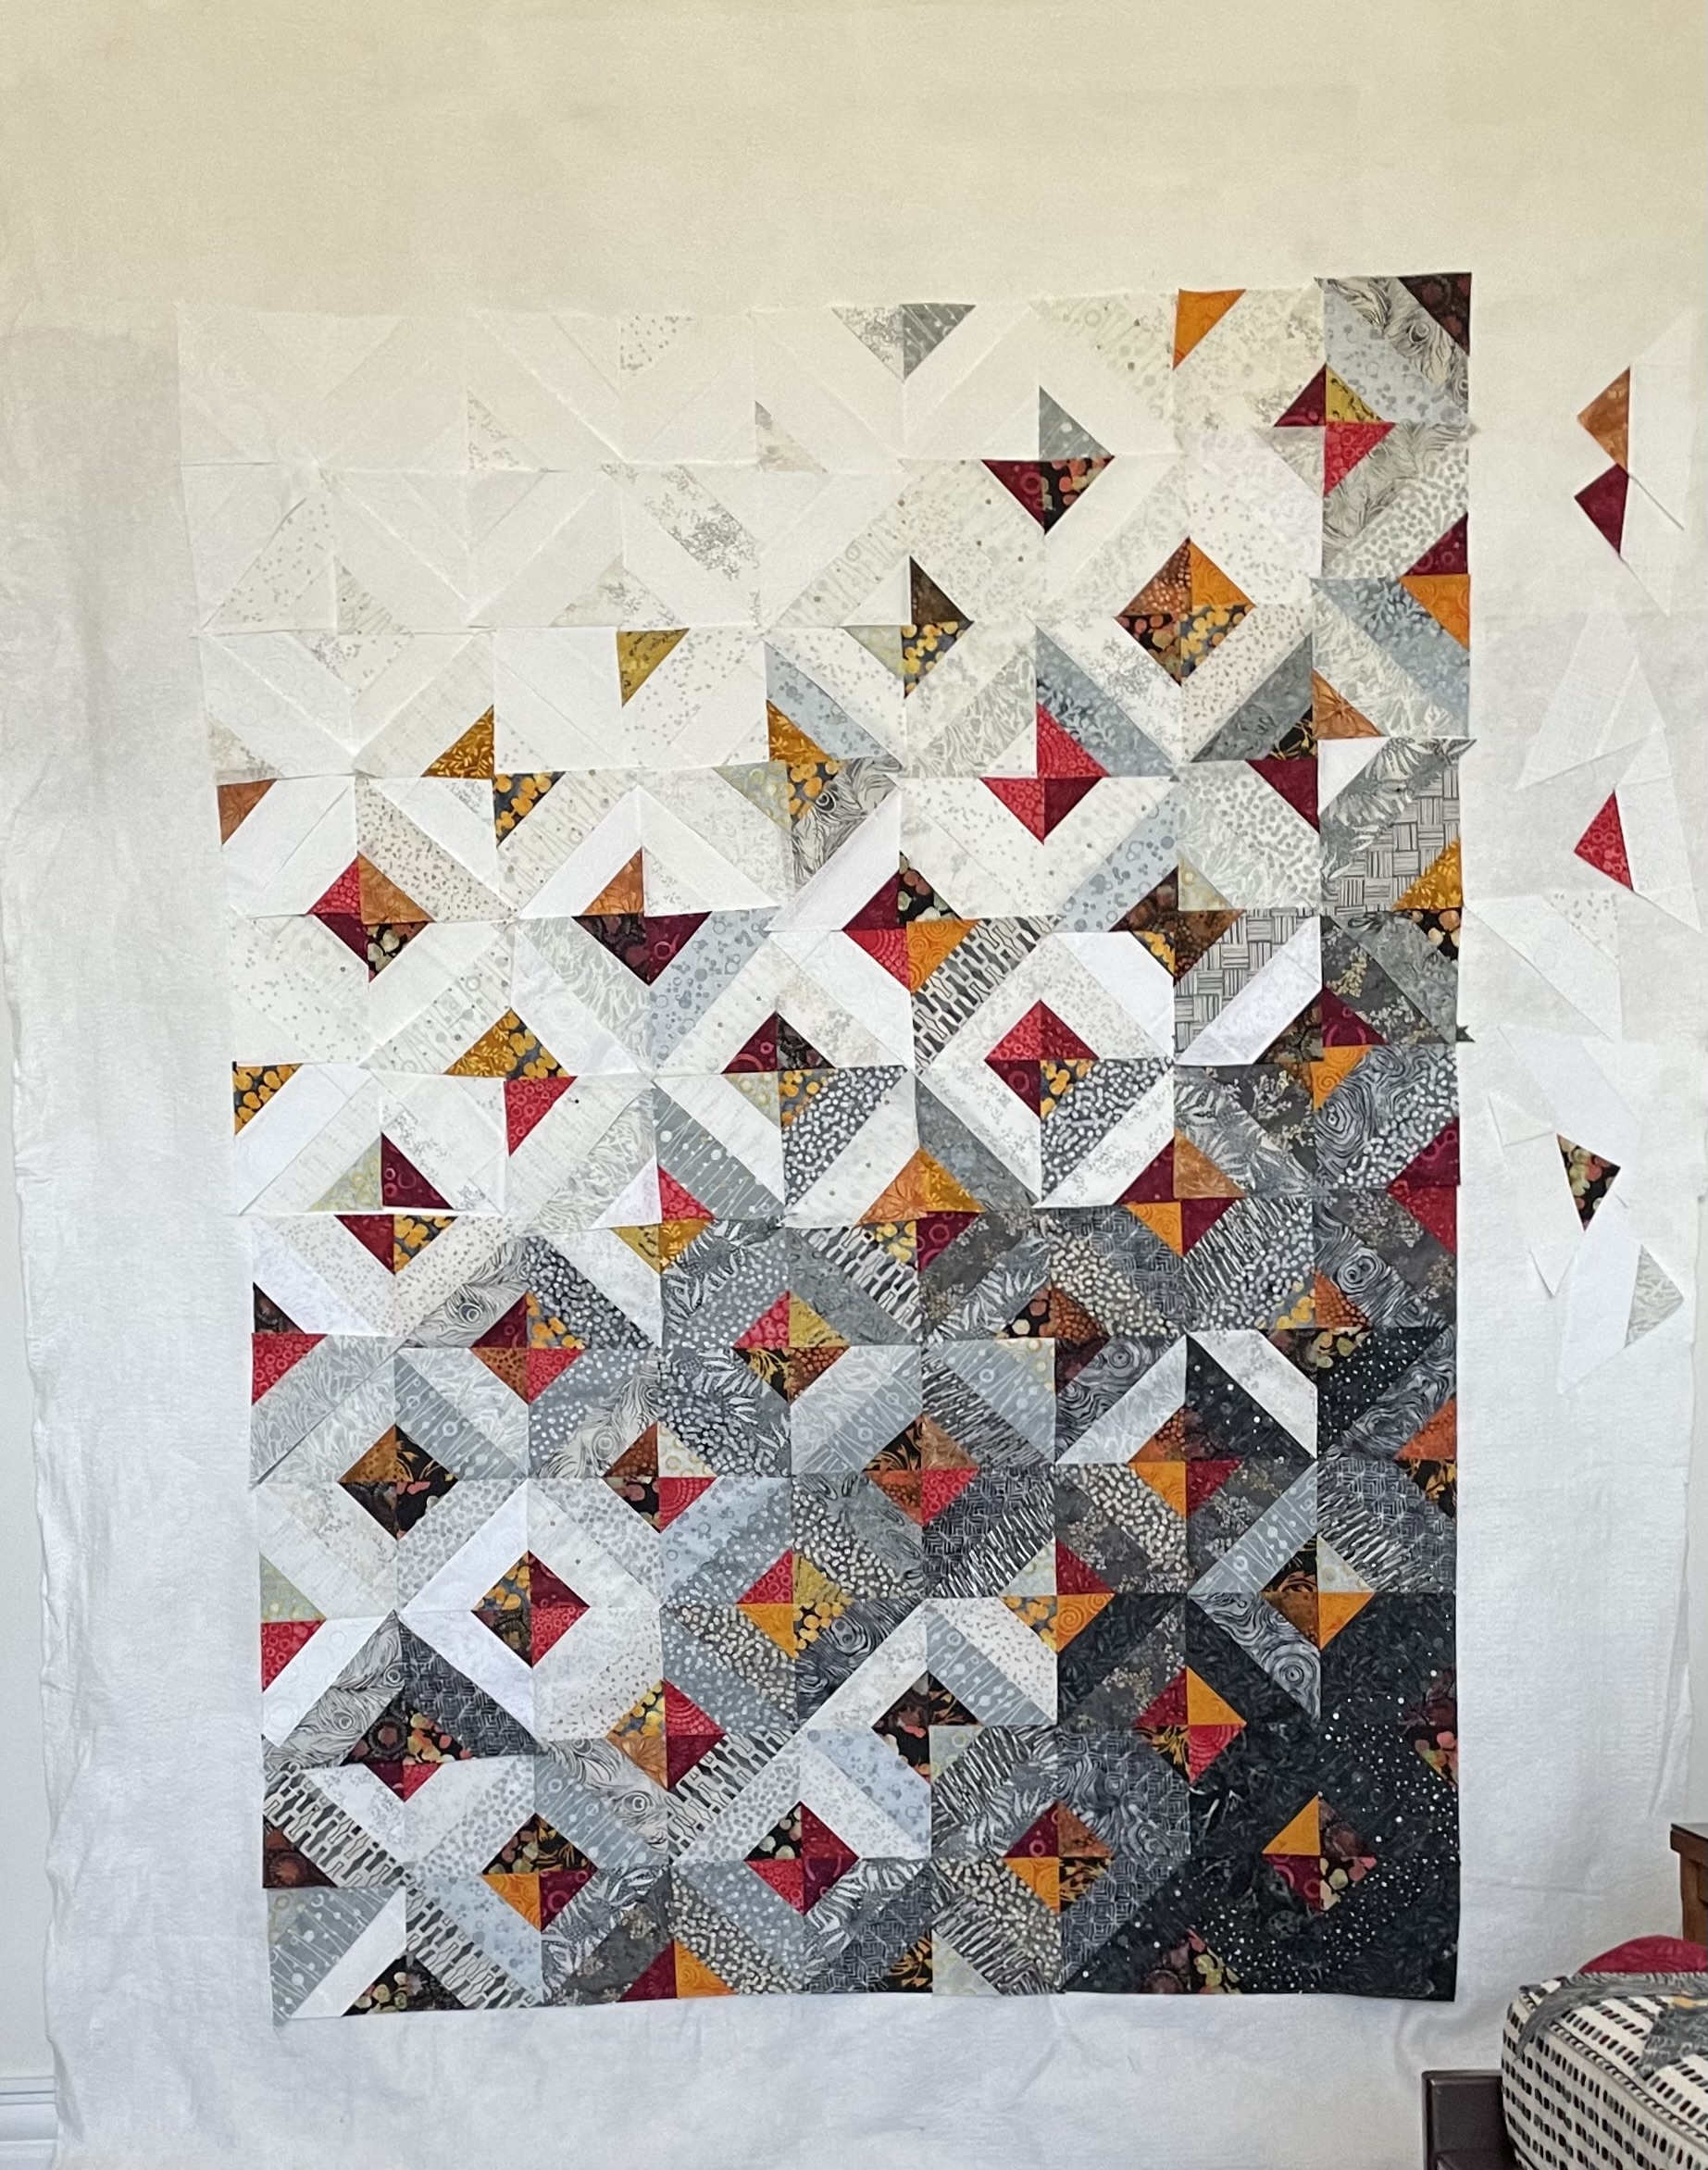
Then there was the matter of layout – I sewed most of the dark blocks together to begin with but then had to disassemble the partial panel because the colour flow wasn’t working. To get a decent colour flow, I ended up pinning triangles, and trapezoid pieces on top of the developing panel on a design wall I improvised in order to get a clearer colour placement. Then I had to take blocks apart to insert the new required piece.

I put the layers together. I created two possible block patterns using my out-of-date Pfaff Premier 2+ software (it still runs on my Mac but not for much longer I’m expecting – then I don’t know what I’ll do, because the cost of a subscription for the software on MySewnet is crazy expensive!):

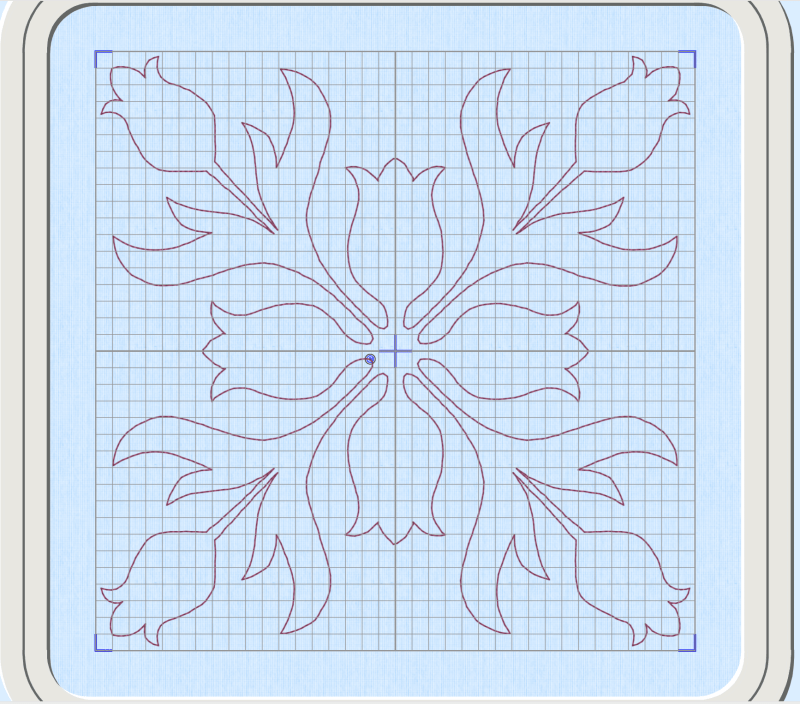
I chose Block 1 after doing a test run with some muslin and batting. I wanted the simplicity of the curves in the first design; I will use the Block 2 design on another quilt sometime.

Because the blocks were placed in the quilt on-point, I had to quilt on the diagonal. When all 44 blocks were filled in, I still had 18 triangle half blocks along the sides with 2 quarter blocks at one end to complete the quilt.

I also changed thread colour to match the colour gradation – I stitched the dark corner with an almost black variegated thread, the top left corner I quilted using white; in between I used three different grey variegated threads to blend with the changing colour. I used a light variegated grey on the back throughout.

I used the off-cuts from the backing for binding – which allowed me to match up the design on the back. I finally added a label.

I finished yesterday by hand basting a hanging sleeve at the top so I can display the quilt. (I still have 8 quilts that need hanging sleeves – gotta get those done over the weekend.)

I’m just about ready for the Craig Gallery Show:

If you’re in the vicinity do drop in!

Finally Back Again

Been gone a month – I’ve been busy sewing and knitting, and engaged in my daily/weekly routine but for some reason I haven’t managed to sit at the computer and describe what I’ve been up to. So let’s get to it.

Mid August, I wanted to start a new quilt. I looked through my fabric stash and decided to use a jelly roll I’ve had for a couple of years.

The jellyroll fabrics (20 strips) ranged from black to white with many gradations of grey. Dull on its own – I decided I needed some strong contrasts. Because the strips were batik, I selected bright batik scraps to contrast with the black/white. I decided to make “square in square” blocks, cut them into triangles on the diagonal, then arranged them in squares again. All is fine, until I try arranging the resulting squares into a larger array only to end up with a hodgepodge I wasn’t happy with.

First Attempt

There’s a hint of a gradation from black to white but it doesn’t work overall because each of my blocks has light/medium/dark elements and to get a good colour flow I need some blocks that are very dark and some that are completely white. To make that happen I had to make many more blocks from scratch.

Second Array

This time, I established a dark corner and a light corner and tried filling in. I was working on my cutting table, rather than on my floor beside the cutting table as I usually do, because I’d injured my right knee and couldn’t get up and down. It didn’t occur to me at that moment that I could set up a design wall using a length of batting hung from a rod in my spare room (in front of the closet door) to hold the triangles/squares to audition placement – that came later.

So I filled up my cutting table with a layout I thought would be the darker bottom half of the quilt top. I made the mistake of actually sewing these blocks together into a 6×12 array. I was planning on filling the cutting table again this time with the top half but then I couldn’t see what I’d already constructed. This was when I set up a design wall:

Array #3

I placed the assembled bottom half of the panel at the bottom of the wall and started laying out more blocks. Two things were immediately obvious: 1. I didn’t have enough “black” extending from the lower right corner and 2. the grey extended too far across in the middle of the emerging piece. I’d also run out of triangles at this point and needed to make another 60 or so.

By this time I had stopped making squares in squares and instead I cut trapezoids from the jellyroll strips (I had to open the second package I had on hand) as well as triangles from the contrast fabrics. I’d figured out that working with reassembled squares wasn’t helpful – I was better off constructing just triangles where I could control the colours I was juxtaposing and had more freedom when placing them.

Array #4

Close, I thought but I still wasn’t completely happy with the colour flow so I played with it over the next few days – shifting blocks in the top half, and pinning other triangles over existing triangles in the sewn bottom portion.

Final Array

It took a couple of days looking at the design wall and moving and pinning elements until I was finally satisfied with the look of my panel. Yesterday, I took a photo, then very carefully stacked the pieces in the top six rows, numbering each stack so I knew the order and orientation of the pieces in each stack. Then I carefully repinned and labelled the changes I’d made to the bottom panel – knowing I would have to take much of it apart in order to get the arrangement I wanted.

It’s taken the better part of two days to reconstruct the bottom half of the quilt top:

Now I have the bottom portion of the array back together – many of the changes were subtle ones, mainly involving extending the darker batiks further across the panel, limiting the lighter, brighter trapezoids and triangles until the mid area.

Tomorrow I’ll start sewing the six top stacks together, row by row – it won’t take long because I’m not having to carefully unstitch many interlocked seams!

As you can gather, this whole process would have been much easier had I planned out on graph paper what I was thinking about, but that’s not how I seem to work. I much prefer just starting and building and designing as the project unfolds. I find improvising so much more interesting because I have no idea where I’m going to end up. Always a surprise and satisfying. It’s how I write as well – just get some words on the screen and see where they take me. I never know what I’m writing about until I get well into something and an ending emerges. That’s my creative process.

I have no idea what I’m going to do with the back – do I want to make another 36 of these triangle elements for an insert or do I want to try something else – still thinking about that.