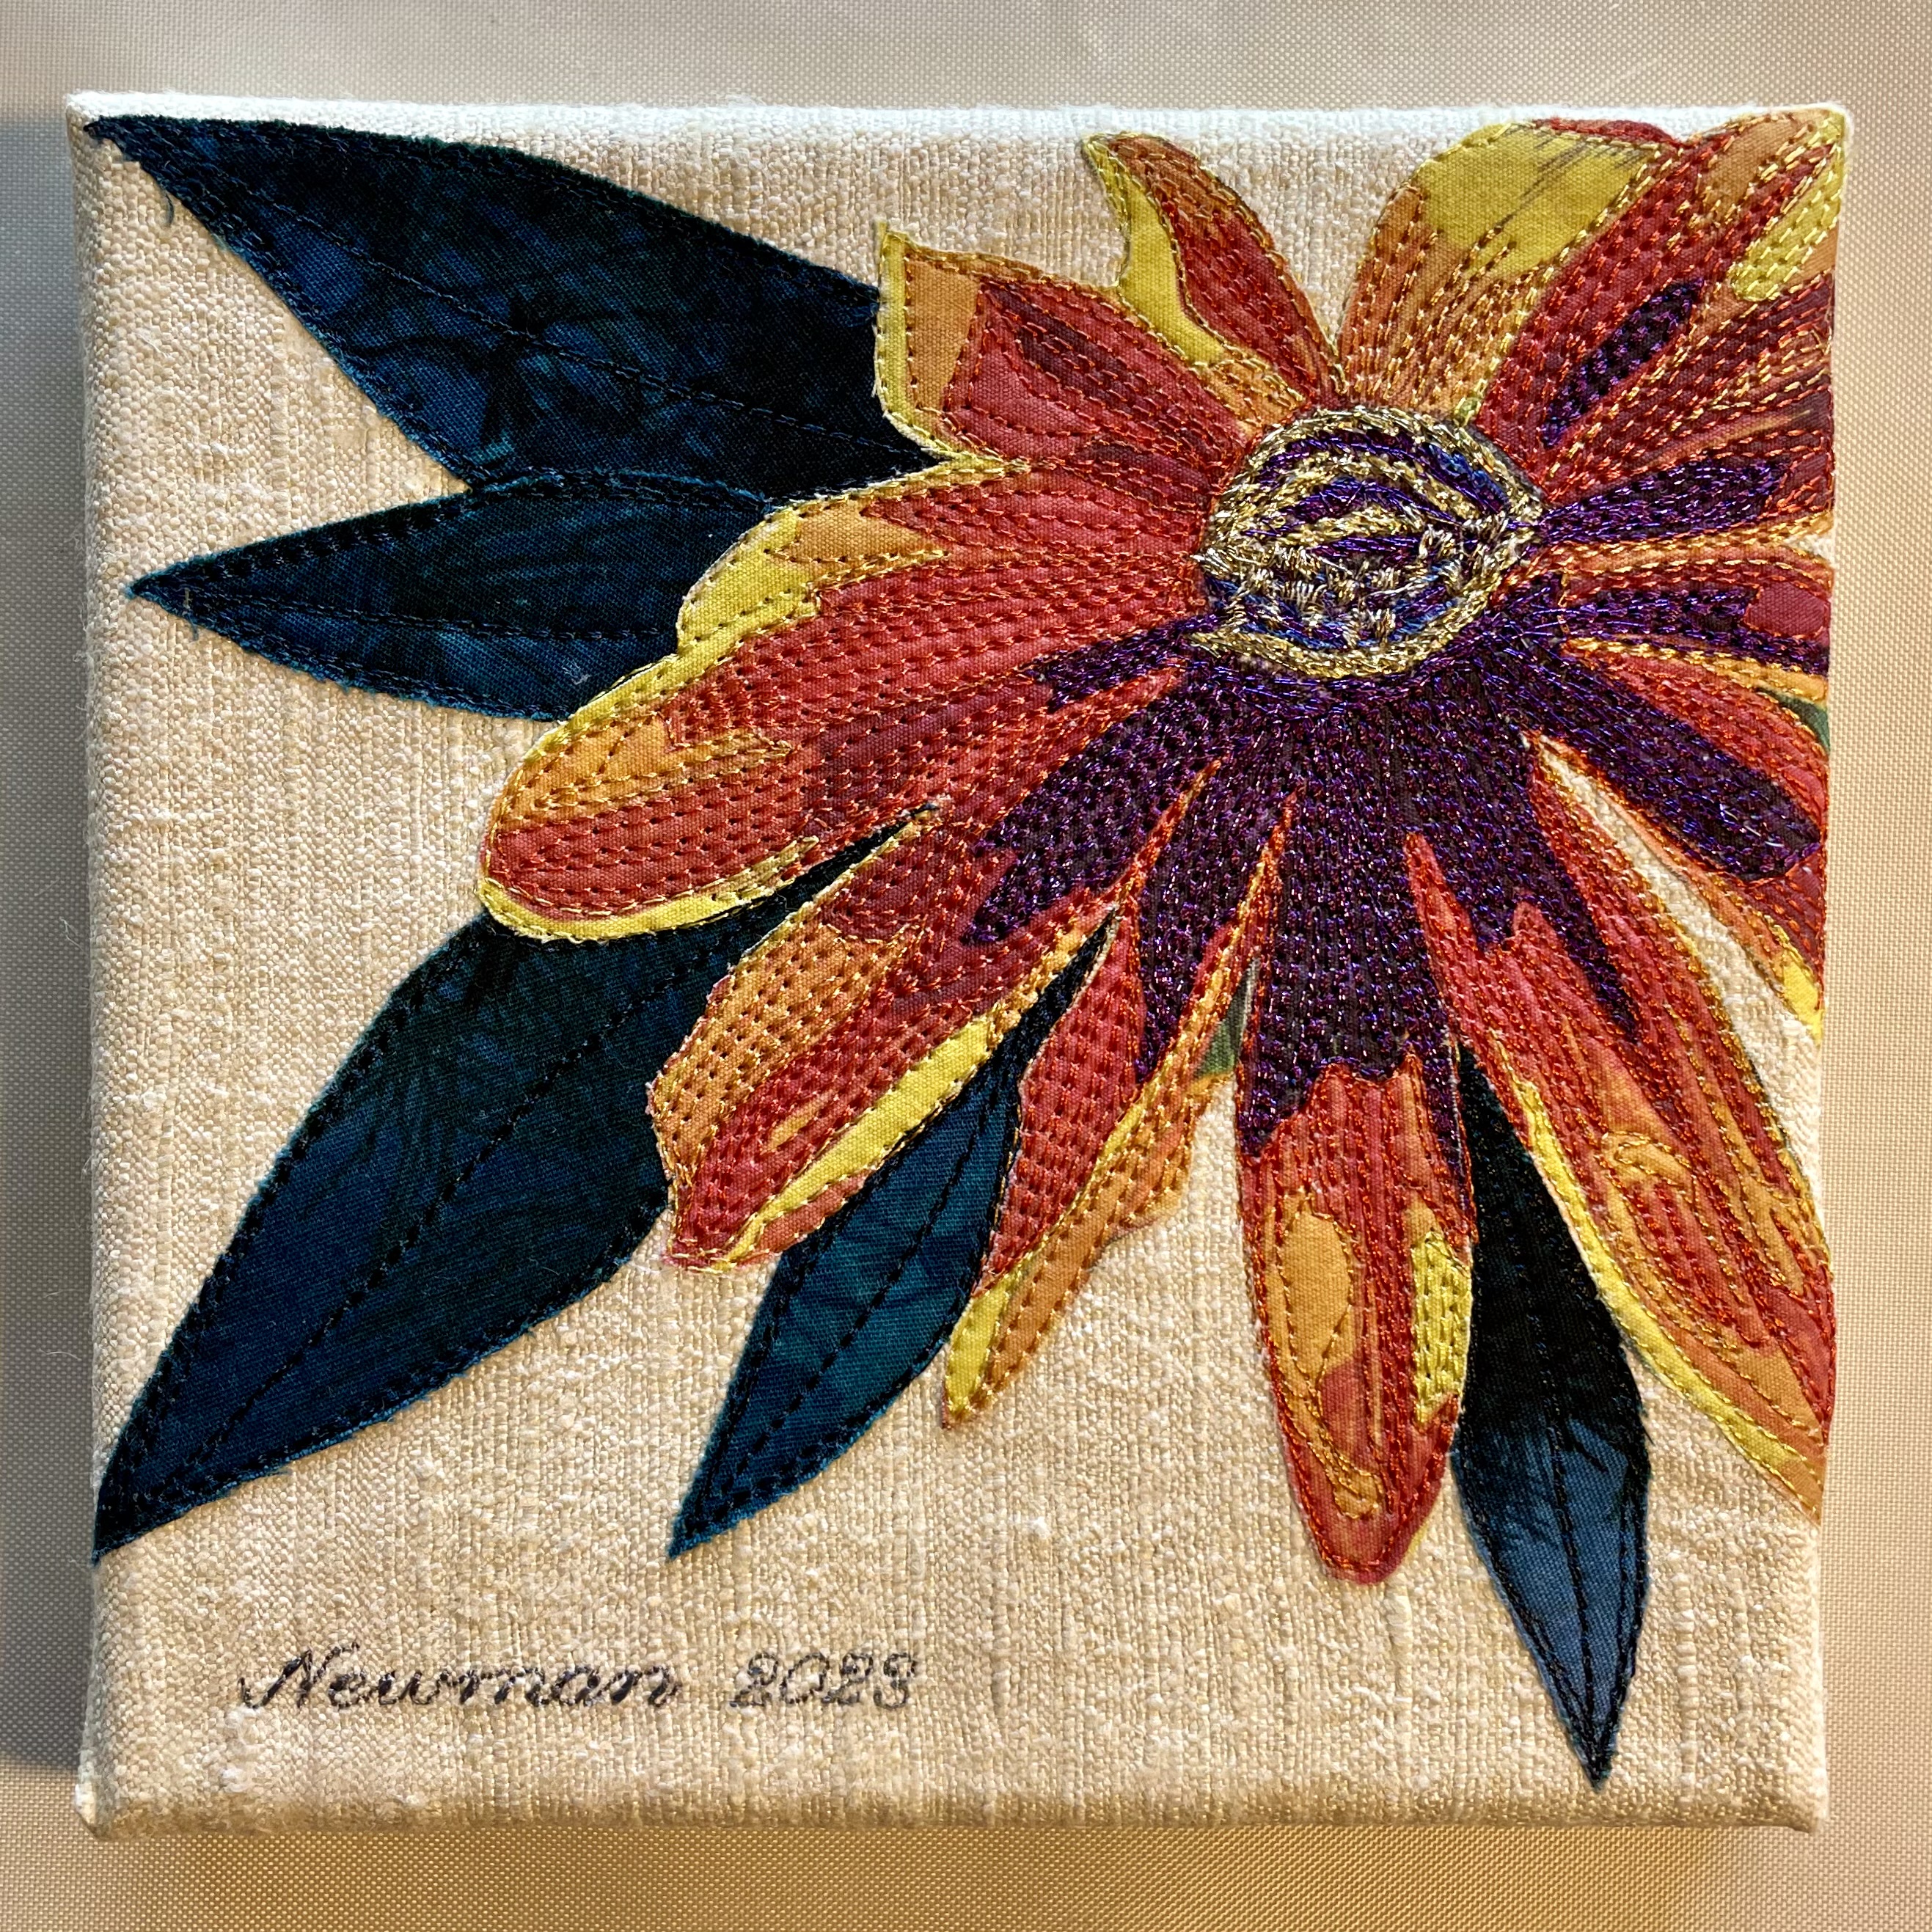
I’ve spent the morning, fussy cutting the flowers, laying them out, fusing them to the raw silk background, redrawing the finished block size, positioning where I want the signature to go on each. The remaining nine are now ready to thread paint.
I’ve tidied up the top of my cutting table, putting fabric scraps back where they live. Stacked the rules in the ruler holder. Put my rotary cutters where they’re normally stashed. Now I have to start selecting thread for the stitching.
It’s a lovely sunny day out – no clouds at the moment. So once I’ve got myself organized it’s time to get out of the apartment! I’ll start sewing on these tomorrow morning.
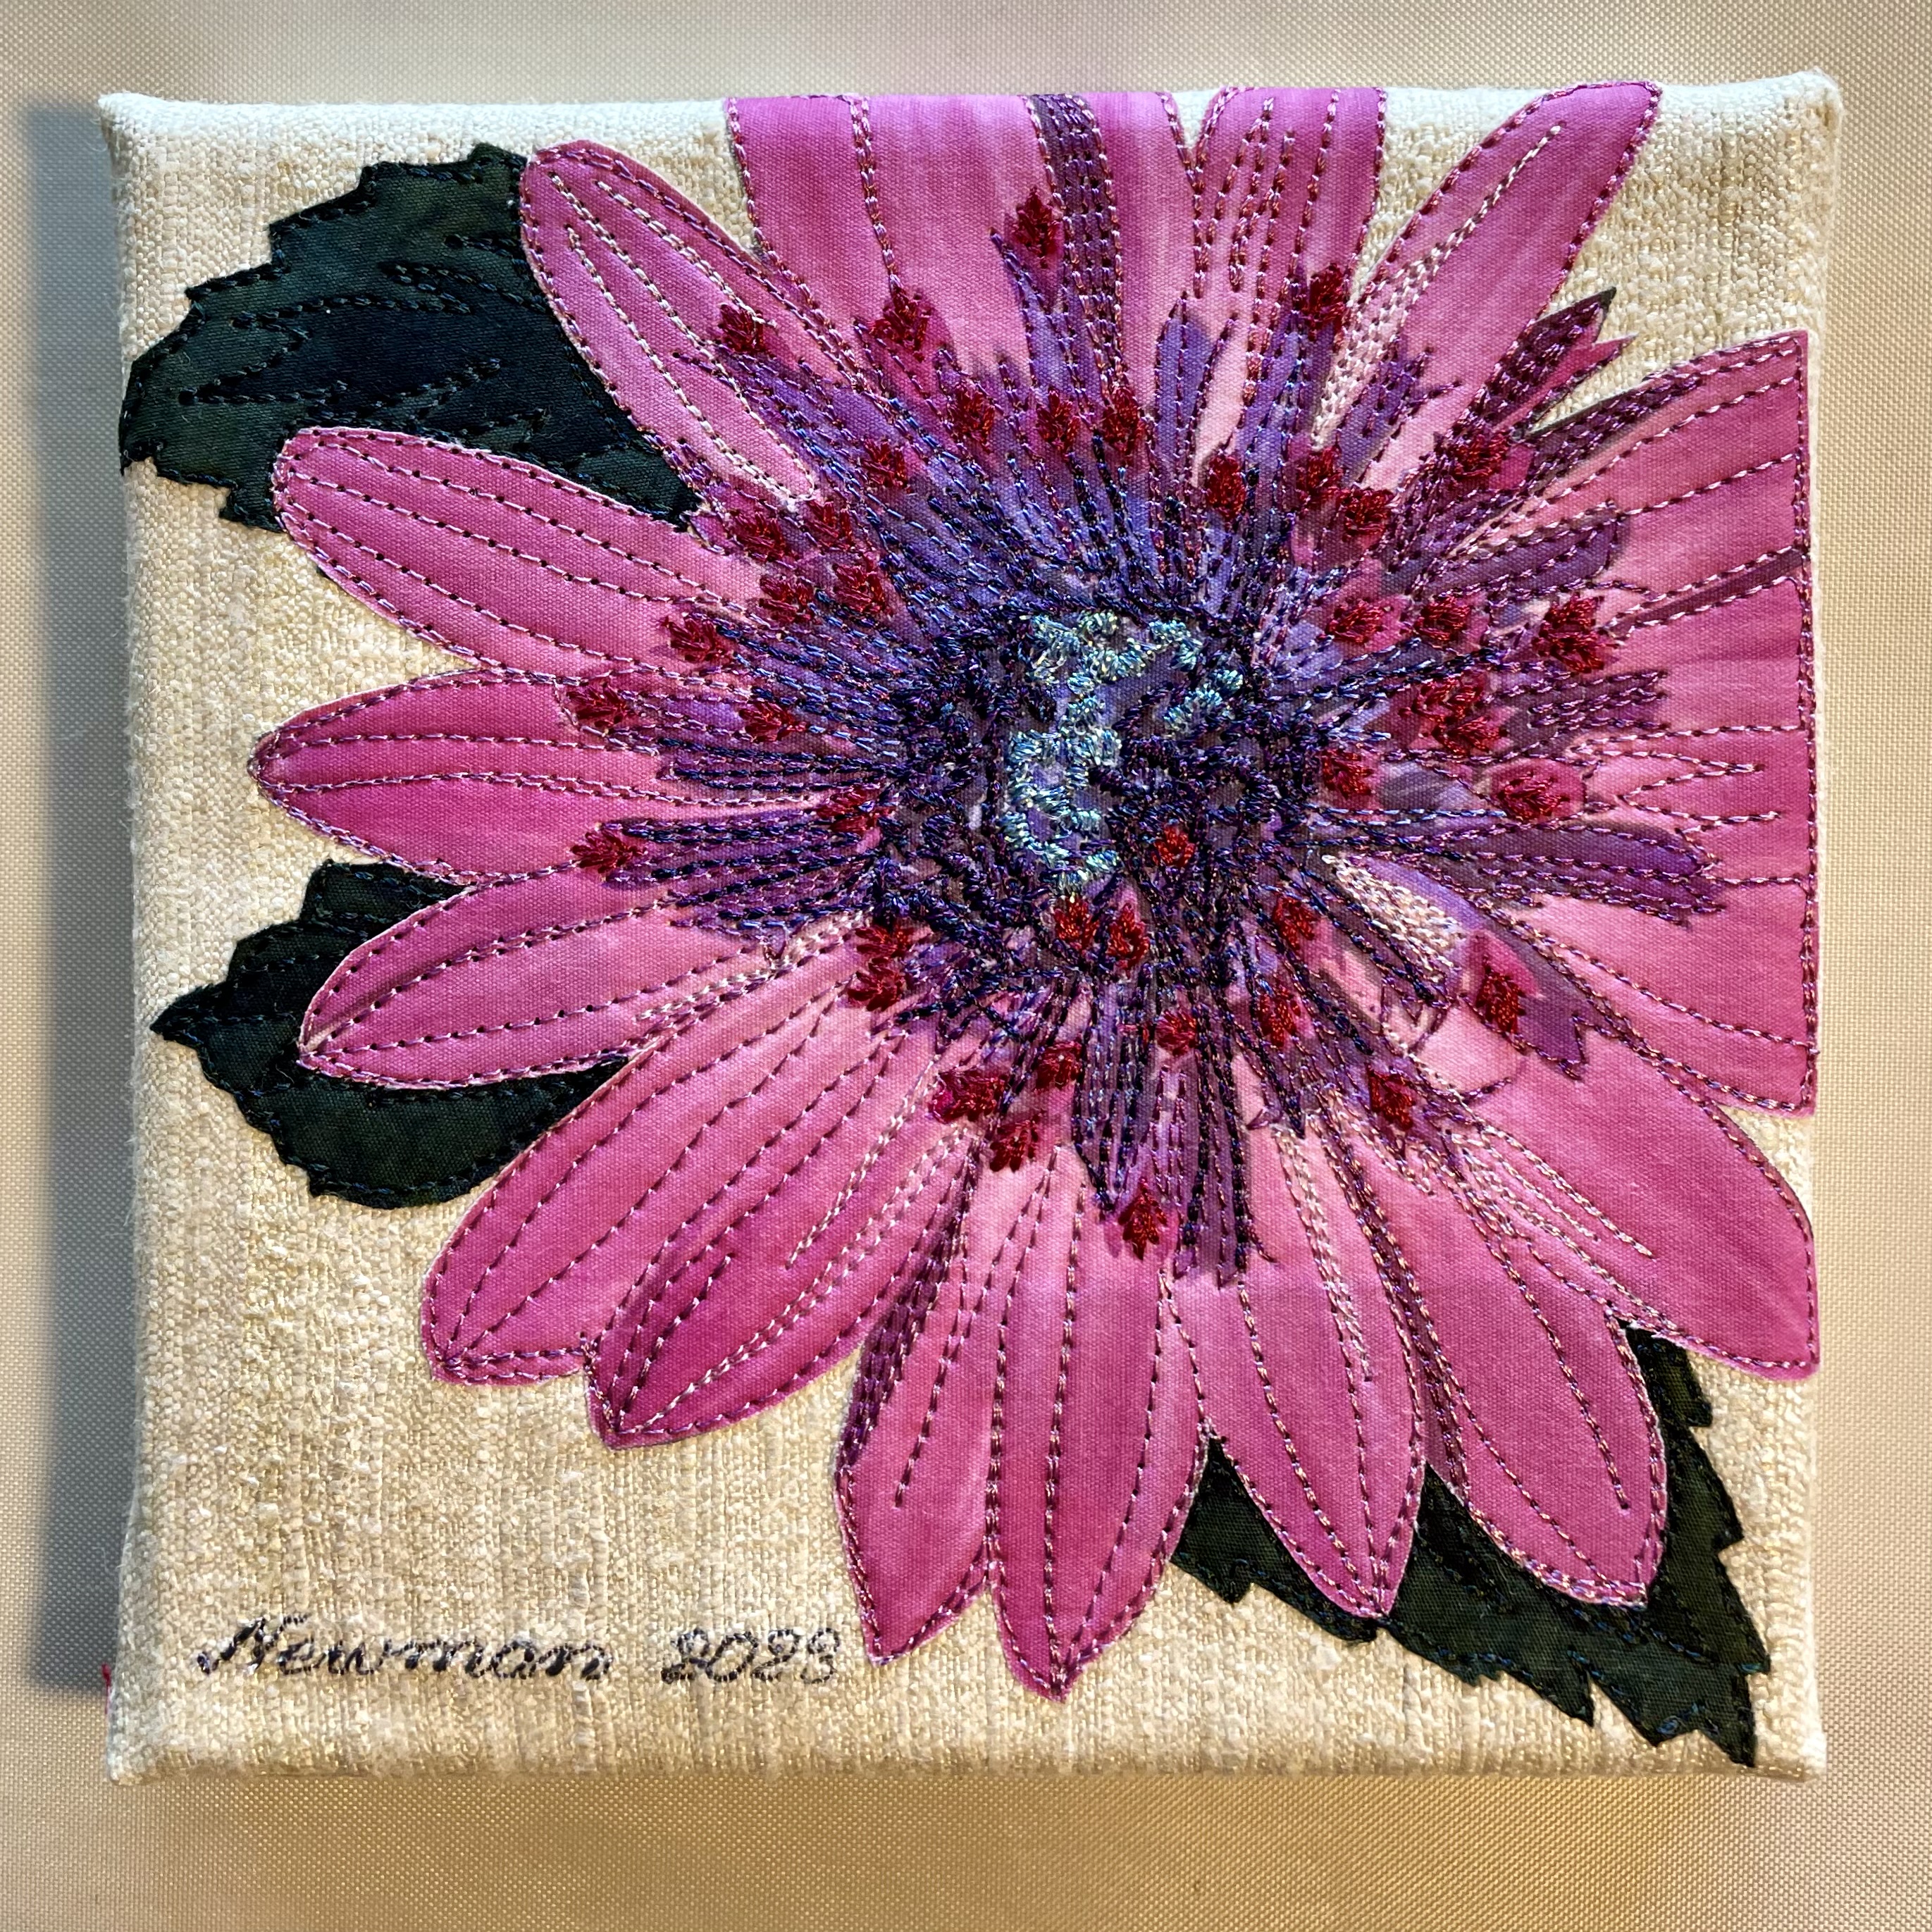
This one is #3. I finished it yesterday. A surprising number of thread changes involved in this one. I’m pleased with how the flower centre turned out – I didn’t feel it needed a metallic thread; the dark brown/black set up enough contrast with the golden yellow to make the flower lively. The challenge is deciding how much stitching and where. The flowers look better when there is some unstitched space but there still needs to be enough thread painting to give the flower texture.
More To Come
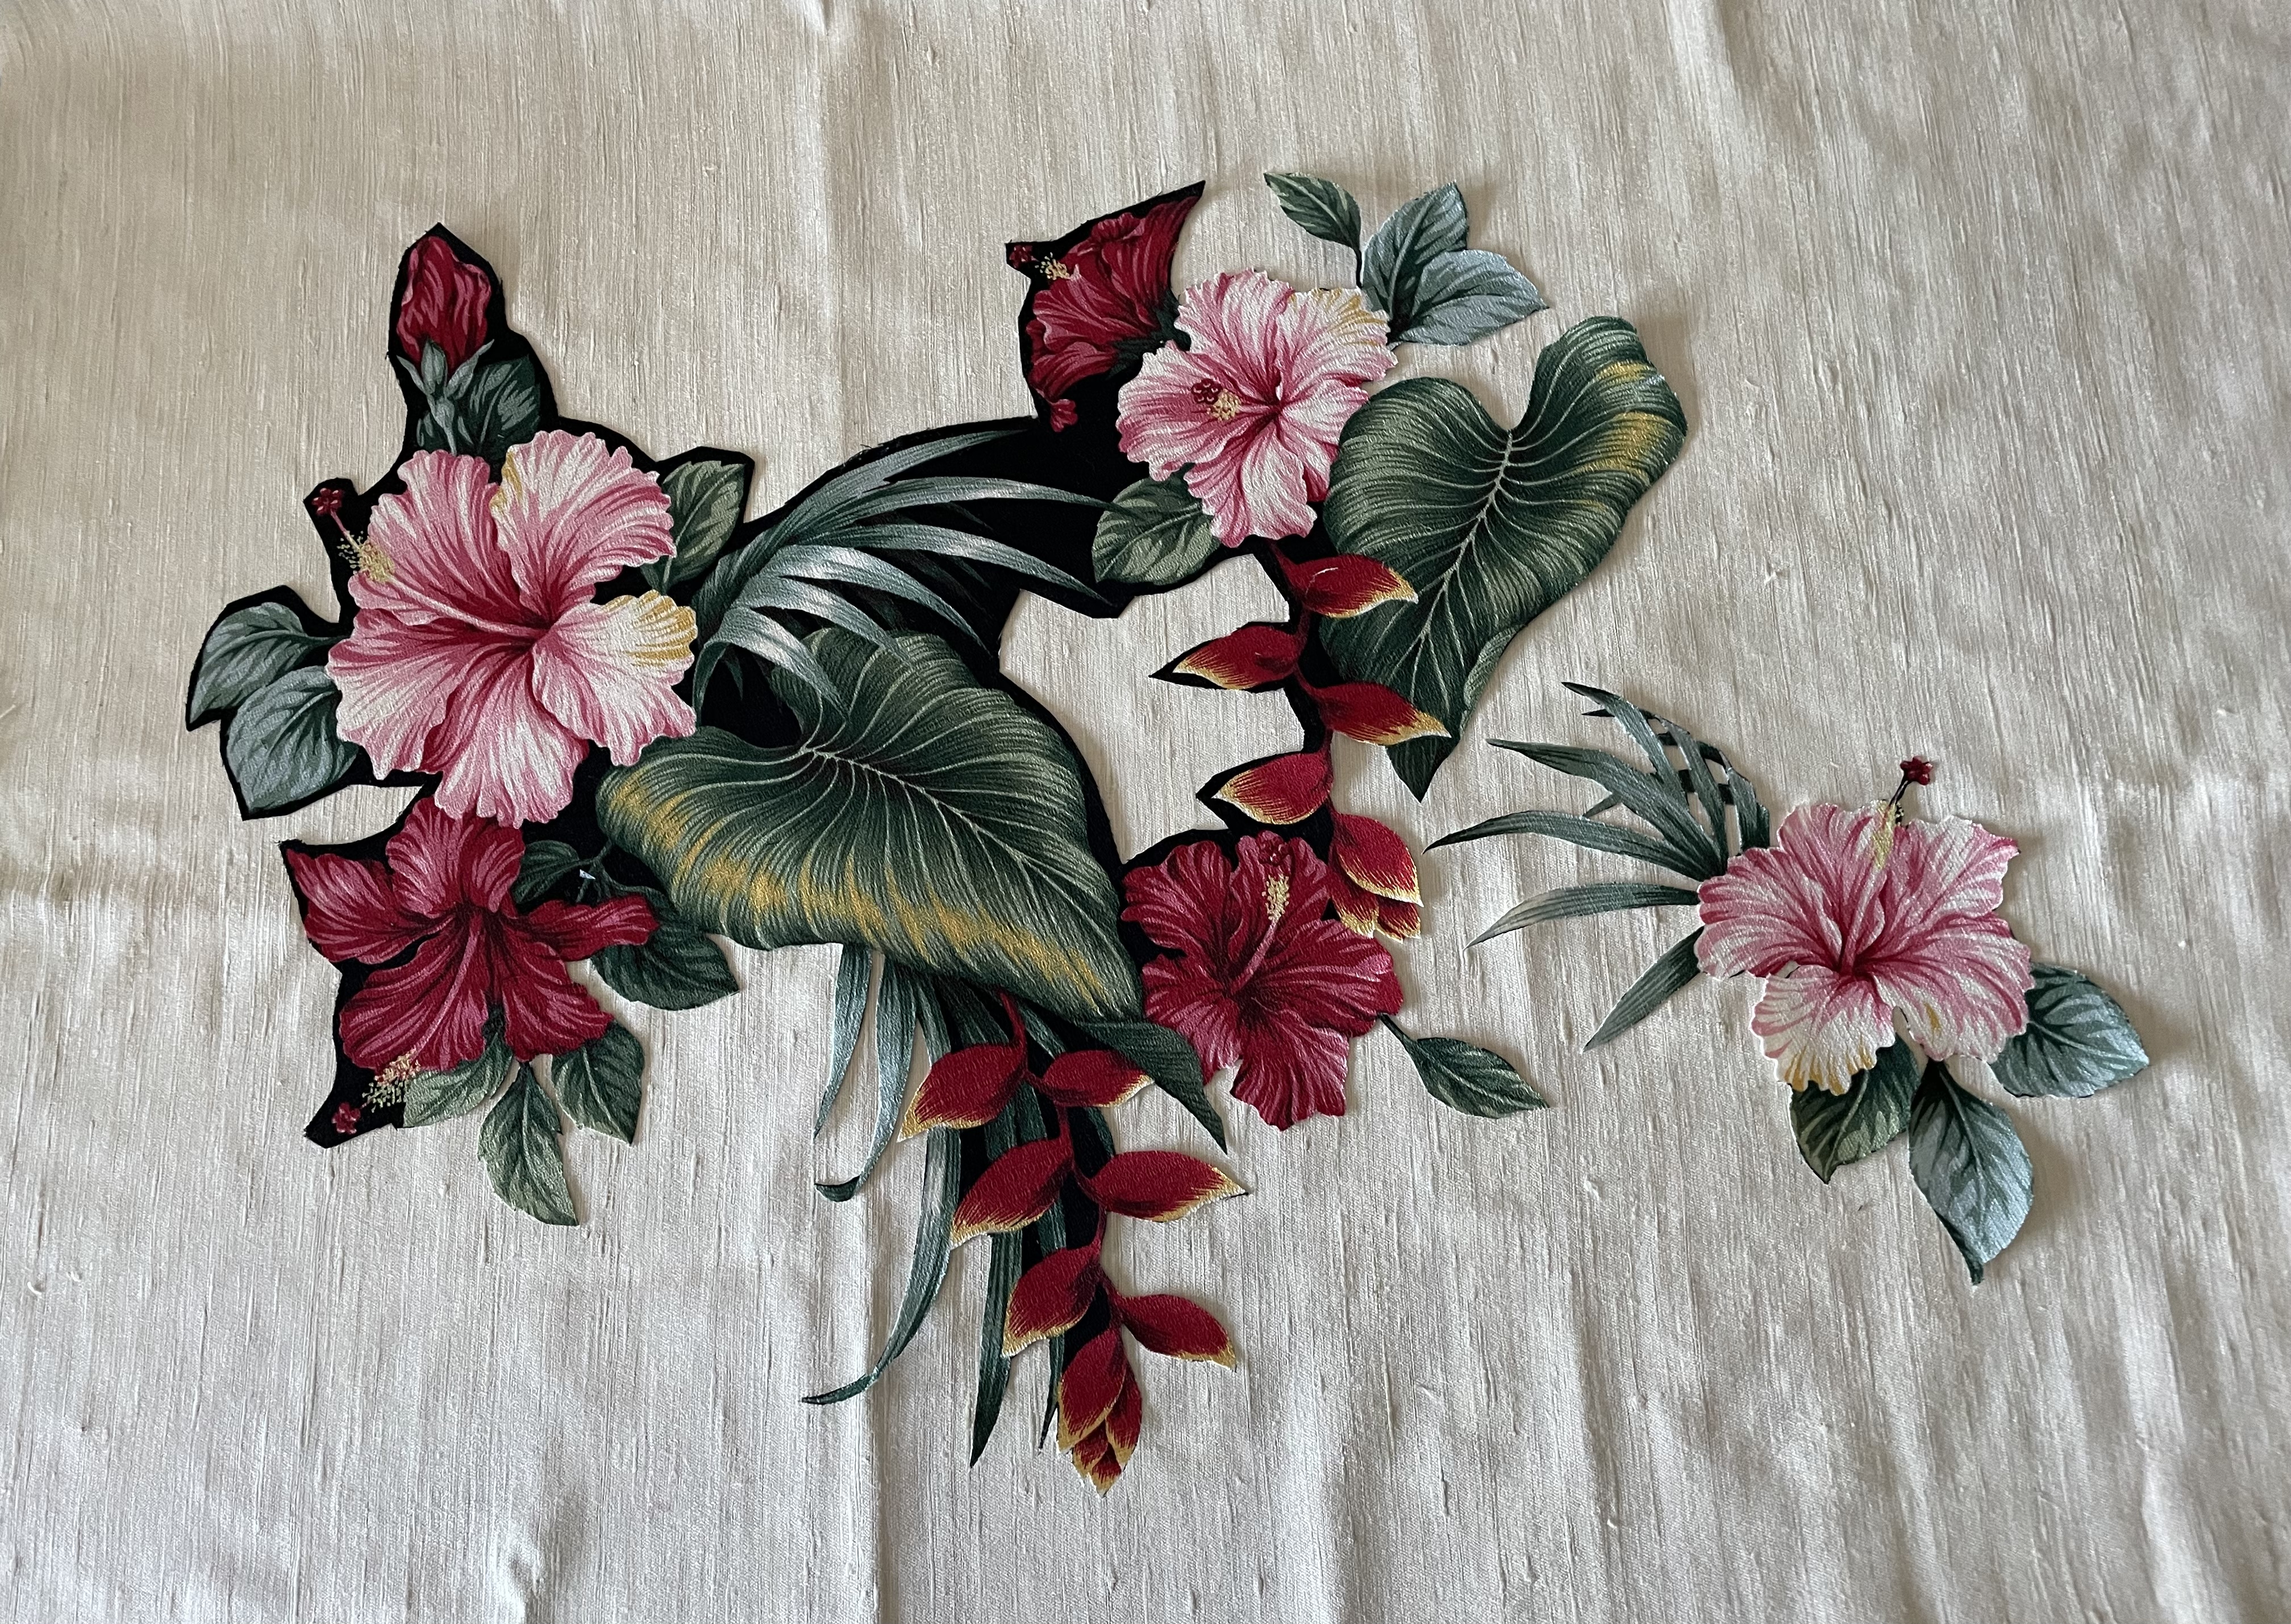
This is what’s on my cutting table (anti-clockwise starting at the bottom left) – a purple poppy (needing to be fussy cut), a Blue Flag iris, Bradford Pear, a clematis, a peony, a day lily, and a hibiscus I cut from some Hawaiian bark cloth which I’m not going to use. Instead, I added a few more printed photos to the collection – a yellow/pink phalaenopsis, a more vibrant purple iris, and a golden/red hibiscus. That gives me the ten flowers I’m hoping to complete for this set.
I’m waiting now for my latest order of 6×6 mounted canvases to arrive so I can mount these pieces when I’ve finished thread painting. This project will take me another ten days or so to complete.
Osterspermum are African daisies. I first noticed them at garden centres maybe 20+ years ago. They come in a range of colours from off white to a lovely purple, red, orange. I started planting them in the container gardens on my back deck. Over the years I took lots of photos of them.
Osteospermum
I decided to include an Osteospermum in the set of ten pieces I’m working on.
Again, on a raw silk background, I fused the fussy cut flower printed on cotton. I selected a variety of rayon and polyester embroidery thread to use for the thread painting. Then I started stitching – first the flower edges with a dusty pink thread, then I spent about an hour designing a stitch to use for the small central florets – I stitched each one separately. Then I worked my way into the centre. wanted to catch the viewer’s eye at the centre – I used a metallic thread paired with a rayon to stitch the unopened florets at the very centre. Last came the leaves.
A second 6×6 piece finished.
Then I went back to Rudbeckia II – I wasn’t happy with the flower centre. I removed the piece from the canvas backing, pressed it lightly and reworked the centre and dark purple areas thread painting with metallic thread.
Rudbeckia II – Reworked
You can just see the glint of the metallic thread at the centre and in the deep purple areas. The thread painting with metallic thread gives more depth and texture at the flower centre. The slight glint of purple metallic thread livens the whole flower.
This is my second go at the Rudbeckia. This time I printed the flower on fabric, pulled off the plastic backing, added fusible web, then fussy cut out the flower. I dug through dark green scraps, added fusible web, then cut leaf shapes. I fused leaves and flowers to a 9″ x 9″ raw silk square of fabric which I’d backed with Sewer’s Dream interfacing to stabilize it.
Then I began stitching! It took several hours to thread paint the flower – constantly changing thread and bobbin colour – using the “hover” function on my machine to simulate free motion sewing.
This time, I left myself enough space on the background to apply a signature. Having used fusible web, my raw edges are relatively smooth, not fraying as was the case with the first Rudbeckia.
I think I’m rather happier with this version than I was with the first prototype.
I haven’t done much textile art for the past month or so – not since the 6×6 pieces. Nothing in particular has called out to me.
This morning I decided I had to start something. I keep a folder on my desktop “Wall Art” where I stick ideas. I looked at Charlie’s first swim photo – I’ve never been happy with my original piece created using raw-edge appliqué. I’ve wanted to print the photo on fabric and embellish it.
Charlie’s First Swim
The problem is his dad sent me a small version of the photo on his phone and when I attempt to enlarge it I get a very pixilated image. This morning, I printed an enlargement on paper – I’m going to try stitching that to see whether I can sharpen the image with some thread painting. If it works, I’ll print Charlie on fabric and carry on from there.
Another thought was to revisit the bark cloth in my stash. I selected an array of hibiscus and heliconia from the black fabric, pressed a sheet of Pellon 805 fusible web to the back, and started fussy-cutting the flowers.
Hawaiian Flowers
I’ll carry on trimming off the black. I plan to use a panel of natural raw silk as background. This may be a project I’ll work on while working on other things.
However, this doesn’t feel like a start – I definitely want to do some quilting – just not sure where to begin.
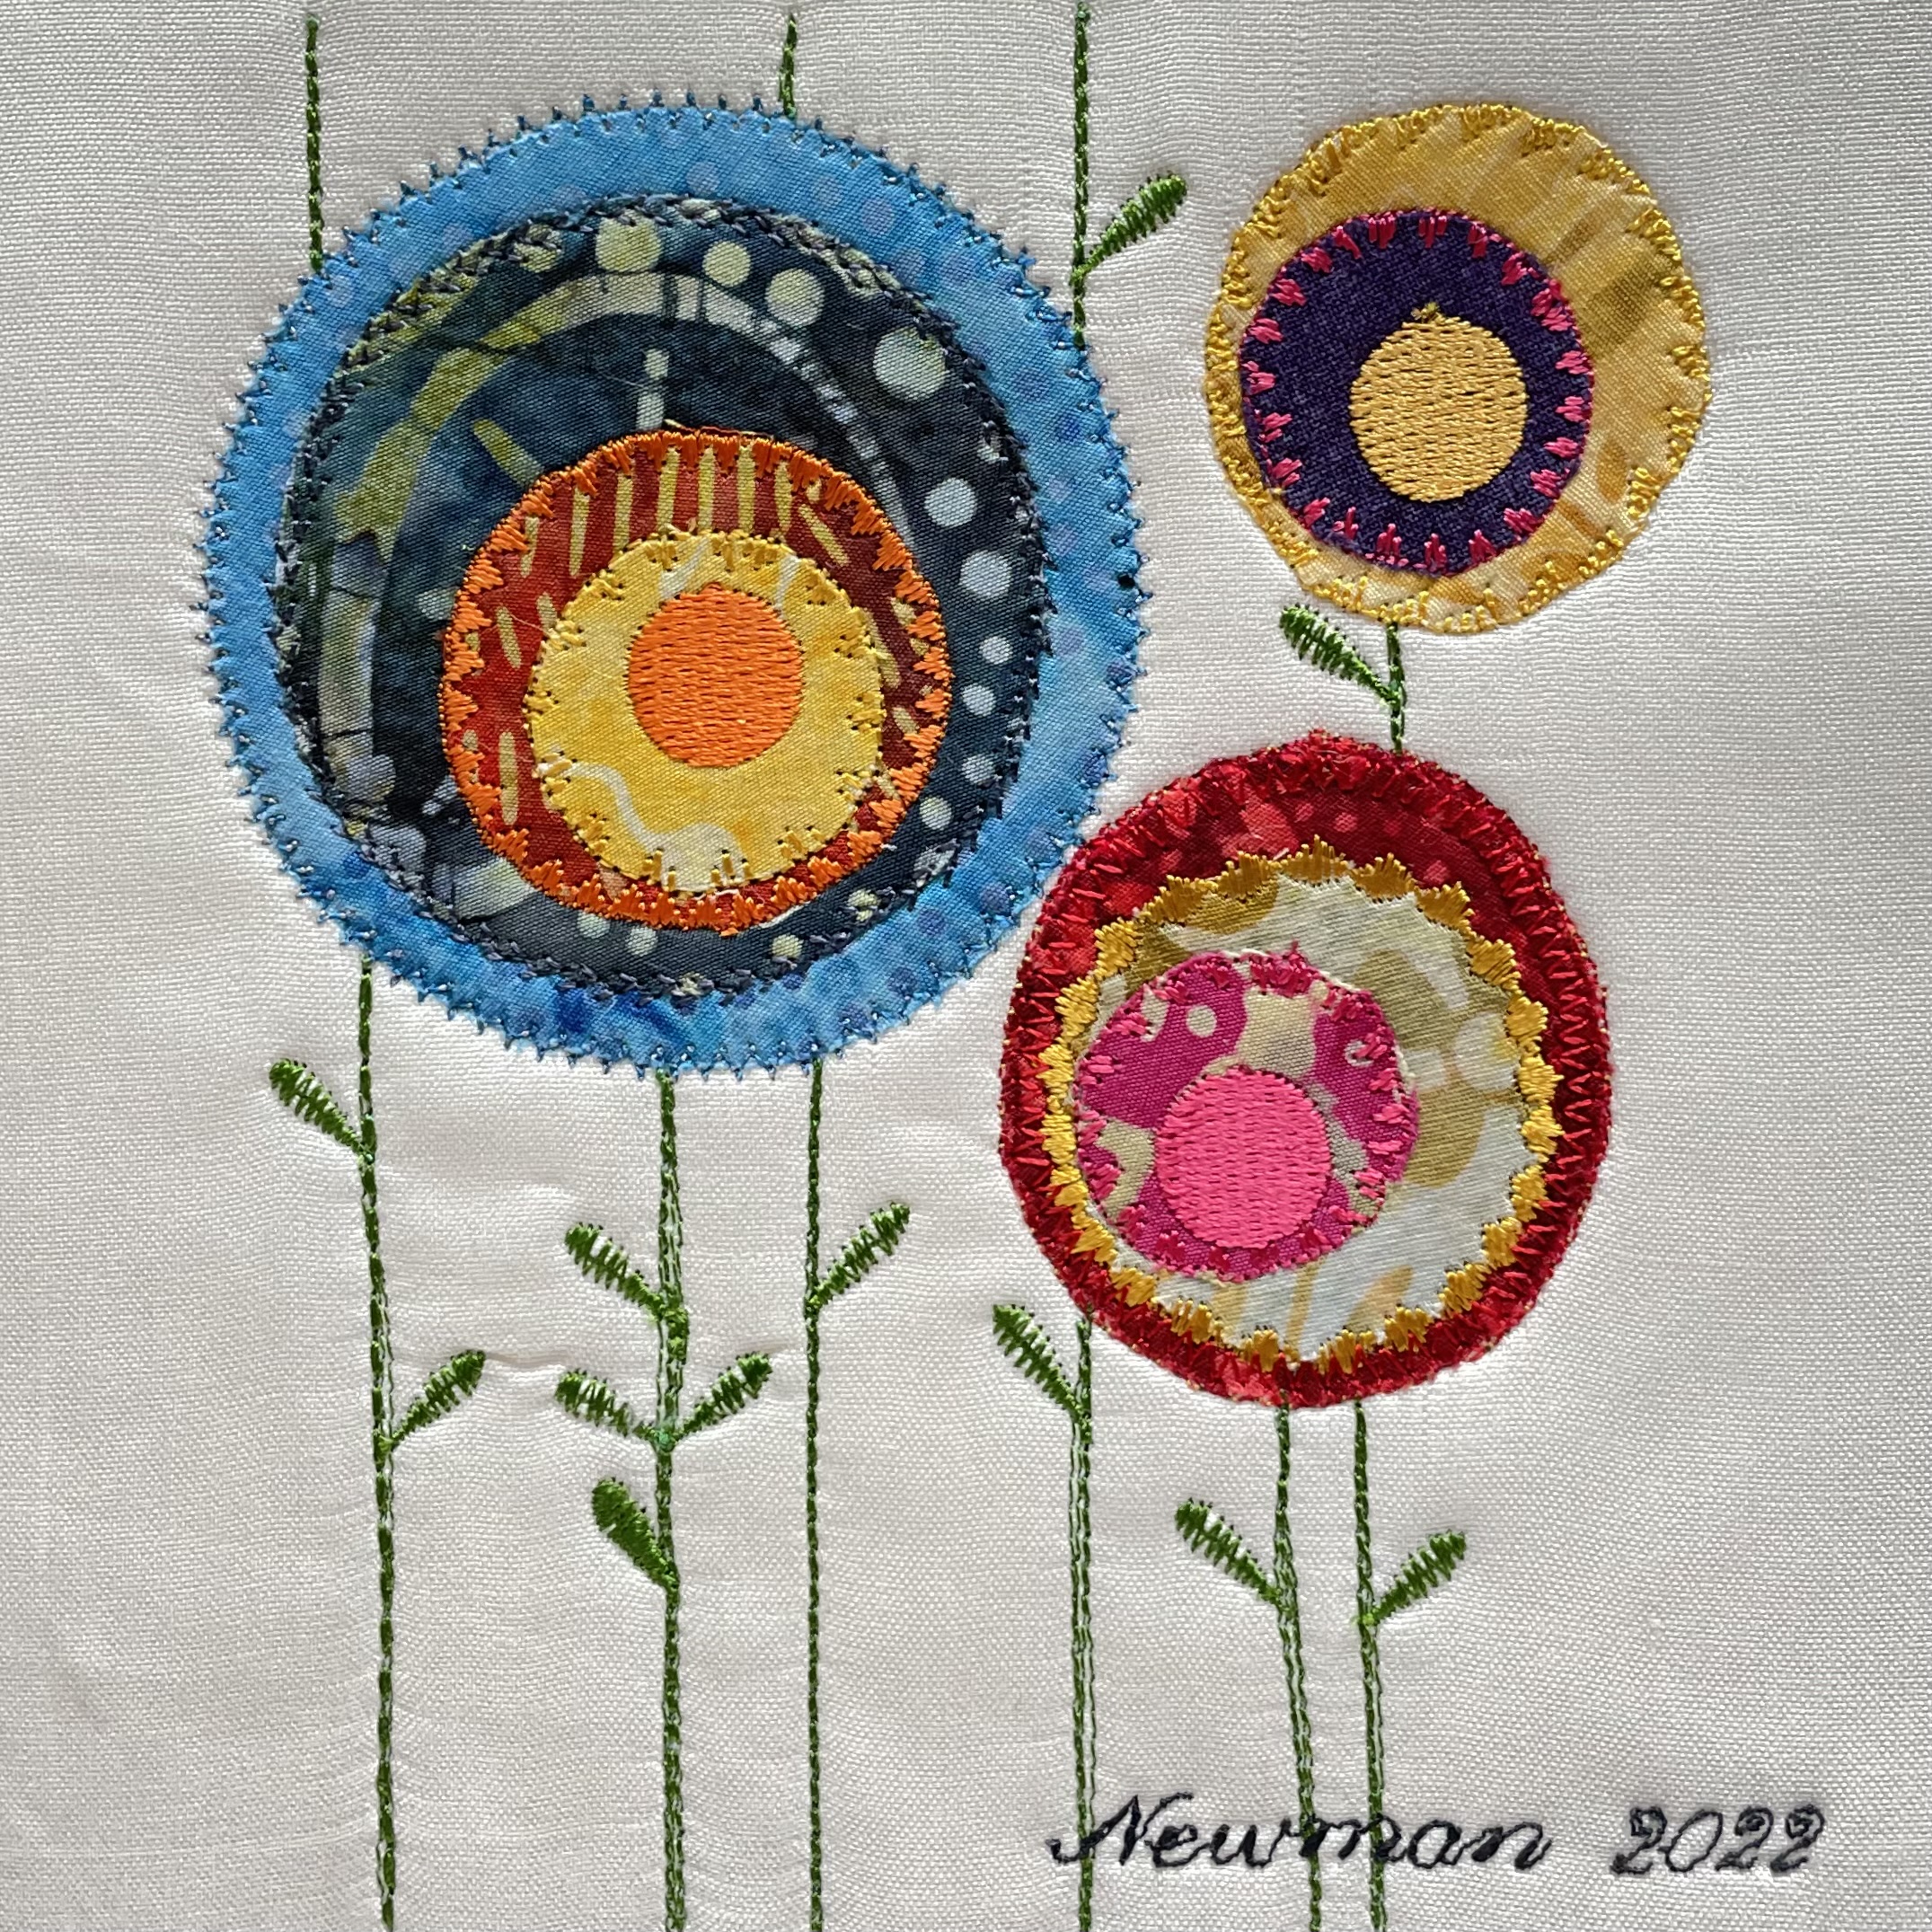
This is an adaptation of my Modern Flowers idea, an outgrowth of the Blue Flowers banner piece. Difficult, however, to decide what to do in a 6″ x 6″ space!
I started with a 10.5″ square of woven silk habotai fabric. Next I opened a baggie filled with circles left over from the Blue Flowers banner and began laying some out. Always the same decisions – centre the circles, offset them, relative size of adjacent flowers….
Once I had an acceptable layout, I fused the circles to the silk, added a 6.5″ x 6.5″ layer of batting beneath. What I didn’t do, and should have done, was add a backing of light tear-away stabilizer – that would have eliminate the bubbling in the silk as I embroidered the edges, stems and leaves. I will definitely add stabilizer to the next experiment.
The tricky element is positioning the embroideries for the centres and the decorative stitches for the leaves. I needed to rebuild the leaf stitch to start and finish at the stem end in order to be able to position each leaf on the stem in a realistic way. And then always the question – how many leaves do I want?
I’m happy with this experiment. I’ll do another couple of these – using the raw silk fabric I have rather than the silk habotai I used here.
There’s still time this morning to move on to another experiment – a crazy quilt block using batik. The question here is whether to cut and fuse it to a background at 6″ x 6″ or to take the quilting to the edges of the base 10.5″ square – that would allow the block to be wrapped around a mounting frame.
In the end I think I’m planning 10 pieces based on a single experiment, rather than 10 unrelated pieces.
I wasn’t intending to carry on with the “fish” but I’m stuck with the quilt I started so I went to work on another “fish” piece.
Fish #4
Because I’d cut bindings from the leftover piece of purple ombre, the leftover piece was a bit shorter than I wanted it to be, so I added some batik to the dark bottom end of the purple and filled in with seaweed-like shapes.
Not so many fish this time, they’re more spaced out, with one behind the seaweed (which meant I had to stitch it in place before fusing the seaweed to the panel. The other fish are just laying in place for now – I don’t know precisely where I will put them, I’ll know that after thread painting the seaweed elements.
I worked away at my machine yesterday, edge stitching the seaweed then adding three seaweed embroideries for texture. Late last evening, I fused the remaining fish in place.
Seaweed stitched
Next will be to edge stitch the remaining fish and add an eye to each. Again, I think I’m not going to do any background stitching, I like the water-like flow in the ombre print and don’t want to interfere with it.
OK. This really is the last of the fish pieces. REALLY.
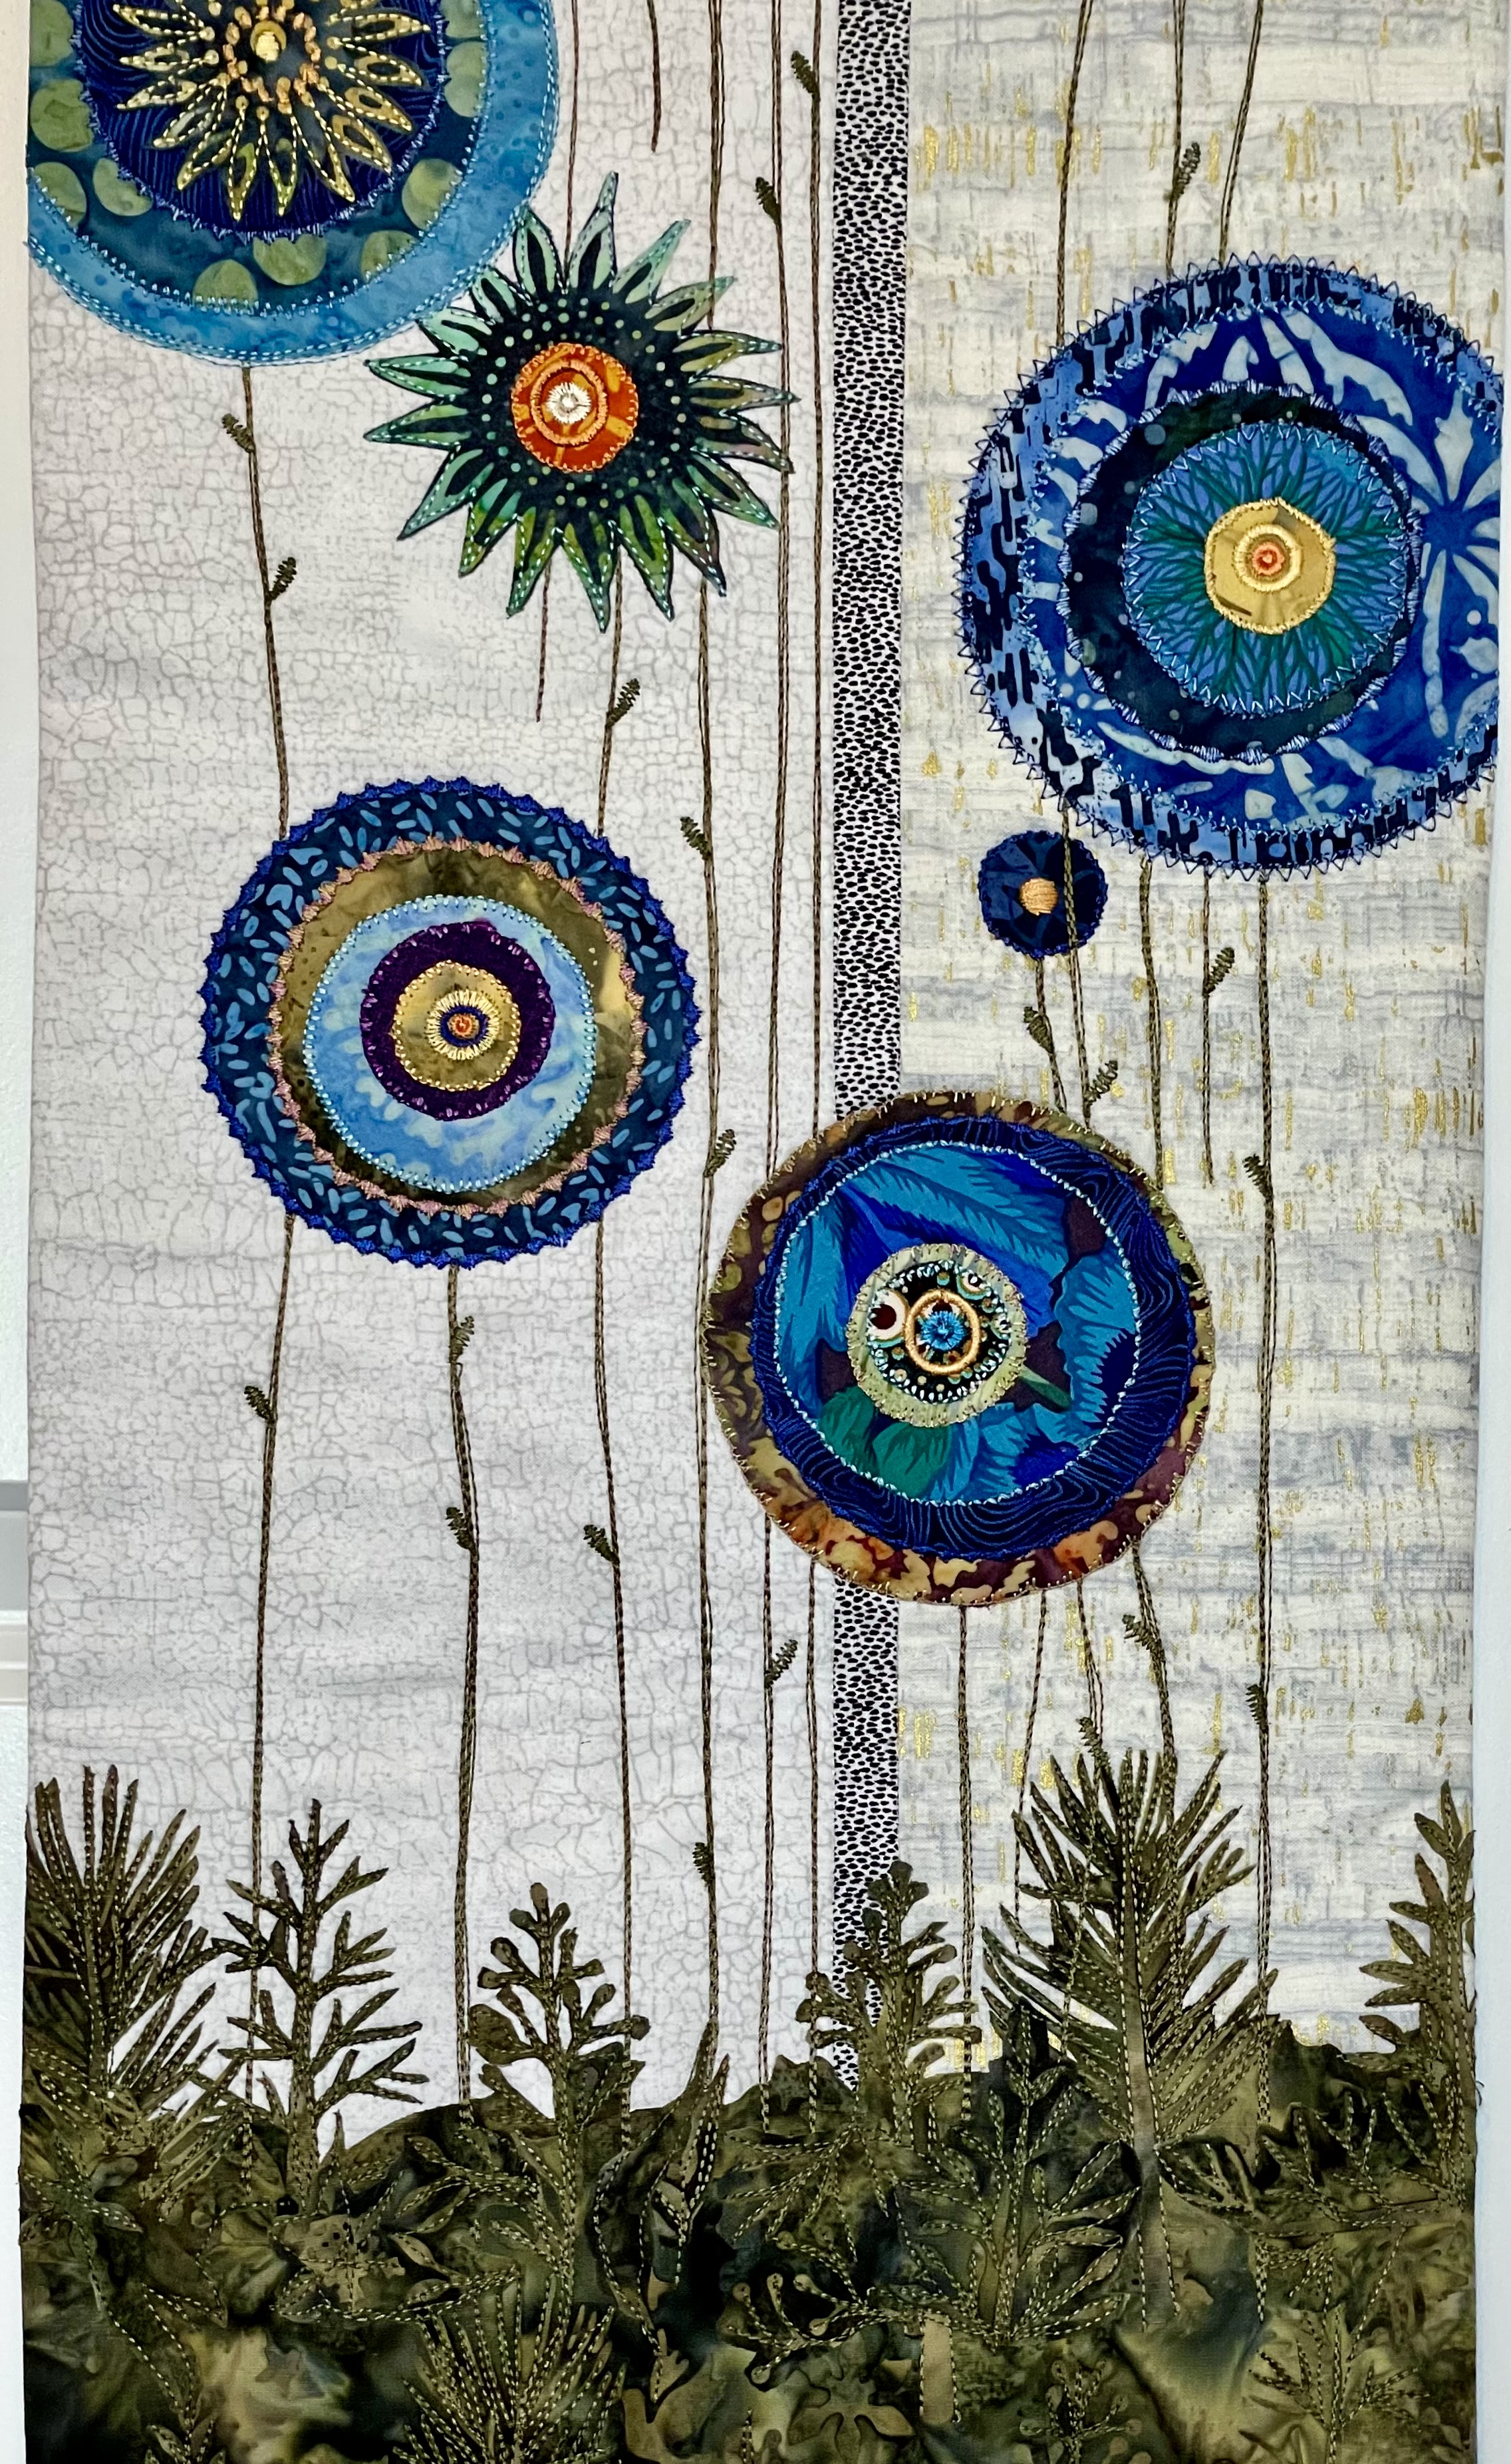
Just finished (well, I’ve still have to hand stitch the hidden binding in place). It took several days to do the thread painting – using decorative stitching around each fabric circle, embellishing the flower centres with embroideries, adding leaves, and stitching the detail in the foreground at the bottom of the piece.
Detail
Here you can see more of the stitching detail – many decisions: what thread colour, which stitches, stitch dimensions. Most of the centre embroideries I’d already set up from a previous floral hanging but they had to be adapted to fit these smaller centres.
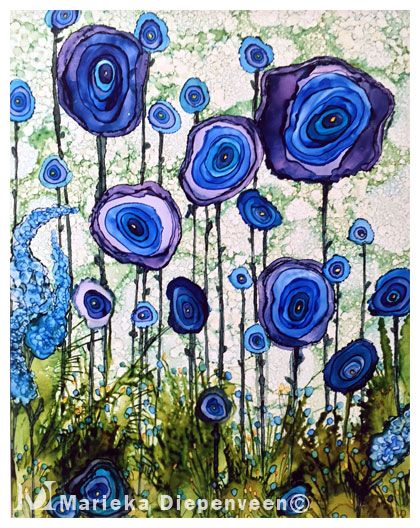
This was the image that inspired the piece:
By Marieka Diepenveen
The piece by Marieka Diepenveen is a watercolour. I particularly liked the irregular concentric blue flower shapes and the tiny leaves growing out of the variable green vegetation. I added more colour and adjusted the dimensions and my circles are regular. My vegetation was dictated by the batik I chose to use which had greenery shapes. I might try another where the flower shapes are irregular….
I started this textile wall art piece on Jan 23. I managed to get the basic appliqués in place and then I was stumped. Before I could embellish the raw edge shapes I had to figure out some way of stitching “stems” for the “flowers”. I thought about cutting narrow strips of various green fabrics, using yarn (yarn couching – using decorative stitches to tack the yarn in place), even stitching over very narrow ribbon. The issue was the colours I’d used in the vegetation at the bottom of the piece which limited my options. I spent time sporadically playing around with decorative stitches but nothing seemed to set up the effect I was after. I had no suitable green/brown yarn in my stash. And trying to force ribbon into gentle curves, even if I could come up with a suitable colour, wasn’t going to work, either.
After finishing a pair of black corduroy pants this morning (more about that in another post), I picked up my stitching sampler, played with a few more decorative stitches and then decided I’d just repeat rows of straight stitching! I practiced a bit. I matched thread colours with the fabric at the bottom of the hanging and started in.
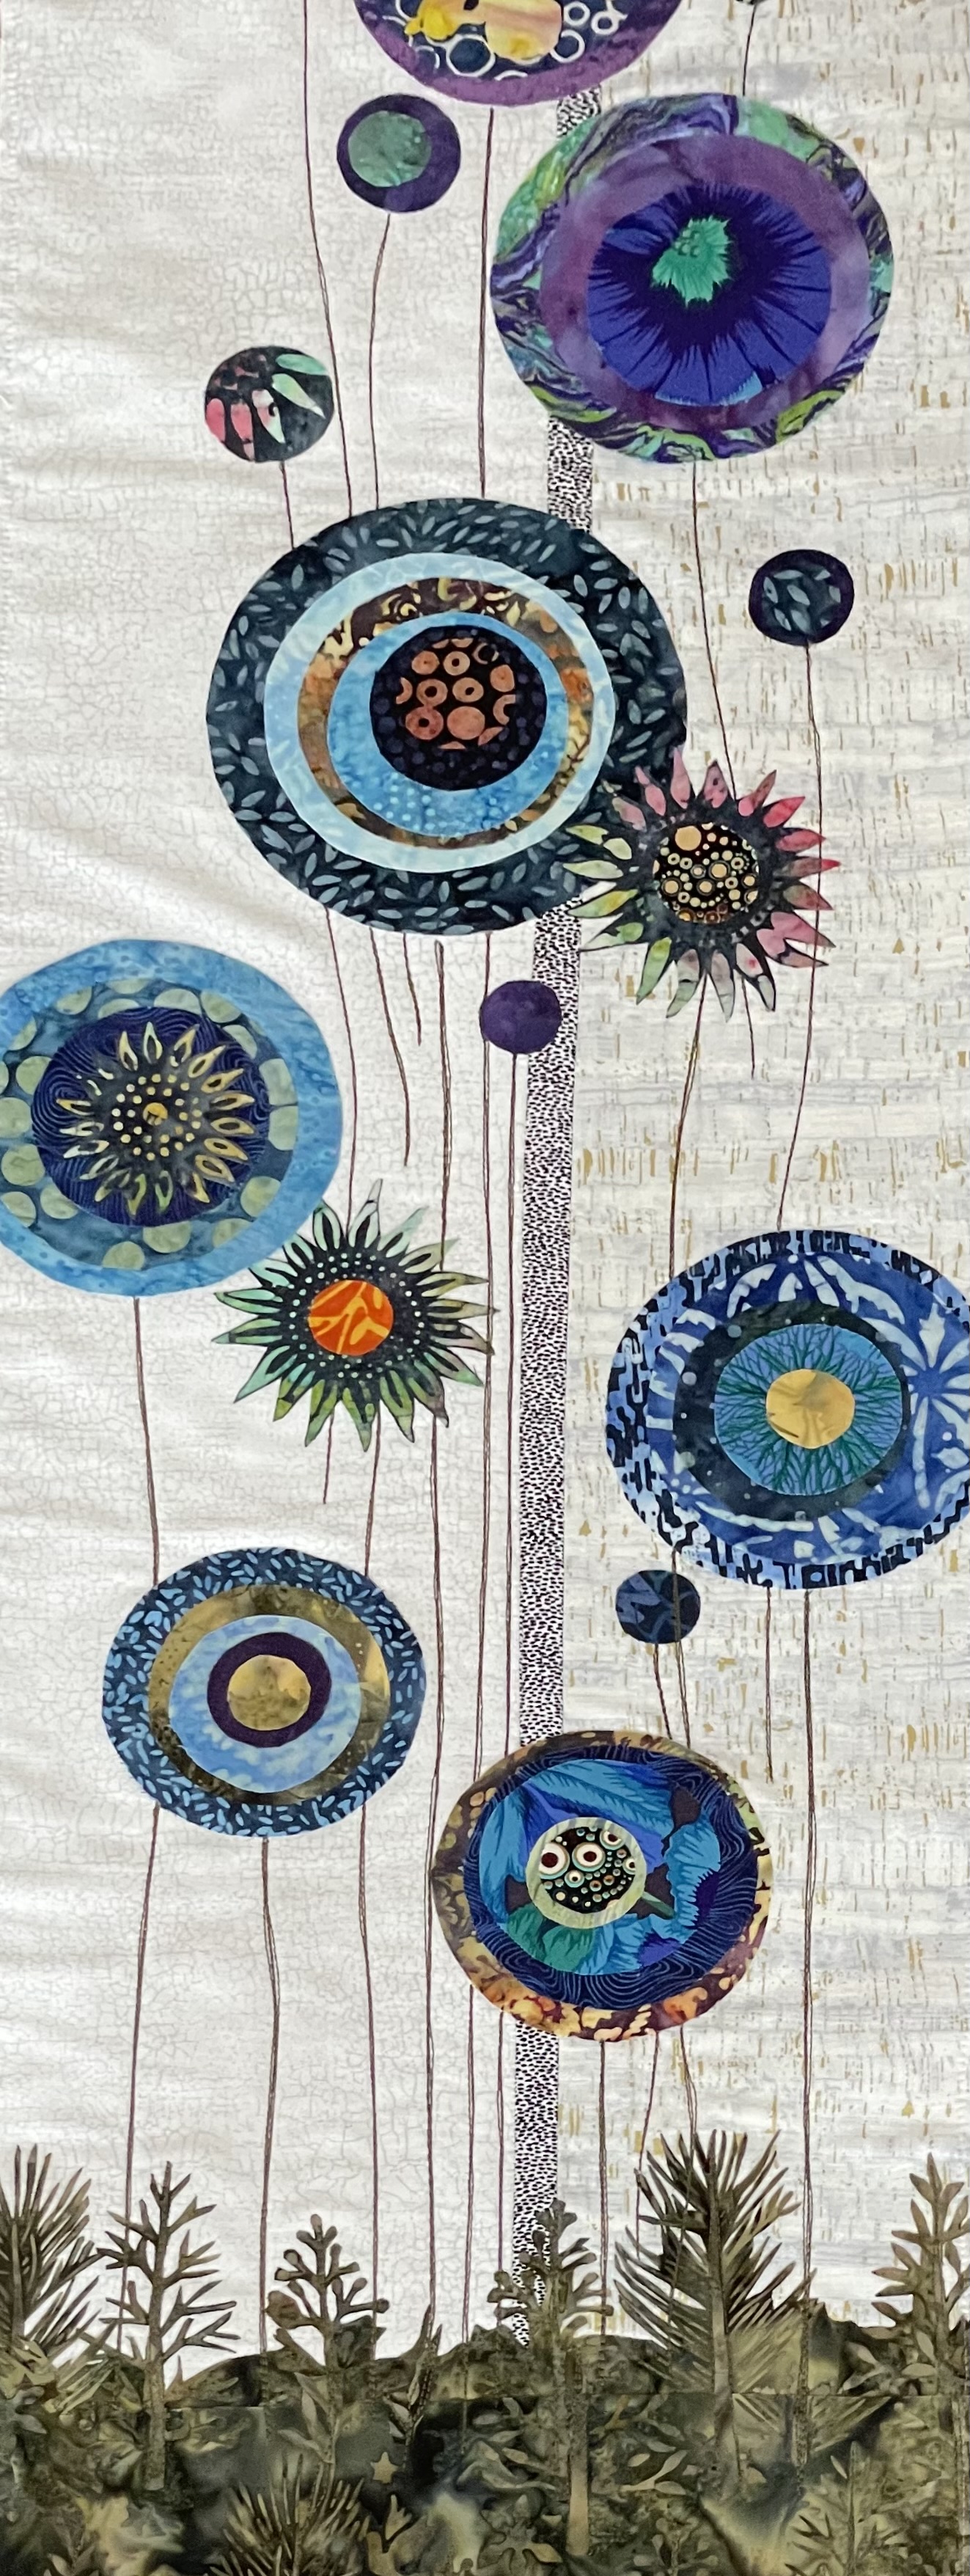
Blue Flowers
This is as far as I’ve got at the moment. Those stems need small leaves of some sort – I intend to work those in last. Next will be embellishing the raw edges of each layer of the flowers to permanently attach them to the backing.
You get the idea here. The vegetation at the bottom also needs a lot more embellishing but that, too will come after I’ve worked on the flowers and flower centres.
I thought it was the COVID-19 Rapid Test Kit building that had interfered with my working on this piece. It wasn’t. It was my not knowing how to do the stems/leaves that had me stopped. I feel like I’m being creative again. Finally!
For some reason I can’t seem to find inspiration for a quilt at the moment – so I’ve turned to smaller projects. Looking through my Pinterest saves I considered the “Skinny Quilt” ideas I’d stored there. Several looked interesting – I selected two, then went through my fabric stash to see what I had that might work for both.
Idea #1
Idea #1
I found a photo of a 4-panel square quilt constructed from blocks with interspersed light and dark. One strip is probably not enough so I think I will work on two, but of unequal width. I started with the light colours – based on a soft teal and juxtaposed some dark blue (with gold), some other blues with greens gold, and finally the tans including two pieces of silk dupione which have a strong grain which I think will work well. I don’t know yet whether I will interject a contrast between the two panel elements, or not. The technical challenge is that the insert strips are cut with a curve which means cutting the seam edge of both fabrics at the same time and sewing the opposing curves. We’ll see how that goes.
Idea #2
Idea #2
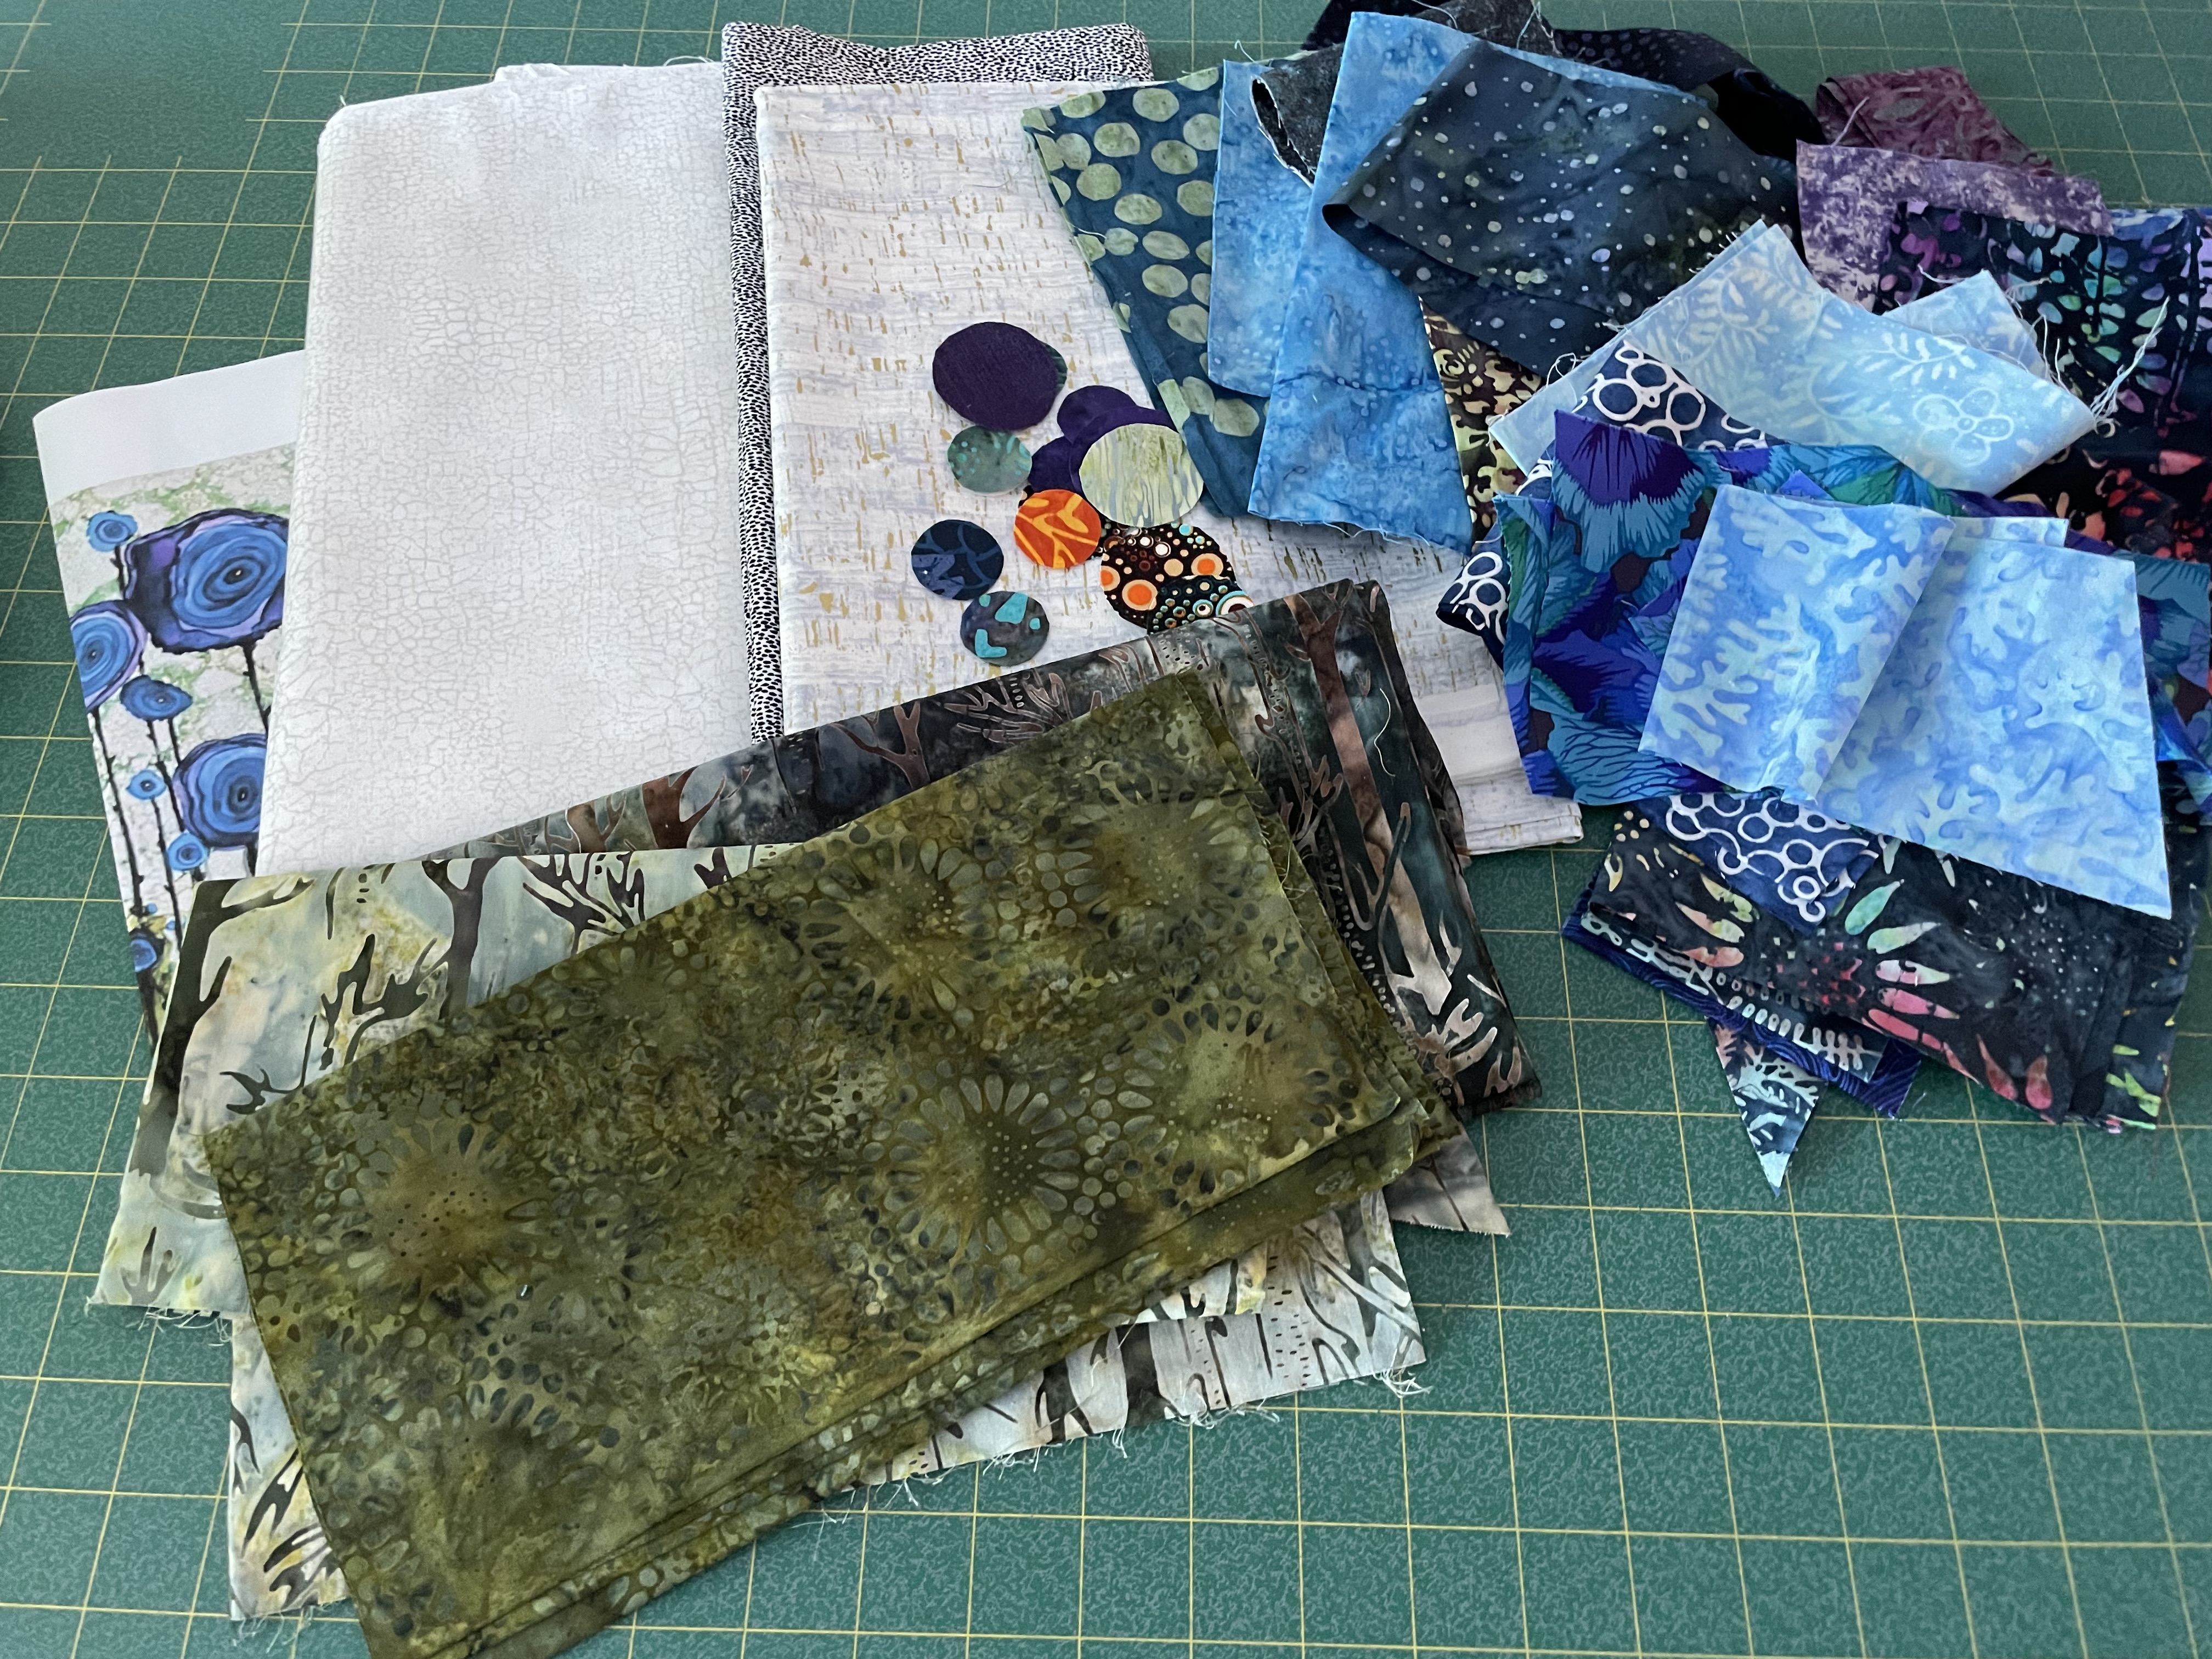
This panel is based on a photo of a painting done by Marieka Diepenveen (you can see it peeking out on the left side of the fabrics – the round blue flowers). Again her painting is a wide rectangle but my intention is to create a panel about 12″ x 50″. I’ve chosen the two pale grey fabrics using the white with tiny black dots to separate them, with a collage of greens at the bottom. I have lots of colourful blue scraps and even some small circles from another project that might work themselves into the banner.