I bind my quilts using 2 1/4″ strips cut from the width of fabric to provide a bit of give as I attach the binding (given the large lap quilt size of my quilts I need six strips). I join the strips using a mitre – the reason is the angled seams don’t attract the eye and often they are nearly invisible.
Sometimes I press the long strip in half lengthwise, but lots of times I don’t bother. I attach the binding first to the back of the quilt starting 10 inches or so from one end (to allow me to create a mitre join when I get all the way around) – no pinning, just stitching in short sections, aligning the binding against the quilt edge (with a hint of stretch), and stitching a smidgeon more than 1/2″ from the edge. When I get near to the join I stop sewing, lay the quilt flat on the cutting table, cut one end of the binding then overlap the second end, measure 2 1/4″ from the end of the first binding edge, and cut. Now I create a mitre to join the two overlapping ends of the binding – I make sure the binding is the tiniest bit short (1/8″ – 3/16″) so I can stretch the joined binding to fit the quilt (that way I don’t get a bubble in the binding). (I haven’t said anything about creating mitred corners – click here to get more or less an idea for how I do it.)
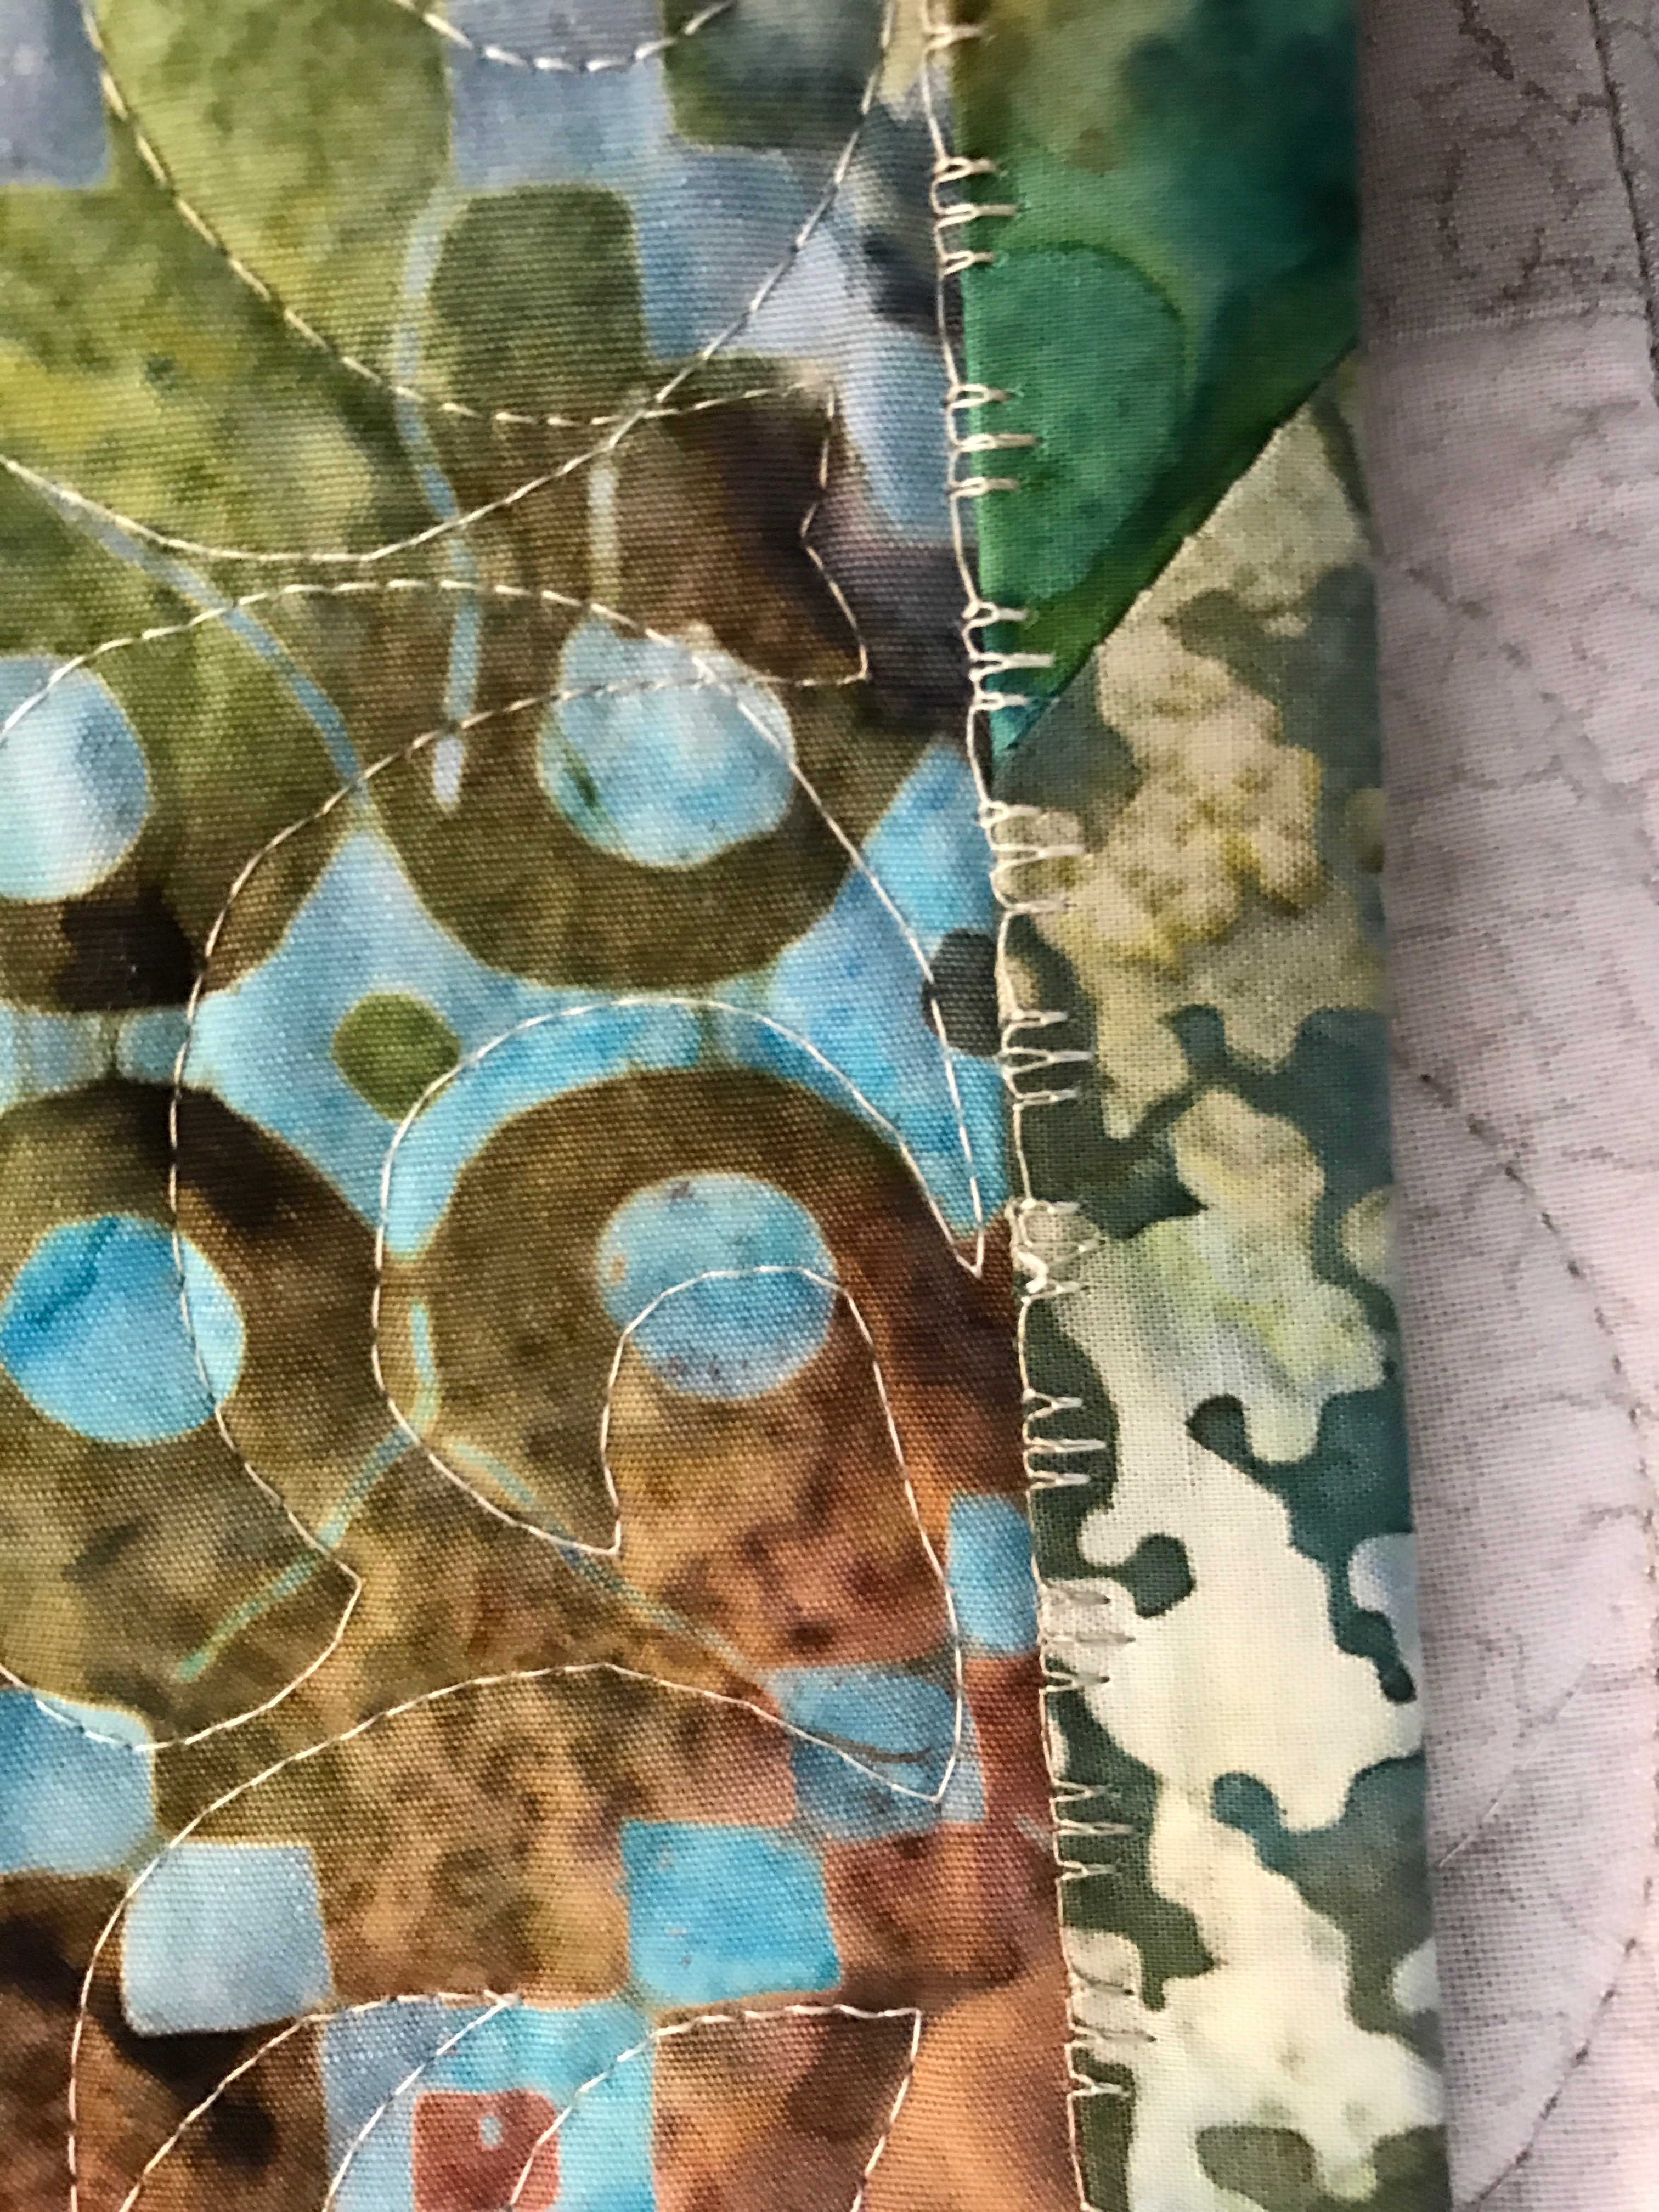
Now I turn to the front of the quilt, fold over the binding, turn it under and pin so the turned under edge just meets my stitching from the back. I have used a number of decorative machine stitches to attach the binding on the front. Here’s the one I use most often:

Binding From The Front
It’s a modification of one of my machine stitches – I am careful to keep the straight stitches along the edge, the stitching to the right and back overlaps the binding and holds it securely.
Binding On The Back
And because I’ve been careful to make my fold align with the stitching, the stitching is pretty much aligned on the back of the quilt (although my stitch tension isn’t always perfect – I don’t worry about that, it is the back of the quilt, after all.)
I’ve done this so many times that it doesn’t take long to bind a quilt.

Thank you for these details! I learn so much from seeing your up-close pictures…and love your work!
If you’ve got questions -ask
I wish I could get the placement of the fold of the quilt consistently right. I find there are always places I have wandered and the stitching doesn’t line up. Your binding looks great!
That’s why I stitch the binding on the back first and do my aligning on the front where I can make sure the fold is precisely lined up with the stitching from the back and I can see see where I’m stitching on the binding. That small change – starting on the back (not the front) and bringing the binding to the front – makes applying a binding very simple!
Thanks
Sent from my iPhone
>