Yesterday, I started by adding fusible web to background fabric. I also did slight enlargements for a couple of parts of the image and printed them on fabric (adding fusible web to those fabric printouts). Today, I started building the background. I had laid out a piece of muslin 20″x24″ and backed it with batting; I serged around the outside to hold the layers together, then marked the horizontal and vertical centres to use for marking the 9″x12″ layout for the image. The muslin/batting functions as a canvas for the fabric/thread painting that becomes the art piece. I’ve purposely made it quite a bit larger than the image to give me lots of room to frame, then trim the piece.
Rather than trying to piece the hosta in the upper left corner I elected to use the image printed fabric and I will add definition with thread painting. Same with the poppy leaves – they are very fine and frilly and I didn’t have any fabric that implied the texture so I also chose to use the image printed fabric for them as well. The taxus, the grass, and the blue house are filled in with printed/batik fabrics. I pressed the elements into place leaving an opening for the poppies which, for the moment, are being shown with an outlined paper cutout.
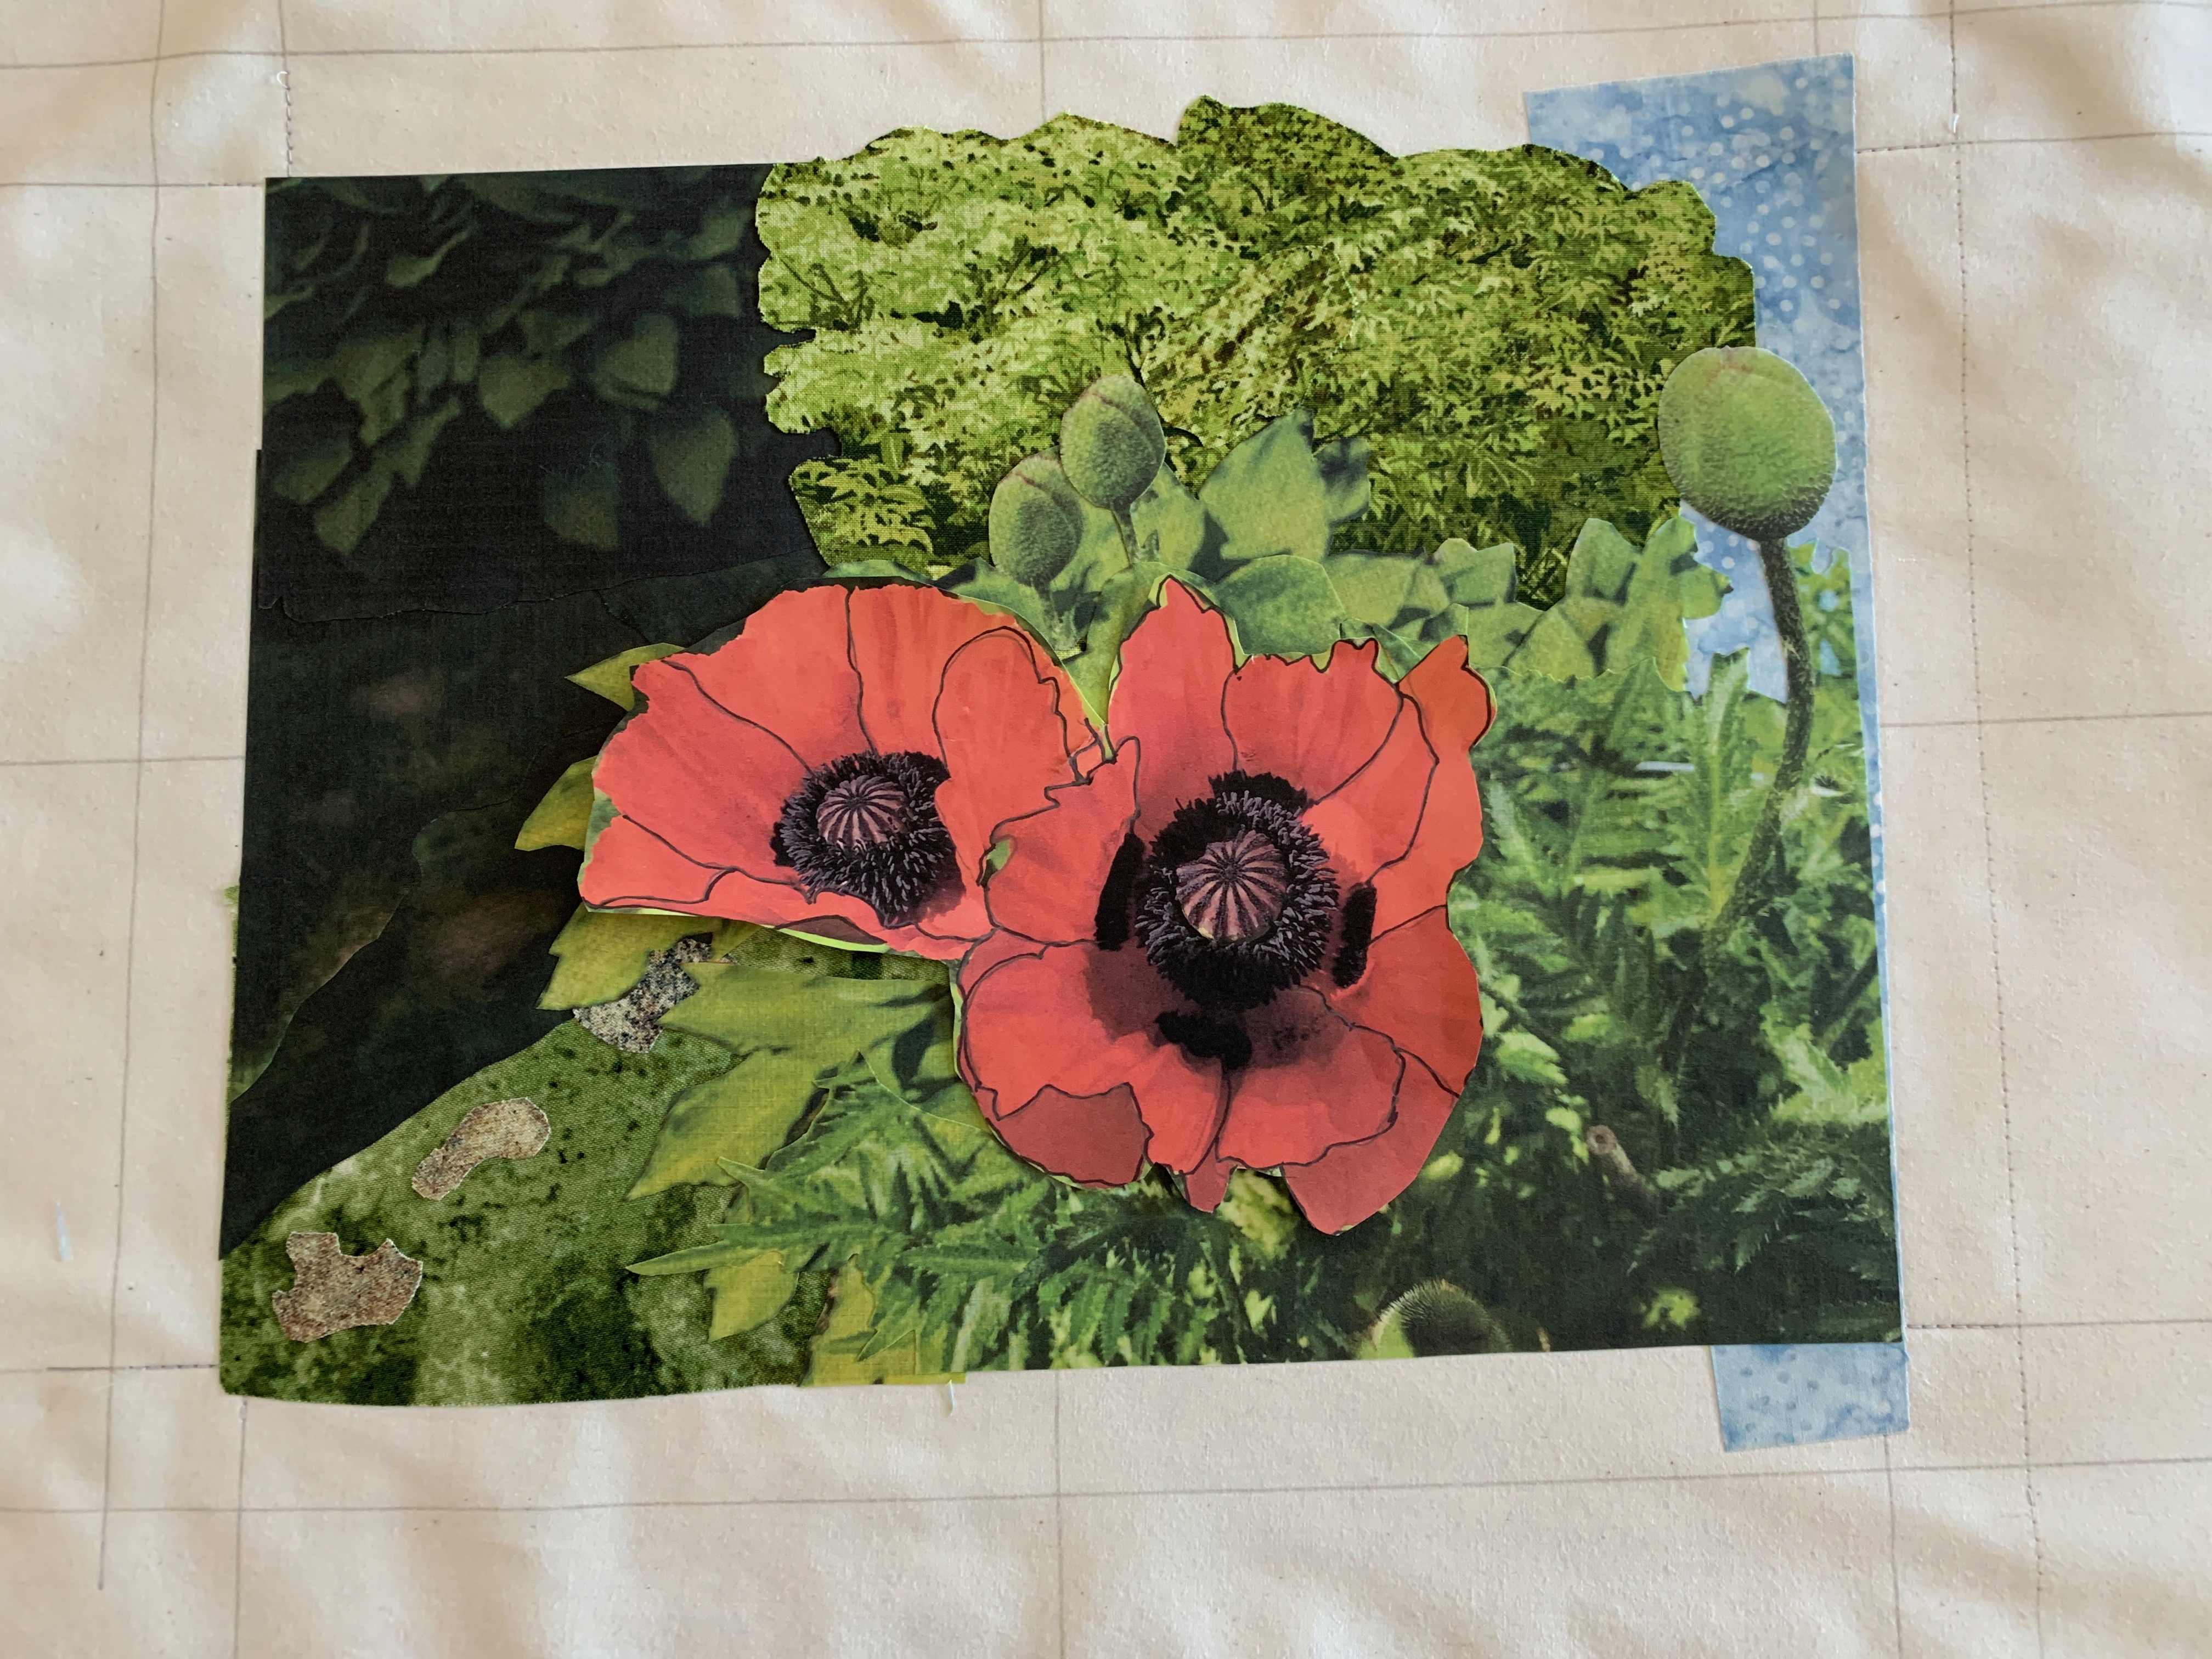
Background In Place
Once the background was set up, I traced the poppy petals based on the lines marking petal edges on the paper flowers. So far I’ve cut out the templates for the larger flower and begun cutting out fabric using the templates – I’m about half-way around the flower. I numbered each petal element both on the template and on on the paper so I can easily reconstruct the flower.

Templates Created For First Poppy
I will set up the poppy using a silicon press sheet so the fusible web on the back of the petals won’t stick to my ironing board. Once assembled, I’ll iron the completed flower in place – that’s after I build the other flower because the flower on the right overlays the smaller, one!
And then the thread painting will begin….