
It snowed quite a lot last week. I happened to visit a friend who lives on a lake in the area with a fast flowing brook/stream past her house.
A typical winter NS winter scene.
It snowed quite a lot last week. I happened to visit a friend who lives on a lake in the area with a fast flowing brook/stream past her house.
A typical winter NS winter scene.

I bought some sock yarn from Knit Picks a few weeks back. A superwash fingering weight self-patterning yarn that has a lovely feel to it, and an interesting pattern, to boot.
I bought four skeins of yarn in a range of colours. This one is called “Cameo”. It turned out a very nice pair of socks!
I know, we’re supposed to give up fabric masks in favour of single use surgical or N95 masks but I hate the waste associated with those and besides my masks are made using a high grade quilting cotton with non-woven interfacing stitched into the middle; mine are three-layer masks.
More important those awful disposable blue surgical masks don’t fit me very well (I have to flip the elastic to fit over my ears to suppress my glasses fogging which makes the sides stand open), whereas my homemade masks do! And fit is more important than the materials used in construction, according to the experts I’ve read.

With Omicron being rapidly transmitted throughout the community I decided everybody could use a new well-fitting face mask as a gift. I started making a batch ten days ago. I made a dozen which I gave away yesterday to the knitting ladies. I have another dozen cut out and ready to assemble – have to work on those today and get them made and washed so I can distribute them, too.
The pattern I’m using this time is the one from SeeKateSew. She provides a template for cutting out the masks. This mask is close fitting but because of the origami folds top and bottom it provides breathing space and I find it comfortable.
I don’t do the folded side in the instructions to enclose the elastic. Instead I insert the elastic into the seam as I construct the facemark which makes the sides a bit longer. I use 6″ – 7″ lengths of elastic depending on the face size of the person I’m making the mask for. When I use a longer elastic I add a silicon slide near the bottom of the mask so people can shorten the elastic if the mask fit is too loose.
Now back to sewing….
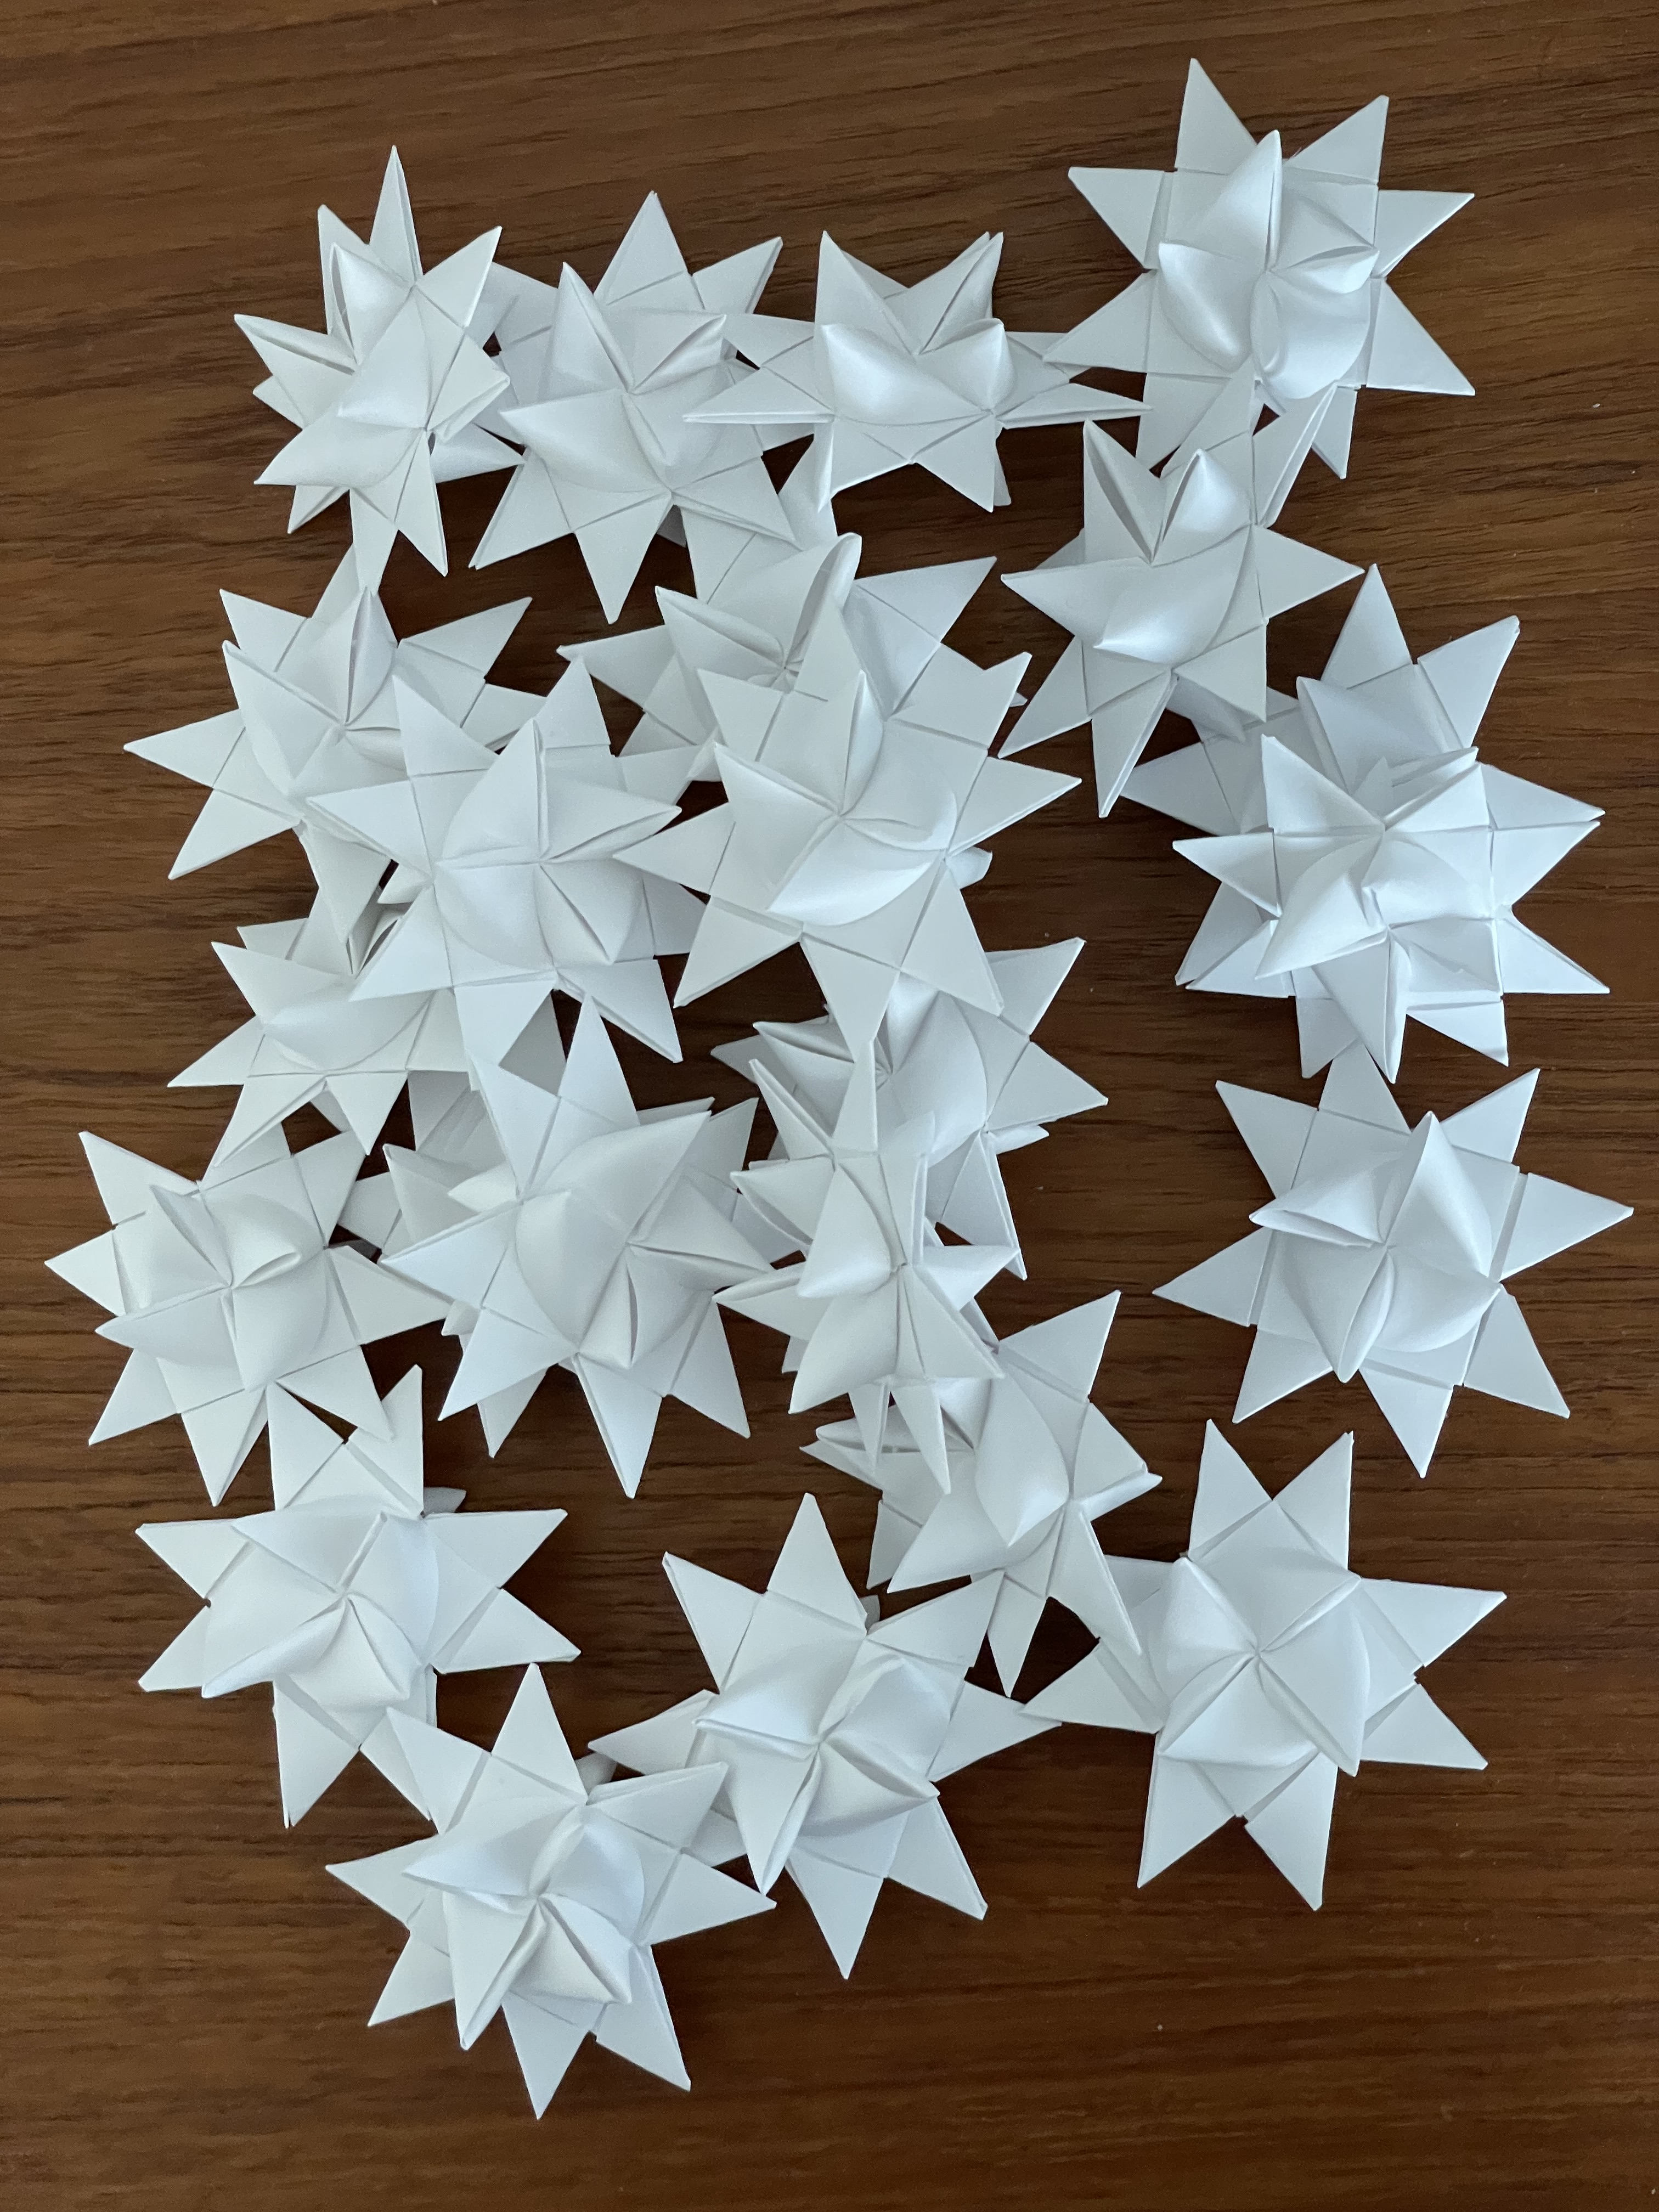
It’s become another recent Christmas tradition – I make a few Danish paper stars to hand out to my neighbours and friends in the apartment building. I finished the two dozen I was planning to make last evening. All they need now is string so they can be hung on a tree or wreath. I’ll pass them around as soon as I get that done, later today.
If you’re interested in trying your hand at making these I found, after a lot of searching, some instructions online: Danish Paper Stars. Let me know how you get on.
It took a star or two before I wove the initial paper strips in the right counterclockwise direction (short arm on top). Once I got the initial steps right, my hands remember the twisting movements and the rest of the folding and twisting are there.
I learned to make these stars at least 40 years ago. Didn’t make them for many years. Started again four years ago. Another few years and people will have enough stars to decorate an entire tree!

This season I bought my usual Amaryllis but there were Calla Lily kits available, too. So I picked up one just to see what it would turn out like.
Long and gangly. Looks like I will have just three blooms on the plant. The first flower has already lasted at least three weeks – the Amaryllis has come and gone but these three Calla Lily flowers are still going strong.

I was surprised by the green hue of the Amaryllis – I did get four flowers on a single stock but they weren’t the vibrant colour I expect from this bulb.
I don’t do a lot of Christmas baking – the fruitcakes and one other pastry – a large cookie sheet of shortbread topped with candied fruit, chocolate chips, shredded coconut, raisins, dried cranberries, chopped pecans all mixed together using Eagle Brand condensed milk! What could be bad about that, right?
The original idea came from a package of shortbread mix from Robin Hood Flour but they stopped making the kit a gazillion years ago. I have a great simple traditional shortbread recipe I use and add the topping and then I do my best to give this pastry away as fast as I can!

Here is the recipe:
Mrs. Cooke’s Shortbread
(I double this recipe when I make my shortbread bars because I need enough shortbread to cover a large cookie sheet)
Preheat oven 350° F
Cream butter, add sugar, vanilla, and last the flour; Mix well until you have a crumbly texture
Dump onto a large non-stick (or parchment lined or Silpat covered) cookie sheet
Press firmly, particularly at the edges
Pierce with a fork to allow the shortbread to expand uniformly
Bake for 15 minutes, then rotate cookie sheet 180° so the shortbread bakes evenly, then bake for another 15 minutes.
The shortbread won’t be quite fully baked but that’s how you want it because you’re going to continue baking after you add the candied fruit topping. Let the shortbread cool for 10-15 minutes before proceeding
Candied Fruit Topping
Put all the topping ingredients into a large bowl, add the condensed milk and mix as well as you can – it’s a sticky mess but is it ever going to be good.
Spoon the fruit/condensed milk mixture onto the shortbread making sure you spread it evenly to cover the entire surface of the shortbread (try getting as close to the edges as you can – don’t want to waste any of this Christmas bar).
Bake 25-30 minutes at 350° – until the coconut begins to turn golden.
Cool on a rack, then cut into bars. I cut the entire concoction into 8 portions – which in turn can be cut into 12-16 bite-sized bars. This stuff is SOOO rich you don’t want to serve more (although you’ll want to eat more).
I make these Christmas bars about three-four weeks before Christmas. Slip each of the 8 portions into its own small ziploc plastic bag, store them in the fridge until I give them away.
Let me know how it goes if you decide to try them – they’ll be an instant favourite – trust me!
Throughout the past year and half, Nova Scotia has been focused on early detection of COVID-19 cases. To begin with that meant many Pop-up Rapid Testing sites – staffed by volunteers, in locations where the presence of CoVID-19 was suspected. I helped out with that effort, registering people as they came in. I did that for a couple of months until the number of cases declined, and while a couple of testing sites continued, they were downtown and difficult for me to get to, so I stopped volunteering.
On Nov 9, I joined the Rapid Testing “Test To Protect” effort. For a couple of months volunteers had been making up rapid testing kits for distribution to the airport but the effort ramped up in late October when the NS Department of Health decided to issue kits to school children in order to pick up early warning of COVID-19 spreading among unvaccinated school-age kids. I decided it was time I helped out again. So a couple of times a week, until last week when TTP closed down for the holidays, I helped assemble Rapid Test Kits.
You wouldn’t think putting a few bits and pieces into plastic bags would take much effort – but it did. A four hour shift doesn’t seem like a lot of time – but it was.
When you walked into the assembly room (a large open space with 25 tables – one person at a table, , hands sanitized, wearing a mask) the walls were lined with large labelled boxes – some holding test kit stuff, others already packed with test kits ready for distribution, and on tables dividing the room a WALL of small boxes containing what you needed to make either 30 or 15 kits depending on the batch we were preparing.

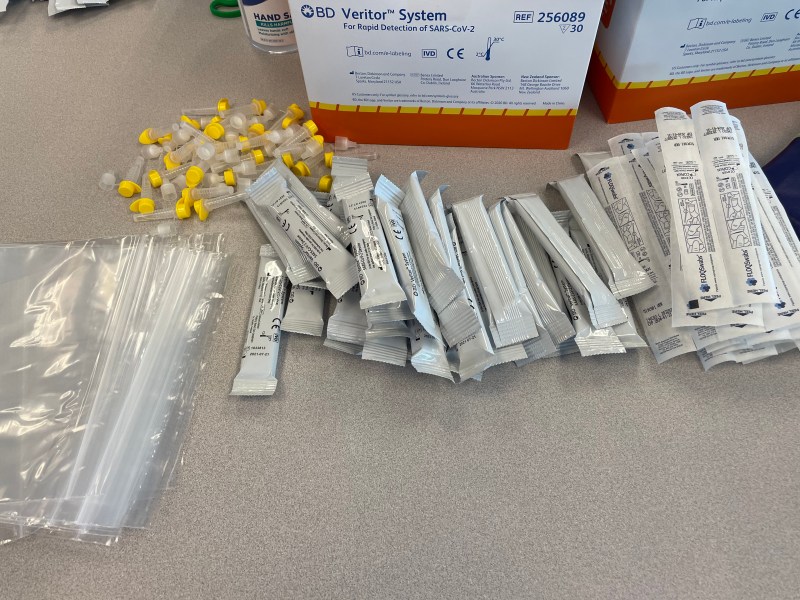


You started by adding labels to the bags explaining the “expiry” date on the test strips could safely be ignored. Next you carefully laid out the test components (swabs, test strips, small vials with testing solution) so you could pick up what you needed to place in each bag. Then you filled and sealed each bag and placed it back in the original box.
We started out assembling 30 single test kits; we progressed to 15 double test kits – these to be handed out to arriving passengers at the airport. Working as quickly as I could, it still took me slightly more than 15 minutes to do a single box of test kits. The assembling took a lot of repetitive physical effort (the tables were a bit too high for me – I found it less stressful on my back and shoulders to stand when filling the bags). More difficult was the concentration required to make sure you put the precise number of each component into each bag! You didn’t want to end up short something or to have something left over – that meant you had to go back through all 15 or 30 bags to find where the error had happened! Each bag needed to have the exact number of swabs, vials with testing solution, and testing strips!
I breathed a sigh of relief every time I finished a set of bags neither short something or with any component left over.
In three and a half months, hundreds of volunteers have managed to assemble well over 500,000 test kits for kids and arriving passengers at the airport. A herculean effort. We don’t know yet whether we’ll be called back into action in January but I’m sure everybody who helped out will return, particularly since Omicron looks like it’s set to take off like wildfire here in the province as it has everywhere else.
