This afternoon I watched Janet Pray’s discussion of “order of construction” (at 3:50 minutes when Janet arrives on the scene) – the order in which you construct garments – something I learned from her several years ago (actually in 2010) when I attended a shirt-making week with her in Ancaster (near Hamilton ON). Up to that point I more or less followed pattern instructions like the rest of us home sewers, but Janet’s explanation of how to think about garment construction based on the idea of “sew on the flat” changed how I approached any garment making I undertook from that point on.
Industrial sewing is based on the easiest, most efficient way of constructing garments – that means all the prep work is done first – everything is cut out at the same time – outer garment, lining if there is one, interfacings. Next all interfacings are applied to the appropriate pieces, all exposed edges (like the open edge of a facing) are finished (either by serging, or turning under, or with a Hong Kong finish).
Then pockets are constructed and stitched to flat pieces to which they belong, plackets in shirt sleeves, shirt fronts, pant fronts (a fly front is really a kind of placket) are also constructed before the garment is assembled. Collar/collar stand are sewn so they’re ready to be attached after the shoulder seams are stitched, or the neckline facing is prepared at the same time you’re doing all the other facings.
You can see what I’m getting at here – all the detail embellishment is much easier to do while the main pieces are still separate and “flat”.
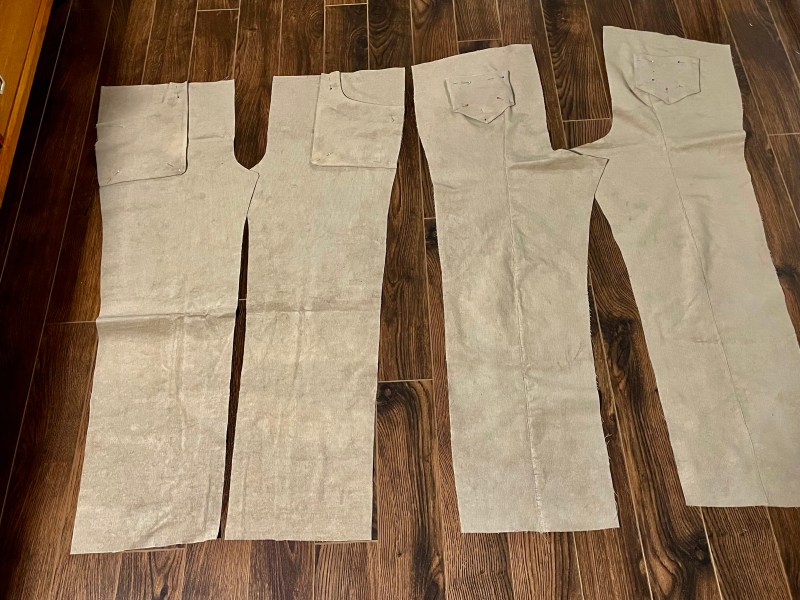
Here’s my current project – a pair of cords. I followed the order of construction – first I sewed/serged the centre back seam in both back pieces (this back seam is really a teardrop dart that takes out the fullness under the bum and back thigh area of my pants because all pants are too baggy in the bum for me – this solution gives me a decent silhouette and fit). Then I pressed the seam open, edge stitched it flat, pressed again.
Next I constructed the pockets. I fused interfacing to the front pocket facing and back pocket top flap, serged exposed edges, stitched front pocket facing to pocket, pressed, edge stitched, turned and stitched facing in place; serged exposed top edge of pocket flap, folded right sides together, sewed side edges of flap, turned right sides out, pressed, top stitched flap in place. Pockets ready, I pinned them to the corresponding pieces.
Tomorrow I’ll edge stitch the pockets in place, sew the inner leg seam, then the outer leg seam, slide one side into the other side and sew the crotch seam (which I’ll edge stitch for strength). I’ll serge the hem edge and add the waist facing. Once the facing is attached I’ll thread elastic through, hem the bottoms (using my coverstitch machine) and the pants are done.
I could easily have put in a faux fly front as a decorative detail – but since any top I put on will cover the top of the pants there really isn’t any reason to do that bit of extra work.
If you’ve not thought about “order of construction” for garment sewing I recommend watching Janet’s explanation.
These pants are pull-on. Had they had a fly front – that would have been done after I’d added in the pockets.
A good set of instructions for inserting a fly front: Sandra Betzina: https://jmncreativeendeavours.ca/wp-content/uploads/2015/01/flat-fly-front.pdf
Here are two links to useful information about the order of construction:
Janet Pray: https://jmncreativeendeavours.ca/wp-content/uploads/2026/06/janet-pray-order-of-construction.pdf
Alexandra Morgan: https://jmncreativeendeavours.ca/wp-content/uploads/2026/06/alexandra-morgan-order-of-construction.pdf
