I spent much of the morning cutting out circles – 5″, 4″, 3.5″, 3″, 2.5″, 2″ & 1.5″. They still have the fusible web paper on the back, nothing here is permanent yet.
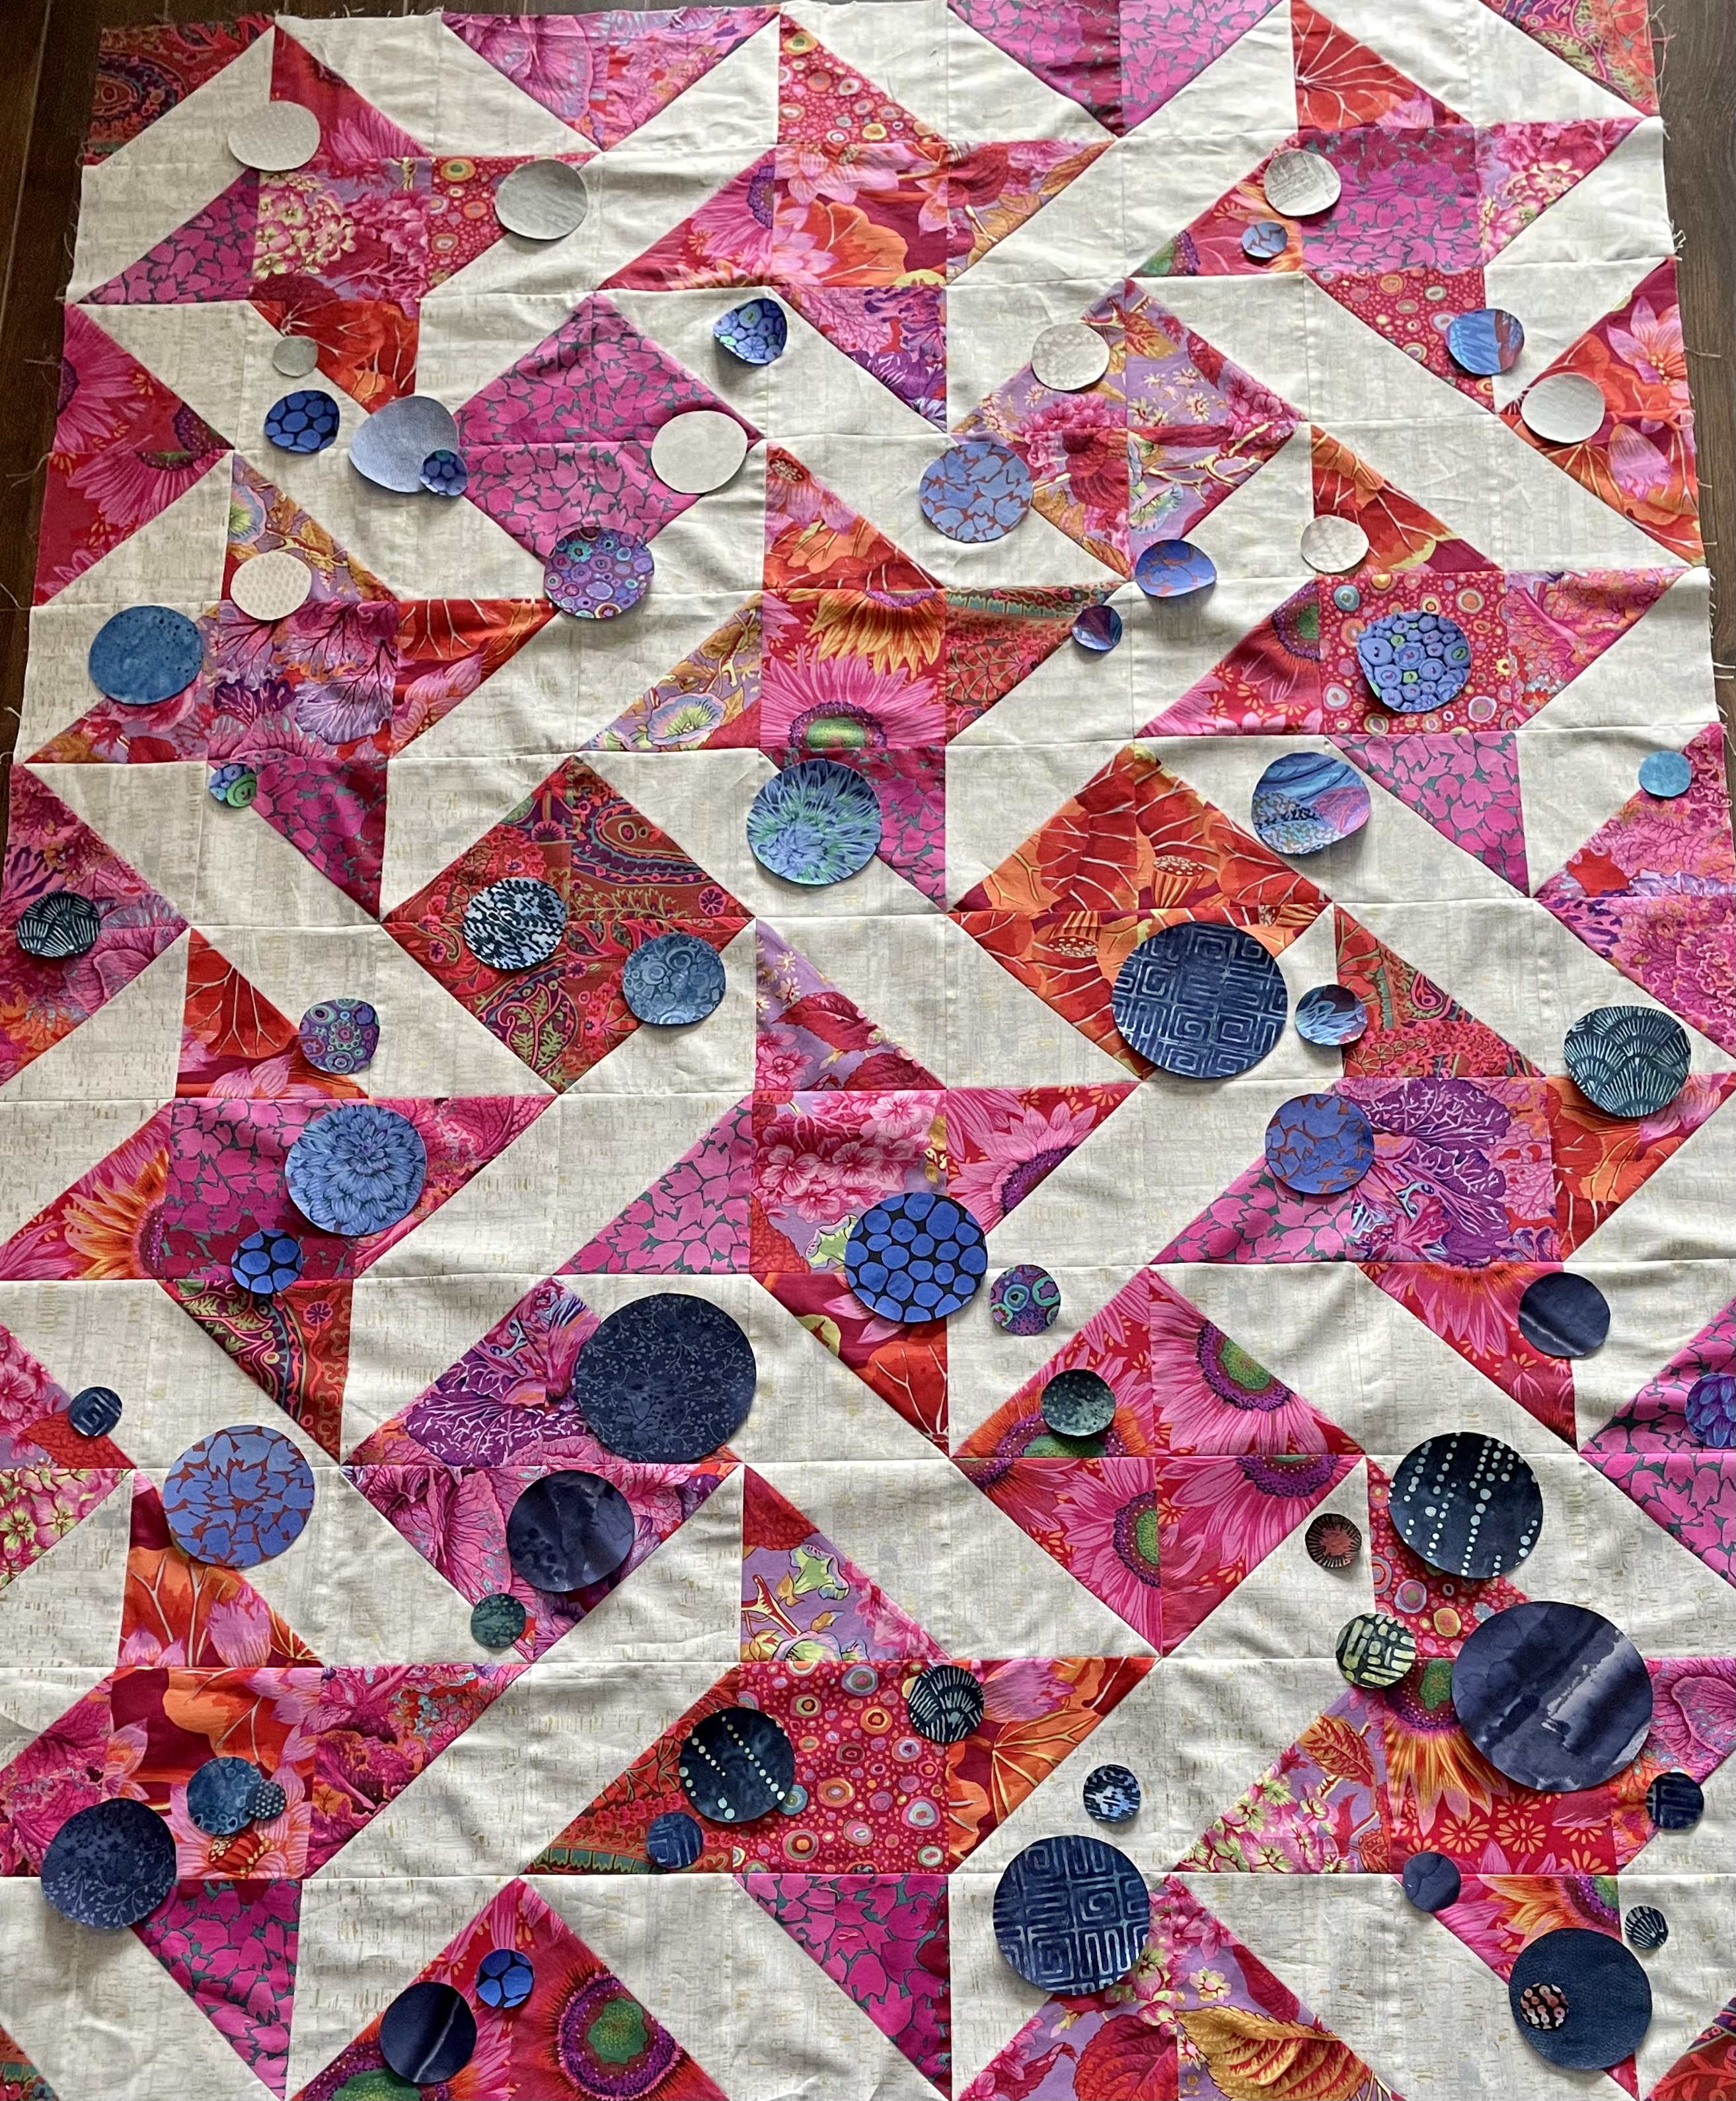
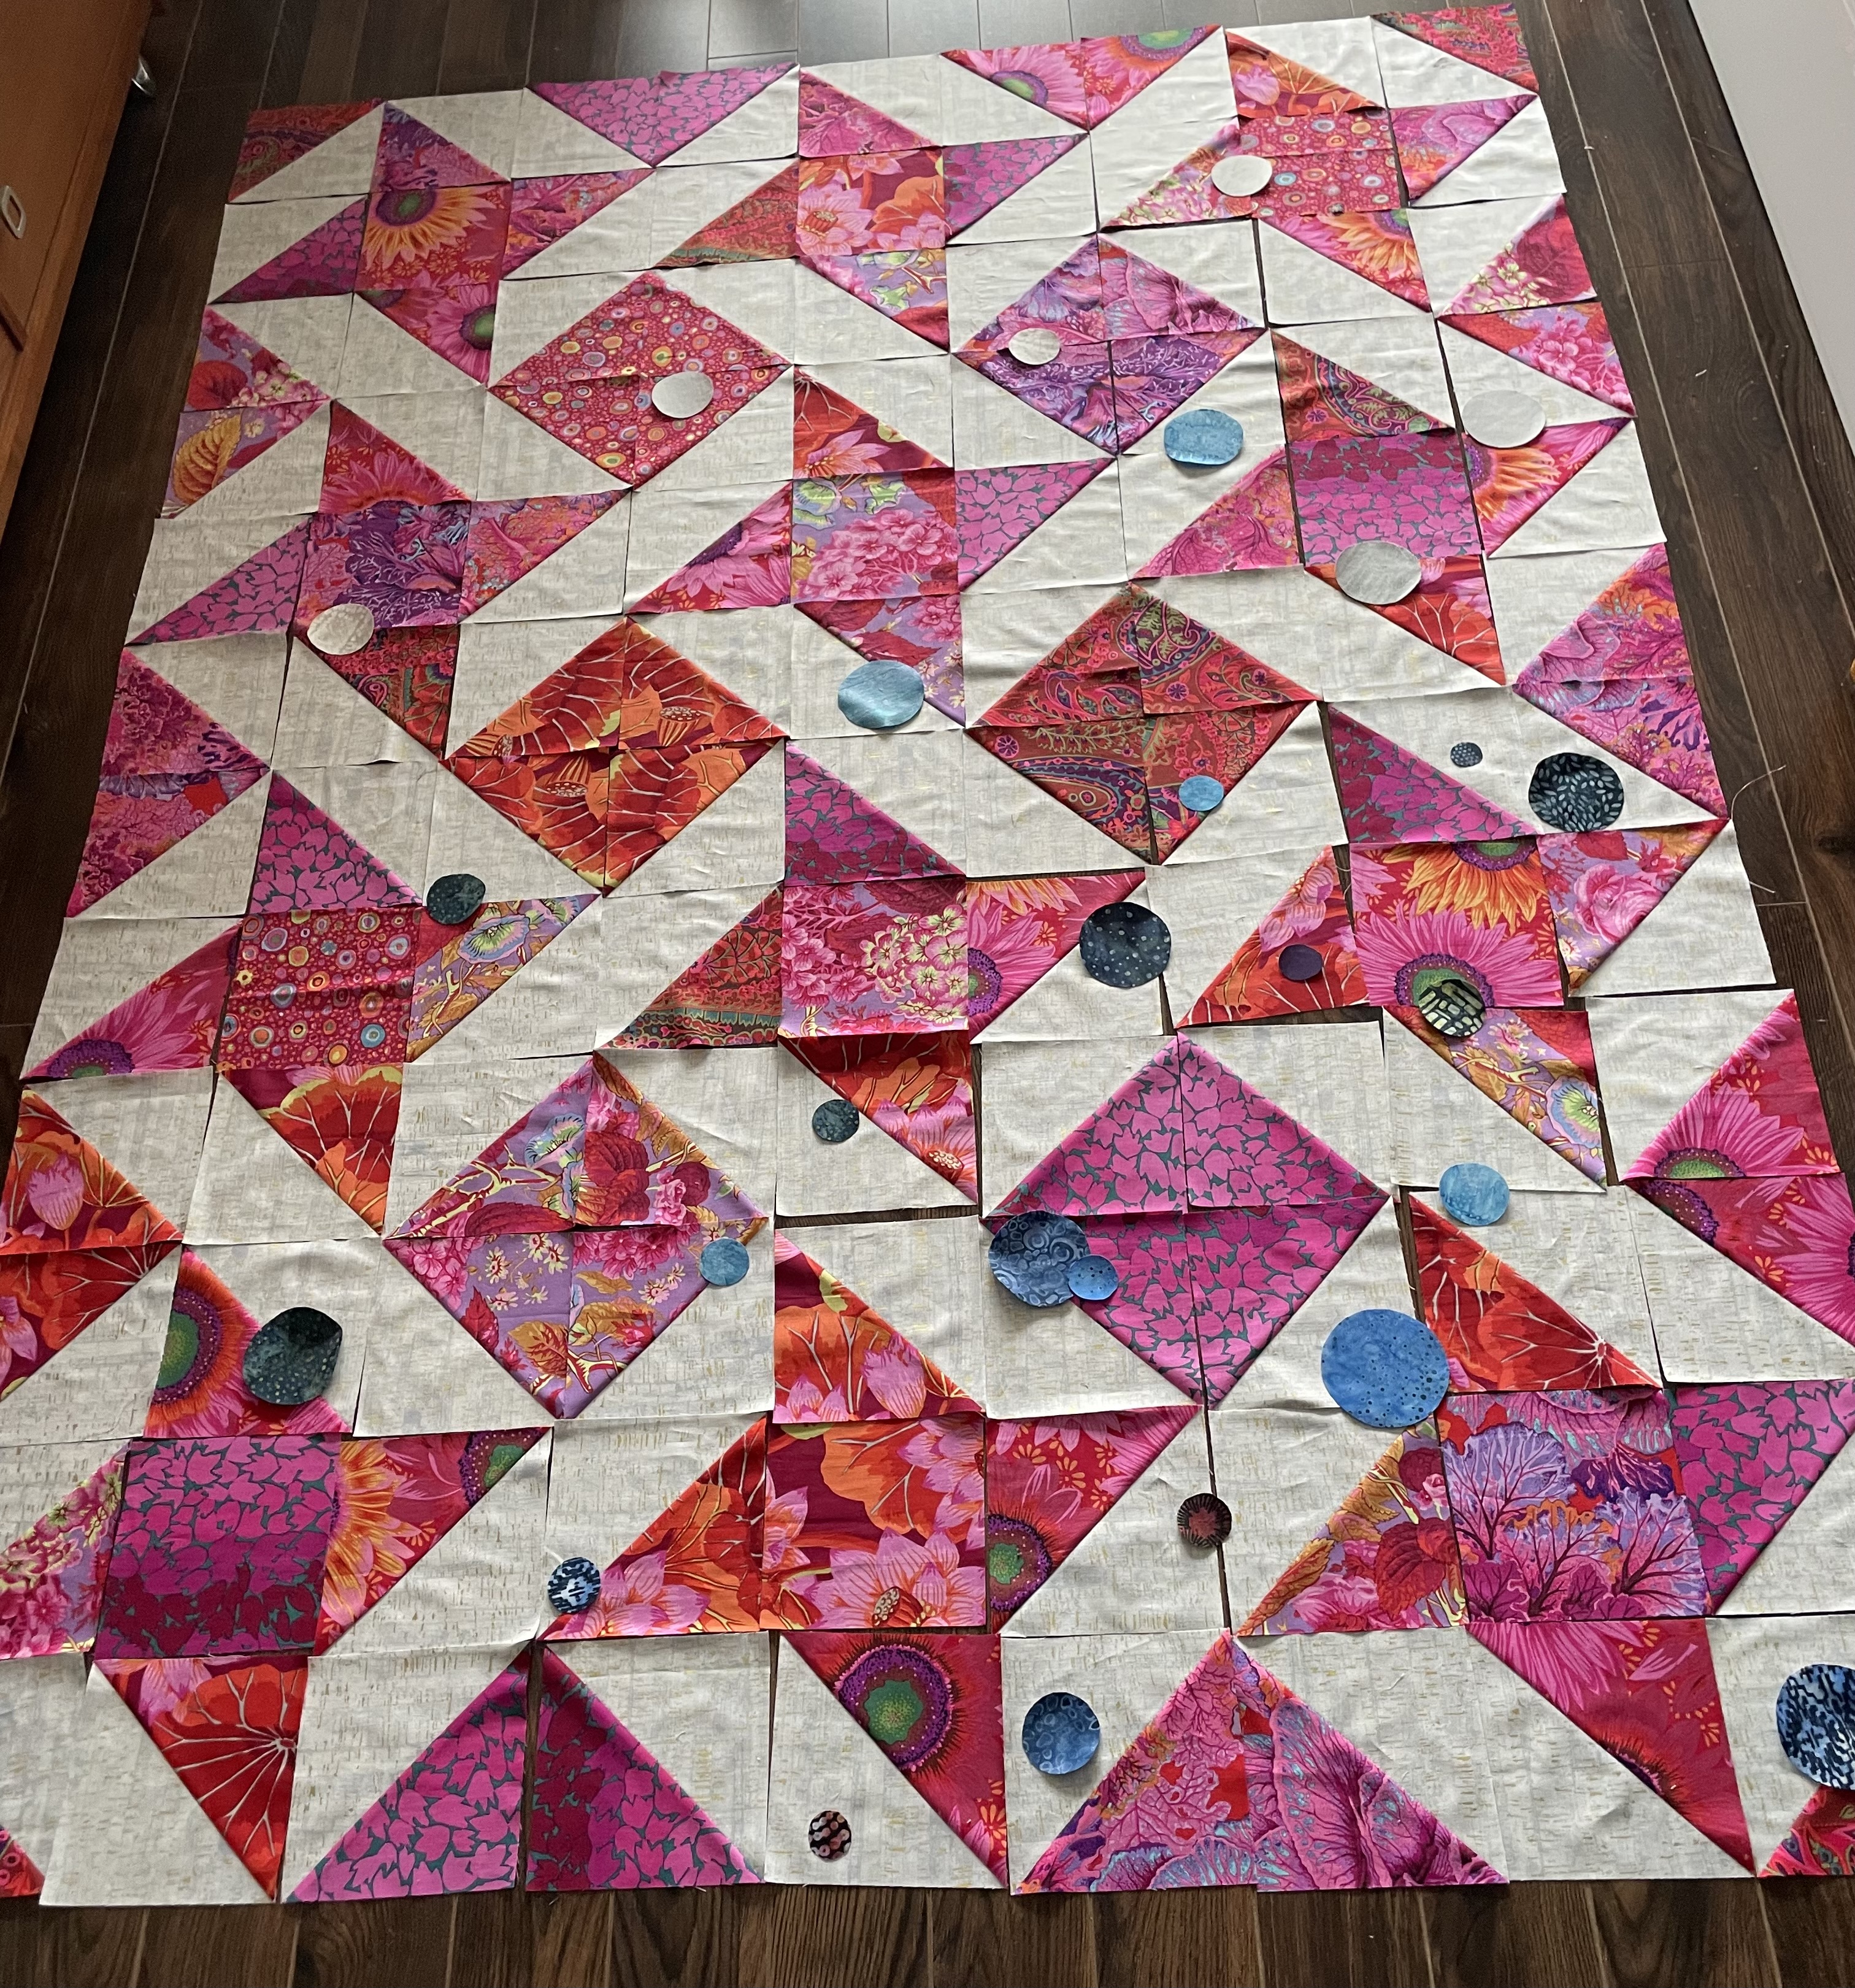
I’ve tried creating a gradient from dark on the bottom right to light on the top left – that seems to be working quite well. I’ve also made the layout denser toward the bottom, less dense toward the top. I’m more or less happy with how this has laid out – next step will be to pin each circle in position.
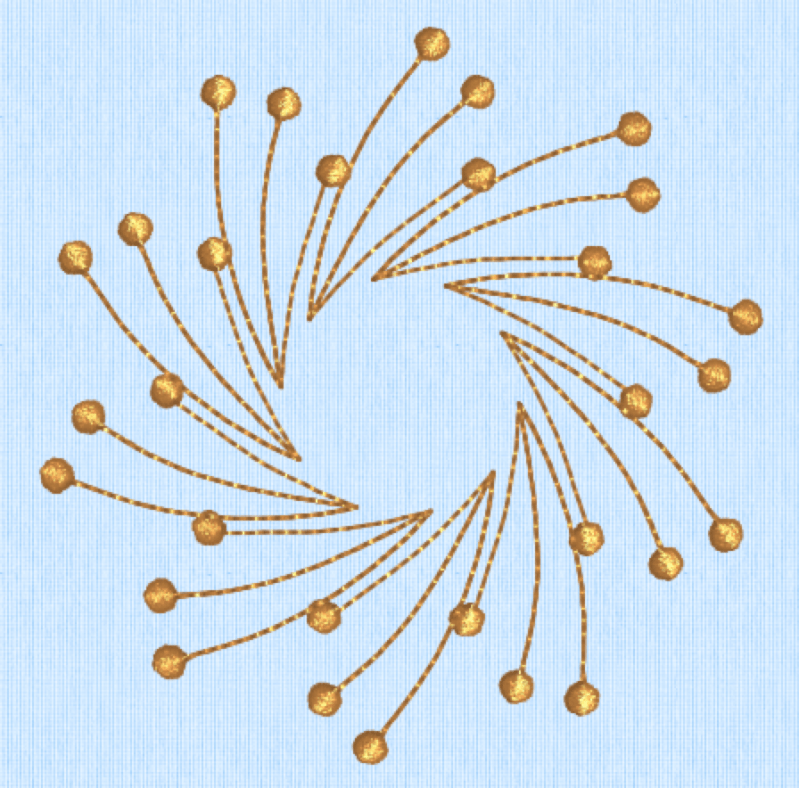
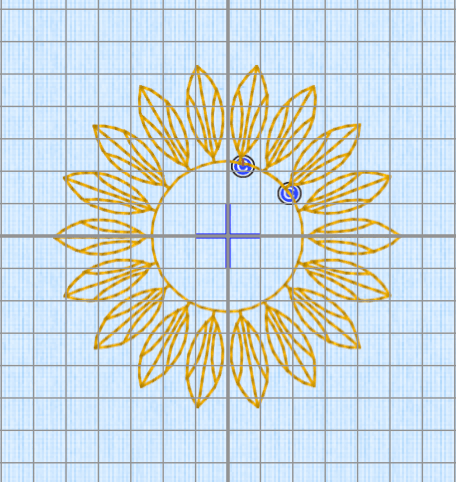
This is only part of the design – my intention is to do 3-5 largish circular embroideries in strategic spots. I also spent time this morning going through my large collection of embroidery designs selecting circular/floral embroideries that might enhance the quilt further.
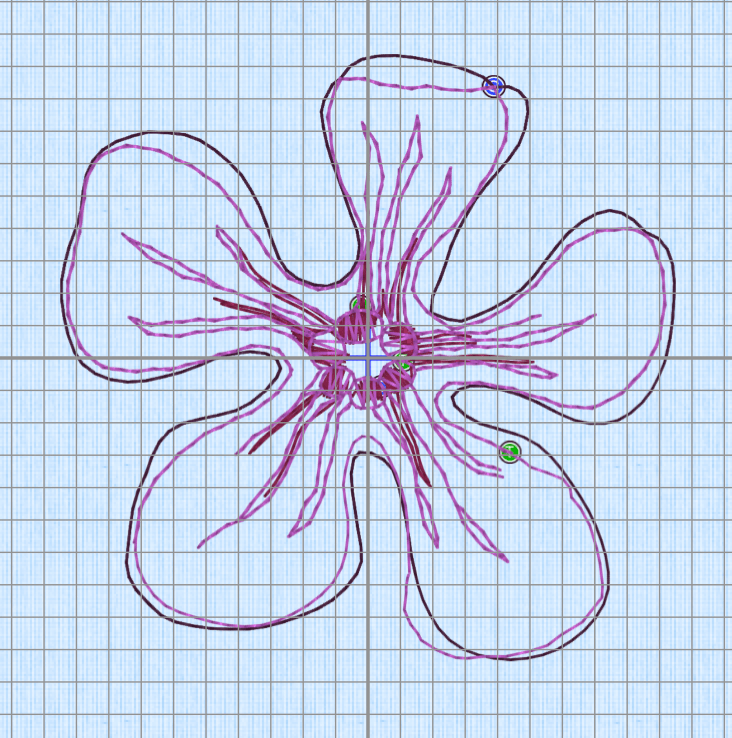
These are but a few of the embroideries I have in the folder – I think I’m actually leaning toward the “Freeform Flower” – I have five different versions of that one which may make the final project feel more “modern”. If I go that route, I will have to edit the embroideries for size and likely add a third outline stitching in another colour.
I’m giving myself a day to walk around the circle placement before I fuse them in place and then I will tackle the embroidery challenge.
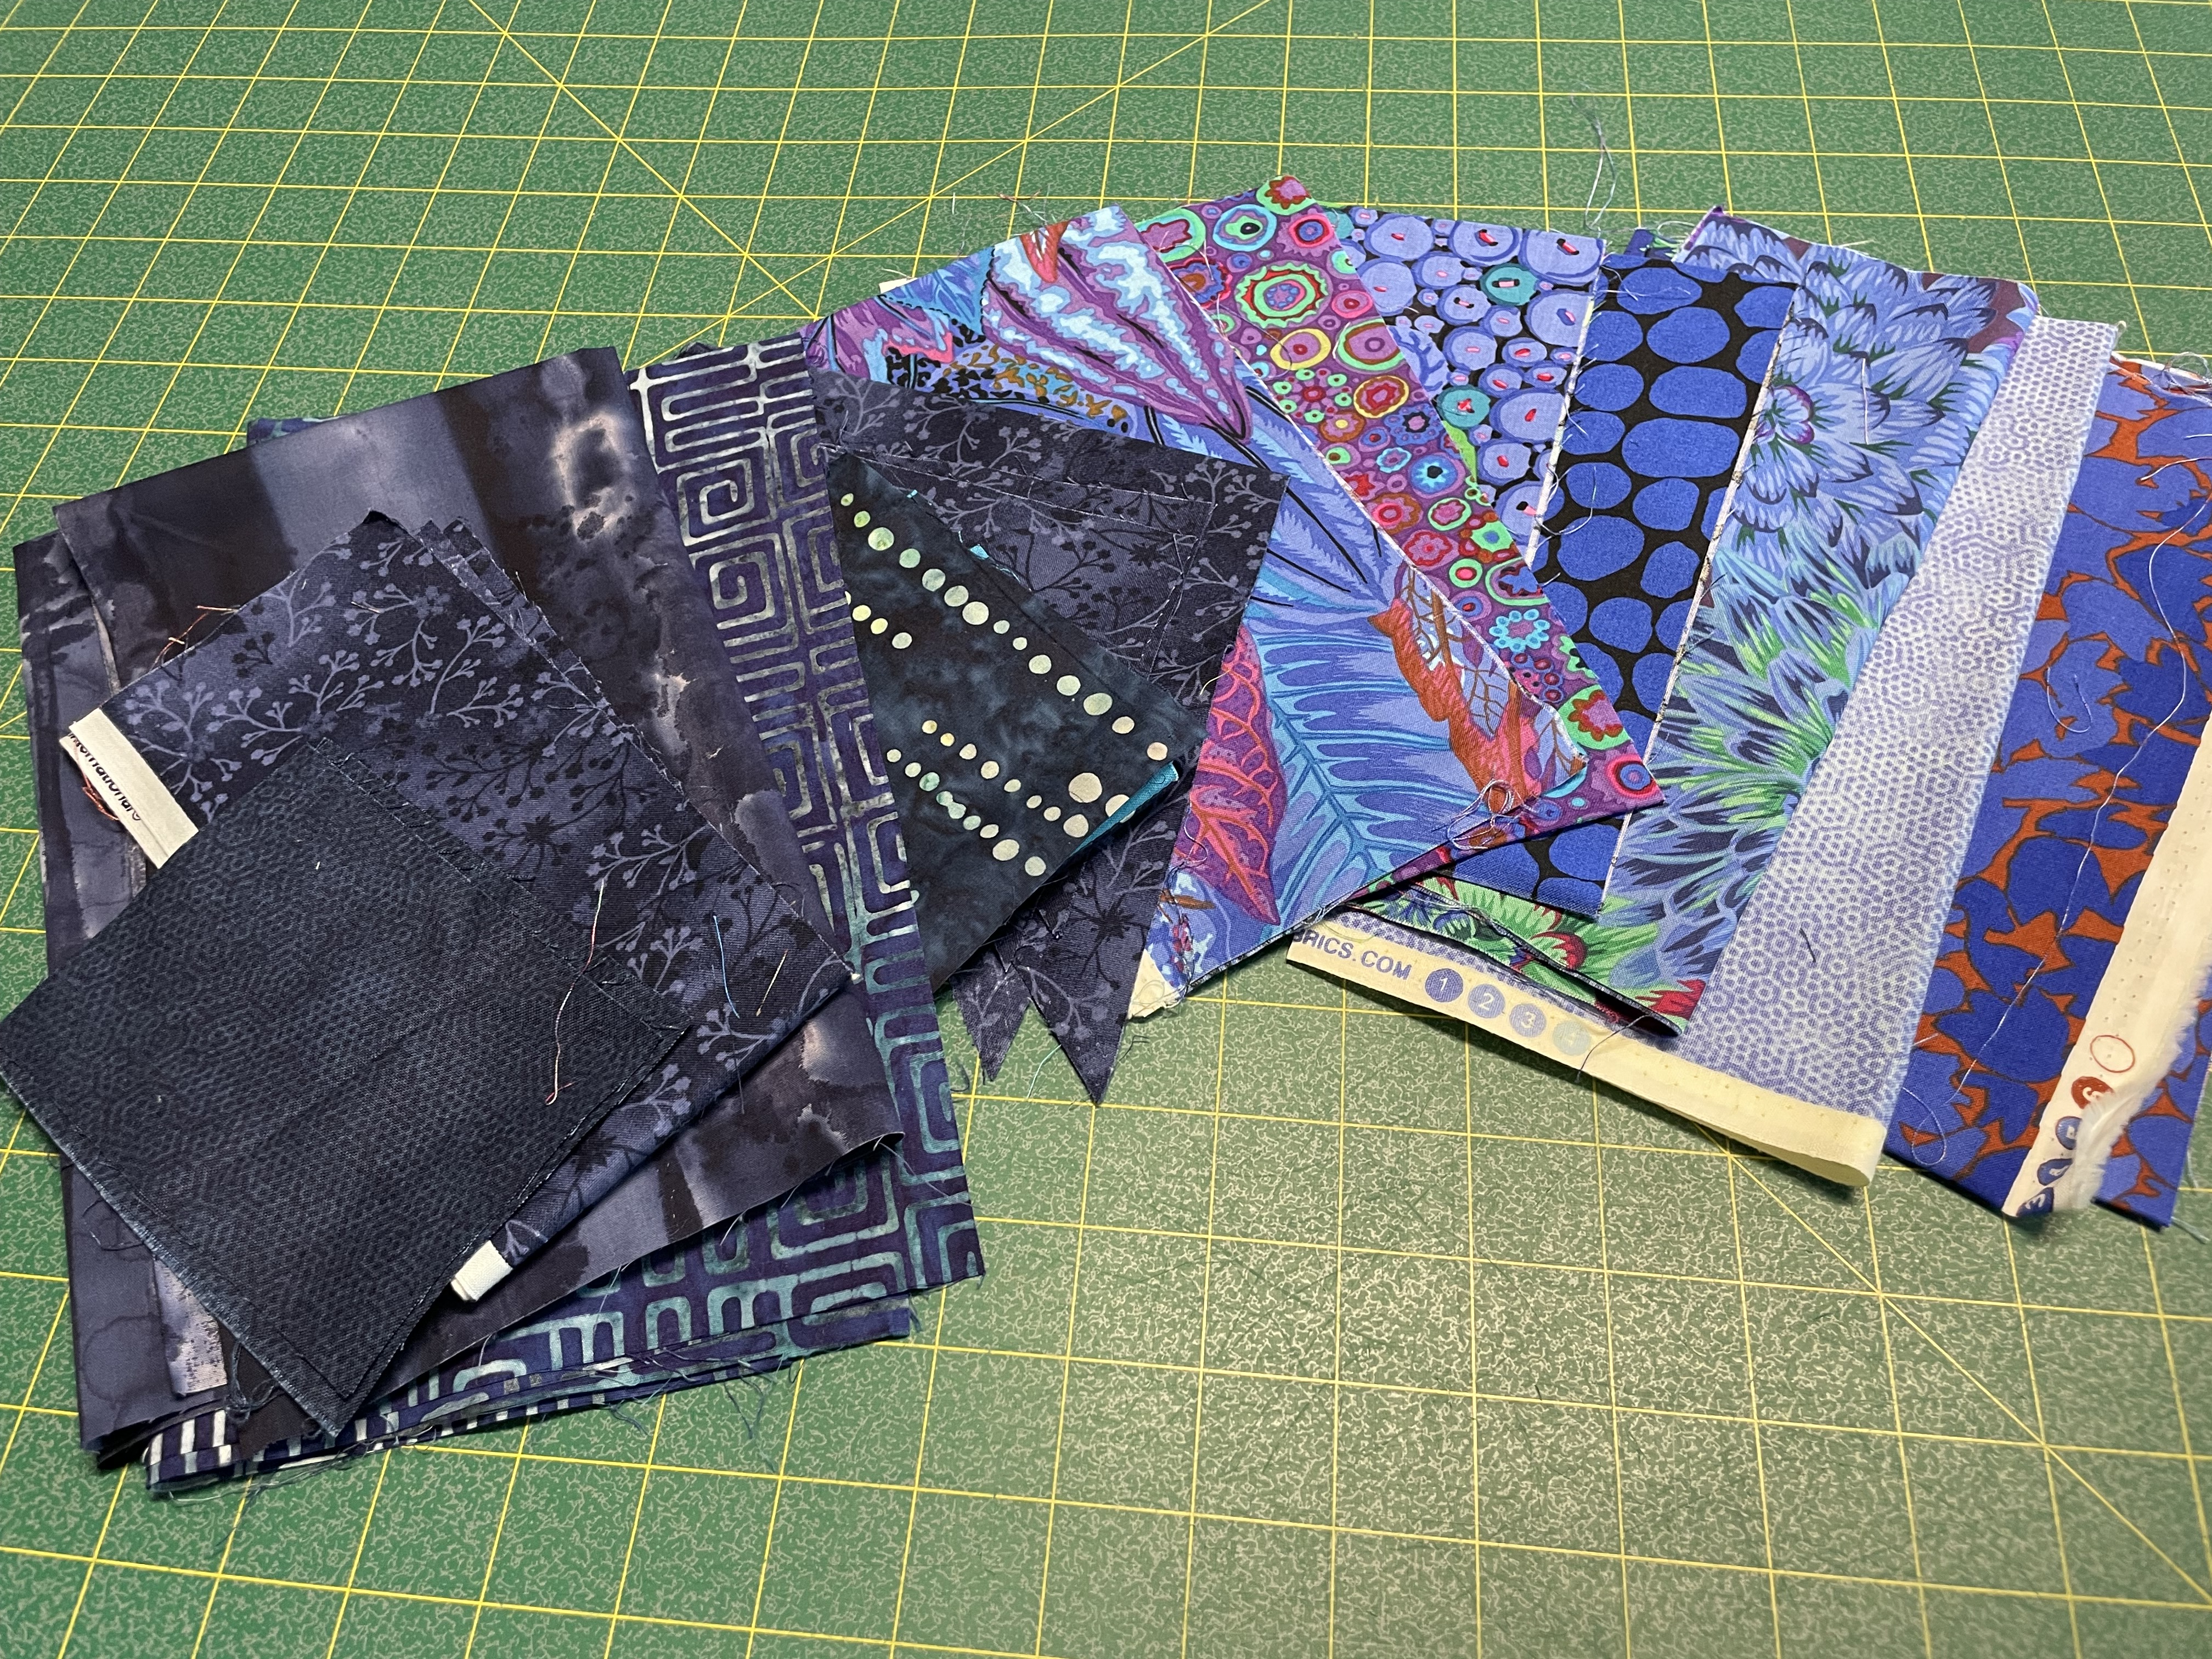
I just finished sewing all 108 blocks together – they need a bit more pressing but I’m now ready to move on to the next step – adding contrasting circles and embroidery to make this a double layer quilt. Later this afternoon, I’ll add fusible web to the back of my pile of blue fabric scraps and begin cutting out circles in many different sizes to fuse to the top.
I’ve already spend a couple of hours looking through my embroidery design collection for circular shaped embroideries – I’ve put several in a folder so I can locate them later. They’ll all need modifying for size and included elements. It takes a lot of time!
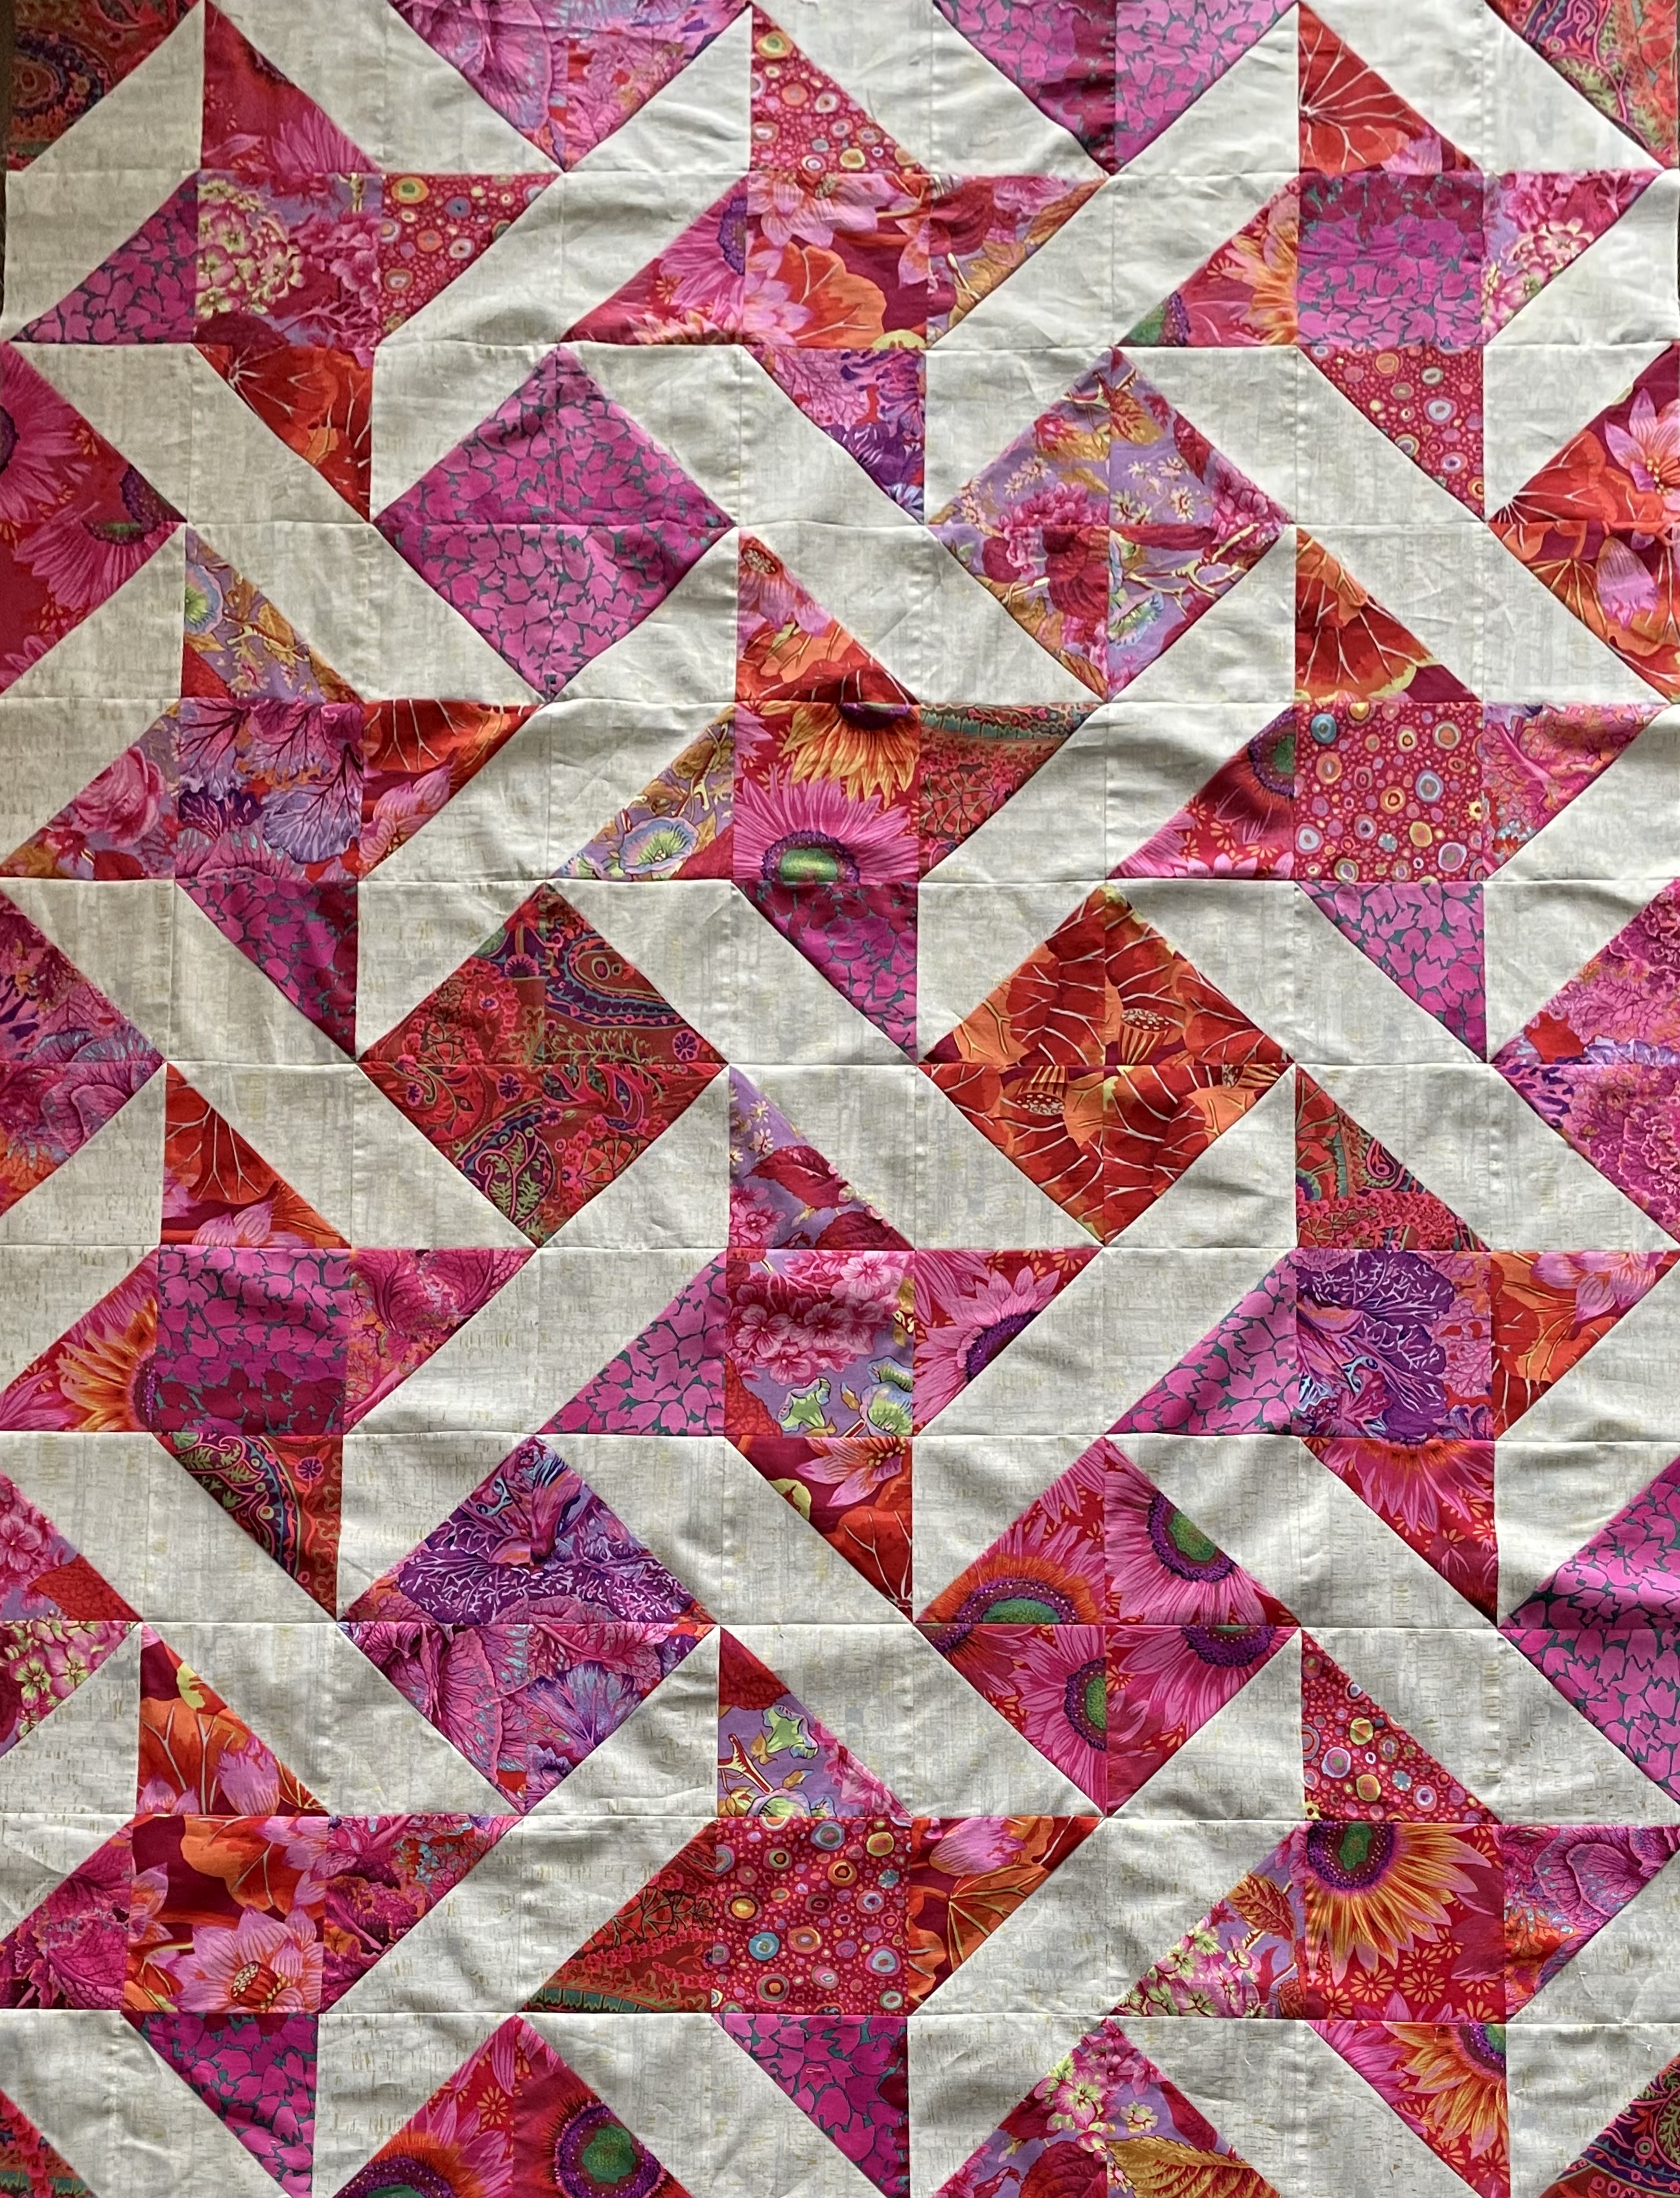
The assembly of the quilt top went reasonably quickly – I didn’t pin each row to the growing top – I find my nestings aren’t as accurate if I do; I start at one end, match up the first nesting, hold it firmly against my machine bed with my right index finger as I stitch toward my finger/the join. I take a stitch or two past the join then align the next nesting, holding it firmly with my index finger as I stitch my 1/4″ seam toward that nesting point. I do that with each segment. When I flip and press that row open my joins/nestings are almost all dead on.
There are some small inaccuracies – the original cutting of the blocks may be a smidgeon inaccurate, the HST diagonals may be a very tiny bit off the corner, my seams may be a thread width from exactly 1/4″ in spots, etc. All those very small variations add up – that’s quilting for you! But if you look closely, my joins are pretty close and when when I’ve added the circles/embroidery and quilt the whole project, nobody but me is going to notice the “background” seam joins.
Thursday, I taught a “bargello” class – about using strips sewn together, the panel then cut in strips of different widths, these new strips are sewn together to create a “wave” – this involves lots of nesting of seams.
2 Bargello Blocks
The two blocks came from one of the two sets of WOF strips I created for a demonstration piece. I’m not going to make the second two blocks – I don’t need another table runner I’m not going to use. I could give it away, but this two block piece will go into my “demonstration” projects box along with the remaining set of strips which I can use on another occasion when I’m teaching “bargello” again.
Both women in the class were nervous about sewing nested seams – there’s lots of practice in this project and in fact they’re easy to do – also without pinning. The joins are actually more accurate, I find, if I just align each new nesting as I go along, one at a time. The whole block assembles surprisingly quickly.
I could have joined the two blocks end-to-end, with the yellow centre blocks pointing in the same direction; I could have aligned them side by side with the yellow centres both pointing toward the opposite side. I chose to alternate them – to make my join I added two narrow strips to each block to bring the yellow back to the edge on each side. I probably should have made the join using the widest strip on each block but one of my wide strips wasn’t cut accurately – I only had one I could use – so I cut it in half!
I dug out my stash of circles with fusible web and selected the blue and grey in whatever size I had and dropped them over the blocks. This tells me several things
I want a few circles larger than the largest I have here
I want to graduate my distribution from bottom right (darkest) to upper left (less dense and lightest)
I want greater density and more sizes of circles in the lower right
I will edge stitch the circles – what I don’t know yet is whether I also want to include some embroidery along with the appliqué – I think it may be a good idea – not much, but circles of some sort embroidered with blue threads
I’m trying to focus on something happening in the foreground rather than on the background quilt design
I spent the weekend working on the latest quilt top – 108 6″ blocks (9 x 12) – 12 unpieced squares, 96 half-square triangles. Earlier in the week I cut the fabric into strips, then into squares, matching 48 squares with 48 background pieces, marked the diagonal. That’s where I stopped on Tuesday. Yesterday and today I sewed 1/4″ each side of the diagonal line, cut along the diagonal, pressed and trimmed the HST blocks.
The 8th Iteration of this Layout!
I’ve opted for maximum symmetry in this layout – at the same time doing my best to distribute the star centres as well as making sure all six fabrics are represented in the assembled on-point blocks with a decent distribution of fabrics on the periphery! That’s meant a lot of moving individual and sets of HST multiple times. (I just noticed in the photo that the direction of the background print isn’t consistent! You won’t see it but I can. I’ll have to try swapping blocks within each set to correct that!)
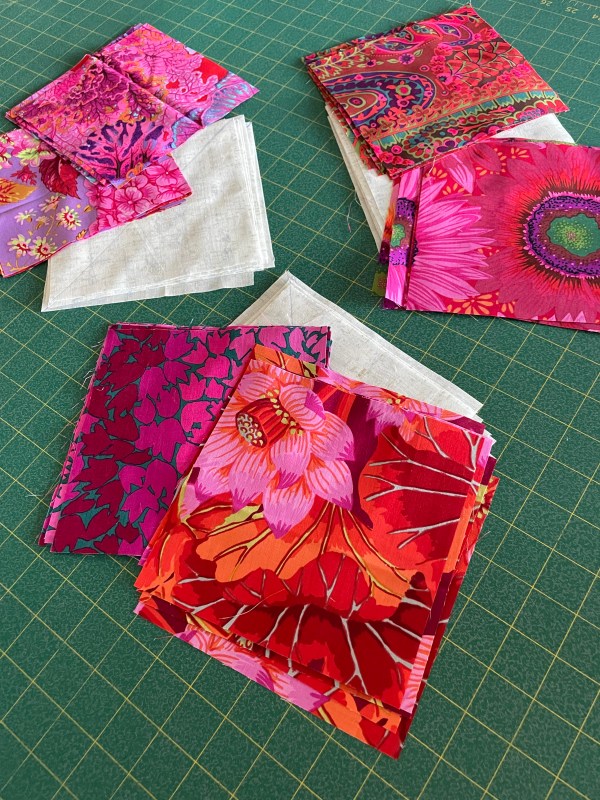
This is the layout at the moment. I realize nobody but me is going to notice the “clashes/repititions” that stand out for me. Besides, once I have the top stitched together, I’m thinking about appliqué of some sort in various dark purple/blue small prints (that will draw attention away from the overall fabric distribution beneath). I have no idea whether that should be circles of various sizes, or small diamonds (some of which might overlap), triangles? I’ve pulled several scraps
from various boxes and laid them out together. Until I assemble the top I won’t know what might work and what won’t. I have still more boxes to rummage through – I’ll do that tomorrow.
I’m finally moving on a quilt again. I’ll have time tomorrow and Wednesday afternoon to chain piece blocks together but before I do that I do want to check the layout at least one more time!
———-
I just took a careful look at the background triangles. I knew the background fabric had a directionality to it but I wasn’t aware of how it was going to play out.
The right leaning diagonals have the subtle background stripe horizontal; the left leaning diagonals have the background strip vertical. I looked carefully – they’re all like that. The background pattern is so subtle nobody’s going to notice it but me! Can’t change any of them! Interesting outcome. Completely unanticipated.
Haven’t worked on a quilt in months but I’m feeling pressure to get one going – I’ll want to show in Parrsboro again next summer and I will need at least six new quilts for that (plus a bunch of smaller creations!).
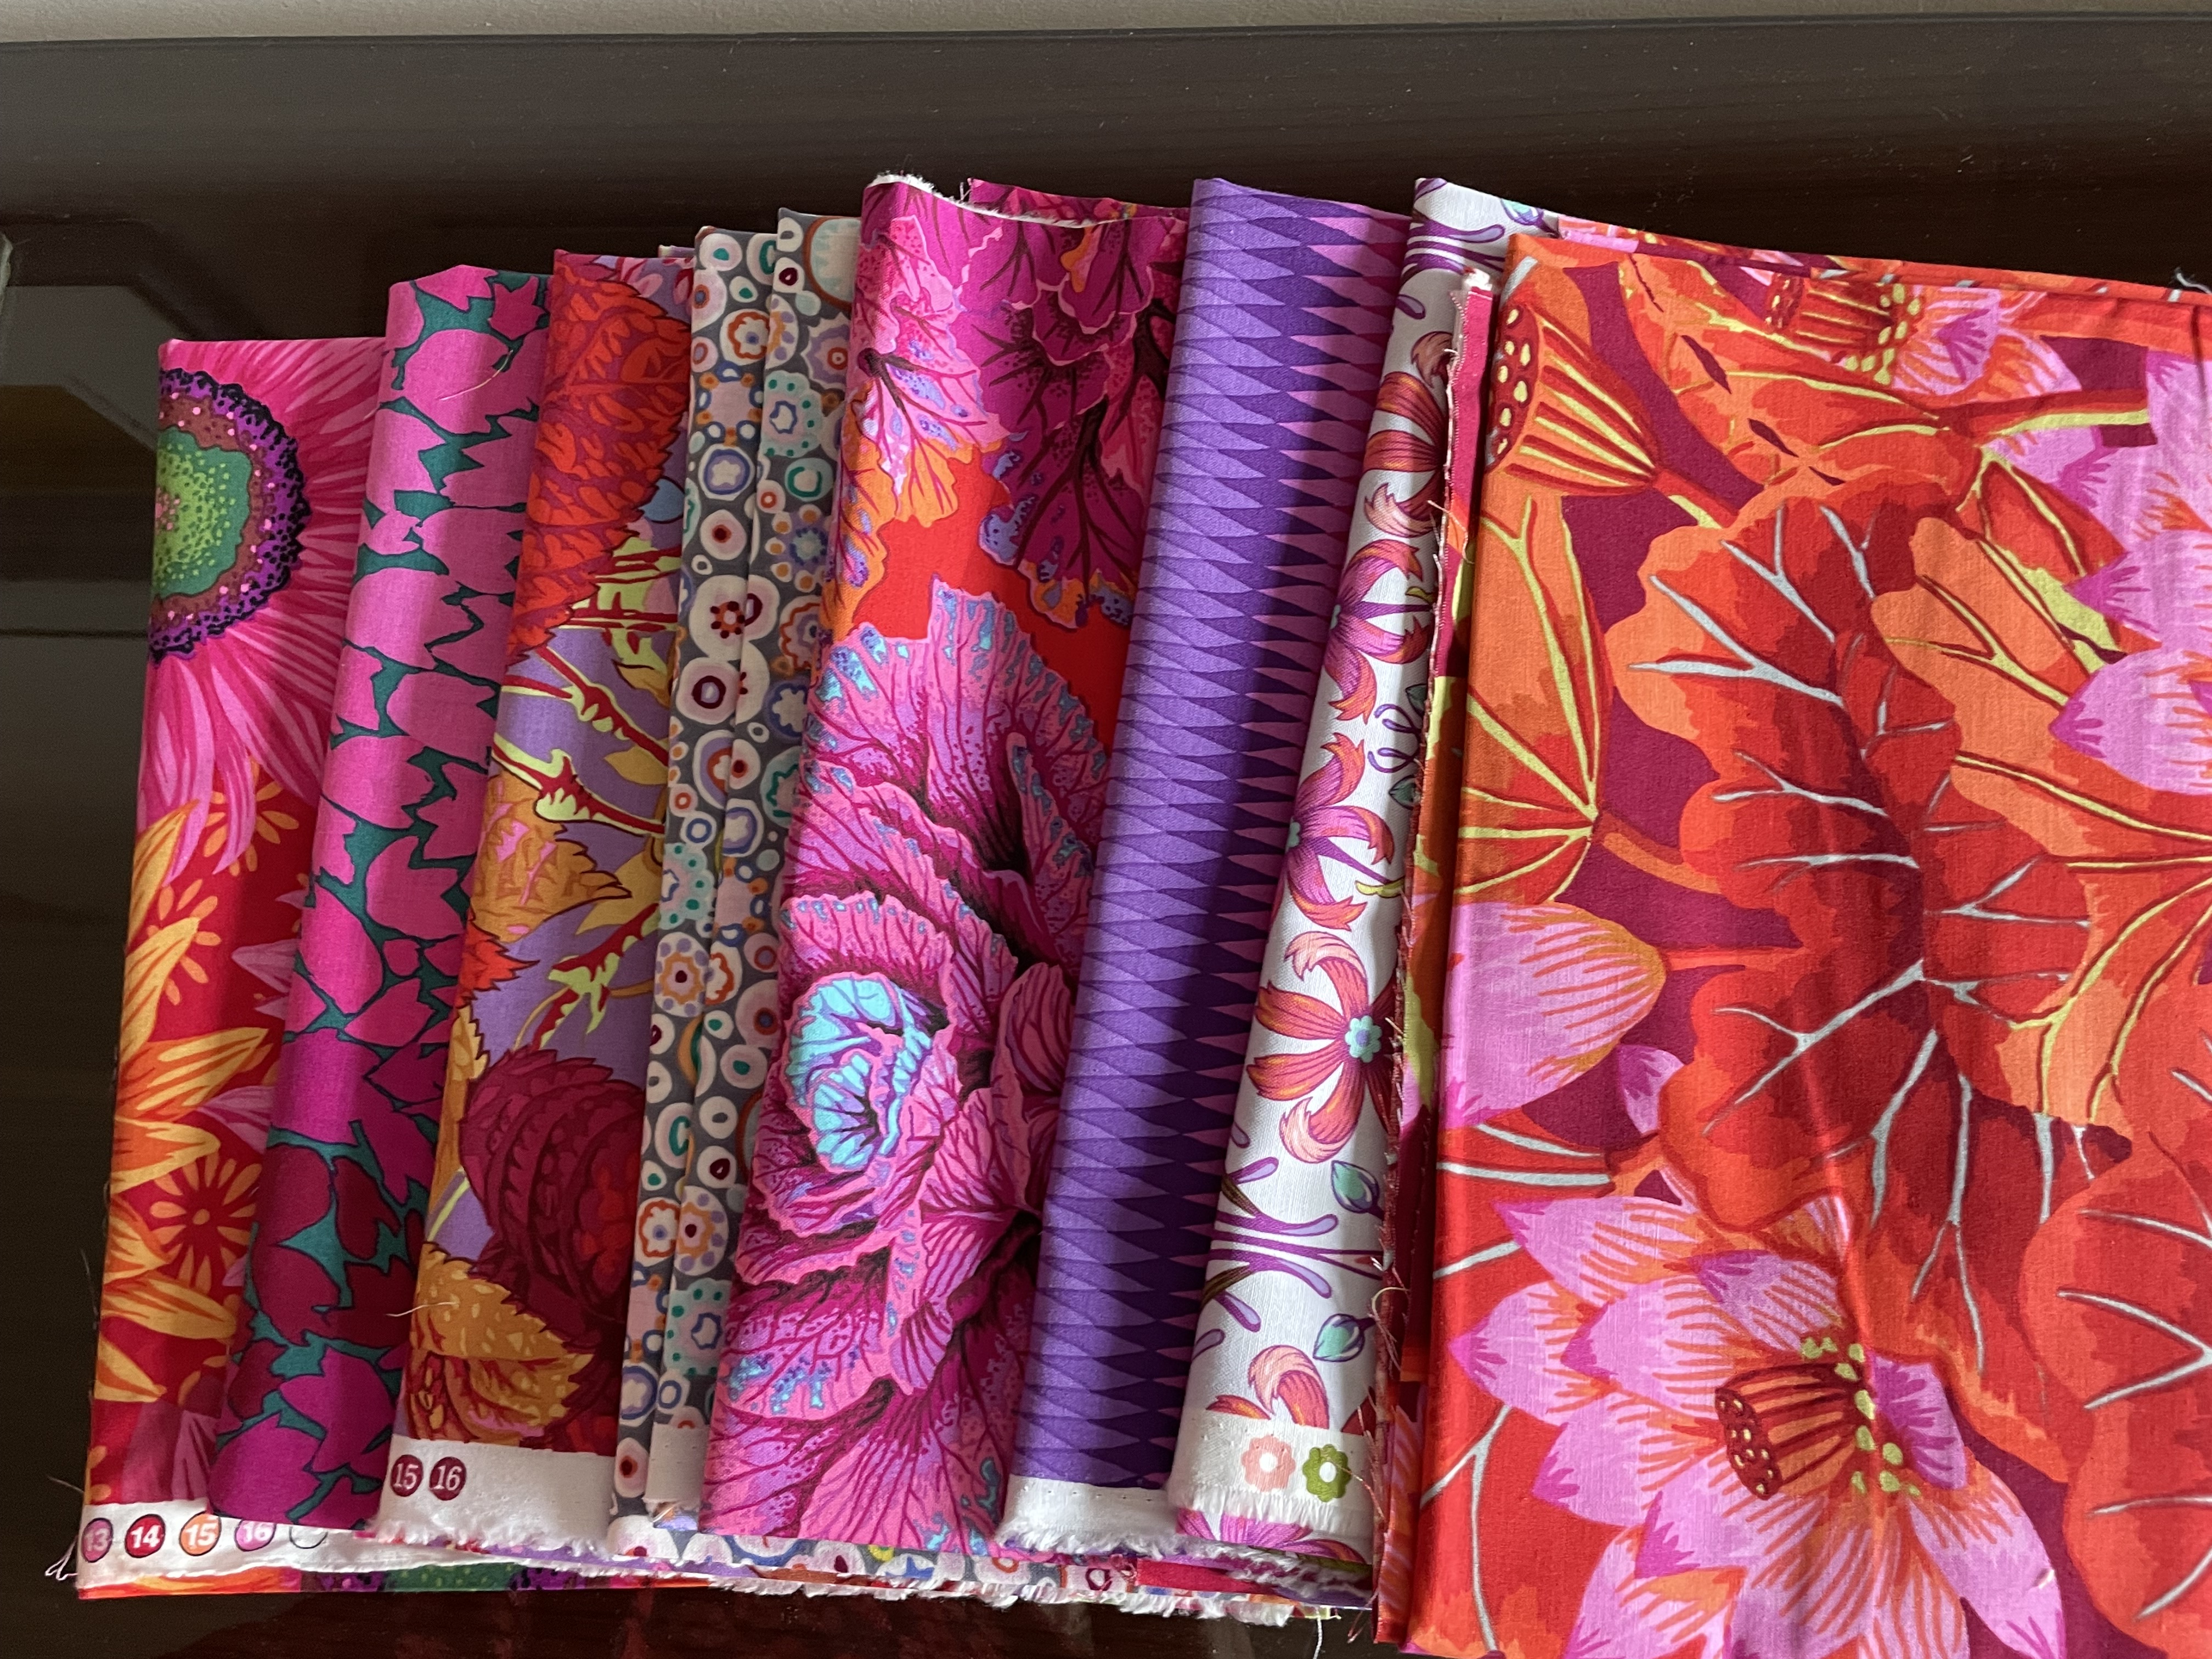
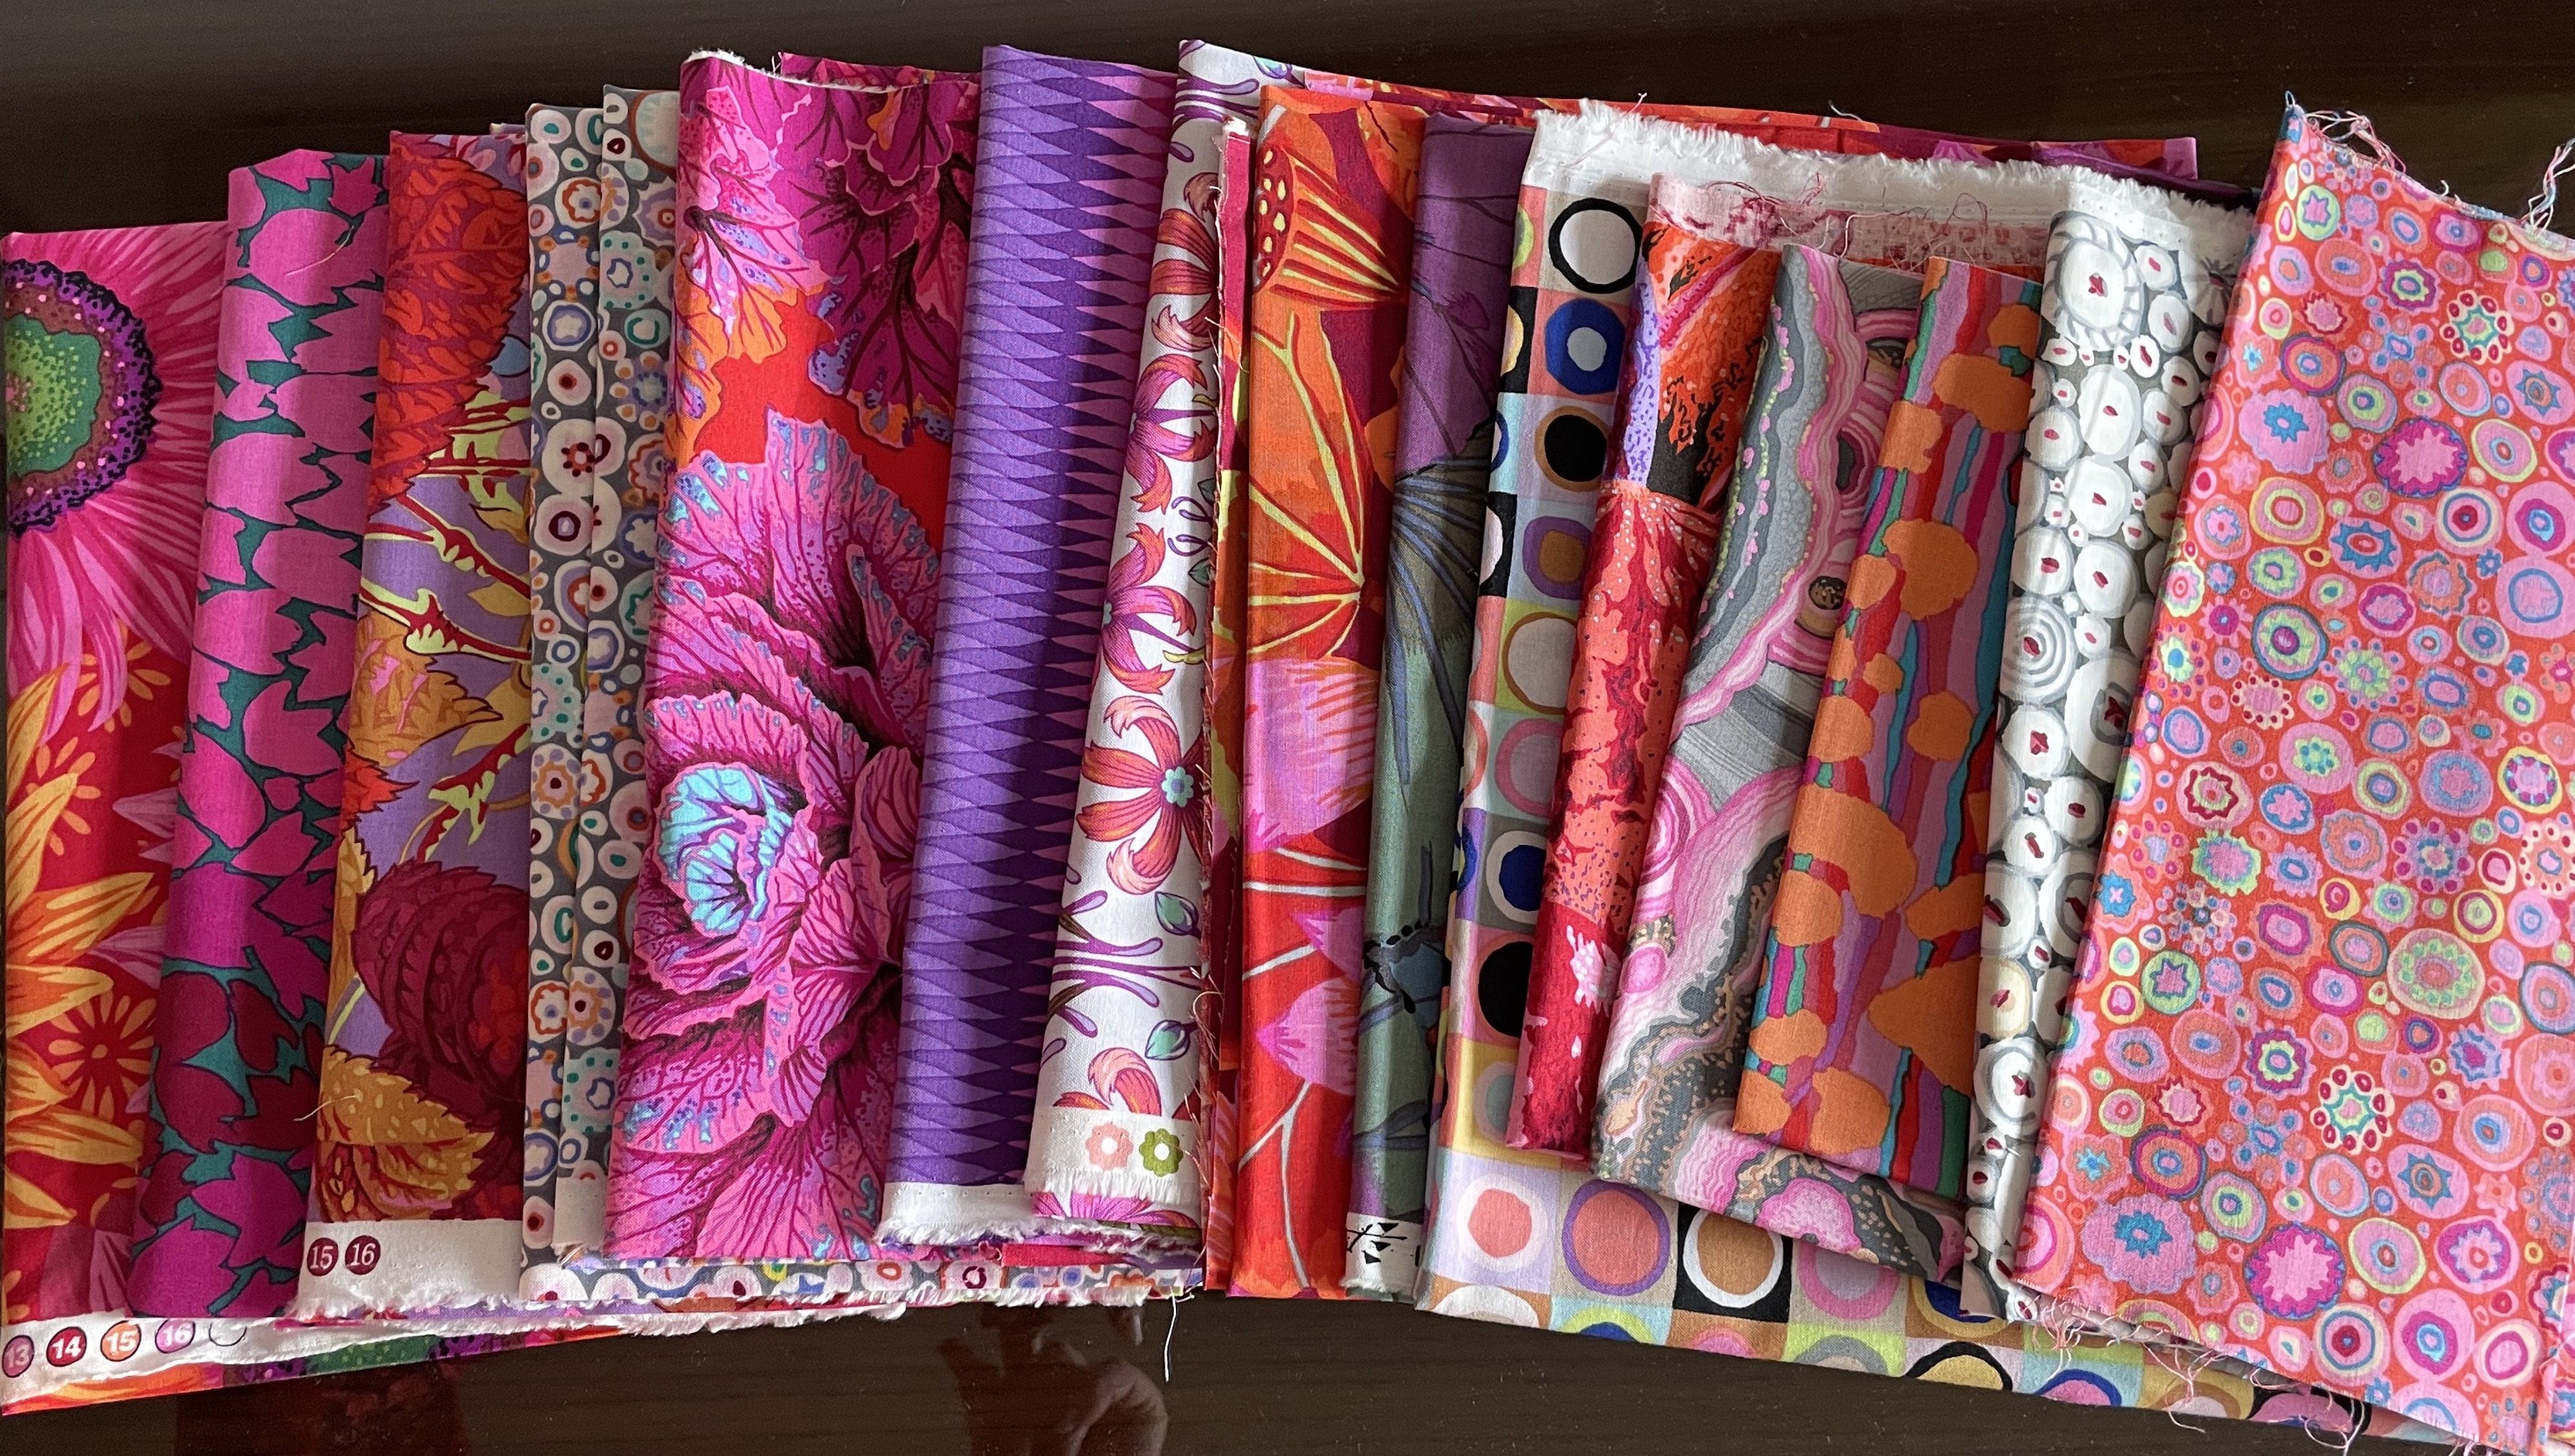
It’s not that I have no fabric! I have more fabric than I will ever use but when I visited Heidi Wulfraat’s Woolworks last Thursday, I couldn’t resist picking up some Kaffe Fassett Collective fabrics.
Eight Yummy Large-Scale Prints!
When I came home I dug into my KFC collection and came up with several more pieces
Next I looked in the Grunge Box – lots there
TOO MANY CHOICES! I was trying to figure out how to use all of these fabrics in a single quilt top. I considered diamonds, triangles, appliquéd circles, freeform appliqué. I slept on it but woke with no idea what to do with all this fabric. I looked through my Pinterest idea collection: Modern quilts, Quilts, Diamond quilts – over the years I’ve saved lots of pictures. Nothing called out. I then looked through photos of quilts I’ve made in the past. In order to start something I decided to revisit a quilt I made in April 2014:
This quilt was based on an idea I’d found on Pinterest, Yusef’s Quilt: Ribbon Star – it seems this 9-patch block (a traditional block) is called “Ribbon Quilt Block”. The intention of this 9-patch is to use a background fabric that creates “ribbon” sections that connect colourful 4-point stars.
My next challenge was to come up with a background fabric – I chose a “cork” textured print in a pale grey to complement and contrast with the reds/pinks of the large scale prints.
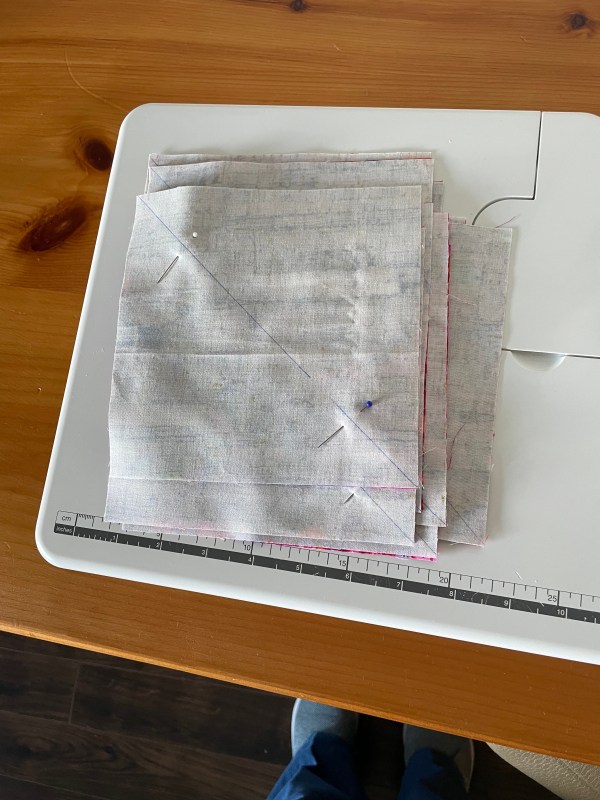
6 1/2″ BlocksBackground/Print Ready To Sew on Diagonal
I’ve got all the prep work done. To make a 9 x 12 quilt I need 108 6″ squares – 12 are 6″ large scale prints (I’m using 2 of each print fabric), 96 are HST (half square triangles) constructed by pairing a 6 1/2″ backing square with a 6 1/2″ large print square, sewing 1/4″ beside the marked diagonal on each side, then cutting on the diagonal and trimming – creating two 6″ HST blocks.
That’s where I am today. I’ll pick this up tomorrow and start sewing the HST. I’ll chain piece each stack; it won’t take long.