I’ve got a collection of face masks hanging on the door handle of my apartment, more on the coat closet doorknob, a couple in my car. They’ve been dormant for the summer and early fall but I’m putting them on again when I’m going into populated places, or medical appointments (because I’m usually asked to), and sometimes when I join the cribbage group on Monday evening. I’m wearing one more and more; I washed six yesterday when I did the laundry.
This past week one of the card women mentioned wanting a couple of new masks; my naturopath said the same thing to me on Friday. I’d been thinking about making a few new ones anyway. I happened to see a suitable fabric at Sew With Vision last week – I bought a half metre, I found another half metre of a fabric that went with it in my stash (you can just see the red peeking out in the lower mask).
Today I cut out two masks, made them up. I was using a pattern by SeeKateSew and while I didn’t follow her directions, I did use her template. The last time I made a batch of face masks I made her Adult M; this time I made Adult L – a better fit from nose to chin for me (and I’m guessing for other people, too). After finishing the two masks for myself, I cut out six more to sew and give away. (My wrist is still bothering me, rotary cutting is painful, but I put up with the pain to get this done.) I’ll get them sewn together in the next couple of days!
Fabric with Fat Quarter Solids – ColourIn Black/White to Show Values
I was looking at the print fabric and the solid fat quarters and thinking I didn’t have “light” in my collection. So I eliminated the colour to see what my tonal contrasts looked like – not too bad, but I could use a bit more light in my colour assortment.
Also, I want to showcase the print even though, in a sense, it’s the background. I found an idea on Pinterest I thought might accomplish that for me:
You have to stretch your imagination to visualize the white above as my print fabric, and the print triangles as my solids. Even further, I’m thinking I will break up the triangle with strips from at least two different solids and include a narrow strip of the background fabric as well.
Just playing around with scrap fabric I start to get a sense of what this idea might yield:
Playing Around
Now imagine that bullrush print as my bright yellow/orange/turquoise/green fabric, those triangle elements as the bright solids above and you get a glimmer of where I think I’m heading. I have more bullrush fabric and a couple of different brown/taupe solids to add to the above – tomorrow I’ll do those and include them to the array.
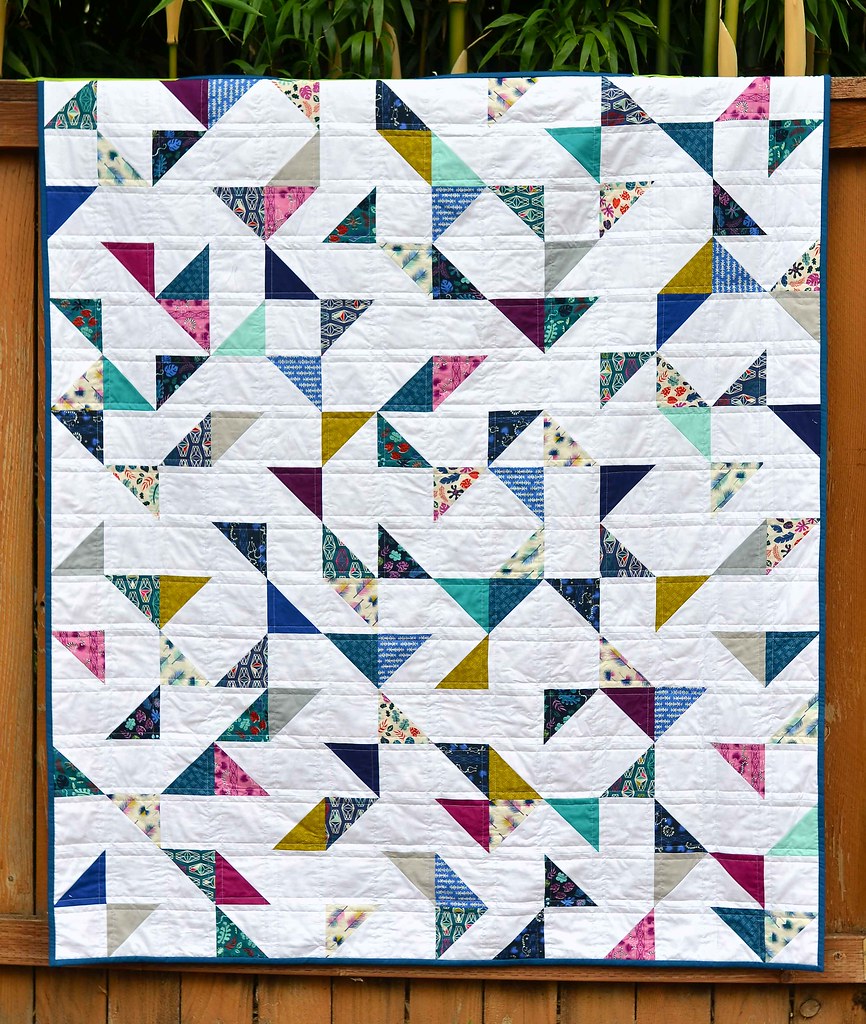
There is actually a pattern for this quilt online: Lagoon Quilt Tutorial but I’m not planning on following it. The block size in the pattern is 4 1/2″ – I want to end up with 5″ or 6″ blocks (not sure which yet). My final quilt size will be more rectangular then the Baby or Lap quilts for which Erika @ KitchenTableQuilting gives dimensions. Her triangles are “solid”, mine will be striped. Lots of differences. What I’m taking from the quilt photo is the inclusion of squares from the background fabric – in my case, the foreground fabric! What I didn’t want was to bury that very interesting print amidst the solids – this way I can showcase it.
One thing stopping me from proceeding at the moment is that I don’t have enough of the print fabric. I’ve ordered some (because my local shop has none left), and I’m waiting for it to arrive! (I’m also in hold mode because my right wrist has decided to be painful – arthritis that will take a bit of time to settle down – cutting with a rotary cutter is almost impossible and I tried but can’t cut with my left hand). As soon as the fabric arrives (and my wrist settles down), I’ll get to work on this quilt.
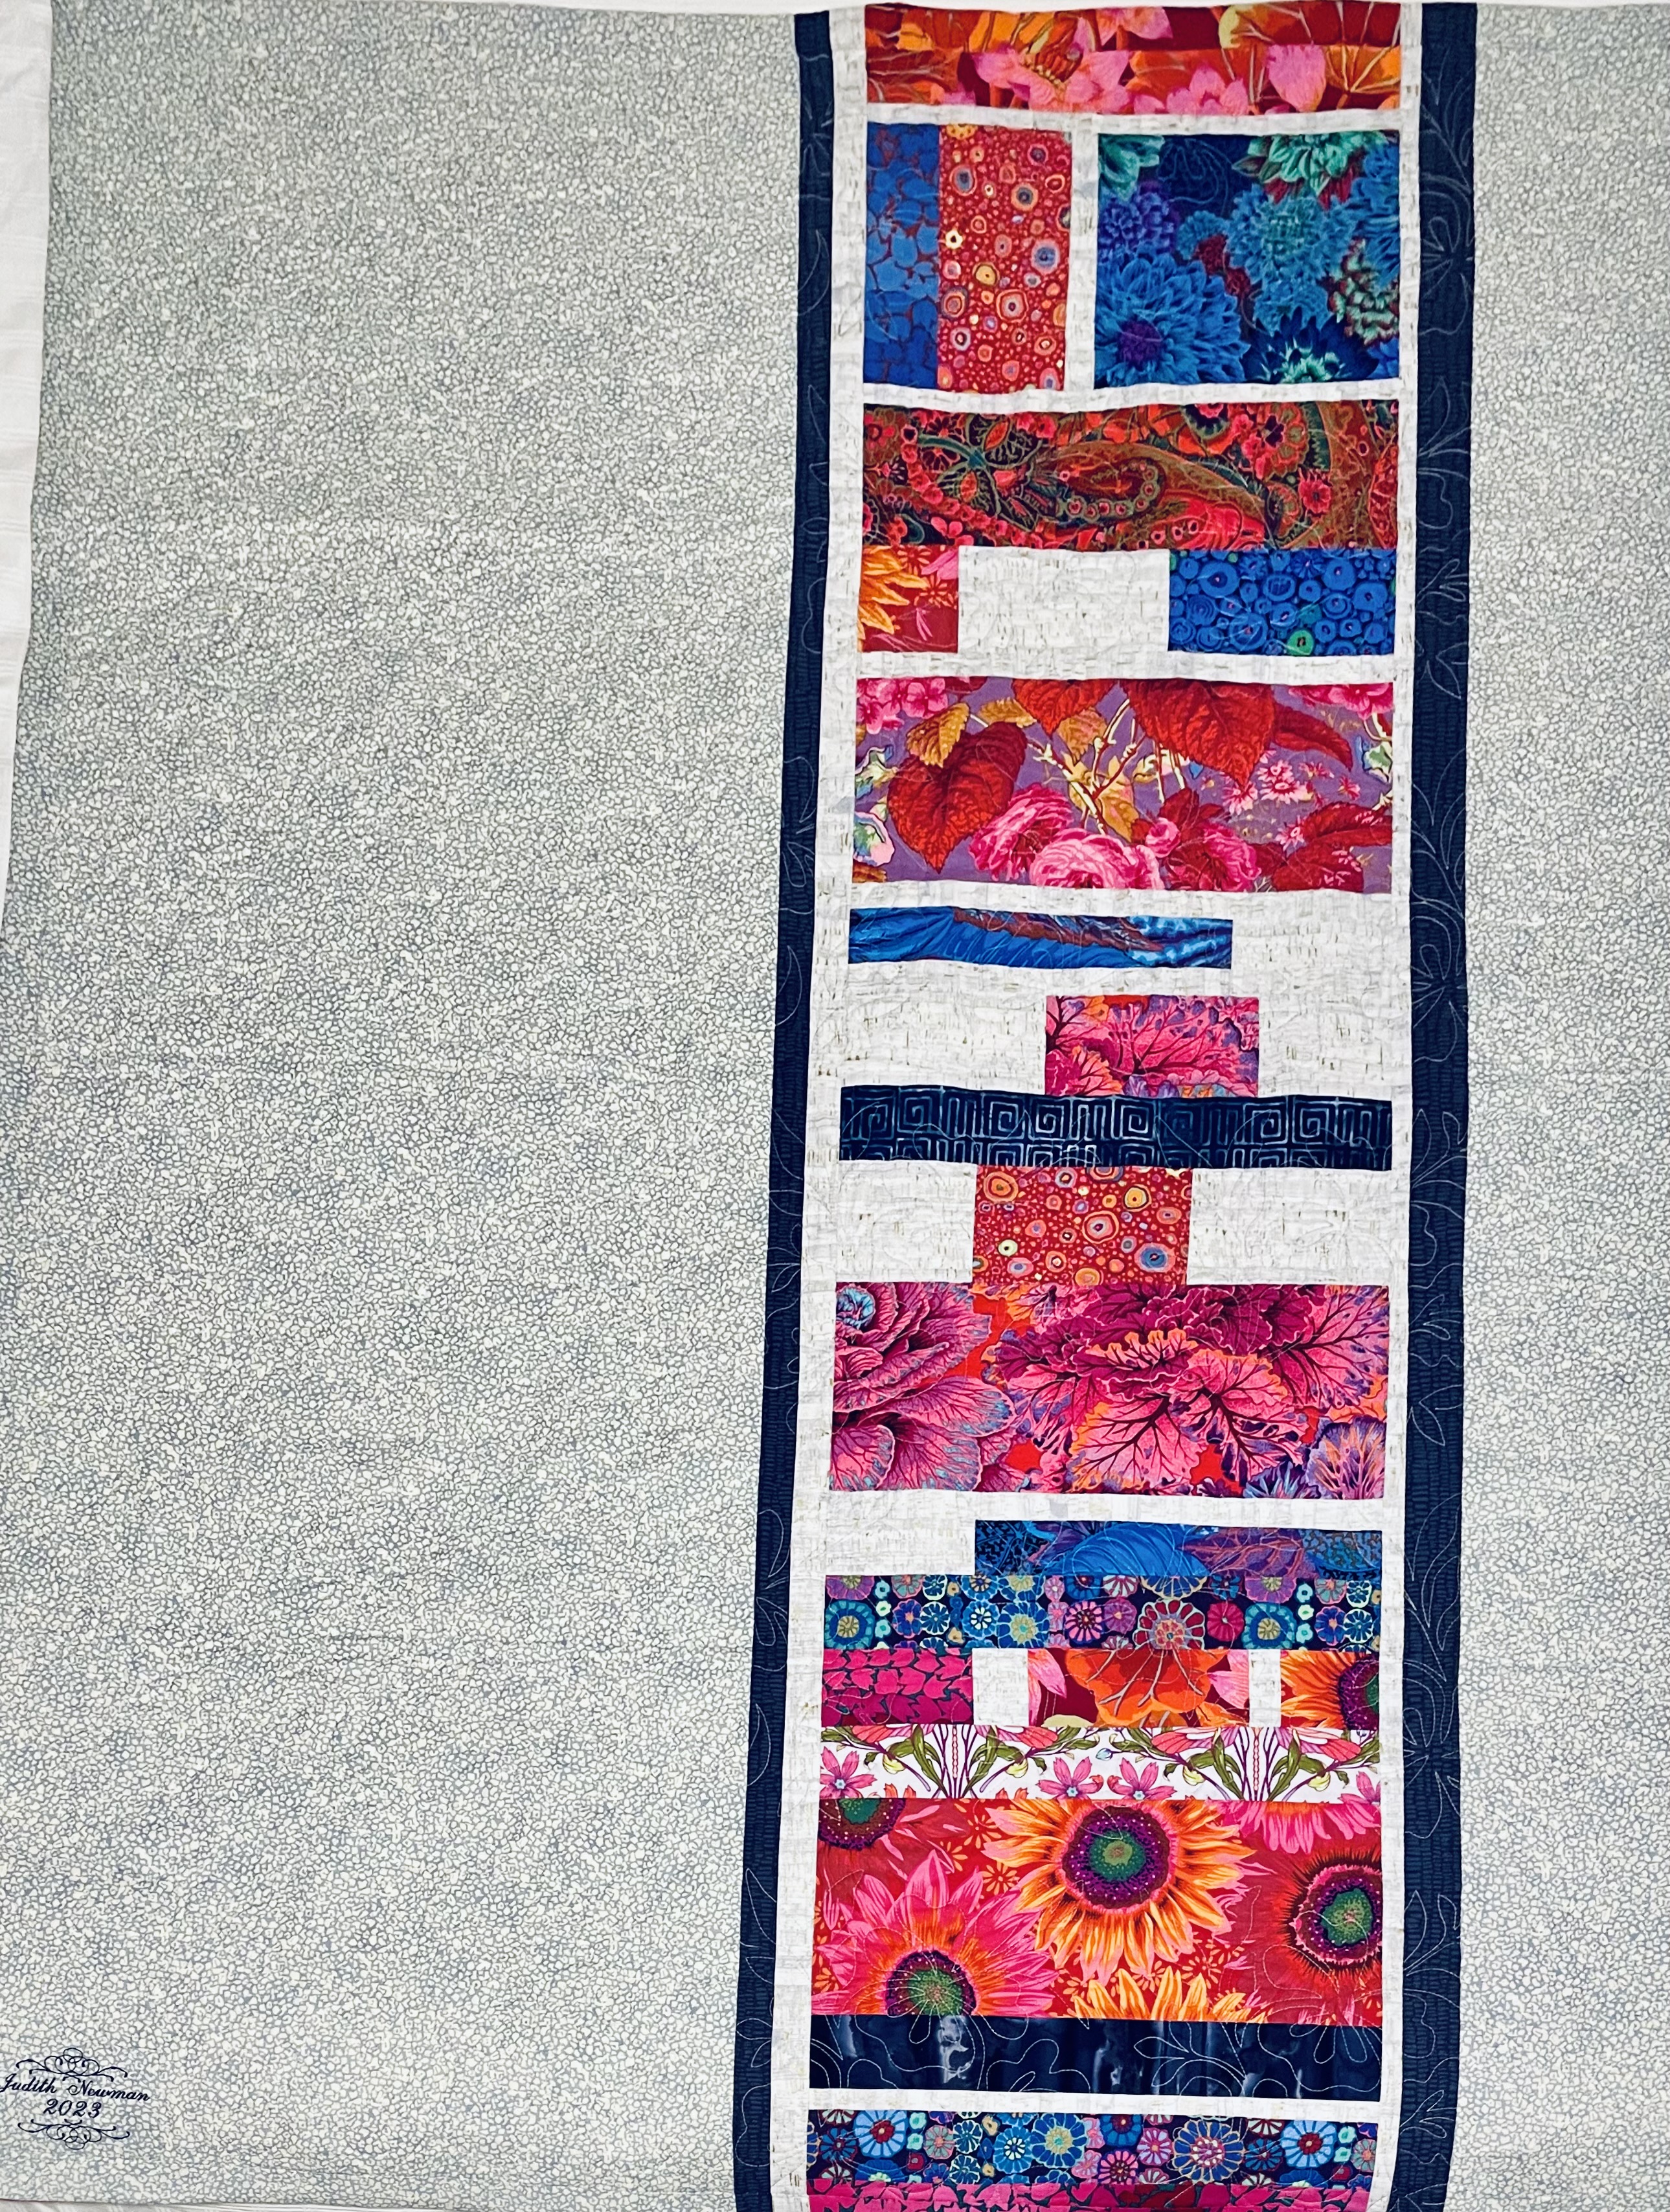
I chose to complete this quilt with a facing/hidden binding (mitred corners) and did the hand stitched blind hem on the quilt back this morning.
The quilting took just three days – that’s because I elected to quilt the top in 4-block squares. That meant each row had to have a half design (because the top was constructed with 9 columns). I decided to stagger the quilting blocks so the half block elements alternated from one side to the other – half using the right side of the design, the other half using the left. Nobody but me will ever notice. All anyone looking at the quilt will see is the fact that it is quilted! I chose thread to match the background fabric on top; the bottom thread matches the blue/grey background fabric – same weight Wonderfil variegated, just a different colour. I embroidered the standard label I always use in a dark navy blue – I usually mute it to blend in but decided this time to make it stand out!
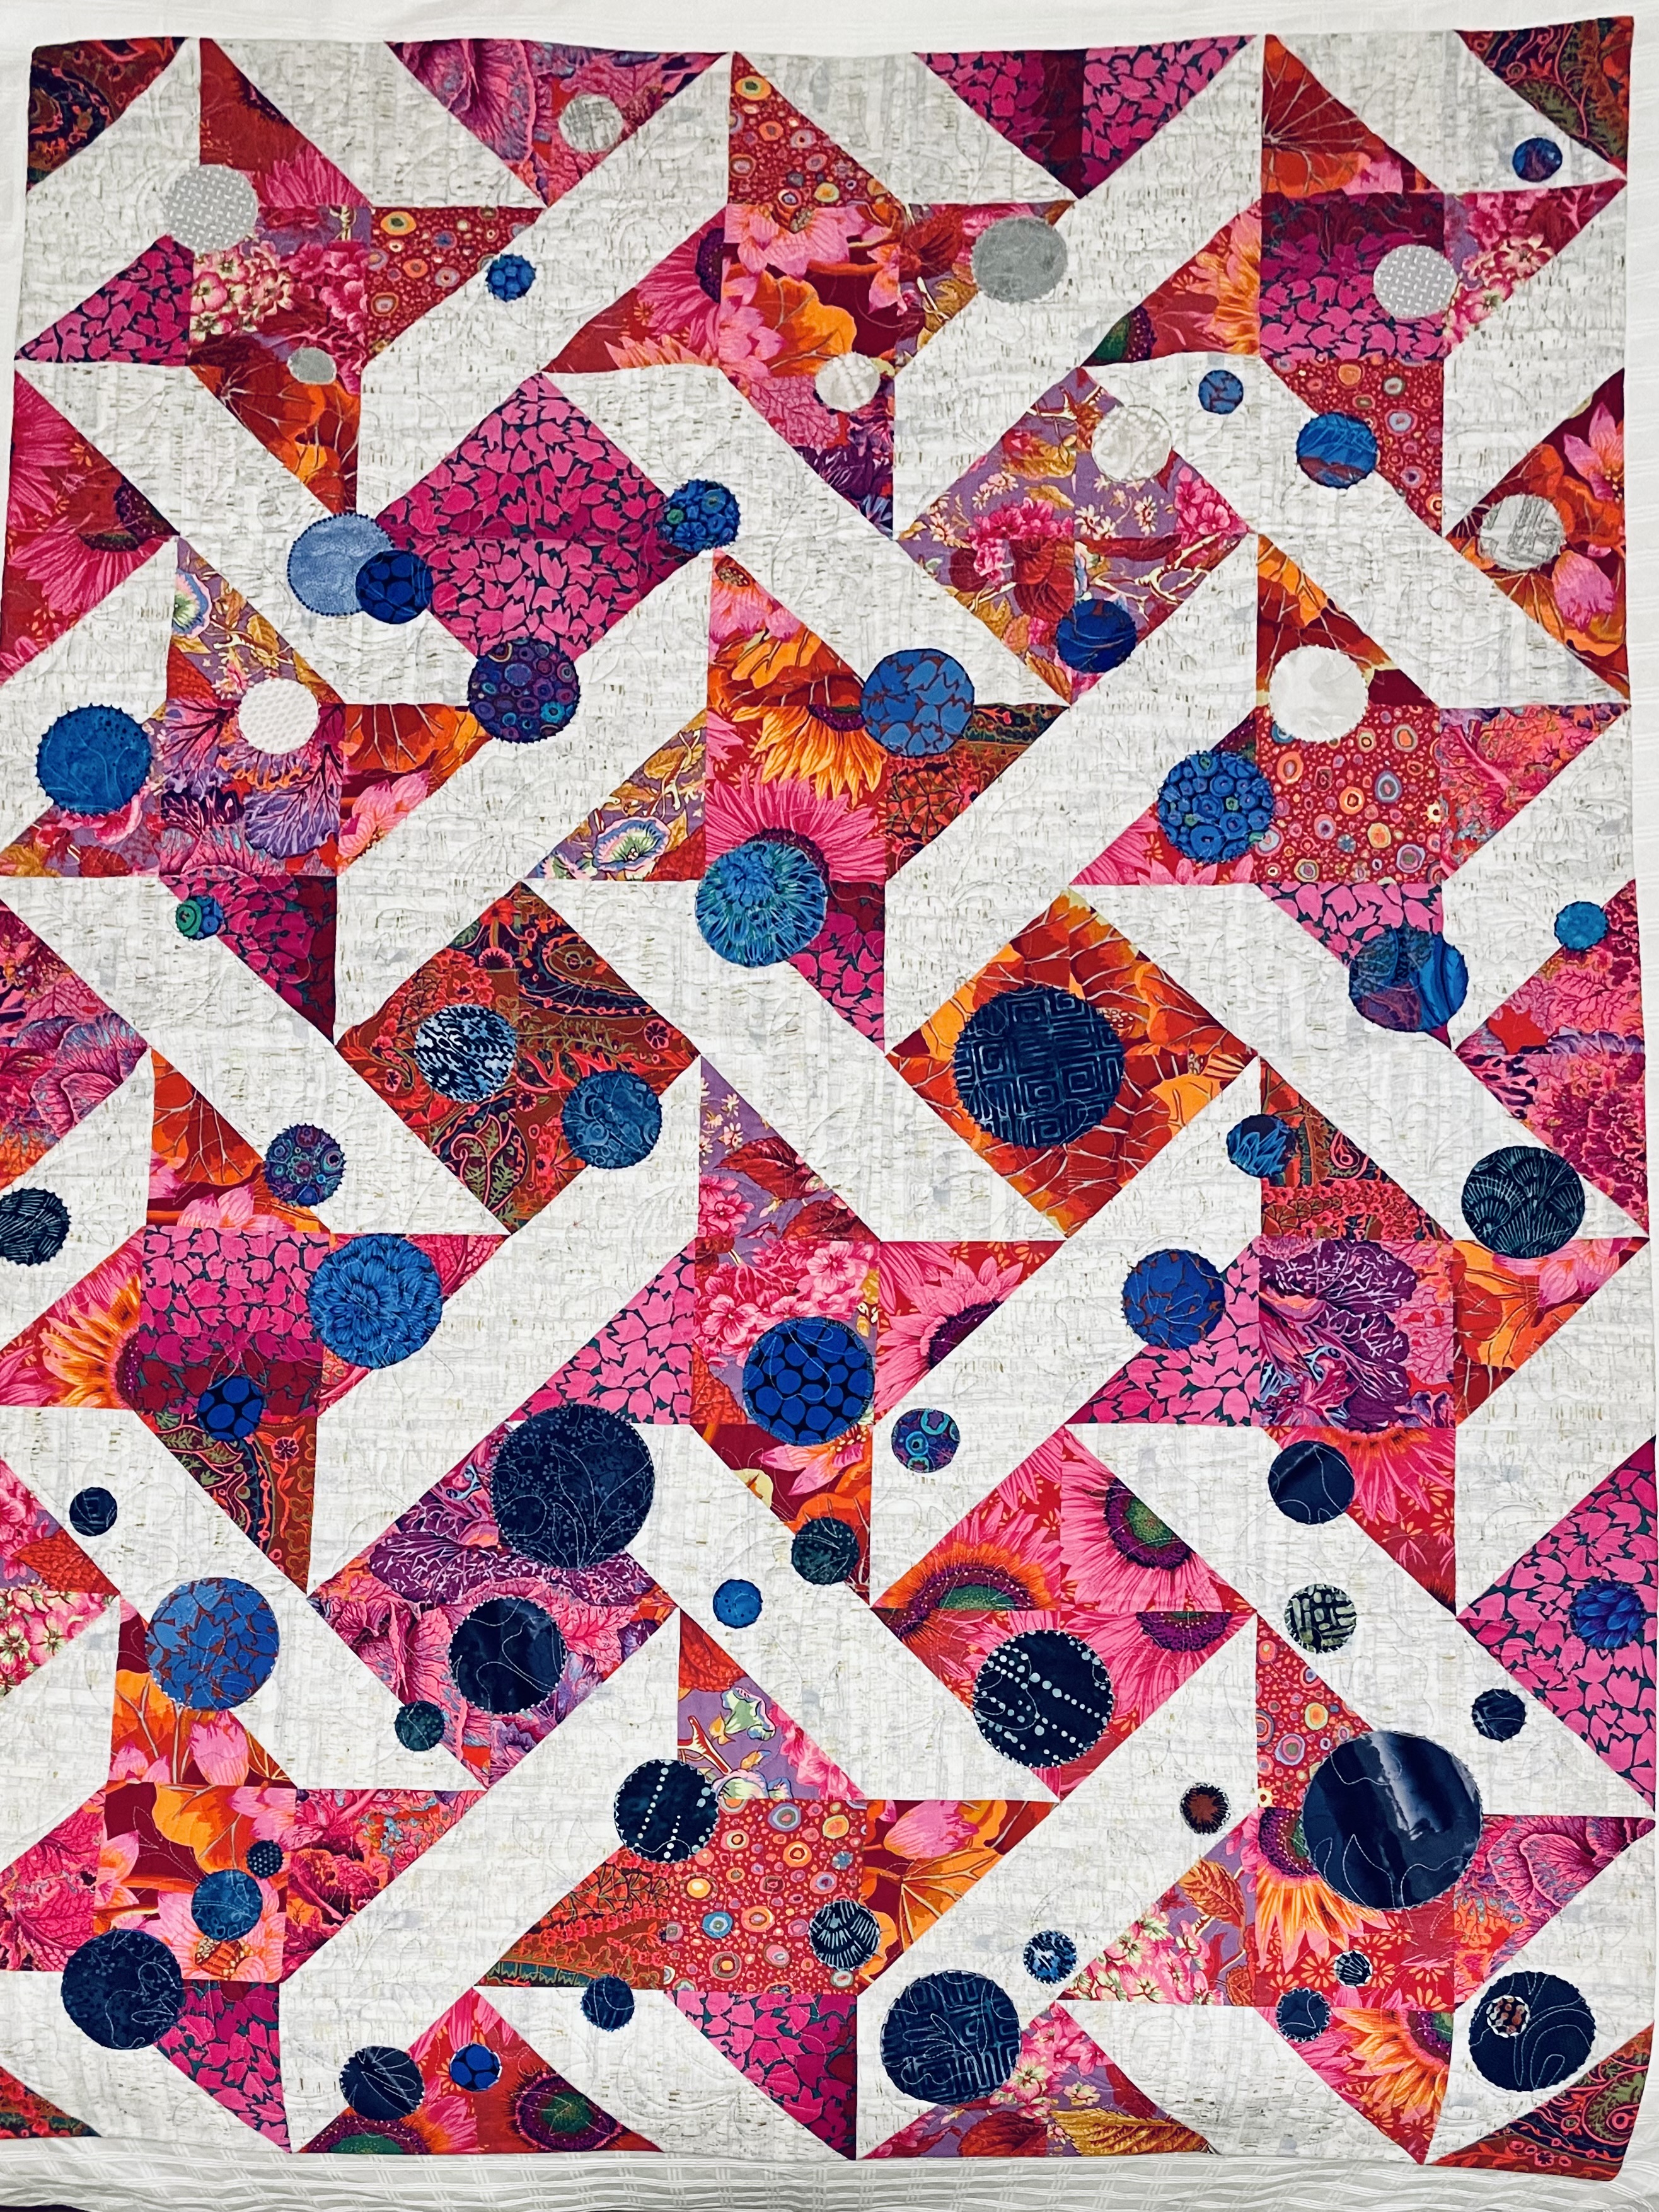
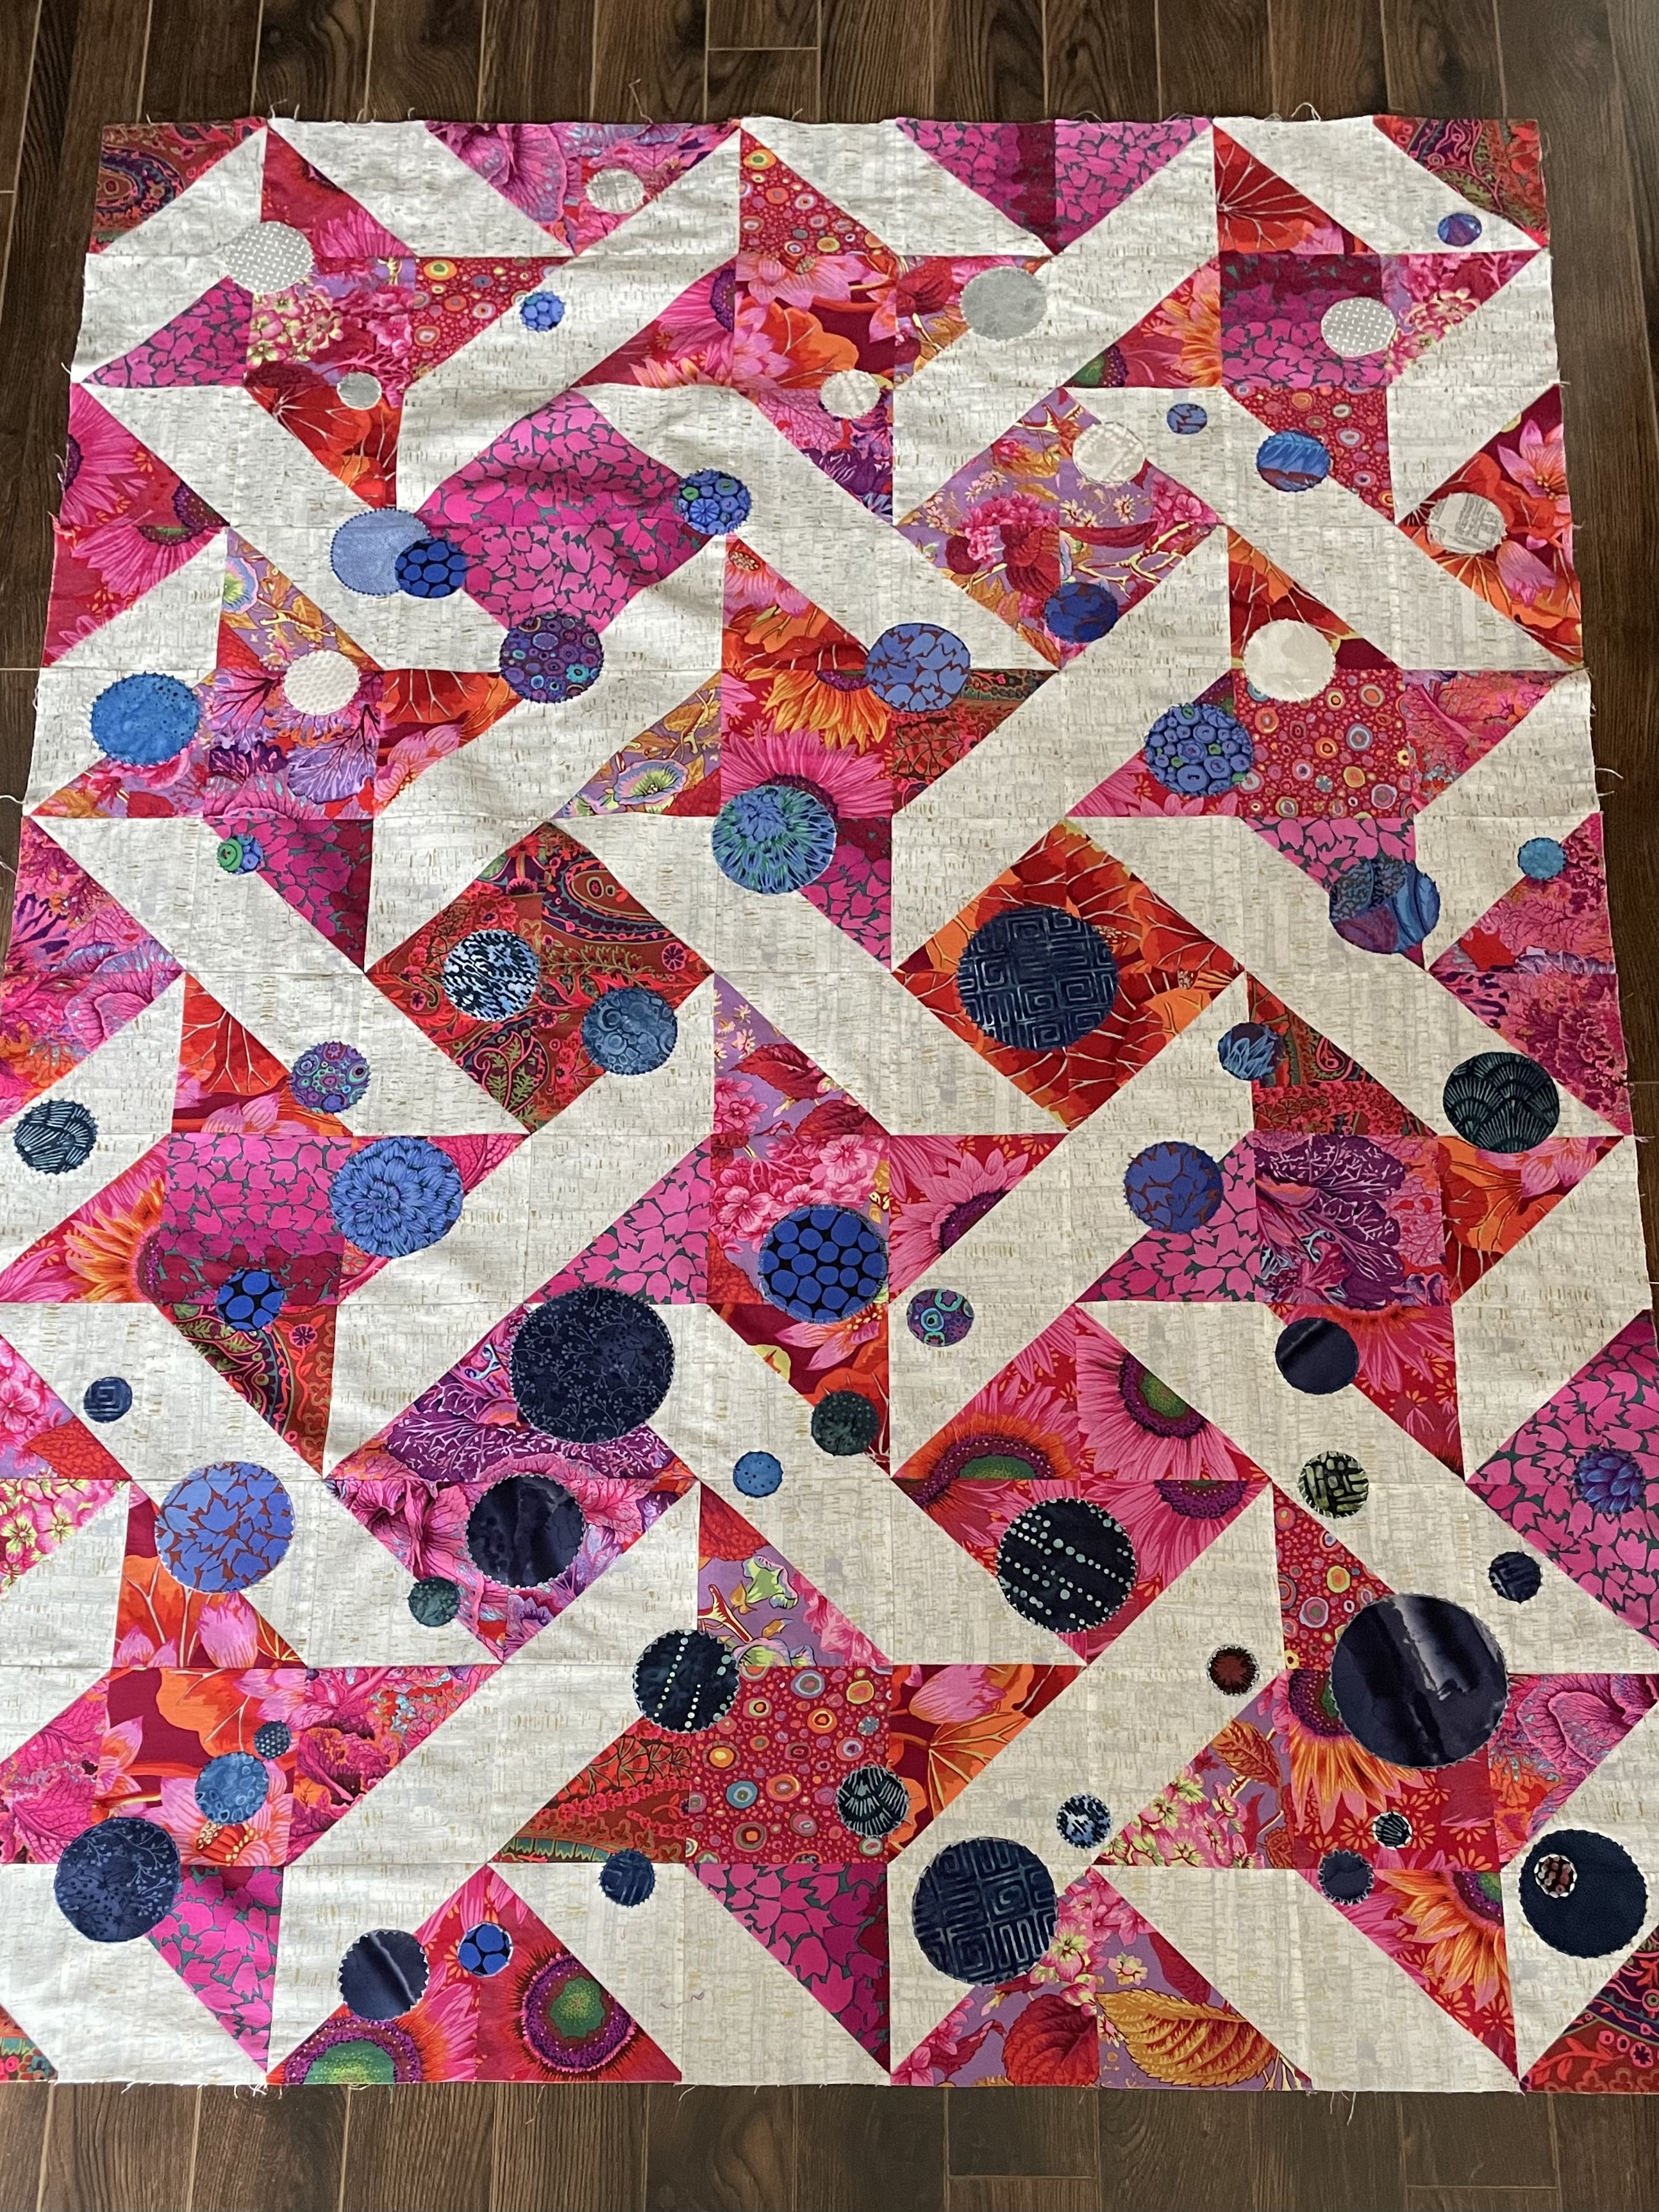
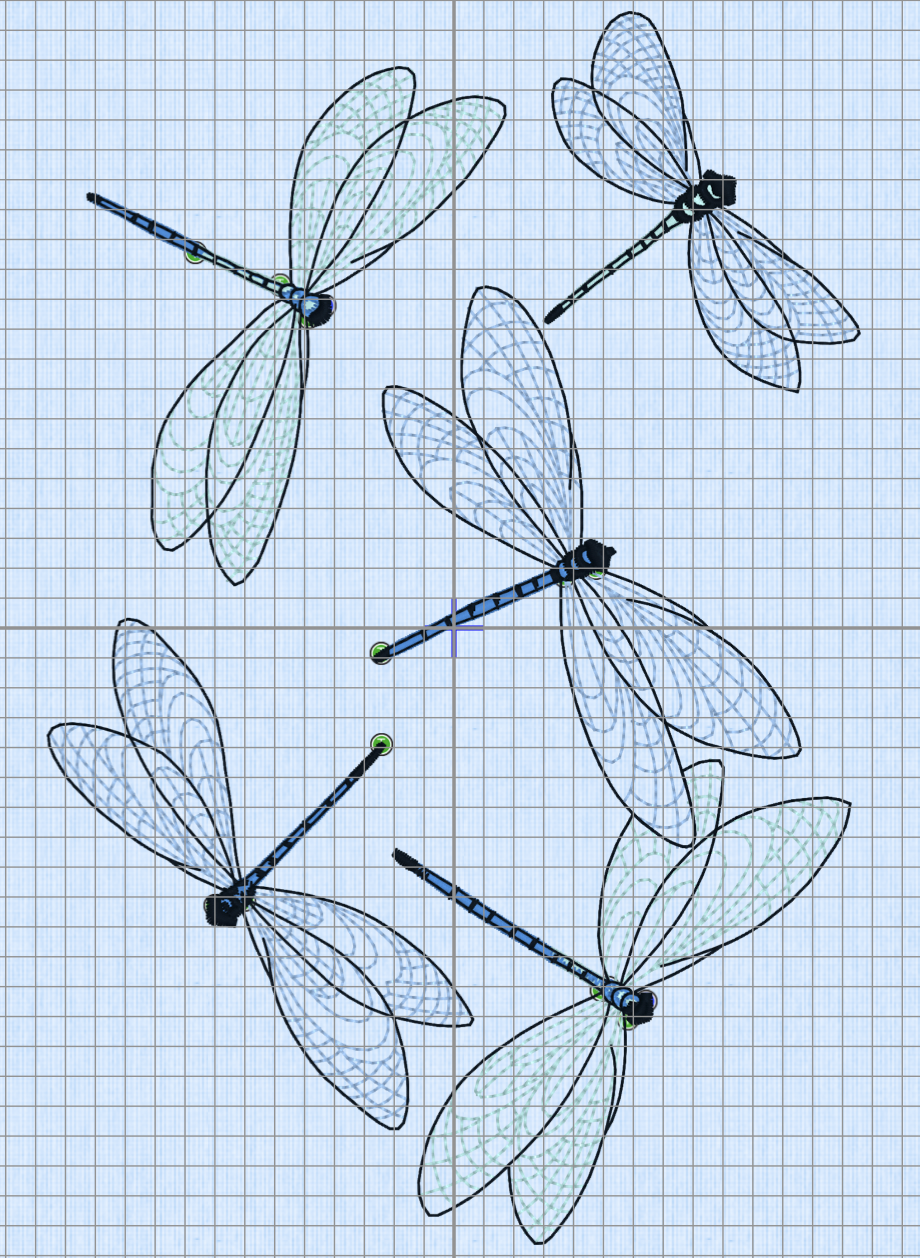
[BTW, no dragonflies, no embroidery – in the end I decided to let the circles be the focus of the work. In the photo you can see the colour and density change from bottom to top of the quilt – which was intentional.] I pieced the quilt back from scraps left over from the quilt top.
I was showing this quilt (top finished but not quilted) one evening last week to two friends when I realized if I build my next quilt using some version of half-square triangles, that would allow me to pull four-five quilts from my collection to go with it – my Parrsboro showing coming summer could become a collection of quilts created from half-square triangles! Each quilt would be seen differently because the HST theme would provide a new context. So now to think about block sizes and ways of combining the main fabric with the solids so the solids don’t take over the quilt – I want to showcase the print!
The print is Eclectic Elements – Abandoned (Rusted Patina) by Tim Holtz for Free Spirit. What grabbed me about the fabric was the rich colour pallet in yellow/oranges and turquoise/greens. When I pulled the solid fat quarters from a nearby box (conveniently at hand on the table in the shop) and laid them on the print the whole came alive. I figure there has to be a way to use the solids so they create a background and the print becomes the dominant feature (rather than the other way around – which is what I fear may happen)! My idea is this: start by cutting 4 1/2″ strips from the print, then cut 2 1/2″ strips from the matching solids, sew them together in pairs, then create a tube from the print strip and the two solids strips, from which I can then cut half-square triangles! I may want to subdivide the solids even further before I pair them with the print – to break up the concentration of solid colour….
I need to play with this idea using scraps to see what actually happens!
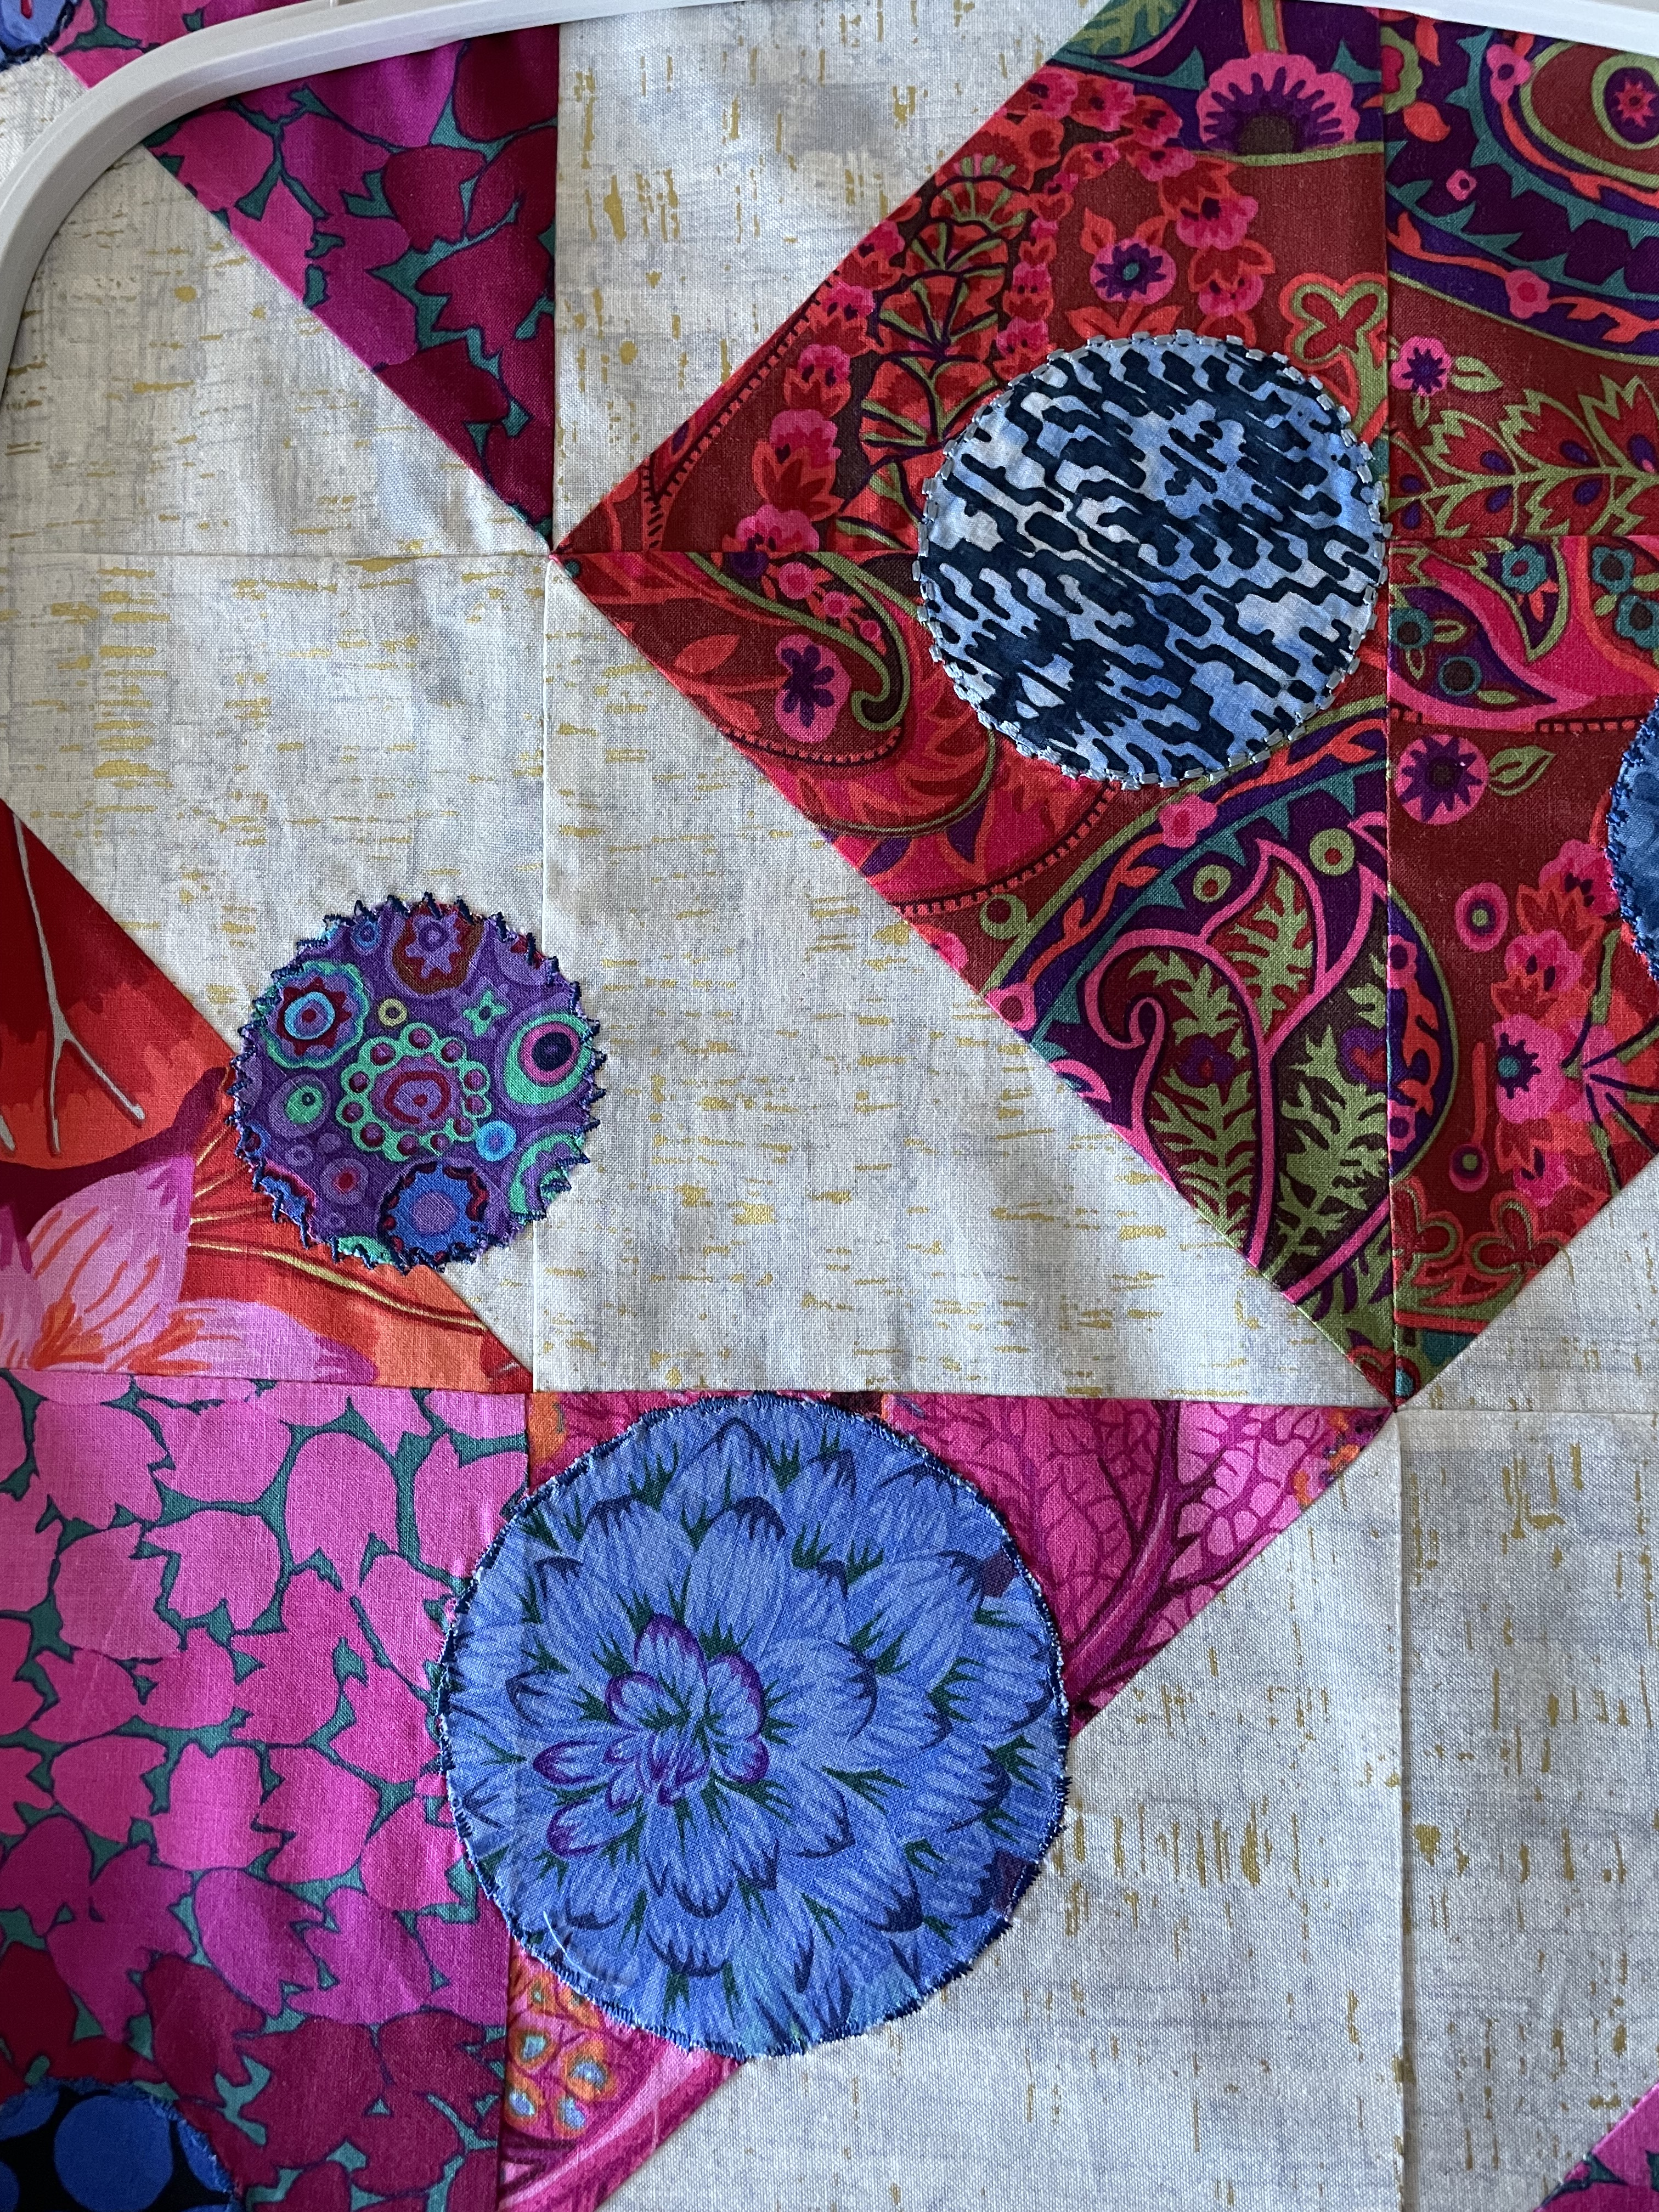
It took two days, but I did get all 87 circles edge-stitched. What with changing thread colour, selecting and modifying different stitches the process was tedious. The large circles are relatively easy because I can keep the raw edge aligned with the centre mark on the open-toe foot I prefer to use; but the smaller the circle, the harder it is to keep the stitching precisely on the edge. On the whole I did a reasonable job although I did unpick the stitching on two of the circles – in the first instance I didn’t like the stitch I had chosen, in the second I wasn’t as accurate as I wanted to be; both undoing operations took considerable time.
Now my challenge is to decide whether to add some embroidery or not:
With 260×260 embroidery hoop as guide
The largest embroidery I can do easily would be using the 260×260 hoop – to go larger would involve the Grand Dream hoop (360×350) which I have to rotate in order to embroider a complete design (always a risky move because the two halves don’t always align precisely).
Here’s the problem – so I embroider a design partly over one or more circles using a placement like I’ve shown – not too dense a design so that it overtakes what I’ve done so far. I think I’d even add the batting at this point to give the embroidery some substance. However, I still need to embroider the whole quilt surface, including over the top of any embroidery and that, I know would make the whole effort muddy. I could add small clusters of dragonflies in a few strategic spots:
They’re not too dense, and might add an interesting bit of detail, although I’m not sure they’d show up against the darker print fabrics!
I’m probably better off leaving the top as it is, setting up the quilt sandwich and just quilting the whole thing!
At the moment the top is sitting on my cutting table while I ponder what to do now.
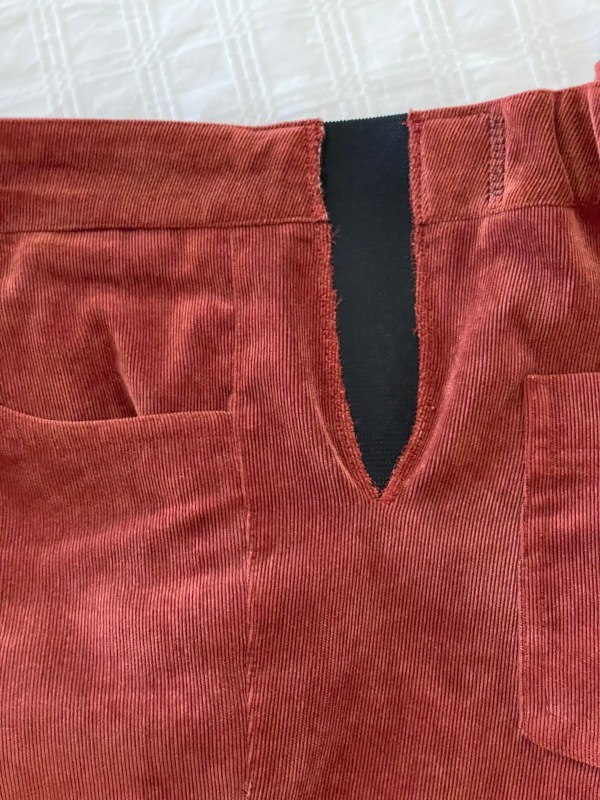
Yesterday, to do something productive while thinking about where to go next with the quilt, I took three pair of corduroy pants I made at least 10 years ago (which I’d put at the back of my closet last winter because they were too small at the waist and I was too lazy to do anything with them), and added long elastic gussets to each side.
The gussets had to be deep and wide enough to allow the fly front zipper to close. I serged the edges of the 6″ elastic inserts, then overlock-stitched the raw corduroy edges to the elastic using one of the overlock stitches on my embroidery machine. The whole process – removing the elastic I’d previously inserted into just the waistband, extending the cut 2″ below the front pocket opening, serging the elastic inserts, and stitching them in place – took about 20 minutes for each pair of pants. I’m wearing one of them today!
What amazes me is that my pants continue to fit everywhere except at the waist and belly. As my large “tummy” gets larger, I need to extend the top 6″ or so of my pants but the rest continues to fit reasonably well. It might be useful to revisit that original pattern (if I can figure out which version it might be – I usually date each modification) and try it out again using a “full tummy adjustment“. Let you know how that goes!