“Cow” Socks

“Cow” Socks

Here they are. Finished last evening. The yarn was dyed to produce the spiral stripes. Overall, I find the black overpowering the white/pink/rose. So these would be socks to wear with black, rather than pink, say.

Into the give-away pile… (which is growing – I’m going to have lots of socks for Christmas presents, coming December).

Improvisation #5: Finished

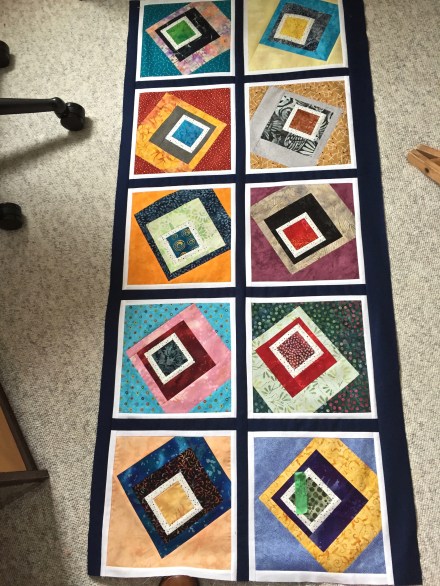
Improvisation #5 Top

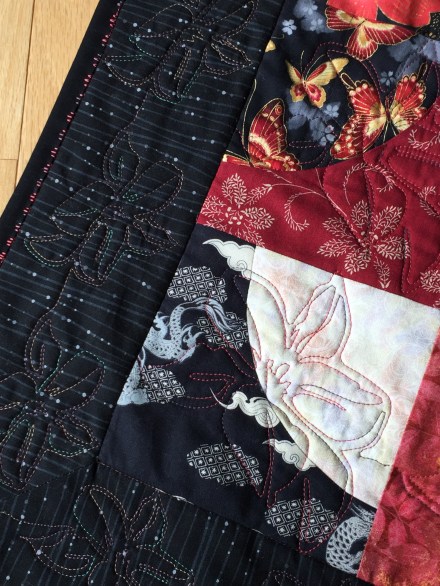
Finished with binding this morning. In the end I added an outside red small print border. The challenge with this quilt was the quilting. The blocks were too big to quilt in any but the large reversible hoop so I decided to try quilting “edge to edge” using the 360 x 200 hoop. I started the quilting in the upper left corner – the design I’d set up had the start align with the end so I was able to use precise positioning to connect each consecutive embroidery as I worked across the width of the quilt. Four and a half repeats in each horizontal pass; nine passes from top to bottom. I could have nested the embroideries a bit more closely and done ten passes. Another time I will attempt to “overlap” each pass a bit more.

The nice thing about “edge to edge” quilting is all the borders are included in the overall quilting – no separate designs to quilt them.

Improvisation $5 Back

The back used up the five extra blocks I constructed.

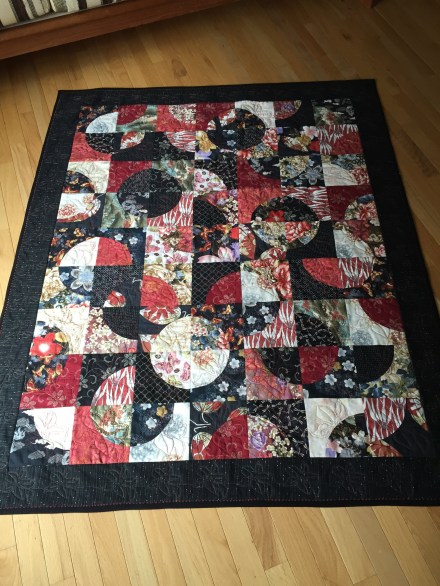
Improvisation #6: Japanese Quilt

IMG_7452

Finished dimensions: 52″ X 64″

Just this minute finished this quilt top. I haven’t yet finished quilting the tipsy squares – the fabric for this quilt called out to me and I had to cut the blocks, then the circular portions leaving an “L” shaped piece, and I couldn’t leave the pile of “L” shaped pieces sitting there so I started working on the blocks.

The blocks are what is called “drunkard’s path”. It’s a classic quilt block with a curved bite removed from one corner. There are a gazillion possible arrangements for these blocks, but I thought this fabric collection called out for complete and partial circles – bubbles.

Sewing drunkard’s path blocks is not for the faint of heart! The challenge is to smoothly fit a convex curve to a concave one. Cutting the corner piece was relatively simple – I’d bought an acrylic template that allowed me to cut consistent 5″ circular pieces with my rotary cutter. To end up with a 6 1/2″ block I actually began with 7″ squares of fabric, cut the 1/4 circle, then trimmed the ends of the “L” 3/8 of an inch so when I aligned the two antagonistic curves they would actually match up. I sewed a bunch of practice blocks before tackling these ones for the quilt. By the time I got to sewing this fabric I had pretty good control over the process and almost all of the blocks could safely be trimmed to 6 1/2″. My finished block size is, therefore, 6″. It took some fiddling to get the block to work – 1/4″ seam on the curve was essential – actually just a tiny bit shy of 1/4″ worked best. The instructions I read recommended using 5 pins along the curve – I found I just needed two – one in the middle of the curve, the second at the end – then carefully fitting the “L” to the 1/4 circle (the latter on the bottom) allowed me the best control. I was surprised how quickly I could construct the blocks.

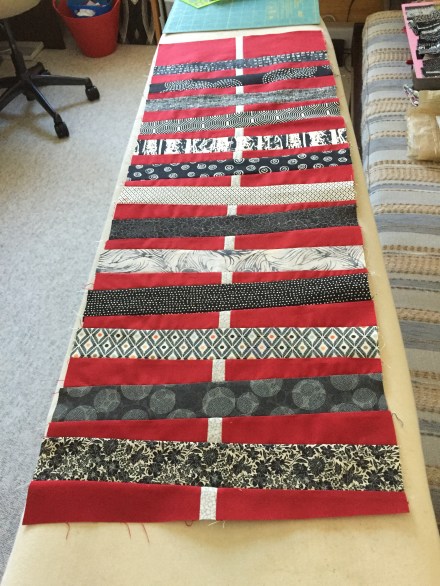
While I was making blocks I did enough for an insertion in the backing. That strip is also assembled. Tomorrow, I’ll construct the backing and set up the quilt for quilting. THEN I have to get back to the tilted squares to get the quilting on that quilt done.

I have four more quilt ideas waiting their turn. I have fabric for some of them – the difficult part is being patient and not starting anything else until these two quilts are finished.

Lufthansa Socks

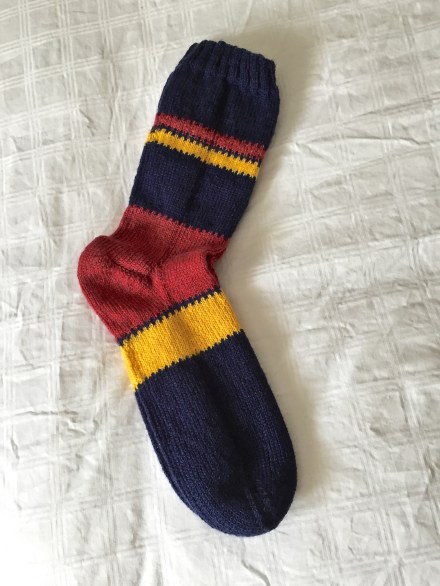
IMG_7450These are the socks for my friend Sab (who works for Lufthansa). She asked me for a pair of socks she could wear with her uniform – indigo and red – but Lufthansa’s colours are indigo and a golden yellow, so I incorporated both the red and yellow into the socks, making sure there was a reasonable amount of navy at the cuff end so she can wear them in her boots without the colour showing! At least I hope that’s what will happen.
Now to pack them up and get them in the mail to her. That’s for tomorrow.

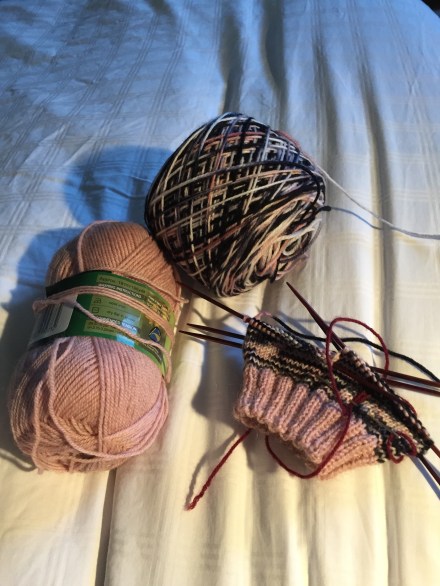
The pair I started last evening I’m calling black/white cow – the yarn colours are white/black/grey with some pink – they just remind me of a cow. The yarn seemed so silly I couldn’t resist it. IMG_7455See what I mean – at the moment I’m knitting on 68 stitches – the “pattern” will change when I reduce to 64 in another 10 rows or so. Then I suspect there will be a set of spirals that appear. That’s the pleasure of knitting with variegated yarn – I love seeing what pops out as I knit!
The Comfort Zone

I’ve been engaging in a written conversation with a quilting blogger – her most recent entry was about the physical stresses that are a part of quilting. Most people don’t think about the strain and tension that goes along with quilting – the ergonomics of sewing are critical.

I replied to Melanie with the following:

IMG_7430

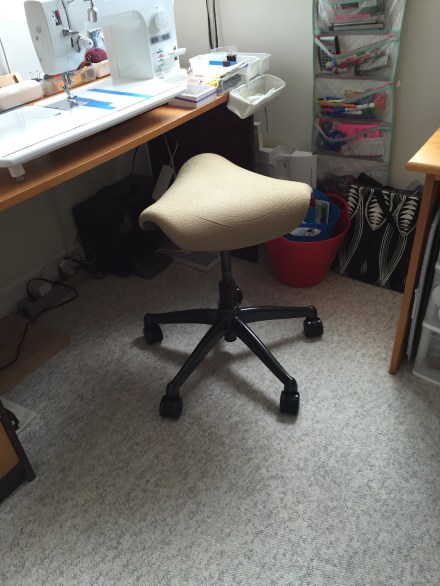
Saddle Chair

For me, the relationship between the height of my sewing machine bed (2 1/2″ above the table top) and the seat height of my saddle seat is critical! Table top – 26″; seat height 22″. That allows me to sit straight, swivel on the seat, support my feet on the wheel supports on the seat, with my arms and shoulders relaxed and elbows at a perfect 90 degree angle. There is no back support on my my saddle chair but sitting on it forces a straight back, neck alignment.

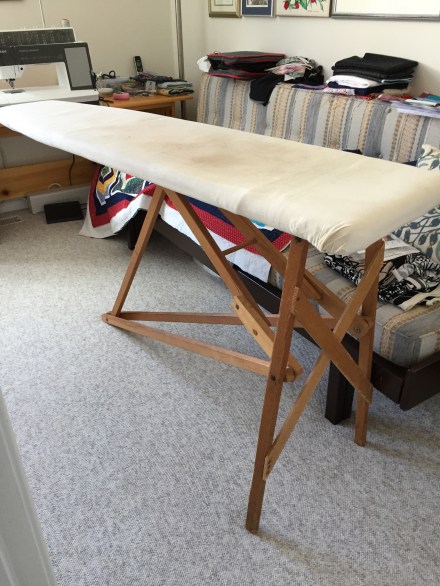
I do big cutting jobs on my dining room table which is too low, but I trim on my ironing board which is 32″ high – a wee bit low but I’m never standing there for long periods of time. Sit to sew, stand to press, trim… I can work comfortably for three – four hours.

IMG_7431

Ironing Board – at least 100 years old!

Melanie then asked:

I haven’t tried a saddle chair. I’ve seen them at shows offered for longarm quilting, which might help when doing very fine work. Is your ironing board adjustable? I feel like I often do a lot of pressing at a time.

My saddle chair is adjustable and I have it set at almost the highest it will go. My ironing board, as you can see is NOT adjustable. I bought this old thing at least 50 years ago at the Salvation Army in Toronto for $1.50! Aside from it’s height, it’s wider and longer than a modern metal ironing board. It also has a solid wood board which now has many layers of padding on it so it holds heat very well. I’ve had new boards but have given them away – this is the best ironing board I’ve ever had. Every year or so, I make a new cover which I install over the old ones. I use an unbleached light weight canvas. At the same time, I tighten all the screws in the legs to keep the board from collapsing when I set it up to press.

There are times, when I’m starting a new quilt that I will have a lot of fabric pressing to do – like today, I just cut out 75 seven inch blocks from a collection of 19 asian inspired fabrics – I’m going to do a drunkard’s path quilt next and I needed to press the fabrics before cutting them so my cutting would be reasonably accurate. The ironing board height, however, seems to be OK. I can press for quite a while before feeling tension in my middle back.

So comfort while sewing – you bet. It’s important to have a working set-up that doesn’t put undue strain on the back and neck, or wrists. It would be awful to end up with a repetitive stress injury and not be able to sew/quilt any more!


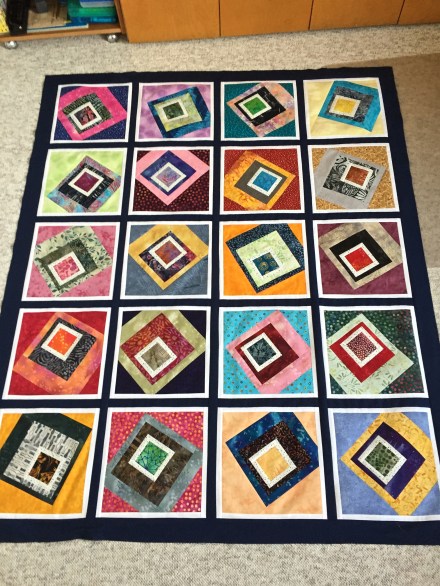
Improvisation #5: Quilt Top Completed

IMG_7427

Just finished assembling the quilt top. Can’t decide whether to leave it as it is or to add a bit more border to it… I cut a 2 1/2″ strip for the border, probably should have used at least 3″ – If I added another couple of inches what would I use – a solid? a bit from the backing? I’ll have to think about that some more.

Now to move on to the five blocks for the backing strip – my backing fabric is 44″, quilt top width = 52″ – I need a strip at least 12″ wide to give me enough fabric for the backing to allow the embroidery/quilting to work.

OK, now to get to it…

Improvisation #5: More Progress

IMG_7426

Last Wednesday, the day before I was supposed to leave on a sewing trip to San Francisco, I came down with a dreadful gastroenteritis (norovirus). I was violently ill for two days and a zombie for three more. My brain ground to a halt. All I managed to do was watch “Lie To Me” – a TV series from 2009-11 on Netflix – all 46 episodes (worth watching, BTW!). Not kidding! All I could manage was to sit there immersed in the story and characters (I took small breaks for a bit of soup and ginger ale/water). I couldn’t even think about walking into the sewing room.

This morning I got up, showered, dressed, had a small amount to eat and sat down at my sewing machine – and began framing the blocks I’d made. I got two rows done, with sashing (and one longitudinal outside border), before stopping for the afternoon.

There are a ton of things to keep track of here and I’m controlling most of it, but not all of it: colour arrangement, block orientation, frame orientation… I had laid out all 20 blocks on my office floor and carefully picked them up in order (I’d added masking tape with row/column identification on each block), but once I started adding the framing I kind of lost sight of block orientation and when I went to add the sashing I found I needed to change block position a bit to be able to match up the framing seams. To use the framing fabric efficiently, I stitch two sides (10 1/2″ in length – these become top/bottom) then add the two longer pieces (11 1/2″ – these become the sides) – so a 45″ strip (with selvages cut off) gives me exactly 2 shorter and 2 longer pieces. As I work on the next two rows, I will try to keep an eye on block orientation as well when I add the first framing strips to the sides. Lots of variables to keep in mind on this quilt.

I have fabric for the backing and five blocks already made for the insertion so I’ll be able to move on quickly with the sewing here. A couple of days and the top and backing will be done. I created an embroidery for the quilting before I closed down to travel – my intention is to edge-to-edge quilt this using my embroidery machine – the embroidery has been set up to allow me to align ending and beginning. That’s because my framed block is 11″ and although I have a 360 X 350 mm reversing hoop it limits the kind of design I can create – can’t have any overlapping in the center because the bulk of the quilt creates just enough distortion that it’s impossible to get a decent alignment across the center. So my plan is to use the 360 X 200 hoop and quilt from edge-to-edge! That will be toward the end of the week.

Another Done

The variegated yarn consisted of shades of grey with some soft burgundy and a grey/white mix. I extended that yarn with more white, a much stronger burgundy, with cuffs, heels and toes in a dark grey. It worked. 

I did portion out the patterned yarn into two equal amounts before starting so if I ran out I could balance the two socks. I actually was able, in this case, to make it all the way to the toe!

This was the last of my leftover yarn. I went to the yarn store last Tuesday to pick up some new stock. Sab, my friend in Munich has asked for a pair of navy with red to keep her feet warm while working. There wasn’t any patterned yarn in those colours so I picked up some navy and red (I had some white at home) to see what I can concoct. Started this afternoon. 


Improvisation #5: Progress Report

IMG_7403

Here’s what I’ve got so far – not necessarily ending up in this orientation and still six blocks to construct for the top. I’m loving how bright this is. Each block has been interesting to make up.

Now that I know what I’m doing, I’ve been able to prep the fabric so I have what I need for the blocks and I’ve tidied up the stacks of fabric (have to put them away tomorrow). Last night I set up each of the blocks – took a backing square (trimmed all of the fabric pieces to 12″), chose two contrast fabrics and a center and put them to one side, until I had all the backing squares set up. So sewing blocks today went much faster because I wasn’t having make all the decisions as I went along.

I’ll get the six blocks for the top finished tomorrow (and perhaps three more to add to the two I have already for the back). I have backing fabric for the quilt which I bought the other day and lots of stuff in the stash for binding.

I still don’t know how I’m going to join the blocks – they need some sashing – the question is whether to sash them symmetrically or to do something wonky with them. I’ll have to ponder that a bit when I have all 20 to play with.

Improvisation #5: The Blocks

The quilt was obviously on my mind during the night because when I got up this morning I knew I wanted to head to the fabric shop for some fabrics in a range of bright colours to use as the large “background” element for each block.

I have ended up with 1/3m of 25 different fabrics (6 fabrics from my stash).

Fabrics for “backgrounds”


Why so much fabric you wonder – well, I figured out the easiest (if most wasteful) way of building that large block is to start with a 12″ X 12″ square of the “background” fabric. Take the block I want to offset, trim a couple of corners off, then lay it on the 12″ X 12″ square.

Block on background


I found if I pulled the block in 1/4″ from the top and left edges of the “background” fabric I can cut out the triangles needed to construct the large square (leaving me with a large piece of background fabric lying beneath the block as leftover, oh well – it’s large enough to use for something else).

Background pieces ready to be sewn


Now I sew the background pieces to the block.

Complete block sewn


Once the triangles are sewn to the block it’s easy to trim it to 11″ and guess what – the pattern is aligned – had I figured that out yesterday I could have salvaged the fabric I ended up discarding.

Finished block

Here are four blocks finished and trimmed to 11″ X 11″. You can see what I mean by “offset” and “background. Each block will be different except for the white with blue dot fabric framing the center square in each block. I’m thinking I will frame each of these 11″ X 11” blocks with a solid white (maybe a slightly off white) narrow frame, and then sash between the blocks. Although a very dark blue framing might work. I’ll have a better idea about what to do when I get all 25 blocks done – 20 for the quilt top, 5 for the quilt back.

IMG_7387

Four finished blocks – 11″

So now I know what I’m actually doing, I can proceed to make up my inner square assembly for the remaining 21 blocks, cut out a 12″ square from each of the background fabrics, and full steam ahead! Yeah.